Blog

  • How to Encourage Natural Schooling Behavior in Small Groups

    How to Encourage Natural Schooling Behavior in Small Groups

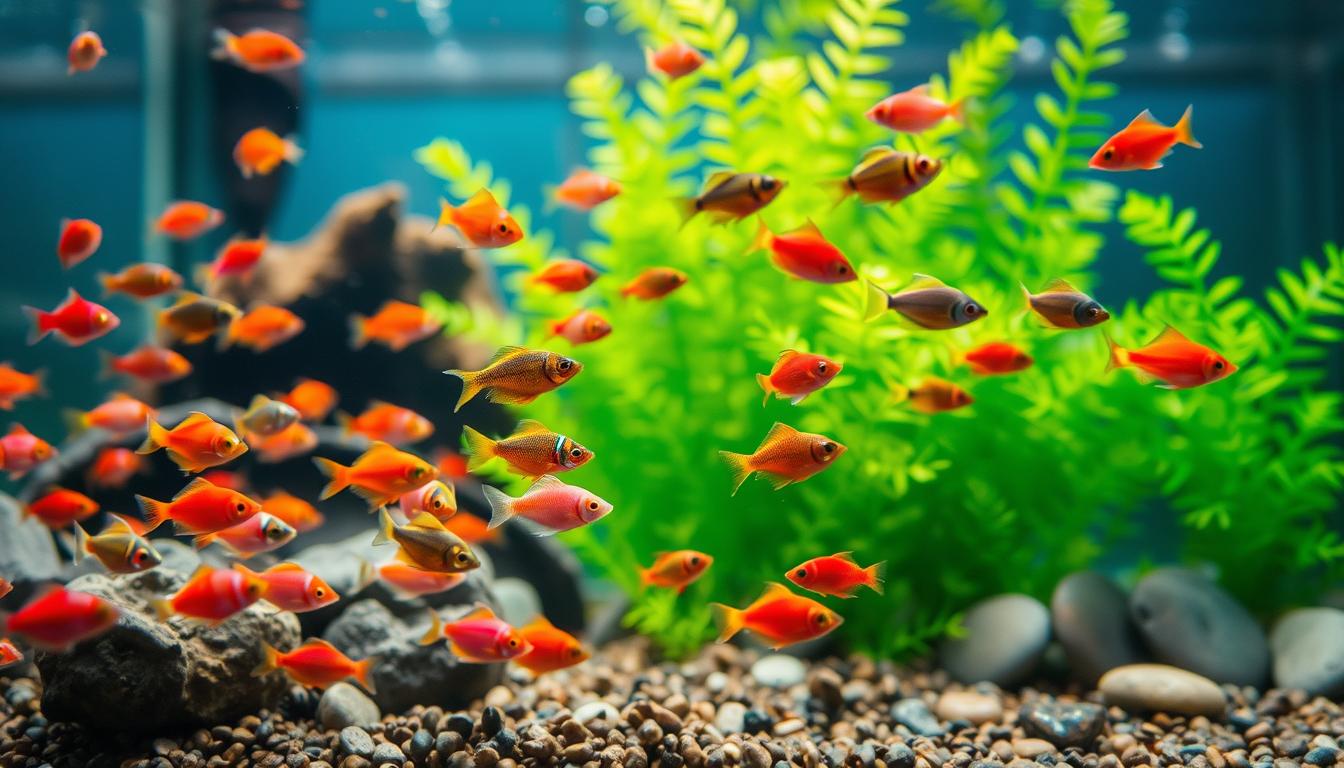
    You want your nano tank to look great and your fish to be happy. Encouraging natural schooling behavior in nano aquariums helps a lot. It reduces stress, improves foraging, and makes social bonds clearer.

    When fish move in their natural way, your tank becomes lively and organized. This makes it stand out in any room.

    Think of small groups of fish like small-group learning. A structured, predictable environment is key. In classrooms, clear schedules and repeated activities build trust and cooperation.

    The same is true for nano fish behavior. Consistent feeding times, steady lighting, and reliable water flow help fish school together.

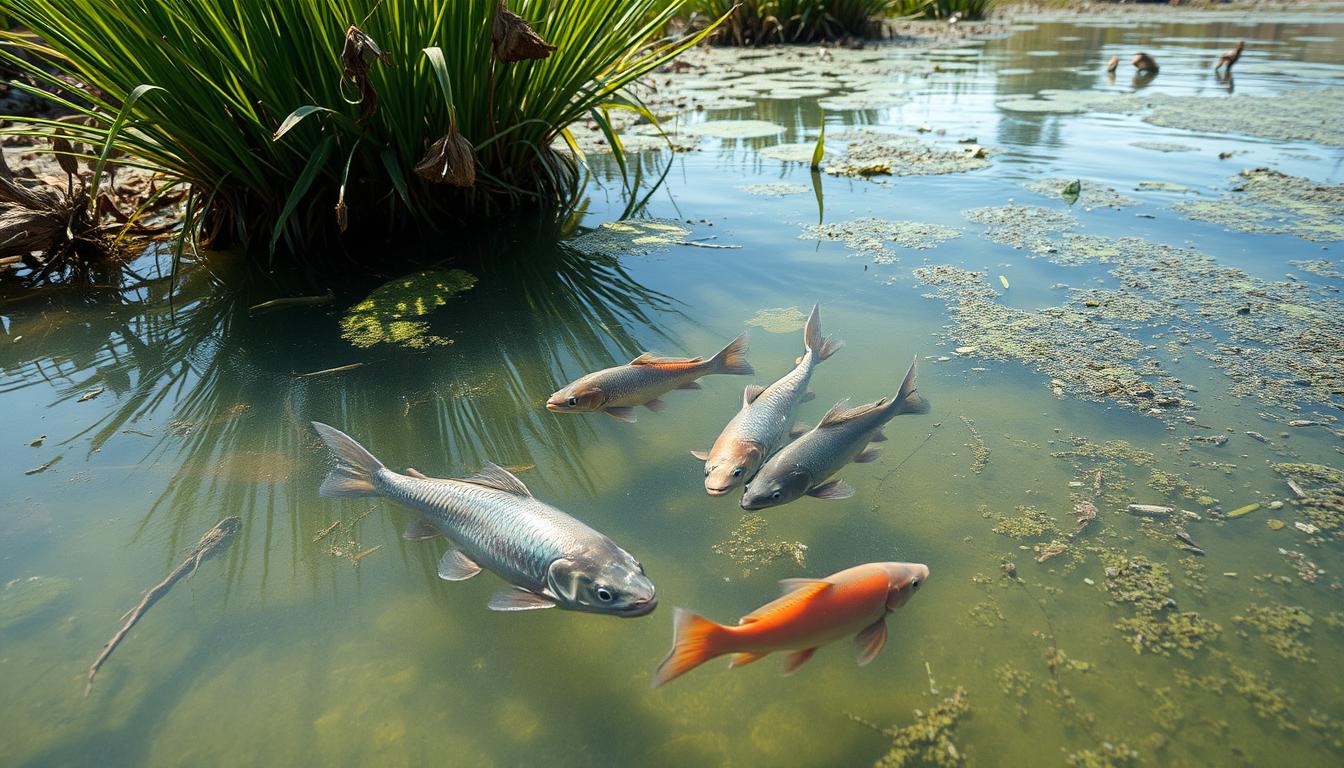
    Small changes can make a big difference. You’ll learn about biology, habitat design, species selection, and more. Resources like National Geographic and Monterey Bay Aquarium live cams can inspire your setup.

    In the next sections, you’ll get detailed advice on environment design, species choice, and more. This will help you create a healthy schooling environment in your nano community.

    Understanding Schooling Behavior in Nano-Environments

    A vibrant nano aquarium filled with small schooling fish, such as neon tetras and guppies, gracefully moving in unison, showcasing their natural behavior. The foreground features detailed aquatic plants, like java ferns and moss balls, providing hiding spots and creating a lush habitat. In the middle, the fish are seen darting around in synchronized patterns, their iridescent colors shimmering under soft, diffused lighting that simulates a natural underwater glow. The background shows a clear glass back wall with subtle reflections, emphasizing the sense of depth. The overall mood is serene and harmonious, capturing the essence of schooling behavior in a confined environment, with a focus on the beauty and dynamics of aquatic life.

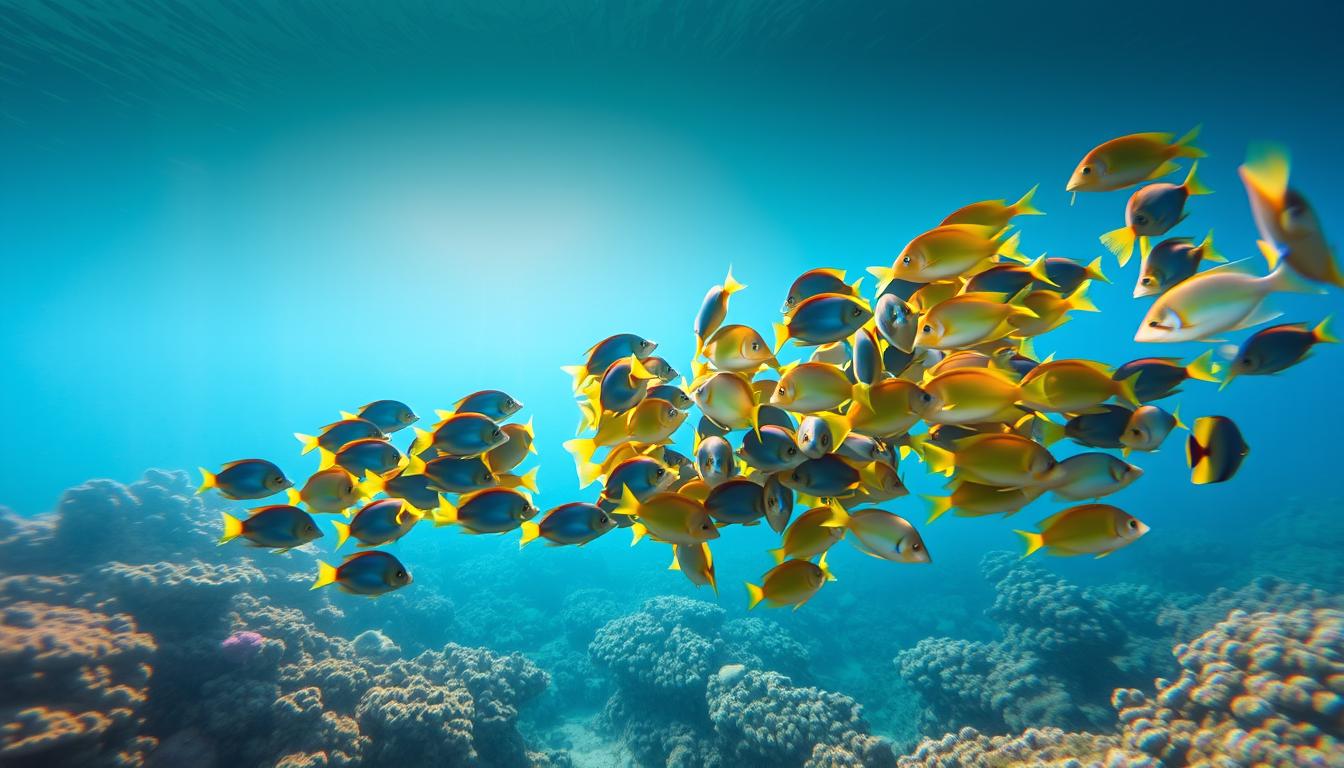
    Schooling and shoaling are different. Schooling means swimming together in a tight group. Shoaling is more relaxed, with no exact coordination. In nano tanks, you aim for a cohesive shoaling that looks like schooling.

    Many things influence nano fish social behavior. Being in a group helps them avoid predators. It also makes finding food easier. Mating and swimming together are other benefits. Learning from each other is also important.

    Size is key in small tanks. Limited space changes how fish swim and react. Choose small fish that don’t fight over space to keep the group together.

    Use simple rules to make your tank better. A clear setup reduces stress and helps fish work together. Keep things the same with lighting and food. Avoid sudden changes to keep things calm and natural.

    • Watch how fish school in real life, like in public aquariums and nature streams.
    • Join aquarium clubs for tips and hands-on advice for nano tanks.

    Creating the Right Environment for Small Aquariums

    A vibrant nano aquarium teeming with small, colorful fish schooling harmoniously together, showcasing their natural behavior. In the foreground, clusters of delicate aquatic plants sway gently, adding greenery. The middle ground features a variety of tiny fish, such as neon tetras and cherry shrimp, darting in synchronized movements, their scales glinting in the soft, diffused lighting. The background reveals a softly blurred view of the aquarium's decorative rocks and subtle bubbles rising to the surface, creating a serene atmosphere. The lighting is natural and warm, evoking a sense of tranquility. The composition is shot from a slightly elevated angle, emphasizing the dynamic movement of fish and the lush aquatic environment, encapsulating the essence of a thriving small aquarium ecosystem.

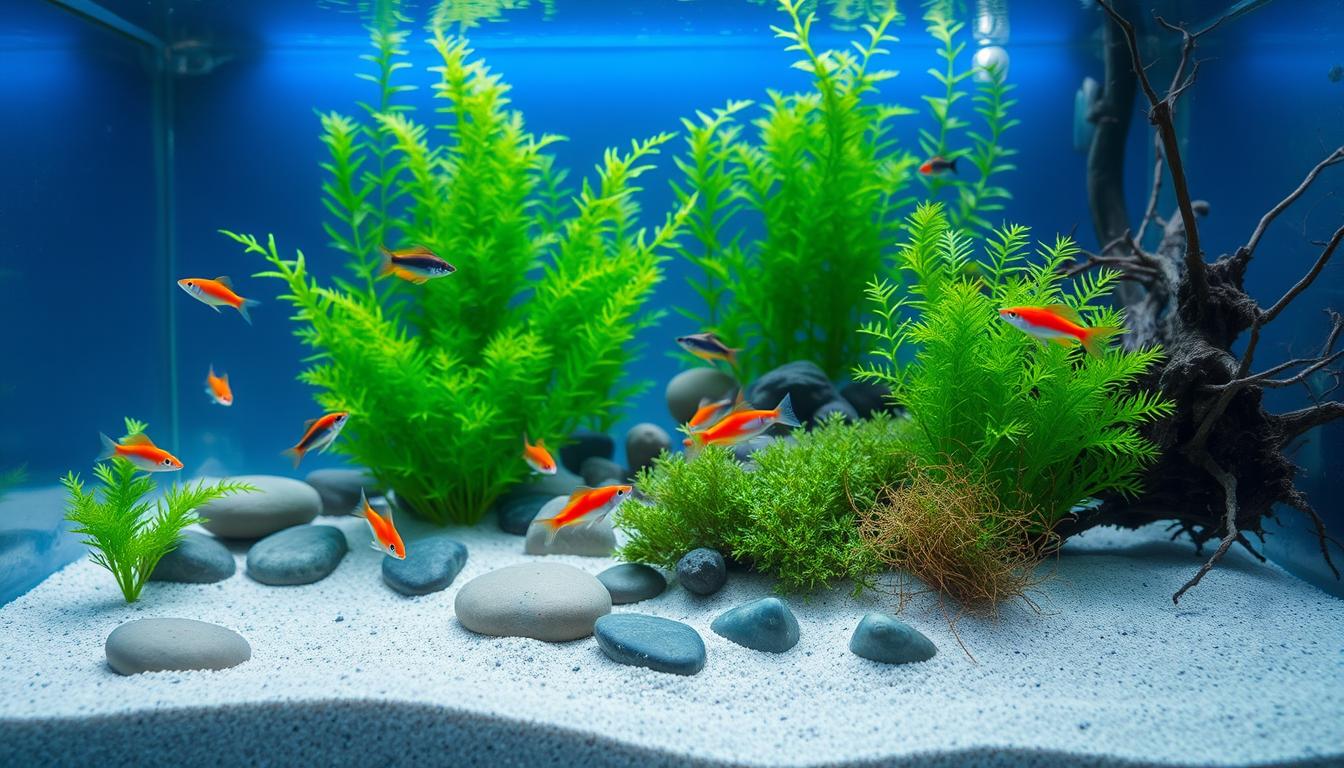
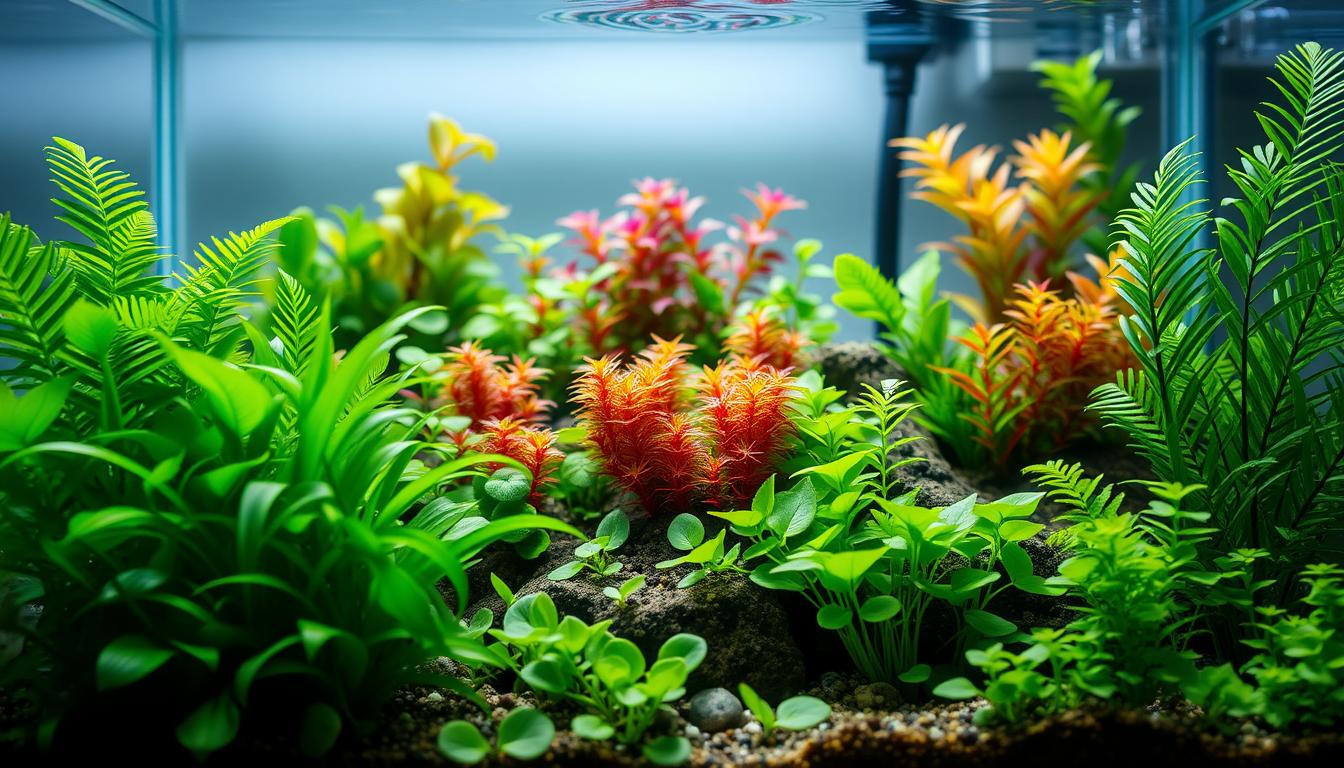
    How you design your tank affects your fish’s movement. Use low-profile decorations and open spaces for them to swim together. Arrange flat rocks or shelves to guide their paths and keep them moving horizontally.

    Plants like Java fern and Anubias help create landmarks and gentle barriers. For easy care, consider silk plants. Add hardscape to direct movement and reduce chaos, just like airport layouts.

    Lighting and schedules influence your fish’s daily life. Use programmable LED lights for a consistent day-night cycle. This helps your fish swim together at the same times, promoting natural behavior.

    Choose the right filtration and flow for your fish. Gentle currents are best for many species. Use sponge filters and adjustable powerheads for soft flow. Avoid strong currents that disrupt schooling.

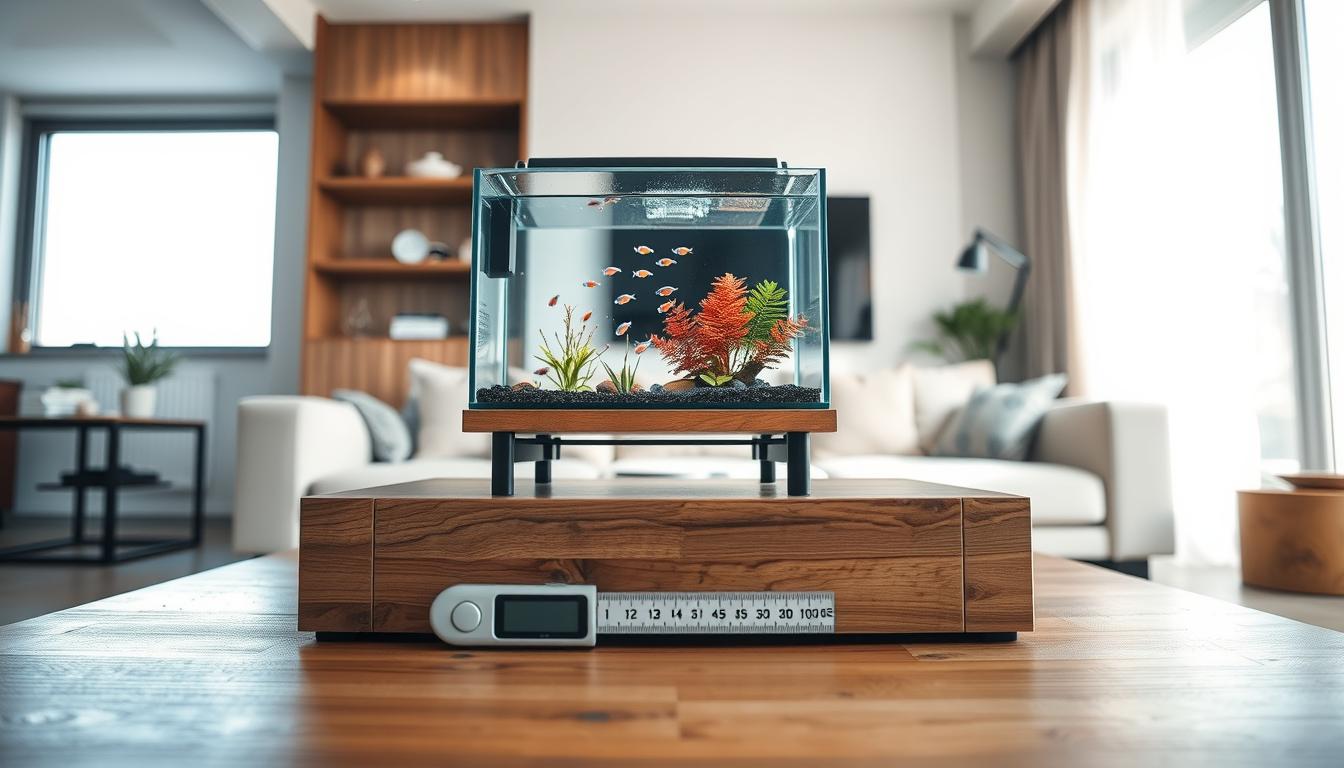
    How many fish you have affects their behavior and water quality. Stock your tank with enough fish to form a school. Too many fish can lead to poor water quality and disrupt schooling.

    Make sure your tank is safe for your fish. Use smooth decorations and avoid sharp edges. Provide plenty of hiding spots and feeding areas to reduce stress and promote social harmony.

    • Sponge filters for gentle filtration
    • Adjustable nano-powerheads to tune flow
    • Programmable LED lights for gradual photoperiods
    • Hardscape and low shelves to define lanes
    • Plants like Java fern and Anubias for low-flow cover

    Small changes can make a big difference in your tank. With the right layout, lighting, and flow, your fish will swim together more naturally.

    Selecting the Right Species for Your School

    Choose species that are small as adults and don’t produce much waste. Look for fish that like to be in groups. They should show clear behavior patterns and prefer living together.

    Use these selection criteria:

    • Small adult size to fit limited swim space.
    • Non‑territorial temperament to reduce conflict.
    • Compatible water‑parameter needs so all members thrive.
    • Low waste production to protect water quality.

    Examples of reliable nano schooling species include ember tetras (Hyphessobrycon amandae), Celestial pearl danios (Danio margaritatus) for true micro setups, and Endler’s livebearers for shoaling tendencies in very small tanks.

    Where space allows, neon tetras (Paracheirodon innesi) and Harlequin rasboras (Trigonostigma heteromorpha) work well in slightly larger nanos. These choices reflect common nano fish behavior patterns and support cohesive nano fish grouping when numbers are right.

    Group size matters. Many tetras and rasboras prefer at least 6–10 individuals for reliable schooling. Smaller species such as Celestial pearl danios form tight groups with 6–8 fish. Follow species‑specific recommendations to encourage natural grouping and reduce stress.

    Match schooling species with peaceful tankmates. Avoid larger or aggressive fish that break schools and stress smaller species. Juveniles often form bonds more readily, so rearing young fish together can strengthen social cohesion similar to small‑group formation in cooperative learning settings.

    Research species needs using reputable sources such as the American Fisheries Society publications, local aquarium clubs, and established aquarium retailers. Good research keeps your nano schooling fish healthy and preserves authentic nano fish behavior patterns within your nano fish grouping.

    Feeding Practices that Promote Schooling

    Set a steady feeding schedule for your fish. This helps them know when to eat. It also reduces stress and makes them forage together better.

    Feed food across the water column to keep fish together. For midwater species, scatter small portions. This method helps fish feed as a unit.

    • Use multiple feeding points to cut competition.
    • Consider an automatic feeder when you are away.
    • Target-feed shy individuals with a pipette or turkey baster.

    Choose micro foods that match species needs. High-quality micro pellets, finely crushed flakes, and frozen baby brine shrimp are good. They meet nutrition needs and reduce fighting.

    Avoid overfeeding. Leftover food harms water quality and causes fish to fight. Offer measured portions and watch clearing times. If food sits after 30–60 seconds, cut back the next feeding.

    Use enrichment feeds sparingly to stimulate natural chase and group cohesion. Occasional live or frozen treats can trigger collective pursuit. Introduce these items gradually to prevent ammonia spikes in small tanks.

    1. Observe how the group responds and adjust portion size.
    2. Rotate food types to cover protein and plant needs.
    3. Keep feeding areas clear of debris to avoid hidden leftovers.

    Duplicate resources to lower aggression and keep the school intact. Multiple feeding sites and varied food presentations help maintain balanced nano fish behavior and support lasting nano tank schooling.

    Social Interaction and Stimuli

    Visual cues are key in nano community behavior. Make sure fish have clear views and simple landmarks. This helps them see and mirror each other.

    Plants trimmed to allow open swim lanes help fish align and follow with less confusion.

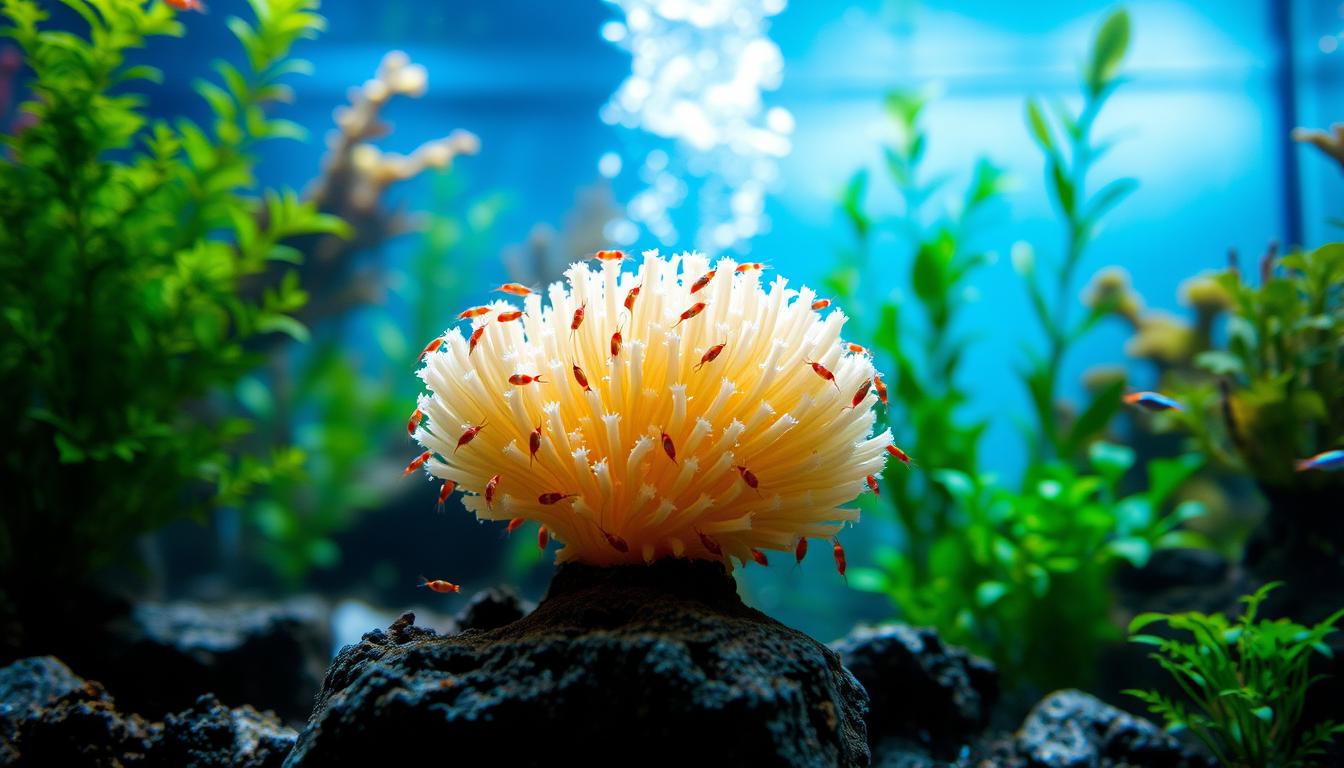
    Enrichment shapes nano fish social behavior. Use a gentle current and varied water-column structure. Also, cluster plants to create predictable routes for movement.

    These features encourage grouping and synchronized swimming. They help avoid isolated hiding spots.

    Social learning is vital in nano fish school behavior. Young or bold individuals often lead the way. Others follow their lead.

    Introduce juveniles together or place newcomers near an established group. This lets them learn paths, feeding spots, and safe zones through observation.

    Minimize disturbance to protect nano community behavior. Keep handling brief and avoid sudden lighting changes. Choose quiet equipment.

    A steady maintenance routine helps fish settle into regular social rhythms. This reduces breakups in the school.

    Try low-risk behavioral enrichment to spark interest without stress. Brief mirror exposure and floating leaf litter for microhabitats can promote exploration. Schedule these changes so the group can navigate and reestablish coordination over time.

    • Provide unobstructed sightlines and simple landmarks.
    • Create gentle currents and layered water-column structure.
    • Introduce groups of juveniles together when possible.
    • Use predictable maintenance and quiet gear.
    • Offer brief mirror tests and controlled exploration days.

    Understanding Stress Factors in Small Groups

    Stress in a nano setup shows up fast. Poor water quality from ammonia, nitrite, or sudden nitrate spikes will change nano fish behavior patterns. You may notice erratic schooling or single fish breaking off from the group.

    Overcrowding and incompatible tankmates push stress higher. Strong turbulent currents and sudden shifts in temperature or lighting can fragment nano fish grouping. Lack of hiding spots makes fish more skittish and prone to clamped fins.

    • Common stressors: ammonia, nitrite, nitrate spikes, overcrowding, incompatible tankmates.
    • Physical triggers: abrupt light or temperature changes, strong currents, too few shelters.

    Watch for behavioral signs that signal trouble. Isolated individuals, increased hiding, loss of color, rapid gill movement, decreased appetite, and heightened aggression all point to stress. Fragmented or erratic schooling is a clear sign your nano aquarium behavior has been disrupted.

    Design your tank with clear zones and predictable routines to reduce stress. Think like an architect: crowded hallways and unclear cues make people anxious in airports or classrooms. In tanks, defined open areas, planted borders, and duplicate hiding sites help stabilize nano fish grouping.

    1. Prevention: test water regularly, avoid overstocking, provide duplicate hiding spots, and choose compatible species.
    2. Ease transitions: change temperature and lighting gradually over hours, not minutes.

    If you detect dangerous parameters, act fast. Do an immediate water test and perform partial water changes. Isolate injured or heavily distressed fish in a quarantine tank until they recover. Check filters, heaters, and pumps to confirm equipment is functioning.

    Consistent monitoring and small, steady adjustments keep nano fish behavior patterns healthy. Stable conditions help schooling remain cohesive and reduce the chance of sudden breakdowns in nano aquarium behavior.

    Introducing New Fish to Your Group

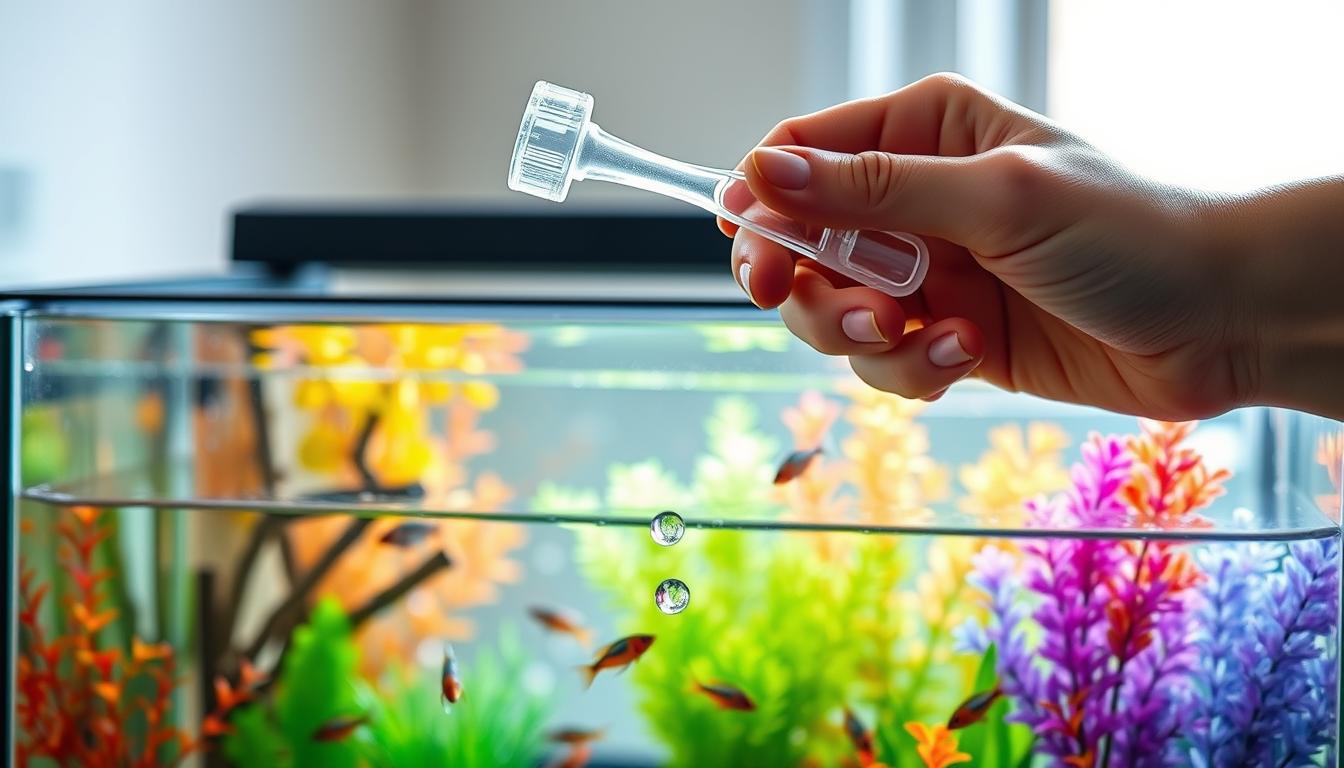
    Quarantine new fish for at least two weeks in a separate tank. Use API test kits to check water chemistry and watch for illness signs. Treat any issues before moving them to protect your nano tank schooling.

    Gradually acclimate new fish to prevent shock. Float sealed bags to match temperatures or use drip acclimation for an hour. Introduce them during quiet times to reduce stress and help them adjust.

    Introduce several new fish together instead of one. This helps them bond and reduces isolation. Young fish added together often form strong groups as they grow.

    Use visual barriers or change the layout to break sight lines. Partitions and plants give newcomers places to hide and explore. This reduces aggression and helps them integrate.

    • Stage introductions: let newcomers settle in a planted refuge before moving to open areas.
    • Watch behavior closely for the first few days: look for chasing, hiding, or exclusion.
    • Be ready to tweak décor to reset territories if dominance escalates.

    Watch schooling patterns over days and weeks. Look for signs of stress or exclusion and act fast. Proper care helps keep your nano fish social and stable.

    Monitoring Schooling Dynamics Over Time

    Set a routine you can stick to. Do brief daily checks at the same times and a deeper weekly review. Predictable observation helps you spot subtle shifts in nano fish school behavior.

    Keep a simple log. Note the date, temperature, pH, ammonia, nitrite, nitrate, feeding times, group size, and any unusual signs. Recording interventions gives you a timeline for changes in nano fish social behavior.

    Watch specific cues. Track group cohesion, which individuals lead, feeding synchrony, signs of dominance or bullying, and physical health like color and fin condition. These markers reveal trends in nano community behavior.

    Use video for comparison. Short clips let you replay moments and compare behavior across weeks. Share anonymized footage with local aquarium clubs for input when you need a second opinion on nano fish school behavior.

    • Daily: quick visual check for cohesion and appetite.
    • Weekly: measure water parameters and log photos or clips.
    • Monthly: review trends and note recurring issues.

    Set clear intervention criteria. Persistent fragmentation, escalating aggression, repeated disease, or unstable water values call for action. Consider partial water changes, temporary rehoming, splitting groups, or consulting a veterinarian.

    Plan long-term adjustments. Based on logs, you may change stocking density, rearrange décor, or shift feeding routines to support healthy nano fish social behavior. Small, measured changes help preserve stable nano community behavior over time.

    Maintaining Water Quality for Healthy Schools

    Water quality is key to peace in small tanks. Ammonia and nitrite can harm fish even at low levels. Nitrate build-up stresses fish and disrupts their social groups.

    Plan your filtration before adding fish. Choose sponge filters, small hang-on-back units, or low-output canisters. Make sure there’s biological filtration for natural fish behavior.

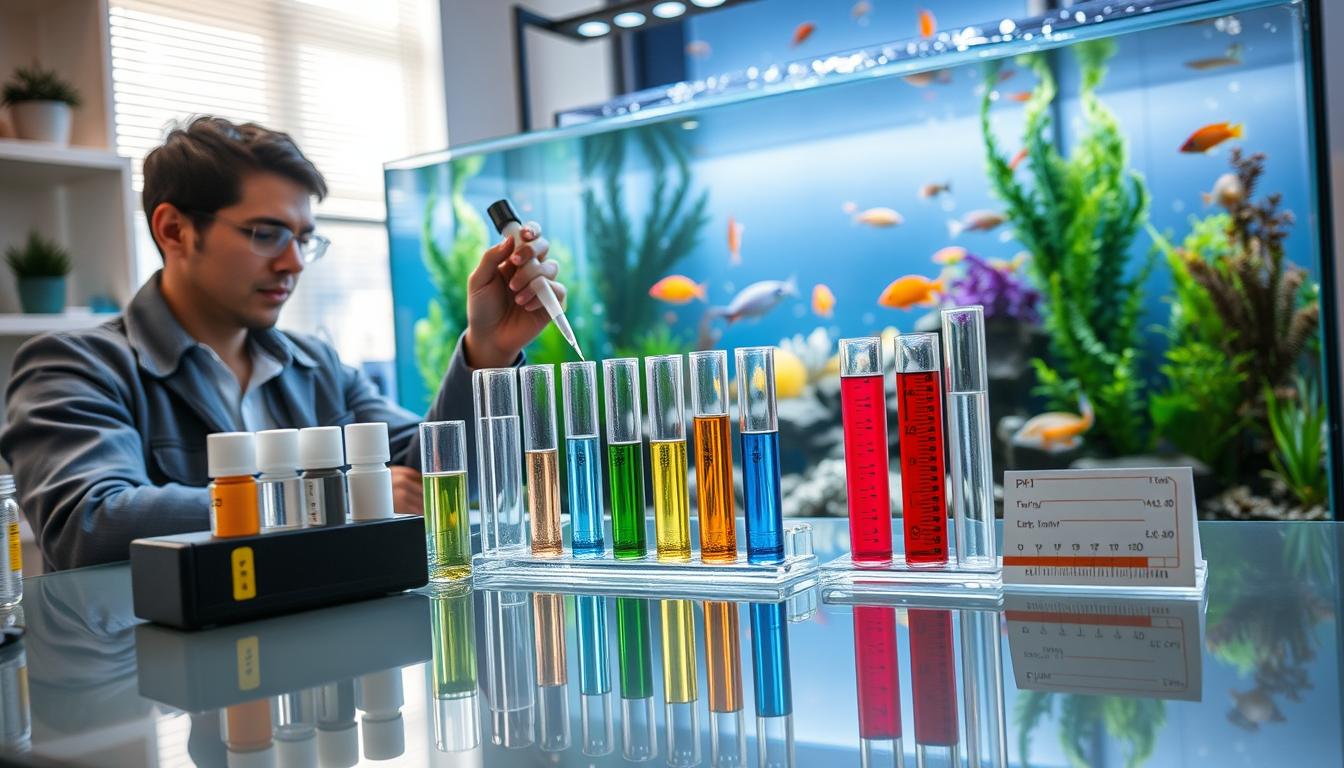
    Use trusted kits from API or Seachem to test water. Check ammonia, nitrite, nitrate, pH, and temperature weekly. Test again after any changes or new fish to see how they affect the tank.

    • Partial water changes: 10–20% weekly, adjusted by bioload.
    • Sponge filter care: rinse in tank water to preserve bacteria.
    • Gravel vacuuming: focus around décor to remove trapped detritus.
    • Replace mechanical media on a schedule to avoid clogging.

    Manage feeding and bioload to reduce waste. Feed small amounts and less often if food is left. Don’t overstock your tank. Provide hiding spots and feeding areas to spread out activity and waste.

    If you find ammonia or nitrite, act quickly. Do a partial water change, clean filters, and quarantine sick fish. Fast action keeps the group healthy and social.

    Learn from experts like the American Aquarium Society and nano keepers on YouTube. Their tips will help you keep your tank’s water stable and your fish happy.

    Enhancing Your Knowledge Continuously

    Keep learning about schooling behavior in nano by using structured resources. Read articles from National Geographic and Monterey Bay Aquarium. Also, observe live cams on Explore.org to see real-time nano fish behavior patterns.

    Professional publications from the American Aquarium Society and local aquarium clubs offer detailed studies. You can apply these to your tank.

    Join a community to deepen practical skills and share observations. Local clubs, FishLore, and Reddit’s r/Aquariums let you compare notes. Find species-specific advice and arrange small-group tank visits.

    These community exchanges mirror the benefits of homeschool co-ops. You get shared expertise, hands-on practice, and social learning.

    Practice structured observation with a behavioral journal and short video clips. Note changes across seasons, feeding times, and after decor or flow adjustments. This helps track schooling behavior in nano.

    Use those records to inform quarantine routines, feeding schedules, and habitat tweaks. This supports predictable group dynamics.

    Take workshops and online courses on fish behavior and nano techniques. Then, form a local nano-keeper group to swap ideas and troubleshoot together. For immediate action, choose schooling species wisely, set stable flow and lighting, and keep consistent maintenance routines.

    Quarantine new arrivals, monitor behavior, and join a community. This way, you can keep improving your approach.

    FAQ

    What are the benefits of encouraging natural schooling behavior in nano tanks and small groups?

    Schooling and shoaling reduce stress and improve foraging. They strengthen social bonds and let fish show their natural behavior. A well-schooled group makes your home or office more attractive and calming. It also promotes healthier, more active fish.

    How do schooling and shoaling differ, and which should I aim for in a nano aquarium?

    Schooling is tight, synchronized swimming in the same direction. Shoaling is a looser social grouping. In nano tanks, aim for cohesive shoaling that mimics schooling, considering space and swim patterns.

    What drives fish to school, and do those drivers apply in captive nano setups?

    Key drivers include predator avoidance, foraging, mating displays, hydrodynamic benefits, and social learning. Even in captivity, these instincts influence behavior. Predictable feeding, gentle flow, and social cues trigger natural grouping.

    How does limited space in a nano tank affect schooling behavior?

    Nano tanks limit natural swim patterns and escape responses. Choose small, non-territorial species. Provide horizontal open lanes and low-profile décor. Avoid turbulent flows that fragment groups.

    What environmental routines and design principles help fish form stable schools?

    Predictable routines reduce stress. Design-wise, clear swimming lanes and horizontal sightlines are key. Duplicated hiding spots and gentle laminar flow support cooperative movement.

    Which equipment works best for encouraging schooling in nano aquariums?

    Use sponge filters, small adjustable internal filters, and nano powerheads for gentle flow. Programmable LED lights with gradual ramps are also beneficial. Smooth hardscape and low shelves define zones without blocking sightlines.

    What species are reliable for schooling or cohesive shoaling in nano tanks?

    Look for small adult size and gregarious temperament. Examples include ember tetras, celestial pearl danios, Endler’s livebearers, and Harlequin rasboras. Always match water-parameter needs and bioload limits.

    How many fish should I keep to get a cohesive school?

    Species-specific minimums vary. Many tetras and rasboras show cohesion in groups of at least 6–10. Smaller species like celestial pearl danios can form cohesive groups in 6–8. Avoid understocking and overstocking.

    What feeding practices support synchronized foraging and schooling?

    Use consistent feeding times and methods. Disperse food evenly across the water column. Offer appropriately sized foods and avoid overfeeding to prevent water-quality issues.

    How can I use social learning and small-group techniques when introducing fish?

    Introduce juveniles together or add multiple newcomers at once. Allow established groups to model behavior for newcomers. Use temporary visual barriers or planted refuges to reduce aggression.

    What are common stressors that break up schooling behavior?

    Primary stressors include poor water quality, overcrowding, incompatible tankmates, and abrupt lighting or temperature changes. Strong turbulent currents and insufficient hiding spots also cause stress.

    What signs indicate a school is stressed or breaking down?

    Look for fragmented or erratic groups, isolated individuals, increased hiding, loss of color, and clamped fins. Reduced feeding synchrony and rising aggression are also signs. Any persistent change should prompt testing and intervention.

    How do I monitor schooling dynamics and keep records?

    Schedule short daily checks and weekly deeper observations. Keep a simple log with date, water parameters, feeding schedule, group size, and behavior notes. Use short video clips or live-stream comparisons for trend analysis.

    What water-quality practices maintain social stability in a nano tank?

    Establish reliable biological filtration before adding fish. Test weekly with reputable kits and perform regular partial water changes. Rinse sponge filters in tank water and avoid overfeeding. Immediate partial water changes are required if ammonia or nitrite appear.

    How should I quarantine and acclimate new fish to prevent disease and social disruption?

    Quarantine new fish for at least two weeks in a separate tank. Use drip acclimation or floating-bag temperature equalization when transferring. Introduce new fish during low-activity periods and consider adding groups.

    What practical layout and décor techniques encourage cohesive group movement?

    Use low-profile décor and plants like Java fern and Anubias to create visual landmarks. Place hardscape to funnel movement into predictable paths. Duplicate hiding spots and feeding zones to reduce competition.

    How do lighting and flow schedules affect daily schooling routines?

    Consistent photoperiods cue daily activity and reduce stress. Use gradual light transitions (programmable LED ramps) instead of abrupt on/off. For flow, aim for gentle laminar current that many schooling species prefer.

    What enrichment strategies promote natural group behavior without causing stress?

    Provide plants, gentle currents, occasional live or frozen foods, and floating leaf litter for microhabitat complexity. Briefly rearrange nonessential décor for exploration. Use mirror stimulation only briefly. Keep changes gradual and monitor for signs of stress.

    When should I intervene if schooling breaks down, and what steps should I take?

    Intervene for persistent fragmentation, sudden aggression, recurring disease, or unstable parameters. Steps include testing water, performing partial water changes, isolating injured fish, checking filtration and flow, and rearranging décor or temporarily splitting the group.

    What resources help me study real-schooling cues and improve my approach?

    Use National Geographic educator resources, Monterey Bay Aquarium live cams, and Explore.org for observation and inspiration. Consult American Fisheries Society publications, local aquarium clubs, reputable retailers, YouTube nano-keeper channels, and forums like FishLore or Reddit’s r/Aquariums for practical tips and community feedback.

    How can I apply small-group learning principles from human education to nano fish care?

    Use predictable routines, duplicate resources to reduce competition, and structured zones to define movement. Peer-modeling by introducing groups together mirrors homeschooling and co-op benefits. It helps fish form stable social patterns.

    What is a simple action checklist to start encouraging schooling in my nano tank?

    Choose suitable schooling species, set up predictable lighting and flow, and use low-profile décor. Duplicate hiding/feeding zones, quarantine and acclimate new fish, establish regular feeding and maintenance routines, monitor behavior and water parameters, record observations, and join a local or online community for continued learning.

  • Choosing Species for Acidic and Soft Water Nano Environments

    Choosing Species for Acidic and Soft Water Nano Environments

    Before you pick fish, test your tap water. Use multi-test strips or a digital meter to read pH, GH (general hardness), and KH (carbonate hardness). If GH is at or below 4 degrees (~75 ppm), your water is naturally soft. This is perfect for many soft-water species without needing heavy treatment.

    Soft water and low pH mimic South American and Southeast Asian blackwater habitats. These conditions shape which species will thrive in a soft water nano fish tank. Stable parameters matter more than chasing exact numbers — low KH can allow pH swings, so consistency is key.

    When your tap water is already soft, it’s simpler to keep soft-water-adapted fish. This choice affects stocking, maintenance, and long-term success with nano fish for low pH water.

    Species that often do well in acidic, soft nano setups include dwarf cichlids like rams and Apistogramma. Small characins and rasboras such as chili rasbora and the green neon are also good. Pygmy Corydoras, wild bettas like Betta macrostoma, dwarf rainbowfish, and Caridina shrimp such as Taiwan bee shrimp are also great choices.

    Remember tank size and social needs when choosing stock. Schools, pairs, or colonies change space and filtration demands. Confirm breeder or store parameters for captive-bred specimens before you buy. This ensures the best match for your nano fish for soft water and the Best nano fish for soft water in your setup.

    Understanding Nano Aquariums and Soft Water Parameters

    A vibrant, serene nano aquarium set in a softly lit environment, showcasing a community of colorful nano fish thriving in slightly acidic, soft water conditions. In the foreground, tiny neon tetra and cherry shrimp swim among lush aquatic plants like java moss and crypts, adding vibrancy and life. The middle ground features delicate rock formations and driftwood, providing hiding spots for the fish. The background is a gentle gradient of soft blues and greens, reflecting the tranquility of the aquarium environment. The lighting is warm and diffused, casting subtle reflections on the water surface. Captured from a slightly elevated angle, this image conveys a peaceful, natural atmosphere ideal for an aquatic habitat, emphasizing the beauty and diversity of suitable fish for soft water.

    A nano aquarium is any tank under about 20 gallons. In such small volumes, temperature, ammonia, and pH can swing fast. You need tighter routines and careful observation when keeping small fish for soft water aquarium setups.

    Soft water means low dissolved minerals, mainly calcium and magnesium. General hardness (GH) measures those minerals. GH ≤ 4° (roughly 75 ppm) is commonly classed as soft. Carbonate hardness (KH) shows buffering capacity. Low KH means the water resists pH change poorly, so pH can drop or spike quickly.

    pH shows acidity or alkalinity of water. KH acts as a buffer for pH. GH indicates total mineral content. In soft water fish species tanks, low KH makes pH stability critical. Stable pH protects gills and eggs of sensitive species.

    • Measure with multi-test strips for a quick check.
    • Use liquid test kits for accurate GH and KH readings.
    • Employ an electronic pH meter for frequent monitoring.
    • Test weekly in nano tanks; test more often after changes.

    To create soft water safely, many keepers use RODI (reverse osmosis deionized) water. You can re-mineralize slightly for shrimp or livebearers to meet species needs. Botanical methods such as Indian almond leaves, driftwood, or peat lower pH and add tannins. Some active buffering substrates suit shrimp setups by keeping pH gently acidic.

    Altering hard tap water down to true soft water is harder than adding minerals to soft water. If your municipal water is very hard, pick species matched to your tap. This saves stress for you and your fish.

    Keep records of GH, KH, and pH trends. That habit helps you spot drift early and keeps Nano fish for soft water flourishing. Small fish for soft water aquarium systems reward steady care and reliable testing routines.

    Why Choose Soft Water for Nano Fish

    A vibrant underwater scene showcasing a variety of nano fish species suited for a soft water tank. In the foreground, colorful tiny fish like neon tetras, guppies, and dwarf rasboras gracefully swim among lush green aquatic plants with delicate leaves, showcasing their vivid colors. The middle ground features a well-maintained aquarium setting with smooth gravel and natural decorations like driftwood, creating a natural habitat atmosphere. In the background, soft lighting filters through the water, creating a serene, tranquil ambiance with gentle reflections on the tank's glass. The overall mood is peaceful and inviting, emphasizing the beauty and diversity of nano fish in an acidic and soft water environment, captured with a focus on clarity and detail.

    Choosing soft water is best for nano fish. It mimics their natural habitats. Fish from places like the Amazon and Borneo live in soft, acidic waters. This helps them stay healthy and behave naturally.

    Keeping their water chemistry right is key for breeding. Fish like Apistogramma and Betta macrostoma breed better in soft water. Their colors also look more vibrant.

    Soft water tanks support a rich ecosystem. Plants like Java fern and Anubias thrive. They also help create a home for tiny animals and shrimp.

    Starting with soft water makes things easier. It’s simpler to add minerals than to remove them. Many use RODI water and add minerals to get the right balance.

    But, soft water needs careful watching. It can’t handle big changes in pH. Regularly check the water and keep it stable. This is important for the health of your fish.

    Key points to remember:

    • Most nano species evolved in soft, acidic waters and thrive under similar conditions.
    • Proper soft water chemistry improves health, breeding, and coloration.
    • Suitable plants and botanicals support a balanced micro-ecosystem.
    • Use RODI plus mineral dosing for precise control when needed.
    • Watch KH and GH to avoid dangerous pH crashes and maintain stability.

    Key Characteristics of Nano Fish

    When setting up a small tank, size is important. Choose fish that are about 1 to 1.5 inches long. This keeps your tank balanced and lets you keep a lively group in a 5–10 gallon space.

    Each fish species has its own social needs. Many soft water fish like to be in groups for safety and to show off. For example, rasboras and chili rasboras do well in schools of 6–12. Green neon rasboras prefer groups of 6–15.

    It’s also important to consider how sensitive each fish is to water. Look for species that are adapted to soft water. Wild-type species and Caridina shrimp need very specific water conditions to stay healthy.

    Temperature is another key factor. Some fish, like discus and certain rams, prefer warmer water around 84–86°F. Others, like celestial pearl danios and many rasboras, do best at 72–76°F. Make sure the temperature of your tank matches the needs of your fish.

    Feeding your nano fish is usually simple. Most accept small pellets, flakes, and live foods like baby brine shrimp and daphnia. Shrimp need special supplements to grow and molt well.

    Think about the temperament and how well different fish get along. Peaceful species are best for small tanks. Some fish, like cichlids, can be territorial, and others, like rams, might dig and move plants and substrate.

    • Size and space: choose fish under 1.5 inches for true nano compatibility.
    • Social behavior: prioritize schooling species for natural activity and reduced stress.
    • Water sensitivity: select soft water fish species or captive-bred lines adapted to low GH and low pH.
    • Temperature: match tank heat to species needs, from 72°F to the mid-80s for tropical varieties.
    • Feeding: provide micro foods and occasional live or frozen treats for variety and health.
    • Compatibility: favor peaceful community fish and avoid known territorial breeders in small tanks.

    To pick the best nano fish for soft water, consider size, social needs, and water chemistry. This way, you can create a healthy and lively small fish for soft water aquarium.

    Popular Nano Fish for Soft Water Environments

    Choosing the right fish for a soft water tank is key. Here are some small species that do well in soft, acidic water. They make great additions to your soft water fish tank.

    • Chili Rasbora (Boraras brigittae) — Tank size: 5–10 gallons. Keep in schools of 8–12. Temperature: 74–82°F. pH: 5.5–7.0. Feed micro pellets and live daphnia for the best color. Plant cover and low flow bring out vivid red hues.

    • Celestial Pearl Danio (Danio margaritatus) — Tank size: 10 gallons. School of 8–15 recommended. Temperature: 72–76°F. pH: 6.0–7.0. Offer varied frozen and flake foods. Stable conditions and gentle filtration keep this species happy.

    • Green Neon Rasbora (Microdevario kubotai) — Tank size: 10 gallons. Best in groups of 10+. Temperature: 74–80°F. pH: 6.0–7.5. Feed small live or frozen foods and maintain a planted layout for security.

    • Pygmy Corydoras (Corydoras pygmaeus) — Tank size: 10–20 gallons. School 6–12. Temperature: 72–78°F. pH: 6.4–7.5. These bottom-dwellers eat nano sinking foods, Repashy, and baby brine shrimp. Provide fine sand and gentle flow.

    • Toothpick Fish (Indostomus paradoxus) — Tank size: 10 gallons. Keep in groups of 6. Temperature: 72–78°F. pH: 5.5–7.0. Low flow, dense plants, and sponge filtration suit their shy nature. Feed small live foods and micro pellets.

    • Taiwan Bee / Caridina Shrimp (Crystal and Bee shrimp) — Tank size: 5–10 gallons for species-only setups. Require very stable, low pH and low KH with GH about 4–7° (70–130 ppm) for many strains. Use RODI water with shrimp minerals and active substrates for breeding. Offer biofilm, algae wafers, and specialized shrimp foods.

    • Ram Cichlid (Mikrogeophagus ramirezi) — Tank size: 20+ gallons for pairs. Temperature: 78–86°F, softer water preferred. pH: 5.5–7.0. Provide hiding spots and visual breaks to reduce aggression. Feed varied diet including frozen bloodworms and high-quality pellets.

    • Discus (Symphysodon spp.) — Tank size: 50+ gallons. Not for true nano tanks but listed for soft-water setups in larger tanks. Temperature: 82–86°F. pH: slightly acidic. Require very stable water, small sinking or slow-moving foods like Vibra Bites and brine shrimp, and a mature system.

    • Betta macrostoma (Brunei beauty) — Tank size: 10–20 gallons. Can be kept in pairs. Temperature: 75–82°F. Wild habitat is very soft, tannin-stained water; captive-bred will tolerate pH 6–7. Provide dim light, floating plants, and catappa leaves. Offer live and frozen protein-rich foods.

    • Dwarf Rainbowfish (Pseudomugil spp., e.g., gertrudae, luminatus) — Tank size: 10–20 gallons. Keep in groups of 6+. Temperature: 72–78°F. pH: 6.0–7.5. Upper-level swimmers that prefer pristine, planted tanks and a varied diet to boost color.

    Match the tank size, group numbers, and feeding to the species’ needs. These picks are some of the Best nano fish for soft water. They help you create a harmonious soft water fish tank.

    When pairing species, choose ones with similar temperature and pH ranges. Use mature aquaria for delicate shrimp and keep mineral dosing steady for breeding success. With proper care, you’ll enjoy vibrant color and active behavior from your nano fish for soft water setups.

    Acclimating Fish to Soft Water

    When you bring home delicate species, acclimation is key. Many soft-water shrimp and wild-caught nano fish are sensitive to sudden changes. Try to match the water parameters from the store or breeder to reduce stress.

    For very sensitive fish, use the float-and-drip method. Float the sealed bag to equalize temperature for 10–20 minutes. Then, set up airline tubing and start a slow drip from the tank into the bag. Aim for 60–120 minutes or longer for shrimp and wild specimens. This method allows for controlled mixing and adjustment.

    For hardy, captive-bred species, a stepwise mixing routine works. Add measured amounts of tank water to the transport water every 10–15 minutes for 30–60 minutes until volumes match. This approach is faster and prevents shock.

    If your tank uses RODI water, recreate the breeder’s mineral profile before moving fish. Use trusted brands like Brightwell, SaltyShrimp, or Seachem trace mixes to adjust GH and KH. Caridina shrimp need shrimp-specific mineral dosing to reach the desired GH/KH for long-term health in a nano fish for soft water tank.

    Quarantine new arrivals when you can. A short quarantine in a small hospital tank helps you observe behavior, treat parasites, and avoid introducing pathogens. If space is tight, use a temporary bottled or partitioned quarantine that lets you monitor feeding, breathing, and color.

    After acclimation, keep changes gradual. Avoid sudden pH, temperature, or hardness swings in the first week. Feed lightly for a few days and watch for stress signs such as gasping, clamped fins, or hiding. Careful early handling pays off in better survival and health under soft water nano fish care routines.

    Essential Water Parameters for Nano Fish

    Keeping soft water fish in a nano tank means aiming for gentle water ranges. The general hardness (GH) for many soft-water species is around 0–4° (0–70 ppm). Some shrimp and breeding setups might need GH 4–7° (70–130 ppm). Always check the breeder’s notes for specific needs.

    Water hardness (KH) is often low in blackwater-style tanks. Very soft setups usually have 0–2° KH. It’s important to watch the pH closely when KH is low to avoid sudden drops. A small buffer can help prevent pH crashes while keeping the water soft.

    The pH for most soft water nano fish care is acidic to neutral. It usually ranges from 5.0–7.0, depending on the species. Wild Betta macrostoma like very acidic water, while rams and discus prefer slightly acidic to neutral conditions in captivity.

    Temperature varies based on the species you keep. Tropical cichlids like discus and some Bolivian rams do best at 84–86°F (29–30°C). Small community fish such as pygmy corydoras, celestial pearl danios, and many rasboras thrive at 72–78°F (22–26°C). Taiwan bee shrimp prefer 68–75°F (20–27°C).

    Regular water testing is key. Test for ammonia, nitrite, nitrate, pH, GH, and KH at least weekly. In the first weeks after setting up a nano tank, test more often because changes happen faster in small volumes.

    Stability is more important than hitting a perfect number. Rapid changes stress fish and shrimp more than a steady, modest value. Use a consistent water source, perform small frequent water changes, and keep heaters steady to avoid shock.

    Prepare and treat water with purpose. Use RODI water for precise control of GH and KH. For softening or tannin tint, add peat, driftwood, or Indian almond (catappa) leaves. Add trace minerals when shrimp or breeding requires higher GH.

    Keep a short checklist for daily and weekly care:

    • Daily: observe behavior, check heater and filter flow.
    • Weekly: test ammonia, nitrite, nitrate, pH, GH, and KH.
    • Monthly: inspect substrate for buildup and top off RODI or conditioned water.

    By balancing these parameters, you can keep healthy nano fish in soft water setups. Follow species-specific guidance when available, and adjust slowly to protect sensitive inhabitants.

    Suitable Tank Mates for Nano Fish

    When picking tank mates, look for matches in temperament, size, and water needs. Peaceful fish go well together. Make sure their water parameters and temperature match.

    Consider their swimming level to keep the tank balanced. Mid and upper swimmers like chili rasbora and green neon rasbora fill the open water. Bottom dwellers, such as pygmy Corydoras, stay near the substrate.

    Keep schooling numbers in mind to reduce stress. Aim for groups like 8–12 chili rasboras. This helps lower aggression and keeps your fish safe.

    • Best nano fish for soft water: chili rasbora, celestial pearl danios, green neon rasbora, Pseudomugil dwarf rainbowfish.
    • Small fish for soft water aquarium bottom dwellers: pygmy Corydoras, Otocinclus where parameters allow.
    • Shrimp and microfauna: Caridina shrimp can work but often need species-only or extremely peaceful communities.

    Be careful with shrimp. Many small fish will eat baby shrimp. Caridina shrimp need their own tanks or very peaceful neighbors.

    Think twice about semi-territorial fish for small tanks. Wild bettas and Apistogramma can work in larger tanks (20+ gallons). They need hiding spots to avoid fights.

    Don’t overstock your tank. Nano tanks are sensitive to waste. Fewer, well-chosen fish are better than many that don’t match.

    Use plants and decorations to create hiding spots. Mid-level plants are good for schooling fish. Leaf litter and caves are great for bottom dwellers. Dense planting is best for shrimp. A well-thought-out setup lets each fish behave naturally.

    Maintaining a Healthy Nano Aquarium

    To keep soft water fish safe in a small tank, stick to a routine. Test the water’s pH, GH, KH, ammonia, nitrite, and nitrate every week. Change the water a little at a time, 10–25%, to keep the tank stable.

    Choose a gentle filter that helps the tank cycle. Sponge filters and low-flow hang-on-back filters are good for shrimp and delicate fish. They provide steady, safe filtration.

    Active substrates and botanicals help shape the water’s chemistry. Driftwood and Indian almond leaves can lower the pH a bit. Leaf litter supports microfauna and natural grazing for fish and shrimp.

    Plants are key to keeping the water stable and providing hiding spots. Java fern, Anubias, Cryptocoryne, Amazon sword, Vallisneria, and hornwort do well in soft water. If you use CO2, watch the pH closely in low-KH systems.

    • Feed sparingly: offer what your fish eat in 1–2 minutes.
    • Use micro-pellets, baby brine shrimp, and specialty diets for small mouths.
    • Remove uneaten food promptly to prevent ammonia spikes.

    Quarantine new fish to prevent disease. Avoid sudden changes in the tank’s parameters. Keep the substrate and filter media clean. Watch your fish daily for signs of stress or illness.

    Shrimp need extra care for minerals. Give them calcium or trace mineral supplements for healthy molts. Aim for steady GH and KH values that match your species’ needs.

    1. Weekly: water tests, 10–25% water change, check filter media.
    2. Monthly: deep-clean sponge filters, prune plants, remove leaf litter buildup.
    3. As needed: quarantine and treat new livestock before adding to the display.

    By following these steps, you can reduce stress and disease risk. This will help your soft water fish and Nano fish thrive in their tank.

    Common Mistakes When Keeping Nano Fish

    One big mistake is ignoring the chemistry of your tap water. Always test the pH, GH, and KH before adding fish. If your tap water is hard or alkaline, you might need to treat it or pick fish that fit your water type. This helps prevent stress and health issues in your nano fish.

    Making sudden changes to your water’s chemistry can be very harmful. Quick changes in pH, GH, or temperature can stress and make your fish sick. Try to avoid big water changes and use slow adjustments to keep your tank stable.

    Too many fish or too much food can quickly raise ammonia and nitrite levels. Keep your fish list small and feed them just enough. This is very important for nano fish, as they live in small spaces with weak buffering capacity.

    Ignoring the need for buffering can lead to pH crashes. If your water’s KH is low, it’s more likely to swing wildly. Keep an eye on your carbonate hardness and use peat or other methods to stabilize your soft water tank.

    Choosing the wrong tank mates can be disastrous. Avoid putting aggressive or territorial fish with your small tank’s residents. Make sure the size and temperament of your fish and shrimp match to keep them all happy in your soft water tank.

    Shrimp are very sensitive and need the right conditions. They require specific GH and pH levels and do best in mature tanks. New hobbyists often lose shrimp due to unstable conditions. Make sure your tank is stable before introducing these delicate creatures.

    Not quarantining new fish and plants can spread disease quickly. Always quarantine new additions to prevent pathogens from entering your tank. One infected fish can quickly spread disease in a small tank.

    • Test your tap water before stocking.
    • Make slow, measured water changes.
    • Stock conservatively and feed less.
    • Monitor KH and stabilize with natural methods if needed.
    • Choose compatible tank mates and respect shrimp needs.
    • Quarantine new additions to protect your tank.

    By following these steps, you can avoid common mistakes. This will help you care for your nano fish better, keep them healthy, and enjoy a thriving tank.

    Feeding Guidelines for Nano Fish

    Feeding small fish in soft water aquariums requires tiny, nutrient-rich portions. Opt for micro-pellets, crushed flakes, baby brine shrimp, daphnia, micro-worms, or finely crushed frozen foods. These fit their small mouths and help keep the water quality good in your nano fish tank.

    Each species has its own feeding needs. Discus and German blue rams do well on a mix of Vibrance or Tetra products, frozen meals, live brine shrimp, and small pellets. Pygmy corydoras like sinking nano pellets, Repashy gel food, baby brine shrimp, and sometimes tubifex.

    Rasboras and small danios prefer crushed flakes and micro-pellets, with live foods for better color. Caridina shrimp need shrimp foods with calcium and trace minerals, plus blanched veggies and biofilm. Wild-type bettas and dwarf cichlids enjoy meaty micro foods like daphnia, brine shrimp, and high-quality sinking pellets.

    Feeding amounts are key in nano systems. Feed small amounts once or twice a day, making sure they’re all eaten in one to two minutes. Overfeeding can quickly raise ammonia and nitrate, stressing the fish and undoing the care for soft water nano fish.

    • Use target feeding for shy species with a pipette or feeding ring.
    • Offer live foods periodically to encourage breeding and vivid coloration.
    • Remove uneaten food promptly to prevent spikes in ammonia.

    Think about adding extra steps to your care routine. A scheduled fasting day can help balance the community. Watch the water chemistry after feeding, adjusting portions if nitrate levels rise. These easy steps will keep your nano fish healthy for a long time.

    Resources for Nano Fish Enthuasiasts

    Begin with good testing and gear to care for your soft water nano fish. Use RODI systems from APEC or iSpring for low-mineral water. Replace filters as needed and check pH with Milwaukee or Apera meters.

    Get reliable test kits from API or Seachem to check water quality. Add a sponge filter for small tanks. These tools help match water to your fish’s needs.

    • RODI systems: APEC, iSpring
    • Test kits: API, Seachem
    • pH meters: Milwaukee, Apera
    • Filtration: sponge filters for nano tanks

    Trust care guides for specific fish advice. Read about discus, German and Bolivian rams, Caridina shrimp, and pygmy corydoras. These guides offer water parameters for your plan.

    Buy fish from good local stores, online retailers, or breeders. Ask about the water conditions before buying. This helps your fish adjust better to their new home.

    Choose plants and substrates for soft water. Look for active buffering substrates and shrimp-specific mixes. Vendors like ADA and catappa leaves help create stable habitats.

    1. Find plant and substrate vendors that list buffering properties.
    2. Buy catappa leaves and botanicals for natural tannins.
    3. Match substrate choice to the species you plan to keep.

    Join groups and clubs for local tips. Online forums and Facebook groups offer quick help. Vendor support emails can answer specific questions.

    If unsure, ask for advice. Experienced hobbyists and breeders can help with your setup. Use their knowledge to improve your care routine.

    Final Thoughts on Soft Water Nano Aquariums

    First, test your tap water to learn about pH, GH, and KH levels. Pick fish that fit your water’s natural chemistry. This way, you avoid extreme water changes.

    Stability is key, not perfect numbers. Keeping water conditions steady helps prevent stress and disease in your tank.

    Next, regularly check pH, GH, and KH levels. Decide if you’ll use RODI water, peat, or botanicals to soften the water. Or choose fish that already thrive in soft water.

    Think carefully about your tank’s size and how many fish you’ll put in. Avoid overcrowding by planning your stocking carefully.

    For beginners, consider chili rasboras, pygmy corydoras, and celestial pearl danios. Green neon rasboras and Caridina shrimp are also good choices. Dwarf cichlids like German rams are great if your tank’s temperature is right.

    These fish are known for doing well in soft water. With the right care, they can make your tank beautiful and healthy.

    Keep the KH level stable to prevent pH drops. Acclimate new fish slowly and quarantine them first. Regular testing and small water changes are also important.

    Keep learning from experts and local aquarium stores. They can share tips on keeping your fish healthy and breeding them successfully.

    FAQ

    What should you check in your tap water before choosing soft-water nano fish?

    First, test the pH, GH, and KH levels in your tap water. Use multi-test strips, liquid kits, or an electronic meter for this. GH should be at or below 4°, which is about 75 ppm, to indicate soft water. KH shows how well your water can resist pH changes.

    Low KH means your water can easily swing in pH. So, it’s better to choose fish that match your water’s chemistry. This way, you don’t have to change your water to fit the fish.

    How do you define a “nano aquarium” and why does water chemistry matter more in small tanks?

    A nano aquarium is one that’s under 20 gallons. Because these tanks are small, even tiny changes in water chemistry can be big. This means keeping a close eye on pH, ammonia, and temperature is key.

    Stable water chemistry is more important than exact numbers. Testing your water often helps keep it stable.

    What is “soft water” and what practical thresholds should you use?

    Soft water has low levels of dissolved calcium and magnesium. A practical threshold for soft water is a GH of 4° or less, which is about 75 ppm. Low KH levels mean your water can’t buffer pH changes well.

    This makes it harder to keep the pH stable. So, you need to actively manage the pH in soft water.

    Which small fish and invertebrates do best in soft, acidic nano setups?

    Good choices for soft, acidic water include chili rasbora, green neon rasbora, and celestial pearl danio. Pygmy Corydoras, toothpick fish, and dwarf rainbowfish also do well. For warmer tanks, consider ram cichlids.

    Caridina shrimp, like Taiwan Bee, Crystal, and Bee shrimp, thrive in species or carefully matched community tanks. Wild-type bettas, like Betta macrostoma, also do well when conditions match their natural habitat.

    How do you match tank size and social needs to species selection?

    Choose fish that are about 1–1.5″ for true nano compatibility. For schooling species, like chili rasboras and green neon rasboras, provide enough space. Schooling helps reduce stress.

    Pygmy corydoras and some cichlids need hiding spots. Rams and Apistogramma may do best in larger nano tanks, around 15–20+ gallons.

    What measurement tools should you use and how often should you test?

    Use multi-test strips, liquid test kits, and electronic pH meters for accurate readings. In nano tanks, test your water at least once a week. Test more often during setup, after adding new fish, or when changing water chemistry.

    How can you create soft or tannin-rich water safely for sensitive species?

    To create soft water, use RODI water and re-mineralize it for shrimp. Botanicals like Indian almond leaves and driftwood add tannins and lower pH gently. Active buffering substrates and shrimp mineral mixes help control GH and KH.

    Always make slow, deliberate changes. Match the water parameters to those of the breeder or store.

    Is it easier to soften hard tap water or to harden soft water?

    It’s generally easier to add minerals to soft water than to remove them from hard water. Converting hard water to reliably soft water is difficult and unstable. When practical, choose species that match your tap water or use RODI plus controlled remineralization for precise needs.

    Why do many nano species prefer soft, acidic nano setups?

    Many nano species evolved in blackwater or clearwater streams with low dissolved minerals and acidic water. These conditions affect their physiology, breeding, coloration, and behavior. Matching these chemistry cues promotes health, natural behavior, and breeding success.

    What are the main benefits of keeping soft-water nano species?

    Keeping soft-water nano species improves health, natural behavior, and breeding success. It reduces stress and enhances coloration. Botanical setups also support microfauna and natural feeding opportunities for shrimp and tiny fish.

    What are the risks of low KH and low GH in a nano aquarium?

    Low KH means weak buffering, which allows pH crashes—dangerous in a small tank. Very low GH reduces essential calcium and magnesium, impairing osmoregulation and, for shrimp, successful molting. Monitor KH and GH, and maintain some buffering or use gradual, controlled water-change routines to avoid swings.

    CO2 injection can further lower pH, so manage carefully in low-KH systems.

    What temperature ranges should you provide for common soft-water nano species?

    Temperatures vary by species. Discus and some rams prefer 84–86°F (29–30°C). Pygmy corydoras, celestial pearl danios, and many rasboras prefer 72–78°F (22–26°C). Taiwan Bee shrimp do well at 68–75°F (20–24°C). Match species with compatible temperature ranges or use separate tanks.

    How should you feed nano fish and shrimp?

    Use appropriately sized foods: micro-pellets, finely crushed flakes, baby brine shrimp, daphnia, micro‑worms, and specialty sinking pastes (Repashy). Shrimp need mineral-rich foods and biofilm supplements for healthy molts. Feed once or twice daily in amounts consumed within 1–2 minutes and remove uneaten food promptly.

    How do you acclimate sensitive soft-water fish and shrimp?

    For sensitive species, use drip acclimation: float the transport bag to equalize temperature, then drip tank water into the bag with airline tubing over 60–120+ minutes. For less sensitive captive-bred fish, stepwise mixing of tank water into transport water over 30–60 minutes may suffice. Match breeder water parameters when possible and change water slowly to avoid stress.

    Do shrimp need special water preparation?

    Yes. Caridina shrimp often require precise GH and low KH and may need RODI water with shrimp-specific mineral dosing to reach the correct GH (some strains want GH 4–7°). Use established, mature tanks with stable chemistry, supplement calcium for molting, and consider species-only or very peaceful community tanks to avoid predation.

    What filtration and substrate options work best in soft-water nano tanks?

    Sponge filters are ideal—gentle flow, biological filtration, and safe for shrimp. Hang-on-back filters with gentle output can also work. Active buffering substrates are useful for shrimp rigs; driftwood, catappa leaves, and leaf litter add tannins and microfauna. Choose substrates and botanicals that support your target GH/KH and do small, regular water changes to maintain stability.

    Which plants thrive in soft water and help the ecosystem?

    Java fern, Anubias, Cryptocoryne, Amazon sword, Vallisneria, and Hornwort adapt well to soft water. Botanicals provide tannins and support microfauna. If you inject CO2 for plants, monitor pH closely in low-KH setups—CO2 lowers pH and can destabilize water chemistry in a nano tank.

    What are compatible tankmates for soft-water nano species?

    Peaceful, small schooling mid/upper swimmers like chili rasboras, celestial pearl danios, green neon rasboras, and dwarf rainbowfish pair well with bottom dwellers like pygmy corydoras and gentle shrimp in carefully chosen setups. Avoid predatory or territorial fish. Caridina shrimp often fare best in species-only or very peaceful community tanks to reduce predation.

    How many of each species should you keep to ensure healthy social behavior?

    Keep adequate school sizes: 8–12 chili rasboras, 10+ green neon rasboras, 6–12 pygmy corydoras. For certain rasboras and dwarf rainbowfish, larger schools (10–15) boost color and reduce stress. Rams and some Apistogramma are best kept as pairs or in species tanks with plenty of cover and room for territories.

    What routine maintenance is required for a stable soft-water nano tank?

    Test pH, GH, KH, ammonia, nitrite, and nitrate weekly; do small, frequent water changes (10–25% weekly based on bioload); monitor temperature daily; clean filters as needed (sponge filters gently in tank water); and remove uneaten food and detritus. In small tanks, consistency prevents dangerous swings.

    How do you avoid pH crashes in low-KH setups?

    Maintain some buffering—even low KH of 1–2° reduces extreme swings. Use peat or botanicals to slowly lower pH instead of abrupt chemical dosing. Monitor pH frequently, perform regular small water changes with similar chemistry, and avoid introducing water with drastically different KH/pH. If necessary, maintain a small, controlled KH using remineralizers tailored to your livestock.

    What are common mistakes hobbyists make with soft-water nano tanks?

    Common errors include not testing tap water before stocking, choosing species incompatible with local chemistry, attempting to soften hard tap water without RODI, neglecting KH buffering and risking pH crashes, poor quarantine practice, overstocking in small volumes, and overfeeding. Shrimp beginners often underestimate the need for precise GH/KH control and mature, stable tanks.

    How should you quarantine and observe new soft-water nano additions?

    Use a separate quarantine tank when possible for at least 7–14 days to observe illness and treat parasites. For tiny species, use small quarantine setups with gentle filtration (sponge filter) and water matched to the store/breeder parameters. Watch for signs of stress, parasites, or disease and avoid introducing livestock until healthy.

    Where can you source accurate water parameters for captive-bred or wild-stock animals?

    Ask reputable local fish stores, specialist online retailers, and breeders for the water chemistry the animals were kept in. Use breeder pages, community forums, and species care guides from trusted hobbyist sources for strain-specific information. Always confirm parameters before purchase.

    What equipment brands and kits are recommended for soft-water nano setups?

    Reliable RODI systems include APEC and iSpring. Trusted test kits include API and Seachem. pH meters from Apera and Milwaukee give accurate readings. Use sponge filters for biological filtration and shrimp-safe substrates or aquarium soils from reputable manufacturers for active buffering.

    If my tap water is hard, what are practical stocking options?

    If you have hard tap water and don’t want to run RODI, choose species tolerant of higher GH/KH or look for captive-bred strains adapted to harder water. Use RODI plus remineralization for target species or maintain community fish that accept a wider range. Remember that converting hard water to reliably soft conditions is challenging and often unstable.

    What immediate steps should you take after reading these guidelines?

    Measure your tap water’s pH, GH, and KH. Decide whether you’ll use RODI/botanicals or stock species matched to your tap water. Plan tank size and group sizes for chosen species. Prepare appropriate filtration (sponge filters for shrimp), botanicals, and a quarantine plan. Prioritize stability and slow acclimation when introducing livestock.

    Which species offer the highest chance of success for a beginner soft-water nano tank?

    High-return choices include chili rasboras, pygmy corydoras, celestial pearl danios, green neon rasboras, and Caridina shrimp if you commit to RODI and precise mineral dosing. Rams and Betta macrostoma are rewarding but require more specific temperature and parameter control. Always match species to your water and experience level.

  • Fine-Tuning Your Photoperiod to Balance Plant Growth and Algae

    Fine-Tuning Your Photoperiod to Balance Plant Growth and Algae

    Adjusting light duration helps plants grow better than algae. This is done by balancing light, nutrients, and CO2 in planted aquariums. This guide will show you how to set light duration for healthy plants and less algae.

    Begin with small changes and wait about two weeks to see results. A new tank looks clean at first but algae can grow when resources are not balanced.

    Lighting is key for photosynthesis and the tank’s look. Finding the right photoperiod balance is important. It depends on the plants and CO2 levels. Most find 6–10 hours of light works well.

    In this article, you’ll learn about setting light duration. You’ll also discover how to use timers and smart LEDs. We’ll guide you to slowly improve plant growth over algae.

    Understanding Photoperiodism in Plants

    A vibrant indoor greenhouse filled with lush green plants showcasing different stages of growth under varying light conditions. In the foreground, a close-up view of a healthy plant with broad leaves, soaking in bright sunlight, illustrating the concept of photoperiodism. The middle layer features an array of plants, some in bright light, others in shade, to highlight the effects of different light durations. The background shows a clear window letting in soft, natural sunlight, casting gentle shadows across the scene. The atmosphere is tranquil and educational, inviting curiosity about plant growth cycles. Use soft, natural lighting for a warm, organic feel, with a depth of field that emphasizes the plants while subtly blurring the background, creating a sense of focus.

    Photoperiodism is how plants use day length to control photosynthesis, growth, and respiration. They need a mix of light and dark each day. This lets them grow by day and rest by night.

    Plants breathe at night, using oxygen and sugars. Running lights all day stops this rest and can lead to algae growth. It’s important to avoid constant light to keep a balanced ecosystem.

    Regular daily light helps plants follow a routine. Adjusting lighting time reduces stress in plants and animals. This makes them more stable.

    Changing light duration affects plant growth. Too little light makes stems and leaves weak. Adjusting light helps plants grow strong and healthy.

    Biological clocks in plants respond to light changes. Simulated sunrise and sunset help plants adjust smoothly. These changes support steady growth and health.

    Key takeaway: create a stable day/night cycle for your plants. Give them a true dark period to support growth and prevent algae. This helps plants thrive.

    The Role of Light Duration in Plant Health

    A close-up view of a well-organized plant growth setup, showcasing various light duration settings for optimal plant health. In the foreground, a digital timer displays adjustable light cycles, with vibrant green plants in grow pots below, demonstrating healthy foliage. The middle ground features LED grow lights casting a warm glow, illuminating the leaves and creating gentle shadows. In the background, blurred images of algae-infested water tanks contrast with the thriving plants, subtly indicating the balance needed in light exposure. The scene is set in a greenhouse with natural light filtering through transparent panels, creating a serene and focused atmosphere on nurturing plant life.

    Light duration is key to how much light your plants get each day. Photosynthesis needs a mix of light, so the total light matters more than just one bright moment. Think of light duration, intensity, and spectrum as a team that gives energy to plants.

    In planted freshwater tanks, a moderate PAR of 50–150 µmol/m²/s is common. This intensity means plants usually need 8–10 hours of light to grow well and prevent algae. When setting light duration, aim for consistent cycles, not sudden changes.

    New setups should start with 6–8 hours of light. Then, slowly increase it as plants grow and spread. For more mature systems, 8–12 hours might be needed, depending on the plants and light. If algae grows too much, first try reducing the light hours before changing the light’s power or fertilizers.

    Changing light duration means balancing hours with light power. Strong lights need less time to avoid too much light. Weaker lights can have a bit longer day to give the same energy. Watch your plants’ leaves, growth, and algae to find the best light time.

    • Begin with conservative light duration settings for new plants.
    • Match duration to intensity: stronger lights need fewer hours.
    • Use 8–10 hours as a general target, tweak per species needs.
    • If algae rises, reduce duration before making major changes.

    Factors Influencing Light Adjustment

    Before you adjust the lighting in your planted tank, consider a few things. The location is key because natural light changes with the weather and seasons. Try to avoid direct sunlight to keep the light consistent and prevent surprises.

    The quality of your lighting fixtures is also important. Choose lights designed for planted tanks, like those from Fluval or Kessil. They provide the right brightness, spread, and spectrum. A good timer ensures the lights turn on and off at the same time every day.

    • Plant type and maturity — classify species as low, moderate, or high light so you match hours and intensity to their needs.
    • CO2 and nutrient levels — higher light typically needs stable CO2 and nutrients to prevent deficiencies and algae blooms.
    • Water depth — PAR drops with depth, so deeper tanks may need stronger fixtures or longer runs for the same effect.
    • Seasonal daylight changes — lengthening or shortening natural days affects how you approach setting light duration.

    The spectrum and PAR penetration are key when choosing light adjustment techniques. Blue wavelengths reach deep water, red supports photosynthesis in freshwater plants, and full-spectrum white mimics natural daylight. Make sure the spectrum of your fixtures matches your plants and measure PAR at plant height when possible.

    To apply this checklist, start by assessing your plants and your CO2 and nutrient plan. Test your hardware limits. Use this information to set the light duration. This way, your photoperiod supports growth without encouraging algae.

    Methods for Adjusting Light Duration

    Start by using a basic electrical outlet timer to make a steady schedule. Timers are more reliable than manual switches. They give you a repeatable baseline for light adjustment techniques.

    Begin new tanks with a short photoperiod, such as 6–8 hours. Increase duration slowly over days or weeks. This lets plants acclimate. When you change only one variable at a time, you can judge results clearly.

    • Use split photoperiods to reduce stress. An “afternoon siesta” breaks the day into morning and evening sessions. This limits continuous exposure.
    • Try ramping sunrise and sunset instead of abrupt on/off. Smooth transitions ease plants into new intensities. This reduces shock.
    • When you need finer control, adopt smart LED fixtures and manufacturer apps like AI Blade or GHL. These apps offer precise channel control and scheduling.

    If your fixture lacks true dimming, you can raise the light or partially cover LEDs. This lowers effective intensity. It’s a workaround for adjusting light interval or testing lower levels without buying new equipment.

    1. Set a clear, consistent timer. Consistency beats constant tinkering.
    2. Implement one change at a time. Wait several days before the next adjustment.
    3. Use smart controls for complex routines: ramp-up, channel mixes, and acclimation modes. These make light duration customization precise.
    4. Monitor plant response and algae trends to decide whether to shorten or split the photoperiod.

    Practical steps for daily use: program the timer, choose ramping if available, and keep notes on each change. These habits will help you refine adjusting light interval and master light duration customization for healthier plants.

    Best Light Durations for Common Plants

    Choose the right light hours for your tank’s plants. Low-light plants like Java Fern, Anubias, and Cryptocoryne need 6–8 hours a day. Start with less light to help them grow.

    For plants that need more light, like Amazon Sword and Vallisneria, go for 8–10 hours. Use a light intensity of 50–150 µmol/m²/s. This helps them grow well without too much stress.

    High-light plants, such as red varieties and carpeting species, also need 8–10 hours. But they require stronger lights and careful nutrient balance to avoid algae. If the light is too strong, cut back on hours to prevent algae.

    • Newly planted tanks: begin with 6–8 hours and increase as plants mature.
    • If algae appears: reduce the photoperiod and reassess nutrient dosing.
    • Measure PAR where plants grow and adjust both intensity and setting light duration accordingl

    Know your plants’ needs and start with the right light hours. Then, adjust based on how they grow and if algae shows up. Aim for the best light hours for healthy growth and less algae.

    Balancing Light Duration to Control Algae Growth

    Algae love too much light and an imbalance of resources. When your tank or greenhouse gets too much or poorly timed light, algae blooms quickly. Plants and algae fight for the same nutrients and CO2, so you need to balance both.

    Start by controlling the photoperiod. Shortening the daily light time is a simple fix for algae spikes. This gives plants a dark time to breathe and stops algae from getting too much light.

    Customize light duration to set clear on/off times. Use timers and smart controllers to avoid long, random light periods that algae love. Consistent light cycles help plants beat algae by keeping photosynthesis and respiration steady.

    Adjusting light duration is most effective with other steps like nutrient management and maintenance. Lower light intensity, increase water changes, and fix nutrient imbalances. Adding algae-eating species like Nerite snails or Otocinclus catfish can also help, but it’s not the only solution.

    • When you see algae, quickly switch to a shorter photoperiod.
    • Reduce light intensity gradually, not all at once.
    • Make sure timers work well to prevent sudden long light periods.
    • Combine adjusting light time with checking nutrients and CO2 levels.

    Many aquarists aim for moderate PAR and a conservative photoperiod, often 6–8 hours for planted tanks. This range supports plants while limiting algae’s chance to grow. Smart scheduling avoids long midday or late-night stretches that algae prefer.

    Remember, light duration customization is just one part of a bigger plan. Use it with trimming, substrate care, and regular testing. By adjusting light duration, you limit algae’s advantage and give plants a better chance to thrive.

    Seasonal Changes and Light Adjustments

    When seasons change, daylight hours and weather affect your indoor plants’ light. Even indirect sunlight from a north window can vary. This means you need to adjust lighting time regularly.

    Start by measuring the total light from sun and fixtures. Track the sunniest months and cloudier periods. Use this data to adjust light duration and keep a stable daily light budget for your tank.

    Smart LED fixtures from brands like Fluval and Kessil offer scheduling and intensity control. These features make adjusting light easy. You can gradually change photoperiods to match seasonal changes.

    If summer brings more daylight, shorten your artificial light time to avoid too much light. In winter, extend artificial lighting to make up for less sun. A consistent daily schedule helps plants and prevents algae blooms.

    • Monitor combined light every week.
    • Reduce artificial time during bright months.
    • Use ramping schedules to change photoperiod slowly.
    • Keep timing consistent to prevent algae surges.

    Measuring Light Exposure Effectively

    Begin by using a PAR meter to measure Photosynthetically Active Radiation in µmol/m²/s. This tells you how much light is good for photosynthesis. Measure at plant height and across multiple points to see how light is spread.

    It’s also important to check the light spectrum along with its intensity. Blue light (450–470 nm) and red light (620–660 nm) help plants grow in different ways. Using full-spectrum white LEDs can help plants grow well if you adjust the output right.

    • Use manufacturer PAR maps from brands like AI Prime, Fluval, or Kessil when available.
    • Compare those maps with your PAR meter readings to validate real-world output.
    • Clean fixtures and glass often; dust and film reduce effective light.

    When measuring light exposure, remember LED intensity percentages can be misleading. Start with 20–40% brightness. Slowly increase the output while watching your plants and algae. Keep a journal or spreadsheet to track changes.

    1. Borrow or buy a PAR meter for precise readings.
    2. Take multiple measurements across the tank or canopy.
    3. Log timer settings, intensity, and PAR values together.

    For planted freshwater tanks, aim for moderate PAR, about 50–150 µmol/m²/s. Reef systems need even more PAR and strict spectrum control. Match readings to what your plants or corals need before changing light settings.

    Keep notes on how plants respond to light changes. Track growth rates, leaf color, and algae. Use this record to fine-tune future changes and to justify adjusting light interval in small increments.

    Make measuring light exposure a regular part of your maintenance routine. Regular checks help you spot any changes in output, prevent algae, and keep conditions stable for healthy growth.

    Tips for Fine-Tuning Light Duration

    Start small and change one thing at a time. This makes it easier to see the effects. Wait about two weeks after each change to see how plants and algae respond. Keep a simple log of dates, settings, and observations so you can repeat what works.

    Use a checklist to guide your light duration customization. Begin new planted tanks at 6–8 hours of light. Keep LED intensity low at first, near 20–40% on many fixtures. If growth is slow and algae are absent, raise duration toward 8–12 hours or increase intensity slowly.

    Take advantage of modern light adjustment techniques in smart fixtures. Use acclimation modes and ramping to reduce shock when you increase intensity or duration. Program gentle sunrise and sunset curves to mimic natural transitions and cut stress on plants.

    Maintain equipment for consistent results. Clean fixtures and lenses regularly, cover the full tank length to avoid hotspots, and match the spectrum to plant needs. These routine steps support stable light duration customization and keep algae in check.

    • Set timers for reliable schedules and avoid daily guesswork.
    • Schedule smart fixture ramps instead of abrupt changes.
    • Prune and fertilize as plant biomass increases to balance demand.
    • Record each adjustment so you can reproduce effective runs.

    Follow an incremental plan for adjusting light duration. Make modest increases in either time or intensity across several sessions. Monitor plants and algae closely and revert if issues appear. Use your log to spot patterns over weeks, then refine your light adjustment techniques based on real results.

    Common Mistakes in Light Duration Management

    Many think more light means healthier plants. But leaving lights on all day is a big mistake. It causes algae to grow and stops plants from breathing at night.

    Changing too many things at once makes it hard to see what works. If you change the light hours, fertilizer, and water flow all at once, you won’t know what helped. Make one change at a time and wait a week or two before checking the results.

    • Using the wrong light fixture is common. Many default kits don’t have enough light or the right color. Brands like Fluval and Current USA make lights that are good for plants.
    • Just looking at hours of light without checking the quality is a mistake. Plants can look weak or leggy if the light is not right. Use a PAR meter or check the light’s specs to see if it’s good.
    • Not paying attention to natural light can mess up your schedule. The position of your windows and the sun’s movement can change your light plan.

    To fix these issues, start by using timers or smart plugs to keep your light schedule steady. When you need to change the light time, do it in small steps of 15–30 minutes.

    If your current lights aren’t strong enough, it’s time for a change. Look for lights made for planted tanks. Check the PAR and spectrum, keep track of your changes, and note how your plants react.

    1. Find out what’s wrong: algae, weak stems, slow growth.
    2. Change one thing: light hours, fixture, or nutrients.
    3. Write down the date and what happens in a simple log.
    4. Make small changes to get the light just right for your plants.

    By avoiding these mistakes and adjusting your light carefully, you can keep your plants healthy and prevent algae.

    Case Studies of Light Duration Adjustments

    Here are three real-life examples of how changing light duration and interval can help your planted tank. Each example gives you clear steps to follow. You can use these tips with smart fixtures and keep track of your progress.

    • New planted tank startup. Start with 6–8 hours of low light (20–40%) and use a timer. Keep a journal of your daily settings and notes. Once plants grow, slowly increase light time to 8–12 hours if needed. If algae shows up, reduce light and intensity while checking nutrients and flow.
    • Adding moderate to high-light species. When adding plants that need more light, increase intensity slowly. Keep light time at 8–10 hours. Make sure CO2 and nutrients are enough. Use smart LEDs to gradually adjust plants to new light. Record these settings for future use.
    • Responding to an algae outbreak. Cut back on light and increase water changes right away. Check if nutrients and CO2 are balanced. Log the changes and wait for algae to go away. Then, go back to settings that helped plants grow well.

    Optimizing light means balancing timing, intensity, CO2, and nutrients. Keep a log to compare changes in light duration versus interval. This record helps you repeat success and avoid mistakes.

    Smart fixtures make adjusting settings easier. Set the fixture to match your logged settings and watch plant response for a week. If needed, make small changes one at a time to see what helps.

    Conclusion: Achieving the Perfect Balance

    When setting up light for a planted tank, start with a regular schedule. Use timers and smart controls for this. Begin with 6–8 hours of light for new setups.

    Change the light gradually when needed. Wait two weeks to see how plants and algae react. This helps you adjust light settings better.

    Match the light schedule to your plants’ needs. Measure PAR and spectrum to make better choices. Light is just one part of the equation.

    Balance light with nutrients and CO2. This helps plants grow better than algae. Keep your tank clean and log your settings for consistent results.

    Choose a good LED fixture for your tank. It should have dimming and scheduling options. Pair it with smart controls for precise light settings.

    Use case studies as a guide. Experiment carefully, monitor often, and make small changes. With patience and practice, you can get your light settings just right.

    FAQ

    What is photoperiodism and why does it matter for planted tanks?

    Photoperiodism is how plants react to day length. It controls photosynthesis, growth, and respiration. Plants need a set light period and dark time for growth.

    A stable photoperiod helps plants grow better. It also keeps fish and plants healthy. Plus, it stops algae from growing too much.

    How long should I run my lights in a new planted aquarium?

    Start with 6–8 hours of light a day for new tanks. Use low intensity lights, about 20–40% on LEDs. Wait two weeks to see how plants react.

    Then, you can slowly increase light time. But watch out for algae. If it grows, turn the lights off sooner.

    How does light duration interact with intensity and spectrum?

    Light duration, intensity, and spectrum all matter for plant growth. More intensity means shorter light times. Less intensity lets you light it longer.

    PAR (400–700 nm) is the light range plants use. Moderate tanks aim for 50–150 µmol/m²/s. Spectrum affects how well light reaches plants.

    What photoperiods suit low-, moderate-, and high-light plants?

    Low-light plants like Java Fern and Anubias need 6–8 hours of light. Use lower intensity lights.

    Moderate-light plants, like Amazon Swords, need 8–10 hours. They do well with moderate PAR. High-light plants, like red plants, need 8–10 hours but more intensity.

    If I see algae, should I change photoperiod first or nutrients/CO2?

    First, try reducing light time and intensity. This is the safest step. Then, check CO2 and nutrients. Make sure to keep a consistent schedule.

    Change only one thing at a time. Wait two weeks to see how it works. Use a timer to keep things consistent.

    How do smart LEDs and ramping features help with photoperiod control?

    Smart LEDs let you set exact light times. They also have features like ramping for natural light changes. This helps plants adjust to new light levels.

    Ramping reduces stress on fish and plants. It’s great for introducing new plants or changing light levels.

    Can ambient room light or direct sunlight affect my tank schedule?

    Yes, natural light can change your tank’s light time. Direct sunlight can be too much. Use a timer to keep light consistent.

    If your tank gets natural light, adjust artificial light during bright months. This keeps light steady.

    How should I measure and track light for reliable adjustments?

    Use a PAR meter to measure light. Check manufacturer PAR maps for your LED. Keep a log of light settings and plant responses.

    Remember, LED percentages can be misleading. Start low and increase slowly. Watch for algae.

    What practical methods can I use to adjust light duration if my fixture lacks dimming?

    Use a timer for consistent light. Raise the fixture to lower intensity. Split the light into two sessions with a break.

    As a last resort, cover some LEDs. Consider a new LED with dimming if possible.

    Which factors determine how I should fine‑tune photoperiod for my setup?

    Consider tank location, fixture quality, and plant species. Also, think about CO2, nutrients, water depth, and seasonal changes. Adjust light based on these factors.

    What’s a safe process for making changes to light duration?

    Change one thing at a time. Start with small adjustments. Use a timer and wait two weeks to see results.

    Record each change and how plants respond. This helps you find the best settings.

    What common mistakes should I avoid when managing photoperiod?

    Don’t leave lights on all day. This hurts plant growth and invites algae. Make one change at a time.

    Don’t ignore PAR and spectrum. And watch out for natural light changes. These can mess up your schedule.

    How do seasons affect indoor planted tanks and what should I do?

    Daylight changes with the seasons. If your tank gets natural light, adjust artificial light. Use a timer to keep light steady.

    Smart fixtures help adjust to seasonal changes. This keeps plants happy all year.

    Can you give quick, evidence-based scenarios for common situations?

    For a new tank, start with 6–8 hours of light. Use low intensity and increase slowly. If algae appears, reduce light and intensity.

    When adding high-light plants, increase intensity carefully. Use a timer and ramping. For algae, reduce light and intensity first.

    What should I invest in to make photoperiod control easier and more repeatable?

    Get a quality LED with dimming and scheduling. Use a reliable timer and PAR meter. Keep a log of settings and plant responses.

    Regular maintenance helps keep light consistent. Clean fixtures, prune, and fertilize plants regularly.

  • Is Your Furniture Strong Enough? Calculating Nano Tank Weight

    Is Your Furniture Strong Enough? Calculating Nano Tank Weight

    A sudden support failure can turn a peaceful living room into a disaster zone. In one well-documented incident, a 180 L aquarium emptied after a stand collapsed. This caused a flood that destroyed flooring, electronics, and months of plants and livestock.

    That event shows why nano tank weight safety is key for hobbyists in the United States. Water is heavy: 1 liter of water ≈ 1 kilogram. So, a 90 L tank carries at least 90 kg (roughly 200 lb) of water. This is before you add glass, a hood, substrate, or hardscape. Even small tanks can weigh as much as—or more than—an average adult.

    You’ll learn how to calculate your aquarium’s actual weight. You’ll also compare it to the safe weight for nano tank setups. Plus, you’ll find out the nano tank maximum weight for planning.

    The article will show how to check and improve your furniture’s load capacity. You’ll learn to match stands to a tank’s footprint and distribute loads properly. It will also guide you on how to reinforce cabinets for long-term safety.

    This guide uses clear, second-person instructions. It helps you avoid structural failures, water damage, and loss of fish or shrimp. Read on to make confident, safety-first choices about your nano tank and its support.

    Understanding Nano Tanks and Their Weight

    A well-organized and informative illustration focused on “nano tank weight guidelines.” In the foreground, a sleek, modern nano aquarium is prominently displayed, filled with colorful aquatic plants and small fish, emphasizing the delicate balance of weight and design. The middle section features a scale with labeled weight categories for various nano tanks, alongside various aquarium components like substrate, filter, and decorations for context. In the background, a cozy living room setting with sturdy furniture, subtly suggesting the importance of weight considerations. Soft, natural lighting creates a warm atmosphere, highlighting the aquarium's glossy surfaces. The angle is slightly elevated, giving an overview that showcases the tank and the scale in a professional, inviting manner.

    A nano tank is a small aquarium, usually holding 30–50 liters. Some people also call tanks up to 60 L nano. They come in shapes like cubes and rectangles, perfect for desks or stands.

    Remember, 1 L of water weighs about 1 kg (2.2 lb). The total weight includes water, the tank itself, substrate, decorations, and equipment. So, the tank’s volume is just part of the story.

    • 30×30×30 cm (~27 L): 27 kg of water. Add glass, substrate, hardscape, and gear and expect about 35–45 kg total depending on how much rock you use. These numbers help you match nano tank weight guidelines to furniture limits.
    • 45×45×45 cm (~91 L): 91 kg of water. With extras you are well over 100 kg total, so this size often exceeds typical desktop supports and changes the weight capacity nano tank owners must verify.

    Hardscape and substrate can add a lot of weight quickly. A 45 cm cube with dense rockwork can add dozens of kilograms. Make sure to check your tank’s weight tolerance before adding heavy decorations or thick soil layers.

    Glass tanks and rimless acrylic models handle weight differently. Rimmed tanks sit better on narrow supports. Rimless tanks need a full-surface board or foam pad to avoid stress and cracks.

    When setting up your tank, compare its expected weight to the furniture’s weight limit. Use safe estimates if you plan to add heavy decorations or extra equipment. This will keep your setup stable and safe.

    Importance of Weight Safety for Nano Tanks

    A contemporary living room showcasing a sleek nano tank filled with vibrant aquatic life. In the foreground, the nano tank rests on a stylish, modern stand that emphasizes its compact design while ensuring stability. Surrounding the tank, a well-organized workspace features tools like a digital scale and measuring tape, highlighting the concept of weight safety. In the middle ground, a calculation sheet is partially visible, illustrating weight estimates and safety guidelines, designed with clean lines and a minimalist aesthetic. The background reveals soft, ambient lighting from overhead fixtures, casting gentle shadows that create a calm yet focused atmosphere. The scene emphasizes the importance of weight safety with a professional tone, suitable for a home or office environment. The overall mood is serene and informative, with a well-balanced composition.

    Even a small tank can be dangerous if you underestimate its weight. A 180 L system can weigh as much as two adults. One case showed how a tank’s weight can cause furniture to sag.

    A 90 L tank holds almost 200 lb of water. Add gravel, rock, and equipment, and the weight goes up even more.

    Ignoring the weight risks can lead to serious problems. Cabinets can sag, glass can crack, and seams can fail. You might also face sudden leaks, water damage, and harm to fish and invertebrates.

    Structural failures can happen in different ways. Cabinets made of flatpack or MDF can weaken over time. Uneven support can twist the stand, causing stress. And, if the legs are narrow or don’t match, the tank can collapse.

    It’s important to consider the building’s floor limits. Most homes can handle 150–250 kg/m². But a heavy tank can exceed this, risking damage to floors or walls. Place tanks near load-bearing walls and make sure they’re oriented right to spread the load.

    Don’t be fooled by how a tank looks. Fitting it on furniture doesn’t mean it meets the load limit. You need to calculate the total weight and compare it to the tank’s capacity. This is the only way to keep your nano tank safe in the long run.

    Choosing the Right Furniture for Nano Tanks

    Choose furniture that fits your tank’s weight and follows nano tank guidelines. A dedicated aquarium stand is the best choice. These stands are made for even weight distribution and often have extra support for long tanks.

    They also resist moisture better than regular cabinets. This is important for tanks over 100 L or those with a sump.

    Commercial aquarium cabinets are designed to fit common tank sizes. They may have waterproofing, ventilation, and cable management. When shopping, check the load capacity and look for features like sump clearance and cable cutouts.

    Brands like ADA and Waterbox offer high-quality, reinforced stands for heavy or display tanks.

    Household furniture like MDF dressers may not last long in a wet environment. Particleboard and low-grade MDF can warp and sag. Use these only if the manufacturer guarantees a load rating higher than your tank’s weight and you can ensure full support.

    Opt for materials that are both strong and resistant to moisture. Marine-grade plywood or reinforced plywood are good choices. Metal frames are also suitable for heavier tanks and systems with a sump.

    MDF might be okay for very small nano tanks but it’s not durable against humidity and will sag over time.

    For small tanks, consider modifying IKEA pieces like the EKET or cube furniture. Reinforce them, check the safe weight for nano tanks, and make sure the tank’s base fits evenly on the stand. This avoids stress on joints and ensures long-term support.

    • Match the footprint: ensure length and width of the stand align with the tank base.
    • Full-surface support: avoid point loads; the entire underside of the tank should sit on the stand.
    • Check load ratings: confirm the stand meets nano tank weight guidelines for your filled tank plus equipment.

    For compact or planted setups, look at Do!aqua and Amtra for nano-sized stands and cabinets. If you plan a sump, choose stands with reinforced frames and sump clearance. Make sure the chosen piece has a reliable weight capacity for nano tank owners before you buy.

    Measuring Your Nano Tank’s Weight

    To find your nano tank’s load limit, start by measuring its length, width, and height. Use these numbers in an aquarium volume calculator or multiply them to get liters. Remember, 1 liter of water weighs 1 kilogram.

    Next, estimate the weight of the glass or acrylic. Small nano tanks can add several kilograms. Add 5–15% of the water weight to account for the frame, sealant, and panels.

    Calculate the substrate volume by multiplying the tank area by its depth. Then, convert liters to kilograms using the substrate density. For example, a 30×30 cm tank with a 2 cm substrate layer is about 1.8 L, or 2–3 kg.

    Estimate the weight of hardscape like Seiryu stone and driftwood. This can range from a few kilos to over twenty kilos, depending on the layout. If you can’t weigh the pieces, assume 5–30 kg for typical nano setups.

    Don’t forget to include the weight of equipment like filters, sumps, CO₂ cylinders, lights, controllers, and reservoirs. Small setups may add 2–10 kg. Sump systems and metal fixtures can significantly increase the weight.

    1. Water volume (L) → kilograms (1 L = 1 kg).
    2. Add glass/acrylic: +5–15% of water weight.
    3. Add substrate: volume × density (1.4–1.8 kg/L for gravel).
    4. Add hardscape: estimate 5–30 kg depending on materials.
    5. Add equipment: estimate 2–10+ kg for small setups.
    6. Sum all items. Convert kg to lb by multiplying by 2.20462.

    Here are two quick examples. A 30 L planted nano: 30 kg water + 5 kg glass/frame + 3 kg substrate + 5 kg hardscape + 2 kg equipment ≈ 45 kg total. A 90 L cube: 90 kg water + 12–15 kg glass + 10–20 kg substrate/hardscape + 5–10 kg equipment ≈ 120–135 kg total.

    Plan conservatively. Add a 10–20% safety margin for future additions and measurement error. Compare the final number to your furniture’s weight tolerance and load limit to avoid surprises.

    After calculating the total, check it against the nano tank’s maximum weight. Compare it to the stand, floor joists, and room location. If it’s close to the limit, strengthen the support or reduce the load until it meets your safety target.

    Evaluating Your Furniture’s Weight Capacity

    First, find the maximum weight the stand or cabinet can hold. This is usually listed by the manufacturer or available from the retailer. Knowing this ensures your tank’s weight won’t exceed the furniture’s capacity.

    If no weight limit is given, be cautious with furniture like flat-pack items. Look for sturdy materials like thick plywood, solid hardwood, or metal frames. These are safer for holding a heavy aquarium.

    • Check the joints and fasteners for any looseness or gaps.
    • Look for signs of weakness like swelling, warping, or sagging in the boards.
    • Make sure the legs or feet are stable and even.

    Consider how the tank’s weight will distribute on the furniture. Furniture with a wide base is safer than items with narrow feet. Narrow feet can put too much pressure on one spot, increasing the risk of damage.

    Before placing the aquarium, test the furniture’s strength. Use heavy but safe items like sealed water jugs or sandbags. Make sure the weight of these items matches or exceeds the tank’s weight. Watch for any signs of instability or damage over time.

    When placing the tank in upstairs rooms or older houses, be extra careful. Place the tank perpendicular to the floor joists and near load-bearing walls. Compare the tank’s weight to the floor’s strength, usually between 150 and 250 kg/m². If it’s close or exceeds this, get advice from a structural engineer.

    Always add a safety margin when choosing furniture. Pick items that can hold at least 20–30% more than your tank’s weight. This extra capacity helps with future changes, water additions, and material wear over time.

    Distributing Weight Effectively

    Make sure the tank sits flat on its base. This spreads the weight evenly, avoiding stress points. It’s key to keeping your tank safe.

    Choose a stand that’s as big as the tank. This prevents tipping and ensures even weight. Even small tanks need a solid base.

    • Distributed load: weight spread across the entire base is ideal for long-term stability and for staying within nano tank weight tolerance.
    • Point load: weight focused on narrow legs or small feet raises pressure on the furniture and floor. Point loads can deform wood, bend metal, and create torsion stress on the tank.

    Adjust the stand’s feet to keep it level. A slight tilt can cause stress. For tanks that don’t sit flat, use foam or plywood to even out the pressure.

    On soft floors, add a plywood base under the stand. This spreads the weight and prevents damage. For heavy tanks, place them near walls to reduce floor stress.

    Check the strength of shelves and furniture before placing a tank on them. Make sure they can handle the weight. Even small tanks can be too heavy for some surfaces.

    • Check the stand for full contact with the tank base.
    • Level the assembly using adjustable feet or shims.
    • Add a closed-cell foam pad or plywood for rimless or imperfect support.
    • Use a baseboard on soft floors to protect floor structure and avoid exceeding the nano tank load limit.

    By following these steps, you can keep your tank stable. This reduces the risk of damage to your tank, glass, and floor. Proper weight distribution is simple but effective for long-term safety.

    Reinforcing Furniture for Nano Tanks

    You can make your stand stronger for nano tank setups without buying a new one. Start by adding a full-sheet of marine-grade plywood on top. This spreads the weight evenly over supports inside.

    Next, add central support beams or cross-bracing under the top to stop sagging. Use 18–21 mm marine plywood for the top. Add corner brackets or wooden dowels where panels meet for more stiffness.

    • Replace narrow legs with a solid base or a metal frame to change point loads into distributed loads.
    • Fit adjustable leveling feet to compensate for uneven floors and eliminate torsional stress on the stand and tank.
    • Apply waterproof sealant and edge banding to protect MDF or standard plywood from humidity and spills.

    For rimless cubes and small aquariums, a solid-top wooden cube or a reinforced IKEA unit can work. Make sure it has full base contact and keep a weight margin above the nano tank maximum weight.

    Use foam pads under rimless tanks and vibration-damping pads under canister hoses and pumps. These small changes reduce stress transfers and help keep the weight capacity nano tank within safe limits.

    If you face high-risk scenarios or large loads, consider a custom aquarium stand. It should be made from marine plywood or a welded metal frame rated to your load. For unusual installations, consult a licensed carpenter or structural engineer to confirm floor compatibility and reinforcement design.

    When reinforcing, remember to keep ventilation, sump clearance, and access for plumbing in mind. Never block routes for plumbing or restrict airflow needed for heaters and CO₂ equipment.

    Regular Maintenance and Safety Checks

    Make a routine to keep your stand and tank safe. Check for signs of damage like sagging, warping, or discoloration every month. Look at cabinet joints, doors, and the top surface for moisture damage.

    Every three months, use a spirit level to check if your tank is level. If it’s not, add shims or adjust the leveling feet to keep it stable.

    After big maintenance or moving, check the load distribution and leveling again. Even small changes can affect the safety of your nano tank.

    • Watch for changes in substrate and hardscape. Adding gravel, rock, or new equipment increases the weight. Recalculate and check if your stand can handle it when you change the layout.
    • Keep a log of weight calculations, reinforcement steps, and inspection dates. This helps track the stability over time.

    If you find a leak or suspect structural failure, move your fish to a temporary home like a bathtub or spare tank. Dry and inspect the stand and floor. Replace any damaged MDF or particleboard right away.

    Apply sealant around exposed edges every year if humidity gets into the stand. Add passive vents or a small fan to reduce moisture and prevent mold.

    • Use GFCI-protected power strips and label the plugs. Keep cables away from water to avoid electrical hazards.
    • After any incident, check the nano tank weight tolerance again. Make changes if needed to ensure safety.

    By following this checklist, you can catch problems early and keep your nano tank safe.

    Common Nano Tank Problems Related to Weight

    Ignoring the nano tank load limit can lead to several problems. Sagging tops or cabinet panels often occur when MDF spans a wide area without support. To prevent this, add plywood reinforcement, install cross-bracing, or replace panels with marine-grade plywood.

    Glass bending, stress cracks, and seam failure can also happen. These issues usually stem from uneven support or point loads. Ensure the base has full-surface support using foam pads or a plywood sheet. If you notice glass damage, re-level the stand and consult the tank manufacturer.

    Sudden leaks and flooding often result from cabinet material or seam fatigue. If you spot leaks, remove the fish and stop water flow right away. Check for structural damage, replace any compromised furniture, and consider a dedicated aquarium stand built for the nano tank’s maximum weight.

    Floor indentation and joist deflection can occur when a heavy tank sits on a small footprint, mainly on wood floors. Move the tank near a load-bearing wall or add a continuous baseboard under the stand. If deflection is significant, get a structural engineer to evaluate reinforcements.

    Mold, rot, and cabinet delamination can arise from repeated moisture exposure, mainly with particleboard and MDF. Replace affected parts with moisture-resistant materials, add ventilation, and seal surfaces to prevent further decay while staying within weight restrictions for nano tank setups.

    Take quick corrective steps before a full replacement becomes necessary:

    • Reduce tank load temporarily by removing water or switching to a smaller display to lower the nano tank maximum weight on the stand.
    • Transfer animals to temporary tanks while you reinforce or replace supports to prevent harm during repairs.
    • Add full-surface plywood under the tank and brace cabinet internals to halt further deterioration and meet the nano tank load limit safely.

    If your furniture seems marginal, play it safe. Upgrading to a purpose-built aquarium stand is the best way to respect weight restrictions for nano tank installations and avoid catastrophic failure.

    Final Thoughts on Nano Tank Weight Safety

    Always figure out the real weight of your tank before you set it up. Think of 1 liter of water as about 1 kilogram. Then add the weight of the glass, substrate, hardscape, and equipment. This will give you the total load.

    Compare this total to the furniture’s load rating. Make sure to add a safety margin of at least 20–30%. This way, you avoid any surprises that could damage your stand or floor.

    Make sure the stand’s footprint matches the tank’s footprint. This prevents any overhang. Choose stands made of plywood or metal for their durability and resistance to moisture. Avoid using un-rated flat-pack furniture for aquarium loads.

    For rimless tanks, use full-surface support. This could be a layer of closed-cell foam or a plywood top. This helps spread the pressure evenly.

    Take steps to stay safe: do a load test before installing, level the stand, and protect your floors. Also, check your furniture often for any signs of wear. If your setup might be too heavy for your floor, talk to a structural engineer.

    Consider hiring a carpenter to build a custom stand. Use 18–21 mm marine plywood and seal it properly for long-term reliability.

    Here’s what to do: calculate your tank’s total weight now. Check or test the stand’s load rating and your floor’s capacity. If needed, reinforce or upgrade your furniture to have at least a 20% safety margin. Schedule regular checks and keep records. By following these steps, you’ll keep your home and pets safe and enjoy peace of mind with your nano aquarium.

    FAQ

    What is a “nano tank” and how much can it weigh when filled?

    A nano tank is an aquarium under 30–50 liters. Some call tanks up to 60 L “nano.” Remember, 1 L of water weighs about 1 kg (2.2 lb). So, the total weight is water plus glass or acrylic, substrate, hardscape, and equipment.

    For example, a 30×30×30 cm (~27–30 L) nano tank might weigh 35–45 kg. A 45×45×45 cm (~90–91 L) cube could weigh over 100 kg with all the added parts.

    Why should I worry about furniture strength for a small tank?

    Even small tanks can be as heavy as an adult. A nano or small aquarium filled with water, substrate, and rock can weigh as much as or more than a person. Ignoring this can cause serious problems like cabinet sagging, glass failure, and leaks.

    These issues can damage floors, walls, and belongings. They can also harm your fish. Real incidents, like a 180 L system that emptied when furniture sagged, show the risks.

    How do I calculate the actual total weight of my nano aquarium?

    First, figure out the internal water volume from the tank’s dimensions. Then, convert liters to kilograms (1 L = 1 kg).

    Next, add the glass or acrylic weight. Use a rough estimate of 5–15% of the water weight for small tanks. Then, add the substrate weight by calculating the area times depth and multiplying by the substrate density (gravel ≈ 1.4–1.8 kg/L).

    Don’t forget to add the hardscape weight (estimate or weigh your rocks/driftwood). Also, add the equipment weight (filters, lights, CO₂ gear, sumps). Sum these up and add a 10–20% safety margin (or more) for future changes.

    How can I estimate substrate and hardscape weight if I don’t have scales?

    Calculate the substrate volume by multiplying the tank area by depth in liters. Then, multiply by the substrate density (gravel ≈ 1.4–1.8 kg/L).

    For hardscape, weigh individual pieces on a bathroom scale or estimate conservatively. For small layouts, expect 2–10 kg. For heavily rock-laden or Seiryu-stone layouts, assume 5–30 kg depending on quantity. Always overestimate slightly for planning.

    How do I check the load capacity of my stand or furniture?

    First, check the manufacturer’s specs for a static load rating. If none are provided, assume flat-pack or household furniture is likely not rated for aquarium loads. Inspect the construction—material (MDF, plywood, metal), internal supports, fasteners—and perform a cautious load test before installing.

    Place evenly distributed weights (sandbags or water containers) equal to or exceeding the calculated tank weight. Watch for sag or instability.

    What’s the difference between distributed and point loads, and why does it matter?

    Distributed load means weight spreads across the entire base area—ideal for tanks. Point load concentrates weight on small feet or legs, increasing pressure and causing localized sagging, torsion, or floor damage. Ensure full-surface support or convert narrow legs into a solid base or larger feet to distribute weight evenly.

    Should I use an aquarium stand or regular furniture like an IKEA unit?

    Dedicated aquarium stands are engineered for distributed loads, moisture, plumbing access, and reinforcement—recommended for tanks over 100 L or with sumps. Some household furniture (e.g., an IKEA EKET) can work for nano tanks if reinforced, sealed, rated, and provides full base support. MDF or particleboard furniture without ratings is not recommended for sustained aquarium loads.

    What materials make the best reinforced stands?

    Marine-grade plywood or reinforced plywood gives the best balance of moisture resistance and strength. Metal frames are excellent for heavy setups or sump-equipped systems. MDF can be used for very small tanks if sealed and reinforced, but it’s vulnerable to humidity and long-term sagging. Use 18–21 mm marine plywood for custom builds when possible.

    How should I match the stand to the tank footprint?

    Match stand length and width to the tank footprint exactly—no overhang. For cube nanos, ensure full base contact across the entire underside. Rimless tanks need full-surface support like a closed-cell foam pad or plywood to avoid stress points and cracking.

    Are there trusted brands and features to look for when buying stands or cabinets?

    Look for stands that state a rated load capacity, sump clearance, ventilation, cable routing, and moisture-resistant finishes. Recommended manufacturers with aquarium-specific stands or cabinets include ADA and Waterbox for premium reinforced options; Do!aqua and Amtra offer compact nano-friendly equipment. Prioritize stands that advertise load ratings and reinforcement details.

    How do I assess floor capacity and joist concerns for heavy tanks?

    Residential live-load design commonly ranges about 150–250 kg/m². Calculate the tank’s weight per square meter on its footprint and compare to these values. For upstairs rooms or older homes, place tanks near load-bearing walls and orient tanks perpendicular to joists. If your calculated footprint load approaches or exceeds typical ratings, consult a structural engineer.

    What reinforcement techniques can I apply to existing furniture?

    Add a full-sheet marine plywood or 18–21 mm plywood top inside the cabinet to spread load. Install central support beams or cross-bracing under the cabinet top. Replace or augment narrow legs with a solid base or metal frame. Seal edges and apply waterproof finishes. Add adjustable leveling feet to compensate for uneven floors.

    How should I level and support rimless tanks to prevent stress?

    Use adjustable feet or shims to get the stand perfectly level across length and width. Place a thin closed-cell foam pad or plywood under rimless tanks to equalize minor surface imperfections and distribute pressure. A slight unevenness can create torsion and cause glass bending or seam failure, so precise leveling is critical.

    How often should I inspect the stand and what should I look for?

    Do monthly visual checks for sagging, warping, loose fasteners, swelling, discoloration, or moisture damage. Quarterly level checks with a spirit level across length and width are recommended. After major maintenance or layout changes, re-check load distribution and plumbing seals. Keep a log of inspections and any reinforcements or weight calculations you perform.

    What immediate actions should I take if I detect sagging or a leak?

    If sagging or a leak is detected, move livestock to temporary containment immediately. Stop water flow and unplug electrical equipment safely using GFCI protection. Dry and inspect the stand and floor; replace compromised MDF or particleboard. Reinforce or replace the stand before returning animals. If structural floor issues are suspected, consult a structural engineer.

    Can I reduce risk without replacing my current furniture right away?

    Yes—temporarily reduce load by removing some water or moving livestock to smaller tanks. Add full-surface plywood under the tank and install internal cabinet bracing to stop further deterioration. Use foam pads for rimless tanks and add leveling feet. These are short-term fixes; plan to upgrade to a rated or custom stand if the furniture is marginal.

    When should I hire a professional like a carpenter or structural engineer?

    Hire a carpenter for custom stands, marine plywood construction, or to install robust internal reinforcements. Consult a structural engineer if your tank’s calculated weight per footprint approaches or exceeds residential floor live-load ratings, for very heavy or upstairs installations, or when joist reinforcement may be needed.

    What safety margins should I use when choosing a stand?

    Aim for a stand and floor capacity at least 20–30% higher than your calculated total tank weight to allow for future additions and long-term material fatigue. For high-risk or upstairs installations, larger margins and professional input are prudent.

    How do I keep electrical equipment safe around aquarium setups?

    Use GFCI-protected outlets and power strips, label and organize plugs, route cables away from likely spill paths, and mount power strips above anticipated flood lines. Keep spare towels and a basic spill kit nearby, and unplug equipment before major maintenance when possible.

    What common problems occur from inadequate weight planning and how do I fix them?

    Common issues include cabinet sagging (fix with plywood reinforcement and cross-bracing), glass bending or seam failure (ensure full-surface support, re-level, and consult manufacturer), sudden leaks (remove livestock, replace compromised furniture), floor indentation or deflection (move tank near load-bearing wall or consult engineer), and mold or delamination from moisture (replace with moisture-resistant materials and add ventilation).

    What final practical checklist should I follow before setting up my nano aquarium?

    Calculate your nano tank’s total weight now using water + glass + substrate + hardscape + equipment. Verify or test the stand’s load rating and floor capacity. Reinforce or upgrade furniture if it’s not rated with at least a 20% margin. Ensure full-surface support, level carefully, add foam pads for rimless tanks, protect the floor with a baseboard if needed, and schedule regular inspections. Keep records of calculations and inspection dates.

  • How to Maintain Pre-Filter Sponges to Protect Baby Shrimp

    How to Maintain Pre-Filter Sponges to Protect Baby Shrimp

    This article will teach you how to keep pre-filter sponges clean. This is to ensure baby shrimp and other small fish stay safe. You’ll learn the basics of cleaning these sponges and how to do it without harming tiny creatures.

    Dwarf shrimp, like Caridina and Neocaridina, are very small. Adults are about 15–40 mm, and new shrimp are just 1–2 mm. These tiny shrimp can easily get caught in filters and skimmers, leading to injuries or death.

    Next, you’ll find out how to pick the right sponge and install it correctly. You’ll also learn a safe cleaning method and how to avoid clogging the sponge. We’ll discuss how to spot pests in sponges and when it’s time to replace them. Keeping intake sponges clean also helps your aquarium’s filtration system work better.

    Understanding the Importance of Cleaning Intake Sponges

    A close-up shot of several cleaning intake sponges submerged in warm, soapy water. In the foreground, a pair of hands wearing yellow rubber gloves gently scrub the sponges with a soft bristle brush, creating small bubbles and splashes around them. The sponges are various shapes and colors, including blue, green, and orange, reflecting light playfully as they soak. In the middle ground, a small, clear tank filled with vibrant aquatic plants and baby shrimp sits on a kitchen counter, slightly out of focus, highlighting the importance of clean sponges for the shrimp's environment. The background features a well-lit kitchen with soft natural light streaming in through a window, creating an inviting and serene atmosphere, ideal for home aquarium maintenance.

    Your intake sponge does two key jobs in a shrimp tank. It stops baby shrimp, snails, and plant debris from getting sucked into pumps. It also helps nitrifying bacteria grow, which is important for cleaning ammonia and nitrite.

    Not cleaning them regularly can cause problems. Clogged sponges can lower the flow rate and reduce filter output. This can stress gas exchange and lead to spikes in ammonia and nitrite, harming your shrimp.

    Some internal filters have open slits that can trap shrimp. If these devices run all the time, a clogged opening can trap shrimp. It’s important to check for vulnerable spots in your equipment.

    DIY fixes like nylon stockings or sponge rolls can block debris. But, they might not work well or could damage the motor if not fitted right. Commercial guards, like Dennerle Nano BabyProtect, are safer and better for protecting your shrimp while keeping the flow good.

    Cleaning intake sponges regularly helps your pump last longer. It also means you won’t have to do deep cleanings of your media as often. This keeps your biological filter stable and reduces the need for emergency maintenance for air and vacuum filter care.

    Types of Pre-Filter Sponges

    A detailed arrangement of various pre-filter sponge types displayed artistically on a light wooden table. In the foreground, showcase a selection of sponges in different shapes and sizes, including cylindrical, rectangular, and round varieties, all with distinct textures and colors. The middle ground features a soft-focus aquarium environment, gently illuminated by natural light streaming in from a nearby window, casting delicate shadows. In the background, a blurred image of a healthy aquarium with baby shrimp swimming, highlighting the importance of pre-filter sponges in their habitat. The overall mood is serene and educational, evoking a sense of care and responsibility in maintaining aquatic life. The composition should feel inviting and informative, perfect for a nature enthusiast's article.

    There are a few common types of pre-filter sponges for aquarium intakes. The most well-known is the coarse-porosity foam cylinder with a center hole. Brands like Fluval and Aqueon make these ready-made guards that fit over intake tubes.

    Coarse foam pads cut-to-fit are great for DIY setups. You can trim a sheet to fit your internal filters or HOB intakes. Fine-pored sponges are less common but useful for protecting very small fry or adding extra mechanical filtration.

    Molded guard assemblies combine rubber edges with stainless mesh. These guards are durable and look good. They’re often used on glass lily pipes or display-ready canister inlets where looks matter.

    • Size options: small/mini for low-flow filters, medium for mid-range, large for high-flow units.
    • Many brands map models to sponge sizes. Check charts from Aquarium Co-Op, Marineland, Seachem, Penn-Plax and Tetra when you match parts.

    Installing a pre-filter can be simple or require some hardware. Some intakes need O-rings to hold a sponge. Others work with zip ties or hose clamps. You can turn a powerhead into a mini filter by zip-tying a sponge over the intake basket, but watch flow loss.

    Choose the right pre-filter for your filter type for the best results. For internal filters, cover slits with a fine sponge or nylon stocking if a factory guard is missing. This keeps baby shrimp safe without blocking flow paths.

    Canister filters work well with a nylon stocking over the inlet strainer or a dedicated pre-filter sponge on the intake tube. If you use glass lily pipes, pick stainless mesh or molded guards to keep aesthetics and safety aligned.

    Hang-on-back filters accept sponge rolls shaped into rings when a rigid guard won’t fit. For surface skimmers, choose specialized shrimp guards such as Eheim Skim 350 shrimp guard or Green Aqua Guard, or run the skimmer on a timer that gives shrimp escape windows.

    When choosing an intake sponge, consider safety versus performance. Commercial products from trusted brands often deliver tested flow and protection. DIY solutions work, but they can reduce pump output if the pore size or fit is wrong.

    Follow basic sponge cleaning tips to keep any pre-filter sponge effective. Regular rinsing prevents clogging and maintains flow. For systems using air-driven inlets, learn the best way to clean air filters and incorporate that step into your maintenance routine.

    Signs Your Intake Sponge Needs Cleaning

    Watch for changes in water flow and how the surface moves. If the filter’s outflow drops or the surface agitation weakens, the sponge is clogged. Check the output after the pump runs. If it’s weaker than usual, it’s time to clean.

    Look at the sponge itself. If it’s covered in brown or green gunk, it’s clogged. This means you need to clean the filters to keep water flowing right.

    See if debris keeps coming back to the tank after the filter cycles. If waste bits keep returning, the sponge isn’t trapping well. You should learn how to detect clogged sponge before it gets worse.

    Listen for strange noises from the pump. If it sounds different or struggles, it might be blocked. These sounds mean the motor is working harder because the intake is blocked.

    • Long intervals without cleaning—monthly is a good rule for most setups.
    • After heavy feedings, substrate disturbance, or plant trimming that raises particulates.
    • High stocking or dense plant load that speeds clogging.

    Watch your shrimp closely. If they’re stuck near the intake or missing after filter cycles, it’s a big risk sign. Excess biofilm on intake parts attracts shrimp, increasing entrapment attempts. If you see this behavior, clean the filters right away.

    For regular care, clean the intake sponge once a month or sooner if you notice decreased output. Adjust how often based on stocking density, feeding habits, and plant numbers.

    Knowing how to detect clogged sponge helps protect baby shrimp and keeps water quality good. Regular checks and timely cleaning keep your filtration working well and prevent accidents around the intake.

    Step-by-Step Guide to Cleaning Your Sponges

    First, turn off the filter and unplug it. If you have a protein skimmer on a timer or a smart plug, stop it. This keeps your tank calm while you clean.

    Next, remove the sponge carefully. Use a plastic bag or container to scoop it out. This helps prevent detritus from spreading into the aquarium. Aquarium Co-Op and other experts recommend this method for safe handling.

    Now, prepare old tank water in a bucket or plastic bag. Don’t use tap water for rinsing; chlorine will harm beneficial bacteria. This step is key for successful DIY filter cleaning.

    1. Squeeze and wring the sponge in the old tank water until the rinse water clears. Repeat until debris is minimal.
    2. If the sponge is clogged, do more wringing cycles instead of replacing it. This helps keep the biological colonies alive.
    3. If the sponge is deteriorating or breaking, replace it. This prevents fragments from getting into the intake.

    Optional: pour the dirty rinse water on houseplants or the lawn. It acts as a mild fertilizer and keeps waste out of the drain.

    Put the sponge back on the intake tube securely. Use an O-ring, zip tie, or tight friction fit. Make sure it’s properly seated to prevent gaps and stray bits.

    Restart the filter and check the flow. Listen for any unusual noises. Watch the intake area for trapped livestock or odd behavior in the first few minutes.

    • For canister and HOB setups, clean the pre-filter sponge instead of the main media. This reduces disturbance to the biological filter.
    • Keep sponge cleaning as a routine. Light, regular maintenance extends sponge life and supports vacuum filter care between major cleanings.

    Follow these steps for safe and effective sponge cleaning. They help your sponges stay effective without harming beneficial bacteria or your shrimp population.

    Best Practices for Regular Sponge Maintenance

    Make a sponge maintenance schedule to protect baby shrimp and keep water quality good. Check intake sponges every week. Clean them at least once a month if flow is low or water is cloudy.

    Keep up with air filter maintenance. Surface skimmer sponges need more frequent checks. Stick to a filter cleaning routine, even when busy.

    • Use dedicated buckets and old tank water when you rinse sponges.
    • Wear gloves if you prefer, and keep spare sponges, O-rings, zip ties, and rubber edge mesh guards on hand.
    • Avoid soaps, bleach, and disinfectants; these strip beneficial biofilm.

    Replace sponges that crumble, smell bad, or lose shape. Lifespan depends on material and cleaning frequency. Keep track of replacements to spot trends.

    Keep a simple log of clean dates and sponge swaps. Note water parameter readings and shrimp behavior after each service. This record helps link sponge work to shrimp health and water chemistry shifts.

    When you deep-clean canister media, stagger maintenance across different pieces so you do not remove all biological filtration at once. Do not sterilize sponges with tap water; preserve some biofilm to maintain nitrifying bacteria.

    Apply the best sponge cleaning tips by rinsing gently in tank water and squeezing until runoff clears. If a sponge traps debris after several cleanings, swap it for a new one. Use the old one as backup for coarse filtering.

    Consider trusted products designed for shrimp systems. Aquarium Co-Op pre-filter sponges, Dennerle Nano BabyProtect for internals, Eheim shrimp guard, Green Aqua Guard for skimmers, and select Oase models are made to protect delicate shrimp while keeping flow steady.

    Keep your routine simple and consistent. A steady sponge maintenance schedule and a clear filter cleaning routine will cut stress on shrimp and extend the life of your equipment.

    Tips for Preventing Future Clogging

    Keep waste low by controlling feeding and stocking. Feed small amounts and clean up uneaten food fast. A balanced shrimp population helps reduce waste and supports filter flow.

    Place the pre-filter sponge at the intake tube’s tip. This ensures water flows evenly through the sponge. Aquarium Co-Op recommends this to avoid hotspots that need frequent cleaning.

    • Match sponge porosity to your pump flow: use coarse-porosity for high-flow setups and finer sponge for low-flow tanks.
    • Use secure fits like O-rings or zip ties to stop slipping. Cut-to-fit coarse pad inserts can fill gaps and stabilize odd-shaped intakes.
    • Install stainless-steel mesh or a small filter guard around the inlet to reduce direct suction on sponge faces and protect shrimp.

    Vacuum substrate regularly to remove suspended particulates. Also, do routine partial water changes for better water quality. This makes cleaning clogged filters easier when needed.

    Automate skimmer cycles with timers or smart plugs. This way, skimmers run in short intervals. Short breaks let trapped shrimp escape and reduce clogging.

    For long-term health, combine vacuum filter care with periodic checks of seals and hose connections. Small fixes now prevent bigger clogs and support ongoing filter flow maintenance.

    Identifying Common Pests in Sponges

    Many pests hide in pre-filter pads. Planaria, hydra, and detritus worms live in biofilms. Small snail eggs and tiny snails stick to sponge fibers. Filamentous algae or Aphanomyces create stringy mats, while cyanobacteria shows as dark smears. Sometimes, small crustaceans or amphipods get stuck in the sponge.

    Spotting pests in intake sponge is easy. Look for tiny, quick-moving creatures in rinse water for planaria or other microfauna. Green or black stringy material means filamentous algae or cyanobacteria. Tiny shells or egg clutches show snail growth.

    Be careful when dealing with pests to protect shrimp. When cleaning sponges, squeeze them in old tank water to remove pests. For planaria or hydra that harm shrimp babies, use safe treatments or quarantine the sponge. Many chemicals are harmful to shrimp, so use them carefully.

    Prevent pests from coming back. Check plants and new decorations before adding them to your tank. Rinse or dip them to remove eggs and small creatures before they reach your sponge.

    Remember the balance of nature when removing pests. Small creatures are food for shrimp and help break down waste. Remove pests gently and clean sponges carefully to keep a healthy environment.

    Enhancing Filter Efficiency with Quality Sponges

    Choosing quality pre-filter sponges makes your tank better at handling waste and protecting baby shrimp. A coarse-porosity sponge gives nitrifying bacteria a place to work while letting water flow smoothly. This combo boosts biological processing and keeps mechanical capture effective.

    There are sponges from Aquarium Co-Op, Fluval, and Aqueon in mini, medium, and large sizes. Choose the right size for your filter and water flow. The right size fits well, ensures even water flow, and reduces dead spots.

    • Place the sponge at the intake tip so it does the work. This stops clogs and extends cleaning time.
    • For units that might trap shrimp, use Dennerle Nano BabyProtect or Eheim shrimp guards. They keep fry safe without blocking water flow.
    • Stainless-steel mesh filter guards with rubber edges are durable upgrades. They look good on glass lily pipes and metal intakes.

    Upgrading to the right sponge means less cleaning and protects the pump from debris. This improves pump life and cuts down on maintenance time.

    To clean air filters and sponge pre-filters well, rinse them gently in tank water during water changes. Avoid harsh detergents. This keeps beneficial bacteria and restores mechanical performance.

    Use product fitment guides from trusted brands to pick sponges. This balances flow, capture efficiency, and shrimp protection. Making smart choices in sponges and filter guard upgrades leads to stable water and healthier fry.

    Troubleshooting Common Problems

    If flow drops after cleaning, check the sponge’s fit and water path. Make sure O-rings or zip ties don’t block the water. Reinstalling the prefilter often fixes flow issues without part replacement.

    Look at the intake tube and upstream parts like canister strainers or baskets. Debris can cause problems further upstream. Regular checks help solve issues and keep performance up.

    • When the sponge slips off, try an O-ring kit, a zip tie, or a small sponge piece for a tighter fit.
    • If clogging persists, consider a larger or coarser sponge. Reduce feeding or vacuum the substrate to lower particulate load.
    • Watch for algae blooms or cyanobacteria that add detritus. Treat light and nutrient issues to stop repeat clogging.

    If baby shrimp keep getting trapped, add external guards like rubber-edged mesh or a nylon stocking over the strainer. Swap intake parts for shrimp-proof designs such as Dennerle Nano BabyProtect or Eheim shrimp guard to protect small livestock.

    Skimmers can pull shrimp when they run constantly. Move skimmers to timed operation or choose models with smaller float openings to reduce capture risk. These small adjustments assist in troubleshooting filter problems tied to animal safety.

    For excessive biofilm or pests in the sponge, rinse more often and remove visible colonies by hand. Quarantine new plants and check them for hitchhiking snails or rotifers before introducing them to the tank.

    Know when to replace the sponge. Replace it if it breaks down, loses elasticity, or fragments when wrung. Clean in tank water to protect beneficial bacteria and avoid over-sterilizing the filter media.

    Use regular maintenance to prevent most issues. Learning how to clean intake sponges and cleaning clogged filters on a schedule extends sponge life and lowers emergencies. Pair these steps with basic air purifier maintenance habits for whole-system health when you use similar small filters in other equipment.

    Resources for Further Learning

    For more detailed advice, turn to trusted sources. Aquarium Co-Op has great blog posts and videos on choosing and cleaning pre-filter sponges. They also have tips on Dennerle Nano BabyProtect, Eheim shrimp guards, and more.

    Join community forums and aquascaping groups for real advice. You can find tips on safe intake modifications and DIY filter cleaning guides. Also, check out local fish stores and online shops for parts like O-ring kits and mesh filter guards.

    Learn about filtration basics and biological cycling to understand sponge maintenance’s role. Read guides on shrimp care to ensure safety for different species. Also, find tutorials on air purifier and aquarium filter maintenance.

    If you need specific help, contact the manufacturer’s customer service. They can offer advice on shrimp safety and equipment use. These resources will help you protect baby shrimp and keep your system running smoothly.

    FAQ

    What is the purpose of maintaining pre-filter (intake) sponges?

    Keeping intake sponges clean protects baby shrimp and other small animals. It stops them from getting sucked into filters. It also helps the filter work better by catching debris and providing a home for beneficial bacteria.

    Why does this matter for dwarf shrimp like Caridina and Neocaridina?

    Dwarf shrimp are small, and their babies are even tinier. They can easily get caught in filters. If they get stuck, they might get hurt or die.

    What intake types most commonly put shrimp at risk?

    Many types of filters can harm shrimp. This includes internal filters, canister filters, and surface skimmers. These filters can trap shrimp if they’re not protected.

    What solutions will keep shrimp safe while maintaining filter performance?

    To keep shrimp safe, use the right sponge size and fit. Clean the sponge regularly with old tank water. Avoid clogging and use commercial guards when needed.

    How do intake sponges serve a dual role in the aquarium?

    Intake sponges act as a barrier to stop shrimp and debris. They also provide a place for beneficial bacteria to grow. This helps keep the water clean.

    What happens if I neglect pre-filter sponges?

    Neglecting sponges can lead to clogs. This reduces the filter’s efficiency. It can also cause water problems that harm shrimp. Clogs can also damage the filter.

    What types of pre-filter sponges are available?

    There are many types of sponges. You can choose from foam cylinders, cut-to-fit foam pads, and molded guards. Each has its own benefits.

    How do I choose the right sponge size and fit for my filter?

    Choose a sponge based on your filter’s flow. Brands like Aquarium Co-Op offer guidance. Make sure it fits snugly for even flow.

    How often should I inspect and clean intake sponges?

    Check sponges weekly. Clean them monthly, or more often if needed. Surface skimmer sponges might need more frequent checks.

    What are the clear signs that a sponge needs cleaning?

    Look for a drop in filter outflow or debris buildup. Also, check for noises from the impeller. These signs mean it’s time to clean.

    How do shrimp-specific risk signs present themselves?

    Signs include finding shrimp stuck to intakes or missing shrimp. Heavy biofilm on intake parts also poses a risk. If you see these signs, add guards and inspect sponges.

    What is a safe, repeatable method to clean a pre-filter sponge?

    Turn off the filter and remove the sponge in a plastic bag. Rinse and wring it in old tank water until it’s clear. Reinstall it securely and check the flow and sounds.

    Can I use tap water to clean sponges?

    No, tap water can harm beneficial bacteria. Always use old tank water for rinsing. If you must disinfect, do so outside the tank and understand the consequences.

    When should I replace a sponge instead of cleaning it?

    Replace a sponge if it’s crumbled, lost elasticity, or has persistent odors. Cleaning preserves beneficial bacteria, but damaged sponges need to be replaced.

    Are DIY fixes like nylon stockings or glued sponge rolls safe?

    DIY fixes can work but may reduce performance. Nylon stockings and glued sponge rolls can restrict flow. Prefer commercial guards when possible.

    How should I protect different filter types?

    Use fine sponges or stockings for internal filters. For canister filters, use a nylon stocking or sponge on the intake. HOB filters need a sponge ring or commercial pre-filter. Surface skimmers should have shrimp-specific guards or run on timers.

    What tools and supplies should I keep for sponge maintenance?

    Keep buckets, old-tank water, spare sponges, O-rings, and zip ties. Use gloves if needed. Avoid soaps and tap water when cleaning.

    How do I handle pests and hitchhikers found in sponges?

    Common hitchhikers include planaria and hydra. Remove pests by squeezing sponges in old tank water. For harmful pests, treat sponges in a quarantined container.

    How do quality sponges improve filter efficiency?

    Quality sponges capture debris and provide surface area for beneficial bacteria. They resist clogging and improve filter performance.

    My flow dropped after reinstalling the sponge. What should I check?

    Check if the sponge is compressed or blocking the intake. Make sure O-rings or zip ties aren’t obstructing flow. Inspect the intake tube and strainers for debris.

    Shrimp are stil getting trapped—what can I do?

    Add external guards or a nylon stocking over the strainer. Replace intake parts with shrimp-proof designs. For skimmers, use timers or switch to models with smaller openings.

    How do I prevent frequent clogging?

    Use a coarse-porosity sponge and position it correctly. Reduce overfeeding and vacuum substrate regularly. Perform partial water changes to prevent clogging.

    Are there recommended commercial products for shrimp-safe intake protection?

    Yes, recommended products include Aquarium Co-Op sponges and Dennerle Nano BabyProtect. Eheim shrimp guard and Green Aqua Guard are also good options. Stainless-steel mesh guards with rubber edges work well for lily pipes.

    How should I document maintenance for best results?

    Keep records of sponge maintenance and water parameters. This helps identify issues and refine cleaning schedules.

    Where can I learn more about sponge selection and maintenance?

    Check manufacturer resources and hobbyist communities. Read Aquarium Co-Op blog posts and product guides. Ask experienced shrimp keepers for tips.

  • The Best Nano Fish Species for Homes with Hard Tap Water

    The Best Nano Fish Species for Homes with Hard Tap Water

    If you live in the United States and have hard tap water, this guide is for you. It helps you choose nano fish that are hardy and don’t need special treatment. You’ll learn about small fish that do well in water with high GH and pH levels.

    This guide is for hobbyists who want easy advice. It covers species choices, care tips, and setup advice. Many popular nano fish, like livebearers and hardy tetras, are bred in hard water. They’ll do well in your tap water without needing an RO system.

    Keep reading for a deep dive into water hardness basics (GH, KH, pH). You’ll also learn about the best nano fish for hard water. We’ll cover traits of resilient species, tank preparation, maintenance, feeding, and health signs to watch. This will help you create a vibrant, easy-to-care-for nano aquarium that matches your water and lifestyle.

    Understanding Hard Water and Its Effects on Fish

    A vibrant underwater scene showcasing a variety of nano fish species that thrive in hard water conditions. In the foreground, several colorful Betta fish swim gracefully, displaying their flowing fins and vibrant colors, with sharp focus on their intricate details. In the middle ground, a school of neon tetras glides past, their iridescent bodies shimmering in the light. The background features a lush underwater landscape with green plants and rocky formations, reminiscent of natural habitats found in hard water environments. Soft, diffused lighting filters through the water, creating a calming atmosphere. The angle is slightly downward, as if peering into an aquarium, capturing the beauty and dynamism of these resilient fish species.

    Hard water has minerals like calcium and magnesium. Aquarists measure this as General Hardness (GH). Carbonate Hardness (KH) measures carbonates and bicarbonates that help keep your tank’s pH stable.

    Here’s how to classify your water:

    • Soft: 0–4° dH (0–75 ppm)
    • Moderately hard: 4–8.5° dH (75–150 ppm)
    • Hard: 8.5–17° dH (150–300 ppm)
    • Very hard: 17°+ dH (300+ ppm)

    KH is important because it keeps pH stable. Higher KH means a more alkaline pH, which is common in many tap waters. This stability helps keep your fish healthy and reduces stress.

    Some fish, like discus and crystal shrimp, prefer soft, acidic water. They may struggle in hard, alkaline water. You might need to treat or modify the water for them to thrive.

    Many community fish, on the other hand, do well in harder, alkaline water. This makes it easier to keep hard water nano fish. You can match your fish to your tap water chemistry instead of changing the water.

    Before adding fish, test your tap water for GH, KH, and pH. Choose fish that match your water chemistry. If you need to change levels, do it slowly and acclimate your fish properly to avoid stress and health issues.

    When picking fish, look for hardy species like many livebearers and danios. They often do well in hard water. Choosing the right species saves time and money on water treatment systems.

    Why Choose Nano Fish for Your Tank?

    A vibrant aquarium scene featuring a diverse array of nano fish species suited for hard water, such as neon tetras, endlers, and guppies, gracefully swimming among lush aquatic plants like Java moss and Anubias. In the foreground, detail the shimmering scales of the nano fish, showcasing their unique colors and patterns under subtle, warm lighting. The middle ground reveals a variety of textured rocks and driftwood, providing natural hiding spots, while the background is softly blurred to enhance the focus on the lively fish. Capture the scene with a wide-angle lens to emphasize depth, creating a serene, inviting atmosphere that reflects the joy of nano fish keeping. The overall mood is calming and vibrant, highlighting the beauty of these aquarium inhabitants in a well-maintained habitat.

    Nano fish are perfect for tanks under 20 gallons. You can keep micro rasboras, Celestial Pearl Danios, and dwarf corydoras in small spaces. They also include ember tetras and some dwarf rainbowfish.

    These fish thrive in tight spaces and show bright colors. They don’t need a lot of room to be beautiful.

    Nano tanks are great for small spaces. They fit well in apartments and busy homes. You’ll save money on equipment and can easily move the tank.

    Many nano fish can handle hard water. Livebearers like guppies and mollies, rainbowfish, killifish, and X-ray tetras do well in alkaline water. This means you can choose fish that don’t need a lot of water changes.

    Feeding nano fish is easy. They eat nano pellets, crushed flakes, microworms, or baby brine shrimp. This makes caring for them quick and simple.

    Schooling behavior is important. Many nano fish look better and feel safer in groups. Plan your stocking to ensure they have a vibrant and secure environment.

    If you’re new to fish keeping, choose species that match your water. This reduces the need for special water treatments. It makes caring for nano fish in hard water easier.

    Keeping a nano tank has many advantages. It produces less waste and is easier to maintain. Small tanks warm up and cycle faster, helping you spot problems early.

    In summary, nano fish offer vibrant colors and lively behavior in small spaces. They are easy to care for, making them perfect for everyday life.

    Popular Nano Fish Species Thriving in Hard Water

    Choosing the right nano fish for hard water is easy. Livebearers like guppies, platies, and mollies thrive in hard water. They are small, with guppies and platies growing up to 3 inches, and mollies up to 5 inches.

    Feed them a mix of flakes, pellets, and calcium-rich foods. This helps them grow and stay colorful. If your water is very soft, add minerals or choose tank-bred fish.

    • Dwarf neon and turquoise rainbowfish like Melanotaenia praecox and M. lacustris enjoy harder water and are lively mid-to-top swimmers.
    • Blue-eyes such as Pseudomugil luminatus and P. gertrudae prefer alkaline GH similar to their native habitats and do best in small schools.

    Smaller rainbows and blue-eyes are perfect for small tanks. They start at 10 gallons for dwarf species. They add color and movement without taking up much space.

    X-ray tetra (Pristella maxillaris) tolerates a broad range of GH and pH. It’s great for small groups in compact setups. Congo tetra (Phenacogrammus interruptus) also accepts harder water but needs more space.

    Hardy killifish and flagfish are low-maintenance options. Aplocheilus lineatus (golden wonder) and Jordanella floridae (flagfish) handle wide pH swings. They’re good for unheated or lightly heated tanks.

    • Ember tetra (Hyphessobrycon amandae), chili rasbora (Boraras brigittae), and celestial pearl danio (Danio margaritatus) are popular in planted nano setups.
    • Many of these small fish for hard water aquarium setups adapt if they come from commercial breeders.

    When stocking nano fish for hard water tanks, check if they are wild-caught or tank-bred. Tank-bred fish are more likely to be acclimated to tap water. This reduces stress and boosts survival in your aquarium.

    Characteristics to Look for in Nano Fish

    Look for nano fish that can handle a wide range of water hardness and pH. Many livebearers, rainbowfish, some tetras, and certain killifish are good choices. They can handle hard or alkaline water, which is helpful if your tap water is hard.

    Check if the fish are tank-bred. Tank-bred fish are easier to care for and less stressed. They are also more likely to thrive in your home aquarium.

    • Size and social needs: choose schooling species that fit your tank. Many nano fish show their best color and behavior in groups of six or more. Examples include ember tetra, celestial pearl danio, and chili rasbora.
    • Diet and feeding: pick fish with small mouths that accept crushed flakes, nano pellets, powdered fry foods, microworms, baby brine shrimp, or daphnia. Make sure the species’ dietary needs match what you can supply regularly.
    • Temperament and tankmate compatibility: avoid slow or delicate plant species when keeping nibblers or algae eaters like flagfish. Match activity level so fast rainbowfish won’t stress calm dwarf corys.
    • Environmental preferences: note whether a species is a surface dweller, midwater swimmer, or bottom-dweller. Plan planting, flow, and tank layout to suit their habits.

    When researching nano fish species for hard water, compare tolerance, breeding history, and social needs. These factors help narrow down the best nano fish for hard water for your tank.

    Use this checklist to pick compatible tankmates and to design a balanced tank. A thoughtful choice now reduces problems later and improves long-term fish health.

    Preparing Your Aquarium for Nano Fish

    Choose a tank that’s under 20 gallons. It should fit your space and the fish you want. Small tanks can hold many nano fish, but don’t overcrowd. Pick a filter that manages the bio-load and keeps the flow gentle for tiny fish.

    Make sure the tank is cycled before adding fish. This step prevents ammonia and nitrite spikes. Test for ammonia, nitrite, and nitrate until they’re all zero.

    Use a substrate and decor that work with hard water. Choose inert gravel or sand that won’t change the water’s hardness. Pick decorations and plants that like alkaline conditions, like Java fern or Anubias, for your hard water fish.

    Set the heater and temperature right for your fish. Many nano fish like 75–78°F (24–26°C). Livebearers and flagfish can handle cooler or unheated tanks, so match the tank’s climate to your fish.

    Acclimate new fish slowly, if their water is different from yours. Use drip acclimation for big differences in GH or pH. This method lowers stress and reduces losses when preparing your aquarium for nano fish.

    Keep test kits for GH, KH, and pH ready. Document your tap water’s baseline values. Regular testing helps you make the right choices for your nano fish in hard water. Keep records to spot trends and make timely adjustments.

    • Tank size: under 20 gallons for most nano setups.
    • Filtration: efficient biological filter with gentle flow.
    • Substrate: inert materials to preserve hardness.
    • Temperature: match species, commonly 75–78°F.
    • Acclimation: drip method for large water differences.
    • Testing: GH, KH, and pH kits and a simple log.

    Follow these steps to prepare your aquarium for nano fish. This groundwork makes caring for them in hard water easier. It helps your hard water aquarium nano fish thrive.

    Maintaining Water Quality in Hard Water Environments

    Test your tank weekly. Check GH, KH, pH, ammonia, nitrite, and nitrate. Keep a log to spot trends. This helps avoid sudden changes that harm your fish.

    Do routine partial water changes on a schedule you can keep. If your tap water chemistry matches your fish’s needs, use straight tap water. Blend RO water with tap water only when you need to lower hardness for sensitive species.

    If you must soften water for certain fish, use RO/DI blends and then remineralize carefully. Peat or driftwood can nudge pH down a little. But they rarely change very hard tap water enough on their own. Combining those methods with RO blending gives better results.

    • Use mineral supplements like Seachem Equilibrium or Wonder Shell when your tap water is too soft for a species that needs higher GH.
    • Raise GH gradually and test after each change to avoid stress.

    Prioritize stability over chasing perfect numbers. Sudden shifts in KH or pH are more damaging than steady, higher hardness. A stable KH provides buffering that protects against wide pH swings, an important part of hard water nano fish care.

    Maintain good mechanical and biological filtration. Clean filter media gently in tank water to preserve beneficial bacteria. Avoid overstocking; many nano tanks rely on careful, light stocking and heavy planting to keep waste low and water quality high.

    Monitor your biological load and adjust feeding to match. Less uneaten food means lower ammonia and nitrate buildup. Good routines make maintaining water quality hard water simpler and safer for your community.

    Feeding Your Nano Fish Properly

    Feeding nano fish in hard water is all about the right food size. Use crushed flakes, nano pellets, and powdered fry foods. For meat-eaters, try freeze-dried daphnia and frozen cyclops.

    For hard water aquariums, livebearers like guppies and mollies are good choices. They like plant matter and calcium-rich foods. Killifish and small rainbowfish need meaty foods like baby brine shrimp and bloodworms.

    • Feed them small meals often to match their fast metabolism.
    • Remove any uneaten food quickly to keep the water clean.
    • Change up the food types to keep them interested.

    It’s important to balance nutrients for nano fish in hard water. Use calcium-rich foods or supplements like Seachem Equilibrium. For herbivores, add vegetable pellets or blanched spinach.

    Keep an eye on how your fish eat. If they’re picky or look dull, it might be time to change their diet. Increase protein for breeding, then go back to a balanced diet.

    1. Make sure the food is the right size for their mouths.
    2. Feed them small amounts several times a day.
    3. Add minerals if you’re breeding or see signs of deficiency.
    4. Keep the diet varied to keep them colorful and active.

    By focusing on the right feeding, your nano fish care will improve. They’ll show better color, activity, and breeding success.

    Common Health Issues in Nano Fish

    Watch for stress from changes in water parameters. Poor acclimation or sudden changes in GH and pH can weaken fish. In a hard water tank, fish may seem fine one day and sick the next.

    Bacterial infections, fungal growth, and parasites are common when water quality drops. Look for fin erosion, white patches, and clamped fins. Fish may also scratch decor or lose their appetite. Mollies and some livebearers may shimmy or swim oddly when moving to soft water.

    • Prevent stress by matching tank GH and pH to the species’ needs.
    • Quarantine new arrivals and prefer tank-bred specimens to reduce pathogens.
    • Keep stocking low to avoid overcrowding and oxygen stress.

    To treat illnesses, first identify the pathogen. Use specific medications for bacterial, fungal, or parasitic issues. Raising the tank temperature slightly and stabilizing pH can help medications work better.

    Breeding and fry care require extra attention. Many livebearers spawn easily in hard water. Provide plants or breeding boxes for fry to hide. Adults don’t care for their young, so separate tanks and use infusoria or baby brine shrimp for food.

    Good care in hard water tanks means steady water chemistry and frequent small water changes. Regular observation is key. A strong prevention routine helps keep your tank healthy and vibrant.

    Creating an Inviting Environment for Nano Fish

    Design your aquascape with the species in mind. Give open midwater space for rainbowfish and blue-eyes. Add dense plants and hiding spots for shy types like ruby tetras and celestial pearl danios.

    Choose plants that tolerate higher GH and KH. Java fern, Anubias, Vallisneria, and many crypts handle hard water well. Avoid peat-dependent species if you plan to keep hardness high for hard water nano fish.

    • Use floating plants and thick foreground planting to protect fry and offer cover.
    • Provide driftwood and rock caves for visual interest and shelter; do not rely on driftwood to change chemistry significantly.
    • Pick an inert substrate such as sand or gravel to maintain stable hardness for nano fish for hard water tanks.

    Plan social groups to let natural behavior show. Ember tetras, chili rasboras, and celestial pearl danios thrive in schools of six to ten. Tail-spot and dwarf corydoras prefer groups of eight to ten.

    Address jump risk with a tight-fitting lid or abundant floating cover. Many small top-dwelling species, including some killifish and blue-eyes, will leap if startled.

    When creating environment for nano fish, balance aesthetics with function. Stable water parameters, proper plant choices, and correct group sizes create a calm tank where hard water nano fish can display color and natural behaviors.

    Conclusion: Choosing the Right Nano Fish for Your Hard Water Home

    To start a successful nano tank in hard water, first test your tap’s GH, KH, and pH levels. This knowledge helps you pick fish that can handle high mineral levels. Often, keeping the water stable is more key than trying to get perfect numbers.

    Look for tank-bred, hardy fish that can handle different water conditions. Good choices include guppies, platies, and mollies. Also, consider dwarf neon and turquoise rainbowfish, x-ray tetras, and cherry barbs. Small killifish, blue-eye species, celestial pearl danios, ember tetras, and chili rasboras are also good. Make sure to buy from trusted sellers to increase survival and color.

    After choosing your fish, test your water, pick compatible species, and cycle the tank. Add plants and filtration, and slowly introduce new fish. Stick to regular feeding and care routines to keep your fish healthy and happy.

    By picking the right fish and caring for them well, you can have a lively, easy-to-keep aquarium. This guide helps you set realistic goals and achieve long-term success. So, your hard water home can be a great place for your nano fish to thrive.

    FAQ

    How do I know if my tap water is “hard” and which measurements should I check?

    Use aquarium test kits to check your tap water. Look for General Hardness (GH), Carbonate Hardness (KH), and pH. GH shows calcium and magnesium levels. KH shows carbonate levels that help keep pH stable.

    Reference ranges are: Soft 0–4°dH (0–75 ppm), Moderately hard 4–8.5°dH (75–150 ppm), Hard 8.5–17°dH (150–300 ppm), Very hard 17°+ dH (300+ ppm). High KH means a stable, alkaline pH, common in hard tap water.

    Which nano fish species reliably tolerate or prefer hard, alkaline tap water?

    Many nano species do well in hard water. Livebearers like guppies, platies, and mollies are good choices. Also, dwarf rainbowfish, blue-eyes, and hardy tetras like X-ray tetras.

    Small killifish and flagfish, and popular nano schooling fish like ember tetras, chili rasboras, and celestial pearl danios also thrive. Always check the vendor source.

    Should I always adjust my hard water to suit my fish?

    No, you should match species to your tap water when possible. Stability is more important than reaching an ideal number. Sudden changes are more harmful than chronic higher hardness.

    If a species needs softer water, use RO/DI blends and remineralize carefully. For most hardy nano fish, keeping your unmodified hard tap water is simpler and healthier.

    Are tank-bred fish better for hard water than wild-caught specimens?

    Yes. Tank-bred fish are usually acclimated to aquarium tap water. They tolerate a wider GH/KH/pH range. Wild-caught soft-water species may struggle in hard, alkaline tap water. So, prefer captive-bred stock for hard-water nano tanks.

    What tank size, filtration, and flow are appropriate for a hard water nano setup?

    Nano tanks under 20 gallons are suitable if you pick species and school sizes correctly. Provide an efficient filter sized for the bio-load. Create gentle flow—many nano species prefer moderate movement.

    Cycle the tank fully before adding fish. This establishes biological filtration. Avoid overstocking to keep ammonia and nitrite at zero.

    Which foods work best for nano fish with small mouths in hard water tanks?

    Use crushed flakes, nano pellets, powdered fry foods, micro-wafers, and size-appropriate frozen/live foods. Baby brine shrimp, microworms, and daphnia are good options. Livebearers benefit from plant matter and calcium-enriched foods.

    Feed small amounts multiple times a day. Remove uneaten food to protect water quality.

    How often should I test water parameters and perform water changes in a hard water nano tank?

    Test GH, KH, pH, ammonia, nitrite, and nitrate weekly. Monitor trends, not single readings. Do regular partial water changes (20–30% weekly or as needed) using tap water if chemistry matches your species’ needs.

    If you adjust hardness with RO blends or supplements, test more frequently while stabilizing the new levels.

    Can I breed nano livebearers and other species easily in hard water?

    Many livebearers (guppies, platies, mollies) breed readily in hard, alkaline water. Provide hiding places or a breeder box for fry. Or set up a separate rearing tank with infusoria and baby brine shrimp.

    For egg-scatterers like some rasboras and danios, stable water and appropriate plants or spawning mops help success.

    What common health issues arise from hard water, and how can I prevent them?

    Problems include stress, weakened immunity, bacterial and fungal infections, and parasitic outbreaks. Prevent issues by choosing compatible species, buying tank-bred fish, and quarantining new arrivals.

    Maintain stable GH/KH/pH, perform regular water changes, and avoid overcrowding.

    Will hard water harm my live plants or limit plant choices?

    Many common aquarium plants tolerate harder, alkaline water. Java fern, Anubias, Vallisneria, and many Cryptocoryne species do well. Avoid plants that prefer very soft, acidic conditions.

    Use inert substrates (sand or gravel) if you want to maintain higher GH/KH. Rely on CO2 and fertilization, not peat, to modify chemistry.

    How should I acclimate fish from the store to my hard tap water?

    Acclimate gradually. If shop water differs from your tap, use drip acclimation for large differences. Float the bag to equalize temperature, then slowly mix small amounts of your tank water into the bag over 30–60 minutes (or longer for sensitive species).

    Drip acclimation over several hours is best when GH/KH differences are significant.

    What are practical next steps to set up a hardy nano aquarium with hard tap water?

    Test your tap water GH, KH, and pH. Pick 1–2 compatible, tank-bred species that tolerate hard water. Cycle the tank, add appropriate filtration and decor, and choose hardy plants.

    Acclimate fish slowly. Feed suitable nano-sized foods, perform regular testing and water changes, and prioritize stability over aggressive chemical correction.

    Which nano species should I avoid if I have very hard tap water?

    Avoid strictly soft-water species like discus and most wild-caught South American tetras and many Neocaridina shrimp strains if your tap water is very hard and alkaline. These taxa often require low GH and lower pH and will need RO/DI water blends or heavy modification to thrive.

    Can mineral supplements help if my tap water is too soft for certain nano species?

    Yes. If your tap water is soft but a species demands higher GH, use commercial mineral supplements like Seachem Equilibrium or aquarium-specific remineralizers to raise GH safely. Follow dosing instructions and test regularly to maintain stable levels for breeding and health.

    Are there nano fish that also help with algae control in hard water tanks?

    Flagfish (Jordanella floridae) and some livebearers will nibble algae, but they’re not a substitute for good maintenance. Otocinclus catfish prefer softer water and are less suited to very hard conditions. For algae control in hard water, prioritize stable chemistry, planting, proper lighting, and routine maintenance.

  • How to Read and Understand Essential Water Parameter Tests

    How to Read and Understand Essential Water Parameter Tests

    Aquarium water testing is key to keeping fish healthy. By learning to test and read water results, you can catch problems early. This helps prevent stress in your fish.

    Regular tests show you what’s in your water. This includes chemicals from fish waste, decaying food, and plants. It’s important for both freshwater and saltwater tanks.

    Testing shows levels of ammonia, nitrite, nitrate, pH, KH, and GH. These levels affect your fish’s life. In saltwater tanks, you also need to check calcium, magnesium, phosphate, and specific gravity.

    The main goal is to keep ammonia and nitrite levels zero. You should manage nitrate and keep pH and buffering stable. Knowing these numbers helps you use conditioners, salts, and additives correctly. It also helps you plan water changes confidently.

    This guide is for hobbyists in the United States. It covers the basics of water quality testing for fish tanks. You’ll learn about freshwater and saltwater differences, how often to test, and the best ways to collect samples. This will help you keep your aquarium stable and full of life.

    Understanding the Importance of Water Testing

    A detailed aquarium setup showcasing the importance of water testing. In the foreground, a clean, transparent glass aquarium filled with vibrant tropical fish swimming around live plants with contrasting blues and greens. A person in smart casual attire, holding a water testing kit, peers curiously into the tank, visually examining the water quality. In the middle ground, the kit's testing strips display various color indicators, symbolizing different water parameters. The background features a well-lit room with aquascaping materials and water quality charts adorning the walls. Soft, natural light filters through a window, creating a calm, educational atmosphere, emphasizing the significance of understanding water quality for aquatic life health. A shallow depth of field focuses on the aquarium and the person, blending the background gently.

    Your aquarium water is vital for every living thing in your tank. It provides oxygen, nutrients, and carries away waste. But, invisible chemical imbalances can stress and harm your fish and plants.

    Ammonia and nitrite are very harmful and should be zero in a healthy tank. Nitrate is less toxic but needs to be controlled. For freshwater tanks, aim for nitrate levels below 50 ppm. Planted tanks do best with 20–50 ppm nitrate.

    Reef systems and saltwater tanks should keep nitrate under 1 ppm. pH is also important because it affects how chemicals work and fish health. Freshwater tanks usually have a pH of 6.5–7.5.

    African cichlids prefer a pH of 7.8–8.5. Planted and discus tanks often have a pH of 6.0–7.5. Marine tanks usually have a pH of 8.1–8.4. Small changes in pH can harm your fish.

    KH, or carbonate hardness, helps keep pH stable. Freshwater tanks usually have a KH of 3–8 dKH. Many experts say 4–8 dKH is safe for stable tanks. Marine tanks need higher KH, about 8–12 dKH.

    GH measures calcium and magnesium, important for growth and health. Freshwater tanks usually have a GH of 4–12. African cichlids like harder water, 12–20 GH. Reef tanks track calcium and magnesium directly, aiming for 350–450 ppm calcium and 1150–1350 ppm magnesium.

    • Routine water quality testing for fish tanks gives early warning of cycling problems or filter failure.
    • Regular freshwater testing for aquariums helps catch overfeeding, medication side effects like copper toxicity, and rising phosphate that fuels algae.
    • Consistency in saltwater tank water testing prevents crashes in sensitive reef systems where parameters must stay tight.

    By testing often and recording results, you can spot trends early. This approach protects your fish, supports breeding, and keeps plants and corals healthy.

    Key Water Parameters to Test

    An aquarium laboratory setting featuring essential water parameters for testing. In the foreground, display an array of colorful test tubes filled with samples of aquarium water, each labeled with parameters like pH, ammonia, nitrite, and nitrate. The middle ground showcases a sleek, modern aquarium housing vibrant fish species, with submerged plants creating a natural environment. In the background, a digital monitor displays water quality data for reference, along with a hand holding a testing kit, exemplifying a professional analysis process. Utilize soft, natural lighting to create a calm, serene atmosphere. Capture the scene from a slightly elevated angle to provide depth and clarity, emphasizing the importance of understanding water parameters in aquarium care.

    Keeping your tank healthy means tracking a few key measures. These include temperature, pH, ammonia, nitrite, nitrate, KH, and GH. Testing these regularly helps keep your fish, plants, and invertebrates happy and healthy.

    Temperature is key for metabolism and oxygen levels. For freshwater tanks, aim for 72–82°F with pH between 6.5–7.5. If you have plants or discus fish, your tank might be warmer, around 76–86°F, with softer water.

    Ammonia and nitrite levels should be zero. Ammonia is very toxic, and nitrite harms blood. Nitrate is less harmful but should be kept low, ideally under 50 ppm.

    KH helps keep pH stable and prevents sudden drops. If KH is low, your tank is more at risk of pH crashes. GH affects how some fish and invertebrates live and look.

    Saltwater tanks need to test for everything freshwater does plus salinity, phosphate, calcium, magnesium, iodine, and strontium. Reef tanks aim for specific gravity around 1.023–1.025, calcium 350–450 ppm, and magnesium 1250–1350 ppm.

    Reef tanks also focus on keeping nitrate and phosphate levels very low. This helps prevent algae and supports coral health.

    Tap water often has chlorine or chloramine. You must test and confirm it’s zero after dechlorination. Copper testing is important for invertebrates. CO2 testing is key for plants. Advanced reef systems use trace element panels to keep corals colorful.

    Learn how to test your aquarium water with kits, strips, or meters. Use trusted brands like API or Hanna for accurate results. Regular testing helps you catch problems early, before they stress your animals.

    Tools for Aquarium Water Testing

    Choosing the right tools for testing aquarium water is key to keeping fish and corals safe. You can use simple test strips, drop reagent kits, or lab services. Each option fits different budgets and needs for accuracy.

    Test strips are quick and affordable. Brands like Aquarium Co-Op offer multi-test strips for pH, GH, KH, and more. They’re great for quick checks but might not be as precise.

    Drop kits offer better results for hobbyists. API and Fritz kits test for various parameters. You mix water with drops and match colors. This method is more reliable for detailed checks.

    For the most detailed analysis, lab services like Aquaforest Lab offer ICP-OES. These tests find trace elements and contaminants with high sensitivity. While more expensive, they provide insights that home kits can’t match.

    • Pros of strips: speed, low cost, easy for quick screening.
    • Cons of strips: lower precision than reagent kits.
    • Pros of reagent kits: greater accuracy for key parameters and repeatable results.
    • Cons of reagent kits: require careful technique and color matching.
    • Pros of ICP-OES: best accuracy, detects trace elements and contaminants.
    • Cons of ICP-OES: lab fees, sample handling, longer turnaround time.

    To begin testing, you’ll need some basics. Start with an ammonia, nitrite, nitrate test or a multi-test strip. Don’t forget a pH test. For reef tanks, add calcium, magnesium, and phosphate kits. Plant tank owners should test CO2 and iron or phosphate levels.

    Effective DIY testing requires consistent methods. Always check expiration dates and store reagents correctly. Follow instructions carefully for accurate results. Calibrate pH meters and refractometers before use.

    When choosing, consider cost versus the information you need. For daily checks, multi-test strips or a mix of reagent kits are best. For detailed data, ICP-OES or spectrometer services are the way to go. Regular testing helps you stay informed and act fast when needed.

    How to Collect Water Samples Correctly

    Learning to collect water samples right is key. Start by rinsing your sample tubes with aquarium water. This step removes any residue that could affect your results. Make sure not to touch the inside of the bottles or test tubes to avoid contamination.

    Take your sample from the middle of the water column for the best results. Don’t scoop up surface film or disturb the substrate unless you’re testing those areas. If you need to sample from the bottom, use a siphon or turkey baster to avoid bringing up debris.

    Test the water as soon as you can after collecting it. Many DIY testing kits need you to act fast. Make sure your tests are done at room temperature and follow the instructions carefully. Waiting too long can mess up the results and make your tests less reliable.

    1. Label your bottles clearly with the tank name, date, and time.
    2. For ICP or lab tests, use the clean, labeled bottles given by the lab. Aquaforest Lab and similar services provide kits and instructions.
    3. Keep samples away from air if they can oxidize quickly. Seal the bottles right away and ship them on the same day.

    When testing tap water for chlorine or chloramine, take the sample directly from the tap. Compare it with dechlorinated aquarium water to see if your conditioner works. This step helps you make sure your water is safe for your fish.

    For saltwater tanks, use a refractometer for the most accurate salinity readings. Clean the prism with distilled water and calibrate it before each use. Even small mistakes here can lead to big problems later.

    By following these sampling tips, you can make your DIY water testing more reliable. Good technique, quick testing, and careful handling help you get accurate results for your daily care and lab tests.

    Interpreting Water Test Results

    When you test your aquarium water, look at the trends, not just one reading. Testing regularly helps you see if things are stable. It also helps you catch slow changes that might harm your fish and plants.

    For toxins like ammonia and nitrite, aim for 0 ppm. If you see any above 0, change some water right away. Also, cut back on feeding until levels go down. Remember, any ammonia is a big deal.

    Nitrate levels are important but not as urgent. Freshwater tanks usually stay under 50 ppm. For planted tanks, 20–50 ppm is best. Reef tanks should keep nitrate under 1 ppm, while FOWLR tanks can handle up to 30 ppm. If nitrate is high, change water, add plants, or check your stocking and filtration.

    Keep an eye on pH levels. They should match what your fish need. Remember, high pH can make ammonia more toxic. It’s better to keep pH stable than to aim for a perfect number.

    KH and GH tell you about your water’s buffering and mineral levels. KH helps prevent pH swings, and marine tanks aim for 8–12 dKH. Freshwater tanks want at least 3 dKH. GH is about calcium and magnesium for growth and breeding. Adjust it for your fish’s needs.

    In marine tanks, salinity is key. Reef systems should be 1.023–1.025 specific gravity. FOWLR tanks are fine at 1.020–1.025. Use a refractometer for the most accurate reading. Top off with RO/DI water often to keep salinity steady.

    Reef tanks need balanced trace elements. Aim for calcium 350–450 ppm, magnesium 1250–1350 ppm, and alkalinity 8–12 dKH. Iodine should be 0.06–0.10 ppm, and strontium 8–14 ppm. Too much can cause problems, so adjust slowly and test often.

    Take action based on your readings. If ammonia or nitrite go up, change some water and eat less. For high nitrate, do more water changes and improve filtration or plants. If KH is low, add buffers slowly. For phosphate, cut feeding, upgrade filtration, and use phosphate media.

    Keep a log of your water tests. It helps you see patterns and make the right choices. Regular testing keeps your aquarium healthy and your fish thriving.

    Maintaining Ideal Water Conditions

    Stable water starts with a clear testing schedule. For new or cycling tanks, test daily for ammonia, nitrite, and nitrate. After stocking or major changes, test every few days to catch shifts early.

    In established systems, test multi-parameter strips every 2–4 weeks. Spot-check ammonia and nitrite when you see stress signs. Follow results with targeted maintenance to avoid harm to fish and corals.

    • Perform regular partial water changes to control nitrate and phosphate.
    • Vacuum substrate to remove detritus and uneaten food.
    • Rinse mechanical and biological filter media in tank water to preserve beneficial bacteria.
    • Avoid overfeeding and promptly remove leftover food.

    For reef systems, schedule dosing of calcium, alkalinity, and magnesium. For planted tanks, dose fertilizers based on readings. Test RO/DI water before topping off or changing water to confirm purity.

    Freshwater and saltwater tank testing require a focus on recording everything. Keep a log or spreadsheet of parameter readings and maintenance actions. Use painter’s tape for single setups and digital logs for multi-tank systems to spot trends and diagnose problems early.

    1. Test before dosing chemicals or medications.
    2. Dose carefully and test after to ensure you remain in target ranges.
    3. Avoid sudden changes that stress your livestock.

    Stick to your testing schedule and keep concise records. Small, consistent steps preserve water quality and make troubleshooting faster when issues arise.

    Troubleshooting Common Water Quality Problems

    If your fish gasp or seem tired, test the water for ammonia, nitrite, and oxygen. Do a 25–50% water change and add more air. Use a special product for ammonia or nitrite if levels are high. Stop feeding until the water is safe again.

    Cloudy water can come from cycling or too much food. Test for ammonia, nitrite, nitrate, and KH. A partial water change and less food might fix it. Check your filter and upgrade if needed.

    Algae means too many nutrients. Test for phosphate and nitrate. Feed less, clean the substrate, and use special products. Less light and more cleaning can help too.

    Big pH changes are often due to unstable alkalinity. Test KH and GH. If KH is low, add an alkalinity buffer slowly. Check for causes like reverse osmosis water or driftwood and fix them.

    Stressed invertebrates or a die-off? Test for copper, salinity, ammonia, and pH. Invertebrates are sensitive to contaminants and copper. Stop treatments, change water, and treat based on test results.

    Reef tank corals with tissue recession need specific tests. Check calcium, magnesium, alkalinity, nitrate, phosphate, and trace elements. Balance dosing and stabilize slowly. Professional ICP-OES testing may be needed if corals keep declining.

    For ammonia or nitrite spikes, do a 25–50% water change and add binders. Cut feeding and increase aeration. Use dechlorinated tap water if it has chlorine or chloramine.

    If many parameters are off or fish keep getting sick, take more action. Get advanced lab testing or ask a local aquarium store for help. Regular water testing can prevent many problems.

    Advanced Testing Techniques

    For deep diagnostics, turn to laboratory methods beyond hobby strips and color kits. ICP-OES aquarium tests, or Inductively Coupled Plasma Optical Emission Spectroscopy, offer accurate testing. They measure many elements at once. Labs like Aquaforest Lab use top-grade spectrometers to find micro and macro elements and trace contaminants that home test kits miss.

    Order ICP-OES aquarium tests for persistent coral decline, strict public aquarium control, or fine-tuning trace element dosing. They reveal heavy metals, unexpected surpluses, and subtle deficiencies. This lets you target dosing and remediation precisely.

    • Labs provide clean sample bottles and clear instructions to avoid contamination.
    • Collect water as instructed, seal bottles, and ship quickly to preserve accuracy.
    • Expect a detailed report with concentrations, units, and actionable recommendations.

    Use a one-time baseline ICP for new reef systems. Run follow-up tests when unexplained issues appear. Consider annual checks for stable long-term displays. This schedule helps tailor dosing of calcium, alkalinity, magnesium, strontium, iodine, and trace elements.

    Combine lab data with the best test kits for aquarium water at home. Use reliable kits from brands like Salifert and Hanna Instruments for routine checks between lab visits. Pair those kits with ICP reports to confirm trends and validate your dosing plan.

    Long-term monitoring keeps surprises at bay. Digital monitors and controllers handle temperature, salinity, and pH round the clock. Automatic dosing pumps can follow schedules or link to your logged results. Keep data logs to spot slow drifts and link them to maintenance, feedings, or new livestock.

    Advanced aquarium water testing gives you a crystal-clear element profile and guides precise corrections. Use lab-grade ICP-OES aquarium tests when precision matters. Support them with accurate aquarium water testing methods at home. Choose the best test kits for aquarium water to maintain daily control.

    Conclusion: Keeping Your Aquarium Healthy

    Testing your aquarium water regularly is key to keeping it healthy. It helps you catch problems like ammonia and nitrite before they hurt your fish. Checking pH, KH, GH, and temperature ensures your tank is right for your fish.

    To test your water, get a good set of test kits. You’ll need kits for ammonia, nitrite, nitrate, pH, KH, and GH. If you have a saltwater tank, get a salinity kit too. Learn how to use these kits and test your water often.

    If you have a reef tank, you might need more advanced tests. Services like ICP-OES can check for trace elements. If you find a problem, fix it slowly with water changes or adjustments.

    Testing your aquarium water regularly is important. It keeps your fish healthy and makes your hobby easier. Testing, logging, and making small changes are the best way to keep your tank thriving.

    FAQ

    What is aquarium water testing and why should I learn to read test results?

    Aquarium water testing checks the health of your tank water. It’s vital because water is essential for your fish and plants. Invisible toxins from waste can be deadly. Knowing how to read test results helps you keep your tank healthy.

    Which parameters are essential for all aquaria?

    Key parameters include temperature, pH, ammonia, nitrite, nitrate, KH, and GH. These ensure gas exchange, prevent toxicity, and maintain mineral levels. Regular checks help spot and fix problems early.

    How do freshwater and saltwater testing needs differ?

    Both need basic checks like pH and ammonia. Saltwater tanks also require salinity, phosphate, calcium, and magnesium. Reef tanks focus on very low nitrate levels.

    What are safe target ranges for common parameters?

    Aim for zero ammonia and nitrite. Nitrate levels should be below 20 ppm in freshwater. Saltwater tanks target 1.023–1.025 specific gravity.

    Which testing methods are available and how do they compare?

    You can use test strips, liquid kits, or lab analysis. Test strips are easy but less accurate. Liquid kits from API and Fritz are reliable for many parameters. Lab analysis is the most precise but more expensive.

    What starter test kits should I buy?

    Start with a kit that measures ammonia, nitrite, nitrate, pH, KH, and GH. Brands like Aquarium Co-Op, API, and Fritz are good choices. For saltwater tanks, add a refractometer and kits for calcium and magnesium. Planted tanks might need CO2 and iron/phosphate tests.

    How should I collect water samples to ensure accurate results?

    Rinse test tubes with tank water first. Take samples from the middle of the tank. Avoid surface scum and substrate. Test samples at room temperature. For lab tests, follow their instructions for shipping.

    How often should I test my aquarium?

    New tanks test daily for ammonia, nitrite, and nitrate. After big changes, test every few days. Stable tanks check every 2–4 weeks and spot-check ammonia/nitrite. Reef tanks test calcium, alkalinity, and magnesium weekly.

    How do I interpret pH, KH, and GH readings?

    pH shows acidity/basicity and affects toxicity. KH measures buffering and pH stability. GH affects mineral levels. Aim for stable readings, not single numbers.

    What immediate actions should I take for dangerous readings?

    For ammonia or nitrite, do a 25–50% water change and increase aeration. For high nitrate, change water and adjust feeding. For low KH, dose buffers slowly. For phosphate, reduce nutrients and use removers.

    How do I test and manage salinity in marine tanks?

    Use a refractometer for accurate salinity readings. Target 1.023–1.025 specific gravity. Top off water loss with RO/DI water and make small water changes to correct salinity.

    When should I consider ICP-OES or advanced lab testing?

    Use ICP-OES for coral issues, unexplained declines, or precise trace element analysis. Labs like Aquaforest Lab provide detailed reports. Use ICP results to adjust dosing and identify contaminants.

    How do I prevent inaccurate test results from expired or mishandled kits?

    Check expiration dates and store reagents correctly. Follow instructions for color-matching and keep reagent bottles sealed. Replace kits on schedule and calibrate digital devices and refractometers as needed.

    What routine maintenance ties to test results?

    Regular water changes control nitrate and phosphate. Clean equipment and avoid overfeeding. For reef tanks, maintain dosing schedules. For planted tanks, dose fertilizers and monitor nitrate/PO4.

    What are common diagnostic signs and which tests should I run?

    Fish gasping or lethargy means test ammonia, nitrite, and oxygen. Cloudy water tests for ammonia/nitrite/nitrate and KH. Algae outbreaks test phosphate and nitrate. Sudden pH swings test KH and GH. Invertebrate distress tests copper, salinity, and ammonia. Coral recession tests Ca, Mg, alkalinity, and consider ICP for trace elements.

    How should I keep records of my test results?

    Keep a log or spreadsheet of test results and maintenance. Use painter’s tape or digital logs for multiple tanks. Regular records help diagnose problems and reduce testing frequency.

    What safety steps should I follow when dosing chemicals or medications?

    Test before and after dosing to avoid sudden changes. Follow dosage instructions and adjust slowly. Use caution with copper medications and monitor levels closely. Increase aeration during stress events and have emergency contact info ready.

    How can I respond to an ammonia or nitrite spike as an emergency?

    Do a 25–50% water change immediately, add aeration, and reduce feeding. Consider ammonia binders or bacterial boosters. Check and repair filtration. Use dechlorinated tap water for returns.

  • Using a Turkey Baster: The Most Versatile Maintenance Tool for Nano Tanks

    Using a Turkey Baster: The Most Versatile Maintenance Tool for Nano Tanks

    Meta title: “The Turkey Baster: The Most Versatile Maintenance Tool for Nano Tanks”. Meta description: “Discover the art of using a turkey baster to easily maintain your nano tanks, ensuring a clean and thriving aquatic environment with precision.”

    This section defines the scope: you will learn how using a turkey baster can become your primary precision maintenance tool for nano aquariums and small reef tanks. A stainless steel turkey baster with a detachable rubber bulb is inexpensive, easy to clean, and built to last. It excels at targeted water movement, blasting sand off rock, stirring detritus into the water column, and assisting with coral acclimation.

    Hobbyists often borrow kitchen gear for aquarium tasks, and forum threads on Reef2Reef and AquariaCentral show many keepers listing a turkey baster as an essential item. Paired with a gravel vacuum, brushes, and a small pump, the turkey baster kitchen tool rounds out a compact maintenance kit that fits neatly on a shelf or in a drawer.

    You, a U.S. nano tank hobbyist, will find clear guidance here on turkey baster uses, how to use a turkey baster safely, and how to choose and maintain the best tool for your tank. The rest of the article will walk you through selection, technique, care, and creative repurposing so the baster becomes a reliable part of your routine.

    Understanding the Turkey Baster’s Design and Functionality

    A turkey baster kitchen tool prominently displayed in a well-lit kitchen setting. The foreground focuses on the sleek, transparent bulb of the baster, demonstrating its pliability, with glistening droplets suggesting its use. A measuring scale is etched on the side, emphasizing precision. In the middle, the baster's tube connects seamlessly, showcasing its sturdy design and comfortable grip. The background consists of a neatly organized kitchen counter featuring fresh herbs and spices, enhancing the culinary atmosphere. Soft, natural light filters through a nearby window, casting gentle shadows. The angle captures the baster from a slightly elevated perspective, inviting the viewer to appreciate its functionality and design. The overall mood is inviting, informative, and focused on the versatility of this essential kitchen tool.

    A turkey baster has three main parts: a nozzle, a bulb, and a shaft. The nozzle helps direct the flow, the bulb creates suction, and the shaft connects them. You can find them made from soft rubber or silicone bulbs and plastic, acrylic, or stainless steel shafts.

    Stainless steel models are durable and easy to clean. They have a detachable rubber bulb and a rigid shaft. For a long-lasting tool that’s easy to clean, choose stainless steel for the shaft and a replaceable silicone bulb for comfort.

    The bulb-and-nozzle system allows for precise control. It’s great for small, directed bursts of water and for drawing up debris. Learning how to use a turkey baster in the tank helps with spot cleaning, gentle coral feeding, and removing detritus without disturbing the fish.

    The length of the turkey baster is important for reach and safety. Aquarium-specific models are about 300mm (12″) long. This length allows for safe and effective work across a nano tank. Kitchen basters are shorter, but aquarium models focus on longer reach and firmer nozzles for substrate work.

    • turkey baster design: narrow nozzle for aim, bulb for suction, shaft for reach
    • turkey baster functionality: directed blasts, dirt sucking, coral feeding
    • turkey baster kitchen tool versus aquarium feeder: aquarium units use aquarium-safe plastics or stainless steel to avoid leaching or corrosion

    When deciding between a standard turkey baster and an aquarium-branded dirt sucker, look for aquarium-safe materials. Also, check for comfortable bulb action and a nozzle stiff enough for substrate work. These features are key to the tool’s performance in your nano tank tasks.

    Benefits of Using a Turkey Baster in Nano Tanks

    A close-up view of a person using a turkey baster to maintain a nano aquarium filled with vibrant aquatic plants and tiny colorful fish. The foreground features the clear, flexible turkey baster held in a steady hand, squeezing to release water or nutrients into the tank. In the middle, the nano tank displays an intricately arranged underwater landscape with vivid green plants, miniature rocks, and swimming fish to create a sense of life and movement. The background shows a softly blurred kitchen setup, illuminated by gentle, natural light from a nearby window to enhance the clarity of the scene. The overall mood is calm and focused, emphasizing the precision and care involved in maintaining a nano tank environment.

    A turkey baster is great for removing detritus in nano tanks. You can aim the tip at waste spots behind rocks or under coral. This way, you suck out debris without messing up the whole tank. It keeps the tank clean between big cleanings.

    Using a turkey baster for feeding corals is also smart. You can give small amounts of food to specific polyps or colonies. This method avoids clouding the water and reduces waste and nitrate spikes.

    • Minimal tank disturbance when you clean or feed.
    • Reduced stress for livestock because you avoid reaching into the tank or netting animals.
    • Assists coral acclimation by allowing gentle, localized water movement and targeted dosing.

    Using a baster with bigger tools makes spot tasks quicker. While tools like Python gravel vacuums and Sicce Ultra Zero pumps handle big water changes, the baster is for quick touch-ups. This combo saves time during maintenance.

    Spot tasks finish fast when you use a baster alongside larger gear. While Python gravel vacuums and Sicce Ultra Zero pumps manage big water changes and flow, the baster handles quick touch-ups. This combination saves time during routine maintenance.

    A turkey baster is also good for sand blasting and stirring detritus. Stirred debris is easier for filters and skimmers to remove. You control where sediment goes, improving tank cleanliness without big disruptions.

    A turkey baster is affordable and does many things. Many hobbyists start with a kitchen baster and later get an aquarium-specific one. Both are good deals compared to specialty tools.

    Short, directed bursts with a turkey baster can create extra water movement. This helps move stagnant water and mimics natural currents for corals during feeding or acclimation. Small actions can make a big difference in water quality and animal health.

    Choosing the Right Turkey Baster for Your Nano Tank

    Choose a material that fits your needs. Stainless steel basters with a detachable rubber bulb are durable and easy to clean. Rigid plastic basters are cheaper and good for simple tasks. Soft silicone tips are gentle on delicate corals.

    Make sure the nozzle size is right for your job. A narrow tip is great for feeding corals and cleaning spots. A wider nozzle is better for moving water fast, like when siphoning gravel. It’s also important that the bulb can be removed for a deep clean.

    • Length and reach: standard kitchen basters are fine for shallow tanks.
    • Extended 300mm aquarium models are better for deep or planted tanks.
    • Angled or long designs are useful for tanks with covers or wide overhangs.

    For precise work, consider aquarium-specific tools. These tools have firmer nozzles and are safe for aquariums. They’re perfect for heavy substrate work or frequent feeding.

    Think about what fits your tank best. For small, shallow nano tanks, a short baster is enough. But for tall rockwork or tight lids, choose an extended or angled baster to avoid stressing fish and corals.

    Get some extra accessories to make your turkey baster more useful. Mesh media bags are great for spot quarantine. OXO brushes are good for cleaning narrow tips. Acrylic rods help with gentle repositioning during maintenance.

    1. Consider the cost versus durability: stainless steel is more expensive but lasts longer.
    2. Make sure the materials are safe for aquariums.
    3. Keep a turkey baster substitute, like a dedicated syringe, for precise dosing tasks.

    Learn to use your turkey baster by practicing control and angle. Use gentle, steady suction to avoid disturbing the substrate. A detachable bulb makes it easy to rinse and sanitize, keeping your tank healthy.

    Proper Techniques for Using a Turkey Baster

    Begin with short, focused bursts to remove algae or sand from rocks. When learning, hold the nozzle a few inches away and squeeze in quick, controlled bursts. This method cleans without clouding the tank.

    For removing visible waste, squeeze the bulb as you place the tip near the waste. This hands-on approach is quicker than waiting for the filter. Empty the bulb into a bucket between uses to keep the tank clean.

    To lift waste from the substrate, place the nozzle near the sand and gently stir. This makes it easier for a gravel vacuum or Python system to collect the waste. Using the baster with a larger siphon provides a complete cleaning process.

    For feeding corals, use the turkey baster to deliver food directly to polyps. Squeeze slowly to place a small, accurate stream of food. This method reduces waste and helps picky feeders eat well.

    For coral acclimation, gently introduce tank water or acclimation water around the coral. Use small, even pulses to mix water without shocking the coral. Keep the nozzle close but avoid touching the coral tissue to prevent damage.

    Always keep the nozzle clean to prevent cross-contamination. Rinse the bulb and tip after each use. Use steady, controlled pressure to avoid clouding the tank.

    • Step 1: Use short directed blasts to clear rock and glass.
    • Step 2: Suction visible detritus with the bulb and empty into a bucket.
    • Step 3: Stir substrate near the nozzle to lift waste for a gravel vacuum.
    • Step 4: Deliver precise coral feedings using slow, steady pressure.

    By following these techniques, you’ll achieve consistent results. Mastering the turkey baster improves maintenance and targeted care without needing complex tools.

    Maintenance and Care for Your Turkey Baster

    Make sure your turkey baster is always ready. Rinse it after each use. Use RODI or clean aquarium-safe water to clean the nozzle and bulb. Always use a separate spray bottle for RODI to avoid mixing tap water with your tank.

    For regular care, take apart any detachable parts. Soak them in a mix of citric acid or white vinegar to remove mineral buildup. A short soak can loosen deposits without needing harsh scrubbing. Then, rinse well with RODI to get rid of any leftover residue.

    Wondering how to deep clean a turkey baster? Try a three-step method. First, rinse with RODI. Second, soak in citric acid or vinegar. Third, rinse again and let everything dry completely. Drying is key to prevent mold and keep seals working right.

    Choose the right material for your turkey baster. Stainless steel basters are great because they resist corrosion and can handle strong cleaning. But, plastic tips and rubber parts might not do well with harsh chemicals. Only use bleach if you’re sure to neutralize and rinse it well afterward.

    • Check rubber bulbs often for cracks or tears.
    • Replace bulbs right away if you see any damage to avoid contamination.
    • Have spare bulbs ready from trusted brands like OXO or Cuisinart.

    Store your tools with bulbs removed and in a clean place or hang them. This prevents moisture and contamination. Regular care will make your turkey baster last longer and work better.

    Common Mistakes to Avoid with a Turkey Baster

    Using a turkey baster can make tank care easier, but small errors cause big problems. Learn the common pitfalls so you keep water clear and livestock safe.

    • Overworking the substrate: squeezing and stirring too much detritus at once creates long-lasting cloudiness. When you practice how to use a turkey baster, take gentle, targeted shots. This avoids bulldozing the gravel.

    • Touching delicate animals: an errant nozzle can bruise corals or anemones. Keep distance and aim low to avoid contact while using a turkey baster on fragile displays.

    • Using non-aquarium kitchen basters risks contamination. Never assume a kitchen tool is safe for tanks. If you want a turkey baster substitute, choose aquarium-grade pipettes or syringes from brands like Eheim or Fluval.

    • Neglecting bulb cleaning spreads bacteria between tanks. Empty and disinfect the bulb after use. Failing to do this is one of the most common turkey baster mistakes hobbyists report on forums.

    • Relying on the baster for major maintenance is a misstep. A baster complements tools like gravel vacuums, Sicce utility pumps, Python water change systems, and magnetic scrapers. Treat Using a turkey baster as a spot-cleaning method, not a full solution.

    • Leaving food residue inside the bulb invites disease and foul odors. Rinse thoroughly and air-dry before storage to prevent cross-contamination.

    • Ignoring wear on rubber bulbs risks splitting and loss of suction. Replace worn bulbs promptly to avoid sudden failure during delicate tasks.

    Follow these tips and you will reduce common turkey baster mistakes and extend the tool’s usefulness. When you need a turkey baster substitute, pick items made for aquariums to protect your tank and its inhabitants.

    Creative Uses Beyond the Standard Functionality

    You can use a turkey baster for more than just water changes. It’s great for feeding corals with liquid food or nutrients. This way, you can feed them exactly what they need without disturbing others.

    It’s also good for moving water around corals. This helps them grow and get more oxygen. Plus, it’s gentle so it won’t stress out your fish.

    Try using it to get rid of snails, worms, and dirt under rocks. A few squeezes can help you remove trapped debris. This is helpful when you’re cleaning your tank.

    It’s also useful for cleaning small parts of your tank. You can use it to get rid of dirt in hard-to-reach places. Just make sure to clean it well if you use it for cooking too.

    • Look for aquarium tools that can do both cleaning and feeding. They’re more precise and less messy than kitchen basters.
    • Use an OXO brush set for scrubbing small parts. Acrylic rods are good for pointing or stirring substrate during maintenance.
    • Use mesh media bags with carbon or GFO to manage water quality after treatments or feedings.

    Hobbyists often use household items for reef tasks. You can borrow a kitchen baster for a quick job. But, always clean your tools before using them in your tank.

    Using small tools carefully makes turkey baster cooking for aquariums effective. Pair it with scrubbers and media, and keep your routines simple. This helps keep your tank balanced and healthy.

    How a Turkey Baster Can Help in Emergencies

    A turkey baster is a quick fix for emergencies in a nano tank. It helps remove toxic surface films without messing up the whole setup. Just a short squeeze can clear scum and debris faster than many tools.

    If a small area of water gets polluted, you can use a baster to clean it up. This way, you avoid draining the tank or setting up hoses in a rush. Many hobbyists use a kitchen baster to quickly remove bad water.

    • Deliver fresh RODI water or precise treatment doses to a single coral, shrimp, or fish.
    • Administer medication drops or freshwater dips in controlled, small amounts.
    • Create temporary flow when a powerhead fails by aiming steady streams to mimic circulation.

    Using a turkey baster makes it easier to do targeted rescue tasks. You can flush away detritus from an injured coral to help with treatment. It also helps expose a stuck animal for safer removal without disturbing the whole tank.

    Speed is key in emergencies. Setting up pumps takes time. But with a baster, you can act fast, reducing stress and improving survival chances for sensitive creatures.

    Always follow strict hygiene when using a baster for rescues. Clean tools well before and after use to avoid introducing pathogens. If you cleaned the baster with citric acid or other cleaners, rinse it until no residue remains.

    Knowing how to use a turkey baster well makes it a true first-aid item for your tank. Practice steady strokes, aim carefully, and keep a dedicated, labeled baster for emergency use only. These small habits can make a big difference when you need immediate action.

    Recommended Brands and Products

    You want tools that last and protect your tank inhabitants. For the best turkey baster performance, choose stainless steel basters with detachable bulbs. These hold up to repeated use and resist staining better than plastic. First source retailers often stock high-quality stainless models that pair well with other maintenance gear.

    For aquarium-specific options, consider the Aquarium Multi-Function Dirt Sucker and Coral Feeder ~300mm from reputable reef suppliers. This aquarium-branded tool gives precise control, a 300mm reach, and aquarium-safe materials designed for gentle, repeated cleaning.

    • Look for turkey baster brands that offer detachable bulbs and replaceable tips.
    • Confirm stock and exact dimensions when ordering aquarium-specific tools. Some sellers require pre-order confirmation before shipping.
    • Balance price and longevity: stainless steel costs more up front but often proves the best turkey baster investment over time.

    Pair your baster and dirt sucker with complementary gear for a thorough maintenance kit. Consider the OXO Good Grips Deep Clean Brush Set for scrubbing, the Python gravel vacuum for larger water changes, and the Flipper Magnetic Algae Scraper for glass cleaning.

    For water movement and chemical control, add a Sicce Ultra Zero Utility Pump for fast transfers, plus high-end media such as ROX 0.8 carbon and a high-capacity GFO for phosphate control. These items work with your turkey baster kitchen tool and aquarium dirt sucker to keep tanks stable between major changes.

    1. Buy locally from aquarium stores for hands-on advice and immediate stock checks.
    2. Use online reef suppliers like Jungle Aquatics for aquarium-branded Multi-Function Dirt Sucker models and detailed product specs.
    3. Shop major marketplaces for competitive pricing, but verify seller reviews and return policies.

    When evaluating options, weigh the long-term value of durable turkey baster brands against cheaper kitchen-only alternatives. The aquarium-specific Dirt Sucker often offers a longer reach and sturdier construction for tank work, making it a dependable choice for routine maintenance.

    User Experiences: Real-Life Applications

    Hobbyists often share their success with using turkey basters in nano tanks. They use kitchen tools like basters and silicone spatulas to clean hard-to-reach areas. These tools help remove detritus from rock crevices and skimmer cups with ease.

    Community tips include simple setups for home use. For example, pairing a baster with a 5-gallon bucket helps collect waste during water changes. Many suggest replacing short siphon tubes with long vinyl tubing and adding a rigid straw to prevent over-suction.

    • Use basters for targeted coral feeding to avoid disturbing livestock.
    • Use a turkey baster as a turkey baster substitute when a branded dirt sucker is not available.
    • Keep a cleaning station with buckets, basters, and spare tubing for quick maintenance.

    Users highlight the benefits of using a turkey baster. It makes detritus removal, cleaning small parts, and quick spot maintenance easy. They also appreciate aquarium-branded dirt suckers for their precision and lower stress on fish and corals.

    But, there are warnings too. Always wash kitchen tools well before using them for food. Mark RODI water bottles and basters used for tank work to avoid contamination. These habits keep your aquarium and kitchen safe.

    Remember, community-driven ideas are key when using turkey basters. By swapping tubing, marking gear, and using a dedicated bucket, you can make kitchen basters into durable tools. These changes reflect many user experiences and help keep your tank clean without breaking the bank.

    Final Thoughts on the Versatility of a Turkey Baster

    Using a turkey baster is a simple and cost-effective way to upgrade your nano tank toolkit. A stainless steel baster is durable, as recommended by the First source. The multi-function aquarium dirt-sucker/coral-feeder, noted by the Second source, is great for precise tasks like coral feeding and spot cleaning.

    Pairing a baster with larger tools can save time and reduce disturbance to your fish. Use it with a Python vacuum for water changes, a Sicce pump for flow, OXO brushes and a Flipper scraper for glass, and an RODI spray bottle for rinsing. This setup mirrors the First source’s recommendation, balancing quick precision with scale.

    For practical maintenance, choose the best turkey baster for your tank. Stainless steel or a 300mm aquarium model are good options. Keep it clean with RODI water or a mild citric acid rinse. Practice controlled techniques to avoid stirring debris or stressing your fish. If you need a substitute, look for aquarium-safe syringe or siphon feeders that offer the same precision.

    Actionable next steps: pick a baster that fits your tank size, add cleaning the tool to your maintenance checklist, and make it part of regular upkeep and emergency plans. Check community forums and product pages for availability and stock notes from the Second source. Update your toolkit based on your fish’s needs and tank growth.

    FAQ

    What makes a turkey baster useful for nano aquarium maintenance?

    A turkey baster is great for nano aquarium care. It helps with spot-cleaning, feeding corals, and removing detritus. It’s also easy to clean and durable, making it a handy tool for hobbyists.

    Should I use a kitchen baster or an aquarium-specific dirt-sucker/coral-feeder?

    While a kitchen baster can work, aquarium-specific models are safer and better. They have longer reach and firmer nozzles. If you have delicate fish, choose an aquarium-branded baster.

    What components should I look for when selecting a baster?

    Look for a narrow nozzle and a detachable bulb. The shaft should be safe for aquariums. Stainless steel is best for durability and easy cleaning.

    How do I use a baster to remove detritus without clouding the tank?

    Use short blasts to loosen detritus. Then, place the nozzle close to the substrate and squeeze to draw waste. Stir gently to avoid clouding the tank. Use a siphon or filter to clean up any debris.

    Can a baster be used for coral feeding and acclimation?

    Yes, a baster is great for feeding corals and acclimating new ones. It helps deliver food directly to the corals and gently introduces new water.

    How should I clean and disinfect my baster?

    Rinse the baster with clean water after each use. Soak detachable bulbs in a solution to remove buildup. Rinse well and air dry. Avoid bleach unless you can rinse it off completely.

    What are the most common mistakes hobbyists make with a baster?

    Common mistakes include using too much force and clouding the tank. Also, touching delicate corals and using non-safe basters. Always disinfect between uses to avoid disease.

    How does a baster fit into a larger maintenance kit?

    A baster is a precision tool for spot tasks. It works well with larger equipment like gravel vacuums and pumps. Use it for prep work and targeted feeds, then finish with bigger systems for full cleaning.

    Are stainless steel basters worth the extra cost?

    Yes, stainless steel basters are worth it. They resist corrosion and last longer than plastic. They’re a good choice for frequent use or saltwater tanks.

    Can I use a baster in emergency situations?

    Absolutely. A clean baster can remove polluted water and deliver treatments. It’s also useful for flushing injured corals. Always sanitize it before use.

    How should I store a baster between uses?

    Store the bulb detached to keep it clean. Hang or store the parts in a clean container to dry. Check the bulb regularly for damage and replace it as needed.

    Can using a baster reduce stress for my livestock?

    Yes, using a baster can be less stressful for your fish. It allows for cleaning and feeding without disturbing them or inserting your hand into the tank.

    What accessories complement a baster in nano-tank care?

    Useful accessories include mesh bags, brushes, and acrylic rods. Also, long vinyl tubing and RODI spray bottles. These tools help with maintenance and extend the baster’s use.

    How often should I replace a baster or its bulb?

    Replace the bulb when it cracks or loses elasticity. Replace the whole baster if it warps or the nozzle degrades. Check before use and keep spares for emergencies.

    Where can I buy aquarium-safe basters and related tools?

    You can find stainless steel basters and aquarium tools at local stores and online. Check dimensions and safety labels before buying. Some items may be pre-order.

    Are there hygiene concerns if I use a kitchen baster for my tank?

    Yes, using a kitchen baster can be risky. Sanitize it thoroughly before using it in your tank. Clean it well before returning to food use. Many prefer dedicated aquarium basters for hygiene.

    What creative uses do hobbyists find for a baster?

    Hobbyists use basters for feeding corals, removing detritus, and cleaning small parts. They also use it to direct flow and rescue stuck animals. It’s a versatile tool.

  • The Dangers of Overfeeding in Small Volumes: Water Quality Risks

    The Dangers of Overfeeding in Small Volumes: Water Quality Risks

    Adding a bit more food might seem harmless, but it’s not in small spaces like home aquariums or ponds. Overfeeding leads to too much uneaten food and waste. This waste adds harmful nutrients to the water, posing risks to all living things.

    Feed costs can be up to 60% of the budget in fish farming, as FAO research by Patrick G. White points out. Bad feeding habits can make you waste money and pollute the environment. Claude E. Boyd’s work shows most feed doesn’t turn into animal tissue but into waste instead.

    Real-life examples show the dangers. In the Philippines, too much food in fish cages harmed the water and the bottom. Small areas can’t handle excess food well. A big feeding can quickly change water quality, harming fish and plants.

    Keep reading to find out how to spot nutrient buildup early. Adjusting your feeding can save your aquatic friends and cut costs.

    Understanding Overfeeding in Aquatic Environments

    A tranquil underwater scene depicting the consequences of overfeeding in aquatic environments. In the foreground, a school of small fish swims among vibrant aquatic plants, showing signs of distress, with a few fish close to the surface gasping for air. In the middle ground, uneaten fish food accumulates on the substrate, surrounded by murky water filled with debris and algae blooms, illustrating declining water quality. The background features a dimly lit underwater habitat, with sunlight barely penetrating, creating a somber atmosphere of pollution and imbalance. Use a shallow depth of field to focus on the fish and food, captured in a slightly tilted angle to enhance the emotional impact of the scene. The colors should be muted with deep blues and greens, evoking a sense of concern for the aquatic life.

    You often think your fish need more than they do. Owners feed during social times and reward fish for coming up. This makes fish seem hungrier than they really are. This behavior causes overfeeding in both home and commercial systems.

    Not all food is eaten. Careful feeding can ensure 90 percent of fish food is consumed. Shrimp and some crustaceans might leave up to 40 percent uneaten, says Claude E. Boyd. About 70–80 percent of what is eaten is absorbed.

    Not all absorbed nutrients turn into body mass. Much is respired or excreted as water, CO2, ammonia, and phosphate. Only a small part of feed is kept in biomass. This explains the metabolic impact of overconsumption and the water quality issues you see.

    Systems handle excess differently. Ponds, cages, and tanks have unique ways of dealing with waste, notes Ronald W. White. Freshwater is often phosphorus-limited, while marine systems are nitrogen-limited. Which nutrient is scarce affects how algal blooms respond to excess feed.

    Improper feeding can start a chain reaction. It creates immediate waste, which spikes nutrient loads and fuels algal growth. Overfeeding consequences include oxygen swings and changes in species composition. These outcomes are linked to the nutrient imbalance you want to avoid.

    • Behavioral drivers: social feeding, cue-driven requests, owner overestimation.
    • Feed fate: uneaten feed, fecal loss, 70–80% absorption of consumed feed.
    • Partitioning: respiration, excretion, limited biomass retention.
    • System differences: ponds vs. cages vs. tanks; phosphorus vs. nitrogen limitation.

    The Impact of Overfeeding on Water Quality

    A serene water body, slightly murky with floating debris, vividly illustrating the consequences of overfeeding. In the foreground, clusters of uneaten fish food sink amidst vibrant underwater plants, while a few small fish swim cautiously, revealing the impact on aquatic life. Midway, a school of fish appears disoriented, surrounded by excess nutrients leading to algae blooms. In the background, hints of an aquarium filter struggle to keep the water clear, shrouded in diffuse, natural lighting that creates a soft, somber atmosphere. The overall image should evoke a sense of concern about water quality degradation, reflecting the delicate balance of aquatic ecosystems. Use a wide-angle lens to capture depth and detail, highlighting both the foreground struggles and the broader implications of overfeeding.

    Overfeeding a tank or pond leads to uneaten food and feces breaking down. This releases ammonia. Metabolic wastes also add to the problem. These factors increase high ammonia and nitrites, which harm fish and invertebrates.

    Microbial decomposition uses oxygen. As microbes digest, dissolved oxygen drops and CO2 increases. You might see dense plankton blooms. These blooms cause oxygen levels to swing, being high during the day and low at night.

    Feeding too much can lower oxygen levels at night. To avoid this, you might need to add aeration. This helps keep oxygen levels safe for your aquatic life.

    Decomposition also lowers pH, making water more acidic. This stress affects species that like alkaline water. It’s important to watch pH levels after heavy feeding to protect your fish.

    • Particulate nutrients settle and enrich sediments, creating anoxic benthic zones.
    • Dissolved nutrients disperse rapidly through the water column and fuel algal growth.
    • Benthic anoxia can produce hydrogen sulfide, which harms bottom-dwelling organisms.

    Filters get clogged with excess waste. This reduces their efficiency. Clogged filters can lead to sudden spikes in ammonia and nitrites, posing water chemistry risks.

    Excessive food consumption has adverse effects. It can lead to poor water quality, stressed fish, and increased maintenance. This is true for both aquaculture and hobby setups.

    To avoid these problems, adjust your feeding rates. Monitor oxygen and nitrogen levels. Keep your filtration and aeration systems working well. Small changes in feeding can prevent major issues in your aquatic environment.

    Nutrient Pollution: A Hidden Danger

    Feed rarely turns into fish or shrimp completely. Studies by Boyd and White show most feed nitrogen and phosphorus go back into the water. This imbalance harms your system and nearby habitats.

    When phosphorus is scarce in freshwater, a little extra can cause blooms. In marine waters, nitrogen is often the key. Adding the missing nutrient can speed up eutrophication and change water clarity quickly.

    Phosphorus can settle in sediments over time. These sediments trap P and other organics. If they get too full, they become anoxic, harming seagrass and coral, and changing the bottom life.

    Your feed conversion ratio is important. A worse FCR, like going from 1.6 to 2.0, means more phosphorus and nitrogen. Boyd’s work shows higher FCRs lead to more nutrients, causing problems in small or enclosed bays.

    Local currents and flushing decide if impacts stay close or spread along the coast. Poor flushing means nutrients build up, raising eutrophication risk and slowing recovery for your local ecosystem.

    Think about the big picture of overconsumption. Too much feed leads to a chain reaction: uneaten pellets and waste increase nitrogen and phosphorus, boost algae, and cause the problems you want to avoid.

    • Track FCR and reduce waste to limit nutrient imbalance drawbacks.
    • Choose sites with good flushing to lower eutrophication risk.
    • Monitor sediments for accumulated phosphorus before anoxic shifts occur.

    Monitoring Food Intake: Best Practices

    Set a proper feeding schedule and stick to it. Feed smaller amounts more often. This way, fish eat what you offer in about 4–5 minutes. Use the number-of-inhabitants, not tank volume, to determine each ration.

    This reduces overfeeding consequences and limits algae overgrowth. Algae overgrowth can look like obesity from overfeeding.

    Watch eating behavior daily. Note uneaten pellets and cloudy water. Record feed times and amounts so you can adjust rations quickly.

    Solid feed management cuts waste and keeps nutrient loading low.

    • Pre-measure rations for sitters and caretakers to prevent double feedings.
    • Use automatic feeders when you’re away to maintain a consistent, proper feeding schedule.
    • Train household members on the plan to avoid accidental overindulgence repercussions.

    Monitor early-morning dissolved oxygen to gauge assimilation capacity. Keep DO above 3–4 mg/L in the morning. If levels fall, reduce feed or boost aeration.

    This practice links monitoring food intake with water-quality control.

    Match feed formulation to species, season, and life stage to optimize feed conversion ratio (FCR). Lower FCRs mean less nutrient output. For reference, salmon FCRs target near 1.2:1 while milkfish can reach 2.8:1.

    Good feed management and quality reduce fines and leaching. This worsens overfeeding consequences.

    Store feeds properly to avoid stale pellets and broken pieces that leach nutrients. Choose well-balanced feeds with correct protein and energy for your species. Proper handling cuts waste and keeps nutrient inputs predictable.

    Use simple tools and metrics: feeding logs, morning DO checks, and occasional FCR estimates. These steps give you clear data. They help prevent overindulgence repercussions and refine your monitoring food intake routine over time.

    The Health Implications for Fish and Other Species

    Overfeeding can harm individual fish and the whole community. It can cause fatty liver in fish, like in African cichlids and rainbowfish. At low temperatures, digestion slows down. So, switch to wheat-germ food below 60°F and stop feeding below 50°F to avoid strain.

    Poor water quality from too much food raises ammonia and nitrite levels. It also lowers dissolved oxygen and pH. These changes stress fish and make them more likely to get infections like fin rot. Constant stress weakens their immune system, making them more susceptible to diseases.

    In crowded or small systems, too much food can cause low-oxygen events and kill many fish. Sediments that turn anaerobic can release harmful gases. These gases can be toxic and kill fish, making recovery harder.

    Your actions also affect the ecosystem around you. Overfeeding can lead to algal blooms that change food webs and harm habitats. It can also harm wild fisheries, seagrasses, and corals. Waste from overfeeding can change the bottom of water bodies and harm creatures that live there.

    • Watch feeding rates to prevent overeating complications.
    • Adjust diets by temperature to avoid fatty liver in fish.
    • Monitor ammonia, nitrite, and dissolved oxygen to limit stress and fin rot risk.
    • Reduce nutrient runoff to prevent algal blooms and broader overfeeding consequences.

    Understanding the Role of Filtration Systems

    Your filter is the first defense against water quality problems. It catches uneaten food and solids. It also hosts bacteria that clean up harmful substances.

    But, if you feed too much, your filter gets clogged. This blocks water flow and lowers oxygen levels. This stress can harm fish and other creatures.

    Removing nutrients from the water is another challenge. Small tanks often can’t handle this. You need to plan your filtration system carefully before adding more fish or food.

    To ease the load, clean or replace your filter media regularly. Add more bio-media if you have more fish. Use aeration to keep oxygen levels up when you feed more.

    • Match filter flow and media to your stock levels.
    • Inspect for clogged filters after heavy feedings.
    • Include scavengers like Corydoras or loaches to cut uneaten food, but don’t rely on them alone.

    Good feed management helps your filters work better. It keeps the water clean. By feeding right and upgrading your filtration, you can avoid many problems.

    The Ecological Balance of Aquatic Habitats

    Feeding practices can greatly affect the balance in ponds, cages, and enclosed bays. The speed at which nutrients spread depends on local water movement and depth. Places with poor water flow hold nutrients longer, increasing the risk of eutrophication.

    Carrying capacity is the maximum amount your system can handle without harm. Too much nutrient input can exceed this limit, causing algal blooms. These blooms then lead to low oxygen levels and harm fish and other bottom-dwellers.

    Different culture systems react differently to feeding. Ponds can remove some waste through sedimentation and plant growth. But, draining them at harvest releases more nutrients. Cage culture, on the other hand, sends waste straight into open water, making overfeeding worse.

    Consider the long-term effects of sediment when setting feeding rates. Repeated nutrient inputs can fill up sediment’s ability to hold phosphorus. Even after drying pond bottoms, sediments can keep releasing nutrients, causing algae to grow too much.

    • Monitor nutrient loading to respect carrying capacity for your site.
    • Match feed rates to local hydrodynamics to cut down eutrophication risk.
    • Limit overfeeding consequences by adjusting schedules and using more efficient feeds.

    By managing feeding with your site’s needs in mind, you can reduce nutrient imbalance and overfeeding in algae. This approach keeps the water healthier and supports more stable production over time.

    Mitigating the Consequences of Overfeeding

    To lessen overfeeding issues, tighten up your farm’s feed management. Adjust how much, when, and how often you feed. Make sure it fits the species, size, season, and water temperature. This helps avoid waste and keeps nutrients in balance with what the water can handle.

    Use different diets for different growth stages to use nutrients better. Choose high-quality feeds with the right mix of protein and energy. Also, improve how you handle and store feed to cut down on waste.

    For extra help, consider mechanical solutions. Add aeration to keep water oxygen levels high in ponds. Increase filtration in tanks and do regular maintenance to avoid clogs.

    Think about using systems where different species help clean up excess nutrients. In enclosed areas, limit farm size and choose locations that are better for water flow. This helps avoid pollution problems.

    • Check water quality early in the morning every day.
    • Adjust feeding or add water and aeration if levels start to rise.
    • Set limits on feed use and promote good feed management.

    By combining careful feed management with mechanical solutions and integrated systems, you can improve feed conversion rates. This approach also reduces pollution without sacrificing production.

    Educating Others on Responsible Feeding Practices

    You can lead effective public outreach by teaching simple, clear rules that prevent overfeeding. Show hobbyists and producers how to use portion control. Feed fish what they consume in four to five minutes.

    Recommend single-person or logged feeding routines to avoid duplicate feedings. Use local case studies like Bolinao milkfish impacts to illustrate overfeeding consequences.

    For aquaculturists, focus on feed conversion ratio (FCR), feed formulation, and feeding strategies. Teach them to match these to species and site hydrodynamics. Encourage routine monitoring of dissolved oxygen and nutrient indicators.

    These steps help reduce overfeeding consequences like algal blooms and benthic damage. They also improve animal health and yields.

    Provide practical tools to change behavior. Distribute feeding charts and checklists for filter and aeration maintenance. Recommend automatic feeders with pre-measured rations for vacations.

    Frame outreach around both animal health and environmental stewardship. This way, your audience connects responsible feeding practices with better health and less harm to ecosystems.

    Build community momentum. Urge aquarium societies and local aquaculture groups to host workshops and share best practices. Support incentives for higher-quality feed and lower FCR to cut costs and environmental impact.

    Through consistent educating on feeding and clear resources, you can help others prevent overfeeding. This protects water quality for the long term.

    FAQ

    What exactly is overfeeding in small-volume aquatic systems and why should you care?

    Overfeeding means giving more food than the animals can eat. This is a big problem in tanks, ponds, and cages. It makes the water quality bad fast.

    It leads to ammonia and nitrite spikes, and drops the oxygen in the water. It also changes the pH and makes the sediment dirty. This is bad for the fish and the environment.

    How much of the feed actually becomes fish or shrimp tissue?

    Not much. Studies show that only a small part of the feed is used by the fish or shrimp. The rest becomes waste.

    For example, shrimp only use about 12% of the carbon from the feed. The rest is lost as waste.

    What is the fate of uneaten feed and feces in the system?

    Uneaten food and feces break down quickly. This process releases ammonia, nitrite, and phosphate into the water. These chemicals harm the fish and the environment.

    The waste also settles on the bottom of the tank. This can cause problems with oxygen and lead to bad smells.

    Which water-quality variables change first when overfeeding occurs?

    Ammonia and nitrite levels go up first. This is because of the breakdown of uneaten food and waste. It also lowers the oxygen in the water and changes the pH.

    Over time, the water can become cloudy and smell bad. This is because of the buildup of waste.

    How do system type and local hydrodynamics affect impact severity?

    Different systems handle waste in different ways. Ponds can spread out waste, but cages release it directly into the water. This affects how bad the pollution is.

    Places with poor water flow are more affected by pollution. This is because the waste stays in one place.

    Are freshwater and marine systems affected differently?

    Yes. Freshwater systems are more likely to have algae problems because of phosphorus. Marine systems have more nitrogen problems.

    This means that different nutrients can cause different problems in different systems.

    How does feed-conversion ratio (FCR) influence nutrient output?

    A higher FCR means more feed is needed. This means more nutrients are released into the water. This can harm the environment.

    Studies show that a higher FCR leads to more pollution. This is bad for the water and the fish.

    What behavioral and human factors cause overfeeding?

    People often overfeed because they think the fish are hungry. They also feed as a way to interact with the fish. This can lead to too much food being given.

    Having multiple people feed can also cause problems. This is because they may not know how much to feed.

    How much feed typically goes uneaten in practice?

    Not all feed is eaten. Studies show that up to 40% of feed can be left uneaten. This is because fish and shrimp don’t always eat all their food.

    Even if they do eat it, not all of it is used by their bodies. Some of it becomes waste.

    What direct health problems can overfeeding cause in fish?

    Overfeeding can cause fatty liver disease in some fish. It can also lead to digestive problems and stress. This makes the fish more likely to get sick.

    It can even cause a big die-off of fish. This is because the water becomes too bad for them to survive.

    How does overfeeding lead to oxygen problems and what thresholds matter?

    Overfeeding can lower the oxygen in the water. This is because the waste breaks down and uses up oxygen. It also makes the water cloudy and lowers the pH.

    It’s important to check the oxygen levels early in the morning. If they are too low, you need to reduce the amount of food given.

    What effects does overfeeding have on pH?

    Overfeeding can lower the pH of the water. This is because the waste breaks down and releases acids. This can be bad for fish that prefer alkaline water.

    It can also make the water more toxic. This is because ammonia and nitrite are more toxic at lower pH levels.

    How do clogged filters factor into water-quality decline?

    Clogged filters can’t clean the water as well. This means that the waste stays in the water longer. It can also make the water cloudy and lower the oxygen levels.

    This can make the water quality worse. It’s important to clean or replace the filters regularly.

    What monitoring routine should you adopt to detect overfeeding impacts early?

    You should regularly test the water for oxygen, ammonia, nitrite, and phosphate. You should also keep track of how much food you give and compare it to the amount the fish eat.

    If the oxygen levels are too low or the ammonia and nitrite are rising, you need to reduce the amount of food given. You may also need to increase the aeration or do a water exchange.

    What practical feeding rules reduce overfeeding risks?

    You should feed on a set schedule and only give as much food as the fish can eat in 4-5 minutes. You should also use automatic feeders and pre-measured portions.

    It’s important to teach the people who feed the fish to only give the right amount. This helps prevent overfeeding.

    How can you improve FCR and reduce nutrient output?

    You can improve the FCR by matching the feed to the species and their needs. You should also use high-quality pellets that don’t break down easily.

    Storing the feed properly and minimizing waste can also help. This reduces the amount of nutrients released into the water.

    What mechanical or biological remedies help when overfeeding has already caused problems?

    You can increase aeration to keep the oxygen levels up. You can also upgrade or clean the filters to handle more waste.

    Adding scavengers or detritivores can help clean up some of the waste. You can also use extractive species in integrated systems to remove nutrients from the water.

    Can sediment-bound phosphorus become a long-term problem?

    Yes. Phosphorus can settle on the bottom of the tank and build up over time. This can cause problems with algae and harm the plants and animals in the tank.

    It’s important to manage the phosphorus levels in the tank. This can help prevent long-term problems.

    How do local currents and flushing alter management decisions?

    The flow of water in the tank affects how waste is distributed. Places with poor water flow need stricter feed limits and more monitoring.

    Well-flushed areas can disperse waste more widely. This can reduce the impact on the environment.

    What are the ecological consequences beyond my system?

    Excess nutrients from tanks can harm the environment. They can cause algae blooms and harm the plants and animals in the wild.

    In enclosed areas, the cumulative effect of waste from multiple tanks can be even worse. This can lead to a decline in water quality and ecosystem services.

    Are there policy or community actions that help reduce overfeeding impacts?

    Yes. Policies can limit the amount of feed given and require monitoring of water quality. Community actions can include training programs and incentives for better feed management.

    Coordinated site planning can also help reduce the impact of waste. This involves avoiding high-density siting in poorly flushed areas.

    How do you educate household members or caretakers to prevent overfeeding?

    You can provide clear feeding instructions and use automatic feeders. You should also teach the “4-5 minute rule” to prevent overfeeding.

    Logging feedings can help avoid duplicate feedings. This ensures that only the right amount of food is given.

    What simple tools help change feeding behavior on farms and in hobby systems?

    Using feeding charts, pre-measured scoops, and automatic feeders can help. Regularly testing the water and maintaining the filters are also important.

    These tools help ensure consistent feeding and timely interventions. They can improve the FCR and reduce waste.

    What thresholds or tipping points should you watch for to prevent eutrophication and mass kills?

    You should watch for low oxygen levels, rising ammonia and nitrite, and sudden pH drops. Visible algae blooms and bad smells are also signs of problems.

    If these signs are present, you need to reduce the amount of food given. You may also need to increase aeration or do a water exchange.

    How does temperature affect feeding recommendations?

    Fish digest food slower at low temperatures. Below 60°F, you should use easily digestible diets. Below 50°F, you should stop feeding most temperate species.

    Overfeeding at low temperatures can lead to waste and poor water quality. It’s important to adjust the feeding schedule based on the temperature.

    Can improving feed quality really lower environmental impact?

    Yes. High-quality feeds are more easily digested and have a better protein-to-energy ratio. This can improve the FCR and reduce waste.

    Using better feed can lower the amount of nutrients released into the water. This helps protect the environment and reduces production costs.

    What role do integrated multi-trophic aquaculture (IMTA) and mixed-species systems play?

    IMTA and mixed-species systems use extractive species to remove waste from the water. This can reduce the net nutrient release and mitigate local impacts.

    These systems require careful planning and matching of species. They can be effective in reducing waste and improving water quality.

    If my system already shows poor water quality from overfeeding, what immediate steps should you take?

    Stop or sharply reduce feeding, increase aeration, clean or replace clogged filters, remove visible uneaten feed and sludge if practical, perform partial water exchanges where appropriate, and test for ammonia, nitrite and DO. Addressing the cause (overfeeding or stocking density) is essential to prevent recurrence.

  • Choosing Aquatic Plants

    Choosing Aquatic Plants

    Choosing the right aquatic plants for your nano aquarium is key. It affects your tank’s look, water chemistry, and the happiness of your fish and shrimp. This guide will help you pick hardy, small plants that do well in tight spaces with little light and care.

    In small tanks, space is a big deal. The light and nutrients change fast. Knowing how fast a plant grows, its size, and how it gets food is important. This helps avoid overcrowding and nutrient problems.

    Live plants are more than just decorations. They make water oxygen, clean it, and fight algae. They also provide shelter for fish and help keep the tank balanced.

    Beginners often pick plants that look good but don’t fit their tank. Plants can “melt” when moved, and it’s easy to underfeed them. This guide will help you avoid these mistakes.

    This guide will be your guide to picking the best plants. You’ll find a list of easy plants, tips on planting and care, and how to fix common problems. It’s based on experience and trusted advice.

    Understanding the Benefits of Live Plants in Nano Aquariums

    A vibrant, well-maintained nano aquarium showcasing a variety of lush, easy-to-care-for live plants. In the foreground, colorful aquatic plants like Java moss, Anubias, and dwarf hairgrass are gracefully swaying, their rich greens contrasting beautifully with the water’s surface. The middle ground features a small, tranquil school of neon tetras swimming amongst the plants, emphasizing the liveliness and health of the ecosystem. The background is softly illuminated, creating a dreamy atmosphere with gentle rays of light filtering through the water, highlighting bubbles rising to the surface. The scene is shot from a slightly elevated angle, providing a clear view of the vibrant colors and textures, evoking a sense of tranquility and natural beauty in aquatic life.

    Live plants make your nano aquarium better in many ways. They produce oxygen and remove harmful substances from the water. This helps keep the water clean and healthy for your fish.

    Plants also help control algae growth. This is important because algae can harm your fish. By choosing the right plants, you can keep your aquarium looking great and your fish happy.

    Adding plants to your aquarium can also help your fish feel safer. They provide hiding spots for small fish and shrimp. This can help them feel less stressed and even encourage them to breed.

    When picking plants, remember that they need space too. Too many plants can make it hard for water to circulate. This can lead to problems with oxygen levels at night.

    By choosing the right plants and placing them carefully, you can create a beautiful and healthy aquarium. This not only looks good but also helps keep your fish and other aquatic animals healthy.

    Factors to Consider When Choosing Aquatic Plants

    A cozy, well-lit aquarium shop interior with a warm atmosphere, featuring a person in casual clothing carefully examining various aquatic plants for selection. In the foreground, a vibrant array of easy-to-care-for live plants, such as Java Fern and Anubias, displayed in pots on the counter, showcasing their lush green colors and textures. In the middle ground, a shelf filled with aquascaping tools and additional plant varieties, adding depth to the scene. The background includes a sparkling fish tank filled with colorful fish swimming around healthy aquatic plants, creating a tranquil ambiance. Soft, natural lighting illuminates the space, enhancing the vivid colors of the plants and the serene feel of the setting.

    Start with light. Plants are classified as low-, medium-, or high-light. Low-tech species like Java fern and Anubias do well under basic LED lights. High-light plants or those needing CO2 are not good for beginners.

    Plan your nutrient strategy. Root feeders like Amazon sword and crypts need root tabs in the substrate. Water column feeders and rhizome plants like Java fern take nutrients from liquid fertilizers. These tips help match fertilizer to plant needs.

    Think about growth habit and rate. Slow growers like Anubias and Java fern are great for beginners. Fast growers like Anacharis need more frequent trimming. This helps choose plants that fit your routine.

    Measure mature size and spread. Vallisneria and Amazon sword can grow big. Dwarf sagittaria and Anubias nana are better for small spaces. Knowing size helps avoid overcrowding.

    Consider propagation and upkeep. Choose plants that are easy to propagate. For example, stem cuttings for Anacharis and runners for dwarf sagittaria. Easy propagation saves money and makes care simple.

    Match plants to your livestock and equipment. Fish like goldfish need tough plants. Floating plants need calm surfaces. These checks help avoid plant loss.

    Mind your substrate and planting method. Use inert gravel or sand for root feeders. Never bury the rhizome of Java fern or Anubias. Follow these steps for proper planting.

    Set expectations for acclimation. Many plants have emergent leaves that melt. This is normal. Let affected plants recover and regrow submerged foliage. Knowing this helps make better choices.

    • Light class: low, medium, high
    • Nutrient match: root tabs vs. liquid fertilizer
    • Growth rate: slow for low maintenance, fast for nutrient export
    • Size at maturity: avoid future crowding
    • Propagation: easy types reduce effort and cost
    • Compatibility: consider fish behavior and equipment
    • Substrate rules: rhizomes versus root feeders
    • Acclimation: expect initial melting and recovery

    Top 10 Easy Live Plants for Low-Maintenance Nano Aquariums

    Here’s a quick guide for setting up a small tank. Each plant is easy to care for. They’re perfect for beginners and fit well in small spaces.

    1. Marimo Moss Ball (Cladophora) — Growth: very slow. Placement: foreground or free-floating. Propagation: split balls into smaller pieces. Fertilizer: not required, occasional water changes suffice. These are one of the Top 10 easy live plants thanks to their low care need.

    2. Christmas Moss (Vesicularia montagnei) — Growth: slow. Placement: attach to driftwood or rock in midground. Propagation: tie fragments to hardscape until rooted. Fertilizer: light liquid fertilizer and microelements help color and density. This moss is great for shrimp cover in guides to the best aquatic plants for beginners.

    3. Anacharis / Elodea canadensis — Growth: fast. Placement: background or midground; can be trimmed as nursery. Propagation: cut stems and replant tips. Fertilizer: liquid fertilizers for water column feeding. Anacharis appears often on lists of top freshwater plants for aquarium use.

    4. Hornwort (Ceratophyllum demersum) — Growth: very fast. Placement: floating or planted in background. Propagation: natural fragmentation. Fertilizer: minimal; it consumes excess nitrates. Watch floaters as they can block light if left unchecked.

    5. Anubias nana ‘Petite’ — Growth: slow. Placement: attach to wood or rock in foreground or midground. Propagation: divide rhizome or rhizome cuttings. Fertilizer: liquid dosing works; rhizome must stay above substrate. Anubias ranks high among the best aquatic plants for beginners because it tolerates low light.

    6. Java Fern (Microsorum pteropus) — Growth: slow to moderate. Placement: midground attached to hardscape. Propagation: rhizome propagation or plantlets on leaves. Fertilizer: liquid column dosing recommended; do not bury rhizome. It belongs on many aquatic plants buying guide lists for nano tanks.

    7. Cryptocoryne wendtii / Cryptocoryne lutea — Growth: slow. Placement: foreground to midground. Propagation: rhizome division. Fertilizer: root tabs and iron boost color and vigor. Crypts may melt after planting but usually rebound, making them common entries in top freshwater plants for aquarium beginners.

    8. Dwarf Sagittaria (Sagittaria subulata) — Growth: moderate. Placement: foreground to carpeting areas. Propagation: runners. Fertilizer: root tabs plus occasional liquid fertilizer for faster spread. This hardy carpet is a staple in lists of Top 10 easy live plants for small aquaria.

    9. Amazon Sword (Echinodorus spp.) — smaller varieties — Growth: moderate. Placement: background. Propagation: runners or plantlets. Fertilizer: heavy root feeder that benefits from root tabs. Note that larger swords can outgrow a nano tank, so choose dwarf species and prune regularly.

    10. Bacopa caroliniana / Ludwigia repens — Growth: moderate to fast. Placement: midground to background. Propagation: stem cuttings. Fertilizer: liquid CO2 alternatives and trace elements encourage color; root tabs help if stems develop stronger roots. These stem plants are practical entries in any aquatic plants buying guide for beginners.

    Quick warnings: floating plants can block light and should be thinned regularly. Fast growers like hornwort and anacharis need trimming to prevent overcrowding. Heavy root feeders such as swords can outgrow a small tank if you skip pruning and root tabs.

    This compact lineup blends ease, visual variety, and practical care notes so you can pick the top freshwater plants for aquarium success. Use it as a Top 10 easy live plants checklist and an entry-level aquatic plants buying guide to help you build a low-maintenance nano aquascape.

    Planting and Arranging Your Aquatic Greens

    Begin by placing tall plants like Vallisneria and Amazon sword at the back. Midground plants, such as Java fern and Ludwigia, go in the middle. Use small plants like Dwarf Sagittaria for the front.

    When planting, gently push roots into the substrate. Make sure they’re below the surface. Use root tabs for plants like swords and Crypts if your substrate is inert.

    For rhizome plants, don’t bury the rhizome. Attach Anubias and Java fern to wood or rock. Use fishing line or aquarium-safe gel to hold them until roots grow.

    Propagate plants to thicken beds. Trim and replant stems to expand midground areas. Let dwarf Sagittaria runners spread to create a carpet.

    Consider flow and fish space when arranging plants. Leave swim lanes open and avoid blocking filters. Use hardscape and plants to create depth.

    In fish tank breeding or shrimp tanks, use dense mosses and fast-growing plants. This provides hiding spots and grazing areas for young fish and shrimp.

    When choosing plants, match size, light needs, and growth rate to your tank. Aim for contrast in leaf shape and color to create focal points.

    • Background: Vallisneria, Amazon sword, Anacharis
    • Midground: Java fern, Bacopa, Ludwigia, Cryptocoryne
    • Foreground: Dwarf Sagittaria, Anubias nana petite, marimo/moss clumps

    Follow this guide to plant and arrange your aquatic plants. Your nano aquarium will be balanced, healthy, and ready for life.

    Maintenance Tips for Your Live Plants

    Start a simple weekly routine to keep your plants healthy. Change 20–30% of the water each week. This helps keep nutrient levels balanced. Also, roll or reshape marimo balls to prevent debris buildup.

    For plants that need a lot of nutrients, replace root tabs monthly. This keeps the substrate rich with nutrients.

    Choose the right fertilizer for your plants. Use root tabs for Amazon sword, crypts, and dwarf sagittaria. Liquid fertilizers are best for water-column feeders like Java fern and Anubias. Add iron for vibrant red colors in crypts and Bacopa.

    • Prune stem plants like Bacopa, Ludwigia, and Anacharis. Snip the tops and replant cuttings to promote bushy growth.
    • Control the spread of dwarf sagittaria and Vallisneria. Remove excess runners to keep space for fish.

    Control algae by using fast-growing plants that outcompete it. Add algae eaters like Amano shrimp for moss and algae control. Trim and remove dying leaves to prevent nutrient spikes.

    Be gentle with rhizome plants. Don’t bury the rhizomes of Java fern or Anubias. Secure them to driftwood or rock to promote healthy root growth.

    Some plants may melt or go dormant after introduction. Leave them planted. They usually recover once they adjust to your tank’s water.

    1. Keep a consistent photoperiod. Use a timer for reliable light cycles and avoid sudden changes.
    2. Limit excessive light to prevent algae blooms. Manage floating plants so they don’t block light to lower growth.
    3. Review tips for choosing aquatic plants and aquatic plants selection tips when you add new species to ensure they fit your tank’s needs.

    When picking plants for your fish tank, think about lighting, substrate, and feeding. Use aquatic plants selection tips to choose species that match your maintenance level. Follow these tips to keep your plants healthy and your aquascape stable.

    Dealing with Common Issues in Aqua Plant Care

    Don’t worry if your plant’s leaves start melting after you plant them. Leaves from emersed plants often die as they adjust to life underwater. Just leave the plant in the soil, add fertilizers as needed, and wait for new leaves to grow.

    Signs of nutrient deficiencies are easy to spot. Yellow leaves mean you need more iron or micronutrients. Use an iron supplement or a complete liquid fertilizer. For plants like Cryptocoryne and swords, add root tabs every three months to help them grow.

    • Algae outbreaks happen when there’s too much light, nutrients, or not enough plant competition.
    • Stop algae by removing it, trimming leaves, and reducing light hours.
    • Plant fast-growing species like Anacharis or Hornwort to fight algae.
    • Introduce algae-eating shrimp or snails if they fit with your tank’s life.

    Nano tanks often face overcrowding and shading. Fast-growing plants can take over, leaving little light for others. Trim often and choose plants wisely to keep a balance. Make sure floating plants don’t block light to lower leaves.

    Some fish like to dig or nibble on plants. Use anchors or attach plants to driftwood and rocks to protect them. Pick hardy plants like Anubias and Java fern for these tanks. Avoid plants that goldfish or cichlids like to eat unless your tank is set up for them.

    Bulb plants like Aponogeton might go dormant. Don’t pull out the bulbs when growth stops. Keep them in place, cut back on food, and wait for new growth. Adjust your fertilizing instead of replanting during this time.

    Use these tips to solve common problems when choosing aquarium plants. Follow these steps to avoid issues and keep your underwater garden thriving.

    Integrating Plants with Your Nano Aquascape

    Begin by planning your layout with the golden triangle rule. Place a tall stem group at one corner. Add a midground mass of Anubias or Java fern on driftwood to draw the eye. This method is key for a compact tank.

    Balance textures for contrast. Use broad-leaf plants like Amazon swords against fine mats of Christmas moss or Java moss. This contrast keeps the scene lively and makes your plants stand out without cluttering the tank.

    Consider function in your design. Place nutrient-hungry species where you can add root tabs easily. Position mosses and marimo where shrimp and snails can graze. These practical moves help you choose the right plants for both looks and tank health.

    Use hardscape to anchor growth. Tie Java fern and Anubias to rocks or driftwood for midground focal points. Wrap marimo balls around a small rock to mimic a miniature tree. These techniques blend hardscape and plants into a cohesive scene.

    Match plant density to your stocking levels. Fast growers like stem plants help control nutrients in heavily stocked tanks. Leave open water for bettas and small schooling species so they have room to swim and display natural behavior.

    Manage surface cover with routine thinning. Use a feeder ring or barrier for hang-on-back filters when floaters gather near the intake. Thinning floaters prevents light loss for lower plants and keeps oxygen exchange healthy in the water column.

    Use simple aesthetic anchors in the foreground. Anubias nana and dwarf crypts work well as low focal points. Place swords or Vallisneria in background corners. Stagger heights and groupings to simulate natural plant islands and make your aquascape feel deliberate.

    Consult an aquatic plants buying guide before you shop. Check growth rates, light needs, and compatibility with your chosen fish. This checklist helps you pick the right plants for aquarium success.

    • Plan focal points using the golden triangle.
    • Contrast textures: broad leaves vs. fine mosses.
    • Place nutrient feeders and grazing spots strategically.
    • Tie epiphytes to hardscape for durable midground interest.
    • Match plant density to bioload and swimming needs.

    Resources for Learning More About Aquatic Plants

    Begin with long-running planted aquarium forums and care guides from specialist retailers. Read about Amazon sword, crypts, and Java fern to understand their needs. Learn about light, fertilizer, and size requirements.

    Use a focused aquatic plants buying guide for planning. Look for sections on nutrient deficiency, propagation, and common pests. This helps avoid early losses.

    • Watch video tutorials for tasks like attaching rhizome plants and trimming stems. Also, learn about tying moss and planting bulbs.
    • Seek species-specific care sheets. Compare growth rate, preferred substrate, and CO2 tolerance.
    • Consider beginner kits from specialist sellers. They offer curated selections for low-tech setups.

    Join community hubs to learn faster. Aquarium clubs, Facebook groups, and subreddits are great for plant ID, trades, and troubleshooting.

    When picking plants, check multiple sources. Confirm light needs and adult size to avoid overcrowding and mismatched expectations.

    1. Find trusted sellers or local fish stores to reduce pests and snails.
    2. Keep copies of guides on propagation and nutrient deficiency for quick reference.
    3. Join video channels and forums for step-by-step demonstrations.

    For beginners, focus on hardy plants that need low light and nutrients. This makes learning easier and boosts success.

    Combine published guides, community advice, and video demos. This mix will help you build a reliable set of resources for your aquarium hobby.

    Conclusion: Embracing the Beauty of Live Plants in Your Aquarium

    When picking aquatic plants, choose ones that fit your tank’s light, substrate, and fish. For small tanks, pick hardy plants that don’t need much light or space. Good choices for beginners include Marimo, Anubias, Java fern, and Cryptocoryne.

    These plants are easy to care for and help you succeed. Other good options are Anacharis, Hornwort, Dwarf Sagittaria, and Amazon Sword plants. Christmas moss is also a great choice.

    For selecting plants, start by picking 3–5 species from the top list. Make sure they fit your tank size. Plan where each plant will go in your tank.

    Decide how you’ll feed your plants early on. Use root tabs for plants that need a lot of nutrients. For plants that get nutrients from the water, use a liquid fertilizer. This helps keep your plants growing well without any surprises.

    Here’s a quick plan to get started: pick your plants, sketch out where they’ll go, buy the right fertilizers, and set up a weekly care routine. Remember, plants might shed leaves or die back sometimes. But with patience and small changes, they’ll get better.

    Start with these tips and see your aquarium improve over time. For more help, check out the resources section for care guides and how to grow more plants. With the right care and tips, your small aquarium will become a beautiful, living space.

    FAQ

    What should I consider first when choosing aquatic plants for a nano aquarium?

    First, pick plants that fit your tank’s light, substrate, and fish. Think about how big they’ll grow and how fast. Choose plants that are easy to care for, like those that don’t need much light.

    Decide if you want plants that grow quickly to clean the water or slow-growing ones for less work. This will help you keep your tank balanced.

    Which plants are best for true low-maintenance nano tanks?

    For easy care, go for plants that are tough and don’t need much light. Marimo moss balls and Christmas moss are great. Anubias nana petite and Java fern are also good choices.

    Other options include Cryptocoryne wendtii/lutea, Dwarf Sagittaria, Anacharis, and Hornwort. Small Amazon sword varieties and easy stem plants like Bacopa caroliniana or Ludwigia repens are also good. These plants work well in the front, middle, and back of your tank.

    How do I decide between root tabs and liquid fertilizers?

    Use root tabs for plants with big roots, like Amazon swords and crypts. They work well in inert substrates. For plants that absorb nutrients from the water, like Java fern and Anubias, use liquid fertilizers.

    For a mix, use root tabs where the roots are and liquid fertilizers for the rest. This way, you get nutrients all around your plants.

    My new plants’ leaves are melting — is that normal and what should I do?

    Yes, it’s normal for plants to melt when they go from being above water to underwater. Just leave them alone and make sure they have the right nutrients.

    Keep the conditions stable and be patient. New leaves will grow back once they adjust.

    Can I use floaters in a nano tank, and what are the risks?

    Floaters like duckweed and frogbit are good for taking up nutrients and providing shade. But in small tanks, they can block light and make it hard for plants to breathe.

    Manage them by thinning them out regularly. You can also use a floater-containment ring or place them where they won’t cover other plants.

    How often should I fertilize and replace root tabs in a nano planted tank?

    For liquid fertilizers, follow the instructions and fertilize once a week. Root tabs should be replaced every 8–12 weeks for heavy feeders. But check if your plants are growing well.

    If they’re not, you might need to replace the tabs sooner. Adjust how often you do things based on how your plants respond.

    What layout works best in a 5–10 gallon nano with limited swim space?

    Use the golden triangle and layer your plants like in a classic setup. Keep the front low with plants like dwarf sagittaria and marimo moss balls.

    In the middle, use focal pieces like Java fern and crypts. For the back, choose tall plants like Anacharis and hornwort. Make sure there’s room for fish to swim and avoid blocking filter inlets.

    Which plants provide the best cover for shrimp and fry?

    Dense mosses, marimo clumps, and hornwort are great for hiding places. They also offer food for shrimp and fry. Fine-leaved stem plants and guppy grass are other good options.

    How do I attach Anubias and Java fern to driftwood or rock?

    Use cotton thread, fishing line, or aquarium-safe glue to attach rhizome plants. Tie or glue until the roots hold. Then, you can remove the thread.

    Never bury the rhizome to prevent rot. Keep it exposed.

    What causes algae outbreaks and how can plants help control them?

    Algae can grow too much due to too much light, nutrients, or not enough plants. Fast-growing plants like Anacharis and hornwort can help by eating up excess nutrients.

    Also, reduce the light, do targeted water changes, remove decaying matter, and consider algae eaters like Amano shrimp and nerite snails.

    My substrate is inert — what’s the best approach for root-feeding species?

    For plants with big roots, like Amazon swords and crypts, use root tabs near the roots. Add occasional liquid fertilizers for extra nutrients. Regular water changes also help balance nutrients.

    If you plan to have many root feeders, consider a nutrient-rich substrate for easier care in the future.

    How do I manage fast-growing stem plants in a small tank so they don’t take over?

    Trim fast-growing stems regularly and replant the tops to thicken midground areas. Remove excess growth to keep the tank open. Group fast growers for easy access to prune them.

    Consider replacing some with slower growers if you find pruning too often.

    What are signs of nutrient deficiency and their simple fixes?

    Yellowing new leaves or slow growth often mean a lack of iron or micronutrients. Add an iron supplement or a complete liquid fertilizer. For older leaves turning yellow or poor root growth in root-feeders, add root tabs.

    Watch how your plants respond and adjust the fertilizers as needed.

    Are there species I should avoid for planted nano tanks because they grow too large or are likely to be eaten?

    Avoid big, fast-growing plants like full-size Amazon swords unless you have dwarf varieties. Soft-leaved plants are not good if you have goldfish or large cichlids that dig or eat plants.

    Choose tough rhizome plants like Anubias and Java fern. Or use anchored plants protected by hardscape in tanks with diggers.

    Where should I buy plants to reduce pests and ensure healthy stock?

    Buy from reputable plant retailers or long-running fish stores known for healthy plants. Specialist sellers often provide care notes and verified health. Buying from community members or clubs can be affordable, but check for pests first.

    How can I learn practical skills like tying moss or attaching rhizomes quickly?

    Watch short videos from trusted planted aquarium channels. Follow photo guides on retailer pages. Join forums and Facebook groups for tutorials.

    Practice with inexpensive plants like Java fern and Anubias. This will help you learn fast and build confidence.

    What’s a simple starter checklist before planting my nano tank?

    Choose 3–5 plants from the top-10 list that fit your tank size and light. Plan where to place them. Buy root tabs and a general-purpose liquid fertilizer.

    Prepare anchoring supplies and set a weekly maintenance schedule. Expect some adjustment time and watch your plants closely.