Blog

  • Managing Fish Aggression: A Comprehensive Guide

    Managing Fish Aggression: A Comprehensive Guide

    You want a peaceful and healthy aquarium. The first step is managing fish aggression. Modern tools like smart tank controllers and AI apps help monitor behavior. They keep conditions stable, reducing stress and aggression.

    Keeping water chemistry steady is key. Temperature, pH, and hardness are important. Proper filtration, regular water changes, and emergency plans prevent sudden changes that cause fights.

    Quarantine tanks and fishless cycling protect new fish. They lower the risk of violent interactions. A thoughtful stocking plan and aquascape also help.

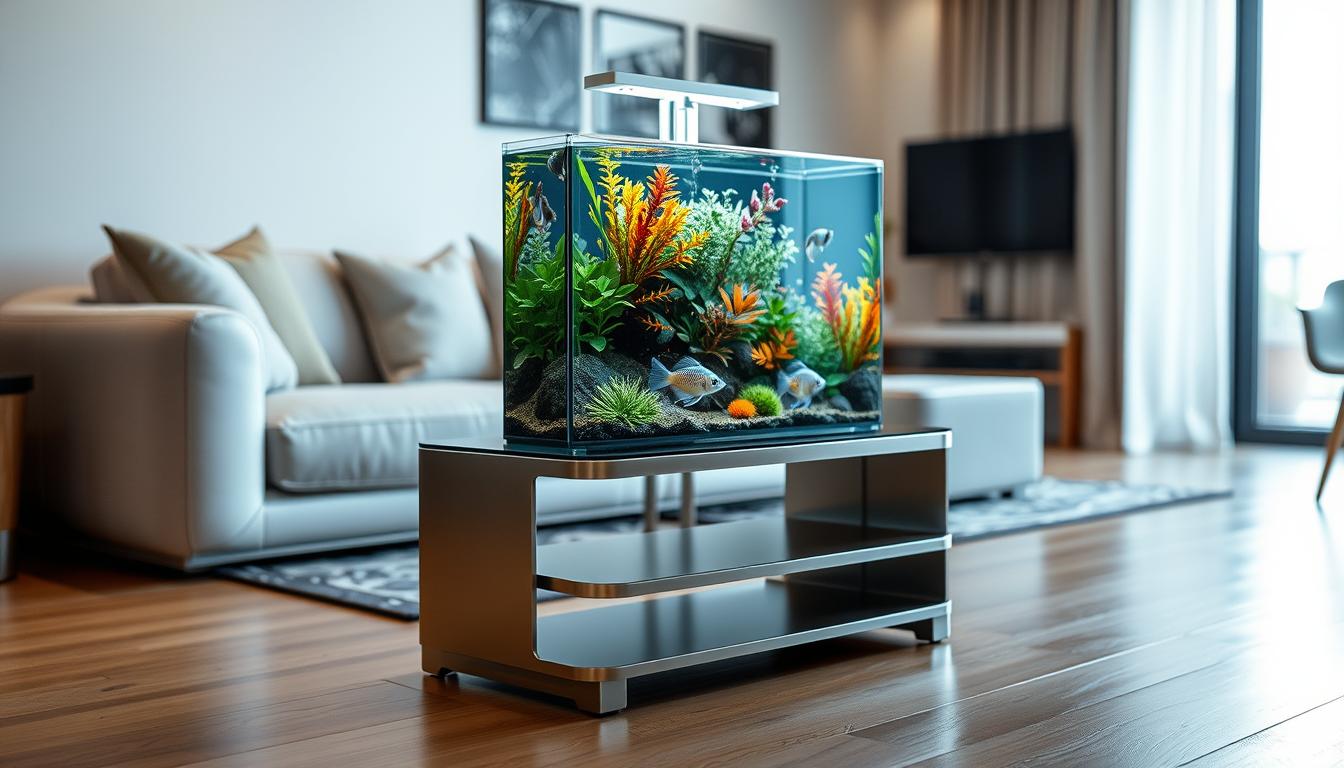
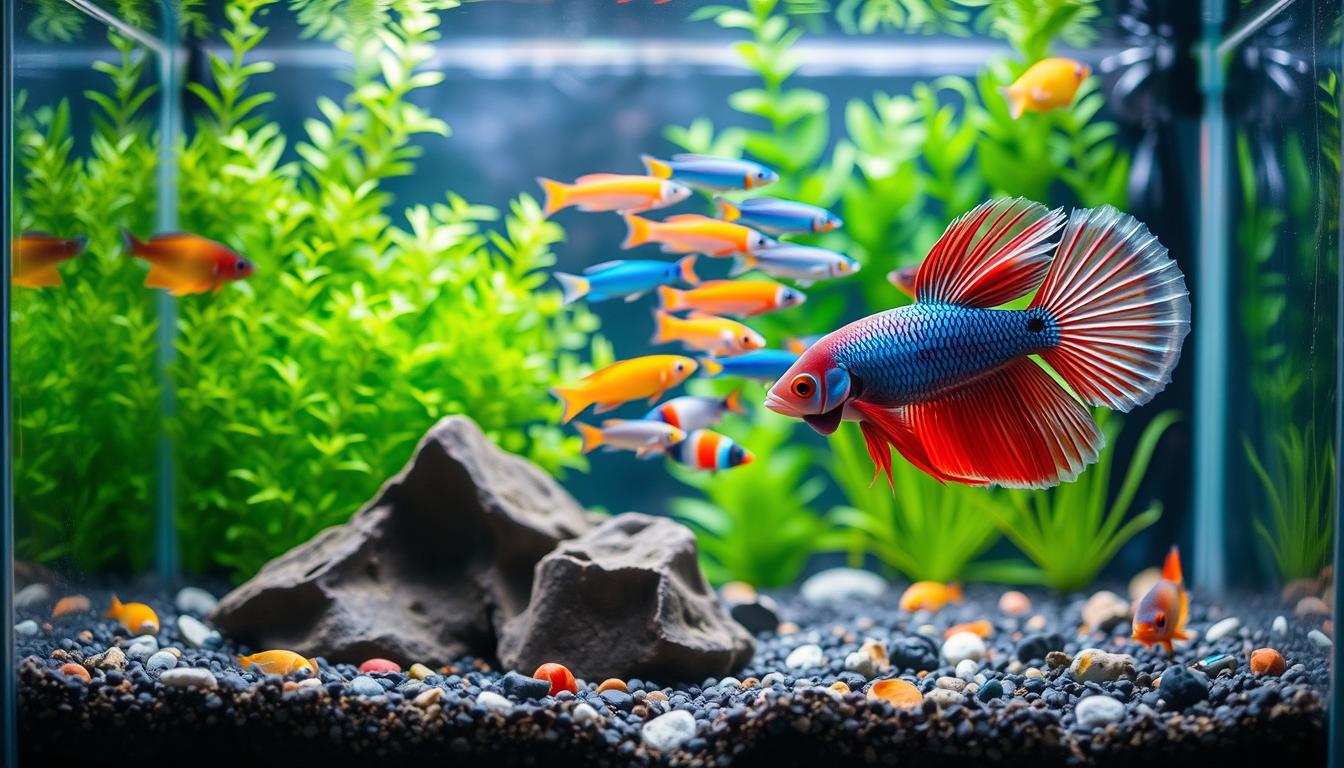
    In nano aquariums, choose species for 10-gallon setups. Avoid overcrowding. Use driftwood, caves, and layered hardscape for hiding spots and to break sightlines.

    Prefer captive-bred fish when possible. Add timid species before bolder ones. This helps form social hierarchies with less conflict. You can’t eliminate all aggression, but with good care and the right tech, you can reduce it.

    Understanding Fish Aggression

    A dynamic underwater scene depicting aggressive fish behavior, showcasing two brightly colored Betta fish facing off in a compact nano aquarium. The foreground features the two fish with flared fins and an intense stance, surrounded by vibrant aquatic plants and rocky crevices that create a sense of territory. In the middle, a variety of smaller fish can be seen darting away, adding to the tension of the scene. The background is a soft focus with diffused light filtering through the water, creating a subtle ripple effect. The atmosphere is charged with a sense of conflict, illuminated by warm natural lighting that highlights the vivid colors of the fish. The image should be captured from a slightly low angle to emphasize the action and drama of the aquatic encounter.

    Aggression in fish is not about spite. It’s a survival strategy shaped by instincts, competition, and the need to protect territory. This behavior is seen in both wild and captive fish.

    Stress in the tank can make fish more aggressive. Issues like wrong water temperature, unstable pH, and poor filtration can cause stress. This stress often leads to sudden attacks or chasing.

    Creating a biotope setup, like a blackwater tank, can help. It provides a natural environment that reduces stress. Matching the tank to the fish’s natural habitat makes dealing with aggression easier.

    • Provide shelters and visual barriers to cut direct lines of sight.
    • Keep stocking levels moderate so competition for space and food drops.
    • Pace introductions to prevent immediate fights between conspecifics.

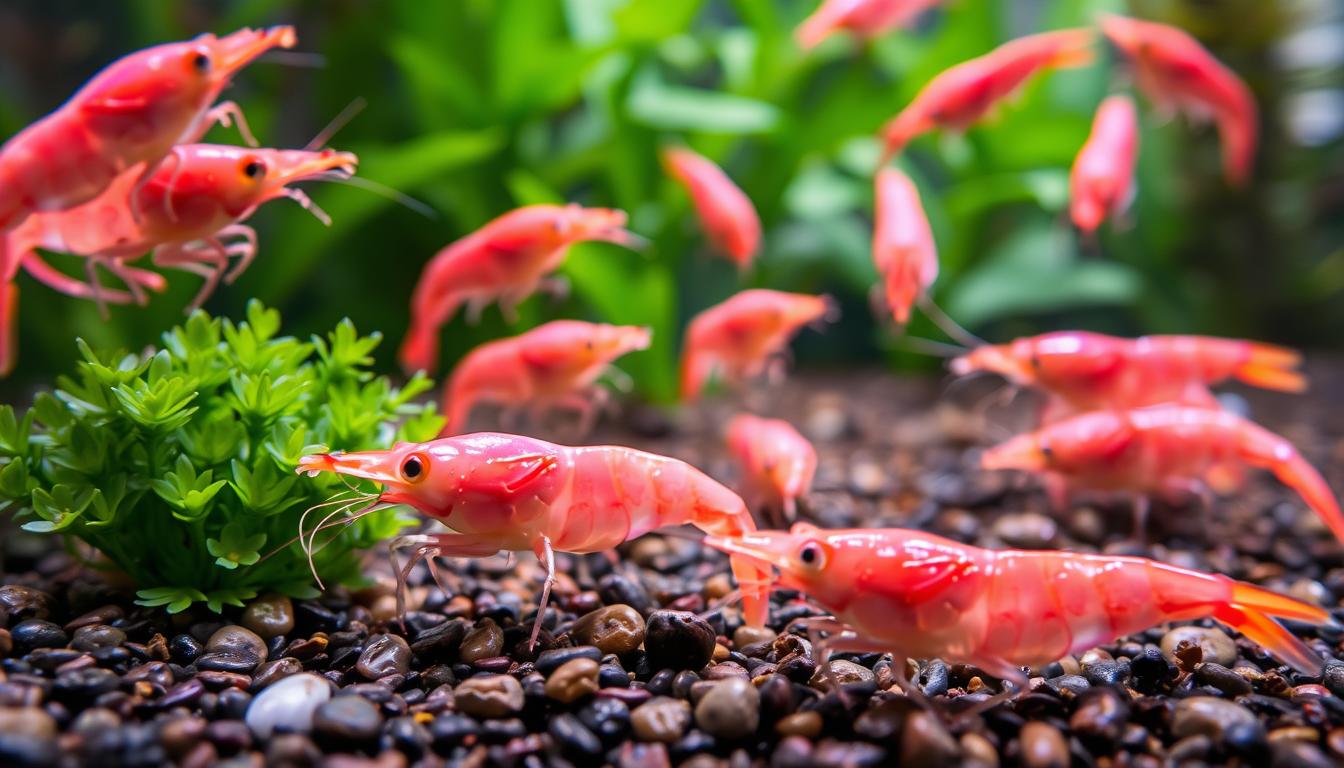
    Competition among fish of the same species is common. This is because they fight over the same space and resources. Fish bred in captivity often have less aggression due to socialization.

    Many aggression problems can be prevented with proper care. By observing and intervening early, you can control territorial fish. This is supported by Tropical Fish Hobbyist guides.

    Tools like visual checks and water testing help in early detection. Camera or AI-vision aids can also be useful. These tools help spot stress and prevent conflicts.

    The Role of Tank Size in Fish Behavior

    A serene nano aquarium showcasing peaceful cohabitation between various species of freshwater fish, like neon tetras and guppies, swimming harmoniously amidst lush aquatic plants likeJava ferns and Anubias. In the foreground, vibrant fish gracefully maneuver around decorative elements such as driftwood and pebbles, with soft lighting creating a tranquil ambiance. The middle ground features a variety of aquatic plants teeming with life, while the background reveals natural textures of the walls mimicking a calm aquatic environment. Use a wide-angle lens to capture the entire scene and create an immersive feel. The overall mood is serene and harmonious, emphasizing the importance of ample space for reducing territorial disputes among fish in their compact habitat.

    Tank size is key in controlling fish aggression. In a 10-gallon nano aquarium, space is limited. This means you must choose fish that do well in small spaces to avoid fights.

    Small tanks are more sensitive to water changes. Temperature, pH, and hardness can shift quickly. To manage this, use reliable heaters, a good filter, and test the water often.

    Adding too many fish can stress them out and make them aggressive. The inch-per-gallon rule is not always right. Watch how your fish behave and stop adding more when you see signs of bullying.

    • Plan realistic stocking for nano setups.
    • Favor low densities and strong filtration.
    • Use aquascaping to break sightlines and expand usable territory.

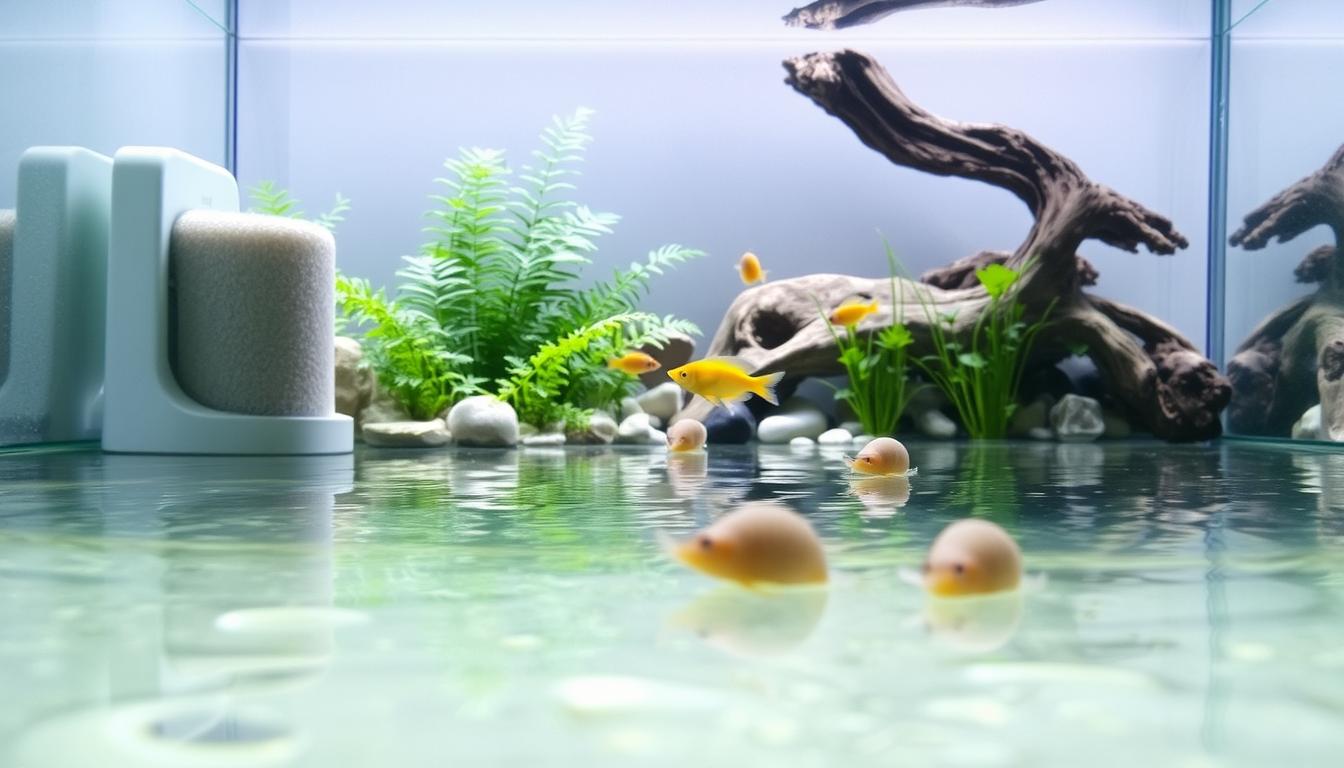
    A well-thought-out layout can help prevent fights. Rocks, plants, and driftwood provide hiding spots. These elements help keep the peace in your aquarium.

    When dealing with fish aggression, remember a few things. Behavior is influenced by space, water stability, and habitat complexity. Small tanks can be beautiful and peaceful if you keep the fish count low and the conditions stable.

    Territoriality in Fish Species

    Many marine and freshwater species, like damsels and cichlids, have strong territorial instincts. To reduce aggression, recreate their natural environments. Use blackwater, caves, driftwood, and layered rock to set boundaries.

    Conspecific aggression happens when fish compete for space or mates. Don’t stock too many territorial fish unless they form groups in captivity. For example, buy pairs or harems of clownfish and anthias instead of trying to pair them.

    Guides for aquarium care suggest ways to handle aggressive fish. Offer hiding spots, introduce fish slowly, and use hardscape and plants as markers. These steps help control territorial behavior and reduce fights.

    • Design territories with plenty of visual breaks to reduce stress.
    • Use staggered introductions: place newcomer in a clear, observed location first.
    • Monitor interactions and be ready to separate persistent aggressors.

    Matching decor to species needs and avoiding overcrowding improves social balance. By focusing on habitat design and careful stocking, you can prevent aggression. This approach leads to healthier, more natural behavior in your fish.

    Creating a Balanced Nano Aquarium Layout

    Design your nano tank with clear zones. Place open swimming areas near the center. Add dense planting or rock clusters at the edges. This layout supports peaceful cohabitation in aquariums by giving fish room to display natural behavior without constant confrontation.

    Start hardscape building by arranging smaller stones first. Then place larger Seiryu or similar rocks on top to form caves and ledges. Use driftwood like spider wood to break sightlines. Visual barriers create microterritories that help in reducing fish aggression.

    Add multiple hiding spots so any stressed or bullied fish can retreat without forcing another occupant from its shelter. For reef setups, avoid packing live rock tightly; keep caves accessible. A home-building approach lowers stress and aids in managing fish aggression.

    Balance low-light plants with open water. Control CO2 to keep plants compact and give consistent cover. This mix of cover and swim space is recommended by hobbyist guides to support peaceful cohabitation in aquariums while minimizing disputes.

    • Use varied hardscape heights to create separate territories.
    • Leave clear swim lanes to reduce accidental triggers.
    • Scatter small caves so no single den becomes a flashpoint.

    When you set up, think like a fish. A balanced nano layout reduces dominance displays and eases monitoring. These design choices are practical steps toward reducing fish aggression and managing fish aggression in a compact environment.

    Environmental Factors Influencing Aggression

    Keeping the water temperature stable is key for peaceful fish. Sudden changes can make them fight. Use a reliable heater, check the temperature every day, and avoid cold drafts.

    Good filtration and regular water changes help keep the water clean. Test the pH and hardness levels often. This ensures the water is right for your fish. Proper oxygen and balanced lighting also help in busy tanks.

    Blackwater or biotope setups can calm many tropical fish. They mimic natural habitats, reducing stress and aggression. This helps fish behave naturally.

    Be ready for power outages. Use a battery backup or a small generator to keep the oxygen levels up. Quick action during emergencies helps keep the tank calm and aggression low.

    Choosing the right fish and not overcrowding is important. Too many fish can lead to aggression. Pick fish that get along and are the right size. Captive-bred fish are often more friendly and less territorial.

    Quarantine new fish and cycle the tank before adding them. This lowers disease risk and stress. Early action helps keep your tank peaceful for a long time.

    Regular cleaning and watching your fish is essential. Daily checks help you catch early signs of stress or aggression. Small, consistent care habits prevent aggression problems.

    • Keep temperature stable and monitor daily.
    • Use good filtration and test water chemistry regularly.
    • Provide hiding places and appropriate stocking levels.
    • Quarantine newcomers and avoid sudden environment changes.

    Following these steps helps manage fish aggression. Regular care, the right equipment, and careful fish selection are key. They help create a peaceful aquarium.

    Strategies for Introducing New Fish

    Begin by setting up a quarantine tank. This is where you can watch new fish for signs of illness or odd behavior. Keep them separate for at least two weeks. This allows you to treat any sickness and observe how they handle stress before adding them to your main tank.

    When moving fish to your main tank, do it slowly. You can use drip acclimation or gradually add water to match the temperature and pH. This helps prevent shock and reduces the chance of fights.

    Plan your stocking carefully. Start with the least aggressive species. This lets them claim shelter and establish territories. Then, add bolder or larger species later. If you have to choose between two species, add the smaller one first. This gives them time to settle.

    • Stagger additions over days or weeks to give timid fish space to adapt.
    • Introduce entire schooling groups at once so they feel secure and conflicts are diluted.
    • Avoid adding a highly territorial species last without allowing others to establish.

    Keep a regular routine with automated lights and timed feeding. A consistent schedule helps calm fish and reduces territorial behavior. Automation also lets you maintain a steady rhythm, which supports long-term harmony.

    Watch fish behavior closely during the first month. If fights start, separate the aggressive fish or change the tank’s layout. This thoughtful approach to introducing new fish and handling aggression can improve survival and harmony.

    Social Dynamics Among Fish

    Watching fish group, chase, and avoid each other can teach us a lot. Their social behaviors come from how they evolved and where they grew up. Some fish, like neon tetras, feel safer in big groups. Others, like cichlids, have clear leaders.

    Look for fish that always chase, lose color, or hide. Use close observation or video to spot early signs of stress. Fish raised in captivity may act differently than those caught in the wild.

    Think about sex, size, and personality when stocking your tank. Competition and rivalry between males can cause fights. For schooling fish, keep groups small to avoid aggression.

    • Watch who chases and who hides during meals.
    • See who claims territory around decorations.
    • Notice color changes that show stress or submission.

    When dominance rules your tank, try changing decor or moving fish. Some keep pairs or small groups in separate tanks. This helps keep the peace in your aquarium.

    Use what you learn to manage aggression in your tank. Make small changes to group sizes or hiding spots. These can help improve social stability and tank health.

    Behavioral Interventions for Aggressive Fish

    Change your tank layout to stop fish from fighting over territory. Add plants, rocks, and caves for hiding spots. Move decor around often to keep bullies from claiming the same spots.

    Use timed lighting and regular feeding times to reduce stress. This can help prevent fights. An automatic feeder and timer make things predictable for your fish.

    Keep your tank not too crowded. This reduces competition and fights. Don’t pair two dominant males or rival species together.

    Choose captive-bred fish if you can. They are often less aggressive than wild ones. When adding a new, more aggressive fish, make sure the weaker ones have a safe place first.

    • Rearrange decor to reset social order.
    • Add refugia or extra cover for victims.
    • Use temporary breeder boxes or quarantine crates to protect injured fish.

    Watch how your fish interact and be ready to separate aggressive ones. Moving a single troublemaker can help balance things out without needing to move them permanently.

    If aggression doesn’t stop, it might be time to find a new home for the aggressive fish. This protects the other fish and keeps your tank peaceful.

    By following these steps, you can manage aggressive fish and keep your aquarium calm and healthy.

    Feeding Practices to Minimize Aggression

    Setting a clear feeding routine helps manage fish aggression. Regular, right-sized portions stop frantic chasing and competition. Quality flakes, pellets, frozen, or live foods provide balanced nutrition and reduce hunger fights.

    Spread food over multiple spots to prevent dominant fish from controlling one area. Use a pipette or turkey baster to feed shy or weaker fish. This way, they get their share without stress. An automated feeder ensures consistent feeding when you’re away, promoting stable behavior.

    • Follow species-specific schedules and portion sizes.
    • Offer varied diets to meet protein, fiber, and vitamin needs.
    • Use sinking wafers or surface flakes based on fish feeding habits.

    Keep a close eye on water quality because overfeeding harms it and causes aggression. Remove uneaten food and do regular water changes to keep nitrate and ammonia low. Clear water reduces stress and lowers territorial disputes.

    Avoid underfeeding as it increases competition and aggression. For hatchery-socialized captive-bred fish, consistent timing makes feeding predictable and calms feeding responses. For specific feeding tips, check our guide on how often to feed aquarium fish.

    If you see persistent fights during meals, try spot-feeding or feeding in separate zones. These adjustments help manage aggression and keep your aquarium healthy and balanced.

    Monitoring and Adjusting Fish Behavior

    Check your tank daily for signs of stress and aggression. Look for fin nipping, hiding, color loss, or reduced appetite. Keep notes so patterns stand out.

    Regular water testing for temperature, pH, and hardness helps you spot problems before they drive fights. Keep a simple log of readings and visual observations.

    • Schedule routine water changes and filter checks to keep conditions stable.
    • Clean algae and inspect equipment to prevent sudden changes that trigger conflict.
    • Have an emergency plan for power outages to reduce stress-driven aggression.

    If aggression flares after adding a new fish, you can reverse the stocking order or add extra shelters. Rearrange décor or increase hiding spots to break up territories.

    Watch for chronic bullies. Removing an aggressor may restore peace faster than long-term interventions. Use temporary dividers when you introduce new fish to ease transitions.

    1. Keep a stocking list and a planned sequence for adding fish.
    2. Note behavior changes tied to each addition or layout tweak.
    3. Adjust stocking if certain species repeatedly cause trouble.

    You can use vision apps and simple AI tools to flag abnormal activity early. These tools support your hands-on monitoring fish behavior and help with managing fish aggression before it escalates.

    Publications like Tropical Fish Hobbyist recommend keeping detailed logs of additions, water parameters, and incidents. These records guide long-term fish tank aggression control and help you refine care routines.

    Long-term Solutions for Fish Aggression

    To keep your aquarium peaceful, use smart tank tech like automated lights and heaters. These tools help keep water conditions stable. This reduces stress, a big cause of aggression.

    For planted tanks, controlling CO2 and keeping temperatures steady is key. This helps plants grow well and makes a calm environment. It stops fish from fighting over territory all the time.

    When stocking your tank, choose captive-bred fish for better behavior. Introduce new fish slowly and quarantine them first. This helps avoid diseases and stress.

    Make sure there’s enough space for fish to hide. Use driftwood, caves, and plants for cover. Changing the tank layout now and then also helps prevent territorial fights.

    Keep a log of your fish’s behavior. Check out Practical Fishkeeping and American Aquarium Society for tips. Use AI or water tests to catch problems early. If aggression doesn’t go away, you might need to rehome some fish or change the tank’s setup.

    FAQ

    What causes aggression in aquarium fish?

    Aggression comes from natural instincts like defending territory and competing for mates and food. Environmental stressors like unstable temperature and poor filtration also play a role. Captive-bred fish are often less aggressive than wild-caught ones.

    Understanding a species’ ecology and keeping the water stable can reduce aggression.

    How does tank size affect fish aggression?

    Smaller tanks can make fish more aggressive due to territorial clashes and water changes. Nano aquariums need careful species choice and precise water chemistry. Larger tanks provide more territory and can dilute aggression.

    But overcrowding can lead to fights. Always match stocking to the available territory, not just by size.

    Which species are most territorial and likely to be aggressive?

    Many cichlids, gobies, damsels, and blennies are very territorial. They fight hard because they compete for the same space. Research their behavior and choose captive-bred strains to reduce aggression.

    How can aquascaping reduce aggression in my tank?

    Use driftwood, rocks, and plants to create barriers and territories. Arrange rocks carefully to form stable crevices. Balanced layouts with both open and dense areas let fish claim space without excluding others.

    Natural-style or blackwater biotopes can calm certain species.

    What special considerations apply to setting up a balanced nano aquarium?

    In a small tank, choose fish adapted to small spaces and keep densities low. Provide plenty of hiding spots. Monitor temperature, pH, and hardness closely.

    Use robust filtration, regular water changes, and consider automation for lighting and CO2 in planted nanos. Avoid housing territorial conspecifics unless they are known to be peaceful in small spaces.

    Which environmental factors most influence aggressive behavior?

    Temperature stability, pH, hardness, oxygenation, and water clarity all affect fish stress and aggression. Poor filtration and irregular maintenance increase conflict. Lighting and CO2 management in planted tanks also impact plant cover and fish comfort.

    Emergency plans prevent stress spikes during outages that can trigger fights.

    What’s the best way to introduce new fish to an established community?

    Quarantine new arrivals to check for disease and acclimate them slowly. Add fish in a planned sequence—least aggressive first, then progressively bolder species. For schooling species, introduce the full school at once.

    Staggered additions and providing extra cover reduce bullying during the vulnerable first 30 days.

    How do social dynamics like schooling or harems affect aggression?

    Social structure matters: schooling species need appropriate group sizes to diffuse aggression, while territorial species may require solitary or harem setups. Conspecific competition and male-male rivalry are common drivers of fights.

    Plan stocking with attention to size, sex ratios, and whether a species is socialized in captivity. Captive-bred fish often integrate more peacefully into community tanks.

    What behavioral interventions work for aggressive individuals?

    Rearranging decor to break established territories, adding more hiding spots, using breeder boxes or refugia, and temporary separation can calm a community. If aggression persists, remove or rehome the aggressor.

    Automation of routines—consistent lighting and feeding—reduces stress peaks. For chronic cases, restructure the tank or move incompatible species to more suitable setups.

    How should I feed to minimize competition and aggression?

    Feed high-quality, varied diets on a predictable schedule and use multiple feeding stations or target-feeding for shy fish. Automated feeders maintain routine when you’re away. Overfeeding harms water quality and increases stress; underfeeding sparks competition.

    Follow species-specific dietary needs and offer foods that reduce chase behavior, specially during introductions.

    How can I monitor and detect early signs of aggression or stress?

    Regularly observe behavior for fin-nipping, color loss, hiding, or reduced appetite. Test temperature, pH, and hardness frequently. Keep maintenance logs and use AI/vision apps or close visual checks to detect abnormal behavior or early disease.

    Early detection lets you adjust stocking, add shelter, or quarantine sick fish before conflicts escalate.

    What long-term strategies prevent recurring aggression?

    Plan realistic stocking lists that progress from least to most aggressive, prefer captive-bred fish, and maintain low densities. Keep robust filtration, scheduled water changes, and stable temperature and chemistry.

    Rotate or refresh aquascape to prevent entrenched territories. Continue education through established hobbyist periodicals, keep records of additions and behavior, and be ready to rehome problem individuals to preserve community harmony.

  • Safe and Stylish Foundations: What to Use as a Nano Tank Stand

    Safe and Stylish Foundations: What to Use as a Nano Tank Stand

    You’re looking for nano tank stand ideas that are both safe and stylish. This article will guide you in choosing the right small aquarium stand or compact aquarium stand. We’ll consider load capacity, placement, access, and upkeep.

    Remember, 1 liter of water weighs about 1 kilogram. A 10–20 gallon tank, plus substrate, decor, and equipment, can add dozens to hundreds of pounds. So, it’s important to choose a stand that’s strong enough.

    Where you place your stand is key. Avoid direct sunlight and vents or exterior doors to prevent algae and temperature changes. Choose a spot near an electrical outlet for your equipment.

    Your stand should also allow for easy access to your tank. Plan for space for filters, heaters, CO2 systems, and for water changes and maintenance. Many people use a mix of store-bought stands, multi-functional furniture, and DIY builds to fit their budget and space.

    The aim is to find nano tank stand ideas that are both safe and stylish. This way, your nano tank will look great and stay secure in your home.

    Understanding the Importance of a Nano Tank Stand

    A stylish living room scene featuring various creative nano tank stand ideas. In the foreground, showcase a variety of designs including a sleek wooden stand with built-in shelves, a modern metal frame stand, and a glass showcase stand. In the middle, a beautifully set up nano tank sits on each stand, filled with vibrant aquatic plants and colorful fish, reflecting a sense of serenity and life. The background consists of a tastefully decorated home environment with soft, natural lighting filtering through a large window, casting gentle shadows and creating a warm atmosphere. Use a shallow depth of field to keep the focus on the stands and nano tanks while maintaining a cozy, inviting vibe overall.

    You need a stand that can handle the full weight of your tank. Ten gallons of water weigh about 83 pounds (38 kg). Add substrate, rock, plants, and equipment, and the weight goes up fast. Look for nano tank stand ideas that list load capacity or use solid plywood or metal frames for safety.

    Levelness is more important than you might think. An uneven surface can cause stress on glass and lead to cracks or leaks over time. Use a carpenter’s level and shims to make the base perfectly flat, whether you choose a small or compact aquarium stand.

    Vibration and movement can shorten seal life. Placing your tank near doors, high-traffic zones, or HVAC vents can cause micro-movements. Choose stands with wider feet or rubber pads beneath legs to dampen vibration.

    Think about maintenance access when picking a stand. A well-designed small aquarium stand offers shelving or removable panels for filters, spare parts, and easy water changes. This saves time during weekly tasks and reduces the risk of accidental spills.

    Organize cords, heaters, and CO2 lines to keep environmental control steady. Stands with built-in routing or hidden compartments help maintain consistent temperature and reduce clutter that might lead to equipment failure. These features are common among smart nano tank stand ideas.

    Your stand affects the health of plants and fish. Proper placement of filters, heaters, and lighting supports stable water parameters and strong aquascapes. Experts like Takashi Amano and George Farmer stress the importance of equipment layout when planning tanks. Choose a compact aquarium stand that supports your setup goals.

    • Structural safety: confirm load ratings and use solid materials.
    • Stability: level the stand and use shims on uneven floors.
    • Vibration control: avoid high-traffic spots and add damping pads.
    • Maintenance access: prefer stands with shelving or removable panels.
    • Cable and equipment routing: keep heaters and CO2 lines organized.

    Popular Materials for Nano Tank Stands

    A modern nano tank stand, designed with sleek lines and a minimalist aesthetic, made from a combination of high-quality, sustainable materials like natural wood and tempered glass. In the foreground, the tank stand is shown holding a small, vibrant aquarium filled with colorful fish and lush aquatic plants. The middle ground features a well-organized space with tools and accessories for tank care, giving a sense of functionality. The background showcases a soft, blurred living room setting, with warm lighting emanating from stylish lamps, creating a cozy atmosphere. The image is captured with a slightly elevated camera angle to emphasize the tank and its stand, using soft focus to enhance the inviting and modern feel of the environment. The overall mood exudes elegance and sophistication, ideal for contemporary interiors.

    Wood is a top choice for a modern nano tank stand. It comes in solid and plywood forms, both sturdy and attractive. You can stain and trim it to match your home decor, like Sauder or IKEA pieces. To protect it, use marine-grade paint, epoxy, or polyurethane against spills and humidity.

    MDF and particleboard are cheaper but need extra care. Untreated MDF can swell and fail if wet. If you pick engineered wood, ensure seams are sealed and it can hold your tank’s weight.

    Metal frames offer a sleek look for a compact aquarium stand. Steel and powder-coated steel are strong and light. Aluminum is lighter and rust-resistant indoors. Add rubber feet or pads to prevent vibration and floor damage. Double-check the welds and fasteners for aquarium load safety.

    Composite and prefabricated materials are great for a quick setup. Laminate, melamine, and resin cabinets are found in kits from big pet stores. They often have plumbing cutouts and storage shelves. But, watch out for thin laminates that can delaminate with moisture and make sure the load rating is suitable.

    Concrete, stone, and custom masonry make a striking, durable stand. They offer near-indestructible support and a minimalist or industrial look. But, remember, these materials are very heavy and usually permanent. They need floors that can handle concentrated loads and aren’t good for most rentals.

    • Pros of wood: customizable, attractive, widely available.
    • Cons of MDF/particleboard: moisture risk without proper sealing.
    • Pros of metal: slim, strong, durable under heavy loads.
    • Cons of metal: can transfer temperature and needs floor protection.
    • Pros of composites: budget-friendly, pre-cut features for plumbing.
    • Cons of composites: possible delamination and lower load limits.
    • Pros of masonry: ultra-stable and dramatic aesthetic.
    • Cons of masonry: permanent, very heavy, floor limitations.

    Always check the manufacturer’s weight ratings or calculate your tank’s full weight before buying or building. For DIY projects, add a 25–30% safety margin to prevent stress and failure.

    DIY Nano Tank Stands: A Hands-On Approach

    Before you start cutting wood, answer some important questions. Measure your tank and decide where to place it. Make sure you have access to water and electricity. Also, think about what fish you’ll have and how you’ll take care of them.

    Choose materials that can handle moisture. Marine-grade plywood or a 2×4/2×6 frame with a plywood top is a good choice. Avoid MDF unless you seal it well. Use powder-coated hardware to prevent rust.

    • Design the top to match the tank footprint with a 1–2 inch perimeter overhang for stability.
    • Plan internal shelving for filters, spare media, and tools with at least 12–18 inches of depth for useful storage.
    • Build a rigid box frame and add cross-bracing to prevent racking under load.

    Secure joints with bolts or screws and wood glue. Add adjustable leveling feet for uneven floors. Include removable panels or doors for easy maintenance and to hide cords. Cutouts for filter hoses and power strips keep things tidy.

    Finish and waterproof the stand to make it last longer. Use marine varnish, an epoxy coating, or several coats of polyurethane. Seal seams and edges with silicone to stop moisture.

    1. Follow step-by-step building videos or the best nano tank stand plans if you need a clear sequence. Use professional tutorials from reliable makers for guidance.
    2. Design a safety margin so the stand supports at least 30% more than the full-tank weight you calculate.
    3. Include vented panels for heat dissipation and a removable top shelf for quick tank removal when needed.

    If you want a creative fish tank stand, repurpose sturdy furniture like a small dresser. Reinforce the top and seal it for moisture. This gives you a unique look while keeping strength and function.

    For beginners, start with simple plans and checklists. Use quality tools and take small, steady steps. A well-built DIY nano tank stand makes your setup secure and enjoyable.

    Store-Bought Nano Tank Stands: Pros and Cons

    Buying a small aquarium stand from a store can save you time. Many places sell stands that fit common tank sizes. These kits usually come with everything you need, like a tank, filter, and lights.

    Look for stands with features that make caring for your tank easier. Features like pre-cut holes for plumbing and built-in shelves help keep things organized. Brands like Fluval and Aqueon offer designs that match both modern and classic decor.

    While store-bought stands are convenient, they might not be the best choice for everyone. Some stands are made of materials that can’t handle moisture well. This could lead to damage if your tank is in a humid area. Always check the materials and finish before you buy.

    The weight capacity of a stand is very important. Cheap stands might not hold the weight of a fully loaded tank. Make sure the stand’s weight limit matches your tank’s full weight to avoid any issues.

    Whether to buy or build your tank stand depends on your needs. Prebuilt stands might not have room for all your equipment. If you have a lot of gear, building a custom stand might be better.

    • Buy from reputable brands and aquarium lines that list load capacity and materials.
    • Favor metal or solid wood models for heavier planted tanks instead of thin laminate kits.
    • Read customer reviews and view real photos to confirm stability and finish quality out of the box.

    For those who value speed, looks, and a complete setup, a store-bought stand is a good choice. But if you want to customize or have a lot of equipment, consider the best nano tank stand plans. Most hobbyists find a reliable stand that fits their tank and needs to be a good balance.

    Multi-Functional Furniture for Nano Tanks

    You can turn everyday furniture into a smart base for a nano tank. A console table, credenza, or sturdy bookshelf can become a creative fish tank stand. Just make sure to reinforce and level it.

    First, check if the furniture can hold the weight of a filled tank. If not, add a plywood or thin steel plate top to spread the load. Small dressers and nightstands often work for 5–10 gallon setups after you reinforce and waterproof them.

    • Level top surface: use shims or adjustable feet to fix minor floor irregularities.
    • Height and sightlines: aim for 30–36 inches for living-room viewing or choose a lower desk height for desktop displays.
    • Storage and ventilation: keep supplies hidden while allowing airflow to prevent heat buildup from filters and lights.

    IKEA-style shelving units are compatible when you add a solid plywood top and distribute weight across several supports. Nightstands make an excellent stylish small tank stand after you seal the top and reinforce corners.

    Think about cord management and styling. Use cable organizers and matching baskets to keep equipment tidy. Coordinate finishes so the tank looks intentional and ties into your room decor.

    If you rent, pick furniture that returns to its original use easily. Avoid permanent build-ins or masonry work. A compact aquarium stand can be temporary, practical, and renter-friendly when you keep changes reversible.

    Aesthetic Considerations for Nano Tank Stands

    Choose a stand that matches your tank’s scale and the room’s style. A modern nano tank stand with clean lines suits rimless tanks and minimal decor. Avoid oversized bases that make the aquarium look lost or tiny stands that appear fragile.

    Match materials to your aquascape. Solid wood or teak complements planted, Nature Aquarium setups inspired by Takashi Amano. Concrete or raw steel fits industrial rooms and rock-heavy hardscapes. Metal frames and powder-coated finishes work well for modern, minimalist spaces.

    Think about color and finish. Dark stands make bright plants and colorful fish pop. Light woods give an airy feel that helps a small room breathe. Coordinate the stand with room accents so the display feels intentional.

    • Functional aesthetics: hidden storage and cable management keep the area tidy.
    • Integrated lighting mounts or built-in LED strips add mood without clutter.
    • Provide space for spare plants, tools, and filter supplies to streamline maintenance.

    Adjust stand height for viewing. Use a midline sightline for tall stem plants. Lower stands work best for carpeted foregrounds so the layout reads well from a standing or seated position.

    Explore unique nano tank stand designs when you want a focal piece. Floating wall-mounted shelving can suit very small desktop tanks if anchors and wall strength are verified. Recessed cabinetry creates an integrated look when structural support allows.

    When you pick a stylish small tank stand, balance looks with function. Ensure storage, stability, and access match the aesthetic you choose. A thoughtful stand ties your aquarium to the room and enhances the aquascape you build.

    Space Constraints: Choosing the Right Nano Tank Stand

    Start by measuring your available footprint. Note floor space, door swing, walkway clearance, and distance to water and electrical outlets before you pick a stand. Knowing exact dimensions prevents surprises and helps you compare compact aquarium stand options that fit the room.

    Think vertically when floor space is limited. Tall, narrow stands and plant stands pair well with slim or tall nano tanks to give a sense of depth without using much floor area. This approach opens up more nano tank stand ideas for tight corners and entryways.

    Consider shelving systems when you want multiple tanks. Reinforced shelving with rated tops lets you stack small tanks safely. Check each shelf’s weight rating and your room’s floor loading before you commit to a tiered layout.

    Wall-mounted and desktop setups work for very small installations. A floating shelf, desk, or console can host 1–5 gallon tanks, but confirm wall studs and anchors can bear the full wet weight. Desktop nano tanks suit offices or kitchens when you plan for daily access and spill protection.

    Use multipurpose furniture to save space and hide gear. An entryway console, narrow dresser, or media cabinet can double as a stand while giving storage behind doors. Picking units with enclosed storage keeps supplies out of sight and maintains a tidy display.

    Place your tank away from direct sun to limit algae and temperature swings. Account for room lighting when setting LED run times, with 8–10 hours usually recommended for planted setups. Proximity to a water source cuts down time spent on weekly partial changes and simplifies maintenance tasks.

    • Measure your footprint and clearances first.
    • Choose vertical stands or shelving for narrow spaces.
    • Confirm weights and anchor ratings for wall mounts.
    • Opt for furniture with doors to hide supplies.

    Blend practicality with style by comparing compact aquarium stand models and exploring unique nano tank stand designs. With careful planning you can turn limited space into a striking aquatic display that fits your routine and your room.

    Ensuring Proper Weight Distribution

    First, figure out the full tank weight. Water weighs about 1 kilogram per liter or 8.34 pounds per US gallon. A 10-gallon tank holds about 83.4 pounds of water.

    Add substrate, rocks, wood, and equipment to get the total weight. This will give you a realistic number.

    Be conservative with hardscape weight. Substrate and decor can add 10 to 100+ pounds. Many use a rule of thumb: about 1 lb of gravel per gallon. Heavier soils like Fluval Stratum increase this number.

    • Design a safety margin of at least 25–30% above the calculated full-tank weight.
    • Factor in dynamic loads from maintenance, people leaning on the stand, and settling over time.

    Leveling is key for stability and glass stress. Use a bubble or digital level on the stand top. Adjust until it’s perfectly flat.

    Install adjustable leveling feet for sloped floors. These are common in older homes and apartments.

    Check your floor’s load capacity for heavy setups or concrete bases. Upper stories need special attention. If unsure, consult a structural engineer or your building management.

    Spread the load to avoid point stress. A sheet of plywood under the tank or a metal wear plate across the stand top will help. This prevents sag and extends your stand’s life.

    Reinforce wide stands with center support beams or cross-bracing. These additions reduce deflection and maintain a flat surface over time. They pair well with the best nano tank stand plans when building your own.

    Reduce vibration and point loading by placing closed-cell foam or rubber pads under the tank edges. This cushions the contact points and protects fragile aquascapes during maintenance.

    1. Measure tank dimensions and volume to compute water weight.
    2. Estimate substrate and hardscape weight; use conservative figures.
    3. Add equipment weight and a 25–30% safety margin.
    4. Confirm stand top is level and add adjustable feet if needed.
    5. Reinforce the stand with bracing and use a plywood base to spread the load.

    When comparing nano tank stand ideas, prioritize plans that address load spreading and leveling. The best nano tank stand plans will include clear reinforcement details and mounting points for leveling feet. Choose a small aquarium stand that matches your calculated loads and allows access for maintenance without stressing the tank or stand.

    Considerations for Maintenance and Accessibility

    Start by thinking about how you’ll access your tank. Make sure your stand has front and rear panels or a removable back. This way, you can easily get to filters, heaters, and tubing without having to lift the tank.

    Position storage at waist height. A stand with shelves or drawers near your working level makes water changes and media swaps easier. You won’t have to bend as much.

    • Store spare filter media, water conditioners, nets, fertilizers, and siphons together.
    • Label containers so you grab what you need and return items quickly.

    Organize your equipment with maintenance in mind. Make sure there’s space for canister filters, CO2 reactors, and spare media. Add cutouts or grommets for hoses and cords to avoid pinch points and keep things tidy.

    Protect the stand’s interior. A built-in drip tray or waterproof liner under equipment catches spills. This helps extend the life of wood or MDF stands.

    Plan a maintenance workflow. For quick partial water changes, keep a siphon, bucket, and hose handy. Make sure there’s a clear path to a sink or drain. Having the stand near a water source makes the job quicker.

    Consider lighting and controls. Place timers and light fixtures where you can reach them without moving the tank. For planted setups, make it easy to adjust lighting schedules for the 8–10 hour window.

    Make room for quarantine and acclimation. A creative fish tank stand or a DIY nano tank stand can include a spare shelf or cleared surface. This is for temporary buckets or small quarantine tanks when new fish need observation or treatment.

    Choose a design that supports routine care. Whether you buy a compact aquarium stand or build one, focus on access, storage, and protective features. This makes maintenance faster and safer.

    Safety Features to Look For in a Nano Tank Stand

    When choosing a nano tank stand, check the load rating. This tells you if it can hold your tank, sump, and decorations. Look for brands tested for aquarium use or sold by trusted names like Aqueon or Fluval.

    Water protection is key. Look for waterproof coatings, sealed joints, and built-in drip trays. These features prevent wood rot and delamination. Rounded or sealed edges also help prevent water pooling and make cleaning easier.

    • Anti-tip brackets and wall anchors add security in homes with kids or pets.
    • A wide base and low center of gravity reduce the chance of toppling.
    • Vented panels let heat escape from pumps, controllers, and transformers.

    Electrical safety is vital. Look for stands with built-in cable management and an accessible power strip. These features keep cords organized and reduce splash risk. Try to keep power strips elevated and hidden behind panels when possible.

    Choose non-toxic finishes and sealants for indoor use. Avoid paints and solvents that may off-gas. These choices protect your fish and keep the air quality safe in your home.

    Plan for emergencies. Keep a spare towel, basic tools, and a quick way to shut off heaters and pumps. Placing a rubber mat or tray under the stand protects hardwood floors from leaks.

    1. Perform weekly checks of seals, hoses, and filter media.
    2. Inspect joints and fasteners for signs of wear or moisture.
    3. Verify vents remain clear and power management stays dry.

    Use these tips when exploring nano tank stand ideas and unique designs. A safety nano tank stand can be stylish and practical. It gives you peace of mind while your display thrives.

    Final Thoughts on Choosing Your Nano Tank Stand

    Start by measuring your tank and figuring out its full weight. This includes water, substrate, decor, and equipment. This weight should guide all your decisions, from DIY builds to buying stands.

    Choose materials and designs that fit your room, budget, and future plans. Options like sealed hardwood, metal frames, and multi-functional furniture are great. DIY projects let you create unique stands and often hold more weight. But, factory stands are convenient and stylish, just make sure they can handle your tank’s weight.

    Next, measure, pick a material, and add extra weight capacity. Don’t forget to include leveling feet and moisture protection. Also, plan for easy maintenance and storage for weekly water changes and monthly filter checks. These details help your stand and tank last longer.

    Remember, stability and ease of access are more important than looks. With the right choice, your Nature Aquarium or shrimp setup will thrive. It will also be a beautiful centerpiece in your home.

    FAQ

    What weight should my nano tank stand support?

    First, figure out the tank’s full weight. A gallon of water weighs about 8.34 pounds. Add the weight of substrate, rocks, wood, and equipment. For example, a 10-gallon tank holds about 83 pounds of water alone.

    Substrate and hardscape can add 10–100+ pounds. Make sure your stand can handle at least 25–30% more than your tank’s weight. This extra weight helps with dynamic loads like people leaning or pets nudging.

    Are wood stands safe for planted nano tanks?

    Yes, solid wood and marine-grade plywood are good for freshwater planted tanks. They are strong and resist moisture better than MDF or particleboard. Seal all surfaces and edges well to prevent swelling from spills and humidity.

    Can I use an IKEA shelf or dresser as a nano tank stand?

    Yes, if you reinforce it. Add a solid plywood top to spread the load. Strengthen the frame with cross-bracing or center supports. Seal surfaces against moisture.

    Make sure the unit can bear the tank’s full weight. Add adjustable leveling feet to correct floor irregularities.

    What are the pros and cons of metal stands?

    Metal stands are strong and look modern. They handle heavy loads well and last longer than thin furniture. But, metal can transfer heat or cold.

    They may need rubber feet or leveling pads to protect floors. Welds/fasteners must be rated for aquarium loads.

    How do I ensure the stand top is perfectly level?

    Use a carpenter’s bubble level or digital level. Install adjustable leveling feet or shims under the stand legs. For large or heavy stands, place a sheet of plywood between tank and stand top.

    This helps distribute weight and correct small imperfections. A level top prevents stress points that can lead to glass cracks or leaks.

    What features should a stand include for easy maintenance?

    Look for removable panels or doors. Internal shelving for spare media and tools is helpful. Cutouts or grommets for filter hoses and power cords are good.

    Vented panels prevent heat buildup. Enough clearance (12–18 inches depth) allows access to canisters, CO2 gear, and filters. A removable top shelf or cutout makes tank removal easier.

    Is a prefabricated aquarium stand a good option for beginners?

    Prefabricated stands are convenient and often match common tank sizes. They have pre-cut openings and integrated shelving. They’re a good start if you confirm the manufacturer’s load rating and choose a reputable brand.

    But, beware of cheap MDF or melamine kits that may delaminate with moisture. Prefer stands rated for the full loaded weight of your planned setup.

    How should I plan placement of my nano tank and stand in my home?

    Avoid direct sunlight and placement near HVAC vents or exterior doors. This reduces temperature swings and algae problems. Choose a location with a nearby electrical outlet for heaters, filters, and lighting.

    Ensure adequate clearance for maintenance, a water source for partial changes, and low foot-traffic or vibration. This protects planted layouts and seals.

    What materials are best for renters or small apartments?

    Multi-functional furniture like narrow dressers or console tables works well in rentals. Reinforce them and seal surfaces against moisture. Choose pieces you can return to original use easily.

    Avoid permanent masonry like concrete or stone unless you own the space. These are heavy and difficult to move.

    How do I protect a wooden stand from moisture damage?

    Apply marine-grade varnish, epoxy, or multiple coats of polyurethane to all surfaces. Seal seams and edges with silicone where needed. Use a waterproof liner or drip tray under external equipment.

    Store supplies in sealed containers. Rounded or sealed edges reduce water pooling and material delamination over time.

    What are the benefits of concrete or stone stands?

    Concrete and stone stands offer near-indestructible stability and excellent vibration damping. They have a striking industrial or minimalist aesthetic. They work well for heavy hardscapes or modern designs.

    But, they are permanent, extremely heavy, and require floors capable of bearing concentrated loads. This makes them impractical for most renters.

    How can I reduce vibration and stress on seals?

    Place closed-cell foam or rubber pads under the tank edge. Use adjustable leveling feet and avoid high-traffic or drafty locations. Choose stands with a wide base and low center of gravity.

    Add cross-bracing to reduce racking. Minimize movement during maintenance to protect planted aquascapes.

    What should I check on a store-bought stand before buying?

    Confirm the maximum load rating and compare it to your conservative full-tank weight. Inspect materials—prefer solid wood, plywood, or powder-coated steel over thin laminate.

    Check customer reviews and photos. Ensure pre-cut openings match your plumbing needs. Verify that the top is flat and stable out of the box.

    Are wall-mounted or floating stands safe for nano tanks?

    Wall-mounted shelves can work for very small tanks (1–5 gallons) if mounted to studs or rated anchors. The wall and shelf hardware must be specified for the tank’s full weight.

    For anything larger, avoid wall-mounted solutions unless a structural engineer confirms the wall can bear the load. Improper anchoring risks catastrophic failure.

    How much clearance should I plan under the stand for storage and equipment?

    Aim for at least 12–18 inches of usable depth beneath many nano tanks. This allows for filters, spare media, and tools. Ensure shelving height accommodates canister filters or CO2 equipment you plan to store.

    Design shelving at waist height where possible. This makes maintenance tasks easier and reduces bending strain.

    What electrical and safety features are important in a stand?

    Include cable management, elevated power strips with surge protection, and cutouts to route cords without pinch points. Keep power strips off the cabinet floor and behind panels to reduce splash risk.

    Vented panels prevent heat buildup. Anti-tip brackets or wall anchors protect against toppling in homes with children or pets.

    Should I factor in long-term maintenance when choosing a stand?

    Absolutely. Choose a stand that simplifies weekly water changes, monthly filter maintenance, and periodic checks of hoses and seals. Built-in storage for supplies, easy access panels, and a clear path to a water source will make routine care faster.

    This reduces the chance of equipment failure.

    How do I calculate substrate and hardscape weight?

    Use conservative estimates: about 1 lb of gravel per gallon for simple substrates. Heavier substrates like aquatic soils or thick rockscapes can add significantly more—plan for an additional 10–100+ lb depending on depth and materials.

    When in doubt, overestimate and add your safety margin.

    When is a DIY stand preferable to a store-bought one?

    Build DIY when you need a custom footprint, higher load capacity, or specific storage and access features. A properly built DIY stand using a 2×4/2×6 frame with a plywood top and cross-bracing often outperforms cheap prefabricated stands.

    If you lack tools or skills, choose a reputable store-bought option and verify load ratings.

    How do I make a stand that complements my room’s style?

    Match materials and finishes to your décor: powder-coated metal for modern/minimal interiors, solid wood or teak for natural/biotope aquascapes inspired by Takashi Amano, and concrete or raw steel for industrial looks.

    Coordinate stand color and texture with room accents. Hide cords with cable organizers for a cohesive display.

    What emergency preparations should I make around my stand?

    Keep towels, a spare bucket, and tools nearby for quick response to leaks. Plan how to turn off heaters and pumps quickly during maintenance.

    Consider placing a rubber mat or tray beneath the stand for floor protection, specially on hardwood. Inspect hoses, seals, and fittings weekly to catch issues early.

    Where should I place a nano tank to reduce algae and temperature swings?

    Avoid direct sunlight from windows. Keep the tank away from exterior doors, drafty vents, and HVAC registers. This reduces temperature fluctuations and evaporation.

    Choose a stable indoor spot with controlled ambient lighting and an electrical outlet within reach for equipment.

  • What to Look for When Buying Healthy Freshwater Shrimp

    What to Look for When Buying Healthy Freshwater Shrimp

    You want shrimp that will thrive in your aquarium. This guide helps you spot healthy shrimp before you buy. It shows you the key signs and attributes of fresh shrimp, so you can choose wisely.

    Shrimp are delicate and sensitive to water changes. Knowing how to identify healthy shrimp is vital. It ensures their survival, breeding success, and the health of your tank.

    In this article, you’ll learn about different shrimp species and their needs. You’ll discover physical and behavioral signs of health. We’ll also cover water quality, disease diagnosis, and environmental requirements.

    Before buying, ask the seller about the shrimp’s species and tank conditions. Look at the water clarity and observe the shrimp’s behavior. This will help you quickly spot quality shrimp and ensure they are fresh.

    Understanding Freshwater Shrimp Species

    Freshwater shrimp displayed on a clean, white market counter, showcasing various healthy species like Neocaridina and Caridina. In the foreground, focus on several vibrant, live shrimp with distinct colors, such as bright orange and deep green, emphasizing their clear exoskeletons and active movement. In the middle ground, an assortment of shrimp in different sizes, highlighting their healthy appearance and well-defined limbs. The background features blurred market shelves filled with aquatic plants and care supplies to set the context of a fresh seafood market. Soft, natural lighting enhances the freshness of the shrimp, creating a vibrant and inviting atmosphere. Capture the scene from a slightly elevated angle to showcase both the shrimp details and the surrounding environment.

    Choosing the right species is key to enjoying freshwater shrimp. The species you pick affects how easy they are to care for. It also impacts the signs you look for to spot healthy shrimp.

    Knowing the main groups helps you quickly identify healthy shrimp. It also lets you understand what to look for in their health.

    • Neocaridina (dwarf/cherry shrimp) — Very hardy and adaptable. They come in red, blue, black, green and other color morphs. Best for beginners, they prefer about 70–76°F, pH 6.8–7.5 and GH 4–6. They thrive in groups of 10+ and breed easily. Avoid mixing color strains if you want to preserve color purity. These traits help you tell how to tell if shrimp is healthy by checking color vibrancy and active molting.

    • Caridina (bee/crystal shrimp) — More demanding and sensitive to water chemistry. Varieties like Taiwan bee and crystal shrimp favor cooler water, around 68–75°F, pH below 7.0, low KH and GH roughly 4–7° (70–130 ppm). They need mature tanks rich in biofilm and very stable parameters. Many keepers use RO/DI water with remineralization. Knowing these needs sharpens your eye for shrimp health indicators tied to water stability and molting success.

    • Amano shrimp (Caridina multidentata) — Hardy and excellent algae eaters. They tolerate 65–80°F, pH 6.5–8.0 and GH above 4°. Because they look translucent, confirm species identity when buying so you know what to expect. Observing feeding behavior and body condition helps you identify healthy shrimp among similar-looking types.

    • Ghost shrimp — A mixed assortment of species sold widely. Sizes range from about 1.5 to 5 inches. Some are strictly freshwater, others prefer brackish water. Care can vary, but many do better with pH above 7.0 and higher GH to support exoskeleton development. Verify species and needs before purchase to avoid surprises and to correctly read healthy shrimp characteristics.

    • Bamboo/filter-feeding shrimp (Atyopsis moluccensis) — Filter feeders with fan-like appendages that need gentle flow and suspended or finely powdered foods. Their larvae typically require saltwater, so they will not breed in most freshwater tanks. Spotting good feeding response and intact fans are key shrimp health indicators for these species.

    When you choose a species, match tank setup to its needs. This lowers stress and makes it easier to tell how to tell if shrimp is healthy. Use species-specific cues like color, activity, molting frequency and feeding response to identify healthy shrimp and keep them thriving.

    Physical Characteristics of Healthy Shrimp

    A close-up view of healthy freshwater shrimp, showcasing their vibrant colors and distinct physical characteristics. The shrimp are displayed in a crystal-clear aquarium with a lush green aquatic plant background, emphasizing their natural habitat. Illuminate the scene with soft, diffused lighting to highlight the shrimp's smooth, shiny shells and the delicate texture of their antennae. Capture the different sizes and postures of the shrimp—some resting on rocks, while others are swimming gracefully in the water. Use a shallow depth of field to bring focus to the shrimp in the foreground, creating a calming, serene atmosphere that highlights their health and vitality.

    When you check shrimp, look for ones with shiny, whole shells and no damage. Shells that are smooth and firm are a good sign. But, if the shell is chalky or cracked, it might mean the water quality is bad or the shrimp haven’t molted right.

    Next, check the color. Healthy shrimp should have colors that match their type. For example, Amano shrimp should be clear with clear markings. Fire red shrimp should have even color. If the color is off, it could mean stress or health issues.

    Look at the shrimp’s eyes and legs too. Healthy shrimp have bright eyes and all their legs, antennae, and pleopods. If the antennae are long and intact, it means they were handled carefully. But, if they’re short or missing, it might mean they were treated roughly.

    • Exoskeleton: smooth, firm, no lesions
    • Color: even for the species or strain
    • Eyes: clean and bright
    • Appendages: complete antennae, legs, pleopods

    Also, check the shrimp’s shape and size. Stay away from shrimp that look odd or are bloated. Pregnant females should have eggs that are evenly spaced under their belly. If the eggs are moving and look right, it’s a sign of healthy shrimp.

    Watch how the shrimp behave too. A damaged rostrum or missing tail fan can make it hard for them to swim and molt. When buying, make sure you know the size and type of shrimp, like Neocaridina. Remember, diet and molting can change how they look without being a long-term health issue.

    Assessing Shrimp Health: Behavior

    Watching shrimp in your tank can quickly show you their health. Healthy shrimp like to graze on surfaces, eating biofilm and detritus. They swim together, forage at the bottom, and graze in groups, like Neocaridina species.

    Active antennae movement is a sign they sense food and their surroundings. This behavior is key to spotting healthy shrimp.

    Look for regular molting and brief hiding during shedding. Berried females with moving eggs are a good sign. But, if eggs turn dark, fuzzy, or fall off, it might mean water quality or disease issues.

    Stress can make shrimp act strangely. Look out for lethargy, constant hiding, or erratic behavior like spinning. Sudden color loss, refusal to eat, and excessive scratching or jumping after water changes are also red flags.

    • Amano and bamboo shrimp often gather near filters where detritus collects. If they stay motionless or keep their fan appendages closed, they are not feeding well.
    • Neocaridina show clear social grazing. If one stands apart, check water parameters and tank mates.

    After a transfer, watch shrimp closely for the first 24 hours. They are sensitive to sudden changes in ammonia, nitrite, pH, and temperature. Many hobby resources suggest observing behavior right after purchase and using drift acclimation when placing shrimp in your tank.

    Here’s a quick checklist for detecting healthy shrimp and other wellness signs:

    1. Active grazing and regular antennae movement.
    2. Coordinated swimming and group foraging.
    3. Normal molting and safe sheltering during molts.
    4. Responsive feeding and no prolonged hiding.

    Regular observation is the best way to improve your skill at spotting healthy shrimp. Small daily checks can help you catch subtle changes in behavior before they become serious health issues.

    Evaluating Water Quality Conditions

    Clear water is key for shrimp health. Aim for zero ammonia and nitrite levels. Nitrates should be under 20 ppm, ideally less than 10–20 ppm to avoid stress.

    Match the pH level to your shrimp species. Neocaridina like 6.8–7.5, while Caridina prefer below 7.0. Most species need a GH of 4–7°dGH, but some ghost shrimp need higher GH for their shells.

    Keep the water temperature steady. Neocaridina like 70–76°F, and Caridina prefer 68–75°F. Amano shrimp can handle 65–80°F. Stability is as important as the temperature itself.

    • Use accurate liquid test kits such as API for precise readings.
    • Consider RO/DI water if your tap water has high nitrates or unwanted minerals.
    • Remineralize RO/DI with products like Seachem Equilibrium or Wonder Shell to set GH and trace elements.

    Change water gently to avoid sudden changes. Pre-match new water, add it slowly, or use drip acclimation kits. Small, frequent changes are better than big, infrequent ones.

    Be careful of toxins and metals. Shrimp are sensitive to copper and other heavy metals. Avoid using fertilizers or supplements that contain copper. Too much iron or copper can cause quick deaths and hide true health issues.

    1. Verify all chemicals and plant fertilizers are shrimp-safe before use.
    2. Test for metals if you suspect contamination from plumbing or old substrates.
    3. Keep a log of parameter trends to spot subtle declines in fresh shrimp attributes early.

    Biological maturity is important. Shrimp do well in mature tanks with biofilm and microfauna. Wait a couple of months after cycling a new setup to allow microhabitats to form. This helps shrimp stay healthy by providing natural food and stable bacteria.

    Use these checks as routine shrimp health indicators. Regular testing, careful water changes, and avoiding toxins help keep a stable environment. This ensures shrimp show strong color, activity, and breeding behavior.

    Diagnosis of Disease Symptoms

    Spotting trouble early is key to protecting your shrimp colony. Look for fuzzy or white patches on their exoskeleton. These signs often point to fungal or bacterial infections, which are major shrimp health indicators.

    Dark spots or blackening can mean bacterial necrosis or shell disease. You might also see tissue erosion, discolored patches, or external parasites like copepods and protozoans, such as Vorticella.

    Behavior changes are important signs of shrimp wellness. Look for lethargy, not eating, abnormal swimming, and loss of limbs. These signs show stress or disease. Rapid or repeated failed molts make shrimp soft-shelled and vulnerable.

    Molting problems can indicate mineral deficiency or poor water chemistry. Low GH or calcium, unstable pH, or high ammonia can cause incomplete molts. If many shrimp fail to molt, check KH and GH levels next.

    • Isolation: move affected shrimp to a quarantine tank when possible.
    • Water checks: test ammonia, nitrite, nitrate, pH, KH, and GH and correct any issues.
    • Treatments: use antibacterial or antiparasitic products made for invertebrates and follow manufacturer directions.
    • Avoid copper: do not use copper-based medications on shrimp tanks.
    • Diet: boost minerals and offer high-quality foods to help molting and recovery.

    Detecting healthy shrimp starts with steady observation and prompt action. Quarantine new arrivals before adding them to your display to reduce risk. Regularly monitor shrimp wellness signs so you can act before a minor issue spreads.

    Preventive care is more important than last-minute fixes. Keep parameters stable, provide hiding places for molts, and maintain mature tanks with plenty of biofilm. Buy from reputable suppliers who practice proper quarantine and husbandry to improve your odds when detecting healthy shrimp.

    The Importance of Environment

    Your shrimp need a mature tank to thrive. They benefit from biofilm and microfauna that take weeks to months to form. These layers provide food and help them stay healthy by foraging and staying colorful.

    Use dense plants, driftwood, and leaf litter like Indian almond leaves. These items increase biofilm areas and offer hiding spots for molting shrimp. Look for active grazing and calm molting behavior when checking for healthy shrimp.

    Be careful with tank mates. Avoid big, aggressive fish like barbs or angelfish. Instead, choose small, peaceful fish like ember tetras or dwarf Corydoras. For breeding, shrimp-only tanks are best to protect fry and keep shrimp healthy.

    Don’t overstock your tank. For Neocaridina, keep 10–15 shrimp in a 5-gallon tank. This helps maintain stability and reduces care needs. A 20-gallon tank offers more space for grazing and stable conditions, making it easier to spot healthy shrimp.

    Use gentle filtration and low flow. Sponge filters are great because they offer grazing surfaces and don’t harm babies. Avoid strong filters that stress species like bamboo shrimp. Good filtration keeps water chemistry stable, supporting healthy molting and color.

    • Tank maturity: patience pays off for natural biofilm growth.
    • Plants and cover: boost hiding spots and grazing surfaces.
    • Tank mates: prefer small, nonpredatory fish or shrimp-only setups.
    • Stocking: follow conservative density guidelines for stability.
    • Filtration: choose sponge filters and avoid strong flow.

    Resources like Shrimpery and Shrimply Explained stress the importance of stable environment, controlled water, and matching habitats to species. By focusing on these, you can spot healthy shrimp and keep them well over time.

    Freshness Indicators When Purchasing Shrimp

    When buying live aquarium shrimp, look for simple signs of quality. Check if they move well, have all their antennae and legs, and have firm shells. Also, notice their color and if their eyes are clear.

    Ask the seller about the shrimp’s display time and water conditions. Good local stores or breeders will share details like species, tank temperature, and feeding habits. This info helps you know if the shrimp are healthy before you buy.

    For shrimp meant for eating, check their smell and feel. Fresh ones should feel firm and smell clean, like the sea. Farmed freshwater shrimp should not smell bad. Stay away from slimy or discolored shrimp.

    • Inspect tanks or display buckets for clear water and minimal overcrowding.
    • Check packaging dates and that seafood is kept on ice without signs of thaw-and-refreeze.
    • Verify eyes and shells look intact; head-on shrimp with clear eyes are better preserved.

    When checking for healthy shrimp, ask about antibiotics or copper treatments. Shrimp sold in mixed batches might hide weak ones. Choose sellers who provide care history and let you see the shrimp up close.

    Use these tips to compare quality with price and convenience. A quick check can make you confident in your choice and protect your tank or kitchen.

    Guidelines for Buying from Suppliers

    When you visit a supplier, ask clear questions to help identify healthy shrimp. Find out what species or strain is available and how long they’ve been in the tank. Also, ask for the tank’s temperature, pH, GH, KH, and nitrate levels.

    Look for signs of quality shrimp before you buy. Check if the tanks are clean and the water is clear. Make sure there’s no foul odor. Watch the shrimp for normal movement and feeding.

    Red flags mean walk away. If a seller can’t provide basic water parameters or refuses a close inspection, avoid them. Also, steer clear if tanks have cloudy water or there are frequent dead shrimp.

    Prefer specialist breeders, reputable online vendors, aquarium clubs, and established local fish stores. Brands like Shrimp King and resources from BucePlant are respected. These sources often show transparent handling and strong shrimp health indicators.

    Always quarantine new arrivals for at least two weeks in a separate tank. Use a sponge filter and provide hiding places. Quarantine helps you identify disease early and gives time to acclimate animals.

    Check payment and return policies before you complete the purchase. Ask about live arrival guarantees, health guarantees, and whether replacements or refunds are offered. Clear policies help protect you and highlight sellers who stand behind their stock.

    • Key questions: species/strain, time in tank, tank parameters, quarantine practice, diet, past use of copper or incompatible meds.
    • Red flags: missing parameters, foul tanks, mass-molting, frequent deaths, species mislabeling, refusal to allow inspection.
    • Preferred sources: specialist breeders, aquarium clubs, reputable online vendors, established local stores with transparent care.
    • Quarantine: two weeks minimum, sponge filter, hiding places.
    • Payment and returns: live arrival policies, health guarantees, replacements or refunds.

    Use these steps to better identify healthy shrimp at purchase. Spotting clear signs of quality shrimp and knowing shrimp health indicators protects your tank and helps your colony thrive.

    Ethical Considerations in Shrimp Sourcing

    When picking shrimp for your tank, choose captive-bred ones if you can. They help protect wild shrimp and usually fit better into aquarium life. Look for sellers who share how they breed their shrimp. This way, you can check if the shrimp are healthy before buying.

    Ask breeders about their grading and inbreeding. High-grade Neocaridina strains like Sakura and Fire Red come from careful breeding. Good breeders will tell you about their stable lines and what to expect from their shrimp. This helps you spot healthy shrimp and keep the strain pure.

    Avoid sellers who overcrowd their animals or use harsh treatments like copper dips. These methods can hide problems and harm the shrimp’s long-term health. Look for vendors who are open about their treatments and let you see how the shrimp behave. This is a big part of knowing if they are healthy.

    • Seek community-vetted breeders and recommendations from aquarium societies.
    • Choose sellers who provide tank history, water parameters, and care notes.
    • Refuse shrimp from sources that lack traceability or hide husbandry details.

    Think about how sales and hobby habits affect shrimp genetics. Mixing different color strains can lead to unpredictable results. If you want to keep a certain strain, buy from breeders who breed responsibly. This way, you can better spot healthy shrimp and know how to keep them healthy over time.

    Consider the welfare of shrimp beyond just buying them. Stress from transport, bad acclimation, and escapes harm shrimp and local ecosystems. Try to prevent escapes, and support vendors who focus on mature tank setups for Caridina and Neocaridina.

    Make choices that fit your ethics and what you want to achieve in caring for your shrimp. By choosing traceable, humanely raised shrimp with honest breeding records, you’ll have clearer signs of their health. This will also give you more confidence in knowing if shrimp are healthy before bringing them home.

    Transporting Your Shrimp Safely

    Short trips with shrimp require simple steps. Use sealed containers or clear plastic bags with air. Keep bags upright and steady. Limit light and temperature changes to protect your shrimp.

    For long trips, choose vendors with insulated packaging and temperature control. Use oxygenated bags or containers to keep shrimp healthy. Always ask for tracking and live-arrival guarantees before paying.

    Reduce stress during transport. Avoid direct sunlight and sudden temperature changes. If driving, keep the container stable and out of the sun. Handle shrimp gently and keep the carrier dark to calm them.

    • Keep transit times short when you can.
    • Check for fresh shrimp attributes on arrival: clear eyes, intact shells, and active movement.
    • Note shrimp vitality markers like strong antennae action and steady breathing.

    Quarantine on arrival to protect your main tank. Move shrimp into a quarantine tank or isolation container right away. Do not pour bag water directly into display water. Use drip acclimation and match temperatures before mixing to preserve the signs of healthy shrimp.

    Special cases need extra care. Filter-feeding species such as bamboo shrimp can weaken if shipped long without food. Ask the vendor about pre-shipment feeding and packing times so you can plan a safe arrival.

    Hobbyists often use drip acclimation kits and sponge filters in quarantine. These tools smooth transitions and protect babies while maintaining shrimp vitality markers during the first critical hours.

    Proper Acclimatization Techniques

    Acclimation is key because shrimp don’t like sudden changes in water. You keep them safe by controlling temperature, pH, and other factors. This way, you avoid stress and death.

    First, get the water details from your vendor. Try to match your tank’s conditions before adding shrimp. This helps your shrimp stay healthy and reduces stress.

    Drip acclimation is best for most transfers. You’ll need airline tubing and a clamp. Let water drip slowly into the quarantine tank. Do this until the water level doubles or triples in 1–2 hours.

    For close parameters, use bulk acclimation. Float the bag in the tank for 15–30 minutes. Then, add tank water slowly over 30–60 minutes before releasing.

    • Match parameters first to reduce shock.
    • Drip acclimation for sensitive species like Caridina and bamboo shrimp.
    • Bulk acclimation when differences are minimal.

    Delicate species need extra care. For Caridina and bamboo shrimp, use special products to adjust GH and trace elements. Slow changes help you spot health issues early.

    After acclimation, provide hiding spots for molting. Watch for normal behavior and clear shells. These signs show your shrimp are adapting well. Avoid copper treatments and do small water changes first.

    Use the acclimation time to learn about healthy shrimp. Look for normal eating, movement, and clear shells. These signs help you quickly spot healthy shrimp.

    Conclusion: Your Guide to Healthy Shrimp

    When buying shrimp, use a simple checklist to spot healthy ones. First, check the species and strain. Look at the exoskeleton, appendages, and color for any damage or odd colors.

    Watch how they move. Healthy shrimp should be active and not hiding. Also, check the water quality. It should have no ammonia or nitrite, low nitrates, and the right pH and hardness levels.

    Ask about the shrimp’s tank history and how they plan to quarantine them. Make sure to transport them carefully and acclimate them slowly.

    Remember, different shrimp species have unique needs. Cherry shrimp are good for beginners because they’re hardy. Caridina species need a mature tank and strict water control. Amano and bamboo shrimp have special roles and needs.

    Prevention is key. Keep the environment stable with mature biofilm and the right tank mates. Use reliable test kits and RO/DI water to control the water. Slow acclimation and careful transport also help keep shrimp healthy.

    By following this guide, you can spot healthy shrimp before buying. Focus on their physical, behavioral, and environmental signs. This way, you can keep them happy and healthy in your aquarium.

    FAQ

    What should I look for first when buying freshwater shrimp?

    First, confirm the shrimp species or strain. Ask the seller about the tank’s water parameters. Look at how the shrimp move and their physical condition.

    Check if the water is clear and how long the shrimp have been on display. This helps ensure they are healthy.

    How do species differences affect care and how can I tell which species I’m buying?

    Species determine the ideal water conditions and diet. Neocaridina (cherry/dwarf) are hardy and colorful. Caridina (bee/crystal) need softer, more acidic water.

    Amano shrimp are algae-eaters. Ghost shrimp may need higher GH. Bamboo shrimp filter feed and need gentle flow. Compare body shape and size to identify species.

    What physical characteristics indicate healthy shrimp?

    Healthy shrimp have a smooth, firm exoskeleton. They should have even coloration and complete appendages. Their eyes should be bright and clear.

    Pregnant females have evenly spaced eggs under their abdomen. This shows they are healthy.

    What behavioral signs show shrimp are healthy or stressed?

    Healthy shrimp graze and move well. They have responsive antennae. Stress signs include hiding, lethargy, and erratic swimming.

    They may also gasp at the surface or refuse to feed. These are signs of stress.

    What water quality parameters are critical for shrimp health?

    Keep ammonia and nitrite levels at 0 ppm. Nitrates should be under 10–20 ppm. Match pH to the species’ needs.

    How do I recognize disease or parasite signs?

    Look for fuzzy growths, dark patches, and tissue erosion. Missing limbs and abnormal swimming are also signs. Persistent lethargy is a red flag.

    External parasites or protozoans may appear as spots or white coatings. Quick decline after purchase suggests stress or infection.

    What environmental factors matter most for keeping shrimp healthy?

    Tank maturity and stable water chemistry are key. Use gentle filtration and provide hiding places. Choose tank mates carefully and feed a balanced diet.

    Avoid copper-based products. Regular small water changes help maintain stability.

    How can I tell if shrimp sold for food are fresh?

    Fresh market shrimp have firm, translucent flesh. They should smell clean and have intact eyes and shells. Avoid slimy or discolored shrimp.

    Ensure they were properly refrigerated or kept on ice.

    What should I ask suppliers before buying shrimp?

    Ask about the species, display tank conditions, and water parameters. Inquire about quarantine practices and feeding. Check if copper or antibiotics were used.

    Request a health guarantee or live-arrival policy if available.

    What ethical sourcing questions are important?

    Prefer captive-bred shrimp to reduce wild population pressure. Ask about breeder practices and inbreeding. Choose vendors who disclose origin and husbandry.

    Look for recommendations from the hobby community.

    How should shrimp be transported to minimize stress?

    For short trips, use sealed containers with minimal light and stable temperatures. For long-distance shipping, choose reputable vendors with insulated packaging.

    Ensure oxygenated bags and live-arrival guarantees. Avoid direct sunlight and temperature extremes.

    What is the best acclimation method when introducing shrimp to your tank?

    Drip acclimation is safest. Slowly add tank water to the quarantine container. Start with 2–4 drops per second until the volume doubles or triples over 1–2 hours.

    If parameters are close, float the sealed bag to equalize temperature for 15–30 minutes. Then, add small amounts of tank water over 30–60 minutes. Never pour bag water directly into your tank.

    How long should I quarantine new shrimp?

    Quarantine new shrimp for at least two weeks. Use a separate tank with a sponge filter and hiding places. Observe for disease and molting issues before introducing them to your display tank.

    What are common molting problems and how do I prevent them?

    Incomplete molts or soft shells often result from low minerals (GH) or unstable water chemistry. Prevent problems by maintaining stable parameters and ensuring adequate GH/calcium. Provide hiding spots for molts and feed a mineral-rich diet.

    What tank mates are safe with shrimp and which should be avoided?

    Small peaceful fish like ember tetras or tiny Corydoras can coexist with shrimp. Avoid larger or aggressive species. For breeding, shrimp-only tanks are best for shrimplets.

    What are red flags at a store or vendor?

    Red flags include sellers who cannot provide basic water parameters. Avoid crowded or cloudy tanks and foul odors. Visible mass molting or dead shrimp are also red flags.

    Be wary of vendors who disclose use of copper dips or excessive antibiotics. Refusal to allow close inspection is a red flag.

    How many shrimp should I stock and what filtration is best?

    Do not overstock. A common guideline is 10–15 Neocaridina per 5 gallons. Use gentle filtration like sponge filters. They provide surface area for biofilm and won’t suck up babies.

    Adjust flow for filter-feeders like bamboo shrimp so they can fan comfortably.

    Are RO/DI and remineralization necessary for shrimp?

    RO/DI is highly recommended for precise control of tap water. Always use appropriate remineralizers to restore GH and essential trace elements. Tailor to your species’ needs.

    What should I do if I receive sick or dead shrimp from an online vendor?

    Contact the vendor immediately with photos and order details. Check their live-arrival guarantee or refund policy. Quarantine any survivors and test and adjust parameters.

    Avoid adding them to your display until assessed. Reputable vendors will offer replacements or refunds.

  • The Risks of Temperature Fluctuations in Small Living Spaces

    The Risks of Temperature Fluctuations in Small Living Spaces

    Living in a small space like a studio or micro-unit can be risky. The temperature can change quickly because of poor insulation. Research by June Teare et al. (2020) shows that these places can be up to 4°C warmer than outside.

    The World Health Organization’s Housing and Health Guidelines (2018) warn about the dangers of cold temperatures. They say it can lead to more illnesses and even death. WHO suggests keeping the temperature at least 18 °C in cooler climates.

    Things like air leaks and single-pane windows can cause temperature issues. Also, appliances that make heat can make it harder to keep a steady temperature. Limited money can make it tough to get good heating and cooling.

    Keeping a steady temperature is important for comfort and health. It can help prevent mold and damage to your home. It also helps you save money and stay healthy.

    Understanding the Importance of Maintaining Constant Temp

    A cozy, modern living room setting that illustrates the concept of maintaining a constant temperature. In the foreground, a sleek digital thermostat displays a steady temperature reading. In the middle, comfortable furniture arranged around a stylish coffee table with a steaming cup of tea, hinting at a warm atmosphere. There are soft pillows and a cozy blanket draped over the sofa, enhancing the inviting feel. In the background, large windows allow soft, natural light to filter in, creating a bright and airy environment. Lush green plants are strategically placed to symbolize air circulation and comfort. The overall mood is warm, serene, and balanced, reflecting the importance of a stable indoor climate. The image should have a slight soft focus, emphasizing a tranquil home environment devoid of clutter or distractions.

    Your body works hardest when indoor conditions swing wildly. Cold air causes blood vessels to constrict, which raises blood pressure and stresses the heart. You face higher respiratory and cardiovascular risks when temperatures dip below about 18 °C, according to World Health Organization guidance.

    Warm indoor conditions bring different hazards. High apparent temperatures and elevated heat index values increase the chance of heat exhaustion, heat stroke, and poor sleep quality. Research that uses heat index thresholds shows clear rises in heat-related illness as indoor apparent temperature moves from caution to extreme danger.

    Your home shapes how outdoor weather affects you. Small dwellings with weak insulation amplify swings and limit your ability to adapt. That makes temperature regulation harder and raises the likelihood of sudden cold or heat exposure.

    Practical steps cut health risks and save money over time. Insulation, efficient heating and cooling systems, and balanced ventilation support a stable temperature and reduce energy waste. The WHO links warm, well-insulated homes to lower blood pressure and fewer hospital visits.

    • Focus on maintaining constant temp through upgrades that improve envelope performance.
    • Use smart controls to support optimal temperature management while avoiding rapid setpoint changes.
    • Prioritize ventilation that preserves indoor comfort without wasting heat or cooling energy.

    Good temperature regulation protects your circulation, breathing, and sleep. It lowers long-term health risks tied to cold or heat and helps you achieve steady indoor comfort in compact living spaces.

    The Health Implications of Frequent Temperature Changes

    A visually striking illustration depicting the health risks of temperature swings in small living spaces. In the foreground, a concerned individual dressed in professional attire is seated at a desk, looking at a thermometer with a worried expression, highlighting the personal impact of temperature fluctuations. The middle ground features a small, cluttered room with a visible air conditioning unit and radiators, showcasing the extremes of hot and cold. In the background, a window reveals dramatic weather changes outside—sunshine on one side and storm clouds on the other—symbolizing rapid temperature shifts. Soft, ambient lighting casts a warm glow on the indoor scene, contrasting with the cooler tones visible through the window, creating a tense yet informative atmosphere.

    Swings in indoor air temperature can affect you more than you think. Sudden cold can make airways inflamed, worsen breathing issues, and increase respiratory infections. The World Health Organization says keeping bedrooms at 18–21 °C helps those at risk breathe better.

    Temperature drops also strain the heart. Studies in the UK and Japan show a one-degree drop in indoor temperature can raise blood pressure. Rooms below 16–18 °C are risky for heart disease or high blood pressure patients.

    Some groups are more vulnerable to temperature changes. Older adults, young children, pregnant people, and those with chronic health issues need a stable temperature. This helps prevent health problems.

    Cold homes can also harm mental health. Insulation or heating upgrades can reduce colds and wheezing, and improve mood. A stable indoor climate is key for mental wellbeing.

    But hot indoor conditions are harmful too. High heat can disrupt sleep, increase heart strain, and raise dehydration and heat stroke risks. Low-cost homes often have unsafe temperatures in summer, showing the need for simple cooling measures.

    • Maintain a consistent temperature at night to support respiratory health.
    • Use basic temperature control tools—thermostats, fans, or portable heaters—to avoid rapid swings.
    • Monitor rooms used by vulnerable household members and adjust settings to reduce health risks of temperature swings.

    The Financial Consequences of Temperature Inefficiency

    Every month, you pay for not keeping your temperature right. If your heating or cooling isn’t efficient, your HVAC works harder. This means higher energy bills and shorter equipment life.

    In small homes, bad insulation leads to more fuel use in winter and more electricity in summer. The World Health Organization has shown that simple upgrades can save money on health costs and bills.

    • Direct costs: higher monthly energy costs from excessive heating and cooling.
    • Hidden costs: condensation, mold remediation, and extra wear on appliances.
    • Health savings: better temperature efficiency can reduce hospital visits tied to cold homes.

    Investing in insulation, smart thermostats, or efficient furnaces has costs upfront. You’ll spend money now to save on bills later. How quickly you get your money back depends on your location, the condition of your home, and local energy prices.

    Low-income families often live in the least efficient homes. Without help, the cost of upgrades seems too high. This can make it hard for them to afford better energy efficiency, leading to higher bills.

    Keeping your temperature stable is good for your wallet and your home. Better temperature control means your systems don’t work as hard. This reduces repair costs and improves comfort over time.

    When deciding on upgrades, think about both immediate and long-term savings. Consider the cost of repairs and health benefits. This helps you make choices that balance your budget and comfort.

    The Impact on Your Home Environment

    Improving insulation and sealing air leaks helps keep your home warm in winter and cool in summer. This reduces energy waste and makes your home more comfortable.

    But, tighter homes can also mean less air flow. Without enough air, humidity builds up. This can cause mold, which is bad for your health.

    For good temperature control, you need both insulation and air flow. ASHRAE says balanced ventilation is key. It helps keep pollutants and moisture in check. Use systems that ensure your home stays comfortable without bad air.

    Choosing the right materials and hiring skilled contractors is important. Wrong insulation or old asbestos can be dangerous. Always go for safe, non-toxic options and certified professionals.

    Every room in your home can have its own temperature. Sunlight, appliances, and cooking can make some rooms hot. And if windows aren’t sealed well, heat can escape. These issues make it hard to control the temperature.

    Good sleep needs a stable temperature. A bedroom around 65–68 °F is best for deep sleep. But, if the temperature keeps changing, it can disrupt your sleep.

    • Address ventilation when you improve insulation to preserve temperature maintenance and air quality.
    • Inspect window and door performance to reduce unwanted heat gain or loss and maintain a stable temperature.
    • Use safe materials and licensed installers to protect health while improving temperature regulation.

    Strategies for Maintaining a Steady Temperature

    Improving insulation in walls, ceilings, and floors can help. Add weatherstripping around doors and windows. Consider upgrading to double- or triple-glazed low-E windows to limit heat loss.

    Small upgrades can cut energy use and help keep the temperature steady.

    Pair insulation with balanced ventilation to avoid damp and mold. Use natural airing or a mechanical system sized for your space. ASHRAE 62 and WHO guidance stress that ventilation must match weatherization to preserve indoor air quality and support temperature control.

    Think about thermal zoning to limit hotspots. Ceiling fans, portable fans, or zoning on an HVAC system will move air and even out differences across rooms. Circulating air prevents cycling that wastes energy and improves optimal temperature management.

    Programmed thermostats or smart thermostats cut swings in setpoint and stop wide variations that force HVAC systems to run harder. Small, consistent setpoint changes are more efficient than large shifts when you are controlling temperature fluctuations.

    • Use low-cost fixes such as door draft stoppers, thermal curtains, reflective shades in summer, and area rugs to add floor insulation.
    • Try targeted measures like safe electric space heaters in cold snaps and passive shading with awnings or operable blinds in heat waves.
    • Replace or seal gaps around frames and add rugs on cooler floor surfaces to stabilize indoor temperatures.

    Prioritize passive cooling and shading before heavy air-conditioning for heat events. That approach lowers emissions and can keep you comfortable without overreliance on mechanical systems.

    Keep materials and installation safe. Use non-toxic insulation products and hire qualified installers when needed. Regular HVAC maintenance reduces inefficiencies and limits short cycling, which supports optimal temperature management over time.

    Recognizing Signs of Temperature Instability

    Spotting temperature issues is easy with clear signs. If people often say it’s too hot or too cold, your temperature control is off. Rooms that don’t get to the set temperature on the thermostat might have HVAC problems or leaks.

    Physical signs are also important. Look for condensation on windows, peeling paint, cracks in walls, damp spots, or mold. These signs mean your home’s temperature isn’t staying steady.

    • Check daily swings. Big changes in indoor temperature compared to outside data show instability.
    • Monitor heat index. If indoor heat index stays in danger ranges in summer, you need better temperature control.
    • Watch HVAC cycles. Short-cycling or uneven heating and cooling cycles mean mechanical stress and poor control.

    Health signs are also clues. More respiratory problems, wheezing, morning phlegm, high blood pressure, sleep issues, or feeling down might be linked to unstable temperatures.

    Set clear triggers for repairs. If bedroom temperatures drop too low in cold months or if indoor temperatures get too high, fix the issue. Follow WHO and local health advice to keep temperatures steady.

    Make a checklist to track problems. Record daily temperature readings, note damp or mold, log complaints, and test HVAC in different rooms. This helps you find and fix temperature issues in your home.

    Seasonal Challenges to Maintaining Temperature

    Winter is tough for small homes to stay warm. In cooler areas, homes under 18 °C can harm heart and lungs. To keep bedrooms warm, improve insulation, use better heaters, and seal drafts.

    Small changes can make a big difference. Add insulation to lofts and walls, service your heaters, and use draught excluders. These steps cut energy waste and keep your home cozy without high heat.

    Summer brings its own set of challenges. Small homes can get too hot, making indoor air feel even warmer. To fight this, use shading, reflective window films, and roof insulation to block the sun’s heat.

    Good ventilation is key in summer. Open windows at night, use cross-ventilation, and ceiling fans to cool down. Fans and natural methods can help you stay cool without expensive air-conditioning.

    Climate change makes summers hotter and winters colder. It’s more important than ever to make your home comfortable in all seasons. Upgrading materials and design is a smart investment for the future.

    • Policy and planning should favor thermal upgrades to informal and older housing.
    • Subsidies for insulation and heating programs help households meet safe indoor thresholds.
    • Building codes that require thermal performance support long-term stable temperature in communities.

    By taking practical steps and planning, you can control temperature all year. Small changes in your home and policy can lead to a healthier living space.

    The Role of Humidity in Temperature Control

    Your comfort isn’t just about the temperature. Humidity plays a big role too. When it’s too humid, sweat doesn’t cool you down as well. This makes the heat feel worse.

    In winter, low humidity can make you feel colder. It also dries out your skin and throat.

    When humidity and temperature don’t match, health problems can arise. Too much moisture inside can cause mold. The World Health Organization says damp homes lead to more asthma and respiratory infections.

    It’s important to keep humidity levels right after renovations. This prevents moisture from getting trapped.

    The ideal humidity is between 30–60 percent. Experts often say 40–60 percent is best. In cold places, you might need it lower to stop windows from fogging up.

    Researchers use humidity and temperature together to figure out how hot it really feels. This helps them understand the health risks of heat.

    To control temperature and humidity better, try these steps:

    • Use dehumidifiers in humid areas and humidifiers in dry ones.
    • Open windows when cooking or showering to get rid of extra moisture.
    • Think about using mechanical ventilation with heat recovery to change air without losing too much heat.

    When you upgrade your building, make sure it’s not too airtight. Insulation and sealing save energy but can trap moisture if there’s not enough air. Follow ventilation rules like ASHRAE 62 and check humidity after making changes. This keeps the temperature steady and prevents moisture problems.

    Keep a small hygrometer handy. It helps you track humidity and temperature. This way, you can adjust things to keep your space comfortable.

    Building a Comfortable Small Living Space

    To make small living spaces cozy, start with a simple checklist. Check insulation in walls, ceilings, and floors. Also, inspect windows and doors for leaks and seals. Look for mold or dampness and consider the type of floor you have.

    Focus on quick fixes that make a big difference. Seal air leaks and add weatherstripping first. Then, upgrade insulation while keeping ventilation open. Replace old windows with new ones and use shading or reflective films in summer.

    If you’re on a tight budget, try thermal curtains and door draft stoppers. Use area rugs and portable fans for cross-flow. Adjust your clothes and bedding to keep the temperature steady. Regularly maintain your HVAC system and use smart thermostats or loggers for better control.

    Also, look into community and policy options to help more people. Apply for retrofit subsidies and join local insulation projects. Advocate for stronger building codes to make homes more energy-efficient. This way, you can keep your home comfortable and sustainable.

    FAQ

    What makes small dwellings specially prone to temperature fluctuations?

    Small homes, like studio apartments, have less thermal mass and poor insulation. This makes it hard to keep a steady temperature. The close living quarters and appliances add to the problem. Single-pane windows and gaps also play a role.

    Research by June Teare et al. (2020) shows big differences in indoor and outdoor temperatures. The building’s structure affects how weather impacts health. This makes it tough to control the temperature in small homes.

    Why is maintaining a consistent temperature important for health?

    Keeping a stable temperature is key for health. It reduces stress on the heart and lungs. Cold can raise blood pressure and worsen breathing problems.

    WHO’s Housing and Health Guidelines (2018) link cold temperatures with health issues. On the other hand, too much heat can cause heat exhaustion and disrupt sleep.

    What indoor temperature targets does WHO recommend?

    WHO suggests a minimum indoor temperature of about 18 °C. This is for temperate and cold climates. People who are more vulnerable might need a bit warmer bedrooms.

    Evidence shows that temperatures below 18 °C can harm health. Warming up cold homes can improve health, like lowering blood pressure and easing breathing symptoms.

    How much can indoor temperatures differ from outdoor temperatures in low-cost housing?

    Studies show that low-cost homes often have indoor temperatures 4 °C higher than outside. This is because the building traps heat. June Teare et al. (2020) found that things like cement floors and poor glazing affect indoor heat.

    This makes the risk of heat-related health issues higher in summer.

    What are the main causes of temperature instability in small homes?

    Temperature instability in small homes comes from several sources. Lack of insulation and air leaks are big problems. Single-pane windows and doors also let heat escape.

    Heat from appliances and limited or unbalanced ventilation add to the issue. Socioeconomic factors can limit access to efficient heating and cooling.

    How do temperature swings affect sleep and mental health?

    Temperature swings can disrupt sleep and reduce its quality. Bedrooms that are too warm or have big temperature swings can make it hard to fall asleep. Keeping bedrooms around 65–68 °F (18–20 °C) is recommended for better sleep.

    Cold, damp homes can also affect mental health. Insulation can improve mental wellbeing, as shown in several studies.

    Which populations are most vulnerable to unstable indoor temperatures?

    Older adults, young children, and people with chronic health issues are most at risk. Pregnant women, those with limited mobility, and people with cognitive impairment are also vulnerable. WHO and June Teare et al. highlight these groups’ increased risk.

    What are the direct financial consequences of poor temperature control?

    Poor temperature control means higher energy bills. Small homes need more energy to stay comfortable. WHO says insulation and efficient heating can save money and improve health.

    But, the upfront costs of retrofits can be a barrier for low-income households.

    Are there hidden costs of temperature instability?

    Yes, there are hidden costs. Temperature swings can lead to mold and health issues. HVAC short-cycling shortens equipment life and increases maintenance costs.

    Structural damage from dampness and temperature changes can also raise repair bills.

    What practical passive measures reduce temperature swings in a small space?

    Improving insulation and adding airtightness can help. Double- or triple-glazed windows and sealing gaps are also effective. Reflective shades or external shading can cool homes in summer.

    Flooring choices and rugs can reduce heat loss. Roof insulation helps in both summer and winter.

    How should ventilation be handled when sealing and insulating?

    When improving insulation and airtightness, ensure proper ventilation. This prevents moisture buildup and keeps air quality good. Use mechanical ventilation with heat recovery or natural ventilation to exchange air without losing too much heat.

    Follow standards like ASHRAE 62 and WHO guidance to balance temperature control with preventing dampness.

    What low-cost steps can you take right away to improve thermal comfort?

    Weatherstripping, door draft stoppers, and thermal curtains can help. Area rugs and reflective window films or blinds also work. Using portable fans and clothing can control temperature without high energy costs.

    How can technology help maintain a stable temperature?

    Programmable or smart thermostats keep temperatures steady. They reduce energy use and avoid short-cycling. Smart controls can schedule heating or cooling and work with sensors for better energy management.

    What should you monitor to detect temperature instability?

    Watch for big temperature swings and indoor heat index readings. Check for temperatures below 18 °C in winter and humidity levels. Look for signs like condensation, damp patches, peeling paint, or mold.

    How does humidity interact with temperature and health?

    Humidity affects how hot or cold we feel. High humidity makes heat feel worse, while low humidity makes it feel colder. It can also cause health issues like asthma and infections.

    Keep humidity between 30–60% with ventilation, dehumidifiers, or humidifiers as needed.

    What summer-specific strategies reduce indoor heat without heavy air-conditioning?

    Use shading, reflective window treatments, and roof insulation. Night purging and cross-ventilation help too. Ceiling or portable fans can also lower the apparent temperature.

    Focus on passive cooling and shading to reduce air-conditioning use.

    What winter-specific actions help maintain a safe indoor temperature?

    Seal drafts and add insulation to walls, ceilings, and floors. Improve window glazing and ensure heating systems are efficient. Keep bedroom temperatures at least about 18 °C.

    Use thermostatic controls to avoid big temperature swings that waste energy and stress HVAC equipment.

    How do insulation and heating retrofits affect long-term costs and health?

    Retrofitting insulation and heating systems has upfront costs. But, they can lower energy bills and health expenses over time. WHO cites national programs that have improved health and saved money, making retrofits worthwhile.

    What equity considerations should be addressed when improving thermal performance?

    Low-income households often live in poorly insulated homes. They may not have the money for retrofits. Subsidies and targeted programs are needed to help them.

    Public investment in affordable weatherization and energy-efficient heating is key to protecting vulnerable populations.

    What are safe practices and risks when choosing insulation and retrofit materials?

    Choose certified, non-toxic insulation materials and hire qualified installers. Poor workmanship or hazardous materials can harm health. After retrofitting, ensure balanced ventilation to avoid moisture buildup.

    Regular maintenance of installed systems reduces risks and preserves performance.

    How can you prioritize interventions in a limited budget?

    Start with airtightness and add thermal curtains and rugs. Improve ventilation where needed. Then, focus on ceiling/roof insulation and window upgrades.

    Small changes can improve comfort and energy savings while planning bigger retrofits. Look for local subsidies or community programs to help with costs.

    When should you seek professional assessment or action?

    Get professional help if you notice persistent cold temperatures or repeated heat index danger readings. Visible mold or dampness, HVAC short-cycling, or major insulation or ventilation upgrades also require expert advice.

    Professionals can assess your home, recommend solutions, and ensure safe installation.

    What simple monitoring helps maintain optimal temperature management?

    Use basic thermometers, humidity meters, or low-cost data loggers to track indoor conditions. Smart thermostats with sensors and simple heat-index calculators help identify harmful conditions.

    They let you evaluate the effectiveness of insulation, ventilation, and heating or cooling strategies for consistent temperature maintenance.

  • How to Prevent Oily Surface Film in Small Low-Flow Aquariums

    How to Prevent Oily Surface Film in Small Low-Flow Aquariums

    A small, low-flow aquarium is a great way to show off plants and keep fish healthy. But, a thin, oily surface film can quickly form. It blocks gas exchange, dims light, and stresses your fish and plants. This section explains why stopping this film is key for clear water and healthy life in your tank.

    This guide offers easy tips to control surface film. You’ll learn how to improve water movement, use skimmers, adjust filters, and pick live plants that break down waste. The aim is simple: keep your water clear, oxygen levels up, and prevent film buildup to protect your fish and plants.

    Later, we’ll cover routine care, feeding tips, chemical solutions, and when to call a pro. For now, start with simple steps at home. Begin effective anti-film treatment and safeguard your aquarium’s health.

    Understanding Surface Film

    An aquarium scene depicting oily surface film prevention, focusing on a small low-flow aquarium. In the foreground, a close-up of clear water with a slight sheen disrupted by gentle ripples, showcasing effective surface agitation. In the middle ground, a variety of aquatic plants, such as Anubias and Java Fern, are vibrant and healthy, with bubbles rising from a small air stone. The background features a serene aquarium setting with soft ambient lighting casting delicate reflections on the glass. Ensure the tank substrate and decorations are visible, emphasizing a well-maintained environment. The mood is calm and informative, illustrating the concept of surface film prevention effectively, with no distractions or text in the scene.

    Surface film is a thin layer that forms on the water’s surface. It’s made from things like yeasts, bacteria, algae, proteins, fats, dust, pollen, and tiny particles. This layer traps materials that are lighter than water, making it visible and easy to skim off.

    Surface tension keeps most particles from sinking. But, organic residues collect and help microbes grow. This includes beneficial bacteria that break down fish waste, but can also contribute to the film when there’s too much protein and fat.

    The film hinders gas exchange between water and air. It slows down the transfer of carbon dioxide and oxygen. Oxygen bubbles from plants can get trapped under the scum. Thick films also block sunlight, reducing photosynthesis in planted tanks and stressing the tank’s inhabitants.

    Low-flow aquariums are more likely to have these issues. Calm water and little movement allow biofilms to form and stick. So, preventing surface film is key to maintaining healthy oxygen levels and clear water in your tank.

    • Recognize the components that cause the film.
    • Understand how surface protection and mechanical removal help.
    • Consider biological balance as part of surface film prevention.

    Identifying Surface Film Issues

    A close-up view of a small, low-flow aquarium displaying a noticeable surface film, emphasizing the oily sheen on the water’s surface. In the foreground, droplets of water gather on the glass, highlighting the contrast between the clear and contaminated areas. The middle ground features aquatic plants gently swaying and small fish swimming just below the surface, providing a vibrant splash of color against the dull film. In the background, warm, natural light filters through, casting gentle reflections and creating a calm atmosphere. The angle is slightly tilted downward, focusing on where the film meets the water. The overall mood is one of concern and observation, perfect for illustrating the issue of surface film in aquariums.

    Look for a thin, shiny or oily-looking layer along the waterline. A silvery-white bacterial sheen often appears first. Greenish patches mean algae are beginning to dominate. If the layer closes quickly after you disturb it, that points to a protein or fat film.

    Watch your fish and plants for clues. Fish may show reduced activity or gasping at the surface when oxygen exchange is limited. Plants can trap gas bubbles under the film or slow their growth from poor light and gas transfer.

    Inspect the surface around the whole tank perimeter. Check for uneaten food, decaying plant leaves, and dust that collect at the top. Test dissolved oxygen and CO2 if you can, as low oxygen often matches visible film and stressed fish.

    • Common causes: overfeeding, low-quality pellets or flakes, thawing frozen foods that leak oils.
    • Other causes: decaying plant matter, overstocking, and weak surface circulation from low-flow setups.
    • Quick manual test: poke the film. Bacterial biofilm may break apart; oily films resist and close back fast.

    Use these observations to guide surface film control steps. Prioritize simple checks like feeding habits and surface flow before moving to chemical treatments. Early detection helps with film buildup prevention and speeds surface film elimination when needed.

    Choosing the Right Aquarium Setup

    Choose a tank that fits your needs. Rimless tanks look modern, but framed ones offer more spots for skimmers. Ensure the tank’s layout allows for skimmer heads or outflows to prevent surface film.

    Think about outlet hardware that boosts surface exchange. Upward-directed outlet pipes or lily pipes increase agitation. The Aquario Neo premium acrylic outlet pipe is a great example. It expels air into the tank to break oil films without sending bubbles to a canister filter.

    • Standalone skimmers: Azoo Skim 250 and ADA Vuppa-I work as independent units or sole filters in nano tanks.
    • Integrated skimmers: May save space but check compatibility with your filter’s flow rate and mounting style.

    Standalone units let you run the skimmer on a schedule. Timed operation reduces CO2 loss while providing film prevention during key periods.

    Focus on materials and mounts. Hang-on or suction-cup-mounted skimmers must fit securely and avoid scratching glass. Choose adjustable mounts that accommodate evaporation and slight shifts in water level for continued surface protection.

    1. Verify flow requirements: confirm the minimum pump capacity for any external-filter skimmer.
    2. Avoid undersized pumps: insufficient flow keeps the skimmer from drawing off surface water effectively.
    3. Match skimmer throat size to tank surface area for best results with surface film prevention.

    When planning equipment layout, balance looks with function. Proper placement of skimmers, outlet pipes, and pumps gives reliable surface protection. It also keeps the tank tidy and easy to maintain.

    Adjusting Water Parameters

    Keep the water clean by changing it often. Small, frequent changes help break down proteins and fats. This makes it harder for surface biofilms to grow.

    Be careful with CO2 and oxygen levels. If you use a protein skimmer or increase agitation, CO2 might drop. Plants might need more CO2 to stay healthy.

    Watch how much nutrients you add. Too much nitrate and phosphate can lead to algae. Avoid too much iron, as it can cause iron bacteria. Too much carbon can also make scum worse.

    Check the water’s basic chemistry often. Test for ammonia, nitrite, nitrate, and phosphate regularly. If you can, measure oxygen levels to see if the film is affecting gas exchange.

    Don’t overstock your tank. Make sure your filtration and maintenance can handle the load. A balanced ecosystem is key to managing surface films long-term.

    • Do regular small water changes to lower dissolved organics.
    • Adjust CO2 dosing when you add surface agitation or skimming.
    • Limit iron and liquid carbon if you spot increased surface scum.
    • Test oxygen and nutrients to guide your maintenance choices.

    Enhancing Filtration Methods

    Effective filtration is key to preventing surface film. Skimmers pull the top water layer into a housing. There, a sponge or cartridge catches proteins, fats, dust, and tiny particles. This step boosts oxygen exchange and stops film buildup early.

    Choose the right skimmer for your setup. Floating intake skimmers adjust to water level changes. Outlet-mounted venturi skimmers, like some from Aquario, introduce gentle flow and catch surface contaminants.

    • External-filter inflows with integrated skimmers offer neat installation and steady surface film control.
    • Standalone units such as Azoo Skim 250 or ADA Vuppa-I provide powerful, dedicated skimming for small low-flow tanks.

    When shopping, look for important features. Adjustable intake height lets you fine-tune collection at the surface. Auto-adjusting floats keep performance steady despite evaporation. Quiet operation with low-watt pumps helps maintain a calm tank atmosphere.

    Material choices are key for longevity. Corrosion-resistant parts like ABS, stainless steel, and acrylic last longer. Tool-free impeller access makes maintenance easier. Switchable outlets that let you choose a duckbill or rain-barrel flow mode add versatility.

    Integration is vital for reliable performance. Match pump capacity to skimmer requirements for steady suction and flow. Outlet-mounted skimmers expel air back into the tank, reducing strain on canister systems.

    Think about maintenance and planted-tank impacts. Skimming can remove CO2 from the water. If you dose CO2, balance skimmer runtime with CO2 delivery or use a timer to protect plants while controlling film.

    Anti-film surface treatment works best with good hardware and regular care. Combining skimming, proper materials, and mindful integration ensures strong surface film control and long-term prevention in small low-flow aquariums.

    Encouraging Water Movement

    To stop thin biofilms from forming, add gentle water movement. Make sure filter outflows point slightly up. This way, water skims the top without stressing fish or plants.

    Use lily pipes or a rigid spraybar to direct flow at the surface. Small, quiet wavemakers can run on a timer or with intermittent settings. This breaks films while keeping CO2 levels stable for plants.

    • Position outlets to create a soft ripple across the surface.
    • Choose skimmers or powerheads with directional outlets to eliminate dead surface zones.
    • Set wavemakers to short pulses for surface film mitigation without continuous strong flow.

    In heavily planted tanks, balance water movement with plant needs. Look for skimmers with switchable outlets or use a timer. This limits CO2 loss while keeping the surface clear.

    When adjusting flow for surface film prevention, watch fish behavior and plant stability. Adjust outlet angle and timing until the surface stays clear and your fish swim calmly.

    Controlling Algae Growth

    Spotting algae-driven scum is simple. Look for a greenish sheen or trapped bubbles with green edges. These signs indicate algae on the surface. Check the tank at different times of day to see when the scum forms most quickly.

    Limit light to cut algae food. Shorten daily photoperiods and lower fixture intensity if plants thrive. Aim for steady, moderate light instead of bursts that fuel blooms.

    Manage nutrients to prevent algal spikes. Test nitrate and phosphate levels and reduce excess by trimming overfertilization. Swap a portion of iron-based supplements if iron bacteria or discoloration appear.

    Use biological helpers with caution. Physidae snails and other algivores will graze biofilm. But they do not replace mechanical control for consistent surface film elimination.

    Rely on manual and mechanical methods for reliable results. Regular skimming, gentle surface agitation, and routine removal of mats stop algal sheets from forming. These steps support long-term film buildup prevention.

    Avoid heavy carbon dosing that can backfire. Products like Easy Carbo may stimulate bacterial growth and indirectly support algae. Cut dosing back if you notice increased turbidity or slime.

    • Check light timing and intensity.
    • Test and lower nitrates and phosphates.
    • Use skimming and surface agitation daily.
    • Add grazers as a supplement, not a solution.

    Track changes after each adjustment. Small, consistent actions give you the best chance at surface film prevention and steady improvement in water clarity.

    Utilizing Live Plants

    Live plants are great for managing surface films. They use up extra nutrients that algae and microbes love. Fast-growing plants like hornwort or Vallisneria grab onto nitrates and phosphates. This lowers the tank’s organic load and makes the water clearer.

    Floating plants, such as Salvinia or water lettuce, change how light hits the water. They can help reduce film formation if used right. Place them to shade problem areas but don’t cover the whole surface. This can trap dirt and cut down on gas exchange.

    Dead leaves can lead to oily layers. It’s important to remove dying leaves fast. Also, keep up with regular trimming to stop too many organics from building up at the surface.

    Don’t overdo it with fertilizers. Too much can undo the good work of plants. If you use CO2, watch out when adding skimmers or more movement. This can push CO2 out and stress your plants.

    • Choose hardy species that match your light and CO2 setup.
    • Trim regularly and siphon away plant debris from the surface.
    • Position substrate-rooted and mid-water plants so they don’t shed directly onto the waterline.

    If your tank keeps getting scum, think about using plants with tools like fine-surface skimmers or screen covers. Some people use film resistant coatings on equipment and trims. This helps keep plants healthy and supports natural film prevention.

    Regular Maintenance Routine

    Make a simple, easy-to-follow schedule for preventing film buildup. For small tanks, do quick checks every day and a more detailed routine once a week. Look for any sheen on the surface and act fast.

    Do partial water changes to cut down on dissolved organics. Change 10–25% of the water, depending on how much life is in the tank. This helps keep the water quality good for fish and plants.

    Take out any food that’s not eaten and any surface debris during your visits. Skim off leaves and floating waste before they rot. This reduces the nutrients that feed biofilm and helps control surface film.

    • Rinse mechanical filter media gently in tank water to preserve beneficial bacteria.
    • Clean skimmer sponges or cartridges regularly to keep suction and flow steady.
    • Empty and rinse collection chambers to keep the skimmer working well.

    Use manual surface removal as a quick fix. Press a clean paper towel or kitchen paper gently to the water surface until it soaks, then lift it away. Keep doing this until the sheen is gone.

    Stay away from oils to prevent them from getting into the tank. Wash your hands before touching the tank to remove lotions and residues. Also, don’t overstock the tank to avoid stressing the system.

    1. Make a maintenance calendar based on how much life is in the tank, not just days.
    2. Watch the tank more closely after feeding or when you add new fish.
    3. Use tool-free impeller access if available for quick skimmer cleaning.

    By doing quick daily checks and focused weekly tasks, you can prevent film buildup and control surface film better. This way, you can keep the tank clean without spending too much time on it.

    Feeding Practices

    Fish food is a big reason for oily films in small tanks. High-fat foods like flakes, pellets, and frozen items can release oils. It’s important to treat feeding as the first step in preventing surface films.

    Feed your fish small amounts they can eat in two to three minutes. Feeding in short sessions helps avoid leftovers and keeps your fish’s appetite steady. Use a feeding ring or small spoon to keep food in one place, so you can see what’s eaten.

    Quickly remove any uneaten food with a small net or siphon. Leftover food breaks down into oils and proteins that rise to the surface. Removing it fast helps get rid of surface films and prevents nutrient spikes that feed algae.

    • Choose high-quality diets with moderate fat content suited to your species.
    • Avoid frequent use of heavy supplements or fatty treats that raise organic load.
    • Adjust portions seasonally and as fish grow to prevent chronic overfeeding.

    Watch your tank after each feeding for signs of slickness or reduced surface tension. If you see film, reduce portions and increase waste removal. These simple steps help keep your water clean and your fish healthy.

    Adding Chemical Treatments

    Chemical treatments can help with surface film control, but use them last. They can lower surface tension or break down organic films. This can quickly help with stubborn low-flow tanks.

    Choose products made for aquariums, like enzyme-based formulas. These digest oils and organics. When used with better filtration and regular cleaning, they help long-term.

    Avoid harsh chemicals that can harm good bacteria. They can upset your nitrogen cycle and lower CO2 for plants. Always follow the directions and check water parameters before and after adding chemicals.

    Activated carbon in your filter removes dissolved organics that feed surface films. It works well with anti-film treatments and reduces the need for more chemical dosing.

    • Test water and watch plant response after any treatment.
    • Reduce feeding and improve skimming before adding chemicals.
    • Favor enzyme-based products over broad-spectrum disinfectants.

    In heavily planted aquariums, skip routine chemical additions unless needed. Focus on mechanical skimming, increased surface agitation, and maintenance first.

    If treatments change surface agitation or skimming, watch CO2 and adjust fertilization or dosing. Balanced use of chemical aids can help with surface film mitigation without harming your tank’s biology.

    Seeking Professional Advice

    If you can’t get rid of surface film, it’s time to ask for help. Local fish stores and brands like Hygger and ADA can help. They know how to fix problems in small tanks.

    Experts can test your water and suggest the right equipment. They might recommend a skimmer or filter. They also help with a cleaning schedule for your tank.

    Before you call for help, gather some information. Take photos of the surface and keep a log of your tank’s care. List your equipment and brands. This helps experts solve your problem quickly.

    Getting advice and sticking to a routine is key. Skim regularly, keep the flow steady, and feed wisely. With these steps, you can manage surface film effectively.

    FAQ

    What causes a thin, shiny oily film to form on my small low-flow aquarium?

    Surface film is made of microorganisms, proteins, fats, and debris. In low-flow tanks, calm water lets these substances gather at the surface. Overfeeding, poor food quality, and decaying plants are common causes.

    How does surface film affect my fish and plants?

    The film reduces gas exchange, affecting oxygen and CO2 levels. This can stress fish and harm plant growth. Thick scum also blocks gas exchange.

    How can I tell if the film is oily (fat/protein) or bacterial/algal?

    Look for signs: oily films have a silvery sheen that quickly reforms. Algae-driven scum is greenish. A quick test—poke the surface—shows oily films resist breaking.

    What quick manual fixes will remove surface film immediately?

    Use a paper towel or kitchen tissue to skim the surface. You can also use a turkey baster to replace water. These are temporary fixes while you work on long-term solutions.

    How does improving surface movement help, and what methods work best?

    Better surface agitation breaks up biofilms and improves oxygen exchange. Try angling filter outflows upward or using lily pipes. Small wavemakers or surface skimmers also work well.

    Are surface skimmers effective for small tanks, and which types should I consider?

    Yes, skimmers are great for small tanks. Look for floating intake skimmers or outlet-mounted venturi skimmers. Choose models that fit your tank size and are quiet.

    What should I check when matching a skimmer to my filter or pump?

    Make sure the skimmer’s pump capacity matches your setup. Check compatibility with your tank type and whether it expels air into the tank. Look for adjustable mounts and secure attachment methods.

    How often should I clean skimmer sponges or cartridges?

    Clean them regularly, usually weekly to biweekly. Empty and rinse collection chambers and remove debris. Use tank water for rinsing and follow manufacturer guidelines for maintenance.

    Will continuous skimming affect CO2 in planted tanks?

    Yes, it can. Skimming increases gas exchange and may drive CO2 out. In planted tanks, consider timed skimming or reduce CO2 dosing when increasing surface movement.

    What role do live plants play in preventing surface film?

    Healthy plants compete with algae for nutrients and oxygenate the water. They help prevent film formation. But, remove dead plant matter promptly to avoid feeding biofilms.

    How should I adjust feeding to reduce film buildup?

    Feed smaller portions that fish eat quickly. Remove uneaten food promptly. Use high-quality diets and limit supplements. Consider feeding rings or tools to monitor consumption.

    Can chemical treatments eliminate surface film?

    Chemical options like enzyme-based products can help. But, they should be used alongside mechanical and biological controls. Some treatments can harm beneficial bacteria or CO2 balance.

    Should I use activated carbon or enzyme additives to control dissolved organics?

    Activated carbon can remove dissolved organics. Enzyme-based products can also reduce film formation. Avoid using oxidizing or sterilizing chemicals that harm beneficial bacteria.

    What maintenance routine reduces film buildup consistently?

    Regular partial water changes and daily removal of uneaten food and debris help. Rinse mechanical filter media and trim plants regularly. Monitor dissolved oxygen or CO2 and keep stocking levels appropriate.

    How do light and nutrient management affect algae-driven surface scum?

    Too much light and nutrients encourage algae growth. Control photoperiod and intensity, avoid overfertilization, and maintain nutrient balance. This limits algae-driven film formation.

    Can algae-eating snails or other fauna solve surface film problems?

    Some algivores can remove biofilm patches. But, they are not a standalone solution. Mechanical removal, improved circulation, skimming, and nutrient control are key strategies.

    How does tank type and hardware choice influence surface film control?

    Rimless vs framed tanks and overflow configurations affect skimmer compatibility. Choose setups that allow installing skimmers or upward-directed outflows. Ensure hang-on or suction mounts fit securely.

    When should I consult a professional about persistent surface film?

    If film persists despite your efforts, seek professional help. Local fish stores, aquatic consultants, or equipment manufacturers can offer tailored advice and solutions.

    Are there any habits to avoid that commonly cause film?

    Avoid overfeeding, using low-quality or oil-rich foods, and excessive carbon dosing. Wash hands before tank work to prevent oil transfer. Regular attention and preventive habits are key.

    What practical steps should I prioritize first to eliminate surface film?

    Start with quick manual skimming and address feeding and decaying organics. Increase gentle surface agitation and perform regular water changes. Consider activated carbon or enzyme products if needed. Combine these measures with routine maintenance for reliable surface film management.

  • Using Natural Foods to Enhance the Colors of Your Nano Inhabitants

    Using Natural Foods to Enhance the Colors of Your Nano Inhabitants

    You can make your nano aquarium inhabitants look more vibrant by giving them a natural diet. Foods like Moina macrocopa, Daphnia magna, and Gammarus scuds are full of nutrients. They help with color and keeping your fish healthy.

    Feeding them live and frozen foods makes them more active. It also lowers stress and makes them look better. This means your fish and shrimp will have brighter colors and healthier skin.

    For small predators like Dario dario, foods like Daphnia and baby brine shrimp are key. They bring out red and orange colors and help with breeding. Adding leaf litter and botanicals also helps. It creates food for tiny fish and shrimp.

    Keep live foods in separate containers and watch the water quality. Make a feeding plan to avoid too much food. With the right care, natural foods will make your nano aquarium look amazing.

    Understanding the Concept of a Color-Enhancing Diet

    Lush and vibrant depiction of a color-enhancing diet, featuring a variety of natural foods. In the foreground, a beautifully arranged assortment of colorful fruits and vegetables—bright orange carrots, deep green leafy kale, vivid purple eggplants, and luscious red tomatoes—should be artfully displayed on a rustic wooden table. In the middle ground, a soft-focus mosaic of herbs like basil and mint intermingles with grains such as quinoa and brown rice, showcasing the variety of nutrients. In the background, a soft, sunlit kitchen setting is revealed, with warm natural light streaming through a window, creating an inviting atmosphere. The composition should evoke a sense of freshness and vitality, highlighting the connection between nutrition and vibrant colors. The image is captured with a shallow depth of field, focusing on the food while softly blurring the surroundings to emphasize the natural bounty.

    A color-enhancing diet gives your nano inhabitants the tools to display bright colors. It includes carotenoids and astaxanthin, along with protein, lipids, vitamins, and minerals. These are what animals use to create and show off their colors.

    In your tank, mix commercial feeds with live foods to mimic a natural food web. Add Moina, Daphnia, scuds, microworms, and vinegar eels. Also, include leaf litter and detritus to support infusoria and biofilms. These help feed fry and small species.

    This diet serves two main goals. It directly gives your fish the pigments they need for color. It also boosts their health, digestion, and behavior. This makes their colors more vibrant and reliable.

    Seasonal changes and environmental conditions influence your diet. Adjust light, flow, and food availability to mimic natural cycles. This can lead to natural color changes in your fish, just like in their natural habitats.

    • Balanced diversity prevents nutrient gaps.
    • Mix commercial feeds with live and botanical items for steady nutrition benefits.
    • Avoid overreliance on risky single foods, such as excess tubifex, which can carry pathogens.

    Creating a microbiological food web in your tank ensures steady nutrition. Adding colorful fruits and vegetables can also enhance the diet. This supports healthy eating and boosts the variety of nutrients available for color production.

    Nutritional Needs of Nano Inhabitants

    A vibrant display showcasing the nutritional benefits of natural foods designed for nano inhabitants. In the foreground, a beautifully arranged platter of colorful fruits and vegetables, such as blueberries, carrots, and leafy greens, represents essential nutrients. The middle ground features miniature, anthropomorphic nano inhabitants, energetically interacting with the foods, illustrating their nutritional needs. The background is a soft-focus kitchen setting filled with sunlight streaming through a window, casting warm, inviting light to enhance the scene. The atmosphere is lively and optimistic, emphasizing health and vitality. The composition is captured with a slight depth of field, focusing on the food and nano inhabitants, while the bokeh effect in the background adds a whimsical touch.

    To keep nano inhabitants healthy and colorful, they need concentrated nutrition. High-quality proteins and lipids are key for growth and color. Vitamins A and E protect their delicate colors and boost their immune system.

    Minerals like calcium are important for shell-bearing prey and metabolism. An antioxidant-rich diet helps protect their colors and tissues from damage. Natural foods offer a balanced mix of these nutrients.

    Live foods provide nutrition that dry feeds often can’t match. Moina macrocopa is packed with protein and lipids. Daphnia magna gives protein, vitamins, minerals, and helps with digestion.

    Scuds are high in protein, great for muscle growth. Microworms are soft and easy to digest, perfect for small fish and fry.

    For the tiniest fry and small predators like scarlet badis, start with vinegar eels and microworms. Then, move to Daphnia and micro-brine shrimp as they grow.

    Botanical-method detritus and biofilm offer a steady supply of microbes, fungi, and small crustaceans. These provide trace vitamins and micronutrients, filling gaps in commercial feeds. They support a healthy diet in your tank.

    Rinse live foods before feeding to avoid sudden changes in water chemistry. For example, rinse vinegar eels to remove acidity. Always check tubifex and other cultures for parasites before feeding.

    • Prioritize live, varied diets for consistent nutrition benefits.
    • Include antioxidant-rich diet elements to protect pigments.
    • Use natural foods to mirror wild nutrient profiles and support healthy eating.

    Best Natural Foods to Boost Color

    There are many natural foods to enhance the color and health of your nano inhabitants. Start with live feeds rich in protein and pigments. Moina macrocopa is small, easy to grow with spirulina or baker’s yeast. It encourages hunting and helps remove algae from tanks.

    Daphnia magna is a bit bigger and adds vitamins and minerals. These support bright colors and healthy digestion. Grow Daphnia in green water or yeast solutions for a steady supply for various fish.

    Scuds (Gammarus sp.) are great for medium and larger nano inhabitants. They provide dense protein for muscle building and active foraging. Microworms (Panagrellus redivivus) are soft and reliable for fry. They’re easy to culture on oatmeal and yeast for daily food.

    • Vinegar eels (Turbatrix aceti): tiny nematodes cultured in apple cider vinegar. They last longer in fresh water than many live foods. Strain and rinse before feeding.
    • Tubifex worms: very high in protein and iron. Use them for conditioning breeders only when sourced from clean, parasite-free supplies and rinsed daily.
    • Bladder snails (Physella sp.): provide protein and calcium through shells. Culture responsibly to serve as sustainable prey for snail-eating species.

    Botanical-method inputs like leaf litter and seed pods promote infusoria and biofilm. These micro-foods are rich in nutrients and support fry while complementing a color-enhancing diet.

    Pair live items with frozen or prepared foods rich in carotenoids for more vibrant food choices. You can also feed small amounts of algae wafers or spirulina flakes to intensify natural pigments over time.

    Include colorful fruits and vegetables in your routine when they suit the species you keep. Small, blanched bits of carrot, spinach, or bell pepper can add beta-carotene and other pigments. These translate into stronger coloration for many nano inhabitants.

    Mix these options into a steady plan so your population benefits from varied nutrients. A balanced approach to natural foods and vibrant food choices supports both immediate color gains and long-term health for your aquatic community.

    The Benefits of a Color-Enhancing Diet

    Feeding your fish carotenoid- and astaxanthin-rich foods can make their colors pop. For example, scarlet badis can turn a deeper red, orange, or yellow. This is because these foods give your fish the molecules they need to color their skin and scales.

    But there’s more to it than just looks. A balanced diet with live foods boosts your fish’s health. It gives them the protein, fats, vitamins, and minerals they need. This makes them stronger and more resilient to sickness, which in turn makes their colors brighter and last longer.

    Choosing the right foods can also improve your fish’s digestion. Foods like Daphnia can help move waste through their system. This means your fish can absorb nutrients better, which is good for their color and growth.

    Live foods also make your fish more active. They encourage natural hunting behaviors, which can reduce stress and boredom. When fish are active, their colors tend to be more vibrant because they’re not stressed.

    Feeding your fish high-quality foods like Daphnia can also improve their breeding. Males may show off their colors more, and they might even start to spawn. This is because they’re getting the nutrients they need to be healthy and ready to breed.

    Creating a self-sustaining ecosystem in your tank can also help. Using plants and natural methods can provide food for young fish. This helps them grow strong and colorful, which is good for the whole tank.

    • Direct pigment supply from carotenoid and astaxanthin foods
    • Stronger immunity and broader nutrition benefits
    • Improved digestion from natural prey like Daphnia
    • Behavioral enrichment that enhances natural color displays
    • Higher breeding success and better fry survival
    • Support from an antioxidant-rich diet in reducing cellular stress

    Choosing a color-enhancing diet can make your fish look amazing. It also boosts their health and makes them more active. You can even use it to help your fish look their best, like a diet for glowing skin.

    How to Implement a Color-Enhancing Diet

    First, figure out your fish’s size and what it eats. Small fish like Dario dario need tiny food like microworms and baby brine shrimp. Make sure the food fits their mouth to keep them healthy and colorful.

    Get live food from trusted places. Try to grow your own food like Moina and Daphnia in green water. Use oatmeal and yeast for microworms, and apple cider vinegar for vinegar eels. These foods are full of nutrients that help your fish look their best.

    Keep your food cultures clean to keep your tank healthy. Don’t overfeed, keep the water moving, and don’t let the temperature change too much. Regularly clean out your cultures to stop them from getting too crowded. This helps your fish stay healthy and colorful.

    Quarantine and rinse food items when needed. Clean vinegar eel cultures and rinse snails and tubifex worms to remove bad stuff. Rinsing gently helps prevent sudden changes in water that can harm your fish.

    Add plants and wood to your tank to create a natural food web. This helps your fish get more nutrients. Let the tank get ready for fish before you add them. This way, good bacteria and tiny animals can get settled in.

    Feed your fish a mix of live and dry foods every day. Use crushed commercial foods or tiny pellets with live foods. This mix gives your fish all the nutrients they need to stay colorful and healthy.

    • Adjust portion sizes to avoid uneaten food.
    • Schedule small, frequent feedings for micropredators.
    • Observe for leftovers and reduce portions if needed.

    Watch your cultures and tank closely. Change the water often and make sure your filter can handle the extra work. Check the water for ammonia, nitrite, nitrate, and temperature. This keeps your tank healthy and your fish looking their best.

    Look for slow changes in color and behavior over time. Small, steady changes mean you’re doing something right. If your fish’s colors fade or they seem sick, check your food and tank care. This will help you get back to feeding them well and keeping them healthy.

    Common Mistakes to Avoid

    You want your nano fish to look their best, but small mistakes can harm them. Overfeeding live foods with yeast or spirulina can lead to bad bacteria. This bacteria takes away oxygen and can kill your cultures. Feed them just enough and watch for signs of trouble like cloudiness or bad smells.

    Big changes in temperature can hurt your fish. Keep the temperature steady and right for each type of culture. This helps keep your fish healthy and food coming.

    • Don’t bring in dirty or wild snails and tubifex. They might have diseases. Get them from trusted places and keep new ones separate before adding them to your tank.
    • Always rinse vinegar-eel cultures before feeding them to your fish. If you don’t, they can make the water too acidic and stress your fish.

    Too many bladder snails can make the water too low in oxygen. Take out snails often and feed them a little. This keeps your tank balanced for your fish and snails.

    Cleaning too much in your tank can get rid of good stuff. Keep your tank clean but also let it be a home for beneficial organisms. This way, your fish and tiny creatures have food to eat.

    1. Don’t ignore the changes that come with the seasons. Not changing your tank’s diet, light, or water can stop your fish from breeding and showing their natural colors.
    2. Think one way of feeding is good for all fish. Change your diet to fit what each fish needs for the best colors.

    Watch out for these common mistakes and make small changes. Taking care of your fish’s diet and environment will make them healthier and more colorful in the long run.

    Monitoring Changes in Color and Health

    First, take a clear photo of your fish before changing their diet. Use the same lighting and note their behavior, appetite, and how they rest. This baseline helps you see changes in their skin and color when you start a new diet.

    Look for brighter colors and more vibrant pigments after introducing new foods. Males might show off their colors more when they’re getting ready to breed. Keep a journal of these changes to see how different foods affect their health.

    Every day, check on your fish’s activity, how they eat, and their overall health. Better nutrition can make them more active and have cleaner fins. If they seem less active or have wounds, stop adding new foods and check again.

    Also, test the water quality often. Check for ammonia, nitrite, nitrate, pH, and temperature. New foods or live cultures can change the water quickly. Keeping the water stable helps your fish’s color and health when you’re trying to make their skin glow.

    • Compare photos weekly to measure pigment brightness and uniformity.
    • Log feeding types and amounts to spot correlations with color changes.
    • Note any spikes in illness after new live foods, which can indicate contamination.

    If your fish’s color fades or they get sick, look back at what you’ve added to their diet. Live foods can sometimes carry parasites or bacteria. Remove any suspect foods and treat or quarantine your fish as needed.

    For fry, watch their survival rates and growth closely. Feeding them infusoria, microworms, or the right-sized prey can help them grow and color better. Keep track of their growth and diet changes to see how nutrition affects them in the long run.

    Keep your observations simple, consistent, and dated. Small, steady records help you see if the new diet is working. This way, you can tell if it’s really improving their skin and color, without getting confused by short-term changes.

    Seasonal Considerations for a Color-Enhancing Diet

    You can mimic natural seasonal cycles to improve color and behavior in your aquarium. In floodplain habitats like Amazonian igapó and várzea, fish shift from fruits and insects to detritus and invertebrates as water rises and falls. A seasonal diet in your tank should follow similar pulses.

    Use programmable LED lighting, pumps, and heaters to change light duration, intensity, flow, and temperature over weeks. Slow, predictable shifts reduce stress and let fish adapt. This creates a rhythm that supports natural feeding patterns and enhances color through diet and environment.

    During wet-season cycles, increase high-protein live prey and supplement with fruit-like foods to mimic abundant resources. Boosting an antioxidant-rich diet at this time supports breeding and brighter pigmentation. Plan to ramp up cultures of Daphnia and scuds for conditioning periods.

    In dry-season cycles, reduce supplemental feeding and allow more leaf litter and biofilm to develop. Encouraging grazing on detritus and microfauna recreates lower-input phases found in nature. This shift favors natural foraging and helps maintain gut health on natural foods.

    Balance planned culture production with tank needs. Grow botanically driven infusoria and biofilms for low-input phases, then increase cultured live prey for breeding windows. Stagger production so you have Daphnia and scuds ready when you need them.

    Monitor tank responses closely and adjust changes slowly to prevent stress. Watch color intensity, appetite, and breeding signals. Fine-tune the color-enhancing diet and environmental pulses based on what you observe.

    • Emulate wet season: higher protein, live prey, antioxidant-rich diet.
    • Emulate dry season: more leaf litter, detritus grazing, reliance on natural foods.
    • Use programmable gear to change conditions gradually.
    • Schedule culture production to match feeding cycles.

    Integrating Color-Enhancing Foods in Existing Diet

    You can start with a high-quality micro-pellet or finely crushed flake as the main food. Add live foods now and then to bring out colors and encourage fish to forage.

    Use live foods as treats or to help fish get used to new foods. Give small amounts of Moina, Daphnia, microworms, or micro-brine shrimp daily. This helps balance the diet and reduces the chance of problems.

    Let some decaying leaves and plants stay in the tank. This provides extra food for fry and small fish to eat.

    • Introduce new items slowly and watch for acceptance.
    • Check water-quality impact before increasing portion size.
    • Avoid sudden large additions of live foods that could foul the tank.

    For picky eaters like scarlet badis, keep trying different live foods. As they grow, switch from crushed flakes to micro-pellets. Make sure the food is the right size for their mouth.

    Be strict about how much food you give and clean the tank regularly. Remove any uneaten food and do water changes often. This prevents too much food from building up and keeps the water safe for fish.

    By mixing staple foods with live and plant supplements, you create a diet that enhances colors. This keeps your fish healthy and your tank vibrant.

    The Science Behind Food and Color

    Learning is easier when the science is simple. Pigments like carotenoids, including astaxanthin, come from food. Aquatic animals can’t make these pigments themselves. They need to eat prey or plants that have them.

    Live foods like Daphnia and Moina get carotenoids and fatty acids from algae. When you feed these live foods to fish, you give them pigment precursors. These precursors can change the color of their skin, scales, or membranes.

    • Antioxidant-rich foods, like vitamin E and polyphenols, protect pigments from damage.
    • Protected pigments stay bright longer and look better under normal light.
    • Good nutrition means healthier cells, a stronger immune system, and better color changes.

    Decomposing plants create a world of fungi, bacteria, protists, and small crustaceans. This world gives fish the nutrients they need. You can mimic this with live foods and a variety of diets.

    Studies show that varied live diets make fish colors more vibrant. For example, red fish get even redder with Daphnia and microworms. Digestive helpers like chitin from small shells also help with pigment absorption.

    The quality of live foods and how they are prepared matters a lot. Clean cultures like vinegar eels before feeding. Don’t use dirty tubifex. Harvest live foods often to keep them nutritious.

    Creating a diet that enhances color is all about balance. Mix carotenoid-rich foods with antioxidants for the best results. This mix explains why varied, high-quality foods make fish colors shine.

    Frequently Asked Questions About Color-Enhancing Diets

    Which live foods give the fastest color improvement? Daphnia magna and Moina macrocopa are quick responders. They have lots of protein, vitamins, and color precursors. You’ll see color changes in weeks with regular feeding.

    Are live foods safe for your aquarium? Yes, if you source and culture them right. Keep cultures clean and aerated. Avoid chemicals and quarantine new stock. Rinse items like vinegar eels before feeding.

    How should you feed fry and young fish? Start with infusoria, vinegar eels, or microworms. Then move to Daphnia and baby brine shrimp as they grow. Botanical-method detritus and biofilm add extra nutrition and help create a natural food web.

    Can botanical-method tanks replace commercial feeds, and how long until you see color changes? Botanical methods are a good addition, not a replacement. Mixing live foods, botanicals, and prepared feeds is best. Some species may show color changes in weeks, while others may take longer. Keep photos and water records to track progress and adjust your plan.

    What are sensible next steps? Choose live foods that fit your species. Start small cultures like microworms or Moina. Add leaf litter to build a micro-food web. Watch water quality closely to protect your tank and its inhabitants as you refine your diet.

    FAQ

    What is a color-enhancing diet for nano aquarium inhabitants?

    A color-enhancing diet gives fish the nutrients they need to show off their colors. This includes carotenoids, proteins, fats, vitamins, and minerals. You can use commercial foods and live foods like Moina macrocopa and Daphnia magna.

    Adding natural materials like leaf litter also helps. This diet improves digestion and immune function. It helps fish show their colors better.

    Which natural foods give the fastest and most noticeable color improvement?

    Daphnia magna and Moina macrocopa are great for quick color changes. They are rich in nutrients. Feeding them regularly can make reds, oranges, and yellows more vibrant.

    Scuds and micro-brine shrimp also help. They add to the color of fish like Dario dario.

    How do live foods improve behavior and well-being in nano species?

    Live foods make fish more active and reduce stress. This improves their appetite and immune system. It also helps them show off their colors.

    For picky eaters, live foods like microworms and vinegar eels are good. They encourage natural behavior and bright colors.

    What role do botanical-method tanks play in a color-enhancing approach?

    Botanical-method tanks add nutrients and antioxidants. They create a healthy environment for fish. This helps them stay colorful and healthy.

    These tanks are great for young fish. They provide a steady supply of nutrients.

    How should I start live-food cultures at home for consistent feeding?

    Start with easy-to-grow foods like microworms and Moina. Use green water or yeast solutions for them. Vinegar eels need apple cider vinegar, but rinse them well before feeding.

    Keep cultures clean and at the right temperature. Don’t overfeed to avoid problems. Quarantine new cultures to prevent diseases.

    Are live foods safe to feed, and what precautions are necessary?

    Live foods are safe if you get them from good sources. Rinse vinegar eels to remove acidity. Avoid wild tubifex and snails that can carry parasites.

    Keep cultures clean and don’t overfeed. Check your food before feeding it to your fish. This helps prevent diseases.

    How do I feed fry and very small nano species for best survival and coloration?

    Feed fry with infusoria and vinegar eels first. As they grow, add Daphnia and micro-brine shrimp. Crushed microfeeds are also good.

    Botanical biofilms provide extra nutrients. Feed small amounts often to help them grow and stay colorful.

    Can botanical-method detritus replace commercial feeds entirely?

    No, detritus and biofilms are supplements, not replacements. They lack the nutrients found in commercial foods. The best diet combines both.

    How often should I feed live foods vs. commercial microfeeds?

    Use commercial foods as the main diet. Live foods are treats or for conditioning. Feed small amounts of live foods with micro-pellets.

    During breeding, increase live food. Always avoid overfeeding to keep water clean.

    What are common mistakes that reduce the effectiveness of a color-enhancing diet?

    Don’t rely too much on one food. Clean your live foods well. Avoid overfeeding cultures.

    Don’t remove too much detritus. Changing water too fast can stress fish. These mistakes can harm color and health.

    How do seasonal or environmental simulations affect coloration?

    Seasonal changes can affect fish behavior and color. In “wet seasons,” feed more live prey. In “dry seasons,” use more leaf litter.

    This mimics natural cycles and helps maintain color.

    How long will it take to see color improvements after changing the diet?

    Improvements vary by species and age. Some fish show changes in weeks. Others take longer.

    Take photos regularly to track progress. Watch for changes in appetite and activity.

    What water-quality and husbandry steps must I take when adding more live foods and cultures?

    Monitor water quality closely when adding more food. Increase water changes and filtration. Harvest cultures carefully.

    Keep cultures clean and avoid overfeeding. This prevents water problems.

    Which live foods are best for conditioning breeders and intensifying male coloration?

    Daphnia, Moina, scuds, and microworms are great for breeders. They provide nutrients that enhance male colors and breeding behavior.

    How do I handle tubifex and bladder snails safely if I want to use them?

    Get tubifex and bladder snails from trusted sources. Rinse them well to remove contaminants. Feed tubifex sparingly to avoid overfeeding.

    Manage bladder-snail populations to prevent overcrowding. This helps keep your tank healthy.

    What indicators show the diet is improving color and overall health?

    Look for brighter colors and more active fish. Better appetite and growth are signs too. For fry, watch for survival and growth milestones.

    Also, check for stable water quality and no signs of illness.

    How should I introduce new live foods to picky or specialized feeders like scarlet badis?

    Introduce new foods slowly and consistently. Start with small amounts of microworms, Daphnia, and baby brine shrimp. Mix with crushed micro-pellets to help them accept new foods.

    Match prey sizes to the fish’s mouth. Be patient, as some fish take time to adjust.

    Are antioxidants and vitamins important for maintaining pigments?

    Yes, antioxidants and vitamins protect and support pigments. A varied diet with live foods and quality commercial foods provides these nutrients. This helps keep fish colors vibrant.

    How do I balance culture production with tank feeding to avoid supply shortfalls?

    Plan culture production around your tank’s needs. Increase Daphnia and scud cultures before breeding. Use microworms and vinegar eels for fry.

    Botanical biofilms are good during low-input times. Harvest regularly and avoid crashes. Keep backups to ensure a steady supply.

  • How to Use a Fine Net to Remove Floating Debris and Dead Leaves

    How to Use a Fine Net to Remove Floating Debris and Dead Leaves

    You’ll learn how to use a fine net to keep your pool, pond, or water feature clear. A swimming pool cleaning net skims the water surface. It captures leaves, bugs, pollen, and small debris before they sink.

    This simple step saves hours of manual cleaning. It also helps cut down on chemical use. This is because organic matter doesn’t decompose as much.

    Daily skimming with a fine mesh net for pools is key. Fine nets catch tiny particles that regular skimmers miss. This makes efficient organic waste removal possible. It also reduces the chance that leaves will break down into tannins or contribute to algae growth.

    When you remove debris as it falls, your water stays clearer. Maintenance tasks become faster. Using a fine net pairs well with frequent skimmer-basket cleaning and weekly vacuuming.

    This creates a complete approach for removing organic waste. The tips below apply across pools, ponds, garden water areas, and decorative water features. They focus on eco-friendly, efficient organic waste removal and sustainable practices.

    Importance of Removing Organic Waste

    A serene lake environment at dawn, showcasing a person in a modest casual outfit carefully using a fine net to remove organic waste like floating debris and dead leaves from the water's surface. In the foreground, the fine net is intricately detailed with droplets of water glistening in the soft morning light. The middle ground features the tranquil lake, reflecting the vibrant hues of the sunrise, while surrounding trees are lush and green, adding depth to the scene. The background includes a misty horizon where the sun rises, creating a peaceful and proactive atmosphere. The focus should be on the action of waste removal, highlighting the importance of environmental care. Soft natural lighting enhances the mood, creating a sense of calm and responsibility toward nature.

    Removing organic waste like leaves and petals helps keep water clear and safe. Dead plants can turn water brown and make surfaces slippery. This is bad for pools and ponds.

    Organic waste can clog filters and skimmer baskets. This makes pumps work harder and filters less well. It shortens equipment life and increases costs.

    Quickly removing waste stops algae and bacteria from growing. This keeps your pool water clear and balanced. You won’t need to use as many chemicals.

    Trimming trees and using covers helps prevent debris. These steps mean you don’t have to clean up as often. They also help the environment.

    • Prevents staining from decomposing leaves and flower petals.
    • Maintains pump and filter performance.
    • Reduces pathogen and algae risks for safer water.

    Combining manual cleanup with proper disposal is key. It supports sustainable waste management. Choosing composting or local green-waste programs helps the environment. It also reduces strain on your systems.

    Tools Needed for Debris Removal

    A close-up view of a fine mesh net, intricately woven with small, tight openings, displayed prominently in the foreground. The net is gently draped over a smooth, wooden surface, showcasing its texture and flexibility. In the middle ground, scattered debris such as dead leaves and small twigs are arranged around the net, hinting at its practical use for removal. The background features a soft-focus garden setting with dappled sunlight filtering through overhead leaves, creating a serene and natural atmosphere. The lighting is warm and inviting, highlighting the net's details with subtle shadows. The composition suggests a calm, efficient approach to outdoor maintenance.

    You’ll need both basic hand tools and powered equipment to keep your pool water clear. A fine mesh net is key for removing pollen and tiny particles from the surface. Use a sturdy telescopic pole to reach corners and shallow edges without straining.

    Flat leaf skimmer nets are great for quick leaf pickup. Deep bag nets are better when leaves are heavy. A good leaf rake helps gather piles near the edge before you scoop them out. Look for nets made from nylon or polyester mesh with aluminum or stainless steel frames for durability.

    • Pool vacuum for debris — get a manual vacuum head with hose or a vacuum-to-waste setup for heavy loads.
    • Robotic pool cleaners for floor work when you want hands-off operation.
    • Leaf vacuums that connect to the skimmer for large green waste removal service jobs.

    Complementary items make cleaning faster. Keep your skimmer basket well-maintained and check hair and lint pods regularly. Durable pool covers reduce debris entry between cleanings. Run your pump and filter 8–12 hours per day for optimal turnover.

    For serious fine particles, use a pool clarifier to aggregate them so the fine mesh net can catch more. Sand filters work well for trapping tiny bits once the system removes bulk debris.

    1. Choose adjustable poles with secure locks and comfortable grips.
    2. Stock both flat and deep nets to match conditions.
    3. Include a pool vacuum for debris and a leaf rake for shoreline cleanup.
    4. Consider hiring a green waste removal service when yard waste piles exceed what you can handle.

    Best Practices for Using a Fine Net

    First, attach the net to a telescopic pole securely. Choose a grip and pole length that feels right. This way, you won’t strain yourself or reach too far.

    Move the net slowly and smoothly. This helps you avoid disturbing the settled debris. Use long, sweeping motions to skim the surface.

    Make sure to overlap your strokes to catch everything. Keep the net close to the water for better results. If leaves are heavy, use deep-bag nets to save time.

    Regularly empty and rinse the net. Rinse it in the shade and dry it to extend its life. Check for any tears after each use and replace them if needed.

    • Skim the water first thing in the morning for best results.
    • Keep the water level at the skimmer’s center for optimal performance.
    • Empty skimmer baskets often to aid in waste removal.

    Switch to a fine mesh net for pollen or dust. Use a leaf cover in heavy leaf seasons to make cleanup easier. Only use clarifier when filters need extra help, not as a replacement for skimming.

    Dispose of the collected material in your compost bin if it’s suitable. Or, follow local green waste rules for environmentally friendly disposal. Always wear gloves for hygiene and use steady motions for safety and efficiency.

    Preparing Your Area for Cleaning

    Before you start, check your pool setup. Ensure the water level is at the skimmer’s center for best skimming. Turn on the pump briefly to move water and bring debris to the surface.

    Next, gather your tools. Use a fine mesh net for pollen and a deep-bag net for heavy leaves. Attach the net to a telescopic pole and make sure the pole lock is tight.

    • Look at the area around your pool. Trim trees and branches that drop leaves and flowers.
    • Put a leaf cover on before storms and remove big leaf piles near the pool.
    • Have a trash bin or compost container ready for the waste you collect.

    For green waste removal, plan to vacuum waste after big leaf events. Clean skimmer baskets weekly and check hair and lint pods every two weeks to keep filters working.

    Wear gloves when handling wet, decomposed organic matter to protect your hands. Check electrical equipment, like robotic cleaners, for safety before using them.

    Follow sustainable waste management by separating compostable material from trash. This helps reduce landfill waste and supports local composting programs.

    Steps to Remove Debris with a Fine Net

    To keep your water clean and your system running smoothly, follow these steps. First, attach a fine mesh net to a telescopic pole. Choose a pole length that lets you reach without stretching.

    1. Skim systematically. Start at one end and move to the other with slow, sweeping strokes. Overlap each pass to catch all spots. Do this daily for the best results.

    2. Target problem zones. Focus on areas where debris tends to gather, like downwind edges and under trees. These spots need extra attention.

    3. Empty frequently. Shake off debris into trash or compost bins and rinse the net. This keeps it clean and effective.

    4. Follow up after skimming. Use a vacuum for heavy buildup that sank. Run your filter 8–12 hours a day and watch the pressure. An 8–10 psi rise means it’s time to backwash. Use organic waste disposal company techniques for large amounts.

    5. Maintain equipment. Check the net for holes, rinse it well, and store it in the shade. Regular checks prevent surprises.

    Follow this ordered approach to make the fine mesh net steps a reliable part of your routine. Small, steady efforts prevent big cleanups later. They also match professional organic waste disposal company techniques used everywhere.

    Handling Dead Leaves and Organic Matter

    Start by scooping heavy leaf piles with a deep-bag leaf rake. These nets catch more debris, making your job easier. Always empty and rinse them after each use. Check for damage and replace if needed.

    Then, use a leaf vacuum or a leaf vacuum attachment on your skimmer for lighter debris. This method prevents clogs and saves your equipment. Regular inspections help spot problems before they get worse.

    Leaf covers can block big debris while letting rain through. Put on durable covers in autumn and winter. Trimming branches also helps reduce leaf fall and cleanup needs.

    For getting rid of leaves, compost them if allowed. Composting is good for your garden and the environment. If not, follow local guidelines for green waste removal.

    Plan for extra maintenance after storms and during peak leaf season. You might need one or two extra cleanings in autumn. Consider hiring a local service for professional help. These steps help keep your water features clean and healthy.

    • Use deep-bag leaf rakes first to remove bulk material.
    • Follow with vacuuming to protect filters and pumps.
    • Rinse and inspect nets; replace when worn.
    • Install covers and trim trees to reduce future debris.
    • Choose composting or approved green waste removal service for disposal.

    Regular Maintenance Tips

    Start your day by skimming the pool surface with a fine net. This catches floating debris and stops leaves from sinking. It’s a simple way to keep your pool water clear and your equipment running smoothly.

    Every week, vacuum the pool floor and empty the skimmer basket. Also, check the filter pressure and clean or backwash cartridges when the pressure goes up 8–10 psi. These steps help keep your pool clean and the water flowing well.

    Once a month, check your nets, frames, and poles for wear. Rinse your nets, let them dry in the shade, and store them right. Regular inspections help your tools last longer and make cleaning easier.

    Don’t forget about seasonal care. Winterize and cover your pool at the end of the season. Also, replace filter media like sand every 5–7 years and use a robotic cleaner for busy times. These steps are part of a long-term plan to keep your pool in top shape.

    • Run the pump 8–12 hours daily to keep fine particles moving into the filter.
    • Test chlorine and pH twice weekly and shock after heavy organic loads or storms.
    • Document tasks on a calendar to keep your regular maintenance organic waste removal on track.

    Follow these tips regularly to reduce algae, lower filter strain, and save time on big cleanups. Small, consistent efforts lead to cleaner water and longer-lasting equipment.

    Environmental Considerations

    Using a fine net and regular skimming can cut down on chemical use. A net helps avoid heavy treatments and extends the life of pumps and filters. This approach supports eco-friendly waste removal and keeps your equipment running longer.

    After big leaf falls, vacuuming the collected material to waste prevents filter overload. Only backwash when necessary to save water and keep filters working well. These steps help reduce waste and lower chemical use, aligning with sustainable waste management.

    Preventing debris at the source reduces cleanup needs. Use leaf covers, trim branches, and place tennis balls on the water to break surface oils. Less debris means less need for intervention and a smaller environmental impact when choosing eco-friendly waste disposal.

    Compost leaves and organic matter when allowed by your municipality. This returns nutrients to the soil and reduces landfill volume. For excess material, hire a local organic waste disposal company that follows green waste pickup rules. This keeps your cleanup in line with sustainable waste management goals.

    • Choose durable, repairable nets with nylon or polyester mesh and aluminum frames.
    • Invest in energy-efficient pumps and robotic cleaners to lower electricity use.
    • Schedule maintenance to avoid costly replacements and reduce waste.

    Every choice and disposal method counts. You can support environmentally friendly waste removal by combining simple daily habits with smart purchases. Proper disposal through an organic waste disposal company or local green services also helps.

    Troubleshooting Common Issues

    If your water turns cloudy or dirt returns after vacuuming, check the filter media. Look for cracks, damaged cartridges, or worn-out sand laterals. These small issues can let particles back into the pool. Fixing them helps avoid repeated work and keeps your pool clean.

    For fine debris that won’t go away, use a fine mesh net to catch it on the surface. Run the filter for 8–12 hours to catch more particles. Adding a pool clarifier helps bind tiny particles so the filter can trap them. These steps help reduce visible grit in your pool.

    • Empty the skimmer basket daily or every other day during heavy use to avoid backups.
    • Backwash when the filter gauge rises 8–10 psi to keep flow steady and prevent strain.

    After a storm with lots of leaves, use deep bag nets and leaf vacuums. Vacuum to waste instead of through the filter to avoid clogging. This method saves your filter media and follows eco-friendly waste removal tips by avoiding frequent chemical cleaning.

    If debris gathers in certain spots, check for dead circulation zones. Adjust the return jets to point slightly downward. This helps push water along the surface and move debris toward skimmers. It’s a simple fix that improves circulation and helps with troubleshooting around pool edges.

    Regularly check nets for tears or holes. Replace damaged nets and choose durable materials like nylon or polyester. Store nets out of direct sun to prevent UV breakdown. This helps extend their life and provides lasting solutions to filter clogs.

    For ongoing problems, mix different approaches. Use surface skimming, fine netting, filter checks, and targeted backwashing. This combination creates effective troubleshooting routines. It also gives you eco-friendly waste removal tips for every season.

    Alternative Methods for Debris Removal

    There are many ways to keep your pool water clear and reduce organic waste. Deep bag nets and leaf skimmers quickly catch big pieces of debris. Fine mesh nets are best for catching pollen and dust on the surface.

    For heavy debris on the floor, try manual vacuuming. Use a vacuum head, hose, and vacuum-to-waste setup. A proper pool vacuum for debris removes settled material without stirring up clouds that strain filters.

    A robotic pool cleaner can handle floor work for you, saving time. Robotic cleaners reduce manual labor but need electricity and space when not in use.

    Filters have their own trade-offs. Sand filters catch small particles and need sand replacement every 5–7 years. Cartridge filters need regular hosing to stay effective and avoid reduced flow.

    Preventive steps can also help. Fit a quality pool cover or leaf cover to block debris. Trimming overhanging trees can also limit leaf fall.

    If you’re dealing with a lot of debris, consider hiring a local pool maintenance company for a thorough cleanout. For yard and branch removal, a green waste removal service or an organic waste disposal company can handle it responsibly and keep clippings out of landfills.

    • Deep bag nets and leaf skimmers for large items
    • Manual vacuuming for heavy floor debris
    • Robotic pool cleaner for regular automated cleaning
    • Pool covers and tree trimming to prevent debris
    • Professional cleanouts and green waste removal service for large jobs

    Choose the right mix of methods based on your schedule, budget, and pool size. Using preventive tools and targeted removal gives the cleanest results and reduces equipment strain over time.

    Conclusion: Maintaining Clean Waters

    Keeping your pool or pond clear is easy with simple habits. Use a fine mesh net often to stop leaves and waste from sinking. This habit helps manage waste and protects your equipment.

    Choose the right net for your needs. Make sure it’s durable and has the right mesh size. Daily skimming and proper pump times are key. Add weekly vacuuming and filter checks for clear water.

    Prevent problems with regular maintenance. Trim branches and use leaf covers. In winter, take extra steps to protect your water. For tough messes, call a pro for a deep clean.

    FAQ

    What is the easiest way to use a fine net to remove floating debris and dead leaves?

    First, attach a fine mesh net to a telescopic pole and make sure it’s locked in place. Choose a pole length that feels comfortable for you. Then, skim the surface slowly with long, overlapping strokes.

    Start at one end and move towards the other. Pay extra attention to areas where the wind blows and under trees. Empty the net into a compost bin or green-waste container often. This keeps the net working well. Rinse it and store it in the shade to make it last longer.

    Why is removing organic waste from pools, ponds, and water features important?

    Organic debris like leaves and insects can make water cloudy and feed algae. This can also clog filters and baskets. Removing it quickly keeps the water clear and healthy.

    It also saves you from using too many chemicals. Plus, it helps your equipment work better and last longer.

    What tools should you have for effective debris removal and eco-friendly waste disposal?

    You’ll need a fine mesh net, a flat leaf skimmer net, and a deep bag net. Also, a telescopic pole, a pool vacuum, and a leaf vacuum or skimmer attachment are helpful. Robotic cleaners and filters are good for floors and keeping water clean.

    Look for nets with nylon or polyester mesh and frames made of aluminum or stainless steel. Choose a comfortable pole with a secure lock.

    What are best practices when using a fine net daily?

    Skim the surface first thing in the morning. Move slowly to avoid stirring up settled debris. Overlap your strokes to catch everything.

    Use a deep bag net for heavy leaf loads. Fine mesh nets are best for pollen and dust. Run the pump 8–12 hours a day to keep particles moving.

    Empty skimmer baskets often and rinse your nets after each use.

    How should you prepare the area before you start cleaning?

    Run the pump briefly to move debris into skimmable areas. Check the water level to ensure it’s at the skimmer center. This helps with skimming.

    Have a trash bin or compost container ready. Wear gloves when handling decomposed material. Use a leaf cover before storms and trim trees to reduce debris.

    What step-by-step process should you follow to remove debris with a fine net?

    Step 1: Attach the fine mesh net to a telescopic pole securely. Step 2: Skim the surface with slow, overlapping strokes daily. Step 3: Target problem areas like downwind edges and under trees.

    Step 4: Empty the net into compost or green-waste frequently. Step 5: Vacuum-to-waste after heavy leaf events and run the filter 8–12 hours. Backwash when pressure rises 8–10 psi. Step 6: Check nets for wear and store them in the shade.

    How do you handle heavy piles of dead leaves and organic matter?

    Use deep bag nets or a leaf rake to scoop up heavy piles first. This saves you from constant trips to empty the net. For very large loads, use a leaf vacuum attachment at the skimmer or vacuum-to-waste to prevent clogging filters.

    Compost collected material where allowed or contact a local green waste removal service or municipal drop-off for excess.

    What regular maintenance should you perform to keep water clear and equipment healthy?

    Daily—skim the surface with a fine net and empty skimmer baskets. Weekly—vacuum the floor, clean skimmer baskets, and hose filter cartridges or backwash when gauge rises 8–10 psi. Monthly—inspect nets, frames, and poles for wear.

    Seasonally—trim trees, use covers, winterize pools, and replace filter media (sand every 5–7 years) as needed.

    How can debris removal support sustainable, eco-friendly waste management?

    Removing debris quickly saves energy and water by reducing chemical use and filter strain. Composting collected organic matter closes the nutrient loop and reduces landfill contributions. When composting isn’t possible, use municipal green waste services or a responsible organic waste disposal company for sustainable disposal.

    What common problems occur and how do you troubleshoot them?

    Persistent fine debris—use a fine mesh net, run the pump 8–12 hours, and consider a pool clarifier. Cloudy water after vacuuming—inspect filter media for damage or sand laterals. Clogged skimmer basket or high filter pressure—empty baskets frequently and backwash at an 8–10 psi rise.

    Heavy leaf storms—use deep bag nets and vacuum-to-waste. Dead circulation zones—adjust return jets downward to improve flow.

    What alternative debris-removal methods complement fine net skimming?

    Robotic cleaners are great for continuous floor work. Manual vacuuming or vacuum-to-waste is good for heavy floor debris. Leaf vacuums hooked to the skimmer are useful for fall cleanups. Durable leaf covers limit inbound material.

    Combining skimming with these methods reduces chemical use and supports efficient organic waste removal.

    What are practical tips to maintain a routine and reduce workload long-term?

    Adopt a schedule: daily fine-net skimming, weekly vacuuming and skimmer cleaning, monthly equipment checks, and seasonal tree trimming and covering. Choose durable, repairable nets and energy-efficient pumps or robotic cleaners.

    Compost collected waste or use green waste removal services for excess. Hire a professional pool maintenance company for major cleanouts when needed.

  • How to Use Aquatic Moss to Create Carpets and Natural Textures

    How to Use Aquatic Moss to Create Carpets and Natural Textures

    You’re about to learn how to use aquatic moss to make lush carpets and natural textures in nano tanks. This guide is full of clear, easy-to-follow advice. It’s perfect for hobbyists in the United States who want great results without hassle.

    Moss is a key part of aquascaping because it’s versatile and tough. You can use it as a moss carpet in the foreground, a midground accent, a background wall, or even as a surface and floating cover. Its ability to handle different light and water makes it great for small spaces.

    For nano tanks, moss offers many benefits right away. It adds instant greenery, fits small spaces, and often needs less care than other plants. It also works well with active fish and invertebrates, making it a stable, easy-to-care-for option for long-term displays.

    This article will teach you how to pick the best moss for nano tanks, prepare your tank, plant it, and care for it. You’ll get step-by-step guides for creating moss carpets, tips on trimming and harvesting, and how to deal with algae and cyanobacteria. You’ll also learn advanced methods and ideas to show off your work.

    Examples and tips come from trusted aquascaping sources and hobbyist experiences. Later sections will give you practical steps to set up and keep moss in nano tanks that look natural and healthy.

    What is Aquatic Moss and Why Use It?

    A vivid underwater scene showcasing aquatic moss in a lush, vibrant aquarium. In the foreground, clusters of bright green, velvety aquatic moss create a dense carpet covering the substrate, with delicate tendrils swaying gently in the water current. The middle ground features various aquatic plants and small pebbles nestled among the moss, adding texture and depth. In the background, soft, diffused light penetrates the water, illuminating the scene and casting gentle shadows. A few small fish swim playfully through the moss, enhancing the aquatic ambiance. The mood is serene and natural, evoking a sense of tranquility and ecological beauty, ideal for showcasing the unique qualities and advantages of aquatic moss in creating natural aquatic environments.

    Aquatic mosses are plants that grow on other surfaces. They use rhizoids to attach to driftwood, rocks, and substrate. They get their nutrients from the water around them.

    These mosses are great for nano tanks. You can use them as foreground carpets, midground shrubs, or to soften edges. You can even create moss walls or floating mats. Riccia fluitans is a popular choice for covering the water surface.

    Aquatic moss is very hardy. It can grow well in temperatures up to 82°F (28°C). It also thrives in cooler water.

    These mosses can handle different water chemistry. They do well in soft, acidic water and can tolerate harder, alkaline, or brackish conditions. They are safe for fish and shrimp.

    • Easy moss for nano tanks often needs no CO2 and grows with minimal substrate.
    • Slow, steady growth reduces fertilizer demands and limits frequent trimming.
    • Resilience to common hobbyist mistakes makes moss a reliable first plant.

    The benefits of aquatic moss include adding texture and depth to your tank. You can hide unsightly hardscape joints, soften cut branch ends, or create focal points like a moss-covered wall.

    Because many mosses require little fuss, they offer aesthetic benefits without heavy maintenance. This is why many hobbyists choose easy moss for nano tanks to create natural, low-stress aquascapes.

    Choosing the Right Moss for Your Nano Tank

    A vibrant layout showcasing a selection of the best moss types for nano tanks. In the foreground, focus on lush, green patches of various aquatic moss species, such as Christmas moss, Java moss, and weeping moss, artistically arranged to mimic a natural carpet. The middle ground features a small, well-maintained nano tank filled with clear water, softly illuminated by gentle, natural light from a nearby source, highlighting the textures of the moss and the tiny aquatic life. The background displays blurred aquatic plants and subtle hints of driftwood to create depth, evoking a tranquil underwater environment. The overall mood is serene and inviting, capturing the essence of a well-designed nano aquarium. The image should have a warm color palette and be taken from a slightly elevated angle to emphasize the moss's layout and details.

    Start by matching plant habits to your tank’s layout. Java moss is great for beginners because it can handle different light and water conditions. It spreads out, filling gaps, making it perfect for easy-to-care-for ground cover.

    Christmas tree moss gives a neat, layered look. It grows in tiers, ideal for midground or background. It adds texture without spreading out too much.

    Flame moss adds vertical interest. It forms tufts that look like flames. Use it as small highlights or on hardscape for contrast.

    • For an easy carpet: choose Java moss or mix hardy varieties.
    • For textured accents: pick Christmas tree or flame moss.
    • For low-light tanks: favor tolerant species like Java moss.

    Pair moss with other plants for contrast. Riccia adds floating texture, brightening the scene. Mixing shapes and colors adds depth and defines areas.

    Get moss from trusted aquarium retailers or online shops. Check for pests and algae before planting. Choosing the right moss and plants makes your tank look great and stay healthy.

    Preparing Your Nano Tank for Moss

    First, pick the right tank size and equipment for your moss carpet. Nano tanks from 2.5 to 10 gallons are perfect. Choose a sponge or hang-on-back filter with adjustable flow for gentle water movement. This helps avoid stagnant water under the moss mat.

    For substrate, you don’t need much. Moss grows well on hardscape, so a thin layer of nutrients or inert sand is enough. Use a modest depth to easily clean under the moss and access detritus. Most mosses like a wide pH and hardness range.

    Keep the water temperature between room temperature and 82°F (28°C). Some mosses prefer cooler water, while others like it warmer. Lighting should be low to moderate to prevent algae growth.

    • Tank setup moss for nano tanks: position the light to give even coverage without hotspots.
    • Provide gentle circulation to sweep away debris under mats.
    • Avoid strong jets that can displace delicate attachments.

    Prepare driftwood and stones before planting moss. Clean and soak wood to remove tannins for clearer water. Use dark cotton thread or fine mesh to attach moss temporarily. These materials break down or can be removed once the moss is firmly attached. Avoid using fishing line, as it can harm growth or small fish.

    Plan for maintenance before planting. Schedule gentle siphoning under mats with a narrow tube or skewers to remove trapped detritus. Trim moss regularly to keep it compact. Choose low maintenance moss like Java moss to reduce pruning and keep care simple.

    Planting Moss in Your Nano Tank

    Start small and work in short sessions when planting moss in nano tank setups. Break the task into steps so you do not disturb the substrate or livestock. When you learn how to plant moss for nano tanks, patience pays off more than speed.

    Loose carpet method: spread strands evenly across the foreground and gently press so rhizoids touch the substrate. Use a few small pebbles or glass beads to hold pieces down until the moss secures itself. This technique produces a moss carpet for nano tanks that fills in naturally over weeks.

    Attaching to hardscape: tie moss to driftwood or stones with dark cotton thread for discreet support. You can wrap moss between two layers of fine mesh or fly-screen to make moss walls. Cotton breaks down over time and lets the moss attach. Avoid clear fishing line; fish line can cut soft moss and looks obvious.

    Create small moss balls or tufts by rolling handfuls into tight shapes and pressing them into crevices in the midground or foreground. These fillers add texture and will not compete with rooted plants. Floating mats made from Riccia or loose moss give brood cover and shaded pockets at the surface.

    • Work in small sections to keep water parameters stable.
    • Ensure good contact between moss and its surface so rhizoids can attach quickly.
    • Use short ties or light pruning to guide initial growth and shape a moss carpet for nano tanks.

    After planting, watch for detritus buildup and reduce flow if pieces keep lifting. Do not change water chemistry suddenly; abrupt shifts can cause browning. If a patch fails to attach, re-tie it and check lighting and CO2 levels.

    Maintaining Your Moss Carpet

    To keep your moss carpet lush, just a little care goes a long way. Trim it now and then to keep it bushy and full. Cut off any brown or overgrown parts to make room for new growth.

    When debris builds up under the moss, be gentle. Use a skewer or soft tool to stir the substrate without pulling up the moss. This way, you can clean out the debris without harming your carpet.

    Keep an eye on the nutrients in your water. Too many nitrates can lead to algae on your moss. Too little can cause cyanobacteria. Test your water and adjust as needed, without using harsh chemicals.

    Most moss species don’t need fertilizers or CO2 to grow well. But if you want your moss to grow faster or thicker, these can help. Just be sure to monitor your water and algae levels closely.

    Lighting is key for keeping your moss carpet healthy. Use moderate light and control the photoperiod to prevent algae. If algae do show up, try reducing the light first, then look for other causes.

    Mosses can handle a wide range of temperatures and water conditions. But make sure your tank is set up for your fish and other inhabitants, not just the moss. If your moss turns brown after sudden changes, get the conditions stable again and trim the affected areas.

    • Routine trim: promotes denser carpet and removes decay.
    • Under-mat cleanup: use skewers and careful siphoning.
    • Monitor nutrients: prevent algae and cyanobacteria.
    • Fertilizer/CO2: optional, used for enhanced growth only.
    • Light control: moderate light reduces algae pressure.

    If algae or cyanobacteria show up on your moss, cut off the affected areas. Rinse the removed moss under tank water and return only the clear parts. This keeps your carpet healthy while you continue with regular moss care.

    Harvesting and Trimming Moss

    Timing is key when caring for a moss carpet. Trim it regularly to keep it compact and prevent shading. How often depends on the moss type and your tank’s lighting. Most mosses grow slowly, needing a trim every few weeks.

    Use sharp scissors to cut the top growth. Remove the clippings immediately to avoid decay and nutrient spikes. This simple step is vital for maintaining your tank’s stability.

    • How to trim moss for nano tanks: angle scissors slightly and snip above the base to encourage horizontal spread.
    • Work in small sections so you can shape the carpet without stressing plants or disturbing livestock.

    Harvesting moss for propagation is easy. Cut healthy sections and attach them to new areas with thread, glue, or mesh. Small moss balls or tufts are simple to split and move because they don’t need substrate nutrients.

    If you spot brown or damaged moss, remove it quickly. Brown moss often comes from low flow, poor pruning, or sudden water changes. Replace damaged areas with healthy moss fragments to restore the carpet.

    Practical tips make moss care simpler. Never leave moss clippings in the tank to rot. Use them to start new patches in other tanks or share with friends. Regular moss care will keep your carpet lush and long-lasting.

    Enhancing Your Nano Tank with Moss

    Use moss to make your nano tank look bigger and more interesting. Place moss in the front to look like a lawn. This makes small tanks feel bigger.

    Attach moss to rocks and driftwood for a cool effect. Moss against dark rocks creates a focal point. Lighter mosses make soft carpets.

    Build a moss wall in the back for a big impact. You can also use moss in riparium or paludarium backdrops. This adds rich textures to your tank.

    • Float moss mats to supply shade and hiding spots for shy fish or fry.
    • Use moss as midground accents on branches to soften hard edges.
    • Combine moss with faster-growing rooted plants to hide edges as the moss establishes.

    Think about how moss looks with other things in your tank. Mix different textures and colors to make everything stand out.

    Practical uses include hiding cut branch ends and defining areas. Moss can also fill gaps without taking over the substrate.

    Choose moss colors wisely. Dark moss for focal points and light moss for carpets. This creates a natural, layered look in your tank.

    Troubleshooting Common Moss Problems

    Algae on moss can happen if light or nutrients are off balance. Try cutting back light time to six to eight hours. Remove bad patches by cutting or rinsing in old tank water. Also, improve flow and filtration to stop spores from sticking.

    Moss turning brown might mean poor flow or sudden water changes. Trim dead parts and replant healthy bits. Good, steady flow helps moss roots grow and prevents dying off.

    Detritus buildup under moss carpets is a problem when mats are dense and flow is low. Use a skewer to gently remove debris. Thin the carpet or move clumps to improve flow under the moss.

    • Tie-down failures often come from weak contact or a slippery surface. Re-tie with cotton thread or use mesh or fly-screen to sandwich the moss until roots anchor.
    • Persistent cyanobacteria needs more than a surface rinse. Remove infected moss, rinse in old tank water, then address light and nutrient imbalances before returning healthy pieces.

    When fixing moss issues, test for nitrates and phosphate. Adjust fertilization and do partial water changes to fix imbalances. Regular pruning helps prevent overcrowding and moss problems in nano tanks.

    Use a checklist to troubleshoot: check lights, test water, trim dead growth, remove algae on moss, boost flow, and reattach loose patches. This step-by-step method helps solve moss problems in nano tanks quickly and effectively.

    Advanced Techniques for Experienced Hobbyists

    Mastering advanced moss techniques lets you create stunning aquascapes. Start by planning how moss will grow over time. Add moss first, then slower-growing plants as the scene develops. This way, your tank stays balanced while you craft detailed moss designs.

    To build moss walls, use fine mesh or window fly-screen. Place moss between mesh layers and tie edges with cotton thread. As moss grows, the mesh becomes hidden, perfect for vertical moss walls.

    Shape moss on complex hardscape to create midground features. Attach moss in a mosaic pattern to rocks, roots, and driftwood. Using many small pieces helps fill gaps and promotes even growth.

    • Targeted pruning and light control shape growth habit.
    • Higher light can compact species like Java moss into dense cushions.
    • Lower, directional light encourages vertical or trailing forms.

    Use selective CO2 or spot fertilization for growth bursts. Keep nutrient levels low to avoid algae. This approach highlights focal points without overstimulating the tank.

    Adopt strategies for rapid moss coverage. Use multiple attachment points and staggered fragment sizes. Anchor pieces with aquascaping tweezers and thin nylon thread until they root. These actions speed up moss carpet establishment.

    Combine moss with high-tech tank elements carefully. CO2 and balanced dosing promote moss growth, but algae control is key. Stable water and regular micro-filtration help prevent algae while supporting moss growth.

    1. Design a planting schedule: moss first, then companions.
    2. Map attachment points to create visual depth.
    3. Use selective fertilization and light for staged growth.

    Plan for long-term evolution. Moss will be the instant green; let slower plants fill gaps over months. Regular, small trims refine form and keep your work aligned with the original concept. These practices will elevate your moss work into consistent, sophisticated designs that last.

    Showcasing Your Moss Tank

    Before showing or taking pictures, make sure the glass is clean and the edges are trimmed. A neat moss carpet looks like a design choice, not just random growth.

    Place foreground carpets with midground moss on rocks or driftwood to add depth. This setup is great for showing moss tanks to friends or at club meetings.

    • Use directional lighting to highlight texture without promoting algae.
    • Photograph after a water change and trim when contrast is sharp.
    • Choose a neutral background to make colors and textures pop in photos.

    When taking pictures, shoot from a typical viewing height. This makes the layout look like a miniature landscape. Slight angles can also show the relief on moss-covered surfaces.

    Share healthy moss pieces with local clubs and online groups. This helps build a community and teaches you how to present moss tanks.

    Place your tank where people can see it at eye level. Use darker rocks or wood to frame the bright green moss. This helps guide the viewer’s focus during a presentation.

    Simple grooming, careful lighting, and framing make showing off your moss tank a fulfilling part of your aquascape journey.

    Conclusion: The Beauty of Moss in Nano Tanks

    Moss in nano tanks is a great way to add beauty without much work. You can choose from Java moss, Christmas moss, and flame moss to create different looks. Use them to make carpets, accents, walls, or mats for a peaceful scene.

    To get the most out of moss, make sure your tank has gentle flow and the right light. Use cotton or mesh to attach it. Keep the moss clean by trimming it and removing debris. Also, make sure the light and nutrients are balanced to avoid algae and cyanobacteria.

    Moss in nano tanks is easy to care for and fun to play with. With a little care and occasional trimming, your tank can have beautiful moss carpets. These carpets enhance the texture, contrast, and beauty of your aquarium.

    FAQ

    What is aquatic moss and why is it recommended for nano tanks?

    Aquatic mosses are plants that grow on surfaces without roots. They absorb nutrients from the water. They’re great for nano tanks because they’re easy to care for and add greenery.

    Which moss species are best for nano tanks?

    Java moss is perfect for easy carpeting. Christmas tree moss and flame moss add texture. Riccia fluitans floats and adds texture. Start with Java moss for beginners.

    What tank size, filtration, and equipment should I use for moss in a nano tank?

    Mosses don’t need special substrate. Your tank should have gentle filtration and consistent flow. Use a filter that fits your tank size and keep the water stable.

    How do I attach moss to hardscape like driftwood or stones?

    Clean the hardscape first. Use dark cotton thread to tie moss in place. Or, use mesh to create moss walls. Cotton biodegrades over time.

    What are reliable planting methods for creating a moss carpet in a nano tank?

    Spread moss strands on the substrate and press gently. Use small pebbles to hold it until it attaches. For hardscape, tie or mesh the moss to the surface.

    How should I care for moss right after planting?

    Watch for detritus buildup and adjust flow if needed. Avoid sudden water changes. Keep lighting moderate and remove floating debris.

    How often should I trim and harvest moss?

    Trimming frequency depends on the moss type and light. Most mosses need occasional trimming. Remove clippings to prevent decay.

    Do mosses need CO2 or fertilizers?

    Most mosses don’t need CO2 or heavy fertilization. They grow well from water column nutrients. Supplemental CO2 and fertilizers can encourage growth but may lead to algae.

    Why is algae showing up on my moss and how do I fix it?

    Algae appears from too much light or nutrient imbalances. Reduce light or correct nutrient levels. Remove affected moss patches and improve flow.

    What causes brown or dying moss, and how can I recover it?

    Browning often comes from poor flow or sudden water changes. Trim brown areas and increase flow. Stabilize water parameters and reintroduce healthy fragments.

    How do I remove detritus trapped under moss carpets?

    Use a skewer or thin tool to loosen waste under mats. Gently siphon while avoiding pulling up the moss. Improve circulation to prevent recurrence.

    My moss failed to attach. What went wrong and what should I do?

    Attachment failures often come from poor contact or unstable surfaces. Reattach using dark cotton thread or mesh. Ensure the surface is clean and the moss is pressed firmly.

    Can I use moss in advanced aquascapes with CO2 and fertilizers?

    Yes, moss can thrive in high-tech setups. But, manage algae risks carefully. Keep nutrient balance and control lighting to avoid algae outbreaks.

    What are effective design strategies for showing moss in a nano tank?

    Use moss carpets for foreground scale. Attach moss to stones and driftwood for midground accents. Build moss walls for dramatic backdrops.

    How should I photograph and present my moss tank for sharing online?

    Trim and clean the moss beforehand. Use neutral or dark backgrounds and directional lighting. Photograph after a recent trim for clear carpets.

    Where should I buy moss to avoid pests and algae?

    Buy moss from reputable retailers or trusted forums. Inspect samples for pests or algae. Quarantine or rinse new moss in old tank water before adding it.

    Any quick troubleshooting tips for persistent cyanobacteria on moss?

    Remove infected moss and rinse it thoroughly. Adjust light and rebalance nutrients. Improve flow and perform regular maintenance before reintroducing cleaned fragments.

    Can moss be used with other plants without competing for substrate nutrients?

    Yes. Mosses are epiphytic and don’t rely on substrate nutrients. They work well with rooted plants. Use faster-growing stem plants to hide moss edges during establishment.

    What are simple ways to propagate moss for faster coverage?

    Divide healthy sections into multiple small clumps. Attach them in a mosaic pattern across substrate and hardscape. Use small balls or tufts to fill gaps. Reattach cuttings using cotton thread or mesh to speed coverage.

  • Water Conditioner Basics: Understanding the Importance of Dechlorination

    Water Conditioner Basics: Understanding the Importance of Dechlorination

    Clear tap water is key for a healthy nano tank. But, you need to know about water conditioner basics. Tap water often has chlorine or chloramine that harms beneficial bacteria and fish.

    Dechlorination is a must: aim for 0 ppm chlorine before adding water. This protects the biological filter and keeps the nitrogen cycle going. The cycle is vital for converting toxic ammonia into nitrate.

    Regular water changes are important for water conditioning. For most nano tanks, change 15–20% of the water weekly. Heavily stocked tanks might need 30–50% weekly. New tanks may need changes two to three times a week until the ecosystem is stable.

    Before starting, get the right equipment. You’ll need a 5-gallon bucket, a siphon/gravel vacuum, a dechlorinator/water conditioner, and a water test kit. Make sure the water temperature and parameters match before adding it to your tank.

    Chlorine and chloramine are different dangers. Chlorine harms biofilter bacteria and gills. Chloramine has bonded ammonia, which is even more dangerous. Find out which disinfectant your local water supply uses.

    Some products, like SL Aqua Black More Stabilizer and SL-Aqua Aquarium Plant Protector Z2, are used for dechlorination and plant care. Always use them as directed to improve water quality safely.

    Here’s a tip: dechlorinate water in your bucket first. Acclimate the temperature by leaving the bucket in the same room or using a heater. Add water slowly by elevating the bucket and feeding with a siphon. This reduces stress on your tank’s inhabitants.

    What is a Water Conditioner?

    A water conditioner placed prominently in the foreground, showcasing its sleek, modern design with a clear reservoir filled with a softly glowing blue liquid. In the middle ground, a softly lit kitchen countertop features scattered aquarium supplies, such as a nano tank, dechlorinating drops, and a measuring cylinder, all evoking a sense of caring for aquatic life. The background is a softly blurred view of a bright, airy kitchen with natural light coming through a window, imparting a clean and welcoming atmosphere. The scene captures a sense of tranquility and purpose, with warm and cool tones blending harmoniously. The angle is slightly above eye level, allowing a clear view of the water conditioner and its surroundings, enhancing the image's informative quality.

    Tap water has disinfectants and trace metals that are safe for humans but not for fish and invertebrates. A water conditioner, also known as a dechlorinator, removes chlorine and chloramine. It also detoxifies heavy metals. Its main goal is to make tap water safe for fish and beneficial bacteria in your filter.

    Knowing how water conditioners work helps you choose the right one. Many use sodium thiosulfate to remove free chlorine. Some formulas break chloramine bonds, making ammonia less toxic. Others add chelators to bind metals like iron and copper.

    Water conditioners come in different forms. Liquid concentrates are most common, while tablets are convenient for small changes. Multi-purpose blends detoxify ammonia, nitrite, and metals. Some claim to support slime coat or help beneficial bacteria survive.

    When buying a conditioner, consider practical things. Check if it works on chloramine or just chlorine. Follow the manufacturer’s dosage instructions. Choose well-known brands like Seachem or API for reliable performance.

    Knowing your water utility’s disinfectant is important. If you’re unsure, call them or use a conditioner for both chlorine and chloramine.

    Proper dechlorination is key to a healthy aquarium. Water must be treated before adding nitrifying bacteria or starting a biofilter. Chlorine and chloramine can harm or kill these bacteria, stopping the nitrogen cycle. So, using a suitable water treatment solution is vital.

    Why Dechlorinating Tap Water is Essential

    A clear glass container filled with freshly dechlorinated tap water sits prominently in the foreground, showcasing its pristine clarity. Surrounding the container, delicate, colorful aquatic plants gently sway in the water, hinting at a thriving nano tank ecosystem. In the middle ground, a pair of hands in professional business attire carefully place a water conditioner bottle next to the container, symbolizing the dechlorination process. The background features a softly blurred kitchen setting, with light streaming in through a window, creating an inviting and serene atmosphere. The scene is well-lit, emphasizing the vibrancy of the plants and the clarity of the water. The angle is slightly elevated to capture both the hands and the container, conveying a sense of careful attention to detail and the importance of water quality in aquariums.

    Water conditioning is key to keeping your tank’s microbes healthy. These microbes, like Nitrosomonas and Nitrospira, are vital for a stable nitrogen cycle. Chlorine or chloramine in tap water can kill them, stopping the cycle and causing harm.

    Chlorine and chloramine can directly harm your fish and plants. They damage fish gills, cause stress, and make them more prone to disease. Even low levels can harm sensitive invertebrates like cherry shrimp and slow down plant growth.

    Not all disinfectants are the same. Chloramine, for example, is a mix of chlorine and ammonia and lasts longer. Always choose products that remove both chlorine and chloramine to be sure.

    Dechlorination is important for water chemistry and care. It keeps the nitrogen cycle going and protects beneficial bacteria. This means you don’t have to do emergency water changes as often and helps keep ammonia and nitrite levels safe.

    • Always dechlorinate replacement water in a clean bucket using the manufacturer dosing.
    • Match water temperature before adding it to your tank to avoid shocking livestock.
    • Test pH, ammonia, nitrite, nitrate, GH and KH after water changes to confirm water quality improvement.

    When choosing filtration options, consider conditioners that protect biological media. A good dechlorinator, combined with mechanical and biological filtration, helps keep your tank healthy and stable.

    The Relationship Between Nano Tanks and Water Quality

    Your nano tank is more sensitive to changes than a big aquarium. Even a small water change or a brief temperature shift can quickly affect pH, ammonia, and nitrite levels. This means you must watch these levels closely for good water quality.

    The size of your tank and how much life it holds affect how often you need to change the water. Lightly stocked tanks might only need 15–20% of water changed weekly. But, tanks with more life may need 30–50% changed weekly or more often to keep the water balanced.

    Filtration in nano tanks often has less room for beneficial bacteria. You can boost biological filtration with high-quality filter media or extra biomedia. For bare-bottom tanks, adding glass beads or marbles during cycling helps bacteria grow.

    Cycling a nano tank is delicate. Nitrifying bacteria work best above pH 7 and struggle in soft or RO water. Chlorine or chloramine in the water can stop the cycle from starting unless treated. Knowing how water conditioners work is key to protecting these bacteria.

    • Test water often to catch early changes in ammonia, nitrite, and pH.
    • Match the temperature and add new water slowly to avoid shocking your fish.
    • Use water conditioners that remove chlorine and chloramine before adding new water.

    Choosing the right method might involve using a water softener if your tap water is hard. Knowing about different water conditioners helps you find one that removes chlorine, chloramine, heavy metals, or detoxifies ammonia.

    Keeping up with simple habits can greatly improve your water quality. Regular water changes, proper filtration, and reliable water conditioners are key. Following this routine keeps your nano tank stable and your fish healthy.

    How to Choose the Right Water Conditioner

    First, find out what disinfectant your water utility uses. You can call them or check their website. Knowing this helps you pick the right conditioner and understand how it works.

    Look at product labels for clear instructions. Make sure they mention chlorine and chloramine. Also, check if they list heavy-metal chelators and provide testable directions. Brands like Seachem offer detailed guides to help you choose.

    • Identify the types of water conditioners available: liquid dechlorinators for routine water changes, granular or cartridge media for inline filters, and whole-house neutralizers for point-of-entry treatment.
    • Match the conditioner to your tank: shrimp and plant-focused nano tanks need gentle formulas without unnecessary additives.
    • Beware of broad claims about permanent ammonia detox. Many products temporarily bind ammonia, but long-term nitrogen control relies on biological filtration and water changes.

    Think about how easy the conditioner is to use and install. For most, liquid dechlorinators are simple and effective. But, if you’re looking at inline systems or softening for plumbing, you might need professional help.

    Test your conditioner to make sure it works. Use test kits to check for chlorine and ammonia levels. Regular testing helps you trust your conditioner and ensures your water is safe for your fish.

    1. Confirm municipal disinfectant (chlorine or chloramine).
    2. Compare labels for target chemicals, chelators, and dosing.
    3. Choose the right type for your tank and livestock sensitivity.
    4. Consider professional installation only for whole-house or hard-water solutions.
    5. Validate performance with routine testing.

    Remember, conditioners are just part of a bigger plan. Combine them with proper cycling, filtration, and water changes. This will protect your fish and make your water conditioner work its best.

    The Dechlorination Process Explained

    Learning about dechlorination is key to keeping your tank safe and water quality stable. Sodium thiosulfate is a common agent that turns free chlorine into harmless chloride. It does this by changing it into a less harmful form.

    Chloramine-breakers work differently. They split the chloramine bond, releasing ammonia and a chloride compound. Some conditioners then bind the ammonia or change it into a safer form. But, they don’t replace the biological nitrification in your filter.

    For water changes, follow a simple step-by-step process. Start by cleaning and preparing a bucket. Use it to measure the exact amount of water you need.

    Add tap water to the bucket and add the recommended dose of dechlorinator. Wait for the time suggested on the label before moving on.

    Make sure the water temperature matches your tank’s to avoid shocking it. You can use a submersible heater or let the bucket sit in the same room. This way, the temperature difference won’t be too big.

    Slowly add the prepared water to your tank. Use a siphon to mix the water gently. Place the bucket higher to allow a steady flow into the aquarium.

    After refilling, turn on your equipment again. Start with the filters, CO2, and heaters. Keep an eye on the water parameters for a few days.

    Test for ammonia and nitrite, even if a conditioner claims to detoxify them. Always follow the manufacturer’s advice and keep testing after changes.

    How long you need to wait and how the product works can vary. Some conditioners work right away, while others need a minute or more. Always follow the label for the best results.

    Knowing how water conditioners work helps you pick the right one. This way, you can match your needs with the right product. Sometimes, you might also need to use other water filtration options.

    Remember, proper dechlorination protects the good bacteria in your filter. Never add untreated tap water to your tank. This could harm the nitrifying colonies and stop the cycle. Treating water correctly is part of keeping your nano tank healthy and stable.

    Using a Water Conditioner with Other Treatments

    Think of your tank as a whole when mixing products. Begin by removing chlorine with a water conditioner. This is because chlorine can kill beneficial bacteria. Wait for the recommended time before adding products like One & Only.

    RO/DI water is very pure but lacks minerals. This is important for shrimp and many plants. Use products that include trace elements or a remineralizer to keep pH stable.

    • Start by removing old water, then add treatments as directed. Finish with dechlorinated water.
    • Be careful when using algae treatments like SL-Aqua Plant Protector Z2. Check if they’re safe with conditioners and avoid mixing chemicals.

    Water softeners change the levels of calcium and magnesium. They can lower GH and affect buffering. You might need to dechlorinate after using a water softener, depending on your system and water supply.

    Don’t try to speed up the cycling process with shortcuts. Ammonia removers can hide free ammonia and slow down the cycle. Stick to simple dechlorinators like First Defense when cycling without fish or adding ammonia.

    1. Always use a basic dechlorinator before adding biological starters.
    2. Remineralize RO/DI water to set GH/KH levels.
    3. Follow the order of medications and algae treatments, with dechlorination first.

    Choose water treatments that work well together for your fish and plants. Test GH, KH, and pH after each change. Small, steady steps help your cycle and support beneficial bacteria.

    Common Mistakes When Using Water Conditioners

    Setting up a nano tank can be tricky. Small mistakes in water conditioner installation can lead to big problems. Many people think their tap water only has chlorine. But, it often has chloramine too, which a simple chlorine remover won’t handle.

    Not dechlorinating water before adding nitrifying bacteria can slow down cycling. If you add live bacteria to chlorinated or chloraminated water, they will die. This makes your cycle go backward. Wait until the water is safe and stable before adding biological starters.

    • It’s easy to overdose or misjudge the amount of conditioner needed. Make sure to measure the bucket’s volume and follow the instructions carefully. This avoids leaving harmful disinfectants or adding too much chemical.
    • Counting on conditioners to fix nitrogen issues is risky. While they can temporarily neutralize ammonia, they don’t replace proper biological filtration, regular water changes, or plant uptake.
    • Using ammonia-removing chemicals during fishless cycling is not a good idea. These chemicals remove the food for nitrifying bacteria, stopping the cycle.

    When adding conditioned water, pay attention to temperature and parameter matching. Water with a different temperature or pH can shock your fish. Let the new water equilibrate and add it slowly to avoid stress.

    Insufficient surface area for bacteria can make cycling take longer. Bare-bottom nano tanks or setups with limited biomedia need extra media. Use ceramic rings, sponge filters, or temporary marbles and glass beads to boost colonization until the tank matures.

    1. Learn how water conditioners work so you choose the right product for your source water.
    2. Compare water filtration options to pair a conditioner with mechanical and biological filtration that suit your stocking and plants.
    3. Double-check water conditioner installation steps and dosing calculations before each change.

    Avoid these common mistakes to prevent sick fish, stalled cycles, and repeat treatments. With careful planning, correct dosing, and suitable water filtration options, your nano tank will stay stable and healthy.

    Monitoring Water Quality in a Nano Tank

    In a nano tank, test key parameters often because small volumes change quickly. Start with ammonia, nitrite, nitrate, pH, GH, KH, and chlorine if unsure about your source water. During cycling, test daily or every few days until readings are stable. After that, check weekly for routine parameters and more often if you spot unusual behavior.

    Choose reliable tools for accurate results. A liquid water test kit gives the best precision for ammonia and nitrite, which should read 0 ppm in a fully cycled tank. Use test strips or digital meters as supplements, but confirm odd readings with a liquid kit to avoid false alarms.

    • Ammonia: any detectable level needs action—partial water change and filtration check.
    • Nitrite: treat the same as ammonia; it is toxic to livestock.
    • Nitrate: keep low for sensitive species; aim under 10–20 ppm with plants or frequent changes.
    • pH, GH, KH: monitor trends; sudden swings demand investigation.
    • Chlorine: test if you suspect tap water is not dechlorinated.

    Interpreting results means knowing when to act. Detectable ammonia or nitrite is a problem and calls for immediate steps like water changes, reducing feeding, and checking filter media. Elevated nitrates point to organic buildup; respond with water quality improvement measures such as partial changes, better mechanical filtration, or adding live plants.

    Keep a simple log of your measurements, water changes, dosing of conditioners, and any livestock additions. A short record helps you spot trends and predict problems before they escalate. Note the brand and dose when you use a product under water conditioner basics so you can repeat effective routines.

    Small tanks react quickly to events like feeding, stocking, or a water change. Monitor after feeding and after adding new animals. Test right after water changes to confirm parameters returned to safe ranges. This close attention lets you practice proactive maintenance and steady water quality improvement.

    Choose a consistent schedule and stick to it. Regular monitoring water quality with a trusted water test kit and clear notes gives you control. That routine supports healthy livestock, steadier chemistry, and confident use of water conditioner basics when needed.

    Signs of Poor Water Quality in Your Nano Tank

    Behavioral signs often show up before tests confirm water quality issues. Fish may eat less, swim slowly, or gasp at the surface. They might also have rapid gill movement. These are signs that water quality needs to improve fast.

    Invertebrates like dwarf shrimp also give clues. Look for molting problems, faded color, or sudden death. These signs show that water conditioning is key.

    Plants react quickly to water imbalances. Look for melting leaves, slow growth, yellowing, or algae outbreaks. These signs point to too many nutrients or poor water quality. Regular dechlorination helps prevent damage and supports plant health.

    • Cloudy water can signal a bacterial bloom.
    • Foul odors suggest organic buildup and poor biological filtration.
    • Visible film or scum may mean inadequate water filtration options or surface flow.
    • Sudden pH swings often follow contamination or weak buffering.

    Tests confirm water quality issues. Any ammonia or nitrite is a clear sign of poor water quality. High nitrates above 20–50 ppm, depending on species, need quick water changes and adjustments.

    Detectable chlorine or chloramine after treatment shows a mismatch in products or dosing. This highlights the importance of water conditioning and choosing compatible dechlorinators with your setup.

    1. Test water immediately when you notice symptoms.
    2. Perform an appropriately sized partial water change using properly dechlorinated water.
    3. Check filtration, heater function, and surface flow for signs of failure.
    4. Review recent additions, medications, or feeding changes that could trigger issues.
    5. For nitrite spikes, add aeration and perform partial changes to protect livestock while you correct the cycle.

    If problems persist, evaluate your water filtration options and upgrade biological media or flow. Small changes to maintenance routines and attention to the importance of water conditioning will support long-term water quality improvement and healthier inhabitants.

    Best Practices for Maintaining Water Quality

    Follow a routine for your tank. For small nano tanks, aim for 15–20% water changes weekly or 20% every two weeks. Larger tanks might need 30–50% weekly changes. In the first month, change water two to three times a week to help the tank settle.

    Use a simple water-change routine. Prepare new water in a clean bucket and add the right dechlorinator. Turn off equipment like filters and heaters before changing water. Clean the glass and trim dead plants first, then siphon and vacuum the substrate.

    Slowly add the prepared water and start the equipment again. Watch the water parameters for a few days.

    Always dechlorinate water before adding it or introducing bacteria. Don’t overuse ammonia-removing chemicals while the cycle is maturing. Provide enough biomedia for nitrifying bacteria to thrive.

    Nitrifying bacteria like a pH near or above 7 and some minerals. If using RO/DI water, remember to remineralize it. This supports both fish and microbes, which is important for water quality.

    Use reliable tools and track your results. Choose a good siphon, accurate test kits, and a trusted dechlorinator. Consider RO/DI water with remineralization for sensitive fish, but always dechlorinate after treatment.

    Keep a log of your maintenance and tests. Adjust your water-change schedule based on the tank’s load and parameters. Act fast if you see stress or algae. Consistency is key to a healthy nano tank.

    FAQ

    What are the basics of a water conditioner and why does it matter for aquarium success, specially nano tanks?

    A water conditioner removes chlorine and chloramine from tap water. It also chelates heavy metals. This is important because even small amounts of chlorine or chloramine can harm your tank.

    They can kill beneficial bacteria, damage fish gills, and stress plants. In nano tanks, these problems happen faster. Always remove disinfectants to protect your tank’s life and filter.

    What exactly is a water conditioner and what does it do?

    A water conditioner is a chemical product that neutralizes free chlorine and breaks down chloramine. It often includes sodium thiosulfate for chlorine and special reagents for chloramine. Many also have chelators to bind heavy metals.

    Its main job is to make tap water safe for fish, plants, and beneficial bacteria.

    Why must tap water be dechlorinated before adding it to an aquarium?

    Municipal disinfectants like chlorine and chloramine are toxic to aquarium life and beneficial bacteria. Chlorine destroys beneficial bacteria in biofilters, stopping the nitrogen cycle. Chloramine is more dangerous because it contains bound ammonia.

    If left untreated, it adds ammonia to the tank. The safe target for free chlorine is 0 ppm before adding water. Dechlorinating prevents harm to fish, invertebrates, and plants and keeps the biological filtration working.

    How do chlorine and chloramine harm fish, plants, and bacteria?

    Chlorine damages fish gills, causing gas exchange problems, stress, and increased disease susceptibility. Plants may experience tissue burn and “melting” of leaves. Nitrifying bacteria are highly sensitive.

    Even trace disinfectants can kill or inhibit them, disrupting the ammonia → nitrite → nitrate conversion. Invertebrates like dwarf shrimp are very sensitive and can die quickly from untreated tap water.

    How do common water conditioners chemically neutralize disinfectants?

    For free chlorine, agents like sodium thiosulfate reduce chlorine to chloride quickly. For chloramine, special breakers split the chloramine molecule into chlorine and ammonia. The chlorine portion is neutralized, and the released ammonia is either bound by the conditioner or converted to a less toxic form temporarily.

    Many formulas also add chelators for heavy metals. This chemical neutralization protects livestock and biofilters but does not replace long-term biological nitrification.

    What forms of water conditioners are available and which is best for hobby use?

    Typical forms include liquid concentrates (most common and easy to dose), tablets, and multipurpose conditioners claiming to detoxify ammonia, nitrite, and heavy metals. For routine water changes, liquid dechlorinators are the practical standard.

    Choose a reputable brand and a product labeled to neutralize both chlorine and chloramine if your utility uses them. Examples referenced in hobby articles include Seachem products and SL Aqua Black More Stabilizer; follow each manufacturer’s dosing instructions.

    How do I know whether my municipal water uses chlorine or chloramine?

    Municipalities are required to disclose their disinfectants. Check your water utility’s website or call them to confirm. If you can’t determine the disinfectant, choose a conditioner explicitly labeled to neutralize both chlorine and chloramine to be safe.

    Testing kits for chlorine/chloramine are also available to verify treated water.

    How should I prepare replacement water and equipment for safe water changes?

    Basic equipment includes a clean 5-gallon bucket with volume markings, a siphon/gravel vacuum (example: Qanvee gravel vacuum siphon), a reliable dechlorinator, and a water test kit. Fill the bucket, dose the conditioner per label, and allow any specified contact time.

    Match temperature and parameters before adding. Use a heater or let water sit in the same room to avoid >5°F differences. Slowly add water using an elevated bucket and siphon to avoid shocking livestock.

    What is the step-by-step workflow for a safe water change?

    Prepare and measure water in a clean bucket. Dose with the correct amount of dechlorinator and wait the manufacturer-recommended time if specified. Match temperature and other parameters.

    Turn off exposed equipment, siphon out the required percentage of old water and vacuum substrate, then slowly add the prepared dechlorinated water. Restart equipment and monitor parameters over the next few days.

    How often and how much water should I change in a nano tank?

    Frequency and volume depend on bioload. For small nano tanks with robust filtration, 15–20% weekly is a common baseline. Heavily stocked nano tanks often need 30–50% weekly.

    New tanks require more frequent changes—2–3× per week—until the system establishes. Adjust by testing: detectable ammonia or nitrite means take action; elevated nitrates (>20–50 ppm depending on livestock) require larger or more frequent changes.

    How does dechlorination relate to cycling and adding nitrifying bacteria?

    Dechlorination is essential before adding nitrifying bacteria or starting a biofilter. Chlorine and chloramine will kill added bacterial inoculants and native nitrifiers, stalling the nitrogen cycle. For fishless cycling, always use dechlorinated water and avoid ammonia-binding chemicals that remove the bacteria’s food source.

    Some conditioners claim to detoxify ammonia or nitrite—can I rely on that?

    Exercise caution. While many conditioners temporarily bind ammonia or convert it to a less toxic form, long-term nitrogen management must rely on biological filtration and water changes. Broad detox claims vary in transparency and supporting data.

    Use conditioners as part of a broader water treatment strategy, not as a substitute for proper cycling, filtration, and maintenance.

    How do water conditioners interact with other aquarium treatments like RO/DI, softeners, or medications?

    RO/DI removes minerals and often requires remineralization for shrimp or plant tanks; dechlorination is needed if disinfectants are present after point-of-use treatment. Water softeners change GH/KH and can affect buffering. When using medications or algae treatments (e.g., SL-Aqua Aquarium Plant Protector Z2), follow product sequences and compatibility notes: many treatments recommend certain timing relative to water changes and conditioners.

    Test and follow label guidance closely to avoid adverse interactions.

    What mistakes do hobbyists commonly make when using water conditioners?

    Frequent errors include assuming tap water has only chlorine (not checking for chloramine), using a conditioner that doesn’t treat chloramine, failing to dechlorinate before adding bacteria or water, overdosing or underdosing by not measuring bucket volume, relying on ammonia-removing chemicals during cycling (which stalls the cycle), and adding water at the wrong temperature or too quickly, which shocks livestock.

    Always read labels and verify your utility’s disinfectant.

    How can I test that my dechlorination worked?

    Use a reliable chlorine/chloramine test kit to check treated water. Also test for ammonia—if your conditioner splits chloramine and binds ammonia, verify ammonia levels shortly after treatment. Regularly test ammonia, nitrite, nitrate, pH, GH, and KH, specially during cycling or after changes.

    Liquid test kits are recommended for accuracy.

    What signs indicate poor water quality or that my dechlorination failed?

    Watch for behavioral signs: decreased appetite, lethargy, gasping at the surface, rapid gill movement, erratic swimming, or sudden invertebrate mortality. Plant symptoms include leaf melt, yellowing, or stalled growth. Water indicators: detectable ammonia or nitrite, cloudy water, foul odor, or sudden pH swings.

    If you suspect failure, test immediately and perform a partial water change with properly dechlorinated water.

    Are there special considerations for shrimp- or plant-focused nano tanks?

    Yes. Shrimp and many aquatic plants are sensitive to additives and heavy metals. Choose gentle conditioners that explicitly remove chlorine and chloramine and chelate metals while avoiding unnecessary additives. Use RO/DI with careful remineralization when required, provide adequate biomedia surface area, and prioritize stable parameters with small, frequent water changes.

    How does limited surface area in nano tanks affect biological filtration and cycling?

    Nano tanks often have less internal media and reduced surface area for bacterial colonization, slowing or destabilizing the nitrogen cycle. Consider high-quality filter media, add extra biomedia temporarily during cycling (glass beads or marbles), and avoid aggressive chemical use. Nitrifiers prefer pH near or above 7 and some mineral content; very soft or acidic water can slow their growth.

    How should I match temperature and parameters when preparing water in a bucket?

    Match temperature within about 5°F of tank water. Let the bucket sit in the same room or use a bucket-safe heater. Also consider pH and KH/GH: abrupt differences can shock livestock. Add dechlorinator before transferring water and add water slowly via siphon to allow gentle mixing and minimize stress.

    What equipment and products should I compare when choosing a conditioner?

    Compare whether the product treats both chlorine and chloramine, includes heavy-metal chelators, provides clear dosing instructions, and comes from a reputable brand with transparent usage directions. Examples cited in hobby literature include Seachem products and SL Aqua Black More Stabilizer. Prefer products that list active ingredients or performance claims you can verify, and test treated water to confirm effectiveness.

    Should I ever use whole-house or point-of-use neutralizers instead of liquid conditioners?

    Whole-house or point-of-use neutralizers are options for broader water treatment but typically require professional installation and maintenance. For aquarium hobbyists, liquid dechlorinators are the most practical solution for water changes. If using softeners, RO/DI, or other point-of-use systems, understand their effect on GH/KH and remineralize RO/DI water when necessary for shrimp or plants.

    How often should I test water in a nano tank?

    Test frequently during setup and cycling—daily or every few days—until parameters stabilize. After that, test weekly for routine parameters and after any change (new livestock, medication, or water change). Check ammonia and nitrite immediately if livestock show stress. Track GH, KH, pH, and nitrates to guide water-change frequency and dosing decisions.

    What immediate actions should I take if I detect ammonia or nitrite in my tank?

    Perform an appropriate partial water change using properly dechlorinated water, increase aeration if DO may be low, check and clean mechanical filter media (but do not sterilize biological media), reduce feeding, and test again. For nitrite spikes, consider adding aquarium salt for freshwater tanks (species dependent) and increase water-change frequency until levels return to 0 ppm. Investigate recent changes that may have caused the spike.

    What routine record-keeping helps maintain stable water quality?

    Keep a log of test results (ammonia, nitrite, nitrate, pH, GH, KH, chlorine), water-change dates and volumes, conditioner doses, new livestock additions, and treatments used. This historical data helps identify trends, anticipate maintenance needs, and spot causes of sudden declines—critical in small nano systems where changes occur quickly.

  • The Benefits of Floating Plants for Water Quality and Aesthetics

    The Benefits of Floating Plants for Water Quality and Aesthetics

    Adding floating plants to your nano aquarium can transform its look and function. These plants act as natural filters. They soak up nitrates, phosphates, and ammonia, reducing algae growth.

    Horizon Aquatics recommends certain plants for small tanks. Phyllanthus fluitans, Limnobium laevigatum, Salvinia minima, and Pistia stratiotes are great choices. These plants use surface CO2 for photosynthesis, boosting oxygen levels for fish.

    Floating plants also provide shade and shelter. Roots from plants like Frogbit and Water Lettuce offer hiding spots for fry and shrimp. This reduces stress and boosts survival rates. It’s best to cover about half the surface to avoid blocking light and causing oxygen issues.

    Introduction to Floating Plants for Nano Aquariums

    Lush floating plants gracefully cascade on the surface of a small, crystal-clear nano aquarium, showcasing an array of vibrant greens, delicate fronds, and textured leaves. The foreground features close-up details of water lettuce and duckweed, creating a sense of depth and life. In the middle ground, several small, colorful fish swim among the plants, adding movement to the tranquil scene. The background gently fades into subtle water reflections and soft, natural light streaming from above, enhancing the serene atmosphere. The image captures the calming essence of an aquascape, emphasizing the harmony between floating plants and aquatic life in a bustling, yet peaceful environment, all shot from a slight overhead angle to highlight the tank's beauty.

    Floating plants stay at the water’s surface. Their roots hang down into the water. Examples include Amazon Frogbit, Red Root Floater, and Duckweed. They’re great for nano aquariums.

    These plants are perfect for small tanks because they don’t take up space. They add greenery without using the bottom. This is great for those with small spaces.

    Floating plants do many things in a small tank. They block light for sensitive fish, soak up extra nutrients, and create homes for fry and shrimp. They also help stop algae from growing too much.

    But, you need to manage their growth. Some plants, like Salvinia, grow fast. You’ll have to prune them often to keep your tank balanced.

    Make sure the water is calm. Floating plants don’t like strong water movement. Avoid using filters and skimmers that can harm them.

    Lighting and nutrients are key for floating plants. They get more light than plants that live on the bottom. Adjust the light and nutrients to keep them healthy and prevent algae.

    Types of Floating Plants You Can Use

    A close-up view of a vibrant nano tank filled with various types of floating aquatic plants. In the foreground, lush green lily pads and delicate water lettuce form a natural canopy, while the middle ground features a mix of colorful duckweed and rich green frogbit, creating a lively and textured scene. The background is a softly blurred underwater landscape with pebbles and small rocks, enhancing the tank's depth. Soft, natural lighting filters through the water, casting gentle reflections and highlights on the plants, evoking a serene and tranquil atmosphere. The image should emphasize the beauty and diversity of floating plants, capturing their role in enhancing water quality and aesthetic appeal in a small aquarium setting.

    There are many floating plants you can pick for your nano tank. Choose ones that fit your light, flow, and the needs of your fish or shrimp. This way, you won’t have to trim them too often or deal with overcrowding.

    • Phyllanthus fluitans (Red Root Floater): This plant has bright red roots and leaves that turn reddish in strong light. It shades lower plants and helps fight algae. It likes medium–high light, 70°F–82°F (20°C–28°C), pH 6.5–7.5, and calm water. It’s perfect for those using Horizon Aquatics stock.
    • Limnobium laevigatum (Amazon Frogbit): It has lily-pad leaves and long roots that soak up extra nutrients. It grows fast but is easy to manage with pruning. Trim its roots to about 1″ if they get too long. It does well in moderate light, 64°F–84°F (18°C–29°C), pH 6.0–7.5.
    • Salvinia minima (Floating Fern / Water Spangles): Its small, fuzzy leaves feel soft. It grows quickly and has gentle leaves, making it safe for delicate fins and shrimp. It prefers low–moderate light, 65°F–85°F (18°C–29°C), pH 6.0–8.0, and is loved by The Shrimp Farm users.
    • Pistia stratiotes (Dwarf Water Lettuce): It forms velvety rosettes with dense roots that offer cover for fry. It shades the surface well and likes medium–high light, 68°F–82°F (20°C–28°C), pH 6.5–7.5. It does best in tanks with little surface movement.
    • Lemna spp. (Duckweed): These tiny plants spread fast and can cover a tank quickly. They take up nutrients well and are good for shrimp. You’ll need to thin them out often to prevent them from covering the whole surface. They can turn purple under some lighting.
    • Azolla filiculoides (Mosquito Fern): It converts atmospheric nitrogen and helps with nutrient cycling. It grows quickly and is best for experienced keepers who can manage its fast growth.

    When picking floating plants for your nano tank, think about their growth rate, root length, and light needs. Slower growers like Amazon Frogbit are good for planted nano tanks because they don’t shade out lower plants. Fast growers like duckweed and Salvinia are great if you need to quickly cover the surface or take up nutrients.

    For small tank floating plants, consider how their roots affect water flow and how much surface they’ll cover. Plants that form dense mats can protect fry and shrimp but might limit gas exchange. Choose plants that fit your filtration and the needs of your fish or shrimp to keep your water healthy and your tank looking good.

    Ways Floating Plants Enhance Water Quality

    Floating plants in nano setups act as natural filters. They soak up nitrates, phosphates, and ammonia from the water. This process cuts down on algae food and keeps your tank clear.

    Species like Red Root Floater or Frogbit are great for fighting algae. Their leaves block sunlight, which stops algae from growing in nano aquarium plants and small tanks.

    Some floating plants can even remove metals and pollutants from the water. Azolla, for example, fixes nitrogen, which is good for plants. Dense mats of floating plants trap organic matter, helping keep water chemistry stable in nano tank floating plants.

    Photosynthesis at the water’s surface adds oxygen during the day. This helps with gas exchange, benefiting fish and invertebrates. But, watch out for too much plant growth, as it can lower oxygen levels at night in small or crowded tanks.

    The roots and undersides of floating plants are home to beneficial microbes. These microbes break down ammonia and nitrite, improving biological filtration in nano aquarium plants.

    • Prune regularly to prevent sudden die-offs that can spike ammonia.
    • Quarantine new plants to avoid pests and hitchhikers brought in with floating plants for small tanks.
    • Manage coverage to balance light, oxygen, and nutrient uptake in nano tank floating plants.

    With regular care, floating plants in nano tanks offer big water-quality benefits. They lower nutrient levels, fight algae, and create healthy microbial habitats. These support stable, clear water in your tank.

    Aesthetic Benefits of Floating Plants

    Floating plants make your nano tank stand out. They add a striking focal point. Shapes like Frogbit or Water Lettuce create beautiful silhouettes.

    These shapes add depth without taking up too much space. They make your tank look more interesting.

    Each plant brings its own color and texture. Red Root Floater adds warm reds under bright lights. Salvinia has a soft texture, while Duckweed creates a dotted look.

    Mixing different plants makes your tank look richer. It becomes more visually appealing.

    You can create scenes that look like ponds or slow streams. This calm look is perfect for small tanks. It makes your tank feel balanced and not crowded.

    Trailing roots add vertical lines. They make your tank look better and provide hiding spots. Shrimp and fry find shelter and food in these roots.

    Light and seasons change the look of your plants. Duckweed might turn purple under strong light. Red Root Floater gets even redder. These changes keep your tank interesting.

    Open-top tanks look great with plants like Dwarf Water Lettuce and Frogbit. Without a lid, their leaves become a centerpiece. Choose plants that fit your tank’s size and light to keep it looking clean.

    Compatibility with Aquarium Life

    You can tailor floating plants to your tank’s inhabitants for better health and behavior. Bettas enjoy surface cover and resting spots from Frogbit and Water Lettuce. These plants cut surface glare and create shaded resting zones that reduce stress.

    Goldfish have different needs. They often nibble on delicate plants and produce more nutrients. Choose hardy, fast-growing small tank floating plants. Plan for more pruning or periodic replacement to keep water quality stable.

    Shrimp and fry gain shelter from dense-rooted species like Salvinia and Duckweed. These nano tank floating plants offer grazing surfaces and soft leaves that limit fin damage. They create microhabitats that improve survival for newly hatched fry.

    If your species grazes on vegetation, pick resilient varieties or accept turnover as part of regular husbandry. Some grazers will consume delicate floaters quickly, so the best floating plants for nano tank in those setups are tough and fast-growing choices.

    • Frogbits and Red Root Floater: good choices for bettas and calm tanks.
    • Salvinia and Duckweed: ideal for shrimp tanks and fry refuge.
    • Water Lettuce: better for larger nano tanks with stable conditions.

    Flow and filtration matter for plant survival. Floating plants prefer calm surfaces. Strong currents or powerful filters can tear leaves and push plants into intake areas. Adjust flow or use plant-safe outlets to protect floaters and keep them in place.

    Match species to inhabitants and tank conditions to get the best results. With the right choice of nano tank floating plants, you maintain natural behavior, improve cover, and support a balanced ecosystem in your aquarium.

    Maintenance Tips for Floating Plants

    Start by regularly pruning and thinning your floating plants. Cut back fast growers like Duckweed and Salvinia to keep the surface covered 40–60 percent. Prune Red Root Floater and Frogbit to prevent shading and stagnation.

    Keep a close eye on water parameters for your nano aquarium plants. Different species have different temperature and pH needs. For example, Red Root Floater does best at 70°F–82°F (20°C–28°C) with pH 6.5–7.5. Frogbit likes 64°F–84°F (18°C–29°C) and pH 6.0–7.5.

    Adjust conditions slowly to avoid stressing your plants. Salvinia can handle 65°F–85°F (18°C–29°C) and pH 6.0–8.0.

    Choose the right lighting for your plants. Frogbit and Salvinia need medium light. Red Root and Water Lettuce prefer medium to high light. Avoid too much light to prevent algae.

    • Manage nutrients by assessing your tank’s load. Floating plants often absorb available nutrients from fish waste.
    • In low-nutrient setups, dose occasional liquid fertilizers to support growth without triggering algae blooms.

    Quarantine new floating plants for about two weeks before adding them to your display. This helps catch pests, snails, or algae hitchhikers.

    Use simple tools to control plant placement and movement. Anchor or corral plants with airline tubing, plant rings, or fine mesh. Avoid strong outflows and surface skimmers that can damage delicate leaves and roots.

    Check plant health daily. Yellowing or browning leaves, root dieback, and stunted growth indicate nutrient deficiency, poor lighting, or water-quality issues. Remove and replace decaying specimens promptly to prevent ammonia spikes.

    Follow these maintenance tips to keep your floating plants vibrant and stable. Small adjustments in pruning, water chemistry, lighting, and placement will help your nano tank floating plants thrive and enhance your aquarium’s look and function.

    How to Introduce Floating Plants to Your Aquarium

    Begin by isolating new plants. Float them in a separate container for two weeks. This step helps detect snails, pests, algae, or diseases. Treat any problems before adding them to your main tank to keep your shrimp and fish safe.

    Next, rinse the plants in aquarium water to remove dirt. Make sure the water is free from chlorine unless it’s been neutralized. Place the plants in areas with low water flow to prevent them from sinking or getting damaged.

    • First, figure out how much surface area you want to cover. Aim for 40–60 percent to balance light and shade for underwater plants.
    • To create a plant carpet, use airline tubing or a fine mesh to keep them together on one side.

    Monitor the plants’ growth in the first week. Fast-growing plants like Salvinia and duckweed may need to be thinned out quickly. Also, check the water’s chemistry after adding the plants to ensure it remains balanced.

    Trim long roots to keep the tank clean and looking good. For Frogbit, cut the roots to about an inch. Regular trimming prevents too much organic matter from building up.

    Be careful with your filter and return outlets. Avoid placing plants where they can block the equipment. If needed, adjust the flow or add baffles to ensure plants and filters work well together.

    For small tanks, choose plants that are well-suited for nano setups. These plants provide shade, add interest to the surface, and quickly absorb nutrients.

    After a few weeks, assess how the plants are affecting your tank. The right mix of floating plants will improve water quality and enhance your tank’s appearance without overwhelming it.

    Common Challenges with Floating Plants

    Aggressive species like Duckweed and Salvinia can grow too fast. They form thick mats that block light and change water conditions. To keep your tank balanced, you need to regularly trim these plants.

    When mats cover a lot of the surface, they use up nutrients. This can harm other plants and cause them to die. It’s important to keep the nutrients in your tank stable to prevent this.

    At night, dense mats can lower oxygen levels. This is because plants breathe more when it’s dark. To avoid this, make sure your tank has enough oxygen and consider adding a small air pump.

    New plants can bring pests into your tank. Snails, algae, and tiny bugs can hide on leaves. Always check new plants for these pests before adding them to your tank.

    Strong water flow can damage delicate plants. Make sure your filter isn’t too powerful near the surface. This will help your plants stay healthy and thrive.

    Some plants are not allowed in certain areas. Check the laws in your state before buying plants like water lettuce. This is to protect both your tank and the environment.

    Here are some tips to manage these challenges:

    • Plant new plants slowly to avoid overcrowding.
    • Trim your plants regularly to prevent mats.
    • Quarantine new plants to catch pests early.
    • Place plants in calm areas to protect them from strong currents.
    • Keep an eye on nutrients and fertilize as needed.

    By following these tips, you can enjoy the beauty of floating plants in your small tank. This will help keep your aquarium healthy and thriving.

    Innovative Uses for Floating Plants

    Use floating plants for nano as focal elements in nano tank aquascaping. A patch of Red Root Floater near the surface gives a bright color pop that draws the eye. Mix in Frogbit to create asymmetric coverage and natural shading for depth.

    Try a refugium-style setup by corralling floating plants in a planted corner or hanging a tiny raft in a sump. This lets aquarium floating plants strip excess nutrients without casting heavy shade over main display species.

    • Breeding and fry protection: dense-rooted species like Water Lettuce, Frogbit, and Salvinia make safe microhabitats. Small tank floating plants block sightlines for predators and boost fry survival.
    • Shrimp grazing grounds: root tangles and plant mats host biofilm that feeds shrimp and supports healthy colonies.
    • Mosquito control: Azolla and Duckweed work well in outdoor pond-edge nano setups where allowed, deterring mosquitoes around backyard water features.

    Anchor floating mats creatively to lock them into place. Use airline tubing, fine mesh, or small floating planters when you want deliberate design lines or to prevent clogging of filters.

    When planning layouts, balance surface coverage so light reaches submerged plants. Thoughtful use of small tank floating plants helps you shape shade, shelter, and texture without overwhelming a tiny aquarium.

    Floating Plants in Betta and Goldfish Tanks

    Floating plants are great for Betta tanks. They provide resting spots and shade. Amazon frogbit and red root floater have broad leaves that bettas can rest on.

    These plants also calm the water surface and reduce glare. This helps to lower stress for bettas.

    Goldfish, on the other hand, need a different approach. They produce a lot of nutrients and might eat delicate plants. Choose strong, fast-growing plants or be ready to replace them often.

    In small tanks, aim for partial coverage. This allows for gas exchange and prevents oxygen drops on warm days. For nano tanks with bettas, provide enough leaf pads but avoid a full mat that traps heat or blocks light.

    It’s important to care for roots and leaves in tight spaces. Trim long roots on frogbit and water lettuce to prevent detritus buildup. Remove decaying leaves quickly to avoid ammonia spikes and keep water stable in nano tanks.

    • Choose the best floating plants for nano tank use: Amazon frogbit, red root floater, and water lettuce are top picks for bettas.
    • For goldfish, prefer hardy floaters that regrow quickly or consider anchored stem plants instead.
    • Monitor light and nutrient balance so floating plants don’t outcompete rooted plants in mixed setups.

    Floating plants have clear benefits. They reduce chasing and surface-skimming by lowering current and glare. They also create shaded retreats that help shy fish feel secure and encourage natural resting behavior.

    Remember to consider stocking and tank size. In nano systems, frequent water testing is key. This helps balance plant coverage with oxygen levels and light needs. With regular trimming and removal of decay, floating plants can enhance health and beauty without extra risk.

    Conclusion: Enhancing Your Nano Aquarium Experience

    Floating plants in nano setups bring many benefits. They clean the water by removing extra nutrients and controlling algae. They also provide shade and shelter, which helps calm nervous fish and shrimp.

    When picking floating plants for your nano tank, choose ones that fit your fish and shrimp. For example, Amazon Frogbit and Red Root Floater are great for bettas. Salvinia and Duckweed are good for shrimp. Always quarantine new plants and keep the water balanced.

    Begin with a few plants and watch them grow for a week or two. Then, trim or move them as needed. Use airline tubing or fine mesh to keep plants in place. Remember to follow local rules and dispose of plant trimmings properly.

    Adding floating plants is a simple way to improve your small tank. Try mixing different plants like Amazon Frogbit, Red Root Floater, Salvinia, and Duckweed. This will make your nano tank healthier and more beautiful.

    FAQ

    What are floating plants and why are they useful in nano aquariums?

    Floating plants stay at the water’s surface with roots in the water. They clean the water by taking in nitrates, phosphates, and ammonia. They also help control algae and provide shade and shelter for fish and fry.

    They add beauty to your tank, making them perfect for small spaces.

    Which floating plants are best for nano tanks and small aquariums?

    For small freshwater tanks, consider Phyllanthus fluitans (Red Root Floater) and Limnobium laevigatum (Amazon Frogbit). Also, look at Salvinia minima (Floating Fern), Pistia stratiotes (Dwarf Water Lettuce), Lemna spp. (Duckweed), and Azolla filiculoides (Mosquito Fern).

    Choose based on how fast they grow, their root length, light needs, and how well they get along with your fish.

    How do floating plants improve water quality in a nano aquarium?

    Floating plants soak up nutrients from the water, like nitrates and phosphates. They also host good bacteria and help block algae growth. This keeps the water clear without needing chemicals.

    Are floating plants safe for bettas and shrimp?

    Yes. Amazon Frogbit and Red Root Floater are great for betta tanks because they offer hiding spots. Salvinia, Duckweed, and dense-rooted plants are good for shrimp and fry. Just make sure your fish won’t eat them.

    How much surface coverage should floating plants have in a nano tank?

    Aim for 40–60% coverage. This lets plants shade and clean the water without blocking light for other plants. Avoid covering the whole surface to prevent oxygen problems at night.

    What lighting and temperature conditions do common floating plants need?

    Lighting and temperature needs vary by plant. Red Root Floater likes medium–high light and 70°F–82°F. Amazon Frogbit does well in moderate light and 64°F–84°F. Salvinia tolerates low–moderate light and 65°F–85°F.

    Dwarf Water Lettuce prefers medium–high light and 68°F–82°F. Adjust light times to keep plants healthy and prevent algae.

    How fast do floating plants grow and how do I manage overgrowth?

    Some plants, like Duckweed and Salvinia, grow fast and can cover a tank quickly. Plan to manage their growth by trimming regularly. Remove dead plants to avoid ammonia spikes.

    Quarantine new plants to check for pests before adding them to your tank.

    Can floating plants cause oxygen problems at night?

    Yes, dense plants can lower oxygen levels at night. To avoid this, don’t cover the whole surface. Make sure there’s open water for gas exchange. Monitor oxygen levels and add aeration if needed.

    Do floating plants need fertilizer or additional nutrients?

    Floating plants get nutrients from the water and often thrive on fish waste. In low-nutrient tanks, you might need to fertilize occasionally. Watch for signs of nutrient deficiency, like yellowing leaves.

    How should I introduce and quarantine floating plants?

    Quarantine new plants for two weeks to check for pests. Rinse them gently in tank water, then place them in a low-flow area. Gradually introduce them to your tank and trim long roots if needed.

    Are there legal or environmental concerns with some floating plants?

    Yes. Some plants, like certain water lettuce and Pistia, are invasive or regulated. Always check local laws before buying or using floating plants to avoid harming the environment.

    How do floating plants interact with aquarium filters and surface flow?

    Floating plants prefer calm water. Avoid strong filter outflows or skimmers that can damage them. Use airline tubing or mesh to protect plants and prevent clogging.

    Which floating plants are best for algae control?

    Plants like Red Root Floater and Amazon Frogbit are good at controlling algae. They block light and take up nutrients. Use them to shade areas and keep algae in check.

    Can floating plants benefit aquascaping and design in nano tanks?

    Absolutely. Floating plants add depth and contrast to your tank. Use them to create focal points and designs. Try different arrangements to enhance your tank’s look.

    What are practical tips for root and leaf care?

    Trim long roots to prevent detritus buildup. Remove dead leaves to keep plants healthy. For fast growers, thin them regularly. Watch for signs of nutrient or water problems.

    Can goldfish live with floating plants?

    Goldfish can live with floating plants, but they might eat them. Choose hardy plants and expect to prune them often. Avoid delicate plants in goldfish tanks.

    How do floating plants help breeding and fry survival?

    Floating plants provide hiding spots and shade for fry and young fish. Their roots also offer food for shrimp and fry. Use dense-rooted plants to create safe areas for breeding.

    What should I do if my floating plants start to decay or die off suddenly?

    Remove dead plants right away to prevent ammonia spikes. Check your tank’s water, light, and nutrients. Consider if you’ve thinned too much or introduced pests. Adjust your tank’s balance as needed.

    How can I keep floating plants where I want them in a small tank?

    Use airline tubing, mesh, or planters to keep plants in place. Place them in calm areas away from strong currents. For nutrient control, use plants in a corner or sump.