Blog

  • How to Silent Your Aquarium: Tips for Bedroom Nano Setups

    How to Silent Your Aquarium: Tips for Bedroom Nano Setups

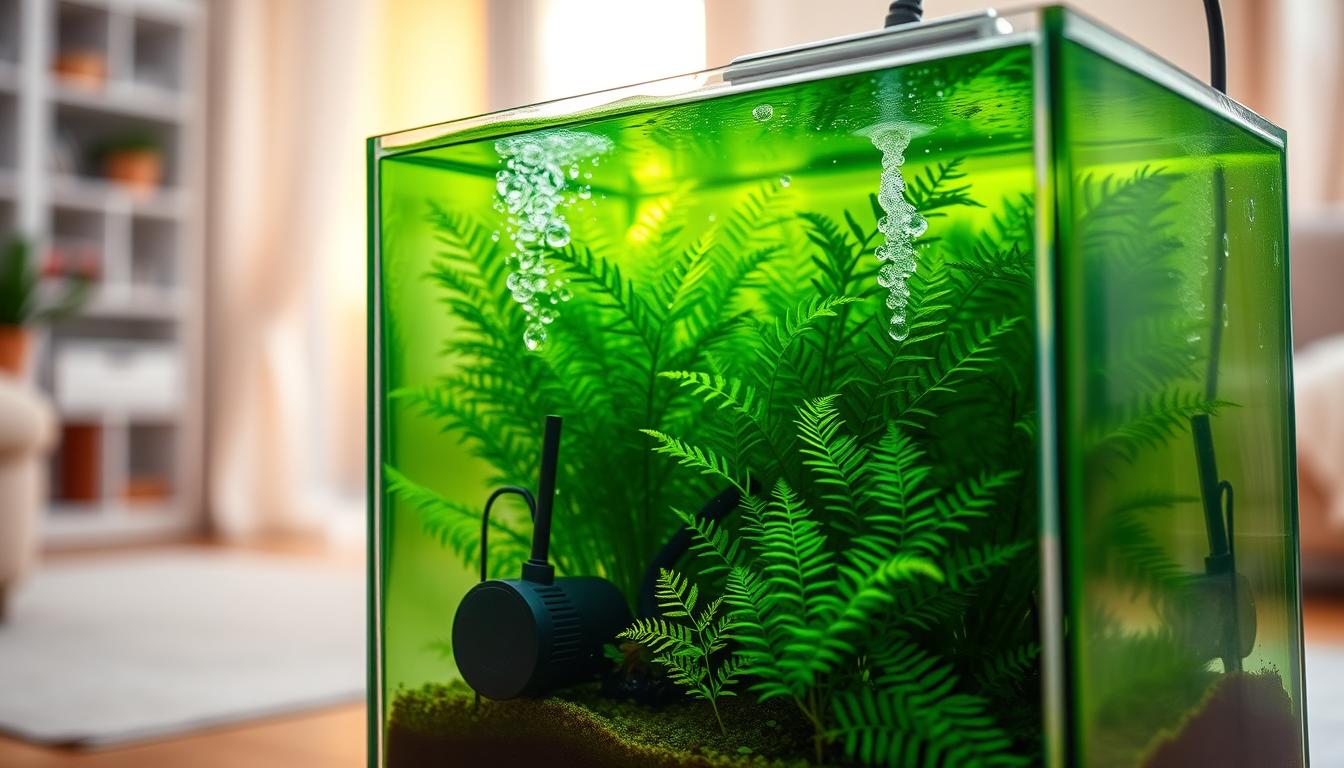
    You dream of a nano aquarium’s calming sight without the hum that disrupts sleep. Studies from the American Academy of Sleep Medicine reveal that even slight mechanical sounds can harm sleep. They can increase stress hormones and lower well-being. A bedroom aquarium should enhance relaxation, not disturb it.

    This guide offers practical steps for achieving nano tank quietness in small sleeping areas. You’ll learn to spot common noise sources and choose silent nano tank or quiet mini tank parts. It also covers using placement and damping tactics for a peaceful nano fish tank experience.

    The article goes deeper into equipment choices, sound-absorbing materials, and routine maintenance. It also talks about stocking considerations, monitoring noise levels, and tech options for a quiet nano tank setup. Each part considers bedroom constraints like room size, humidity, lighting, and weight. It aims to help you create a setup that promotes sleep and reduces stress.

    Understanding Nano Tank Noise Factors

    A beautifully designed noise-free nano tank, featuring a minimalist aquascape with lush, green plants and small, colorful fish swimming peacefully inside. The foreground displays crystal-clear water with air bubbles rising gently, enhancing the serene atmosphere. In the middle, delicate electronic equipment such as a silent filter and a small, low-noise pump are integrated unobtrusively, showcasing advanced technology. The background features soft, calming lighting that creates gentle reflections on the glass, evoking a tranquil bedroom setting. The image is captured from a slight angle, emphasizing the elegant design of the tank and its peaceful inhabitants, encapsulating a sense of relaxation and harmony ideal for a cozy living environment.

    Small aquariums can make three kinds of noise. The first is mechanical vibration from motors and poor mounting. Loose parts or worn-out parts cause pumps to rattle. This rattling can travel through the stand and room, making the tank less quiet.

    The second noise is from water turbulence. This includes splashing from returns and strong circulation. In small tanks, these sounds are more noticeable than in bigger ones.

    The third noise is from air displacement. Air pumps and bubbling filters push air that pops at the surface. Cheap pumps make sharper clicks. But, tuning them right can help keep your tank quiet.

    • Mechanical vibration: motor noise, impeller contact, poor mounting.
    • Water turbulence: returns, splashes, surface agitation.
    • Air displacement: air pumps, bubbles, check-valve clatter.

    The size of your tank affects what equipment you need. Small tanks require compact, high-turnover gear. This can make more noise. But, bigger tanks can dampen vibrations and hide some noise, making your bedroom setup quieter.

    Many people want their tank to be under 35 dB for a bedroom. While completely silent gear is hard to find, you can get very quiet with the right parts and setup.

    How you hear sound in your bedroom matters. Noise can be worse near vents, furniture, and busy areas. Loud noises can stress fish and wake people up. So, choose quieter equipment to protect your fish and sleep.

    Using all-in-one units can be quieter. They have integrated filtration and smaller pumps. For a quiet bedroom nano tank, an AIO might be a good choice.

    Choosing the Right Equipment for Quiet Operation

    A peaceful, modern nano tank filter designed for quiet operation, situated in a cozy bedroom aquarium setup. In the foreground, focus on the sleek design of the filter, showcasing its compact size and silent water circulation system. The middle of the image features a lush, well-maintained aquarium filled with vibrant aquatic plants and small fish gracefully swimming, reflecting a serene atmosphere. The background is a softly lit bedroom environment with warm, ambient lighting, enhancing the tranquility of the scene. Capture the image from a slightly elevated angle to emphasize the filter's design and functionality, creating a calming and inviting mood. Use soft shadows to convey a sense of relaxation and well-being, ensuring a harmonious and unobtrusive aesthetic.

    Choose a filter that matches your tank size and noise preferences. Canister filters like Eheim Classic, Fluval C/Fx series, or Oase Biomaster are great. They sit outside the tank, reducing in-tank vibration. This makes them a top pick for a silent tank, but they need more space and setup time.

    Sponge filters are perfect for small tanks and offer great biological filtration. Use ultra-quiet air pumps like Tetra Whisper or Sera Air models. Or, go for low-noise electric submersible sponge units. A sponge setup with a quiet mini tank pump will keep bubbles and sound to a minimum.

    Internal mini filters and integrated AIO systems are almost silent. Models like Hydor Professional Mini or Aqueon QuietFlow use submerged motors and modest flow rates. These designs are great for a quiet mini tank because they stay underwater and reduce surface splash.

    Hang-on-back filters can work well if you manage the outflow. Look for AquaClear style baffles, a pre-filter sponge, and options to lower flow. Baffled outflows, spray bars, or laminar returns cut splashing. This helps you achieve a quiet nano tank without moving to a full canister.

    When shopping, look for technical features that reduce sound. Adjustable flow rates help cut turbulence. Rubber vibration pads or isolation mounts stop motor buzz. Submerged motor designs eliminate air-motor noise. No-splash outflows and energy-efficient low-RPM pumps from brands like Hydor, Ecotech, or Jebao keep hum and vibration low.

    • Match GPH to your tank volume. Aim for about 4–6x turnover per hour to avoid excess turbulence.
    • Avoid overpowered units that struggle at low flow and create noise.
    • Skip protein skimmers for many planted or soft-coral nano setups to reduce complexity and noise unless you keep reefs that need them.

    Test filters before buying when possible. Run a unit at about three feet away and read user reviews that mention quiet operation. This simple check helps you pick a quiet nano tank filter that will keep your bedroom setup peaceful and efficient.

    Placement Strategies for Noise Reduction

    Where you place your tank affects how much sound it makes. Use thin rubber mats or vibration-isolating pads for external canisters and powerheads. This stops mechanical buzz from spreading to floors and furniture. It’s a simple way to make your nano tank quiet in a bedroom.

    Stay away from hollow stands or metal frames that can sound like drums. Opt for a solid stand or place the tank near a load-bearing wall. This ensures your small tank stays quiet and stable.

    Keep your aquarium away from HVAC vents and radiators. Drafts can make filters work harder and increase noise. Positioning it away from vents helps keep your tank quiet and water conditions steady.

    Reduce splash from HOB filters and return pumps by angling the return nozzle. Use a spray bar or diffuser to soften flow and cut gurgle. Directing outflow away from the surface lowers turbulence and audible splashes.

    Move air pumps and external pumps away from your bedside. Route tubing so vibrations don’t travel through bedside tables or headboards. Secure hoses with clips or clamps to stop rattles and bleed trapped air to prevent gurgling noises.

    • Place pumps on rubber pads or carpeted surfaces.
    • Secure tubing to stands, not furniture edges.
    • Test pump placement at night to find the quietest spot.

    Consider all-in-one (AIO) models that tuck filtration into the tank back. AIO tanks keep plumbing compact and often quieter. They are a great choice for a noise-free nano tank and a peaceful nano fish tank environment in your bedroom.

    Adding Sound-Absorbing Materials

    To make your noiseless nano aquarium quiet, start by isolating vibration paths. Place a rubber mat or anti-vibration pads between the tank and its stand. A thin layer of craft foam or neoprene under the tank corners will cut mechanical noise and stop low-frequency buzzing.

    Use adhesive foam or neoprene under external filters, canisters, and pump feet to silence rattles. Fit pre-filter sponges on intakes and outflows to muffle splashes and diffuse harsh flow. For hang-on-back filters, tighten clips and secure hoses so loose parts cannot vibrate.

    • Install spray bars or baffles on returns to reduce surface agitation.
    • Route return tubing below the waterline for laminar flow and less splash noise.
    • Fit silicone tubing to air-driven sponge filters and set the air pump on a soft surface.

    Place an air pump inside a ventilated cabinet to muffle sound, while ensuring enough airflow to prevent overheating. Acoustic foam panels or fabric wall hangings behind the tank will absorb room echoes and reduce reverberation around your quiet mini tank.

    When you stack equipment, add thin layers of foam between contact points. That small step removes friction noise and makes a silent nano tank feel more refined. Regular checks to tighten fittings and replace worn foam keep noise levels low over time.

    Maintenance Tips for Noise Control

    Stick to a regular maintenance schedule for your quiet nano tank. This stops small problems from becoming loud. Clean the impellers, intake tubes, and filter media every 4–6 weeks. Or, follow the maker’s advice to avoid clogs that make motors work too hard.

    When you clean your quiet nano tank filter, don’t overfill it. Too much media blocks water flow and puts more strain on the pump. This can cause more vibration and noise. Use the right amount of media for your filter model.

    Prime your canister filter carefully after maintenance. This removes air pockets and stops cavitation. Check for air in lines and seals to avoid loud noises that disrupt the tank’s peace.

    Check your tubing for kinks and make sure it’s the right size. Small or kinked lines can cause pressure and turbulence. This leads to bubbling and rattling sounds.

    Replace old rubber parts like gaskets and vibration dampers. They wear out over time and can cause rattling. Keep spare parts and service kits for brands like Fluval and Eheim ready for quick replacements.

    After maintenance, look for leaks and airlocks. A pocket of air can cause gurgling until you release it. Regular checks keep your nano tank quiet and reliable.

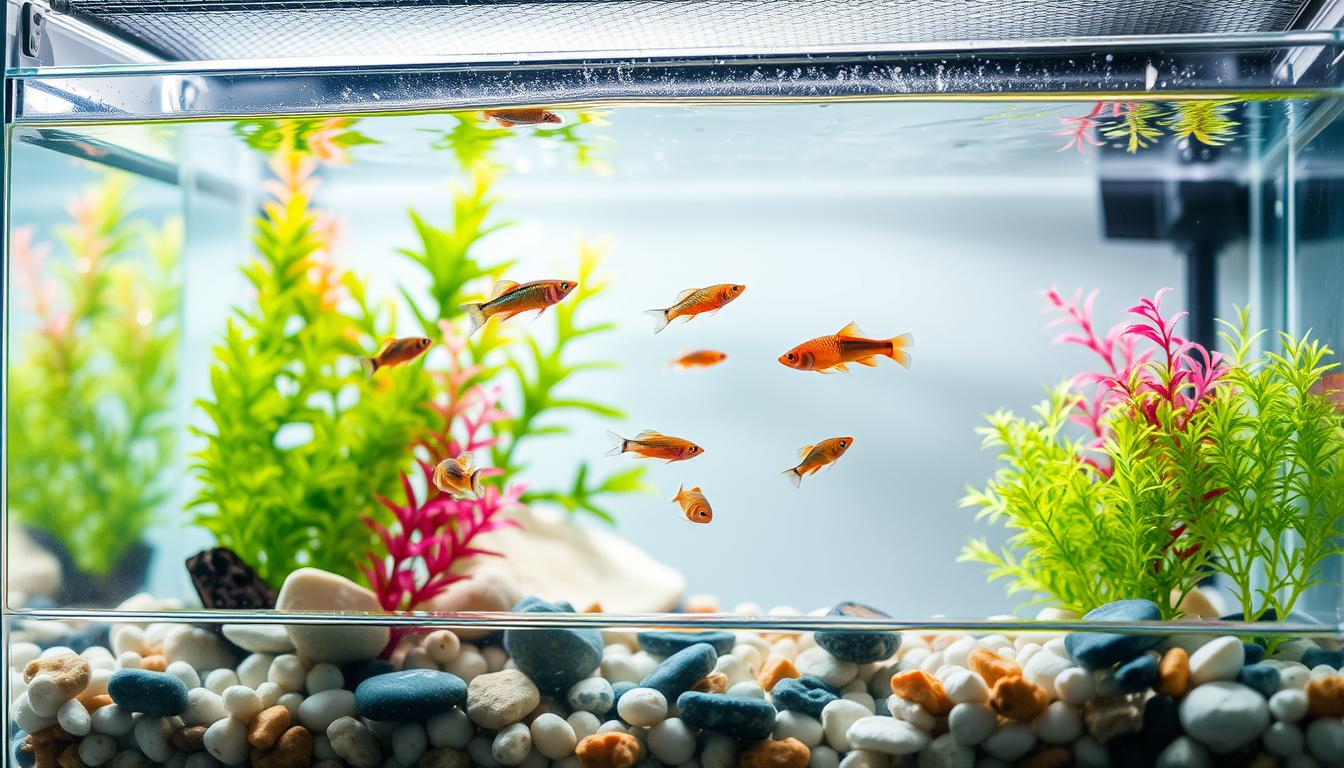
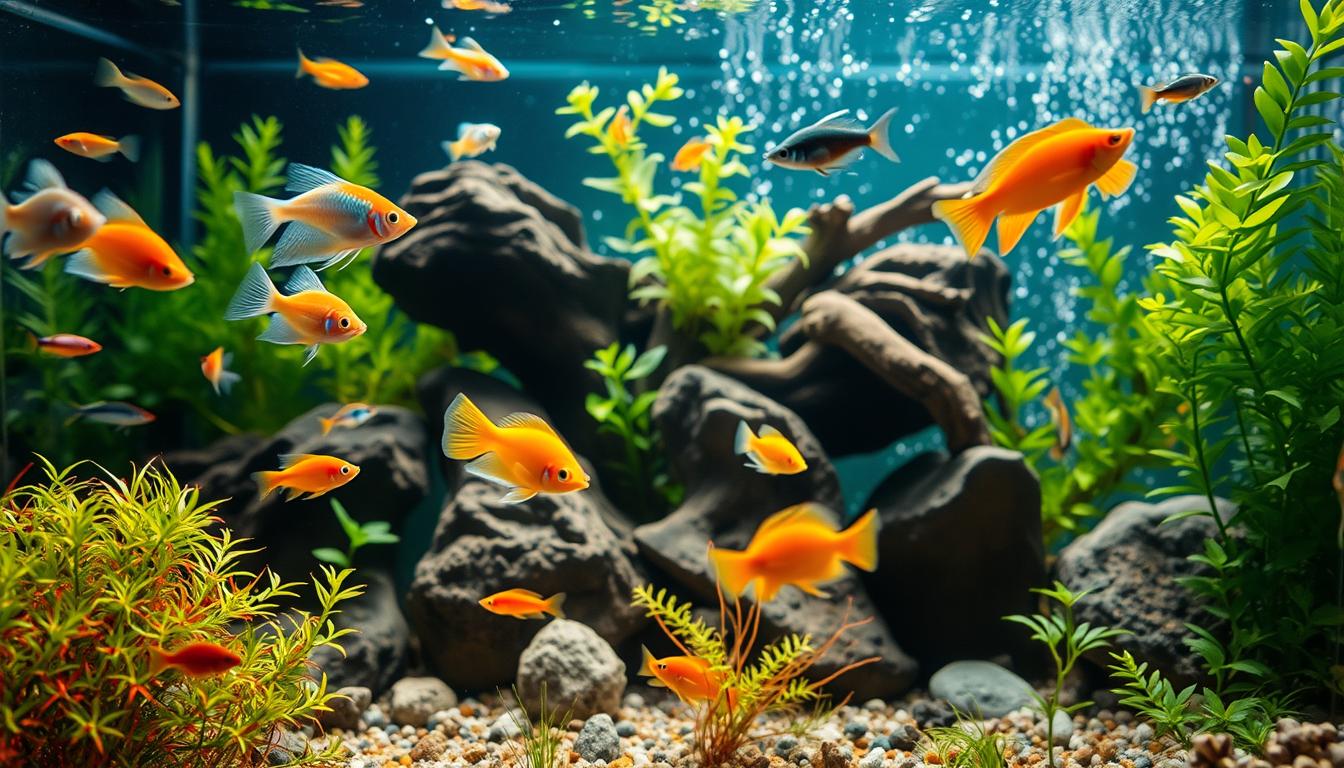
    Considerations for Stocking Your Nano Tank

    Start by thinking about the bioload when stocking your tank. Too many fish can lead to more waste, stronger filtration, and louder pumps. To keep your tank peaceful, it’s best to keep the number of fish low.

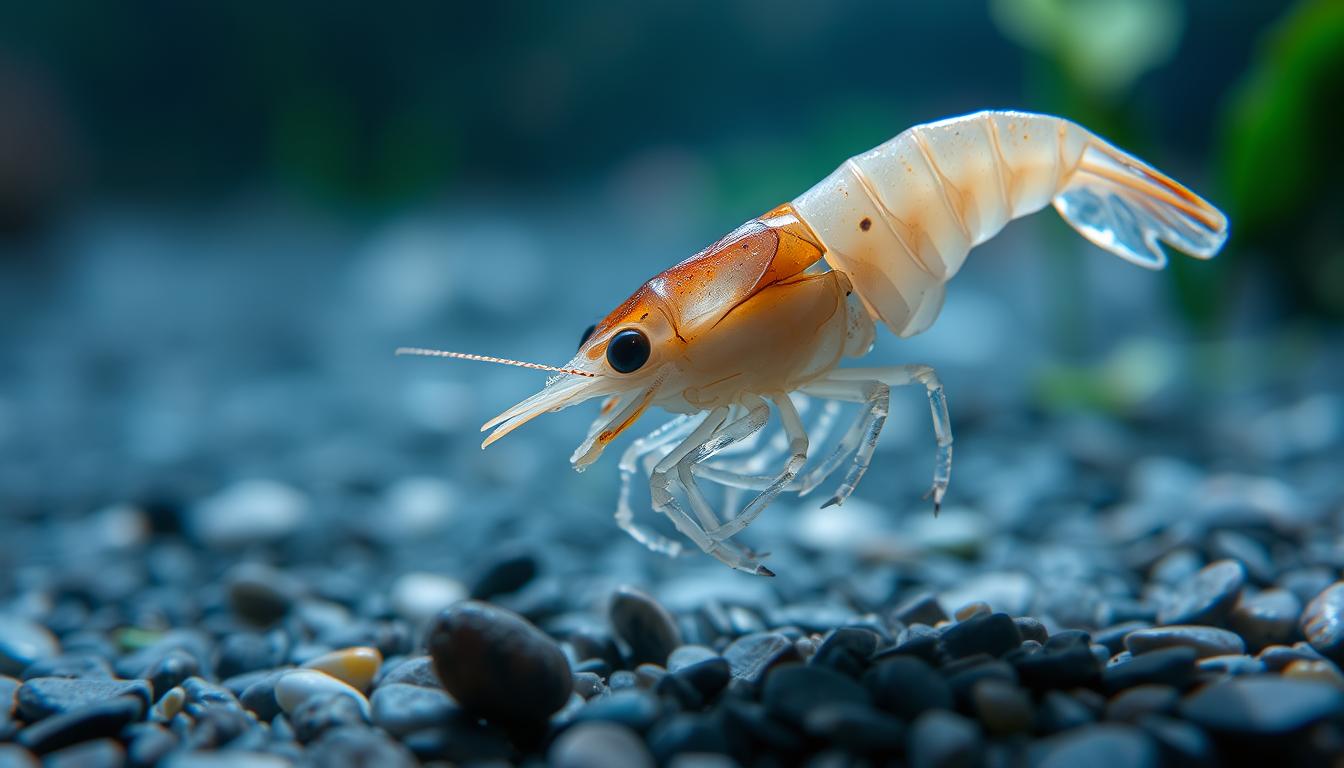
    Choose fish that don’t need a lot of space or food. Bettas, small rasboras, cherry shrimp, and nerite snails are good choices. They require less food and gentle water flow, which helps keep your tank quiet.

    Don’t add protein skimmers unless you have corals or a lot of fish. Skimmers can make your tank noisier and more complicated. For most freshwater nano tanks, a simple filter and regular maintenance are enough to keep it quiet.

    • Match stocking to your filter’s real flow and turnover.
    • Target 4–6x/hour turnover to use quieter, lower-flow equipment.
    • Favor hardy, low-feed species to reduce waste and maintenance.

    It’s also important to teach family members how to handle the tank gently. Loud noises and vibrations can stress fish and make them sick. Ask kids to avoid tapping the glass and keep speakers away from the tank.

    Plan your maintenance routine based on your stocking levels. Fewer fish mean less water changes and quieter filtration. By stocking thoughtfully, you can enjoy a peaceful and quiet nano fish tank experience.

    Monitoring Noise Levels

    Start tracking sound levels right away to keep your nano tank quiet. Aim for background noise under 35 dB for a peaceful bedroom. Many pumps and filters don’t list decibel ratings. Use a smartphone sound meter app or a consumer decibel meter to measure at three feet and at your bedside.

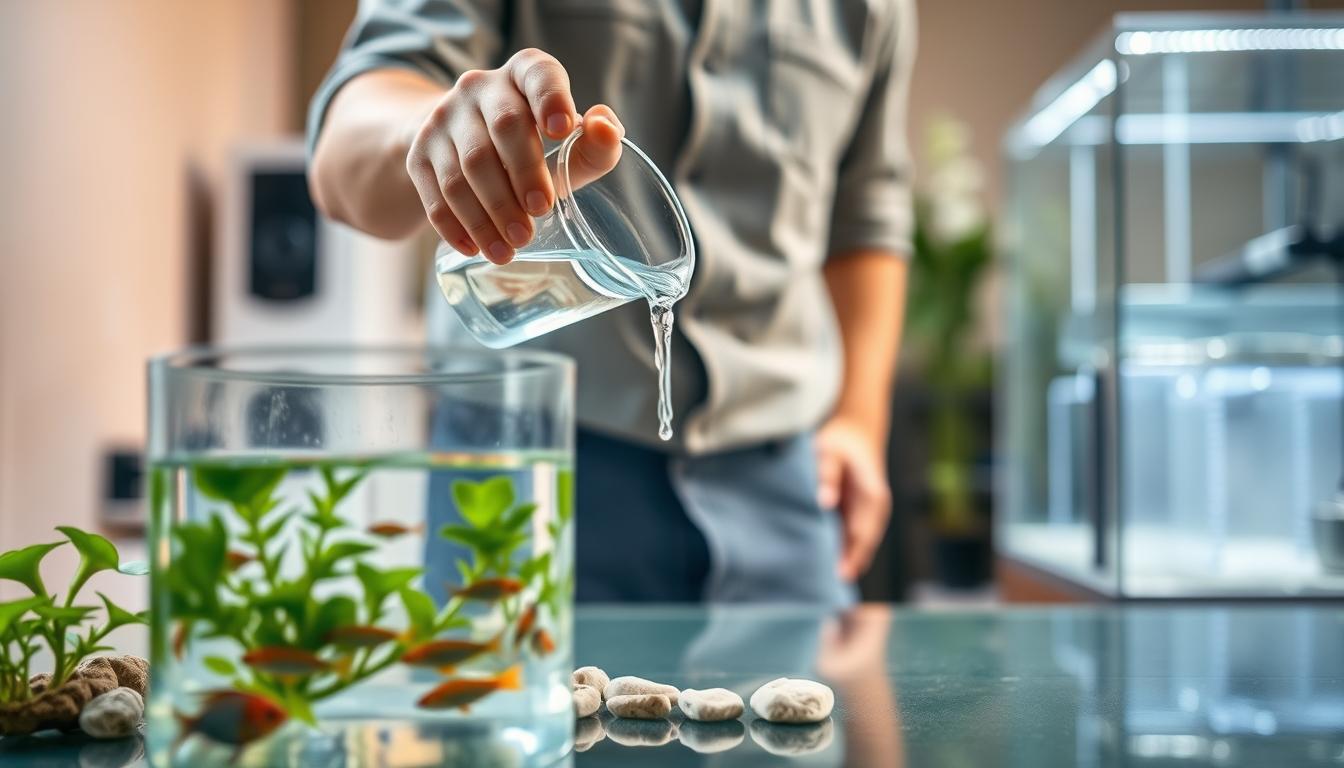
    Test new gear outside the room before installing it. Place a filter or pump in a sink, basin, or garage and run it for a few minutes. If it’s clearly audible from three feet during the quiet test, look for alternative models that promise a noiseless nano aquarium experience.

    Check again after 24 hours and at regular intervals. A unit that was quiet when new may grow louder as debris builds up or bearings wear. Schedule quick inspections to catch issues early.

    • Log noise incidents and maintenance steps to find patterns.
    • Note the time, device, measured dB and what you cleaned or adjusted.
    • Correlate louder periods with events like feeding, water changes, or power cycles.

    If you hear persistent gurgling or vibration, troubleshoot step by step. Look for air trapped in lines, secure loose mounts, clean impellers, check tubing diameter, and lower flow rate when needed.

    1. Measure noise at 3 feet and bedside with a meter.
    2. Run gear outside the bedroom to judge baseline sound.
    3. Log readings and maintenance actions to spot trends.
    4. Troubleshoot air locks, mounts, impellers, tubing and flow.

    Regular monitoring helps keep your nano tank quiet. Small measurements and simple logs keep your nano tank quietness predictable. This lets you enjoy a truly peaceful bedroom setup.

    Incorporating Technology for Quietness

    To make a silent nano tank, pick gear that cuts down on vibration and turbulence. Start with low-RPM, energy-saving pumps from brands like Hydor or Ecotech. These pumps run cooler and make less noise.

    Variable speed controllers let you adjust flow to the bare minimum needed for water quality. Models from Ecotech and Jebao work with these controllers, making it easy to fine-tune. Slower flow means less splashing and cavitation, keeping your tank quiet.

    • Use electronic air pumps with noise-dampening chambers or long-life diaphragm pumps such as Tetra Whisper for sponge filtration.
    • Place pumps in decoupled enclosures or vented cabinets to isolate vibration, while ensuring airflow to avoid overheating.
    • Consider sound-dampening boxes made for aquarium equipment to cut transmitted noise.

    Smart monitoring helps catch problems early, before they get loud. Use flow and temperature sensors, plus smartphone alerts, to act fast on issues. Automated reminders help avoid noisy failures in your best silent small tank.

    But remember, technology is not a replacement for proper sizing and installation. Even the quietest filter will make noise if plumbing causes turbulence, cavitation, or vibration. Make sure tubing fits snugly, use soft mounts, and avoid sharp bends for smooth, quiet operation.

    Final Thoughts on Achieving a Silent Nano Tank

    To make a noise-free nano tank, pick the right gear and place it well. First, know where the noise comes from: pumps, returns, and vibration. Choose quiet equipment like filters under 35 dB.

    Mount gear to reduce vibration. Use foam pads or rubber mounts. Angle or mute return outlets and use adjustable valves. These steps can make your tank quiet without big costs.

    Think about your bedroom when setting up. Choose a tank size that fits your room. Make water changes easy and use timers for lighting. Avoid extra devices like protein skimmers unless you have a reef tank.

    Follow a simple checklist: check decibel ratings, adjust flow, and dampen vibration. Test gear before placing it. Schedule maintenance and teach others to handle the tank gently. Make small changes to keep your tank quiet and peaceful.

    FAQ

    Why optimize nano tank quietness for a bedroom?

    Making your nano tank quiet helps keep the aquarium’s calming look without disturbing sleep. Studies show that noise in the bedroom can lead to poor sleep, stress, and health issues. A quiet nano tank helps you relax, not disturb your sleep or increase stress.

    What are the main noise sources in a nano aquarium?

    The main noises come from mechanical vibration, water turbulence, and air displacement. In small tanks, these sounds are more noticeable because the equipment is larger compared to the tank size. This can make sounds travel to furniture and walls.

    How does tank size affect noise and equipment choice?

    Smaller tanks need equipment that moves water fast but can be noisy. Bigger tanks can absorb sound better. Choose equipment that moves water 4–6 times an hour. Too much equipment can make too much noise and disturb the water.

    What noise level should I aim for in a bedroom?

    Aim for a noise level under 35 dB for a quiet bedroom. It’s not possible to make a tank completely silent, but you can make it quiet enough. Reduce noise and disturbances to achieve a peaceful environment.

    Are bedroom-specific factors important for noise perception?

    Yes, factors like HVAC vents, room acoustics, and furniture can make noise louder. Place your tank away from vents and hollow furniture. This helps reduce noise and stress on your fish.

    Which filter types work best for quiet nano setups?

    Canister filters, sponge filters with quiet air pumps, and internal mini filters are good choices. They are designed to be quiet. Look for brands like Eheim, Fluval, and Hydor for the best options.

    What technical features reduce filter noise?

    Look for adjustable flow rates, rubber pads, and submerged motors. No-splash outflows and low-RPM pumps are also good. Brands like Hydor and Ecotech make quieter motors. Adjustable controllers help set the right flow for quiet operation.

    Do protein skimmers make sense for bedroom nano tanks?

    You usually don’t need a protein skimmer in freshwater or soft-coral nano tanks. Skimmers are good for reef tanks but add complexity and noise. Only use a skimmer if you have a reef nano tank.

    How should I position equipment to minimize noise transmission?

    Use rubber mats or anti-vibration pads under canister filters and pumps. Place them on solid stands away from hollow furniture. Keep air pumps and devices away from your bed. Secure hoses and clamps to prevent rattling.

    What return/outflow adjustments reduce splashing and gurgling?

    Angle return nozzles and use spray bars or diffusers. Add baffles to break splashes. Position returns so they don’t hit the surface directly. This reduces noise and disturbances.

    What materials help absorb noise around a nano tank?

    Use rubber mats, craft foam, and adhesive foam to absorb sound. Acoustic foam panels or fabric wall hangings can also help. Pre-filter sponges on intakes and outflows can muffle splashes.

    How can I reduce air-pump noise for sponge filters?

    Choose ultra-quiet pumps like Tetra Whisper or Sera Air. Place the pump on a soft surface and use silicone tubing. Consider putting the pump in a sound-dampening box for extra quiet.

    What maintenance prevents filters from getting louder over time?

    Clean impellers, intake tubes, and media regularly. Prime canister filters and bleed air after servicing. Replace worn parts and avoid overloading media to prevent noise.

    How does stocking affect noise and filtration needs?

    Overcrowding increases the need for more filtration, which can be noisy. Choose low-bioload species for your nano tank. This lets you use quieter, lower-flow equipment.

    How do I measure and monitor noise from my aquarium?

    Use a decibel meter or a smartphone app to check noise levels. Test new equipment before placing it in your tank. Keep a log of noise incidents and maintenance actions to find causes.

    What troubleshooting steps help fix persistent gurgling or vibration?

    Check for air in lines, secure mounts and hoses, and clean impellers and intakes. Confirm tubing size and reduce flow if possible. Replace worn parts and bleed canister filters to stop cavitation. Small changes can often solve gurgling issues.

    What technology upgrades improve quietness?

    Use variable-speed controllers and low-RPM pumps for quieter operation. Modern brands like Ecotech and Hydor offer quiet options. Sound-dampening enclosures can also help, but make sure they are well-ventilated.

    Any practical purchasing tips for quiet equipment?

    Test filters at about three feet when possible. Read user reports for quiet operation. Buy from reputable brands with service kits and spare parts. Look for dB specs and aim for models under ~35 dB.

    What day-to-day practices help keep a nano bedroom tank peaceful?

    Schedule routine maintenance and avoid overfeeding and overstocking. Use timers for lighting to prevent sleep disruption. Control humidity and ventilation. Teach household members to handle the tank gently. Small changes can keep your tank quiet and peaceful.

  • How to Handle a Green Water Outbreak in a Small Aquarium

    How to Handle a Green Water Outbreak in a Small Aquarium

    When you approach your tank, you see water that looks like pea soup. Green water is a fast growth of tiny plants that makes it hard to see and stresses fish. This article will guide you on what to do and why it’s urgent for small tanks in the U.S.

    It offers clear steps to find the problem, treat the green water, and fix it for good. Quick fixes include a blackout, UV sterilizer, polishing pad, and water changes. But, these might not stop it from happening again.

    To really solve the problem, you need to address the main causes. These are too much light, too many nutrients, overfeeding, and not keeping up with tank care. The guide also shows how to control algae by testing regularly and stocking wisely. This keeps your tank clear and healthy.

    In this article, you’ll learn how to treat algae blooms safely. Follow these steps to get clear water and prevent future green water problems.

    Understanding Algae Blooms in Your Aquarium

    A vibrant underwater scene showcasing an aquarium experiencing an algae bloom, with a rich variety of green hues. In the foreground, healthy aquatic plants and colorful fish swim playfully among the velvety green algae, illustrating the imbalance. The middle ground features swirling, thick patches of algae, with clusters of small air bubbles rising through the murky water, adding texture. In the background, subtle light filtering through the water creates a soft glow, revealing the aquarium’s glass sides and the reflections of light dancing on the surface. The overall atmosphere is a blend of beauty and chaos, inviting curiosity and concern, while emphasizing the need for understanding and management of algae blooms. The angle should reflect a slightly elevated view, capturing the entire aquarium layout without any distractions.

    Green water in a small aquarium is usually a rapid bloom of single-celled phytoplankton that float in suspension. This is different from surface films or algae attached to glass and rock. Knowing what causes algae blooms helps you target the right fix.

    Not all algae look the same. Brown diatoms are common in new tanks and tie to silicates and phosphates. Black beard algae grows bushy and tough. Hair or staghorn algae appears stringy when nutrients or light are out of balance. Green spot algae forms hard spots on glass linked to low phosphate or uneven light. Blue-green algae, actually cyanobacteria, makes a slimy mat and a distinct odor.

    Algae persist because they use broader light wavelengths and different nutrient compounds than your plants. They cope with poor conditions that plants find stressful. Total eradication is unrealistic. Your goal should be balance so algae stay minimal and unnoticeable.

    Some microalgae are helpful. Infusoria and phytoplankton cultures feed fry and support reef corals. During daylight they release oxygen and can act as biological filtration by consuming nitrates. Recognizing these benefits makes your approach less about elimination and more about control.

    The core drivers are light and nutrients acting together. Excess light or surplus nitrate, phosphate, or ammonia creates ideal conditions. If plants cannot use the available nutrients, algae will. Those pressures explain both sudden green water outbreaks and slow, stubborn patches.

    When you focus on overcoming algae blooms, you look at light scheduling, nutrient inputs, and plant health. Practical ways to manage algal blooms include reducing direct light, trimming excess feed, and improving plant uptake. Long-term algae bloom prevention comes from steady maintenance and balancing your tank’s ecology.

    Signs of Algae Overgrowth

    A close-up view of a small aquarium exhibiting clear signs of algae overgrowth. In the foreground, vibrant green patches of algae cling to the glass walls, creating a textured, wavy effect. Mossy growth can also be observed on decorative rocks and substrate, adding to the lush scene. In the middle ground, a few aquatic plants are partially obscured by the thick green film, indicating an imbalance in the ecosystem. The background features colorful fish swimming through murky water, enhancing the sense of an overgrown environment. The lighting should be soft and natural, resembling sunlight filtering through the water surface, creating a tranquil yet concerning atmosphere. The focus is sharp, capturing the intricate details of the algae and the impacts on the aquarium's aesthetics.

    Look for a uniform pea-soup green tint that makes your tank look cloudy. This green water cuts light to bottom plants. It’s an early sign you need to take action.

    Check surfaces for other algae types. A dusty brown film on glass or rock points to diatoms. Black or gray bushy clumps on driftwood or stems suggest black beard algae.

    Fine, hair-like strands growing from decor or leaves are typical hair algae. Hard green dots on glass and slow-growing leaves usually mean green spot algae. Slimy mats that smell foul may be blue-green algae, also called cyanobacteria.

    Notice fish behavior and plant performance. Stressed or gasping fish at night can indicate oxygen dips tied to heavy algal loads. Plants that melt or show nutrient deficiency symptoms while receiving fertilizer may be suffering from light blockage by algae.

    If algae return quickly after you scrub or do a water change, that pattern hints at ongoing nutrient or lighting issues.

    • Frequent blooms after tap water changes can point to high nitrate or phosphate in your source water.
    • Blooms that follow overfeeding or a pet-sitter visit often trace back to feeding-induced nutrient spikes.
    • Tanks near sunny windows or bright room lights can develop algae from too much natural light.

    Identifying these signs of algae overgrowth helps you target fixes. Use the clues from appearance, behavior, and recurrence. Decide whether to cut light, adjust feeding, test source water, or step up maintenance.

    Testing Your Water Parameters

    First, test for ammonia, nitrite, nitrate, phosphate (PO4), and general hardness. Use trusted freshwater kits from API or Seachem for accurate readings.

    Check your tap water before adding it to the tank. High nitrate or phosphate can make it hard to fight algae and treat blooms.

    Any ammonia or nitrite means your tank is cycling badly, you’re feeding too much, or it’s too crowded. These issues cause green water in new tanks and after fish die-offs.

    • Target nitrate: many planted setups prefer under 20 ppm. High nitrate means more water changes and less nutrients.
    • Target phosphate: keep it as low as possible. Small phosphate levels can feed algae, so avoid fertilizers that raise it without plant use.

    Check results weekly to see how changes affect your tank. This helps you know which treatments work best.

    If levels stay high, look at feeding, stocking, and supplements. Use RO/DI water if tap levels are always high.

    Testing your water gives you the data to fight algae. Use these numbers to set goals and choose the right treatments to reduce algae.

    Prevention Strategies for Algae Blooms

    Keep light under control to limit algae growth. Avoid placing your tank in direct sun or next to bright windows. Use a timer for aquarium lighting and set non-planted tanks for 6–8 hours daily; planted tanks need 8–12 hours depending on species and CO2.

    Feed conservatively to reduce excess nutrients. Offer only what fish eat within two minutes, once or twice a day. Many hobbyists skip feeding one day per week to cut nitrates and help with preventing algae overgrowth.

    Follow a steady maintenance routine to stay ahead of issues. Aim for at least 10% weekly water changes or 20% when possible. Siphon uneaten food and vacuum substrate lightly unless you have a newly cycled or heavily planted system.

    • Choose fast-growing stem and floating plants like hornwort, water sprite, or Salvinia to outcompete algae for nutrients.
    • Well-planted tanks often resist severe outbreaks and reduce the need for chemical fixes.

    Service filters and check flow to avoid dead spots that favor cyanobacteria. Replace hang-on cartridges monthly, clean mechanical media, and refresh activated carbon every 4–6 weeks. Good circulation helps with algae bloom prevention.

    Test tap water for nitrates and phosphates. If levels run high, use RO/DI water and reconstitute with trusted products such as Seachem Equilibrium or Aqueon Water Renewal. That step supports long-term strategies for combating algae blooms.

    Dose fertilizers with care. Tanks without injected CO2 require lighter dosing. Measure net water volume accurately when dosing to prevent nutrient spikes that encourage algae.

    For overall success, combine these best practices for algae control into a routine you can follow every week. Small, consistent steps will reduce nutrient buildup and make preventing algae overgrowth much easier.

    Physical Removal Techniques

    Quickly reduce algae in water with hands-on methods. Start with the blackout method for free-floating phytoplankton or some cyanobacteria. Turn off lights and cover the tank with opaque material for up to seven days. Keep pumps and aeration running. Uncover briefly to feed if needed.

    Watch live plants closely because stress or die-off may raise ammonia. This might require follow-up water changes.

    Manual removal is effective for attached algae like hair algae, black beard algae, and green spot. Use algae scrapers, old toothbrushes, razor blades on glass, or plastic cards for acrylic tanks. Pull out heavily infested plants and decorations and treat them separately.

    A short hydrogen peroxide soak can help remove stubborn black beard algae from hardscape and plant leaves.

    Add fine mechanical filtration to support reducing algae in water. Filter floss, polishing pads, or filter socks placed downstream of your main filter will trap suspended particles. Replace or rinse these pads often so they do not become nutrient sources themselves.

    During routine water changes, vacuum the substrate to remove detritus and decomposing matter that feed blooms. Regular gravel cleaning lowers nutrient levels and is one of the simplest ways to manage algal blooms in small aquariums.

    For very clear results, consider a diatom filter when you need extra polishing. Diatomaceous-earth filters remove microscopic particles, including suspended algae, and can produce crystal-clear water. These units cost more, but they are a useful tool among the practical ways to manage algal blooms in setups that tolerate periodic external filtration.

    • Blackout method: block light up to 7 days; keep pumps on.
    • Manual scraping: scrapers, toothbrushes, razor blades or plastic cards.
    • Pre-treat items: remove and soak decorations or plants if infested.
    • Mechanical polishing: filter floss, polishing pads, filter socks.
    • Substrate care: vacuum during water changes to cut nutrient input.
    • Diatom filtration: for microscopic particle removal and clear water.

    Chemical Solutions for Algae Control

    When green water or spotty growth shows up, chemical options can help quickly. UV sterilizers like the Aqueon QuietFlow UV for tanks up to 40 gallons or Coralife Turbo-Twist for larger tanks are good for algae. Place the unit inline or in your sump and match the flow rate to the UV rating for best results.

    Over-the-counter algaecides like Aqueon Algae Remover can cut down visible growth. But, use these products only as a last resort. Chemical solutions don’t fix nutrient or lighting issues. Remove activated carbon and other chemical media before dosing and follow the manufacturer’s directions for your tank size.

    For tough patches like black beard algae, a 3% hydrogen peroxide spot treatment can work. Treat items out of water for about five minutes, rinse well, then return them to the tank. Avoid broad application near live plants and invertebrates to limit harm.

    Severe cyanobacteria outbreaks may respond to erythromycin-based products like Maracyn when used carefully. Follow package dosing—often one packet per ten gallons—and repeat as directed. Understand that antibiotic use can disrupt beneficial bacteria and may promote resistance, so reserve this option for extreme cases.

    • Monitor parameters closely after any chemical dosing.
    • Prepare for oxygen drops and ammonia spikes by increasing aeration and planning timely water changes.
    • Keep chemical use targeted and short-term to protect your tank’s biological balance.

    Adopt best practices for algae control by pairing treatments with source fixes. Cut excess feeding, reduce light duration, and improve filtration. Chemical treatments can remove visible algae, but the most durable results come from correcting the root causes that allow blooms to return.

    Introducing Natural Algae Eaters

    You can cut down on algae by adding natural eaters that fit your tank’s algae. Nerite snails are great for green spot algae. Amano shrimp and Siamese algae eaters are good for hair and filamentous algae. Otocinclus catfish eat soft algae and diatoms.

    Choose the right species for your algae and water conditions. Florida flagfish and some Siamese algae eaters can handle black beard algae in certain setups. Remember, no single cleaner can solve all problems.

    Use these helpers along with controlling nutrients and light to manage algae. Algae eaters clean the surface, not green water. So, pair them with biological control, water changes, and less light.

    When adding new animals, follow best practices for algae control. Make sure they’re compatible with your fish, tank size, and temperature. Give them hiding spots and extra food to stay healthy if algae levels go down.

    • Amano shrimp — effective on hair and filamentous algae.
    • Nerite snails — eat green spot algae; they won’t breed in freshwater.
    • Siamese algae eaters — target tough filamentous types, including some BBA.
    • Otocinclus catfish — gentle grazers for soft algae and diatoms.
    • Florida flagfish — useful for some stubborn patches in compatible tanks.

    Stock your tank carefully and watch your cleanup crew. Don’t rely only on animals for algae control. By combining these helpers with good algae management, you’ll keep your aquarium balanced in the long run.

    Enhancing Lighting Conditions

    Control light duration to keep your tank stable. For non-planted aquariums, limit artificial light to six hours or less each day. For planted tanks, set a schedule between eight and twelve hours based on plant needs and whether you use CO2.

    Use timers to maintain consistent photoperiods and prevent accidental extended lighting that can lead to algae spikes. Gradual changes work best; alter photoperiod or intensity over days and monitor plants and fish for two to three weeks.

    Avoid direct sunlight on the aquarium. Move the tank away from bright windows or install blinds. If the room is bright, consider keeping the aquarium light off during daytime or reducing its intensity to help with reducing algae in water.

    Choose LED fixtures with dimming or spectrum control so you can fine-tune output. Plants need specific wavelengths while algae thrive on broader spectrums. Dialing back intensity and favoring plant-friendly spectra can aid in preventing algae overgrowth.

    Balance light with nutrient management. Over-lighting combined with limited nutrient uptake by plants often favors algae. Excess nutrients paired with low light can do the same. Adjust dosing and feeding when you change lighting to support plant growth and reduce algae in water.

    • Set timers for consistent on/off cycles.
    • Reduce peak intensity if algae persist.
    • Make changes slowly and watch plant response.

    Follow these steps and you will strengthen tank stability, making lighting adjustments a practical tool for preventing algae overgrowth while supporting healthy plants and livestock.

    Monitoring and Maintenance Practices

    Keep a simple testing schedule to track ammonia, nitrite, nitrate, and phosphate. Write down results and note any actions like water changes, dosing, or feeding adjustments. This record helps you spot trends and shows how your monitoring and maintenance practices affect algae levels.

    Set a weekly routine: a 20% water change, siphon the substrate, remove visible debris, and check filter flow. Rinse mechanical media when it clogs. These tasks follow best practices for algae control and cut nutrient sources that feed green water outbreaks.

    Adopt monthly chores: replace filter cartridges, service canister filters, and swap activated carbon or chemical media every four to six weeks. Clean impellers and check tubing for blockages so circulation stays strong and you reduce stagnant spots where algae thrive.

    Manage flow and filtration to avoid dead zones. Add a small powerhead or air stone if water movement is weak. Proper flow supports biological filtration and makes it easier to control how to control algae growth in hidden corners.

    Feed sparingly and measure fertilizer doses. If you do not run CO2 or your plant cover is thin, cut back on nutrients. Dose liquid fertilizers based on actual water volume after subtracting substrate and decorations to prevent excess that encourages algae.

    Change one variable at a time and wait two to three weeks to judge results. Plant health and algae response take time to show. Patient recordkeeping and steady application of the best practices for algae control deliver the clearest path to long-term stability.

    Seeking Professional Help

    If green water or algae keeps coming back, it’s time to get help. Look for a local aquarium store with experts. They can also be an aquatic consultant or a trusted online service for in-person checks.

    These professionals use top-notch test kits like API or Seachem. They can do detailed water chemistry tests that you might not catch at home.

    Experts can give you specific plans to fight algae in your tank. They might suggest RO/DI water, filter upgrades, or the safe use of algaecides. They’ll also guide you on stocking, feeding, and choosing algae eaters to prevent future problems.

    Be ready for some costs, but think about the damage of not fixing it. A pro can fix severe cases and create a plan to keep your tank healthy. If you see fish dying or water chemistry issues, get help fast to save your tank and its life.

    FAQ

    What exactly is green water and why does it happen?

    Green water is when tiny plants in the water turn it green and make it hard to see. It happens when there’s too much light and nutrients in the water. Tanks that are new or have too much food are more likely to get green water.

    How quickly can a green water bloom develop and how long will it last?

    Blooms can start in just a few days if the conditions are right. How long it lasts depends on what you do. Quick fixes like using a UV sterilizer can clear the water in a few days. But if you don’t fix the root causes, it will come back in weeks.

    Is green water dangerous to my fish and invertebrates?

    Green water itself isn’t usually toxic. But it can make it hard for plants to get enough light. It can also lower oxygen levels at night. If the algae die off, it can make the water toxic to fish and invertebrates. So, it’s important to watch the water closely during treatment.

    What quick steps can I take tonight to clear green water?

    Start by covering the tank and turning off the lights. Keep the pumps and air running. Use a polishing pad or fine filter to catch the algae. If you have a UV sterilizer, turn it on. Do partial water changes if you see ammonia rising or after any algae die-off. These steps can clear the water fast, but they’re not a long-term solution.

    How do I interpret test results during a bloom? Which tests matter most?

    Test for ammonia, nitrite, nitrate, and phosphate. Any ammonia or nitrite means there’s a problem. High nitrates and phosphates mean there’s too much food for the plants. Also, test your tap water to see if it’s adding to the problem.

    How often should I water-change and vacuum my substrate to prevent blooms?

    Change about 10% of the water every week or 25% every two weeks. Many people do 20% weekly. Vacuum the substrate during changes to remove waste. If nitrates or phosphates keep going up, you might need to change more water.

    Will feeding less help control algae growth?

    Yes, feeding less can help. Too much food is a big source of nutrients for algae. Feed only what fish eat in about two minutes, once or twice a day. Consider skipping a day of feeding each week. Don’t feed too much during algae outbreaks and clean up any uneaten food right away.

    Can adding live plants prevent green water?

    Yes, live plants can help. Fast-growing plants like hornwort and water sprite compete with algae for nutrients. Well-planted tanks usually have fewer algae problems because plants use up the nutrients algae need.

    How effective are UV sterilizers for green water, and which models work for small tanks?

    UV sterilizers are very good at killing algae when they’re the right size and set up right. For small tanks, compact models like the Aqueon QuietFlow UV or Coralife Turbo-Twist can clear green water in days. Make sure to install them correctly and follow the manufacturer’s flow rate recommendations.

    Are polishing pads or finer mechanical filtration worth adding?

    Yes, they are. Using polishing pads or filter floss after coarse filters can trap tiny algae particles and make the water clearer. But, you’ll need to replace or rinse them often because algae can clog them up fast.

    Should I use chemical algaecides to treat green water?

    Chemical algaecides can help, but they should be a last resort. They don’t solve the root problem and can harm plants, invertebrates, or beneficial bacteria. If you use them, follow the instructions carefully and be ready to do water changes if your fish or plants show stress.

    How do I safely perform a blackout and what risks should I watch for?

    To do a blackout, cover the tank and turn off the lights for up to seven days. Keep the filters and air pumps running. If you need to feed, uncover briefly. Watch for plant stress and rising ammonia from dying plants. Test the water daily and be ready to do water changes and boost aeration if ammonia goes up.

    Can I use hydrogen peroxide to treat algae?

    3% hydrogen peroxide can be used to treat tough algae like black beard algae. Soak removed decor or apply it carefully to affected leaves out of water for a few minutes and then rinse well. But, use caution with live plants and animals. Avoid using it in the tank unless you understand the risks.

    What algae eater species work best in small freshwater tanks?

    Good choices include Amano shrimp, nerite snails, otocinclus catfish, Siamese algae eaters, and Florida flagfish. They help control algae, but they’re not a complete solution. Match the species to your tank’s size, water conditions, and the type of algae you have.

    Why does algae come back after I clear it?

    Algae comes back if you haven’t fixed the root cause. This could be too much food, too much light, or not enough plants. Keep track of your feeding, test your water, adjust the lighting, add plants, and maintain regular water changes to prevent it from coming back.

    How should I adjust aquarium lighting to minimize algae without harming plants?

    Limit the light time with a timer. For non-planted tanks, use 6–8 hours of light. For planted tanks, use 8–12 hours, depending on the plants and CO2. Avoid direct sunlight. If algae persists, gradually reduce the light intensity or duration over 2–3 weeks. Use dimming features on LEDs if available.

    When are fertilizers appropriate, and can they cause algae?

    Fertilizers help plants grow but can fuel algae if plants can’t use all the nutrients. Use them sparingly, and only in tanks without CO2 or with sparse plants. Consider the actual water volume and avoid phosphate spikes. Test before adding and adjust based on plant uptake and algae response.

    How do I know if my tap water is contributing to algae problems?

    Test your tap water for nitrate and phosphate. If you find any, consider using RO/DI water for top-offs and changes. Many hobbyists mix RO water with additives like Seachem Equilibrium to keep minerals without adding nitrates or phosphates.

    Should I rely solely on algae-eating animals to control algae?

    No. Algae eaters can help control visible algae but can’t stop green water or replace good care. Use them as part of a broader plan that includes nutrient control, lighting management, plant competition, and regular maintenance.

    What maintenance schedule will help prevent algae blooms?

    Weekly tasks include a 20% water change, vacuuming the substrate, removing debris, and checking filter flow. Monthly tasks include replacing filter cartridges and servicing canister filters. Change activated carbon every 4–6 weeks. Regularly test the water and keep a log to spot trends before blooms appear.

    When should I seek professional help for persistent algae?

    If green water or other algae types don’t go away with standard treatments, or if you see fish deaths, seek help. Local aquarium stores, aquatic consultants, or services that offer RO/DI, diagnostic testing, and equipment recommendations can help.

    Can diatom filters or other specialty filters help with green water?

    Diatom filters can make water very clear by removing tiny particles, including algae. They’re more expensive and used less often. They’re a good tool for quick, clear water if you’re addressing the root causes of algae.

    What should I track to understand and prevent future blooms?

    Keep track of test results, maintenance actions, feeding amounts, stocking changes, and lighting schedules. By tracking these over weeks, you can find patterns and take steps to prevent algae blooms.

  • Which Nano Fish are Known Jumpers and How to Secure Your Tank

    Which Nano Fish are Known Jumpers and How to Secure Your Tank

    Small tanks need extra care. In nano systems (10–30 gallons or less), some fish can jump out and not survive. So, keeping your tank safe is very important.

    Marine hobbyists say Firefish, many gobies, and some blennies are big jumpers in reef and nano-marine tanks. In freshwater, guppies and Endler’s livebearers also jump a lot. Experts suggest using secure lids for these fish.

    This article will guide you on how to spot jumping fish, check your tank, and keep your fish safe. You’ll learn about lids, surface covers, and other ways to prevent escapes. Plus, you’ll get tips on monitoring and safety practices to protect your fish.

    Keep reading to find out which fish might jump, how to fix your tank, and simple ways to keep your fish safe. These tips will help you prevent jumping fish and keep your tank secure.

    Understanding the Behavior of Jumping Fish

    A serene aquarium setting illustrating various nano fish, such as neon tetras and guppies, exhibiting their lively behavior near the water surface. In the foreground, focus on a clear acrylic tank lid designed to prevent fish from jumping out, with intricate details and a slight reflection of the water. The middle ground features vibrant plants and soft rocks, creating a natural habitat, while the background shows gentle ripples and a soft, diffused sunlight filtering through. The lighting enhances the colors of the fish, making them pop against the lush greenery, while soft shadows add depth. The atmosphere is calm and tranquil, inviting viewers to appreciate the beauty of these small creatures and their environment.

    Learning why fish jump can help you avoid surprises. Many fish jump when they’re startled by sudden noises or movements. Firefish and dartfish, for example, have a natural flight response. They might jump out of their tank when they’re scared.

    Small fish like guppies and Endlers often swim near the surface. Changes in their water or sudden movements can stress them out. This stress makes them more likely to jump out of the water.

    Nano tanks have less space, which can lead to more jumping. With less room, fish may jump more often. This is because they have nowhere to hide and are more likely to be startled.

    The behavior of fish also depends on their temperament and social needs. Some fish are more territorial or stressed, which makes them more likely to jump. Choosing the right fish for your tank and keeping it peaceful can help prevent jumping.

    To prevent fish from jumping, focus on prevention. Reduce noise and vibrations around your tank. Make sure your fish have places to hide and avoid sudden changes in their environment. Small, consistent actions can help keep your tank peaceful and prevent fish from jumping out.

    Popular Nano Fish That Are Known Jumpers

    A dynamic scene showcasing a fish jumping deterrent device in a beautifully arranged aquarium. In the foreground, a sleek, modern deterrent structure made of clear acrylic, specifically designed to prevent fish from leaping out, with small, vibrant nano fish like neon tetras and guppies actively swimming. The middle ground features lush aquatic plants like Amazon swords and Anubias, creating a vibrant, natural habitat. The background consists of soft, diffused lighting filtering through the water, casting ethereal shadows. The camera angle is slightly elevated, providing a comprehensive view of the tank. The overall mood is serene and enchanting, highlighting both the beauty of the fish and the practicality of the deterrent device.

    Several nano species are known to jump a lot. Firefish (Nemateleotris magnifica) is a favorite among marine hobbyists. They dart quickly and might jump if scared. A tight-fitting lid and rockwork with hideouts can help prevent this.

    Clown gobies (Gobiodon spp.) and other small gobies often sit near the surface. Some jump when startled. Choosing species that stay low and adding cover can help in a nano reef.

    The tailspot blenny (Ecsenius stigmatura) is active among rocks. It grazes and hops while eating. Without algae or grazing food, it might jump. Matching diet and habitat can reduce this.

    Ocellaris clownfish (Amphiprion ocellaris) is hardy but territorial. In small tanks, stress and aggression can lead to jumping. Choosing the right tankmates and avoiding overstocking can help.

    In freshwater, guppies (Poecilia reticulata), Endlers (Poecilia wingei), and longfin white cloud minnows are known jumpers. They are active and need secure lids. Simple covers and floating plants can help.

    • Think about how invertebrates and larger fish affect small species. Stress from tankmates can trigger jumps.
    • Check out Flip Aquatics and nano reef guides for info on beginner-friendly jumpers like Endlers, guppies, firefish, and gobies.
    • Research adult size and temperament before buying. Species under ~3 inches are good for nano tanks, but small size doesn’t mean no jumping.

    When picking fish, consider their temperament and jump tendency. The right species, secure lids, and a good habitat are key to stopping fish from jumping in your tank.

    How to Identify a Jumping Nano Fish

    Watch for frequent visits to the surface. If a fish spends more time at the top, it may be testing the air or searching for gaps. These visits often precede actual jumps and help you start controlling fish jumps before an escape occurs.

    Look for sudden bursts toward the glass or surface. Quick darts, such as during feeding or when lights change, signal skittishness. Such bursts often match the early stages of attempts to leap, so they are key to timely fish jumping prevention methods.

    Note persistent stress signs. Rapid gill movement, clamped fins, faded color, or loss of appetite all point to poor conditions. Stress raises the chance a fish will try to flee, making it essential to act fast to prevent fish leaping out of water.

    Check how fish react to routine disturbances. If they bolt at minimal noise or a hand near the tank, you face a higher risk of escape. Skittish species like guppies and Endlers often show this behavior and need closer monitoring.

    Inspect tank structure and stocking choices. Overcrowding, aggressive tankmates, and fish that will outgrow your nano tank increase jumping attempts. Vet adult size and social needs before purchase to reduce risks and improve controlling fish jumps.

    • High activity near the surface raises warning levels.
    • Absence of hiding spots makes bolting more likely.
    • Ammonia or nitrite spikes push fish toward the surface.

    Run quick diagnostic checks when you spot warning signs. Observe behavior at feeding time, after lights switch on or off, and during maintenance. Test pH, temperature, ammonia, nitrite, and nitrate, and compare values to species-specific ranges such as those listed by Flip Aquatics for guppies and white clouds.

    Use clear action thresholds. If you see repeated surface-breathing, frequent thrashing, or clear attempts to leap, cover the tank temporarily and test water chemistry. These steps combine observation with practical fish jumping prevention methods to keep your stock safe.

    Apply small upgrades to reduce risk. Add floating plants, provide crevices, and correct stocking mistakes. Simple changes help in controlling fish jumps and serve as frontline measures to prevent fish leaping out of water.

    Tank Setup: A Barrier Against Jumping

    Begin with a secure top. A glass or acrylic lid with special cutouts for filters is a good start. It keeps fish in and air out. Make sure it fits tightly to prevent fish from jumping out.

    Mesh and perforated covers are good for air flow. Use stainless steel or nylon mesh with small holes to stop small fish from jumping. These are great for keeping fish in while letting air circulate.

    • Commercial aquarium hoods are easy to use for feeding and maintenance. Choose one that fits your tank.
    • DIY covers can also work. Egg crate light diffusers cut to fit are a cheap and effective solution.
    • For small tanks, choose lids with few openings to keep fish like Firefish safe.

    Keep cords and tubing tight with sealed grommets or precision cuts. This stops fish from finding ways to escape. Heaters, filters, and powerheads should fit through these tight spots.

    Plan your rockwork and aquascape to prevent fish from escaping. Avoid wide channels that lead to the surface. Use stable structures and avoid unstable ones that could cause fish to jump.

    1. Place low-profile decorations near the surface to block fish paths.
    2. Check lids and covers for movement. A wobbly lid can be an escape route.
    3. Regularly check seals and mesh tension as part of your tank care routine.

    Choose the right setup for your fish. For guppies and Endlers, a lightweight hood with feeding access is good. For saltwater nano species that jump a lot, use rigid tops with small holes. These strategies help keep your tank safe and reduce stress for your fish.

    Water Conditions and Their Role

    Poor water quality can make fish restless and more likely to jump. Issues like ammonia or nitrite spikes, high nitrate, wrong pH, or sudden temperature changes stress them. This stress leads to more jumping, making water care essential for preventing this behavior.

    Before adding fish, check the water conditions they need. For example, guppies and Endlers prefer 72–80°F with pH 6.5–7.8. White clouds like 70–74°F and a slightly different pH. Marine fish, like firefish, gobies, and blennies, need stable salinity and reef-appropriate temperatures. Knowing these needs helps prevent fish from jumping out of water.

    Regularly test your tank for ammonia, nitrite, nitrate, pH, temperature, and specific gravity for marine setups. Cycle new tanks and do routine water changes. Avoid sudden changes in temperature or salinity, as they can cause fish to jump and harm them.

    • Follow “less is more” stocking in nano tanks to control bioload.
    • Avoid overfeeding; excess food raises ammonia and stresses fish.
    • Add fish slowly so beneficial bacteria can establish and keep parameters stable.

    If you see fish jumping due to stress, act fast. Test the water, do a partial water change, check filtration and aeration, and cover the tank to prevent escapes. These steps are practical ways to prevent fish jumping and help your fish stay healthy.

    Aquascaping Strategies to Prevent Jumping

    Design your layout so fish feel secure. Build stable rockwork with caves and crevices for species like firefish and gobies. Use ceramic caves or live rock in marine nano reefs to create safe spots.

    In freshwater nano tanks, plant densely with hornwort and anacharis. Add driftwood for cover. Flip Aquatics suggests these plants for shelter and better water quality, aiding in long-term fish containment.

    • Create distinct zones to reduce territorial clashes.
    • Place mid-water décor to break sightlines that trigger flight responses.
    • Use floating plants to calm surface-skimming species.

    Avoid long, open surface corridors where fish can gain speed. Arrange rockwork and plants to interrupt straight paths from substrate to surface. This slows fish down, making jumping prevention more effective.

    Provide proper grazing areas for tailspot blennies and algae grazers. Offer algal surfaces and refugia for mandarins and other specialists. This way, they find food without roaming, helping to stop fish from jumping.

    Add visual barriers like background plants or mid-water obstructions. These barriers clarify territory lines and calm anxious fish. They strengthen overall fish containment strategies in your tank.

    Using Equipment to Minimize Risks

    Choose a filter that fits your tank’s size. A filter that’s too strong can stir up the water and scare your fish. Sponge filters are great for small tanks because they move water gently.

    Get a heater with a thermostat to keep the water at a steady temperature. This helps prevent sudden changes that stress your fish. Keeping the water temperature stable is a simple way to keep your fish calm.

    Make sure your tank has enough oxygen without strong currents. Adjustable pumps or wavemakers on low can help. This is a good way to keep your fish from jumping out.

    • Use secure hoods with tight latches and dedicated feeding ports that do not leave wide openings.
    • Consider egg crate covers or purpose-made mesh screen lids to block escape routes while allowing light and gas exchange.
    • Install silicone grommets for cables and tubing to eliminate gaps where fish might slip through.
    • Clip-on feeding ports with small flaps cut down on fallback openings compared with loose lids.

    Have a backup plan for your tank. A spare air pump or a battery-powered aerator keeps oxygen flowing when you’re not around. Small surface skimmers also help with gas exchange without startling your fish.

    Choose equipment that’s right for your tank. For marine tanks, use reef-safe gear. For freshwater tanks with lots of plants, pick low-flow filters and full-spectrum lighting.

    Use a combination of smart equipment choices and regular checks to keep your tank safe. This approach offers multiple ways to prevent fish from jumping out and keeps your fish safe.

    Monitoring Your Fish for Unusual Behavior

    Keep an eye on your fish during feeding times and when the lights change. Also, watch them closely after you’ve done maintenance. These moments can show you if something is wrong and help you stop fish jumps.

    Start a simple log to track your fish’s behavior. Write down any odd incidents, water tests, and changes in how they act. Even small notes can help you see patterns that mean you need to act fast.

    Know the signs of trouble. Look for fish swimming near the surface, hiding, breathing fast, losing color, clamping their fins, or trying to get out. These signs mean they might jump more.

    If you see these signs, act fast. Check the water right away and change it if it’s not right. Also, make sure the tank cover is secure to keep your fish safe while you figure out what’s wrong.

    If one fish is being too aggressive, put it in a separate tank. This keeps the other fish safe and stops them from jumping out of the main tank.

    Regularly check your tank’s equipment. Make sure the lid, filters, heaters, and cords are all in place. Also, seal any holes and make sure decorations are stable to avoid startling your fish into jumping.

    Use online resources for tips on your fish’s behavior. Guides and other fish keepers can offer advice on how to prevent fish jumps and keep your fish safe.

    Best Practices for Fish Safety

    Follow this checklist to keep your nano tank safe and prevent fish escapes. Start with a small number of fish. Research the size and behavior of each species before buying. Add fish slowly to let the tank adjust.

    Secure the top with a tight lid or mesh cover. Make sure there are no big gaps. This is a simple way to stop fish from jumping out.

    • Keep the water quality stable by testing and changing it regularly.
    • Avoid sudden changes in water conditions when adding new fish or chemicals.
    • Use a basic test kit and test the water regularly.

    Provide hiding spots and clear areas for fish to claim as their own. Use caves, dense plants, or rocks to reduce stress and fights. A well-organized tank helps prevent fish from jumping and keeps them healthy.

    Feed your fish the right food for their needs. Offer a variety of foods, like mysis for mandarins or algae wafers for blennies. Proper feeding helps prevent hunger-driven escapes and keeps your fish healthy.

    Have a plan for emergencies. Keep spare lids, a backup air pump, and a quarantine tank ready. Knowing how to do quick water changes can save your fish if they jump or if equipment fails.

    1. Stock your tank slowly to avoid stressing the biofilter.
    2. Watch your fish closely for any signs of stress.
    3. Deal with stressors quickly to prevent fish jumping.

    Use advice from nano reef and freshwater hobbyists like Reef2Reef and Practical Fishkeeping. They offer tested methods for stocking, feeding, and setting up your tank. These tips will help you keep your fish safe and your tank healthy.

    Final Thoughts on Keeping Your Fish Safe

    You now have a clear checklist for keeping fish from jumping. Look out for species like firefish and certain gobies that tend to jump. Make sure your tank is covered well and think about adding decorations that provide hiding spots.

    Stable water conditions and gentle flow are key. Also, having reliable heating and filtration systems is important. These steps help prevent fish from jumping out of their tanks.

    Start by checking your tank’s lids and covers. Make sure the water parameters are stable and the fish are not overcrowded. Add more hiding spots to reduce stress on your fish.

    Keep an emergency kit ready with a spare lid, test kits, and a quarantine tank. This way, you can quickly respond if a fish jumps or gets sick.

    Stay updated with the latest from trusted sources on marine and freshwater nano care. Use their advice on water parameters and fish species. Regularly check on your fish and keep your tank clean. This way, you can prevent fish from jumping and keep your aquarium safe and healthy.

    FAQ

    Which small (nano) fish species are most likely to jump and need lids or covers?

    Firefish, many small gobies, tailspot blennies, and some clownfish like Ocellaris are jump-prone. In freshwater, guppies, Endler’s livebearers, and longfin white cloud minnows also jump. They are active near the surface or have a strong startle/flight response. A secure lid or screen is strongly recommended.

    Why do fish jump out of aquariums—what triggers the behavior?

    Fish jump for several reasons. They jump due to a startle response to sudden noise or movement. They also jump to avoid predators or aggressive tankmates. Territorial disputes in cramped conditions and stress from poor water quality or rapid parameter changes also trigger jumping. Some species have an instinctive surface-skimming or darting behavior.

    What signs indicate a fish in my nano tank is likely to attempt jumping?

    Look for frequent surface visits and sudden bursts of speed toward the surface. Watch for skittishness at routine disturbances and rapid gill movement. Clamped fins, pale or faded coloration, and repeated attempts to dart into gaps are warning signs. Check water parameters and temporarily secure the top of the tank.

    How does tank size and stocking affect jumping risk in nano aquariums?

    Smaller tanks (10–30 gallons or less) magnify stress from overcrowding and territorial conflicts. Overstocking increases ammonia and nitrite risk, raises aggression, and reduces hiding spaces. Follow conservative stocking rules, research adult sizes and temperament, and add fish slowly so the biofilter can keep up.

    What kinds of lids or covers work best for preventing fish from jumping?

    Effective options include fitted glass or acrylic tops with sealed cutouts for plumbing. Commercial aquarium hoods, fine mesh or stainless-steel screen lids, and egg-crate light diffusers cut to fit are also good. Solid lids reduce evaporation and maintain heat but must allow gas exchange. Mesh or perforated covers balance ventilation with containment. Use sealed grommets or snug pass-throughs for cords and tubing so there are no wide gaps.

    Can aquascaping reduce the chance of fish leaping out of the tank?

    Yes. Build stable rockwork with caves and crevices (for Firefish and gobies). Avoid long open surface corridors that let fish build momentum. Add dense planting or floating cover in freshwater tanks to break line-of-sight. Secure decor so it won’t shift and startle fish, and design clear territories to lower aggression and stress-related flight responses.

    What water parameters should I monitor to reduce jump-related stress?

    Regularly test ammonia, nitrite, nitrate, pH, temperature, and specific gravity for marine tanks. Maintain species-appropriate ranges. For many freshwater jumpers (guppies, Endlers), aim roughly 72–80°F and pH 6.5–7.8. White clouds prefer slightly cooler temps. Marine species need stable salinity and reef-compatible temperature ranges. Address any spikes quickly with partial water changes and filtration checks.

    Which equipment choices help prevent fish from jumping without stressing them with strong currents?

    Use gentle yet effective filtration like sponge filters for low flow. Reliable thermostat-controlled heaters prevent temperature swings. Adjustable pumps or wavemakers set to low flow are also good. Lids with secure feeding ports are recommended. Avoid strong surface agitation that drives surface swimmers to thrash. Provide adequate oxygenation with steady, gentle circulation and backup air options in case of outages.

    What immediate steps should I take if a fish is repeatedly trying to jump?

    Cover the tank more securely right away. Test water parameters and correct ammonia/nitrite or temperature problems with partial water changes. Check filtration and aeration. Look for aggressive tankmates or unstable decor. If one fish is harassing others, consider moving the aggressor to a quarantine/hospital tank until the situation stabilizes.

    Are there species-specific housing or feeding needs that reduce jump risk?

    Yes. Tailspot blennies and other grazers need algal surfaces or algae wafers. Mandarins and similar specialists require established copepod populations and refugia. Firefish need crevices and secure rockwork. Meeting dietary and habitat needs reduces stress and lessens the likelihood of escape attempts. Research each species’ adult size, social behavior, and diet before adding it to a nano tank.

    How can I secure equipment routing through lids and hoods to prevent escape paths?

    Use silicone grommets, rubber pass-throughs, or custom-cut holes that snugly fit cables, heater cords, and tubing. Avoid leaving large open gaps. Route plumbing through sealed cutouts or under the hood where possible. Egg crate panels and clip-on hoods often provide easier, safer routing while minimizing open surface area.

    What routine observation habits help you catch jumping behavior early?

    Watch fish during feeding, lights-on and lights-off transitions, and after maintenance. Keep a simple log of behavior notes and water parameter readings to detect trends. Look for increasing surface activity, avoidance of shelter, rapid breathing, or attempts to access gaps; these are early warnings that require prompt action.

    Are there emergency supplies I should keep on hand to prevent losses from jumping incidents?

    Keep a spare lid or mesh cover, basic water test kits, a quarantine/hospital tank, a backup air pump (battery- or UPS-powered if possible), and quick-access tools for partial water changes. These items let you secure the tank quickly and address water-quality problems that often underlie jumping behavior.

    Can interactions with invertebrates or larger fish increase jump risk for small nano species?

    Yes. While invertebrates aren’t jumpers themselves, their presence or interactions with more aggressive or larger fish can stress small species and trigger escape attempts. Carefully plan community dynamics and provide ample hiding spaces so small fish can avoid harassment that would push them toward the surface or a gap.

    Where can I find reliable species-specific guidance on jump tendencies and parameter ranges?

    Reputable hobbyist resources include Nano-Reef.com for marine nano setups and species notes, and Flip Aquatics or similar freshwater care guides for parameter charts and beginner-friendly species advice. Use these alongside manufacturer specs for equipment and peer-reviewed community reports to inform stocking, temperature, and salinity decisions.

    What are the most important preventative rules to follow for nano tank fish safety?

    Stock conservatively and research adult size and temperament; secure the top with a proper lid or screen; maintain stable water quality through routine testing and water changes; provide adequate hiding places and territory division through aquascaping; route equipment through sealed pass-throughs; and keep emergency supplies ready. Consistent observation and prompt corrective actions are the best defense against fish jumping incidents.

  • How to Remove Clogs and Slime from Small Air and CO2 Lines

    How to Remove Clogs and Slime from Small Air and CO2 Lines

    If you have aquarium CO2 systems, pneumatic controls, or HVAC condensate lines, you know how important small tubes are. Keeping them clear is essential for smooth flow and reliable operation. It also helps avoid expensive downtime.

    Clogs can come from algae, mold, biofilm, dust, mineral scale, and debris. These blockages can reduce flow and cause intermittent operation. They might even trigger safety shutdowns or lead to water damage or equipment failure.

    This guide will show you how to clean airline tubing yourself. You’ll learn safe ways to shut off power, find lines and access points, and do basic inspections and cleanings. The aim is to help you handle maintenance and know when to call a professional.

    There are similarities with AC condensate drain problems. Moisture can cause slime and biofilms, increasing energy use and repair costs if ignored. This article will discuss signs of blockages, tools needed, a step-by-step cleaning process, tips for tough clogs, prevention, risks of neglect, troubleshooting, and environmental considerations for cleaning air and CO2 lines.

    Understanding Airline Tubing and Its Importance

    Airline tubing materials displayed in a detailed and informative manner, focusing on various types of clear and colored tubing, connectors, and fittings. In the foreground, showcase a close-up view of flexible PVC tubing, with glistening surfaces indicating clarity and cleanliness. In the middle ground, arrange a set of connectors and valves, emphasizing their intricate designs and functionality, all set against a smooth, neutral-colored work surface. The background should feature a blurred out laboratory or workshop setting, subtly hinting at a professional environment. Natural lighting should illuminate the scene, creating soft shadows for depth, while a slight overhead angle adds a dynamic perspective. The overall mood is technical and instructive, suitable for an educational context.

    Airline tubing is small, flexible tubing for air or CO2. It’s made from materials like PVC, silicone, polyurethane, and polyethylene. PVC is used in HVAC systems, while silicone and polyurethane are in aquariums and instruments.

    This tubing is key for air or CO2 flow. It’s used for aeration, dosing, control, and drainage. Its small size means even a little buildup can harm the system.

    It faces many challenges. Moisture and organic matter cause algae and mold. Hard water leaves deposits, and debris can get in. Biofilms reduce flow and pressure by sticking to the walls.

    Lessons from HVAC maintenance help with small lines. Cleaning coils and pans prevents clogs. Keeping small lines clean does the same.

    Proper care keeps flow steady and prevents problems. Avoid harsh treatments on aluminum and choose the right cleaning method. This also keeps air quality good and prevents overflows or shutdowns.

    Signs of Blockages in Airline Tubing

    A close-up view of airline tubing showing clear signs of blockages, with vivid details illustrating clogs, slime, and residue. In the foreground, focus on the tubing, revealing darkened areas and visible obstructions that suggest poor airflow. The middle ground features a workstation with tools for maintenance, including a small cleaning brush and pressure gauge, providing context. The background includes blurred shelves stocked with aquarium supplies, enhancing the environment. The lighting is bright and clinical, simulating an industrial workspace, while the angle captures the tubing from a slightly elevated perspective, emphasizing the blockages. The mood is informative and technical, suitable for an educational article, with a sterile, professional atmosphere.

    Knowing how to spot clogged airline tubing can help catch problems early. Look for reduced or no airflow or CO2 flow at the endpoint. If a regulator shows low pressure or gauges drop suddenly, it might be blocked.

    Listen for sputtering or intermittent delivery when the system runs. Gurgling or slow trickling in condensate drains often points to partial clogs. HVAC techs often notice condensate backing up into the overflow pan as an early alarm.

    Watch for visible slime or discoloration at access points and vents. Vacuuming or blowing the line can reveal sludge or stringy biofilm. Unusual musty odors near vents signal mold or bacterial colonies inside tubing.

    Behavioral clues matter. Recurring clogs after short fixes typically mean persistent biofilm or zooglea. Frequent trips of float switches or overflow safety devices are strong airline tubing maintenance signs that flow is impaired.

    • Reduced or no airflow/CO2 flow
    • Sputtering or intermittent delivery
    • Pressure loss on gauges
    • Condensate backup or overflow into pans
    • Tripped float switches on HVAC systems
    • Unusual musty odors and visible slime

    Spotting these indicators early helps prevent water damage and stops microbes from affecting indoor air quality. You protect system efficiency and avoid premature failure when you pay attention to how to spot clogged airline tubing and follow airline tubing maintenance signs.

    Tools Needed for Cleaning Airline Tubing

    Before you start, gather the basics. Wear gloves and eye protection. Have a flashlight, bucket, and clean water for flushing. A garden hose is great for initial rinses.

    Use small flexible brushes or pipe cleaners that fit the tubing ID. They help remove slime near fittings. A wet/dry shop vacuum is strong enough to pull sludge from the outlet end.

    • Seal the tubing end with tape or foam for an airtight fit with the shop vac.
    • Vacuum from outside while capping risers or access ports near the unit. This draws material through the entire run.

    For pressure cleaning, use compressed air or a CO2 cartridge gun. Field pros suggest blowing from the unit toward the outside while vacuuming from the outlet. This stops sludge from being pushed back into coils or drain pans.

    Mechanical tools can tackle deeper clogs. A drain snake, flexible plastic hose cut at an angle, small zip ties, or fish tape can probe and pull out blockages. Use electrical snakes for severe obstructions with caution to avoid damage.

    Chemical and treatment options can speed up cleaning and prevent regrowth. Use distilled white vinegar, household bleach, and 3% hydrogen peroxide for sanitizing. Enzymatic drain cleaners and quaternary ammonium condensate tablets treat biofilm.

    • Commercial coil and drain line cleaners, and automatic dosing systems like FloXtreme or iFlo, help keep lines clear over time.
    • Always use PPE and ensure good ventilation when handling chemicals.

    Focus on safety tools and procedures. Use masks for fumes, turn off equipment, and flip breakers near electrical components. Good ventilation protects you and boosts chemical effectiveness.

    Follow this guide to pick the right tools for cleaning airline tubing. The right mix of suction, pressure, mechanical, and chemical tools is key. These tools are the foundation for effective cleaning and prevent future blockages.

    Step-by-Step Guide to Cleaning Airline Tubing

    Follow these steps to clean airline tubing safely and avoid damage. First, turn off the system at the thermostat and switch the circuit breaker off. Make sure to cut water and air flow to the line before you start.

    Next, find the tubing run and access points. For HVAC condensate lines, look for the PVC drain line, risers, and outdoor outlet. For aquarium CO2 or pneumatic setups, find the tubing ends, check valves, and fittings to access restricted spots.

    Remove caps and inspect the tubing. Take off drain caps or access plugs and use a flashlight to check for slime, algae, or debris. Wear gloves to protect your hands during this step.

    1. Vacuum or suction out debris. Attach a shop vac to the outlet end and seal it airtight; cap other risers to increase suction. Run suction for several minutes, then check for removed sludge.
    2. Probe mechanically if needed. Use a flexible hose, snake, fish tape, or a bent zip tie to gently break up clumps in horizontal runs. Slide angled plastic tubing to dislodge blockages near pans when reachable.
    3. Apply a chemical clean. Pour a cup of distilled white vinegar into the access port and let it sit 15–30 minutes for routine cleaning. For stubborn biofilm consider hydrogen peroxide as a milder alternative. Follow product instructions when using enzymatic or quaternary cleaners and limit bleach use due to corrosion risk.
    4. Flush with water. Run clean water through the line until the discharge runs clear. Use a garden hose or pour water slowly to rinse dislodged debris. For HVAC, flush until the outdoor outlet clears.
    5. Re-cap and test. Reinstall access caps securely, restore power, and run the system. Watch for gurgling or overflow that signals remaining blockage.

    Record what you did and set reminders for routine upkeep. Note the date and method used, then schedule monthly or seasonal checks. Consider automatic cleaners for hands-off protection as part of your airline tubing upkeep techniques.

    Removing Stubborn Clogs

    When basic cleaning doesn’t work, you need stronger methods. Start with a long, flexible snake or an electric drain auger. These tools can reach deep into the system. Move slowly to avoid damaging the tubing or bending the coils.

    Use pressure carefully. An air compressor or a CO2 cartridge gun can blast the clog. Aim from the unit to the outside. Have someone vacuum the outlet end to catch the debris.

    For tight spots, try a fishing technique. Insert a small-diameter hose or a plastic line cut at a 60-degree angle. Use compressed air to break the clog and push debris out. Fish tape or a bent zip tie can help find the clog.

    Combine mechanical action with safe chemicals for organic biofilm. Use enzymatic drain cleaners or hydrogen peroxide to break down residue. These options are safer than heavy bleach. Always follow the product directions.

    • Watch for repeat issues or signs of corrosion.
    • If clogs keep coming back, access is hard, or you think there’s metal damage, call a licensed HVAC technician like those from Trane or Carrier.

    Be careful before you start. Blowing toward the air handler can push gunk back into the drip pan. Using too much bleach can harm aluminum parts. Aggressive tools can damage small tubing or coils.

    Follow this guide for cleaning airline tubing. Use careful tools, measured pressure, and targeted chemicals. This approach reduces downtime and protects your system.

    Preventing Future Clogs in Airline Tubing

    Make a simple maintenance plan. Flush drain and access ports with vinegar every month to stop slime buildup. Also, get professional tune-ups for your HVAC system every six months to keep coils and drains clear.

    Use tools to make maintenance easier. Quaternary ammonium condensate tablets keep pans clean. Enzymatic treatments break down organic matter slowly. Automatic dosing systems like FloXtreme and iFlo meter eco-friendly cleaner, saving you from manual work.

    Keep the area around condensers clean. Remove leaves, dirt, and debris to prevent organic load buildup. Change HVAC filters every one to three months to reduce dust and mold that cause clogs.

    • Prefer vinegar or enzymatic cleaners for routine work to protect metal parts.
    • Reserve bleach for rare, tough clogs and apply it cautiously to avoid corroding aluminum coils.
    • Maintain P-trap water level; add a few drops of mineral oil in winter to slow evaporation and keep traps from drying out.

    Check airline tubing at least once a year and after heavy-use seasons. Look for recurring symptoms to act early and avoid major blockages and water damage. These checks are key to preventing clogs airline tubing and to following best practices for cleaning airline tubing.

    Keep a short log of treatments and dates. This helps you follow tips for maintaining airline tubing and shows trends that point to worsening issues. Early action saves time, money, and the frustration of unexpected clogs.

    Understanding the Risks of Neglecting Cleaning

    Ignoring small air and CO2 line care can lead to big problems. You might notice reduced airflow and system inefficiency right away. Water can also back up into drip pans or living spaces, triggering safety switches and shutting systems down.

    Mold and bacteria, like zooglea, grow inside tubing if not cleaned. This growth can release spores and odors, harming indoor air quality. It can also worsen asthma or allergies in people living there.

    Equipment wears out faster with clogged lines. Clogs put more strain on compressors and blowers. If you use harsh cleaners wrong, you might see coil corrosion. Neglecting maintenance can also shorten your system’s life.

    Using bleach or strong chemicals without the right guidance is risky. It can release harmful fumes and damage aluminum coils. Mixing cleaners can create toxic gases. Excess runoff can harm septic systems and local waterways.

    Ignoring upkeep can cost you a lot. You’ll face higher energy bills, emergency repairs, and water damage restoration costs. Regular checks and gentle cleaning save money by avoiding big failures and mold problems.

    Knowing the risks of neglecting airline tubing maintenance helps you plan better. Regular inspections and gentle cleaning protect your system’s performance, indoor air quality, and your wallet.

    Troubleshooting Common Issues Post-Cleaning

    If problems persist after cleaning, first check if power is fully restored and the system has cycled fully. Look for any partial clogs or air pockets in the tubing that might cause sputtering. Make sure caps and risers are sealing properly.

    If water keeps flowing into the pan or overflows, there might be a blockage between the trap and pan. Or, there could be an internal restriction near the coil. Try vacuuming from the outside end while capping risers near the unit. This helps isolate the problem. If the clog is inside the unit, you might need a licensed HVAC technician to access the coil.

    Sputtering or pressure changes often mean there are leaks, cracked tubing, or failing check valves. Replace any soft, brittle, or discolored tubing. Also, check fittings and replace any worn-out check valves to ensure steady flow.

    If you notice chemical residue, odors, or early corrosion after using strong cleaners, flush the line with lots of water. A hydrogen peroxide rinse can help remove any remaining residue. Check aluminum coils and pans for any discoloration or pitting and address it quickly to prevent further damage.

    If clogs keep coming back within weeks, it’s time to review your cleaning routine and preventive steps. Consider using automatic cleaners like FloXtreme or iFlo, enzymatic treatments, and regular filter changes. Also, keep debris away from the condenser to prevent organic material from entering the lines.

    Use this troubleshooting checklist: check power and cycling, verify seals at caps and risers, isolate and vacuum suspect runs, replace damaged tubing, neutralize chemical residue, and upgrade preventive measures.

    For long-term reliability, follow maintenance tips from HVAC experts. Keep this cleaning guide handy for future servicing. Proper care reduces the need for repeat visits and protects your system.

    Environmental Considerations in Cleaning

    When cleaning small air and CO2 lines, think about the environment. Use vinegar or hydrogen peroxide for regular cleaning. These options are gentler and protect aluminum parts.

    For tough biofilm, enzymatic cleaners or quaternary ammonium tablets work well. They are less harsh on the environment than bleach. This approach helps keep lines clean without harming the planet.

    Bleach kills mold but can damage metals and release harmful fumes. Never mix bleach with acids or peroxide. Always rinse lines well and follow the disposal instructions on the label.

    Automatic dosing systems use biodegradable formulas to reduce waste and exposure. These systems help maintain safe levels of chemicals. They support best practices in cleaning airline tubing.

    • Ventilate the work area to limit inhalation of fumes.
    • Wear gloves and eye protection when handling cleaners.
    • Rinse lines with plenty of water after treatment.
    • Follow manufacturer guidance before disposing of chemical residues.

    Choose eco-friendly methods for cleaning airline tubing. This protects people and the environment. Using safer chemicals and automated systems is key to efficient and green maintenance.

    Final Thoughts and Best Practices

    To keep small air and CO2 lines in good shape, follow simple steps. Always turn off equipment before you start. Check the tubing and where it connects every month. Keep a record of each check.

    For regular care, vacuum the outside outlet and cap the indoor risers. This removes sludge. Use one cup of white vinegar each month to prevent problems. Only use bleach for very bad clogs, and then rinse well with clean water.

    Use gentle cleaners like vinegar, hydrogen peroxide, or enzymes instead of harsh bleach. Also, vacuum outside and use pneumatic blows to remove tough debris. Change filters often and keep the condenser area clean. Think about using enzymatic cleaners or automatic systems like FloXtreme or iFlo for ongoing protection.

    Have a quick checklist ready, keep track of maintenance, and plan for yearly HVAC checks. If you can’t reach clogs or they involve coils and drain pans, get a pro. Regular care keeps lines working well, protects your equipment, and saves money. Follow these steps all year to keep your systems running smoothly and safely.

    FAQ

    What is airline tubing and where is it used?

    Airline tubing is thin, flexible tubing for air or CO2. It’s used in aquariums, pneumatic systems, HVAC, and labs. It’s made of PVC, silicone, and polyurethane. Its small size makes it prone to clogs.

    Why does airline tubing get clogged?

    Clogs come from algae, mold, and biofilm. Also, dust, mineral deposits, and debris can block it. Moisture and organic matter create slime that blocks the flow.

    What common signs indicate a clog or slime in small air or CO2 lines?

    Look for less airflow, sputtering, and pressure loss. Also, check for condensate backup, musty smells, and visible slime. Sounds like gurgling or slow trickling are signs too.

    What basic tools do you need to clean airline tubing safely?

    You’ll need gloves, eye protection, and a flashlight. A bucket, garden hose, and small brush are also needed. A wet/dry vacuum and CO2 cartridge gun are useful for pressure. Don’t forget masks and PPE for chemicals.

    What are the safe power-off procedures before cleaning HVAC condensate or pneumatic lines?

    Turn off the system at the thermostat and switch the circuit breaker off. Make sure the unit is fully powered down. Wait briefly for moving parts to stop before working.

    What is the step-by-step DIY method to clean airline tubing?

    First, locate the tubing and access points. Remove caps and inspect with a flashlight. Vacuum or suction debris from the outlet.

    Use a flexible hose or snake if needed. Pour vinegar or approved cleaner and let it sit. Flush with clean water until it’s clear. Reinstall caps, restore power, and test the system. Document the date and set reminders for maintenance.

    How do you use a shop vac and compressed air correctly to clear clogs?

    For suction, attach the shop vac to the outdoor outlet and create a seal. Cap other risers to increase suction. For pressure, blow from the unit toward the outside and vacuum the outside end.

    This removes sludge without pushing it back into the pan or coil. Use gentle pressure and avoid forcing debris into inaccessible areas.

    Which chemicals are effective and which should you avoid using often?

    Vinegar and hydrogen peroxide are safe choices for routine maintenance. Enzymatic cleaners and quaternary ammonium condensate tablets are effective with lower corrosion risk. Bleach can remove biofilm but is corrosive and produces harmful fumes—use it sparingly and with caution.

    How often should you perform maintenance on airline tubing?

    Inspect tubing monthly and perform a routine vinegar flush monthly for HVAC condensate lines. Change HVAC filters every 1–3 months. Schedule biannual or annual professional tune-ups for HVAC systems, including coil and drain inspections. Consider automatic dosing devices for continuous protection.

    What should you do if basic cleaning steps fail to clear a stubborn clog?

    If basic steps fail, use a longer flexible snake or electric drain auger with caution. Combine mechanical probing with enzymatic or hydrogen peroxide treatments. If the clog remains inaccessible, or if you suspect coil/pan damage, call a licensed HVAC or pneumatic professional.

    What are the risks of improper cleaning methods?

    Blowing toward the air handler can redeposit sludge into the pan. Overuse of bleach can corrode aluminum evaporator coils and pans. Aggressive snakes can puncture tubing or damage coils. Improper chemical disposal or mixing creates toxic fumes and environmental harm. Always follow safety precautions and manufacturer guidance.

    How can you prevent future clogs and biofilm formation?

    Keep the condenser area and surrounding space clean. Change filters regularly and perform monthly vinegar flushes. Install enzymatic cleaners, condensate tablets, or automatic dosing systems like FloXtreme/iFlo. Maintain P-trap water level (add a few drops of mineral oil to slow evaporation). Regular inspections and prompt action on symptoms reduce recurrence.

    How does neglecting airline tubing cleaning affect equipment and indoor air quality?

    Neglect leads to reduced airflow, higher energy use, water backups, and tripped safety switches. It strains equipment and can corrode coils with improper chemicals. This results in costly repairs. Microbial biofilms can compromise indoor air quality and worsen symptoms for occupants with allergies or respiratory issues.

    What environmental and occupant safety precautions should you take when using cleaners?

    Use milder options (vinegar, hydrogen peroxide, enzymatic cleaners) when possible. Avoid repeated bleach use near living spaces and ventilate the area when using strong cleaners. Flush lines thoroughly after chemical use, do not mix chemicals, and follow disposal guidance to protect septic systems and the environment.

    What steps should you take if problems persist after cleaning?

    Confirm power was restored and the system cycled. Re-inspect for partial clogs, trapped air pockets, or leaks. Vacuum the outside outlet while capping indoor risers to clear residual sludge. Replace brittle or discolored tubing or faulty check valves. If overflow, gurgling, or recurring clogs continue, contact a licensed HVAC or pneumatic professional.

    Are there automatic or professional options to minimize manual maintenance?

    Yes. Automatic dosing devices such as FloXtreme/iFlo and condensate tablets provide continuous, eco-friendly treatment and reduce manual intervention. For a thorough cleaning—coils and internal pans—hire a licensed HVAC technician for safe disassembly, cleaning, and preventive service.

  • Choosing the Most Efficient Bio-Media for Small Filter Compartments

    Choosing the Most Efficient Bio-Media for Small Filter Compartments

    Choosing the right biological media is key in small filter spaces. Every inch must support beneficial bacteria for a healthy fish environment. With 10.5% of U.S. homes having a freshwater fish tank, compact solutions are in high demand.

    Filtration has three layers: mechanical, chemical, and biological. This article explores biological media types and their role in small spaces. Proper layering prevents clogs and keeps water clear and beautiful.

    You’ll learn about various biological media like ceramic rings and sintered glass. We’ll discuss the best options for small filters, how to size them, and where to place them. You’ll also get tips on maintenance, monitoring performance, and eco-friendly choices.

    By the end, you’ll know how to pick, arrange, and care for bio-media in small spaces. This ensures beneficial bacteria thrive, keeping your aquarium’s nitrogen cycle stable.

    Understanding Biological Media Types

    A detailed scientific illustration showcasing various types of biological media used in small filter compartments. In the foreground, display examples like ceramic rings, foam cubes, and bio-balls, each labeled with clear textures and colors. The middle section should feature a transparent filter housing to visualize the arrangement of media, illuminated by soft, diffused lighting that highlights their shapes and textures. In the background, show subtle outlines of laboratory equipment and a gentle gradient to evoke a clean, professional lab atmosphere. Use a close-up angle to draw focus to the media types while maintaining a sterile and academic ambiance, ensuring a sense of clarity and understanding in the depiction.

    Knowing what biological media is helps you choose the right materials for your filter. These materials give beneficial bacteria a lot of surface area and safe spots. They help turn ammonia into nitrite and then nitrate through the nitrogen cycle.

    Surface area and oxygen exchange are key because bacteria need oxygen to work. Ceramic rings and sintered glass have deep channels for bacteria to grow. Bio-balls and K1 media promote gas exchange and keep bacteria healthy.

    Biological media classification helps match media to their function. Some media focus on surface area, while others focus on flow and resistance. Knowing the different types helps balance growth with maintenance.

    Your biological media comes after mechanical media in the filter. Mechanical media removes big particles that could block biological surfaces. Chemical media deals with dissolved contaminants, but follow the product’s guidelines for use, as rinsing can lessen its effect.

    • Porous ceramics and sintered glass: highest internal surface area for bacteria.
    • Open-structured bio-balls and K1: excellent oxygen transfer and easy cleaning.
    • Sponges and foams: dual mechanical and biological roles but can clog if not tended.

    A 2020 study found that the right placement and care of biological filter media can boost beneficial bacteria by up to 70%. This leads to better water quality. The study shows how choosing the right media affects growth and filter performance.

    Keep in mind the trade-offs when choosing media. Sponges need frequent cleaning to avoid anaerobic pockets. Chemical media should be replaced regularly, not rinsed. A good maintenance plan and media layout will maximize your biological media’s performance.

    Types of Biological Media

    A detailed illustration showcasing various types of biological media for filtration systems, arranged thoughtfully for visual clarity. In the foreground, display several samples of bio-media: porous ceramic rings, bio-balls, and sponge filters, each exhibiting unique textures and colors. The middle ground features a transparent filtration chamber with flowing water, highlighting the effectiveness of these media types in action. The background consists of a softly blurred laboratory setting, with shelves containing scientific equipment and plants, creating a serene and professional atmosphere. Use natural lighting to enhance details and depth, shooting from a slight overhead angle for a comprehensive view. The mood is informative and engaging, inviting readers to explore the potential of each media type.

    When picking biological media for small filter spots, you have many good choices. Pick the right media for your flow, space, and upkeep needs. This boosts biological filtration without using too much space.

    • Ceramic rings: These are porous and long-lasting, with lots of internal surface area and steady oxygen flow. Clean them in tank water once a year or when needed. They’re great for tight spots where they last a long time.
    • Bio-balls: These plastic balls have lots of surface area and don’t clog easily. They fit in sumps and canister filters. They also work in small spots if you make sure there’s enough room for water to flow.
    • Sintered glass and sintered ceramic: These media are very porous and have lots of surface area. Sintered glass blocks and special rings are great for colonization, but they cost more than usual options.
    • K1 media: Also known as moving-bed bio-media, K1 media from brands like Seachem work in fluidized beds. They clean themselves while tumbling, which helps with colonization. You’ll need a chamber or more space to keep them moving.
    • Biomax and proprietary rings: Products like Fluval Biomax are made to have lots of surface area and stay strong. They offer consistent biological performance in small spaces.
    • Porous stones and live rock: Natural porous stones are good for marine setups. Live rock adds complex microbial communities and pH buffering, along with surface area.
    • Sponges and bio-sponges: Sponges do both mechanical and biological work. They’re perfect for sponge filters and small filters run by air pumps. Clean them often in tank water to avoid clogging.

    In small spots, thin layers of very porous media usually do better than bulky, low-surface-area options. Choose based on available space, upkeep frequency, and your system type.

    Advantages of Using Bio-Media

    Choosing bio-media gives beneficial bacteria a home. This helps keep your tank’s water stable by turning ammonia and nitrite into nitrate. You’ll see clearer water and healthier fish.

    But bio-media does more than just chemistry. Live plants and rocks remove nitrates and add beauty. Engineered media like Seachem Bioballs help bacteria grow fast and stay healthy.

    • Compact, high-surface-area media let you over-filter without expanding the compartment footprint.
    • Pairing mechanical pre-filtration with bio-media protects colonies by keeping solids out of pores.
    • Ceramic rings and bio-balls rarely need replacement; routine cleaning preserves function.

    Keeping your media clean is easy with the right mix. Ceramic rings need a gentle rinse once a year. Sponge filters can be reused after rinsing in tank water. Chemical media like activated carbon need to be changed every 4–6 weeks.

    Using bio-media is great for small systems. It helps keep water chemistry strong and media lasting longer. Fine mechanical filtration can remove up to 99.9% of particles, reducing fouling and helping bacteria.

    Knowing the benefits of biological media helps with maintenance and choosing the right materials. It’s a smart choice for stable water chemistry, lower toxicity, and less frequent media changes in small spaces.

    Choosing the Right Size for Your Filter

    When picking bio-media size, make sure it fits your tank and filter. For small spaces, focus on media that offers a lot of surface area. Opt for ceramic rings, sintered glass, or small BioMax rings over bulky types.

    Remember, it’s better to overfilter than not enough. Choose a filter that’s bigger than your tank or add more biological media. This helps during feeding times and when the seasons change.

    Know the difference between internal and external filters. Internal filters, common in tanks under 200 liters, need compact media. This includes sponges, small ceramic rings, and layered cartridges like Fluval U series.

    External canisters and sumps can handle larger baskets. They let you mix and match media more freely.

    • For internal setups, stack thin mechanical media above bio-media to prevent early clogging.
    • For canisters, arrange trays so water flows through mechanical first, then biological layers.
    • Consider dedicated small media trays to keep layers separate in tight spaces.

    Look at real products when deciding. Fluval U internal filters are great for small tanks with cartridge-based layering. Canister models like Fluval FX or Betta Choice Canister let you customize trays and add more biological media for better cycling.

    When planning filter compartment sizing, measure the space and consider flow rate. Leave room for easy maintenance. In tight spaces, choose media that maximizes surface area. This keeps bio-loads in check and makes cleaning easy.

    Factors Influencing Bio-Media Efficiency

    Choosing the right bio-media involves considering several key factors. The surface area of the media is important because it determines how much bacteria can grow. Media with a lot of surface area, like sintered glass or ceramic rings, supports more bacteria. This increases efficiency.

    Media porosity also plays a role. It affects how nutrients move and protects microbes. Media with small pores can trap solids, while larger pores let water flow better. Choosing the right pore size helps avoid clogs and keeps bacteria healthy.

    Oxygen is essential for bacteria to work well. You need to make sure oxygen reaches the media. Media that moves, like moving-bed K1, helps by exposing bacteria to air and water. Static media needs good water flow to keep oxygen levels up.

    The flow rate of bio-media is another important factor. If it’s too low, oxygen may not reach bacteria well. If it’s too high, water doesn’t stay in contact with the media long enough. Finding a balance is key.

    Where you place the bio-media and how you filter the water before it gets there also matter. Using mechanical filters or foam pads can keep debris out. Regular cleaning of these filters helps keep the bio-media working well.

    • Clogging and maintenance: trapped solids cut usable surface area and slow oxygen diffusion.
    • Temperature and pH: both affect bacterial metabolism and change how fast bio-films work.
    • Media longevity: plastic bio-balls and ceramic rings last years while sponge media may need replacing every 2–4 months.

    Examples show how different media work. Moving-bed K1 media needs constant motion to work well. Sintered glass has a lot of surface area but needs good pre-filtration to stay open.

    Regular maintenance is important. Gently rinse the bio-media in tank water when needed. Replace worn-out sponge media and swap out chemical packs like activated carbon as needed.

    By balancing surface area, porosity, oxygenation, and flow rate, you can keep your system running smoothly. Proper placement, regular care, and the right media choice help avoid downtime and keep biological filtration efficient.

    Installation Tips for Optimal Performance

    Begin by placing mechanical filtration at the water’s entry point. Use a coarse sponge or filter floss to catch debris. This protects the biological layer and improves flow.

    Then, add the biological layer. Arrange ceramic rings, bio-rings, or sintered glass for even water flow. Avoid tight packing to keep oxygen flowing and support beneficial bacteria.

    Chemical media should go last or in a separate cartridge. Use activated carbon, zeolite, or phosphate removers as needed. Always follow the manufacturer’s replacement schedule to maintain adsorption.

    • For compact filters, use thin trays or media bags to increase usable surface area.
    • Consider stacked modular cartridges like those in the Fluval U series for neat arranging biological media in tight spaces.
    • Small mesh bags filled with high-surface-area media work well in narrow compartments.

    When using sponge filters, place the sponge first for both mechanical and biological filtration. Rinse sponges monthly in tank water to keep bacteria alive. Make sure you can easily access media for rinsing or replacement.

    1. Check that water flows through each layer evenly.
    2. Use thin trays to test different best configuration small compartments.
    3. Change only one media component at a time to avoid upsetting bacterial populations.

    Never rinse biological media with chlorinated tap water. Always use tank water to preserve beneficial bacteria. These simple tips will help you maintain stable cycling and reliable filtration in small setups.

    Cost-Effectiveness of Different Bio-Media

    When choosing bio-media, consider the initial cost and how long it lasts. Ceramic rings and bio-balls are moderately priced but last a long time. They rarely need to be replaced, which saves money in the long run, even for small filters.

    On the other hand, sintered glass, sintered ceramic, and Seachem Matrix or K1-style media are more expensive upfront. But they’re worth it for heavy bioloads or long-term use. They have a lot of surface area and last a long time, which can save money over time.

    Sponges are a budget-friendly option. They’re cheap and can be reused after cleaning. They’re best for small tanks with light stocking. You might need to replace them every two to four months, but it’s a cost-effective choice for small setups.

    Moving-bed media like K1 need a special chamber and constant flow. They’re moderately priced. They’re good for systems that can handle them because they help keep the system clean, saving money in the long run.

    Chemical media, like activated carbon and specialty resins, add to your costs. Carbon usually needs to be replaced every four to six weeks. When looking at prices, remember to include these costs. Think about whether changing water more often or using less carbon could save you money.

    • Use a mix of durable bio-media and cheaper mechanical media to save money.
    • For long-term setups, choose media with a lot of surface area to reduce future costs.
    • For small, lightly stocked tanks, combining sponges with ceramic rings is often the best choice for cost and performance.

    Retailers like Fluval and Seachem offer a wide range of prices. When comparing prices, think about your tank size, how many fish you have, and how often you’ll need to clean. This helps you plan a budget and keep costs steady over time.

    Performance Monitoring and Adjustments

    Make a simple plan to check your bio-media often. Use a good test kit like Tetra 6-in-1 to monitor ammonia, nitrite, nitrate, pH, and hardness. Regular water tests help you catch problems before they affect your fish.

    Check the flow and how clear the water is each week. If the flow is low, it might mean your mechanical media is clogged. This can hurt your bio-media’s performance. Also, watch your fish for signs of stress like gasping or hiding. These signs mean you need to take action fast.

    • If you see spikes in ammonia or nitrite, test the water again and look at your mechanical media. Clean any clogged sponges, cut back on feeding, and do water changes right away.
    • If you notice color changes or smells, check your chemical media. Activated carbon usually needs to be replaced every 4–6 weeks, based on the product’s instructions.
    • If you add more fish or messy species, you might need to increase your bio-media or get a bigger filter.

    Change things slowly. When you adjust your bio-media, don’t swap out too many types at once. This helps keep the good bacteria stable. If you must replace biological media, do it one type at a time to keep the colonies healthy.

    Stick to a maintenance schedule that fits your tank. Rinse your biological media gently in tank water every 3–12 months, as needed. Clean your mechanical media every 7–14 days and replace sponges every 2–4 months, depending on how worn they are.

    Use your test results and performance data to make smart choices. Keep track of your readings and maintenance actions. This helps you improve your care and keep the water in your tank healthy and balanced.

    Eco-Friendly Considerations with Bio-Media

    Choosing durable options like ceramic rings, bio-balls, or sintered glass helps reduce waste. These pieces are key to sustainable biological media. They also cut down on disposable chemical cartridges and single-use pads.

    In small tanks, a well-maintained sponge can be a low-waste filter. Rinse sponges in tank water during water changes. Replace them only when they break down. This simple habit extends media life and lowers your environmental footprint.

    Look for products made from recycled or inert materials. Recyclable bio-media and items from post-consumer content keep plastic out of landfills. Avoid unnecessary chemical media that demand frequent disposal or special handling.

    Good biological filtration reduces the need for large, frequent water changes. This saves fresh water and cuts energy use. Choose an efficient filter with the right flow rate to prevent pump overwork and support low-energy operation.

    • Use only essential chemical media and follow local rules for disposal.
    • Prefer long-lasting biological media to minimize trash.
    • Repurpose plastic bio-balls or donate usable ceramic rings when upgrading.

    Natural alternatives can supplement mechanical systems. Live plants and live rock for marine tanks help sequester nitrates. They reduce reliance on consumable products and improve habitat complexity without added waste.

    Maintain media correctly: gentle rinses, scheduled checks, and swapping only when necessary will extend life. These habits promote sustainable biological media practices. They help you achieve effective, low-waste aquarium filtration while protecting the environment.

    Conclusion: Making the Right Choice

    When picking biological media for small filters, choose high surface-area and oxygen-permeable types. Options like ceramic rings, sintered glass, and Seachem BioMax or K1-style media are great. They give bacteria lots of space to grow in tight spots.

    Start with a coarse sponge to catch solids and help bacteria grow. Place chemical media last to keep beneficial bacteria safe.

    Keep your system clean and check it regularly. Rinse mechanical media weekly to biweekly. Refresh biological media every few months, but avoid using chlorinated water.

    Replace chemical cartridges as needed. Test water often and change media one at a time to avoid upsetting the balance. This approach makes choosing bio-media easier and more reliable.

    Consider the cost and environmental impact when choosing media. Durable, reusable media and live plants save money and reduce waste. If your filter can handle it, think about using more advanced media like moving-bed or sintered options. Just make sure you have enough space and flow.

    For most small setups, a layered approach works best. Start with a coarse sponge, then add a thin layer of ceramic or BioMax rings. Use these tips to pick the right bio-media for your tank and routine.

    FAQ

    What is biological media and why does it matter for small filter compartments?

    Biological media helps convert ammonia into safe water for fish. In small spaces, choose media that offers lots of surface area. This ensures your fish stay healthy and your tank looks good.

    How do biological, mechanical, and chemical filtration work together in compact filters?

    First, mechanical filters catch big particles. Then, biological media break down waste. Chemical media clean up last. This order keeps your water clean and your fish safe.

    Which biological media types are best suited to small internal filters?

    For small filters, pick media that’s compact but has lots of surface area. Ceramic rings, small Biomax rings, and sponges are good choices. Sintered glass is also great if you have space.

    What are the pros and cons of ceramic rings, bio-balls, and sintered glass?

    Ceramic rings are durable and cost-effective. Bio-balls are good for flow but take up more space. Sintered glass is very porous but more expensive and needs pre-filtration.

    Can sponges serve as both mechanical and biological media in small tanks?

    Yes, sponges can do both jobs. They catch debris and help break down waste. But, they need regular cleaning and may need to be replaced often.

    How much biological media volume do I need for a small aquarium?

    Focus on surface area, not volume. Use thin, porous media. Choose a filter that’s a bit bigger than your tank to ensure good filtration.

    Where should I place biological media inside a small filter compartment?

    Put mechanical media first to catch debris. Then, biological media to break down waste. Chemical media goes last or in a separate cartridge. Use thin trays or mesh bags for bio-media.

    How often should I maintain biological, mechanical, and chemical media?

    Rinse mechanical media every 7–14 days. Biological media needs gentle rinsing every 3–12 months. Chemical media should be replaced every 4–6 weeks. Never use chlorinated water on biological media.

    What are the signs my biological media isn’t working well?

    Look for high ammonia or nitrite levels, reduced flow, debris buildup, cloudy water, or stressed fish. Test water regularly and check filter flow. Add more bio-media or improve aeration if needed.

    How does flow rate affect biological media performance in small compartments?

    Flow rate affects oxygen delivery and contact time. Too slow or too fast can harm performance. Aim for moderate flow that oxygenates media pores well.

    Are there eco-friendly and cost-effective bio-media choices?

    Yes, choose durable media like ceramic rings and sintered glass. Reusable sponges are also low-waste. Avoid chemical media and consider live plants or rock for extra filtration.

    Should I ever replace all biological media at once?

    No, replacing all media at once can harm your tank. Swap media in stages, keeping old media in tank water to seed new.

    Which retail products and brands are recommended for small tanks?

    Look for compact solutions from Fluval, Seachem, Marineland, and Tetra. Choose based on your tank size and maintenance preferences.

    How do I budget for bio-media—upfront vs ongoing costs?

    Durable media like ceramic rings offer long-term savings. Sintered glass is more expensive but performs well. Sponges are cheap but may need frequent replacement. Chemical media increases ongoing costs.

    Any quick installation checklist for small filter compartments?

    Start with a coarse mechanical layer, then biological media, and end with chemical media. Use thin trays for bio-media and test water regularly. Adjust as needed.

  • What is the Average Lifespan of Popular Nano Aquarium Fish?

    What is the Average Lifespan of Popular Nano Aquarium Fish?

    You’re curious about how long your tiny fish friends will live. The lifespan of nano fish varies by type. Knowing this helps you plan their care, like feeding and maintenance.

    Smaller fish usually live shorter lives than bigger ones. For instance, bettas can live 2–5 years, while goldfish might live 10–30+ years with the right care. This shows size and biology affect how long they live.

    Dr. Adam Denish says genetics and environment play big roles. Things like metabolism, how they reproduce, water quality, and diseases all impact their lifespan. Fish that lay eggs often live longer than livebearers, and many tropical nano species live 3–5 years.

    Understanding the life cycle and average lifespans of nano fish helps set realistic goals. It helps you pick the right fish for your lifestyle, budget, and commitment level.

    This article will explain what makes a fish a nano fish. It will list common nano species and their lifespans. We’ll also compare lifespans and give tips to help your fish live longer.

    Understanding Nano Fish and Their Popularity

    A detailed illustration of the nano species life cycle featuring a variety of popular nano aquarium fish, such as Betta fish, dwarf shrimp, and neon tetras, in various stages of their life cycle. In the foreground, show vibrant, colorful fish swimming gracefully amidst lush aquatic plants and delicate coral formations. The middle ground includes a gradual transition from eggs to juvenile fish, highlighting small fish and shrimp among the greenery. In the background, create a softly lit underwater landscape with shimmering light rays piercing through the water, creating a tranquil, natural habitat. The mood should be serene and educational, emphasizing the beauty and diversity of nano fish life. Use a wide-angle perspective to capture the entire scene, with natural lighting to enhance colors and textures.

    In aquarium circles, you often hear “nano.” It refers to small fish that fit in tanks under 10–20 gallons. This term helps match fish size to tank size, planning space, filtration, and maintenance.

    Many hobbyists pick nano species for their bright colors and lively behavior. Fish like bettas, neon tetras, guppies, killifish, and white cloud mountain minnows are great for nano setups. They appeal to beginners and busy owners, making aquascaping easier and costs lower.

    Size often relates to lifespan, so the smallest fish usually live shorter lives. Yet, miniature fish lifespan varies a lot. Some small tetras and danios can live four to eight years with stable water, balanced food, and enough space.

    Biology explains these patterns. Nano species have faster metabolisms and reach reproductive maturity sooner. This faster pace shortens their natural life compared to larger fish. But, proper care can help them live longer.

    Your care for nano fish is key, just like choosing the right species. Regular water changes, consistent temperature, and a proper diet extend their life in captivity. Keep an eye on stocking levels and water chemistry to help your fish thrive.

    • What to expect: varied lifespans across tiny species.
    • Why they’re popular: color, activity, and small space needs.
    • How to help: focused nano fish care duration for longer lives.

    Factors Affecting Nano Fish Lifespan

    A vibrant underwater scene showcasing a variety of popular nano fish species, such as neon tetras, guppies, and cherry shrimp, swimming gracefully amidst lush aquatic plants. In the foreground, a close-up of a neon tetra, its iridescent scales shimmering as it navigates through colorful aquatic foliage, conveying vitality. The middle ground features a diverse school of guppies darting around, with contrasting colors enhancing visual interest. The background reveals a well-maintained nano aquarium setup with soft, filtered light cascading through the water, creating a serene and peaceful atmosphere. The scene captures the essence of aquatic life, emphasizing the environmental factors influencing fish lifespan, such as water quality and habitat richness. Use a slight depth of field to focus on the fish while softly blurring the background plants and aquarium structure.

    Knowing what affects nano tank fish longevity is key to better care. Genetics and species are very important. Larger fish often live longer because they have slower metabolisms, as Geoffrey West’s scaling concept shows. Dwarf fish, on the other hand, may have shorter lives due to their size and genetics.

    Water quality is also critical. Spikes in ammonia and nitrite, big pH swings, or sudden temperature changes can be deadly. Regularly check ammonia, nitrite, and nitrate levels, keep the temperature stable, and do routine water changes. These steps help ensure the longevity of nano fish.

    How fish reproduce also impacts their lifespan. Livebearers like guppies, mollies, and platies usually live three to five years. Egg-layers may live longer if cared for properly. Think about breeding habits when considering the lifespan of nano fish.

    What you feed them matters too. Choose high-quality foods from brands like Hikari or Omega One. Mix flake, frozen, and live foods to meet their nutritional needs. A good diet boosts their immune system and can help them live longer.

    The size of the tank and space available also play a role. Overcrowding can lead to aggression and disease. Goldfish show how bad housing can shorten their lives. Make sure the tank is big enough for the fish to thrive.

    Who they live with matters too. Aggressive fish can stress out smaller ones, leading to illness and early death. Add hiding spots, plants, and carefully chosen tankmates to reduce stress and improve health.

    Preventive care and watching for signs of illness are key. Look out for color loss, lethargy, white spots, gasping, or odd behavior. Quarantine new fish and check your equipment regularly. Early action can prevent disease and help your fish live longer.

    Here are some practical tips to manage risks:

    • Test water weekly for ammonia, nitrite, and nitrate; aim for 0 ppm ammonia and nitrite, under 20 ppm nitrate.
    • Keep species-appropriate temperatures steady; most tropical nano fish prefer 74–80°F.
    • Do 20–30% water changes weekly, more for heavily stocked tanks.
    • Maintain filtration and clean mechanical media monthly.

    Lifespan of Common Nano Fish Species

    The lifespan of nano fish varies a lot, depending on the species and how well they are cared for. Here are some typical lifespans for common nano fish.

    • Betta (Betta splendens): usually lives 2–5 years. Some betta fish can live longer than five years with the right care. But most live between 2 and 5 years.
    • Guppy (Poecilia reticulata): lives about 3–5 years. Guppies are livebearers, so their lifespan is on the shorter side for nano fish.
    • Neon tetra (Paracheirodon innesi): usually lives 4–5 years. But some neon tetras can live up to 10 years. This shows how important water quality, diet, and tank stability are.
    • Zebra danio / Pearl danio: lives about 3–5 years. Some sources say up to 5 years. These active swimmers do well in well-filtered tanks.
    • Killifish: usually lives 2–3 years. Killifish are among the shortest-lived aquarium fish, so their lifespan is quite short.
    • White Cloud Mountain Minnow (Tanichthys albonubes): lives about 5–7 years in cool, clean water.
    • Dwarf gourami (Colisa lalia): lives about 4–6 years. Keeping stress low and water quality high helps them live longer.
    • Corydoras species: many corys live about five years or more in good conditions. Their small bodies need steady care.
    • Otocinclus: usually lives near 5 years in stable, algae-rich tanks.

    Livebearers like guppies, platies, and mollies usually live 3–5 years. Some small egg-layers can live 5–8 years with great care. Plan your tank care and diet with the expected lifespan in mind to help your fish live longer.

    Good care can help most fish live longer. Regular water changes, stable temperatures, balanced feeding, and low stress are key. These practices improve the lifespan of tiny fish and dwarf fish across many species.

    Nano Fish Lifespan Comparison

    When you compare nano species, you’ll see many live 2–7 years. Tiny schooling fish like neon tetras and ember tetras often fall in that range. Your nano tank fish longevity depends on species, water quality, and diet.

    Size and reproductive strategy are useful to look at. Livebearers such as guppies, platies, and mollies breed quickly and may have shorter lives. Egg-layers like tetras, danios, and corydoras often live longer when kept in stable conditions.

    Exceptions are common. White Clouds and some well-cared-for neon tetras can reach 5–10 years. On the other hand, larger species such as angelfish, plecos, loaches, and goldfish are capable of 10+ years or decades. Yet, poor care can cut tiny fish life expectancy dramatically.

    • Many nano species: typical 2–7 years.
    • White Clouds and some tetras: possible 5–10 years with ideal care.
    • Larger species (angelfish, clown loach, goldfish): often 10+ years, sometimes much longer.

    Environment and husbandry matter more than size alone. Stable water, proper nutrition, and low stress can extend nano fish lifespan far beyond average expectations. Your focus on consistent care will best influence nano tank fish longevity and miniature fish lifespan outcomes.

    Tips to Maximize Your Fish’s Lifespan

    Keep water chemistry steady with regular tests for ammonia, nitrite, nitrate, and pH. Stable temperature matters for many species. A steady environment improves nano fish care duration and lowers stress.

    Perform routine maintenance on a schedule. Weekly water changes, filter cleaning, and brief tank checks stop toxin buildup. These steps support nano tank fish longevity by reducing disease triggers.

    Feed a species-appropriate diet. Offer high-quality commercial food and add live or frozen treats like brine shrimp or daphnia when suitable. Proper nutrition helps extend dwarf fish lifespan and overall health.

    Avoid overcrowding in small tanks. Follow recommended stocking levels for nano setups. Less crowding cuts stress and disease risk, which directly affects nano fish lifespan and your success with nano fish care duration.

    Quarantine new additions before introducing them to the main tank. A two-week isolation reveals hidden illnesses and prevents pathogens from harming existing stock. This practice protects nano tank fish longevity.

    Give fish places to hide and escape bullying. Plants, caves, and driftwood reduce aggression and let timid fish rest. Hiding spots support recovery and help maintain dwarf fish lifespan in community tanks.

    Set a consistent routine for feeding, lighting, and maintenance. Predictable patterns reduce chronic stress and improve immune response. Routine lowers the chance of sudden declines in nano fish lifespan.

    Watch for early signs of illness: white spots, gasping, faded color, rapid breathing, or erratic swimming. Act quickly by isolating affected fish and consulting a veterinarian or experienced aquarist. Fast action preserves nano fish care duration and tank health.

    Have realistic expectations about natural lifespans. Some species, like killifish and bettas, live shorter lives despite excellent care. Focus on quality of life and measures that enhance nano tank fish longevity, not chasing unrealistic years.

    Typical Lifespan of Nano Fish in Captivity

    Most tropical nano fish in home tanks live 3–7 years with proper care. Short-lived fish like many killifish and some bettas usually live 2–3 years. But, some might live longer.

    Medium-lived fish, like neon tetras, white clouds, and guppies, can live 4–7 years. Good care helps them reach the upper end of their lifespan. Bad conditions can shorten their life and stress them out.

    It’s hard to know exactly how old your fish is. But, you can guess by their growth and behavior. Keep track of when you bought them, any breeding, and any big changes. This helps you understand their life cycle.

    • Short-lived examples: ~2–3 years (some killifish, certain betta lines).
    • Medium-lived examples: ~4–7 years (neon tetra, white cloud, guppy).
    • Common tropical band: most small species fall within 3–7 years with proper care.

    To help your fish live a long life, watch the water, feed them well, and don’t overcrowd. Keep new fish separate first. Good care and records help you see your fish’s whole life cycle.

    Health Considerations for Nano Fish

    To keep your nano fish healthy, watch for common issues. Look out for signs like loss of appetite, faded color, and erratic swimming. Also, check for gasping at the surface, rubbing against objects, and clamped fins. These can signal serious health problems.

    Water quality is a big threat to nano fish. Fin rot, ammonia burns, and stress diseases come from bad water. Regularly test the water and change it partially. Clean the filters to keep the water stable.

    Parasites and fungi are other dangers. Ich looks like white spots, and fungal growth is cottony. Quarantine new fish and watch them closely for two weeks. Treat any infections early and keep the water clean to prevent outbreaks.

    • Bad nutrition can cause growth issues, dull colors, and weak immunity. Feed a balanced diet with flakes, pellets, and live or frozen foods. This supports their health.
    • Bullying and stress can harm fins and make fish more prone to disease. Add hiding spots and rearrange the tank to reduce stress. This helps keep your fish healthy.
    • As fish get older, they may eat less and have weaker immune systems. Give older fish gentle care and monitor their health closely. Adjust tank maintenance to support their quality of life.

    Don’t ignore early warning signs. If fish eat less, change color, swim strangely, or gasp at the surface, isolate them. Run tests and treat them quickly. This can help them recover and stay healthy.

    If problems don’t go away or seem serious, get help. Talk to an aquatic vet or an experienced aquarium expert. Online services like Dial A Vet offer quick advice for aquatic pets. Their guidance is key to keeping your fish healthy and happy.

    Conclusion: Enhancing Your Nano Fish Experience

    You now know that nano fish can live from 2 to 10 years. Most live 3–7 years. Their size, how they reproduce, their genes, and their environment all play a big role in how long they live.

    To help your nano fish live longer, keep their water stable and feed them right. Also, make sure to quarantine new fish. Don’t overcrowd their tank and give them places to hide. Watch for any signs of sickness early on.

    Some nano fish, like killifish, don’t live as long. But others, like gouramis or small barbs, can live longer with the right care. If you want a long-term pet, pick species known for living longer. If you like changing your tank’s look, short-lived fish can be great too.

    FAQ

    What is “nano fish lifespan” and why does it matter for you as an owner?

    “Nano fish lifespan” is about how long small fish live in home tanks. Knowing this helps you plan for their care. The size and type of fish greatly affect how long they live.

    Many nano fish live 3–7 years. Some live only 2–3 years, while others can live 8–10+ years with the right care.

    How do you define “nano fish”?

    Nano fish are small and fit in tiny tanks, usually under 10–20 gallons. They are not a specific group but a size category. Examples include bettas, neon tetras, and guppies.

    Do smaller fish always have shorter lifespans than larger fish?

    Not always, but often. Smaller fish may grow fast and reproduce early, which can shorten their lives. Yet, some small fish like neon tetras can live 5–10 years with good care.

    On the other hand, big fish can die young if their tank is not well-kept.

    What are the main biological and environmental factors that determine a nano fish’s lifespan?

    Several factors affect a nano fish’s lifespan. These include their size, metabolism, and how they reproduce. Water quality, diet, tank size, and tankmates also play a big role.

    Each factor can greatly affect how long a fish lives, more than just its size.

    What lifespans can you expect for common nano species like bettas, guppies, and neon tetras?

    Here are typical lifespans for some common nano fish:

    • Betta (Betta splendens): 2–5 years
    • Guppy (Poecilia reticulata): ~3–5 years
    • Neon tetra (Paracheirodon innesi): commonly 4–10 years, often cited around 5
    • Zebra danio: ~3–5 years
    • Killifish: ~2–3 years
    • White cloud mountain minnow: 5–7 years
    • Dwarf gourami: 4–6 years
    • Corydoras and Otocinclus: ~5 years

    Good care can help fish live longer, up to the maximum of these ranges.

    How do livebearers and egg-layers compare in lifespan?

    Livebearers, like guppies, usually live 3–5 years. Egg-layers, such as tetras, often live 5–8 years with proper care. How a fish reproduces is one factor in how long it lives.

    What measurable water parameters should you monitor to protect lifespan?

    Keep an eye on ammonia, nitrite, and nitrate levels. Aim for zero ammonia and nitrite and low nitrates. Also, ensure the water temperature is right for your fish and check the pH.

    Regular water changes and filter maintenance help prevent toxins and stress.

    What are practical, evidence-backed steps to maximize your nano fish’s lifespan?

    To help your nano fish live longer, keep the water stable with regular tests and changes. Feed them a balanced diet that includes live foods when possible.

    Avoid overcrowding and quarantine new fish. Provide hiding spots and maintain a consistent routine. Monitor for disease and act quickly if you see any signs.

    Which health issues most commonly shorten nano fish lifespans and how do you prevent them?

    Common health issues include water-quality problems, parasites, and nutritional deficiencies. Stress and age also play a role. To prevent these, keep the water clean, quarantine new fish, and feed them well.

    Provide hiding spots and catch health problems early to treat them effectively.

    What early-warning signs should you watch for that indicate declining health?

    Look out for signs like loss of appetite, faded color, and clamped fins. Also, watch for erratic swimming, gasping, and visible spots or lesions. Lethargy is another warning sign.

    Acting fast and quarantining sick fish can help them recover.

    How realistic should your expectations be when choosing a species for companionship?

    Be realistic about the lifespan of the fish you choose. Some, like killifish, are short-lived and great for short-term displays. Others, like neon tetras, can be long-term friends.

    Choose based on how long you want a fish as a companion and be ready to meet their needs.

    How can you estimate a fish’s age if you don’t know its birthday?

    To guess a fish’s age, look at its growth, size, and behavior. Keep records of changes in color, activity, and body condition. These help you care for your fish as they age.

    When should you consult an aquatic veterinarian?

    See an aquatic vet for serious or unclear illnesses, unexplained deaths, or when treatments don’t work. Online advice can be helpful, but a vet is best for complex cases.

  • Understanding Molting: Why Your Shrimp Need Calcium and Stability

    Understanding Molting: Why Your Shrimp Need Calcium and Stability

    Molting, or ecdysis, is a key event for your shrimp’s growth. It lets them repair damage and grow new limbs. During molting, they shed their old, rigid shell to grow into a new, larger one.

    The molting cycle is controlled by hormones like ecdysone. It involves breaking down the old shell, expanding the body with water, and forming a new, soft exoskeleton. This new shell then hardens. Calcium and stable water are essential for this process.

    Young shrimp molt often, sometimes every 5–7 days. Adults molt less frequently, depending on their species, environment, and diet. In aquariums, you might see a discarded shell. This is normal and often eaten by shrimp to get minerals.

    To help your shrimp molt successfully, keep the water clean and balanced. Provide hiding spots like plants or caves. Avoid disturbing them during molting to ensure their health and growth.

    What is the Shrimp Molting Process?

    A serene underwater scene showcasing the shrimp molting process, highlighting a translucent shrimp shedding its exoskeleton. In the foreground, capture the shrimp mid-molt, with its delicate newly-formed carapace glistening. The shrimp should be surrounded by tiny particles of the shed exoskeleton, emphasizing the transformation. In the middle ground, depict an array of corals and rocks, providing a natural habitat, with small fish curiously observing. In the background, soft light filters through the water, casting ethereal rays that create a calming atmosphere. The color palette should consist of soft blues and greens, enhancing the tranquil underwater environment. Aim for a high-resolution, close-up angle to focus on intricate details of the shrimp and its shedding process, conveying a mood of wonder and fascination.

    The shrimp molting process is a natural growth cycle you can observe in your tank. It includes four stages: pre-molt, molting, post-molt, and inter-molt. Each stage has unique behaviors and physical changes related to shedding the exoskeleton.

    In pre-molt, shrimp absorb minerals from their old shell and store them in stomach stones. They may eat less, groom more, and hide. A pale or white line on their back indicates the shell is loosening.

    During ecdysis, shrimp release enzymes and take in water to swell and split their shell. This process can take minutes but is very energy-consuming. After splitting, they carefully remove their legs and antennae.

    Post-molt is a risky time when the new shell is soft. Shrimp often eat their old shell to get back lost minerals. This helps their new armor harden over time. Keep them in a quiet, stable place during this phase.

    Inter-molt comes after the new shell hardens. Growth happens inside this armor until it’s time for the next pre-molt. The molting cycle’s timing depends on the shrimp’s age, species, diet, and environment.

    Hormones control the timing and sequence of these stages. Ecdysone and other molting hormones in crustaceans manage tissue breakdown and rebuilding. Environmental factors like temperature, nutrition, and water chemistry affect these hormonal signals. This changes how fast the molting cycle progresses.

    • Watch for hiding, reduced appetite, and preening as signs of pre-molt.
    • Expect quick but intense effort during exoskeleton shedding.
    • Provide protection and steady water conditions during post-molt.

    Why Shrimp Need Calcium for Molting

    A vibrant underwater scene featuring a close-up of a shrimp, its delicate exoskeleton being prepared for molting. In the foreground, the shrimp is perched on a smooth, sandy substrate surrounded by scattered tiny particles of calcium-rich sources such as crushed coral and mineral deposits. The middle ground showcases a rich array of aquatic plants, providing a lush habitat. The background includes soft, diffused lighting filtering through water, creating a serene and nurturing atmosphere. Use a macro lens effect to highlight the textures of the shrimp and the small granules of calcium. The overall mood should evoke a sense of care and vitality, emphasizing the importance of calcium in the shrimp's natural habitat for successful molting.

    Molting is key for shrimp to grow. They need calcium to build a new shell. Without it, their growth slows down.

    Shrimp get calcium from water and their own bodies. They also eat their old shells to get more calcium. This helps them harden their new shell fast.

    Not having enough calcium can cause soft shells. Shrimp may have trouble hardening their shells or molting. This makes them more likely to get sick or be eaten.

    • Most Neocaridina and Caridina shrimp need water with a hardness of 4–6 dGH and a pH of 1–2 dKH.
    • Adding mineral supplements or foods like cuttlebone can help increase calcium levels.
    • Chitin supplements, like HS Aqua Crusta Chitin+, help with the structure of the new shell.

    Let shrimp eat their old shells if they can. This helps them get more calcium. It’s good for their molting process.

    Keep an eye on the water’s mineral levels. Add supplements if you notice weak molts or soft shells. Making small changes can help keep your shrimp healthy.

    The Environmental Factors Affecting Molting

    Your shrimp need stable conditions to grow. Small changes in water or temperature can affect their molting. This can lead to failed molts.

    Water quality is key for molting. High levels of ammonia, nitrite, or sudden changes in nitrate can stress shrimp. Keeping these levels low and stable helps during their sensitive times.

    pH and water hardness matter for mineral availability. A stable pH of 6.5–7.5 and consistent hardness values help. Sudden pH changes can shock shrimp when they are soft and vulnerable.

    Temperature affects how often shrimp molt. Warmer water, like 26°C, speeds up molting. A small temperature change can greatly affect how often they molt.

    • After molting, shrimp need plenty of oxygen. This helps them breathe and recover.
    • A safe tank layout is important. Dense plants, moss, caves, and wood provide hiding spots. This reduces predation and lets shrimp molt in peace.
    • Choosing the right tank mates is critical. Avoid aggressive or large shrimp that might harm soft shrimp.

    Nutrition and trace elements are vital for shell growth. A balanced diet with protein, chitin, and minerals supports healthy molts. Without these, molting can fail, leading to death.

    Monitoring water quality and molting factors reduces stress. Regularly check parameters, provide safe hiding spots, and feed a mineral-rich diet. This supports each growth stage of your shrimp.

    How to Prepare Your Shrimp for Molting

    First, keep the water stable. Check ammonia and nitrite levels often. Make sure they are zero. Nitrates should be low, and pH should stay between 6.5 and 7.5.

    Match the water temperature to your shrimp’s needs. For most, this is around 72–78°F (22–26°C).

    Provide minerals to support molting. Keep the General Hardness (GH) right and add supplements when needed. Use crushed coral, cuttlebone, or Shrimp King Mineral for this.

    These help with gastrolith formation and later shell hardening.

    Feed a balanced diet to help with shell regeneration. Give shrimp-specific pellets, blanched veggies like spinach, and a bit of protein. Also, add chitin-rich supplements like HS Aqua Crusta Chitin+.

    These supplements give your shrimp the building blocks for a strong new exoskeleton.

    Make hiding places for your shrimp. Add java moss, leaf litter, caves, and driftwood. These spots let shrimp hide during pre-molt and while their new shell hardens.

    Keep disturbances low near molting times. Avoid big water changes, handling, or aggressive tank mates. Don’t remove new shells; shrimp eat them for minerals.

    Watch for signs of pre-molt. Look for less eating and retraction. Make sure mineral sources are available for a smooth molting cycle.

    Common Molting Problems in Shrimp

    When a shrimp gets stuck in its old shell, it’s called a failed molt. This can happen if its legs, tail, or antennae get caught. Poor water quality and weak minerals often cause this issue.

    Shrimp with soft shell syndrome have trouble after molting. This is because they lack calcium or trace minerals. Their soft shell makes it hard to eat and leaves them vulnerable to harm.

    Broken shell points and the white ring of death are caused by improper shell splitting. This usually happens due to stress, sudden changes, or a lack of nutrients. It can lead to serious health issues.

    Shrimp that molt too often are facing bigger problems. This could be due to too much protein, unstable water, or constant stress. Frequent molting weakens the shrimp over time.

    Shrimp that delay or refuse to molt might be sick or not getting enough nutrients. Make sure their water is stable, their diet is balanced, and they have places to hide.

    • Preventive steps: test water regularly and keep parameters steady.
    • Offer a balanced diet with mineral supplements and natural calcium sources like cuttlebone.
    • Create ample hiding places so shrimp can molt in peace.

    If you notice any molting issues, act fast. Keep the water clean and avoid sudden changes. Provide extra calcium and watch the affected shrimp closely. For serious cases, seek help from experts or a vet who knows about invertebrates.

    The Connection Between Stress and Molting

    Stress can really mess up the molting process in shrimp. Things like sudden temperature or pH changes, or even spikes in ammonia or nitrite, can stress them out. When this happens, shrimp tend to hide, eat less, and might even skip molting altogether.

    Stress also messes with the molting schedule of shrimp. It disrupts the hormonal cycles that tell them when to shed their skin. This can lead to molts that aren’t complete or happen at the wrong time, leaving them exposed and vulnerable.

    Poor water quality and aggressive tank mates can make molting even more dangerous. If a shrimp can’t get the calcium it needs, its new shell won’t be strong. This makes them more likely to get sick or die, which is a big problem when stress is a constant issue.

    To help your shrimp, keep the water in their tank stable. Do water changes slowly to avoid shocking them. Also, make sure you’re not overcrowding the tank and choose tank mates carefully. Give them plenty of places to hide, too, so they feel safe while they’re molting.

    Feeding them well and adding minerals to their food can help them rebuild their shells. This can also help get their molting back on track. By reducing stress and keeping their environment stable, you’re helping your shrimp stay healthy and thrive.

    Frequency of Molting in Different Shrimp Species

    Shrimp molting frequency changes based on species, age, and environment. Young shrimp molt often, every 5–7 days. As they grow, they molt less frequently, every 1–2 weeks.

    Adult shrimp molt less often, every 3–6 weeks. Some species may molt every 20–40 days, depending on their environment.

    Temperature affects molting too. Warmer water speeds up molting. For example, a temperature increase from 22°C to 26°C can shorten the time between molts.

    Each shrimp species has its own needs. Neocaridina, like cherry shrimp, can handle a wide range of conditions. Caridina, such as bee shrimp, are more sensitive to pH and mineral changes.

    In a healthy colony, molting is a constant process. About 5% of a strong colony may molt each day. This makes molting a regular part of community tanks.

    Experienced breeders track molts to care for their shrimp better. They predict when molting will happen and provide special care. They use the shrimp’s growth stages and environmental cues to help them molt safely.

    • Very young: every 5–7 days
    • Juveniles: every 1–2 weeks
    • Adults: every 3–6 weeks (20–40 days possible)

    Observing Your Shrimp During the Molting Process

    Look for small changes in behavior before a molt. Your shrimp might hide more, eat less, or stay under leaves and in caves. You could see them grooming more and a faint white line or loosened area on their back as they prepare to molt.

    During ecdysis, you’ll see the shrimp split its old shell and gently free itself. The shed exoskeleton looks like a full shrimp. Don’t think the empty shell is a dead shrimp.

    After a molt, your shrimp will be soft, pale, and often very quiet for hours or up to 48 hours. This is a time when they are very sensitive. Disturbances or aggressive tank mates can harm them. Keep the tank calm and avoid touching molted shrimp.

    Many shrimp eat their old shell to get minerals back. Leave the molts in the tank for at least 24 hours unless you need to remove them due to bad water quality. This helps them recover quickly during the molting cycle in shrimp.

    • Track molting frequency and patterns to spot trends.
    • Note clustering of molts or more frequent molts than usual.
    • Record failed molts or repeated problems to identify underlying issues.

    Watch for signs of trouble. Look for molts that are not complete, shrimp that are limp or unresponsive after molting, or any discoloration and infection. These need quick action to fix water quality and nutrition.

    In big colonies, you’ll see molts regularly. Plan your feeding and water changes to help reduce stress on your shrimp during the molting cycle. Regular checks while observing shrimp molting help you spot problems early and keep your shrimp healthy.

    The Aftermath of Molting in Shrimp

    After molting, your shrimp are in a vulnerable state. Their new shell is soft, and they need to absorb minerals. It’s important to keep them calm and safe during this time.

    Shrimp get minerals in two ways. They eat their old shells to get calcium and other elements. They also take minerals from the water and their bodies. Watching this shows if they’re growing well.

    Shrimp can grow back lost limbs after molting. These new limbs start as small buds. It takes a few molts for them to fully grow back.

    • Increased vulnerability: fresh molts attract predators and aggressive tank mates.
    • Provide hiding places to reduce injuries and stress during the hardening period.
    • Keep water chemistry steady to support the shrimp molting process and re-mineralization.

    As the shell hardens, shrimp start to eat and look brighter. Females might even be ready to breed again. This shows they’re doing well after molting.

    If shrimp have trouble molting, it could mean they’re not getting enough minerals. It could also be due to bad water or too much stress. Fixing these problems helps them grow and stay healthy.

    Tips for Maintaining Calcium Levels

    Keep GH and KH tests handy to track water hardness. Neocaridina shrimp prefer GH 4–6 dGH. Caridina species might need different levels. Regular tests help keep the molting process smooth.

    Use natural sources to slowly increase calcium. A small cuttlebone or crushed coral in a mesh bag works well. Place mineral stones in the filter for a steady release. Always check pH and KH levels to avoid sudden changes.

    For consistent calcium, use shrimp-specific supplements. Shrimp King Mineral and calcium carbonate powders are good options. Add them slowly to avoid stress on the shrimp.

    Feed a varied diet to support shell growth. Offer blanched spinach, shrimp pellets, and chitin-rich foods like HS Aqua Crusta Chitin+. These provide the nutrients needed during molting.

    • Encourage molt recycling by leaving shells in the tank for 24–48 hours so shrimp can reclaim minerals.
    • Remove uneaten shells only if they start to foul water quality or attract pests.

    When adding supplements, do it gradually. Small amounts over several days are better than one big dose. Stable water conditions help shrimp absorb calcium better.

    Keep water quality consistent. Stable temperature, pH, and low ammonia and nitrite levels are key. Healthy water makes calcium uptake easier and reduces molting problems.

    Follow these tips to maintain calcium levels. This supports a smooth molting process for your shrimp in the aquarium.

    Conclusion: Ensuring a Healthy Molting Process

    Your shrimp need the molting cycle to grow and reproduce. This process is driven by hormones and requires the right internal and external conditions. Keeping ammonia and nitrite levels at zero is key. Also, maintain stable pH and GH/KH levels and a consistent temperature.

    Calcium and balanced nutrition are vital for healthy molting. Use supplements like Shrimp King Mineral and HS Aqua Crusta Chitin+ when needed. Offer a varied diet rich in chitin and trace minerals. Make sure the tank has plenty of hiding spots for molting.

    Watching your shrimp closely and keeping records is important. Look out for signs like hiding, reduced appetite, and visible shell looseness. If you see failed molts or soft-shell syndrome, act fast. Check water quality, adjust minerals, reduce stress, and seek help from experts if needed.

    Preventive care is key to reducing molt failures and improving colony health. Focus on steady water parameters, choose tank mates wisely, and provide a proper diet. By understanding the importance of molting, you can boost survival rates, encourage breeding, and keep your aquarium thriving.

    FAQ

    What is the shrimp molting process and why is it essential?

    Molting is when shrimp shed their old shell and grow a new one. Their shell is made of chitin and calcium carbonate, which can’t grow with them. This process lets shrimp grow, repair, and reproduce.

    It’s driven by hormones and involves breaking down the old shell and forming a new one. This is vital for all freshwater shrimp to survive, both in the wild and in aquariums.

    What are the stages of the molting cycle?

    The molting cycle has four stages: pre-molt, ecdysis, post-molt, and inter-molt. In pre-molt, shrimp hide and prepare to molt. During ecdysis, they shed their old shell and emerge with a new one.

    Post-molt is when the new shell hardens. Inter-molt is the period when the shell is hard and ready for the next molt.

    Why does calcium matter for molting?

    Calcium is key for making the new shell strong. Shrimp need to absorb enough calcium before and after molting. They get calcium from the water, their own body, and by eating their old shell.

    Without enough calcium, shrimp can have soft shells and struggle to molt.

    How do environmental factors affect molting?

    Water quality, temperature, and pH are important for molting. Poor water conditions can disrupt the molting process. Shrimp need stable water to molt successfully.

    Temperature also plays a role. Warmer water makes shrimp molt more often, while cooler water slows them down.

    How should you prepare your shrimp for molting in an aquarium?

    Keep the water clean and stable. Provide hiding spots and mineral sources like cuttlebone. Make sure the water has the right mineral balance for your shrimp.

    Leave the molted shells in the tank for 24–48 hours. This lets shrimp get minerals from their old shells.

    What are common molting problems and their causes?

    Shrimp can have problems like soft shells or stuck molts. These issues often come from mineral deficiencies, poor water quality, or stress.

    Failed molts can be serious and may lead to infections or death if not treated.

    How does stress affect molting?

    Stress can make it hard for shrimp to molt. It can come from changes in the water, overcrowding, or aggressive tank mates. Stressed shrimp may hide, stop eating, or molt irregularly.

    Chronic stress can lead to more failed molts and weakened immunity.

    How often do shrimp molt at different life stages?

    Young shrimp molt more often than adults. The frequency depends on the species, age, and environment. Warmer water speeds up molting, while cooler water slows it down.

    What signs indicate a shrimp is about to molt or is molting?

    Look for hiding, reduced appetite, and a pale line on the back. During ecdysis, you might see the shrimp emerge from its old shell. Afterward, it will be soft and pale for a while.

    What should you observe immediately after a shrimp molts?

    The new shell is soft and vulnerable right after molting. Shrimp will be pale and less active for a while. They eat their old shell to get calcium.

    Make sure they have hiding spots and keep the water clean. Provide extra minerals and chitin to help them recover.

    How can you maintain calcium levels safely in your tank?

    Use crushed coral or mineral stones to control GH. Add calcium sources like cuttlebone or shrimp mineral supplements slowly. This avoids sudden changes in water chemistry.

    Feed calcium-rich foods and chitin supplements. This supports strong shells and molting.

    When should you intervene for a failed molt and what can you do?

    If a shrimp is stuck in its shell, ensure the water is clean and calm. Add calcium and minerals. Avoid handling them too much.

    In severe cases, consult an expert or veterinarian. They can help with delicate rescue techniques.

    How does nutrition support successful molting?

    A balanced diet is essential for molting. Shrimp need protein, chitin, and minerals. Feed them shrimp pellets, vegetables, and chitin supplements.

    Mineral-rich additives help ensure they have enough calcium. Poor nutrition can lead to molting problems.

    What tank design and stocking practices reduce molting mortality?

    Use plants, moss, and hiding spots to reduce stress. Choose peaceful tank mates and avoid large predators. Keep the tank clean and avoid sudden changes.

    Monitor water quality and adjust as needed. This helps prevent molting problems.

    How can you track molting patterns in a colony?

    Keep a record of molts, noting age, temperature, and water conditions. Healthy colonies have a steady molt rate. This helps you prepare for molting waves.

    Adjust care by providing extra hiding spots and minerals during vulnerable periods.

    What differences should you expect between Neocaridina and Caridina shrimp regarding molting?

    Neocaridina (like cherry shrimp) are more adaptable to water conditions. Caridina (like bee shrimp) are more sensitive and need tighter control. Both need calcium and stable conditions for successful molting.

  • How to Properly Acclimate New Life to a Small Water Volume

    How to Properly Acclimate New Life to a Small Water Volume

    When you bring new aquatic life into a small aquarium, acclimation is key to their health. Shipping water often has different temperatures, pH, and salinity than your tank. Even small changes can stress fish, corals, invertebrates, and plants. Start using acclimatization strategies right away to lessen shock.

    Start acclimating as soon as you arrive and never hurry. Temperature, pH, and specific gravity differences can cause shock or death. Most invertebrates and marine plants are more sensitive than fish. They often need a specific gravity of 1.023–1.025 in marine systems. Follow clear steps to match conditions slowly.

    Practical steps help. Turn off aquarium lights for at least four hours after introduction to lower stress. Always discard shipping water instead of pouring it into your tank to avoid pathogens or contaminants. Also, avoid adding an airstone to the shipping bag; it can raise pH and convert ammonia to toxic forms.

    Quarantine new arrivals for 2–4 weeks in a separate tank. This quarantine protects your main display from disease and lets you confirm feeding and health. Handle corals carefully: never touch fleshy tissue, and always hold by the base or skeleton.

    Using solid environmental acclimation strategies and careful handling will give your new animals the best chance to thrive in a small-volume aquarium.

    Understanding the Importance of Acclimation

    A serene aquarium scene illustrating environmental acclimation strategies. In the foreground, a clear water container filled with aquatic plants and small fish, featuring colorful species representing diverse environments. In the middle ground, a person in modest casual clothing meticulously adjusting water temperature and salinity levels, demonstrating the acclimation process with tools like a thermometer and hydrometer. The background features a lush underwater landscape with soft lighting streaming through the water, creating a calming atmosphere. An emphasis on gentle ripples enhances the sense of tranquility, while the composition highlights the delicate balance required for new life in a small water volume. Capture this scene with a soft focus lens to give it an inviting, educational feel.

    Before adding new fish, shrimp, or corals, understand why acclimation is key. Sudden changes in pH, temperature, salinity, or hardness can upset their balance. This stress can damage their slime and increase the risk of shock or toxicity.

    Knowing the risks helps you make better choices. A small pH change can be big for sensitive species. A full pH unit change is a huge jump in acidity that can be deadly. During transport, pH drops and ammonia levels rise, making longer trips riskier.

    Start adapting your environment as soon as the animals arrive. Begin acclimation right away and keep the lights off for a few hours to reduce stress. Check your water for ammonia, nitrite, nitrate, pH, temperature, hardness, alkalinity, and specific gravity to ensure the tank is stable before introducing new life.

    Choose acclimation strategies that fit the species you keep. For delicate corals and marine invertebrates, slow, measured additions of tank water are best. For hardy community fish, a shorter acclimation might be enough. Tailor your approach to the species’ needs and the transport conditions.

    Use practical acclimatization strategies to protect your investment and improve animal welfare. Many losses happen because acclimation was rushed or skipped. A steady, documented process helps keep animals healthy and reduces disease risks.

    • Test key parameters before introduction.
    • Start acclimation right away upon arrival.
    • Keep lights off for several hours after adding new life.
    • Match salinity and temperature slowly in small steps.

    Types of Aquatic Life that Require Acclimation

    A serene aquarium setting showcasing various types of aquatic life acclimatizing to a small water volume. In the foreground, a close-up of a technician gently introducing a fish into the aquarium, wearing professional attire. The middle ground features a diverse range of aquatic species, including colorful freshwater fish, delicate shrimp, and vibrant aquatic plants. Soft, natural lighting illuminates the scene, creating a calming atmosphere with gentle shadows. The background reveals a clean, well-maintained aquarium filled with lush greenery, adding depth to the composition. The overall mood is one of care and attention to the delicate process of acclimatization, highlighting the importance of this phase for aquatic life.

    Fish, invertebrates, corals, and marine plants all need different care when changing their environment. Fish can handle bigger changes in temperature and chemistry. But, invertebrates like shrimp and sea stars need gentle care and steady conditions.

    Marine invertebrates and plants prefer a specific gravity of 1.023–1.025. Even small changes in salinity or pH can stress or kill them. It’s important not to expose sponges, clams, scallops, and gorgonias to air while handling them.

    When acclimating corals, some may release mucus or stay closed for days. This is a normal reaction to stress from travel. Being patient and slowly adjusting their environment helps them recover and open up naturally.

    After introducing new life to a tank, watch how they interact. New fish might get chased by territorial tankmates. Be ready to separate them or provide hiding spots if needed.

    • Hardy species are best for beginners; they resist fluctuations and make adjusting to new environments simpler.
    • Sensitive species demand specialized acclimatizing procedures and often benefit from quarantine tanks.
    • Plan for species-specific needs before you buy: salinity, pH, flow, and handling rules.

    Use habitat conditioning approaches that fit each group’s needs. For mixed collections, create a plan that protects the most sensitive members. This helps all animals adjust to your system smoothly.

    Preparing Your Setup for Acclimation

    Before you begin, gather all the necessary supplies. You’ll need scissors, a clean bucket for aquarium use, a measuring cup, and airline tubing. Also, have a specimen container or plastic bowl for heavy corals, a towel, and a watch or timer.

    Don’t forget an algae clip or bag clip to keep transport bags secure. A soft net is also essential for moving fish gently. You might want to consider an acclimation kit, like the Doctors Foster and Smith Acclimation Kit, for convenience.

    Do some key checks on your aquarium water first. Make sure ammonia and nitrite levels are 0 ppm. Also, check that nitrate levels are safe for the species you’re adding.

    Verify that pH and temperature are stable and match the new specimen’s needs. For marine systems, measure specific gravity with a hydrometer or refractometer. Check hardness or alkalinity if necessary.

    Adjust your aquarium’s lighting and cleanliness before the new arrivals. Turn off the lights to reduce stress. Wash your hands thoroughly to remove any harmful substances.

    Use only tools and buckets meant for aquarium use to avoid contamination. This is important for keeping your tank healthy.

    Consider setting up a quarantine tank if possible. A separate tank allows you to observe new arrivals for two to four weeks. This reduces the risk of disease in your main tank.

    If you don’t have a quarantine tank, inspect the seller’s display tank carefully. Avoid animals from tanks with sick or dead fish. Determine if isolation is needed based on the species and seller’s transport method.

    Plan how to condition the habitat for a smooth transition. Prepare water in buckets and containers to match your tank’s parameters. Use slow-mixing methods to ensure temperature and salinity are equalized.

    Follow acclimation techniques that are right for the species and the seller’s transport method. This helps in a successful transition.

    Make simple checklists to guide you through the process. List the supplies, water checks, and timing steps. Following consistent routines helps avoid mistakes and ensures a smooth adaptation process each time you add new life to your tank.

    Different Acclimation Techniques

    When moving new aquatic life to a small water volume, you have two main choices. Each method is suited for different species and shipping conditions. Pick the one that best matches the sensitivity of the animals and the water parameter differences.

    Floating, or float-and-swap, starts with temperature matching. Place the sealed bag on the water’s surface for 10–20 minutes. Then, add small amounts of tank water to the bag in steps. Start with one-quarter to one-half cup every four to five minutes.

    Continue adding water until the bag is full. Discard half the liquid and repeat the process. Finish by releasing the animals without adding the remaining shipping water.

    The drip method is slower and gentler. Put the animals and their original water in a clean bucket. Connect airline tubing from your aquarium to the bucket to create a siphon. Adjust the flow to about two to four drips per second.

    Let the incoming water slowly double the bucket’s volume. Then, discard half. Repeat until about one hour has passed and the water chemistry is close to your tank.

    Use separate buckets for fish and invertebrates with the drip method. This prevents cross-contamination and keeps delicate species safe. Many aquarists choose this for corals, shrimp, sea stars, and wrasses. Small changes in salinity, pH, or ammonia can be deadly.

    • Floating suits many hardy fish and some invertebrates when shipping time is short and parameters are similar.
    • Drip best serves sensitive invertebrates and corals where gradual change reduces stress and shock.

    Both floating and drip are accepted acclimation techniques that reduce transplant shock. Use these acclimatizing procedures with careful observation during and after acclimation. If unsure, choose the gentler environmental acclimation strategies to protect fragile specimens.

    Step-by-Step Guide to the Drip Method

    First, make sure the temperature is equal. Turn off the aquarium lights and dim the room. Float the sealed shipping bag on the tank’s surface for 15 minutes without opening it. This helps reduce shock.

    Next, move the animals to a clean 3–5 gallon bucket. Pour the bag contents gently so the animals stay submerged. Use separate buckets for fish and invertebrates to protect them.

    1. Set up the siphon using clear airline tubing from your aquarium to the bucket. Tie small knots or install a plastic airline control valve to slow flow. Secure tubing with an airline holder so it won’t slip.

    2. Start the siphon by mouth or pump. Adjust the valve until you get about 2–4 drips per second. This rate mixes the water without stressing the animals.

    3. When the bucket’s water volume doubles, discard half the bucket water. Resume the drip until the volume doubles again. Total drip time is roughly one hour. This gradual exchange balances pH, salinity, and other parameters.

    Follow special transfer steps for sponges, clams, and gorgonias. Never expose these to air. Scoop them into a specimen bag, submerge the bag when moving to the aquarium, then open and release underwater. Avoid touching fleshy coral tissue during handling.

    • Test specific gravity before release. Aim for 1.023–1.025 with a hydrometer or refractometer.

    • Never place an airstone into the shipping bag. That can force gas into tissues and harm animals.

    • Be patient and monitor the whole process closely. Good acclimatization strategies mean slower, controlled changes instead of quick swaps.

    These environmental adaptation methods pair well with other acclimation techniques you may use. Careful drip routines reduce stress and improve survival for sensitive livestock.

    Float and Swap Method Explained

    First, make the water temperature equal. Turn off the aquarium lights and dim the room. Place the sealed bag in the tank and let it float for 15 minutes to an hour. This allows the water and bag to reach the same temperature while keeping oxygen available.

    Then, make the bag float if it sinks. Cut the bag near the clip and roll the top edge about one inch. This traps air and keeps the bag afloat. For heavy corals, put the bag in a plastic bowl or container to keep it on the surface.

    Slowly add water to the bag. Every 4 to 5 minutes, add a quarter to half cup of aquarium water. Keep doing this until the bag is full. Then, pour out half the water into a bucket. Re-float the bag and add water again until it’s full.

    When releasing animals, be careful and slow. Net fish gently or let them swim out on their own. For invertebrates and corals, submerge the bag and remove them by hand. Avoid touching soft tissue. Always throw away shipping water, not back into your tank.

    Timing and patience are key. Plan for about an hour and don’t rush. Some animals seem inactive but will recover with the right care. These steps protect their delicate bodies during the transition to a new home.

    The Importance of Monitoring During Acclimation

    Keeping an eye on your new pets is key during the acclimation process. Check the water’s temperature, pH, and specific gravity often. For marine invertebrates, use a refractometer or hydrometer to ensure the specific gravity is between 1.023 and 1.025.

    Before adding new fish, test the aquarium’s baseline for ammonia, nitrite, nitrate, hardness, and alkalinity. Do quick tests during the acclimation to catch any sudden changes. Even small changes can stress out delicate creatures and mess up your acclimation plans.

    Look for signs of stress in your fish. Watch for gasping at the surface, odd swimming, color changes, too much slime, or being very inactive. Some fish may seem dead at first, but they can come back to life as the water conditions get right.

    • Watch how your fish behave after they’re in the tank. Look out for any bullying or aggression from other fish.
    • Have a plan to separate aggressive fish. You can use a perforated critter keeper, a spaghetti strainer, or a plastic grid divider.
    • Feed the fish already in the tank before adding new ones. This can help reduce territorial fights.

    When drip acclimating, keep the siphon steady. Try to drip at a rate of 2–4 drips per second and make sure no air gets into the line. Don’t leave sensitive invertebrates alone for too long without checking on them.

    Keep track of your readings and observations. Writing down your notes can help you improve your acclimation strategies. Regular monitoring means you can react faster and increase the chances of your new pets surviving.

    Common Mistakes During Acclimation

    Many early losses can be avoided by watching for common mistakes during acclimation. Pouring shipping water into your aquarium is risky because it can introduce parasites and pathogens. Always discard that water into a sink or bucket.

    Rushing acclimation steps raises the chance of pH shock and osmotic stress. Slow drip methods and measured climate adjustment tips protect delicate gills and slime coats. Take your time when mixing water and matching temperatures.

    Adding an airstone to the shipping bag may seem helpful, but it can quickly raise pH and increase ammonia toxicity. Keep aeration in the bag minimal and move on to proper acclimation techniques instead.

    Netting small or fragile fish from the bag strips protective slime. Let those fish swim out on their own when possible. For delicate invertebrates and corals, avoid touching fleshy parts or exposing them to air. Sponges, clams, and gorgonias suffer from rough handling.

    • Skip quarantine at your own risk; new arrivals need 2–4 weeks in a separate tank to reveal hidden illnesses.
    • Failing to test water parameters before introduction leaves you blind to ammonia, nitrite, nitrate, pH, temperature, and specific gravity problems.
    • Using the wrong acclimation techniques or skipping steps increases mortality and stress.

    Follow clear acclimatizing procedures and use simple climate adjustment tips to protect your investment. Small habits, like testing water and avoiding haste, make the difference between a smooth transition and preventable losses.

    Post-Acclimation Care

    Turn off aquarium lights for at least four hours after adding new animals. This helps them settle and reduces stress. Feed your existing fish a small amount to distract them from the new arrivals.

    Watch the new animals closely for hours and days. Corals might stay closed for a while and have slime. Gently remove slime before placing them in the tank to help them open faster.

    Try to keep new animals in a quarantine tank for 2–4 weeks. This lets you check for diseases and parasites before adding them to the main tank.

    • Test ammonia, nitrite, and nitrate daily for the first week after adding animals.
    • Add only a few new animals at a time to avoid overloading your biological filter and reduce spikes.
    • Use targeted water changes if parameters rise unexpectedly.

    If aggression persists, use a floating basket or critter keeper to protect the new animal. You can also move decorations to break up territories and reduce aggression.

    Follow practical steps like gradual feeding and regular checks of water parameters. These steps help your tank stabilize as the new animals settle.

    Use slow, consistent changes in the tank to help animals adapt. Small, steady adjustments protect the water chemistry and reduce stress for both fish and invertebrates.

    Specialized Acclimation for Sensitive Species

    Marine invertebrates like corals and sponges need special care. They can only handle a small range of salt and pH levels. Make sure they never get exposed to air.

    Most species prefer a specific gravity between 1.023 and 1.025. Use a refractometer or hydrometer to check this. The right tools help you keep your aquarium healthy.

    When handling corals, always use the rock or skeleton, not the soft parts. For sponges, clams, and gorgonias, keep them underwater. Scoop them up in their bag, then submerge the bag in your tank. Remove the animal underwater and throw away the bag and its water.

    Drip acclimation is the best for slow changes in salt and pH levels. Aim for 2–4 drips per second for about an hour. This method helps delicate animals adjust better.

    Corals might stay closed for days after moving. Don’t jump to conclusions about illness. Lower the light and keep the water chemistry steady while they recover. If you’re unsure about water quality, get it tested for free at places like Petco.

    By following these steps, you can reduce stress and help your sensitive species thrive. Proper acclimatizing is key to keeping them healthy in your aquarium.

    Conclusion: Ensuring a Successful Acclimation Experience

    Start acclimation as soon as your new pet arrives home. Be patient and consistent. Choose the right method for your fish, like float or drip acclimation.

    Keep an eye on temperature, pH, and specific gravity. Never mix shipping water with your tank’s water. Quarantine new fish for 2–4 weeks and keep the tank dark for a few hours after introducing them.

    Use a checklist for acclimation: a clean bucket, tubing, a measuring cup, a timer, and scissors. Check your tank’s water quality before starting. Float the bag for 15–60 minutes to match temperatures.

    For gradual changes, use 1/4–1/2 cup increments or a drip system at 2–4 drips per second. Discard the shipping water and watch your fish closely as you move them.

    Use effective acclimation techniques to help your fish adjust. Many issues can be fixed if you stay calm. Proper acclimatization and careful watching will help your fish thrive. Always make slow, controlled changes for their long-term health.

    FAQ

    Why is acclimation necessary when introducing newly purchased or shipped aquatic life to a small-volume aquarium?

    Acclimation is key because shipping water is different from your tank’s. It has different temperatures, pH levels, and salinity. This can shock the aquatic life, causing harm. Slow acclimation helps them adjust and survive the move.

    When should acclimation begin and how long should it take?

    Start acclimation right when you get the animals. Don’t rush it. Most acclimations take about an hour. But, sensitive marine life might need longer and more careful handling.

    What are the primary risks during transport that acclimation must address?

    Transport can lower pH and raise ammonia levels. Even small pH changes can be deadly. Acclimation helps match your tank’s conditions to the animals’ needs.

    Should I ever pour shipping water into my aquarium?

    No, never pour shipping water into your tank. It can carry harmful pathogens and chemicals. Dispose of it safely, not in your aquarium.

    What quarantine procedures do you recommend for new arrivals?

    Quarantine new arrivals for 2–4 weeks. This lets you observe and treat for diseases. If you can’t quarantine, be very careful with your choices.

    Which acclimation method should I choose: float-and-swap or drip?

    Use float-and-swap for hardy fish and some invertebrates. For sensitive species, like corals, use the drip method. It’s slower and safer.

    How do I perform a proper float-and-swap acclimation?

    First, match the temperature by floating the bag for 15–60 minutes. Then, add aquarium water slowly. Repeat until the bag is full, then transfer the animal.

    What is the step-by-step drip method for sensitive specimens?

    Pour the bag into a bucket. Use a siphon to drip water slowly. When the bucket doubles, discard half. Repeat until it doubles again, about an hour.

    How should I acclimate marine invertebrates and corals regarding specific gravity?

    Marine life needs a specific gravity of 1.023–1.025. Use a refractometer or hydrometer for accurate acclimation. Drip acclimation is best for precise adjustments.

    What supplies and pre-checks should I prepare before acclimation?

    Get scissors, buckets, measuring cups, and airline tubing. Check your tank’s water parameters before introducing new life.

    Should I turn off aquarium lights and for how long after introducing new animals?

    Yes, turn off lights before and after introducing new animals. Dimming room lights helps. Many corals need darkness to recover.

    Why must I never add an airstone to the shipping bag?

    Airstones can raise pH and convert ammonia to its toxic form. Shipping bags have their own oxygen balance; don’t artificially aerate them.

    How do I handle corals and fragile invertebrates safely during transfer?

    Handle corals by the base, not the tissue. Keep sponges, clams, and gorgonias submerged. Transfer them underwater, avoiding air exposure.

    What behavioral issues should I expect after adding new fish or invertebrates?

    New fish may be chased. Feed established fish first or isolate aggressive ones. Corals may stay closed and produce slime.

    What signs of distress should I watch for during and after acclimation?

    Look for gasping, erratic swimming, discoloration, slime, inactivity, or failure to respond. Some may seem lifeless but revive after proper acclimation.

    How does acclimation protect against ammonia toxicity and pH shock?

    Acclimation slowly adjusts pH and salinity, diluting ammonia. This prevents sudden changes that harm the animals. It protects their gills and tissues.

    How should I transfer heavy corals that sink the shipping bag?

    Use a plastic bowl to keep the bag afloat during equalization. Submerge the bowl in the tank and remove the coral underwater, avoiding air.

    How often can keywords like acclimation, specific gravity, or drip method be repeated in educational content?

    Use keywords sparingly for clarity. Explain acclimation techniques clearly so readers can follow them easily.

    What immediate steps should I take if a new arrival shows signs of acute stress?

    Stop adding water, stabilize temperature, and keep lights off. Continue gentle acclimation while monitoring water quality. Seek help if symptoms persist.

    How should I proceed if I don’t own a quarantine tank?

    Be selective and inspect the seller’s stock. If you must introduce directly, be cautious and monitor water quality closely.

    What post-acclimation monitoring and maintenance should I perform?

    Check water parameters and watch for behavioral changes. Introduce animals slowly and keep lights dim. Observe corals for days to weeks.

    Are there species that novices should avoid due to narrow tolerance ranges?

    Yes, many corals and invertebrates need specific conditions. Novices should start with hardy species and learn acclimation techniques first.

  • Checking for Leaks

    Checking for Leaks

    Checking for leaks involves carefully checking storage tanks. This includes aboveground, underground, and chemical tanks. Your main goal is to keep cargo safe, prevent contamination, and protect water sources.

    There are millions of storage tanks in the U.S., with over 553,000 underground. The EPA requires regular inspections of these tanks. This makes leak testing a must, not just a good idea.

    Missing a leak can be very bad. Even a tiny hole in an underground tank can spill hundreds of gallons of fuel. Cases like the one in Richmond, Rhode Island, show the long-term damage a small leak can cause.

    This guide is for anyone who owns or manages tanks. You’ll learn how to find leaks, what tools to use, and when to call experts. It also covers staying in line with the law. For more, look into plumbing, water, and gas leak detection.

    Importance of Regular Leak Checks

    A technician in professional attire, examining a tank seal for signs of wear during a leak inspection. In the foreground, the technician is crouched beside a large, industrial storage tank, holding a flashlight and using a magnifying glass to inspect the seal closely. In the middle ground, tools like a wrench and safety equipment are neatly arranged on a workbench. The background features a dimly lit industrial setting with metal scaffolding and pipes, emphasizing the technical environment. Soft, focused lighting highlights the technician’s concentrated expression, creating a serious and meticulous mood, while shadows add depth to the scene. The angle is slightly above eye level, giving a comprehensive view of both the technician and the inspection area.

    Regular leak inspections are key to keeping our health and environment safe. Even small leaks in tanks can harm soil and water. The EPA has strict rules for these checks to avoid fines and legal trouble.

    Testing tanks often helps keep products safe. In places like food factories and oil fields, leaks can ruin goods or pollute supplies. This can lead to expensive shutdowns and big cleanups.

    When moving liquids and gases, checking tanks is vital. It stops theft and keeps products fresh. A good leak detection service ensures seals are tight and keeps records safe.

    Across many industries, regular checks lower risks. This includes farms, water systems, and power plants. Using certified services means you have reliable reports for regulators or insurers.

    Knowing the risks helps see why regular checks are important. Early detection saves time and money in cleanups. It also prevents big environmental disasters.

    • Protect public health and ecosystems through scheduled inspections.
    • Preserve product quality across logistics and processing chains.
    • Meet EPA and state requirements with accredited leak detection services.
    • Work with a reputable leak detection company to document and act on findings.

    Tools Needed for Leak Inspection

    A well-lit scene depicting a plumber in professional attire inspecting a tank seal for leaks, focused on specific tools used for leak detection. In the foreground, showcase a variety of equipment: a moisture meter, plumber's tape, and a flashlight, all meticulously arranged on a clean surface. In the middle ground, the plumber is kneeling beside a water tank, closely examining the seal with a concentrated expression. The background should feature a dimly lit utility room, adding to the atmosphere of careful inspection, with pipes visible and a soft, ambient glow illuminating the scene. Capture the seriousness of the task, emphasizing safety and professionalism, with a slight depth of field to draw attention to the tools and the plumber's actions.

    To do a good leak inspection, you need a few key tools. Bright lights help you see inside. Cameras, like bore and crawl cameras, show you hidden spots and cracks.

    Ultrasonic gauges measure how thick walls are. This helps you decide where to test for leaks. Seal testers check if seals are strong. For testing materials, you’ll need tools for impact and gel tests.

    For safe work in tight spaces, you need safety gear. Gas monitors keep an eye on air quality. You also need gear to protect you from falls and to safely get into domes.

    Don’t forget safety clothes like splash- and flame-resistant coveralls. You’ll also need hard hats, gloves, face shields, goggles, and boots.

    It’s smart to have a small set for quick fixes. Torque wrenches ensure fittings are tight. Keep spare gaskets, fittings, and cleaning tools handy for any repairs you find.

    Many places use their own inspectors for regular checks. For more detailed work, third-party firms and leak detection companies are great. They use special tools and follow strict rules for plumbing, water, and gas checks.

    How to Identify Common Leak Symptoms

    Start by looking for visible signs on tanks. Check for stains, high-water marks, and residue lines. These signs show if the tank has been overfilled before.

    Also, look for sediment buildup or rust on fittings. These are signs of long-term problems that need to be checked quickly.

    Look for stress cracks or crazing inside the tank. Cracks often start inside before they are visible outside. Also, watch for brittle or embrittled areas, soft spots, or discoloration. Use ultrasonic testing to find thinning walls that are not visible to the eye.

    • Exterior bubbling or seepage near foundations for buried tanks.
    • Vegetation die-off, which can signal contamination from a hidden leak.
    • Fuel in wells or groundwater, a clear environmental indicator.

    Be aware of unusual odors at vents or manway openings. A smell of fuel or petroleum is a serious warning. It may mean you need to find a gas leak. If you smell fumes, stop people from going near and follow your emergency plan.

    Operational symptoms can also show problems. Look for unexpected pressure changes or ballooning during filling. This could mean there’s a leak or a blocked vent. Also, check for vent obstructions like bird nests or debris. These can cause the tank to work too hard.

    • Broken or mismatched seals on transportation containers.
    • Leaks at fittings, hoses, valves, or gaskets visible during visual checks.
    • Puddles or visible seepage that require immediate attention.

    For water systems, use tools to find leaks. Look for damp areas, rising moisture, or wet stains. These could mean water is getting in. For fuel systems, focus on finding gas leaks. This helps you know if there’s a risk to people and property.

    When you check for leaks, write down every sign and where you found it. This helps you know where to fix things and what to do next without guessing.

    Steps for Inspecting Tank Seals

    First, figure out what kind of seal is on the tank. You might see bolt seals, cable seals, or even electronic ones with GPS. Knowing this helps you know what to check during the inspection.

    Next, do a quick look at all the seal points. Look for any broken seals, mismatched numbers, or signs of tampering. Pay close attention to where fittings meet and corners. These areas often show early signs of leaks.

    1. Check the serial numbers against the shipping documents and log them.
    2. Take photos of each seal before and after it’s moved for records.
    3. Keep track of any seal changes, including new serial numbers and why they were needed.

    Use tools if you can. Electronic seal readers and testers make checking faster and more accurate. Also, use portable leak detection equipment for quick checks. If you’re working with a leak detection company, plan to have them do more detailed tests when needed.

    For tanks on the move, consider using IoT or electronic seals to watch for tampering. These systems send alerts quickly, helping to respond fast and lower risks. For tanks that stay in one place, check the gaskets, make sure bolts are tight, and that seals fit right on lids and manways.

    • Do regular leak tests on high-risk spots and valves.
    • Keep track of the environment, as it can affect seal performance.
    • Use the same forms for all reports to keep things consistent and easy to check.

    Keep detailed records of everything. Write down the seal’s condition, take photos, and note any replacements. Good records help with regulations, support leak detection services, and prevent theft during transport.

    If you find complex problems or a pattern of failures, call in a certified leak detection company. They have the tools and knowledge to find leaks that are hard to spot.

    Best Practices for Routine Leak Checks

    Make checking for leaks a regular part of your routine. Look at tanks at least once a year. If tanks are outside, store harsh chemicals, or look worn, check them more often. The EPA also requires third-party checks for many underground tanks.

    Get ready before you start inspecting. Empty and clean tanks when needed. Clean both inside and outside so you can see any problems. Always follow safety rules and use the right equipment when checking tanks.

    Use a set way to inspect tanks. Shine a bright light through the manway to see inside. Check the dome for cracks and avoid standing on it. Look at fittings, gaskets, hoses, and other parts for damage.

    Have a plan for each inspection. Use tests to check for corrosion or thinning. If you think the tank might be damaged, take samples for testing. Use cameras to show what you find inside.

    Keep detailed records of each inspection. Make reports with photos and notes on what you found. List any repairs or replacements needed and when to check again. This helps with maintenance and following rules.

    Think about getting help from experts for tough tests. Certified services have the right tools and know-how. For leaks in buildings, use plumbing experts to find all problems.

    Make leak testing a part of your team’s routine. Teach staff how to do basic checks and when to call in experts. Regular checks help keep tanks safe and working well.

    Maintenance Tips to Prevent Future Leaks

    First, create a clear maintenance plan. It should list all routine tasks and how often to do them. Make sure to replace old gaskets and fittings on time. Also, keep the right torque on bolts and clean vent lines and scrubbers.

    Always check if the materials you use are compatible. For polyethylene tanks, test for embrittlement. Run impact or gel tests if you think the material might be degrading. This helps avoid unseen failures.

    Look out for structural problems that can stress the tank. Fix foundation settling fast and address rust or failing sealant on metal tanks. Small repairs now can save a lot of time and money later.

    Control how you operate to reduce mechanical stress. Avoid overpressurizing tanks during filling and ensure proper venting. Follow safe loading and unloading procedures. These steps help prevent leaks and make seals last longer.

    Train your team on how to inspect and follow confined-space safety. Schedule regular inspections by a certified leak detection company. Use certified field-service technicians for detailed assessments and repairs.

    • Keep an inventory of spare parts like gaskets, bolts, and sealant.
    • Log inspections, repairs, and next-inspection dates.
    • Use documented procedures for routine and emergency work.

    Keep detailed records to reduce downtime and spot recurring problems. When you combine good documentation with regular leak detection services, you build a strong defense against future leaks.

    When to Seek Professional Help

    If you find a leak or think there might be one in an underground tank, call a leak detection company. Look for signs like cracks, brittle fittings, or unusual wall thinning from ultrasonic tests. These are clear signs you need help fast.

    For leaks that could harm health or the environment, like fuel spills or contamination, act quickly. These experts use lab tests, photo reports, and can prove you meet local and federal rules.

    Look for companies with good credentials or factory-trained techs. Make sure they have the right certifications, insurance, and experience with your tank type. This is important before they do a detailed leak check.

    • Emergency response: call a leak detection company or emergency services for gas leaks or any danger.
    • Field services: expect ultrasonic thickness checks and camera inspections from skilled techs.
    • Sampling and lab work: trusted providers can take samples for tests and give certified results.

    Professionals can replace gaskets and fittings on-site and give repair advice. They use special tools and provide documents to meet rules.

    When picking a company, choose accredited third-party inspectors for underground tanks. This choice lowers your risk and ensures a complete, rule-following check of leaks and system problems.

    Regulatory Compliance and Safety Standards

    When you schedule leak inspections for tanks, you must follow federal, state, and local rules. The EPA requires inspections for underground storage tanks every three years. Other rules depend on what’s stored and where the tank is.

    ISO and IMO provide guidelines for transport and container-seal standards. ASTM standards, like ASTM D1998 for polyethylene, offer methods for leak testing and material checks. Use these standards for routine inspections.

    Safety is key when entering confined spaces and monitoring air. Always have a buddy, two-way communication, and proper PPE. Respiratory protection is essential if air monitoring shows hazards.

    • Keep detailed inspection reports with dates and inspectors’ credentials.
    • Store photos and repair records for audits.
    • Record when the next inspection is due to show you’re on top of it.

    Choosing a certified leak detection company is smart. They document procedures and test results. Professional services provide formal reports that help with audits and compliance.

    Ignoring rules can lead to fines, legal trouble, and damage to your reputation. Rules are in place to protect the environment and public health. Regular leak testing and documented inspections show you’re responsible.

    Impact of Environmental Factors on Leak Integrity

    UV rays, extreme temperatures, and humidity can harm tank materials. UV can damage coatings and plastics. Thermal cycling can stress seals and welds.

    Regular leak checks help find early signs of wear. This way, you can fix problems before they get worse.

    Soil movement and foundation settling can also affect tanks. These changes can strain fittings. After heavy rain, earthquakes, or construction, it’s key to inspect tanks for leaks.

    Biological and debris risks are another concern. Bird nests, beehives, and dust can block vents and scrubbers. This can cause improper venting and pressure swings, increasing leak risk.

    Simple cleaning during scheduled leak tests can help. This reduces the risk of clogs and blockages.

    Seals and coatings lose their effectiveness over time. Predictive maintenance and condition monitoring, like IoT sensors, can track this degradation. This way, you can catch leaks before they happen.

    Combining water leak detection sensors with regular inspections strengthens your defense. This approach helps protect against leaks.

    To mitigate these risks, choose materials and coatings that resist local climate conditions. Apply UV-resistant coatings and keep secondary containment in place. Increase inspection frequency in harsh environments and after extreme weather. Also, clear vents regularly and schedule targeted leak testing when conditions warrant.

    • Use climate-appropriate materials and coatings.
    • Maintain secondary containment and clear vent obstructions.
    • Employ predictive monitoring and regular leak inspection cycles.
    • Integrate water leak detection for early alerts.

    Conclusion: Keeping Your Tanks Leak-Free

    Regularly checking for leaks is key to protecting your site and the public. Look for leaks visually and use special tools for detailed checks. Keep records with photos and test data.

    Regular inspections help catch small problems early. This saves money on big cleanups later.

    Keep detailed logs and follow safety rules during inspections. Use professional services for tough issues or when needed by law. They offer tests that help your efforts.

    Make a checklist for inspections and set regular times for them. Use leak detection services for extra help. This ensures your tanks are safe and meet standards.

    Focus on preventing leaks and document your efforts. Use qualified services when needed. This keeps your tanks reliable and saves money in the long run.

    FAQ

    What does “checking for leaks” mean for storage tanks and why does it matter?

    Checking for leaks means looking for any signs of damage or breaches in storage tanks. This is important to keep cargo safe, prevent water contamination, and avoid legal issues. It also helps protect the environment and public health. Regular checks can also stop theft and keep operations running smoothly.

    How many storage tanks are in use in the United States and what regulations should you be aware of?

    The U.S. has up to 15 million storage tanks in use, including over 553,000 underground ones. The EPA requires inspections of many underground tanks every three years. Not following these rules can lead to fines and legal trouble.

    What are the consequences of missing a small leak?

    Even a tiny leak can cause big problems. It can release hundreds of gallons of fuel into the soil and water. This can lead to costly cleanups, fines, and damage to your reputation.

    Who should use this guide and what will you learn?

    This guide is for anyone who owns or operates storage tanks. You’ll learn how to spot leaks, use the right tools, and know when to call experts. It also covers how to keep up with safety and legal rules.

    What visible signs should you look for during a visual inspection?

    Look for stains, sediment, and residue inside tanks. Also, check for rust, corrosion, and any signs of leaks around the tank. For transport containers, check the seals and look for any signs of tampering.

    What interior signs indicate a tank may be failing?

    Inside the tank, look for cracks, brittle surfaces, and discoloration. Also, check for soft spots and wall thinning using ultrasonic testing. These signs can show problems before they’re visible outside.

    What operational symptoms point to leaks or seal failures?

    Watch for unusual pressure changes, vent obstructions, and leaks at fittings. Also, look for odors, changes in buoyancy, and puddles around the tank. These signs can indicate a leak.

    What tools should you have on hand for leak inspection and testing?

    You’ll need bright lights, cameras, and ultrasonic gauges for inspections. Also, have sampling equipment and tools for maintenance. This includes torque wrenches, spare parts, and cleaning tools.

    What safety and confined-space equipment is required?

    Use gas monitors, certified lift equipment, and fall protection. Also, have breathing apparatus and PPE like coveralls and gloves. Always follow safety protocols and never enter a confined space without a plan.

    How do seals work and what types should you inspect?

    Seals like bolt and cable seals keep tanks closed. Check for damage, mismatched serial numbers, and signs of tampering. For transport, log and photograph seal serial numbers before and after transit.

    What are the recommended steps for inspecting tank seals?

    Visually check seals for damage and mismatched serials. Also, inspect fittings and gaskets. Use seal integrity testers and document every seal and replacement.

    How often should you inspect tanks and when should frequency increase?

    Inspect tanks at least once a year. Increase frequency for tanks in harsh environments or with aggressive chemicals. Follow EPA rules for underground tanks, which often require inspections every three years.

    What testing protocols should you follow beyond visual checks?

    Use ultrasonic testing and cameras for detailed inspections. Also, collect samples for testing when needed. Document all findings and measurements in a report.

    What preventive maintenance tasks reduce leak risk?

    Replace worn parts, maintain correct torque, and clear vents regularly. Also, ensure secondary containment is intact and apply protective coatings. Keep a spare-parts inventory and maintain clear records.

    How do environmental factors affect tank integrity?

    UV, temperature, and humidity can damage tanks. So can oxidation and contact with corrosive substances. Regular monitoring and protective measures can help prevent damage.

    When should you call professional leak detection services?

    Call experts for suspected leaks, wall-thickness loss, significant cracking, or contamination. They can also help with required inspections and specialized testing.

    What professional services do accredited firms provide?

    Accredited firms offer inspections, ultrasonic testing, and camera inspections. They also collect samples, replace parts, and provide detailed reports. They ensure compliance with regulations.

    How should you document inspections to maintain compliance?

    Create detailed reports with photos, measurements, and findings. Keep logs, repair histories, and spare-part inventories. Proper documentation shows you’re following rules and meeting contractual obligations.

    What immediate actions are required in an emergency leak or gas release?

    In case of a leak, evacuate the area and call emergency services and a leak detection company. Isolate the tank, stop flows, and secure the area to protect people and the environment.

    How can IoT and electronic seals improve leak and tamper detection?

    IoT sensors and electronic seals monitor tank conditions in real-time. They detect anomalies early, reduce response time, and create automated logs. This supports security and chain-of-custody during transport.

    What standards and tests are relevant to tank inspections?

    Follow EPA rules and applicable regulations. Use ASTM standards for testing, like ASTM D1998 for polyethylene. Ensure inspectors and labs follow recognized methods and certifications.

    What are the long-term benefits of routine leak checks?

    Regular checks protect public health, prevent contamination, and keep products safe. They also reduce theft, avoid costly cleanups, and support smooth operations. Predictive maintenance and timely repairs prevent major issues.

    What are the next practical steps after reading this FAQ?

    Create an inspection checklist and schedule regular inspections. Document findings and maintain records. Train staff in safety and consult experts for specialized testing. This ensures compliance and safety.

  • How to Pour Water into a Nano Tank Without Ruining the Scape

    How to Pour Water into a Nano Tank Without Ruining the Scape

    You love the neat, detailed look of your planted nano tank. In small setups, even a small splash can cause big problems. It can shift substrate, uproot plants, or cloud the water.

    Refilling a nano tank the wrong way can be a disaster. It can mess up your days or weeks of work. Disturbances can move sand or soil, scatter leaf litter, and bury carpeting plants. This makes your scape look messy and the water cloudy.

    But, experienced aquascapers have simple tricks to protect their layouts. They use a plate, a clear plastic sheet, or even a folded tissue over the substrate. These methods help disperse the water flow and cushion the impact. They keep hardscape and plants in place while adding water.

    In this guide, you’ll learn how to refill your nano tank step by step. You’ll get practical tips on topping off your nano tank. The goal is to keep your original layout and clear water. This way, your scape will stay exactly as you designed it.

    Understanding Your Nano Tank Setup

    A beautifully arranged nano tank setup showcasing a lush aquatic landscape filled with vibrant green plants, natural stones, and small driftwood pieces. In the foreground, clear water is angled to show the delicate details of the tank, emphasizing the fine pebbles and substrate beneath. Bright LED lighting illuminates the tank from above, casting soft reflections and highlighting the contrasting colors of the aquatic plants, while a gentle gradient in the background fades into blurred ambient decor, such as a clean countertop. The scene should elicit a tranquil and peaceful atmosphere, inviting viewers to appreciate the intricacies of nano aquascaping. The camera angle captures the tank from a slight elevation, ensuring a comprehensive view of both the aquatic flora and the subtle design elements within the aquascape, creating a harmonious and visually stunning composition.

    Before you refill your nano tank, it’s important to know each part. Start with the substrate. Options like Tropica Aqua Soil powder hold nutrients and shape water flow. Loose sand or fine gravel can shift if water hits it too hard.

    This matters when you refill and when you run filters or powerheads.

    Hardscape choices also affect water movement. Slate shards and bog wood alternatives create pockets and channels. These can trap or redirect flow.

    If you place tall pieces near an inlet, refilling may push water through narrow gaps. This can disturb plants or create cloudy water.

    Plant placement is key for refilling and ongoing care. Foreground carpet plants like Sagittaria repens root close to the substrate. Midground species like Anubias nana attach to wood and rock.

    Mosses and stem plants add structure and slow currents. When you refill, aim for gentle flow to avoid uprooting delicate stems.

    Lighting and CO2 systems shape growth and gas exchange. Custom LED floodlights or branded units help plants thrive. But CO2 delivery needs care.

    Use drop checkers and adjust gradually. Sudden CO2 or pH swings during refilling can stress fish and invertebrates. So plan water additions to keep parameters steady.

    Filtration type and flow pattern are key to nano tank care. Canister filters, hang-on-back units, and small sponge filters each move water differently. Powerhead placement and spray bars change surface agitation.

    Strong jets near the substrate will displace sand during a refill. So you may need to block or reduce flow temporarily.

    Tank specifics influence your approach. Note tank size and capacity. An AquaOne Nano60 holds around 100 liters, which changes the volume you replace and the refill speed.

    Check for overflows and inlet locations. Added water should follow predictable paths and avoid flooding stands or equipment.

    DIY modifications affect water dynamics. A copper gooseneck or homemade spray bar can soften incoming water. Custom LED mounts may alter where you can place tools while refilling.

    Test how these tweaks change circulation as part of routine nano tank maintenance. This helps protect hardscape and plants during refilling.

    Knowing your setup helps you choose the right tools for refilling a nano tank. A siphon, a turkey baster, or a soft tubing fed through a padded nozzle will reduce disturbance. Match your method to substrate type, hardscape stability, and plant sensitivity to keep the scape intact while you carry out nano tank care.

    Preparing for Water Refilling

    A well-organized and tidy aquarist’s workspace, showcasing a person dressed in modest casual clothing, preparing for water refilling into a nano tank. In the foreground, a clear, carefully labeled water container sits ready to be filled, while tools like a siphon and measuring cup are neatly arranged beside it. The middle layer features the nano tank itself, beautifully aquascaped with vibrant green plants and colorful pebbles, reflecting the light. The background includes shelves lined with aquarium supplies, softly lit by natural light streaming in through a nearby window, creating an inviting and productive atmosphere. The scene conveys a sense of focus and care essential for maintaining an aquarium's balance.

    Before you start, gather the right tools. You’ll need a clean plate or plastic sheet, a small bowl, siphon tubing, a measuring cup, dechlorinator, and water conditioner. Also, a bucket, a hose with flow control, towels, and gloves. Having these ready makes the job faster and keeps your plants and livestock stress-free.

    Prepare replacement water that matches the tank’s temperature and chemistry. Use your aquarium heater or let water sit until it’s the right temperature. Treat tap water with a dechlorinator like Seachem Prime or API Tap Water Conditioner. If using RO/DI water, mix in the right remineralization solution to restore hardness and trace elements.

    Inspect the tank before refilling. Check the substrate and plants for loose pieces that might float up. Reduce filtration or powerhead flow to lower current and avoid substrate lift. If you run CO2, confirm delivery is stable and check your drop checker; a yellowish-green tone often signals CO2 is too high and needs adjustment.

    • Have a plate or plastic sheet ready to catch incoming water. Place it near the substrate so new water pours gently onto the plate and disperses without stirring the scape.
    • Use a small bowl for delicate flows when you need precise control over where water enters the tank.

    Organize your workspace. Keep towels and buckets within reach to catch spills. Set aside a spot for removed equipment like a surface skimmer or spray bar so those pieces stay dry and out of the way. Staying organized prevents accidents and makes refilling a nano tank easier.

    Follow a simple routine when topping off: verify water chemistry, reduce flow, place the plate, pour slowly, and monitor plants and substrate for movement. These steps help you avoid sudden changes and show how to top off a nano tank without disturbing the aquascape.

    For quick reference, remember these preparing for water refilling checkpoints: tools ready, water matched, pre-checks done, plate in place, and workspace tidy. Using these practical tips for refilling a nano tank keeps your tank stable and your scape intact.

    Techniques for Refilling Water

    Follow a clear, calm protocol for step-by-step nano tank refilling to protect substrate, plants, and livestock. Start by turning down or turning off strong pumps and powerheads to reduce internal turbulence.

    Place a plate, plastic sheet, or folded tissue where you plan to pour. Angle it so water runs down gently onto the surface, then disperses into the tank. This simple barrier is one of the best ways to refill a nano tank without disturbing the scape.

    1. Pour slowly and steadily using a measuring cup or small pitcher for precise control.
    2. For larger top-offs use a hose with flow control so you can reduce flow to a trickle.
    3. If you perform a partial water change, siphon out the desired volume first with siphon tubing and a gravel vacuum.
    4. Refill slowly while watching substrate and plant positions; pause if anything moves and adjust your angle or flow.
    5. Restore pumps gradually after the water level is stable to prevent sudden suction shifts.

    For very gentle alternatives, aim a low-flow hose at an overturned bowl inside the tank to diffuse flow. Use a turkey baster for ultra-precise local top-offs when you need to target a small area.

    Avoid direct high-velocity pours onto substrate or plants. Fast streams will scatter gravel and uproot stems, which creates extra work and stress for your animals.

    When you follow these steps for how to top off a nano tank, you reduce risk and keep the aquascape intact. Small, steady moves protect roots and keep water parameters stable while you work.

    Protecting Your Aquascape While Refilling

    First, use physical barriers to protect plants and decorations. Place heavy plates under big rocks and driftwood to prevent them from moving. Use small rocks or acrylic dividers to block water from reaching the foreground plants.

    When adding water, do it slowly to avoid disturbing the plants and substrate. Cover the area with a clean plastic or tissue to let water trickle in gently. Practice this until you can pour water without splashing.

    Before adding water, adjust your equipment settings. Turn down the flow from return jets or spray bars to prevent plants from being uprooted. Also, lower the CO2 injection to avoid sudden pH changes and keep the water stable.

    Don’t do a lot of pruning or replanting right before refilling. Loose leaves and cuttings can cloud the water and float on the surface. Wait until the water has settled to do any major trimming.

    When you top off the tank, you might see surface scum. Many people notice this before they install a skimmer. Using a small surface skimmer helps manage this scum and keeps the water gas exchange efficient.

    Make smart choices when designing your tank to make maintenance easier. Choose heavier materials like slate or denser stones for your decorations. This reduces the chance of them moving when you work inside the tank.

    Follow a checklist every time you refill your tank. Slow down the return pump, place barriers, reduce CO2, and pour water gently. These steps help protect your delicate setup and make maintenance easier.

    See nano tank maintenance as a skill you can improve. Practice refilling on the bench to get better at pouring water. This will help you feel more confident and make refills safer and smoother.

    Testing Water Parameters Post-Refill

    After changing the water in your nano tank, it’s important to check a few key things. First, quickly check the temperature and pH levels. Try to match the new water to the tank’s temperature to avoid stressing your plants and fish.

    Then, do a more detailed test 30–60 minutes after adding new water. Wait up to 24 hours and test again to catch any late changes. This step is key for keeping your nano tank healthy.

    • Critical parameters to test:
      • Temperature
      • pH
      • Ammonia (NH3/NH4+)
      • Nitrite (NO2-)
      • Nitrate (NO3-)
      • GH and KH (general and carbonate hardness)
      • CO2 stability (via drop checker)

    For planted nano tanks, aim for stable and modest values. Keep the temperature close to what it was before. Try to keep pH changes small, no more than 0.2–0.3. Ammonia and nitrite should be zero, and nitrate levels should be low to moderate.

    Match the GH and KH levels to what your plants and fish need. Soft-water shrimp like Neocaridina need lower GH, while many stem plants prefer moderate GH. KH helps keep pH stable, so avoid sudden drops during a water change.

    CO2 levels can change after adding new water. Check your drop checker color after things settle. If it shows too much CO2, slow down the bubbles and adjust slowly. For example, you might lower to about 1.4 bubbles every 2 seconds, then fine-tune over hours.

    1. Immediate checks (0–5 minutes): temperature, pH.
    2. Stabilization check (30–60 minutes): ammonia, nitrite, nitrate, GH/KH, CO2 drop checker.
    3. Follow-up (within 24 hours): repeat key tests to spot delayed swings.

    If temperature or pH changes too much, make small adjustments. Use a partial water change with water that matches the tank’s temperature and chemistry, or adjust the heater slowly. If ammonia or nitrite show up, cut back on feeding and do a partial water change right away. Treating problems too aggressively can harm good bacteria, so be careful.

    Regular testing after each water change helps you understand your tank better. This understanding lets you fine-tune dosing, CO2, and maintenance. Good testing habits are key to keeping your nano tank healthy for a long time.

    Keeping Your Nano Tank Clean

    Keeping your nano tank clean is easy with small, regular tasks. Skim the surface daily to remove oil film and debris. Use a small net or skimmer for scum until you get a permanent one.

    Trim plants often to avoid too much detritus. Short trims prevent cloudiness and reduce disturbance. Start with hardy plants like Java moss or Anubias if you’re new.

    Vacuum gravel during water changes, but do it slowly. This avoids uprooting plants. Use a narrow siphon and lift substrate a little at a time.

    • Clean filters gently: rinse sponges in tank water and avoid scrubbing biological media.
    • Inspect and reorient spray bars or powerheads to reduce substrate disturbance.
    • Perform frequent small top-offs to limit large refills that could shift plants and decor.

    Direct flow downward with spray bars to help CO2 dissolve. This reduces substrate migration. Balance circulation with gentle flow near the bottom.

    Plant placement is key for long-term care. Use heavy-rooting plants to anchor the substrate. Group taller plants in the back for easy trimming.

    Follow a weekly maintenance checklist: skim, spot vacuum, trim plants, and rinse filters. This keeps water clear and reduces big cleanings.

    By following these routines, keeping your nano tank clean becomes a part of your hobby. Small, consistent steps protect your aquascape. This makes refills and daily care easier, keeping plants and visuals in top shape.

    Establishing a Routine for Water Changes

    Make a schedule for water changes to keep your nano tank stable. For planted nano tanks, small water changes of 10–25% weekly are best. The number of fish, plants, and nutrients will tell you how often to change the water.

    Choose the change volume based on nitrate levels, debris, and bioload. A small water change is better for beneficial bacteria and your plants. If nitrate levels go up or there’s a lot of debris, increase the change amount a bit. But if levels are low and plants are doing well, stick to small changes.

    Do maintenance when the tank is calm. Don’t do big water changes right after replanting, pruning, or cleaning the filter. Change water at the same time every day to keep biological rhythms and reduce stress on your pets.

    Get your replacement water ready before starting. Make sure it’s the same temperature and use a dechlorinator like Seachem Prime. Let it sit for a bit to reach room temperature. Have a siphon, bucket, and a diffusion plate or spreader ready to pour gently and protect your plants.

    • Use a diffusion plate or a rock to break flow and avoid disturbing substrate.
    • Top off small amounts more often to limit parameter swings.
    • Store pre-mixed water in a spare container to speed routine work.

    Keep a simple log of dates, volumes changed, and parameter readings. Note nitrate, ammonia, and pH after a refill for several weeks to spot trends. This record will help you find the best routine for your tank.

    Stick to your plan but be ready to adjust. If algae blooms or your pets seem stressed, change the frequency and volume. Over time, you’ll find the perfect balance for water quality and plant health, making water changes easier and safer.

    Troubleshooting Common Issues

    If you notice substrate or plants moving after refilling, use tweezers to gently move them back. Add heavy decorations like lava rock or small stones to keep plants in place. If plants collapse, do a controlled siphon and replant carefully to avoid disturbing the layout.

    Cloudy water after refilling might clear up on its own. Let it settle or use your filter to remove particles. Make sure your filter is clean and working well. Use a clarifier only if needed. If agitation caused the cloudiness, stop refilling and let your filter work its magic.

    Scum on the water surface can come from oils or too many organics. Skimming helps a lot. Consider adding a surface skimmer or adjusting your return flow to reduce scum. Also, check how much food you’re adding to avoid uneaten food at the top.

    Changes in CO2 or pH can happen after adding new water. Reduce agitation and match the new water’s chemistry to your tank. Adjust CO2 slowly while watching a drop checker. If it shows yellowish-green, lower the bubble rate until it’s right.

    Too much flow can move substrate during or after refilling. Try redirecting jets, using a spray bar, or lowering the pump speed. This helps keep the substrate and plants in place.

    • Quick fixes: reposition plants with tweezers, slow down refill flow, let the filter clear cloudiness.
    • Stability measures: add weightier decor, use spray bars, match water chemistry before topping up.
    • When to get help: persistent unexplained parameter swings, widespread plant collapse, or mass animal stress should prompt consultation with a local aquarium shop or an experienced aquascaper.

    Keep a troubleshooting nano tank checklist handy. This way, you can quickly solve nano tank refilling problems. Use these tips to refill your nano tank without issues and keep your aquarium healthy and stable.

    Final Thoughts on Refilling a Nano Tank

    When refilling a nano tank, start with careful planning and a gentle touch. Make sure the new water’s temperature and chemistry match the tank’s. Use a plate, overturned bowl, or tissue to soften the water flow.

    Pour the water slowly to avoid upsetting the substrate, plants, and fish. This helps keep your tank’s ecosystem balanced.

    For a stable water environment, do small water changes often. This method reduces stress on your plants and animals. After adding water, check the pH, ammonia, nitrates, and CO2 levels. Keep a log to track changes and improve your routine.

    The right method for refilling your nano tank depends on its design and your tools. Try using an overturned bowl, a low-flow hose, or a turkey baster. This will help you find the best way to refill your tank, whether it has slate, bog wood, or soil.

    Watch for scum on the water’s surface. If it’s a problem, consider using a surface skimmer.

    Try using a plate or bowl for your next water refill. See how it helps keep your aquascape safe. Making small changes and keeping records will help you maintain a healthy nano tank over time.

    FAQ

    What is the best way to refill a nano tank without disturbing the substrate?

    Use a clean plate or plastic sheet to diffuse the water. Angle it at the pour point. Pour slowly with a small pitcher or a hose set to trickle.

    What tools should I have ready before refilling?

    Get a clean plate or plastic sheet, a small bowl or measuring cup, siphon tubing, a gravel vacuum, a bucket, a hose with flow control, towels, gloves, dechlorinator or water conditioner, and pre-mixed replacement water.

    How do I match the replacement water to my tank?

    Let the replacement water reach tank temperature. Treat tap water with a dechlorinator. If using RO/DI water, remineralize it to match GH/KH. Test a sample before pouring.

    Should I turn off filters and powerheads when refilling?

    Turn them down or off briefly to reduce turbulence. Restore pumps gradually after the water level stabilizes.

    Is using a hose safe for larger top-offs?

    Yes — use a hose with flow control. Aim at a diffusion surface or an overturned bowl in the tank. Keep the flow very low.

    How do I protect carpet plants like Sagittaria repens during a top-off?

    Use a diffusion plate or temporary acrylic divider to shield the carpet. Reduce pump flow and pour very slowly. Add small, weight-stable rocks at the carpet edges if needed.

    What should I test right after refilling?

    Check temperature and pH immediately. Then test for ammonia, nitrite, nitrate, GH, KH, and CO2 (via drop checker) within 30–60 minutes and again over the next 24 hours.

    My water turned cloudy after refilling — what now?

    Fine particles often clear as mechanical filtration runs. Let the filter work for several hours to a day. Avoid over-agitating; use a clarifier only if necessary.

    How does CO2 affect refilling and post-refill stability?

    Surface agitation from refilling can drive CO2 out, causing pH shifts and plant stress. Reduce turbulence while refilling and monitor the drop checker. If CO2 was previously high, reduce bubble rate gradually.

    How often should I perform water changes on a planted nano tank?

    Perform weekly small changes (10–25%) for better stability. Frequency depends on stocking, plant load, and nutrient levels; log tests and adjust.

    What are quick fixes if plants or hardscape get displaced?

    Reposition plants with aquascaping tweezers, add weightier decor to hold edges, or perform a controlled partial siphon and replant. For large disturbances, work slowly and use gentle water movement.

    Can I use a turkey baster for refilling?

    Yes — a turkey baster is excellent for ultra-precise local top-offs. It’s best for small volume adjustments.

    When should I consider installing a surface skimmer?

    If you see persistent surface scum despite manual skimming, a surface skimmer will remove films and improve gas exchange. It also helps CO2 stability and reduces frequent manual cleaning.

    How do powerhead and spray bar placement affect refilling?

    Downward-pointing spray bars help dissolve CO2 and reduce substrate disturbance. During refilling, turn down or redirect jets to avoid blasting substrate. Permanent placement that avoids direct jets at carpet zones reduces future maintenance risks.

    What’s the safe pH and temperature variance after a refill?

    Aim to keep temperature within a degree or two of the tank’s prior temperature and pH within about 0.2–0.3. Larger, sudden swings can stress plants and animals; correct small mismatches slowly.

    How do I decide how much water to change?

    Base the volume on nitrate levels, visible detritus, and bioload. Small frequent changes reduce disturbance. If nitrates are high or detritus plentiful, a larger change (25%) may be needed, but perform it gently with diffusion techniques.

    What should I log after a water change?

    Record the date, volume changed, water source and treatment, temperature, and key parameter results (pH, ammonia, nitrite, nitrate, GH/KH). This log helps you track trends and fine-tune your schedule.

    Who should I contact if I have persistent problems after refilling?

    If you see ongoing stress, unexplained parameter swings, or mass plant/animal decline, consult your local aquarium shop or an experienced aquascaper for hands-on help.