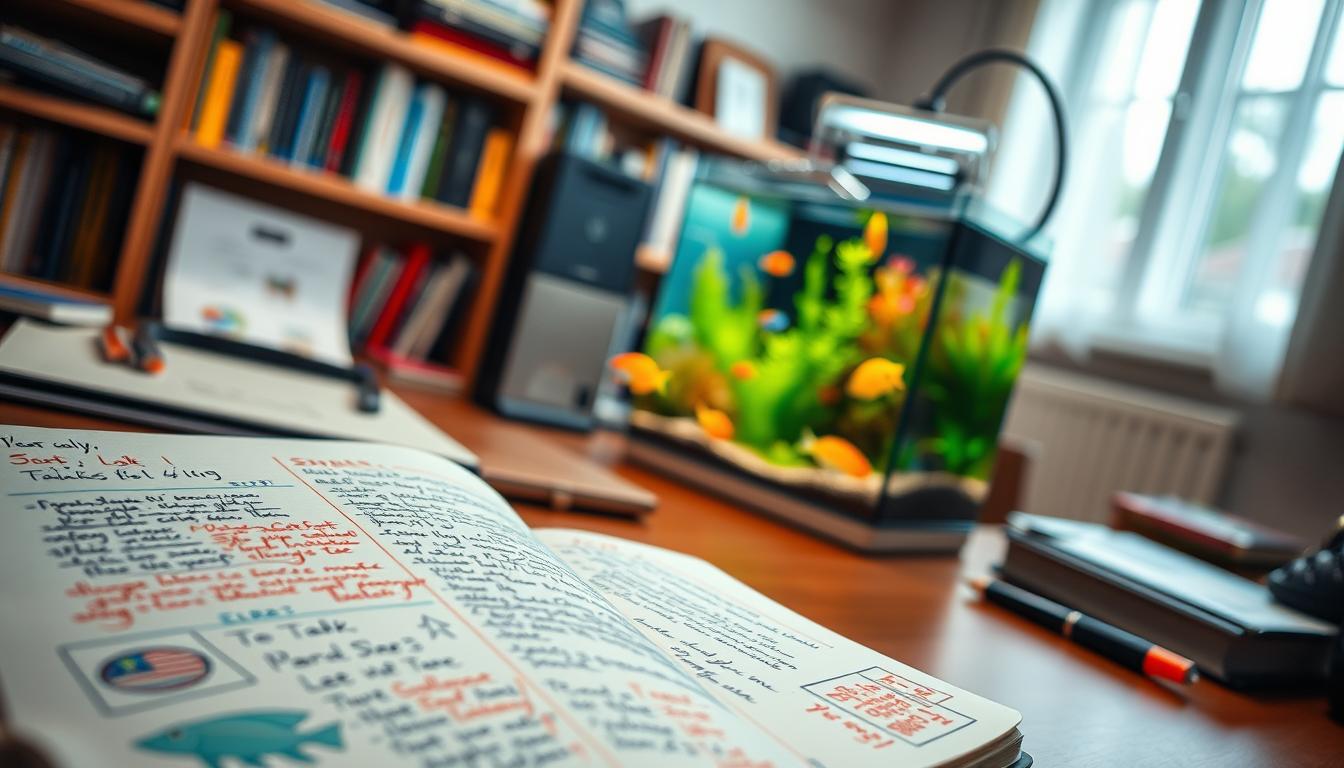
You want a small, beautiful aquarium without spending too much. This guide will help you start a nano tank on a budget. It shows a simple step-by-step guide to set up a tank for under $100.
Your aim is to create a compact aquarium. You can choose a kit or build one yourself. Focus on stability and the health of your fish. Use brands like Fluval, Waterbox, and AquaIllumination for reliable gear.
We’re talking about tanks under 20 gallons for freshwater or basic saltwater setups. Some people even go up to 30 gallons. These tanks save space but need careful planning due to quick changes in water conditions.
This guide will cover what a nano tank is and how to pick the right size. You’ll learn about essential equipment, affordable decor, and stocking choices. We’ll also talk about live plants, setting up your tank, maintenance, and troubleshooting. It’s all about creating a low-cost nano tank that’s both functional and healthy.
Along the way, you’ll find specific steps, recommended brands, and ways to save money. Your budget nano setup will stay in top shape without costing too much.
What is a Nano Tank?

A nano tank is a small aquarium that holds less than 20 gallons of water. Some people include tanks up to 30 gallons in this category. These tiny aquariums are perfect for small spaces like tiny homes, apartments, and desktops. They offer a beautiful living art piece without taking up much space.
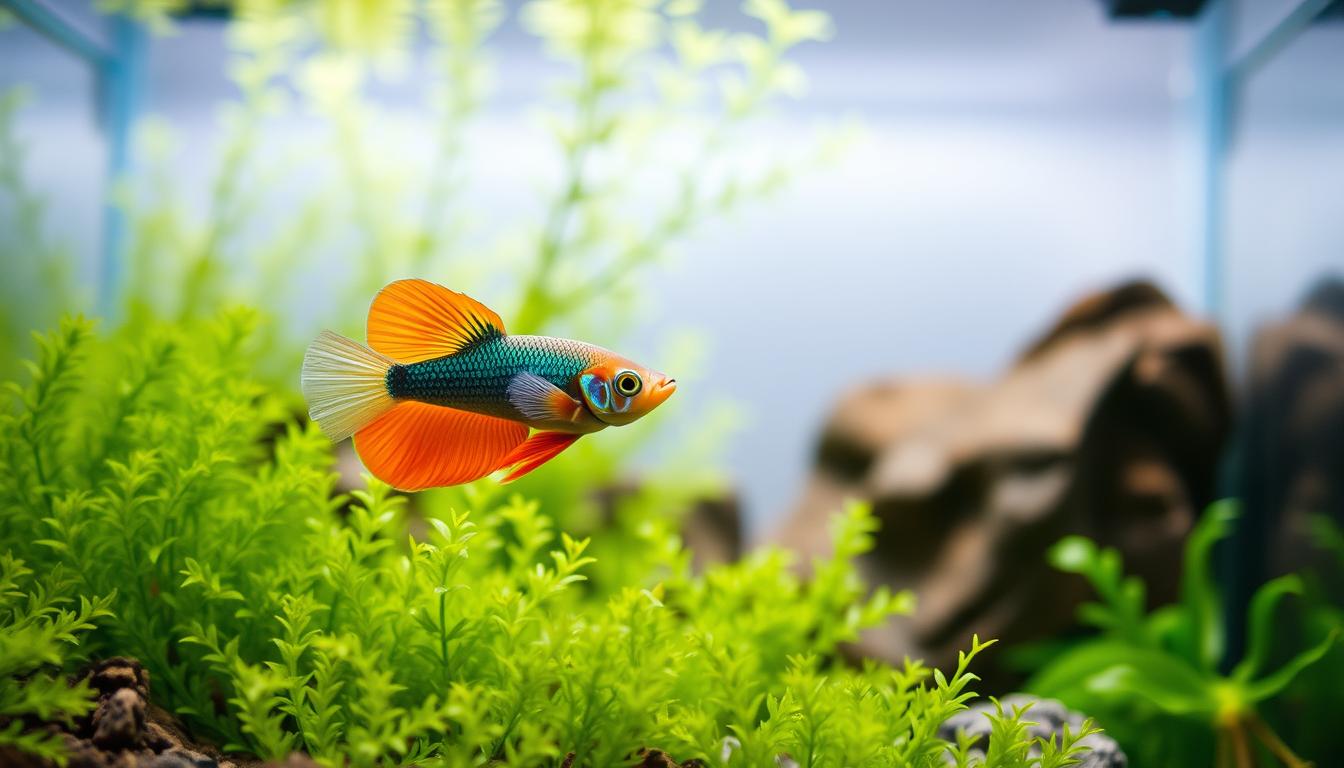
Starting a nano tank is affordable. It’s a great way to begin with aquascaping or reef keeping without spending a lot. You can create stunning freshwater scenes with small fish, shrimp, and snails. Or, you can try a saltwater nano reef with tiny clownfish, gobies, blennies, and small corals.
But, small tanks come with their own set of challenges. They have less water, which means temperature and chemistry changes faster. This makes it harder to keep the tank stable than larger ones. You’ll need to test the water more often and do regular maintenance to prevent sudden changes that stress your fish.
- Livestock options: small freshwater fish, shrimp, snails.
- Saltwater choices: dwarf clownfish, gobies, blennies, reef corals.
- Practical tip: larger nano tanks (10–20 gallons) offer better stability than 2–3 gallon extreme nanos.
When choosing your first tank, consider its size and your goals. A compact aquarium kit can be more affordable and simpler. Choose a tank and fish that are easy to care for. This way, your budget nano setup will be a reliable and enjoyable part of your home.
Choosing the Right Tank Size

Larger tanks are more stable. For beginners, aim for a 10–20 gallon tank. This size helps you learn without sudden changes in water quality or temperature.
Small tanks, like 2–3 gallons, are for experts. They need constant care. Problems can hide and then become serious. If you pick a small tank, test the water often and change it frequently.
Think about the space and your budget before buying. Measure where the tank will go. Consider the ongoing costs. Choose fish, shrimp, or corals that fit your tank size.
- Freshwater beginners often find 10 gallons to be a forgiving starting point.
- For saltwater or nano reef, 10–20 gallons supports small clownfish, gobies, blennies, shrimp, and many soft corals.
- Avoid tangs, angelfish, and triggerfish in tiny systems because they grow too large.
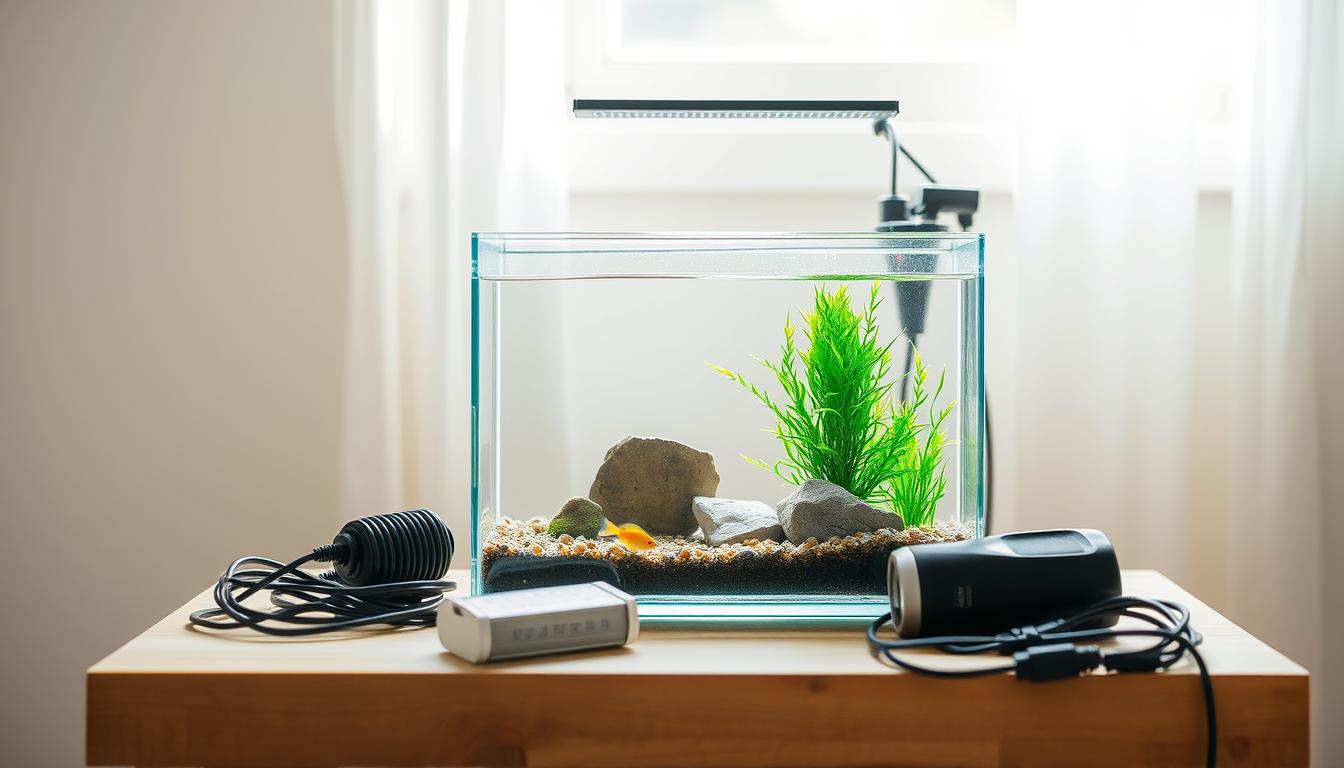
AIO kits from Fluval, Waterbox, and Innovative Marine are easy to set up. They come with built-in filters and clear instructions. An AIO is a great choice for a simple, budget-friendly nano tank.
Custom tanks offer more flexibility but can be more expensive and complex. If you like DIY, a custom tank might be for you. For a hassle-free start, an AIO is a good option.
Match your tank size to your plans and skills. Choose a 10–20 gallon tank if you can. An AIO is simple and affordable. Tiny tanks are for experienced hobbyists who can watch water chemistry closely.
Essential Equipment for Your Setup
Begin with the basics to keep life thriving. Your tank can be an AIO or a standard glass aquarium. A reliable heater with a thermostat is key. Choose filtration that fits your space, like HOB, sponge, or AIO.
Lighting is vital for plants and corals. The Kessil A80 is great for small setups. Budget LEDs are okay for low-light plants. But, avoid tiny units without spectrum control.
For circulation, a small powerhead or a USB compact pump is perfect. They provide gentle flow without being too strong.
- Tank: AIO or standard
- Filtration: Fluval or AquaClear are dependable entry-level picks
- Heater: thermostatic unit sized for your volume
- Lighting: LED suited to plants/corals
- Water circulation: small powerhead or pump
- Substrate and decor: live rock or dry rock for saltwater
- Test kits: ammonia, nitrite, nitrate
- Salinity tool: refractometer for marine tanks
Tools that speed up setup and maintenance are helpful. A refractometer prevents salt guessing in saltwater tanks. Test kits catch problems early. A small gravel vacuum makes water changes quick.
Optional gear can enhance your tank. A nano-specific protein skimmer keeps marine tanks clear. Bacterial starters like FritzZyme or Bio-Spira speed up cycling. These extras are great with an economical nano tank kit for quick results.
Buy wisely to stay within budget. Focus on a good heater and filtration over fancy decor. Look for compact aquarium kits or used AIOs to save money. Choose multifunction gear to reduce parts and complexity.
Follow safety rules to protect your equipment and fish. Don’t run filters or heaters dry. Install hardware after hardscaping and before filling the tank. Only power devices once submerged or as the manufacturer says. These steps keep your setup safe and extend gear life.
Finding Budget-Friendly Decorations
Begin with dry rock like Dragon Stone or Seiryu Stone. These rocks are affordable and easy to shape. They also let you seed the tank with bottled bacteria. Using local stones or driftwood can save money and add a unique touch to your tank.
Live rock boosts biological filtration and can start your tank quickly. It might come with hitchhiking critters, though. Mixing live rock with dry rock balances cost and function in a budget-friendly tank.
Design your aquascape for both beauty and ease of maintenance. Create arches, caves, and overhangs for flow and hiding spots. Make sure to leave a 1–2 inch gap between rock and glass for better water flow. This thoughtful design saves on cleaning time and costs.
- Use thrift-store finds that are aquarium-safe after thorough cleaning.
- Check classifieds or aquarium club swaps for gently used pieces.
- Buy only what adds structure or biological value; skip purely ornamental clutter.
Place substrate after arranging the hardscape. Pour water over a plate or cup while filling to avoid disturbing sand layers. This method keeps your layout intact and prevents cloudy water, making your tank look polished on a budget.
Choose a cleanup crew that fits your tank’s needs. Nerite snails, Amano shrimp, and small gobies are good at controlling algae and detritus. A well-chosen crew lowers maintenance time and saves money on cleaning supplies.
Reuse materials, shop local, and focus on function. Smart choices in hardscape, stock, and layout help you create a beautiful, efficient tank. You can do this without sacrificing health or enjoyment in the long run.
Selecting the Right Substrate
Choosing the right substrate is key for your nano tank. It affects plant growth, water quality, and upkeep. For a budget setup, decide if you want live plants or a simple display. You’ll choose between inert sand or gravel, nutrient-rich planted substrate, or bioactive/seeded substrate with beneficial bacteria.
For a planted freshwater nano, go for nutrient-rich substrates for heavy planting. Use inert sand or gravel with root tabs for plants like Vallisneria. Beginners can opt for easy plants like Anubias and Java Fern, which attach to rocks or driftwood and don’t need nutrient substrate.
Sand beds need careful handling in small tanks. Keep the sand depth to 1–1.5 inches to prevent anaerobic pockets and trapped debris. In freshwater tanks, avoid deep substrate to avoid hiding waste and causing smells or ammonia spikes.
Preparation varies by substrate. Rinse inert sand and gravel well to remove dust before adding water. Don’t rinse bioactive or seeded substrate; it has live bacteria you want to keep. For saltwater, choose live sand or dry aragonite sand. Rinse dry sand to reduce clouding, then add rock and mix gently to stabilize the setup.
- Inert sand/gravel: low cost, simple care, needs root tabs for heavy planting.
- Nutrient substrates: best for planted freshwater nanos, higher upfront cost but boosts plant health.
- Bioactive/seeded: speeds cycling with beneficial bacteria, avoid rinsing.
Save money by buying only what you need. Measure your tank’s floor area to figure out volume, then order smaller bags. You can also ask local aquarists or stores for leftover bags. Mix inexpensive aragonite with live sand for a balanced saltwater base.
For a successful small tank substrate choice, match it to your plant and livestock goals. A thoughtful selection makes maintenance easier and supports a healthy, attractive nano aquarium. It’s a smart choice for a budget nano setup.
Choosing Your First Fish
Start slow and stock conservatively when you plan a budget nano setup. Small tanks have limited filtration and oxygen. Follow the one snail or clean-up crew per two gallons guideline to keep populations balanced.
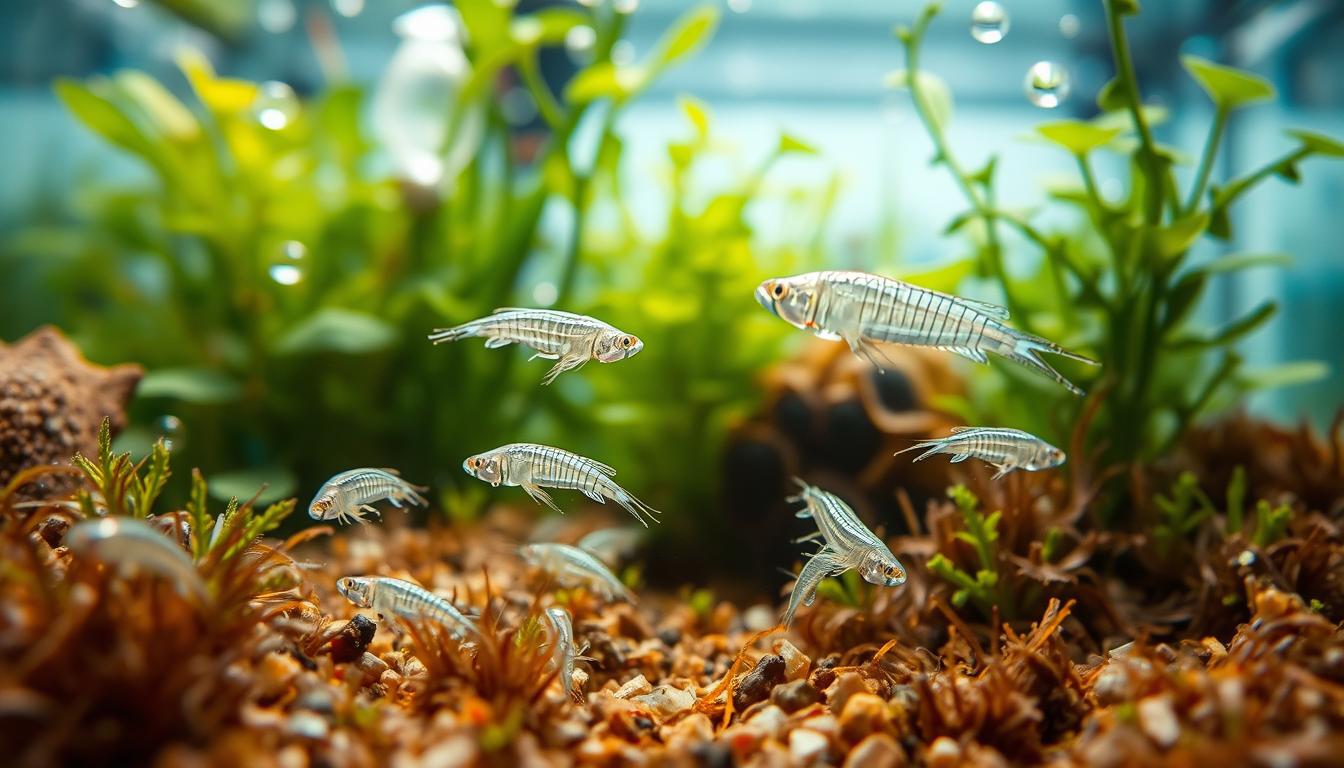
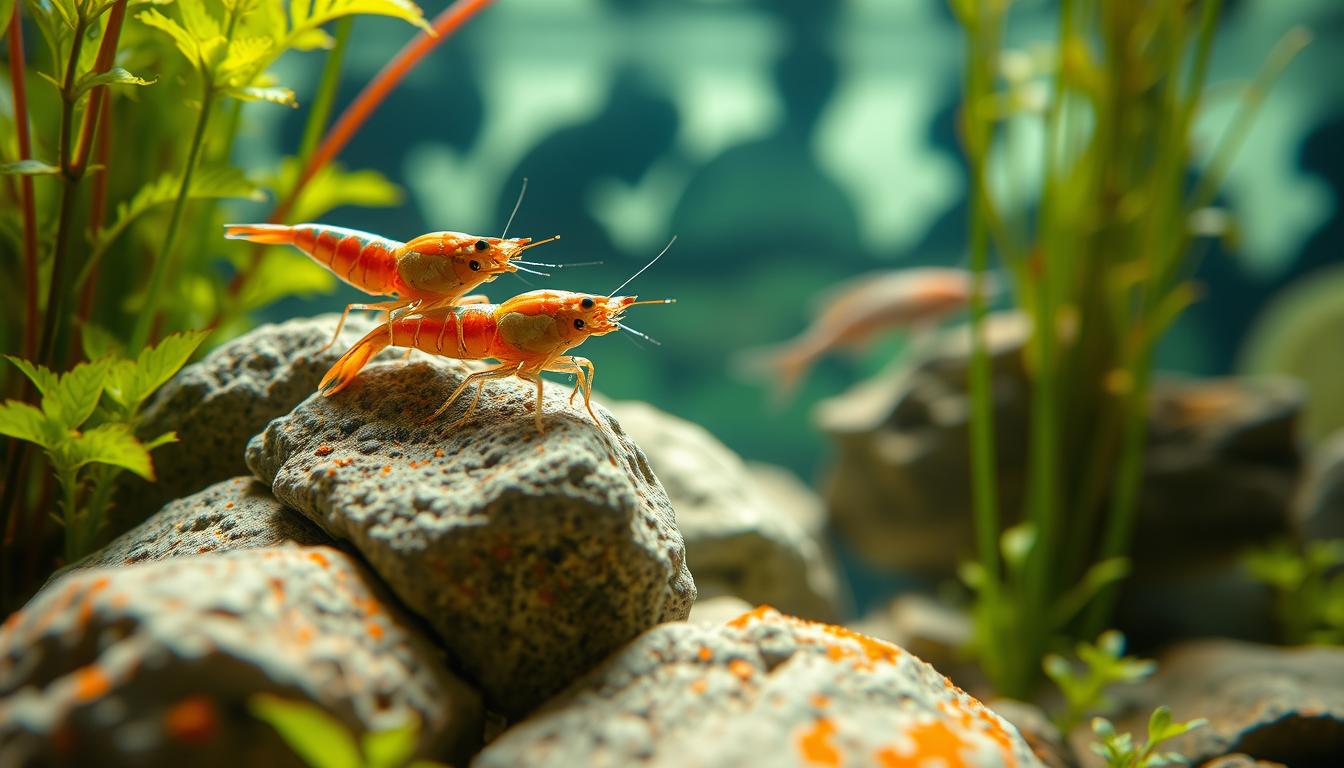
Pick hardy freshwater starters if you want simplicity. Ember tetras, neon tetras, small rasboras, and a single male betta can thrive in modest systems when you avoid overcrowding. Guppies are colorful, but watch breeding. Cherry shrimp work great as a low-cost clean-up crew where compatible.
For a nano tank setup on a budget that leans marine, choose species with low bio-loads. Small clownfish, gobies, blennies, and cleaner shrimp suit 10–20 gallon nanos. Stay away from tangs, large angelfish, and triggers. Add marine snails like Nassarius or Cerith and a few hermit crabs gradually for algae control.
- Freshwater options: ember tetras, small rasboras, guppies (controlled), single betta.
- Marine options: small clownfish, gobies, blennies, cleaner shrimp, Nassarius snails.
- Clean-up crew rule: one snail or equivalent per two gallons to prevent overpopulation.
Acclimation matters for survival. Float sealed bags for about 15 minutes to match temperature. Add small amounts of tank water into the bag at intervals for 20–30 minutes before releasing livestock. Never pour bag water into the tank to avoid introducing pathogens or ammonia spikes.
Aim for patience. Let the tank fully cycle before adding delicate corals or ornamental shrimp. A well-cycled tank reduces stress, disease, and losses, making your nano tank setup on a budget more sustainable.
Adding Live Plants to Your Setup
Live plants turn a budget-friendly nano tank into a thriving ecosystem. They clean the water by absorbing nitrates. They also provide hiding spots for shrimp and small fish, and help control algae.
Begin with easy plants like Anubias, Java Fern, Java Moss, and Cryptocoryne. These plants are great for adding height in the background. They don’t need much light and fertilization, making them perfect for a budget-friendly tank.
Consider the substrate before planting. Plants like crypts and stem varieties need a nutrient-rich substrate or root tabs. But, Anubias and Java Fern can attach to rocks or driftwood, saving money.
Choose an LED light that promotes plant growth. Entry-level LEDs work well for low-light plants without breaking the bank. For more light, consider premium models like AquaIllumination Freshwater Blade or Prime.
Use a timer to set a light cycle of 6–8 hours a day. If algae is a problem, shorten the light hours before using chemicals. Skip CO2 for now; it’s not needed for most beginner setups and can be tricky to manage.
- Planting technique: use tweezers for tissue-culture plants.
- Layout tip: place tall species in back, low growers in front.
- Spacing: leave about two inches between plants to allow growth.
By planning your aquascape carefully, your nano tank with live plants will thrive. This setup is not only beautiful but also supports fish and invertebrates. It’s a great way to enjoy an affordable nano tank or a budget-friendly nano tank project.
Setting Up Your Nano Tank
Begin by arranging the hardscape in your small tank. Start with rocks and big decorations, then add substrate around them. Bioactive substrates don’t need rinsing, but inert ones should be rinsed well to remove dust.
Next, install filters, the heater, and pumps. Do this after setting up the hardscape but before adding water. Make sure not to turn on pumps or heaters until they’re fully covered by water to avoid damage.
- For a saltwater nano tank on a budget, mix RODI/DI water with reef salt mix in a bucket.
- Use a bucket heater and a powerhead to ensure even temperature and salinity.
- Check specific gravity with a refractometer and aim for about 1.025 for reef tanks.
When adding water, pour it slowly through a small plate or cup on the substrate. This helps avoid disturbing plants and keeps the water clear.
Start the nitrogen cycle before adding fish. You’ll see an ammonia spike, then nitrite, and then nitrate levels rise. Use pure ammonia, raw shrimp, or products like FritzZyme or Bio-Spira for cycling.
Test for ammonia, nitrite, and nitrate every 2–3 days during the cycle. Keep going until ammonia and nitrite are zero and nitrate levels drop within 24 hours after adding ammonia.
- Once the cycle is done, do a big water change, about 50%, to lower nitrates.
- Add a small clean-up crew first to help establish biological balance.
- Slowly introduce hardy corals or fish over several weeks to avoid overloading the system.
Being patient and observant is key for a successful nano tank setup on a budget. Check for leaks, ensure stable temperature and flow, and monitor water parameters closely before adding more fish.
By following these steps, your nano tank setup on a budget can thrive. View it as a long-term project. This approach will help you enjoy a healthier tank with less stress for your new fish.
Maintaining Your Nano Tank
Check your tank every day to keep it healthy. Look for signs like heavy breathing, being very tired, or scratching. Feed your fish just enough and add fresh water as needed.
Use a protein skimmer? Empty it daily or when it’s full.
Weekly tasks are key to keeping your tank clean. Test the water for ammonia, nitrite, nitrate, and pH. For saltwater tanks, check the salinity too.
Clean the mechanical filter media and wipe off algae. Plan to change 10% of the water each week or 20% every two weeks.
- Use a gravel vacuum or siphon to remove detritus during water changes. The Python Pro-Clean Gravel Washer is a reliable choice for quick, mess-free siphoning.
- Record test results so you can spot trends before problems escalate. A simple log helps with long-term stability.
Monthly, replace filter cartridges and media. Check and clean pumps and powerheads. Also, check on your fish and remove any that are sick or stressed.
Keep the temperature steady for your tank’s health. Most reef systems prefer 76–78°F. Monitor the salinity in saltwater tanks. Keep the lighting schedule consistent and feed your corals extra food if needed.
Regular care makes your nano tank reliable and fun. Good maintenance means fewer surprises and a thriving tank without spending a lot.
Troubleshooting Common Issues
Act fast if you see algae blooms. Reduce light, do more water changes, and add algae-eating creatures. Use phosphate removers if needed. These steps help control algae in your budget nano setup.
Ammonia or nitrite spikes mean trouble. Stop adding fish and test water daily. Do partial water changes to lower toxins. Use bottled bacteria to speed up the tank’s cycle. Check your filter media and pump for any blockages.
Temperature swings stress your fish. Make sure your heater is working right. Use reliable heaters like Eheim or Cobalt. Keep your tank away from drafts and direct sunlight.
Cloudy water might mean new substrate or rocks. Let it settle for a few days. Use mechanical filter media and do gentle water changes. Rinsing substrate before use can prevent cloudiness.
Stressed fish or corals need attention. Review how you acclimated them. Float them, then mix tank water slowly. Test water parameters and quarantine new fish to catch diseases early.
Equipment failure can be a disaster. Keep spare parts for air pumps, powerheads, and timers. Never run pumps dry and replace worn parts early. A checklist and spare parts box help in emergencies.
- Algae control: reduce light, increase water changes, add cleanup crew.
- Ammonia/nitrite: stop stocking, test often, use bottled bacteria, partial changes.
- Temperature: check heater quality, use controllers, avoid vents and sun.
- Cloudy water: allow settling, use mechanical media, rinse substrate beforehand.
- Stress and disease: acclimate slowly, verify water parameters, quarantine new arrivals.
- Equipment: keep spares, monitor pumps, replace worn parts early.
Use this guide to keep your nano tank healthy. Small fixes early on prevent big problems. This way, your budget nano setup stays reliable.
Understanding the Costs Beyond Setup
After buying your tank, you’ll face ongoing expenses. You’ll need to buy test kits and replacement chemicals regularly. If you use RODI water, you’ll need to get a unit, buy cartridges, or go to a store for affordable RODI.
Marine tanks require salt mix and regular water top-offs. Filter media and cartridges will need to be replaced. Pumps, heaters, and lights use electricity, which can increase your bills. Fish and invertebrate food is a regular expense. You’ll also need to replace impellers and small parts.
Some items are one-time buys, but you’ll need to replace them periodically. You might upgrade your lighting or add a protein skimmer as your tank grows. Buying extra live rock or corals is common when you expand your tank. These purchases are less frequent but can be costly.
To save money, buy test reagents in multipacks and larger bags of food. Getting RODI water locally can save you money on cartridges. Join aquarium clubs or Facebook groups for equipment swaps and local classifieds. Buying used gear from trusted sellers can also help you get a low-cost nano aquarium or parts in good condition.
If you wanted to start for under $100, you’ll have to make some compromises. Thrift shopping, choosing a basic AIO kit, and picking the right fish or corals can help. Monthly costs for supplies and occasional upgrades are realistic, even if you move to more demanding fish or corals.
Think of your purchases as investments in your tank’s stability. Spending a bit more on a reliable heater, a quality filter, or a strong light can reduce the risk of losing your livestock. This approach often saves money in the long run and makes an economical nano tank kit a wise choice.
- Recurring: test kits, reagents, RODI or additives, salt mix, filter media, electricity, food.
- Periodic: replacement parts, upgraded lighting or skimmer, extra live rock or corals.
- Budget tips: multipacks, local RODI, clubs and swaps, used equipment from trusted sellers.
Resources for Further Learning
To learn more about nano tanks, start with online forums and manufacturer websites. Reef2Reef and ReefCentral are great for reef and saltwater nano reef talks. For freshwater and general care, check out The Spruce Pets and Practical Fishkeeping.
Manufacturer sites from Fluval, Waterbox, AquaIllumination, Kessil, and Sicce have detailed gear specs. They help you pick the right lighting, filtration, and pumps for your budget nano setup.
For biological cycling and bacterial support, look into products like FritzZyme, Bio-Spira, and Dr. Tim’s lines. These brands help with fishless cycling and seeding beneficial bacteria. This speeds up safe stocking.
Also, get reliable test kits for ammonia, nitrite, and nitrate. If you have marine tanks, consider a refractometer. These tools are key for weekly maintenance.
Video tutorials and channels focused on aquascaping and reefing can help a lot. Look for experts like MJ Aquascaping for plant and nano fish advice. Combine online learning with local resources like aquarium clubs and workshops.
Lastly, keep a log of water parameters and maintenance tasks. A simple spreadsheet or logbook and daily observation are essential. Using these resources will keep your nano setup healthy and help you grow your skills over time.
FAQ
What is a nano tank and does it include tanks up to 30 gallons?
A nano tank is usually under 20 gallons. Some people call tanks up to 30 gallons nano. For easy care, aim for 10–20 gallons. This size helps keep water stable.
Can I build a functional nano aquarium for under 0?
Yes, you can make a basic nano tank for under 0. Look for a good heater and filter. Use a used AIO kit from Fluval or Waterbox. Choose simple LED lights for plants.
Find secondhand substrate and decor. Use bottled or local water. You might have to skip some fancy lights or skimmers.
Should I choose an AIO kit or a custom tank for a budget nano setup?
AIO kits from Fluval, Waterbox, or Innovative Marine are easy and save money. They come with built-in filters. Custom tanks offer more freedom but cost more.
For a first project under 0, look for used AIO kits. They’re a good mix of cost and convenience.
What essential equipment must I not skimp on?
Don’t skip a thermostatic heater and good filtration. Also, get LED lights for your plants or corals. A small powerhead or pump is needed for water flow.
Get test kits for ammonia, nitrite, and nitrate. For saltwater, a refractometer is key to measure salinity.
Can I use secondhand gear and what should I check?
Yes, used gear can save a lot of money. Make sure pumps and heaters work well and quietly. Check for wear on impellers.
Verify that lights produce full spectrum without flicker. Look for any cracks or leaks in the tank or plumbing. Clean and sterilize used decor and parts when possible.
Which substrates are best for a budget nano planted tank?
For planted freshwater tanks, nutrient-rich substrates are best for root feeders. Inert sand or gravel works with root tabs and surface dosing. Buy just enough for your tank size or find leftover bags locally.
Rinse inert substrates well. Don’t rinse bioactive or seeded substrates.
How deep should substrate be in a nano tank?
Sand beds should be 1–1.5 inches deep to avoid anaerobic pockets. For planted tanks, a slightly deeper layer helps root feeders. But avoid deep substrate that traps debris.
Add substrate after setting up hardscape. Pour water carefully to avoid disturbing the substrate.
What are low-cost hardscape options that are aquarium-safe?
Dry rock types like Seiryu or Dragon Stone are affordable and safe. Inert rocks and aquarium-safe driftwood from local sources or thrift stores also work. Avoid rocks with soluble minerals.
Leave 1–2 inches from the glass for detritus flow.
Should I use live rock for a saltwater nano?
Live rock jump-starts biological filtration and adds beneficial microfauna. But it’s pricier and may introduce hitchhikers. Dry rock seeded with bottled bacteria is a budget alternative.
It reduces initial cost and lets you control introductions.
What are good first fish or invertebrates for a 10–20 gallon freshwater nano?
Start with ember tetras, small rasboras, small tetras, shrimp like Cherry shrimp, and snails such as Nerite. Avoid overstocking. Follow rules like limited biomass and research species compatibility and social needs.
What are safe saltwater nano starter species for 10–20 gallons?
For a 10–20 gallon nano reef, small clownfish, gobies, blennies, cleaner shrimp, and many soft corals are good. Avoid larger fish like tangs and triggers. Add a small clean-up crew to control algae and detritus.
How should I acclimate new livestock to my nano tank?
Float the bag for about 15 minutes to equalize temperature. Then slowly drip or add small amounts of tank water to the bag over 20–30 minutes. Never pour bag water into the tank.
For sensitive species or corals, use a longer drip acclimation. Quarantine new fish when possible to reduce disease risk.
How do I cycle my nano tank on a budget?
You can fishless cycle using pure ammonia or a small piece of raw shrimp. Or speed up with bottled bacterial starters like FritzZyme or Bio-Spira. Test ammonia, nitrite, and nitrate every 2–3 days.
Wait until ammonia and nitrite read zero before adding most livestock. Keep detailed logs to track progress.
What is a sensible maintenance schedule for a nano aquarium?
Daily: check on your fish, top off water, and feed sparingly. Weekly: test core parameters and clean mechanical filters. Wipe glass and do a 10% water change each week or 20% every two weeks.
Monthly: replace filter media, clean pumps and impellers, and review fish health.
How can I prevent algae blooms and ammonia spikes?
Balance light duration (start 6–8 hours/day), avoid overfeeding, and stock slowly. Maintain consistent water changes. For algae, reduce light, add a clean-up crew, and consider phosphate removers (GFO) if needed.
For spikes, stop adding fish, do partial water changes, and use bottled bacteria to rebalance the cycle.
How should I handle temperature swings in a small aquarium?
Place the tank away from HVAC vents and direct sunlight. Use a reliable thermostatic heater. Consider a second small heater or a heater controller if swings persist.
Keep room temperature stable and monitor with a thermometer. Small tanks react faster to ambient changes, so steady room conditions are important.
What tools and test equipment should I own for long-term success?
Essential tools include reliable test kits for ammonia, nitrite, nitrate, pH, and a refractometer for marine salinity. A gravel vacuum (Python Pro-Clean recommended), a small siphon, tweezers for planting, and a logbook or spreadsheet for tracking results are highly useful.
Investing in quality reagents and a good refractometer saves money and headaches over time.
What ongoing costs should I budget for beyond the initial build?
Recurring expenses include test kit reagents, RODI/DI water or salt mix for marine tanks, replacement filter media and cartridges, electricity for heater/pumps/lights, livestock food, and occasional equipment replacement parts like impellers.
Periodic purchases like upgraded lighting or a protein skimmer may be needed if you move into corals or higher-light planted setups.
Are protein skimmers necessary for nano saltwater tanks?
Protein skimmers are beneficial for reef tanks because they remove dissolved organics and reduce nutrient loads. For very small nanos, a nano-specific skimmer can help, but it adds cost and takes space.
In budget builds, manage with diligent water changes and a healthy clean-up crew until you can justify a skimmer upgrade.
Where can I learn more and find budget gear or livestock locally?
Trusted resources include online forums like Reef2Reef and ReefCentral for marine topics, The Spruce Pets and Practical Fishkeeping for freshwater guides, and manufacturer sites (Fluval, Waterbox, AquaIllumination, Kessil, Sicce) for gear specs.
Locally, join aquarium clubs, visit reputable local fish stores, and check classifieds or social groups for secondhand gear and livestock swaps.
Which brands and entry-level products are good to consider for a budget nano?
Look at AIO and filter brands like Fluval and AquaClear, compact powerheads from Sicce (Voyager Nano), and budget LED options from AquaIllumination or entry Kessil models if your budget stretches. For cycling and bacteria, consider FritzZyme or Bio-Spira.
Choose gear that reliably maintains temperature and filtration before upgrading lights or extras.
How should I prioritize purchases to keep the build under 0?
Prioritize a good heater, reliable filtration (or a used AIO kit), and test kits. Buy lighting that supports your plants or corals but consider a budget LED for low-light plants.
Source substrate and decor secondhand, use dry rock or inexpensive inert substrates, and add livestock slowly. Reuse or repurpose safe household items when appropriate to save costs.