Category: Maintenance

  • What is Old Tank Syndrome and How to Avoid it in Nano Systems?

    What is Old Tank Syndrome and How to Avoid it in Nano Systems?

    Old Tank Syndrome (OTS) is a slow decline in water quality. You might not notice it until sensitive fish start to die. Waste, uneaten food, and decaying plant matter can build up in established aquariums, leading to problems.

    This buildup causes rising nitrates and phosphates, falling KH and GH, and sudden pH swings. These changes stress the fish.

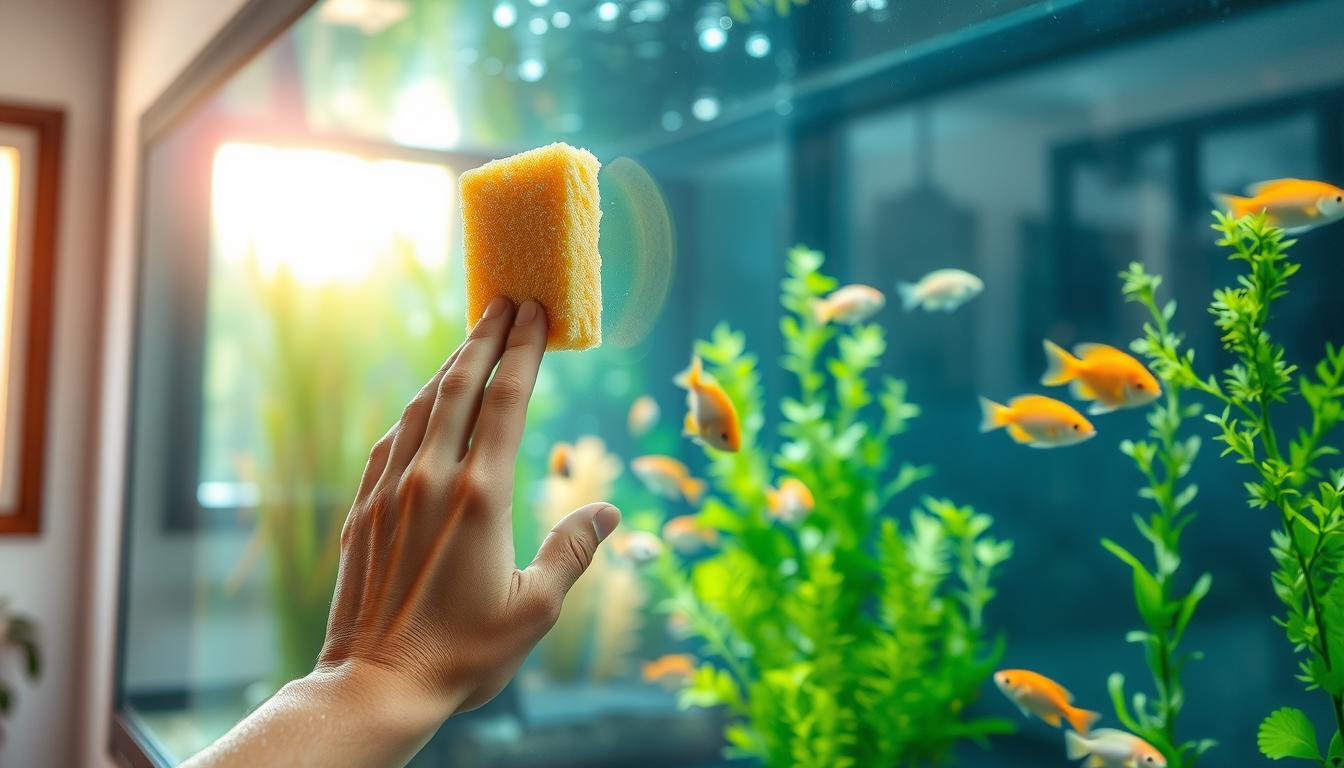
    To prevent OTS, follow simple aquarium maintenance tips. Regular water changes and gravel vacuuming help stop hidden waste. Checking filter media is also important.

    Even with automation and smart gear, basic care is the most reliable way to avoid OTS in nano aquariums.

    Testing water with Tetra test strips or using products like FritzZyme or Stress Zyme helps. Keep an eye on stocking levels and feed sparingly. Regular checks keep your fish tank care proactive.

    Understanding Old Tank Syndrome

    A well-lit scientific laboratory setting illustrating the concept of "Preventing Old Tank Syndrome." In the foreground, a researcher in a white lab coat, wearing safety goggles and gloves, is closely examining a modern, high-tech nano tank filled with vibrant, healthy aquatic life. The middle ground features various diagnostic tools and measurement devices assessing tank conditions, highlighting the importance of proactive monitoring. In the background, illuminated shelves filled with books on marine biology and environmental science create an atmosphere of study and innovation. The lighting is bright yet soft, creating a clean and professional mood. The angle is slightly from above, giving a comprehensive view of the entire scene while emphasizing the researcher's engagement with the tank.

    Many think a long-running aquarium is safe after the cycle is done. Hobbyists often relax after a few months, skipping routine checks. But, preventing old tank syndrome requires ongoing care, not just a one-time setup.

    Old tank syndrome often hides until a tank crash or when fragile fish arrive. Filters convert ammonia to nitrite and then nitrate. Yet, nitrate levels build up over time. You must regularly check the aquarium’s water chemistry.

    An aquarium is a closed system, unlike rivers and lakes. Without regular water changes and substrate cleaning, dissolved solids and nitrates increase. This slow buildup is the main problem in preventing old tank syndrome.

    Many hobbyists rely too much on equipment like canister filters, heaters, and automation. While these tools are helpful, they can’t replace basic maintenance tips. These include weekly testing, partial water changes, and gravel vacuuming.

    Follow a simple routine to keep your aquarium’s water chemistry balanced. Regularly test nitrate, ammonia, and nitrite levels. Do scheduled water changes, clean filter media gently, and stir the substrate when needed. These tips help protect your tank’s balance and the health of its inhabitants.

    • Test water parameters weekly.
    • Do partial water changes on a set schedule.
    • Maintain filters and clean substrate as needed.

    The Science Behind Old Tank Syndrome

    An intricate aquarium water chemistry scene, focusing on the scientific aspects of maintaining a balanced aquatic environment. In the foreground, a glass beaker with vibrant, colorful water samples labeled with pH, ammonia, nitrite, and nitrate indicators, surrounded by probes and testing strips. In the middle ground, a neatly organized table with a pH meter, a refractometer, and various chemicals utilized for water treatment, all illuminated by soft, artificial lights to create a laboratory atmosphere. The background features a well-maintained nano aquarium, showcasing lush aquatic plants and healthy fish, subtly lit to emphasize the clarity of the water. The overall mood is educational and scientific, with a sense of tranquility and focus on water quality management.

    It’s important to know what’s happening in your tank’s filter and substrate. Nitrifying bacteria in filters change ammonia to nitrite and then to nitrate. This process lowers the pH over time.

    Carbonate hardness, or KH, helps keep the pH stable. When KH is used up, pH can drop or swing wildly. If pH goes below 6.0, bacteria slow down, making water quality worse.

    Nitrate is less harmful than ammonia or nitrite in the short term. But, it causes long-term stress, weakens fish immunity, and shortens their lives. High nitrate levels are a key sign of failing filtration and low buffering.

    Phosphate builds up because fish and bacteria don’t use all of it. High phosphate levels lead to algae growth. Heavy organic matter and decaying matter also lower buffering, making pH crashes more likely.

    It’s vital to regularly check the General Hardness (GH) and KH levels. If KH drops several degrees from your source water, it’s a warning sign. Tanks with low KH need fish adapted to soft water to avoid problems.

    • Routine water changes add carbonate ions and dilute nitrates and phosphates, improving water quality.
    • Nitrate reduction often requires water changes or nitrate-specific media and biological denitrification to lower chronic stress on fish.
    • Products that seed bacteria or remove nitrate can speed recovery, but they do not replace steady maintenance and monitoring.

    Monitoring KH, GH, nitrate, ammonia, and phosphate closely helps you catch problems early. Understanding these chemical links makes preventing old tank syndrome a manageable task.

    Recognizing the Signs in Your Nano System

    You might not see old tank syndrome at first. Look for signs like dull fish colors, slow movement, or plants stretching for light. These signs often show before water problems appear.

    Watch for more diseases. If you see Whitespot (Ich) or fin rot after adding new fish, it’s a sign of imbalance. For example, a two-year-old nano tank might seem fine until you add tetras and then Ich breaks out. This is because your tank has more stressors than the fish from the store.

    • Check for sudden mortality when adding new fish.
    • Note frequent illness among tank inhabitants.
    • Observe whether plants become sparse or leggy.

    Use test kits to confirm your observations. Tetra EasyStrips and reliable liquid kits give quick readings for nitrate, phosphate, GH, and KH. If nitrate goes over 50 ppm, it’s a warning sign. Try to keep it as low as possible.

    Compare your tank’s readings to your source water. If your KH or GH is lower than the source, your minerals are running low. A pH difference of more than 0.5 units can stress fish and plants. Phosphate levels over 0.5 ppm above the source are concerning; levels of 5 ppm or higher need immediate action.

    Regularly check your equipment and substrate. Buildup in the substrate, old filter media, and poor filtration all point to bad tank care. These signs often come before chemical warnings.

    1. Perform routine visual checks during feeding and maintenance.
    2. Test water weekly with a trusted kit for nitrate, KH, GH, pH, and phosphate.
    3. Combine regular fish tank cleaning with targeted testing for best results.

    Small, steady observations save tanks. Pair aquarium maintenance tips with consistent testing to catch problems early. This way, Preventing old tank syndrome becomes a key part of your hobby.

    Prevention Strategies for Nano Tanks

    Start by checking your tank regularly. Test the water weekly or every two weeks. Look for ammonia, nitrite, nitrate, GH, and KH levels. These tests help you stay on top of your tank’s health.

    Make a plan for water changes and cleaning the substrate. Change the water regularly and clean the gravel. Remove any dead plant matter right away. If your tank starts to decline, do small water changes to fix it without stressing your fish.

    Act fast if nitrates get too high. Do small water changes, up to 25% a day, to bring levels down. Use products like Stress Zyme to help your tank’s bacteria.

    Don’t forget to keep your filter and media clean. Rinse sponge filters and replace old resins. Use special media to cut down on nitrates and phosphates. For ammonia, try API Ammo-Lock. For very soft water, use Tropic Marin Remineral Tropic.

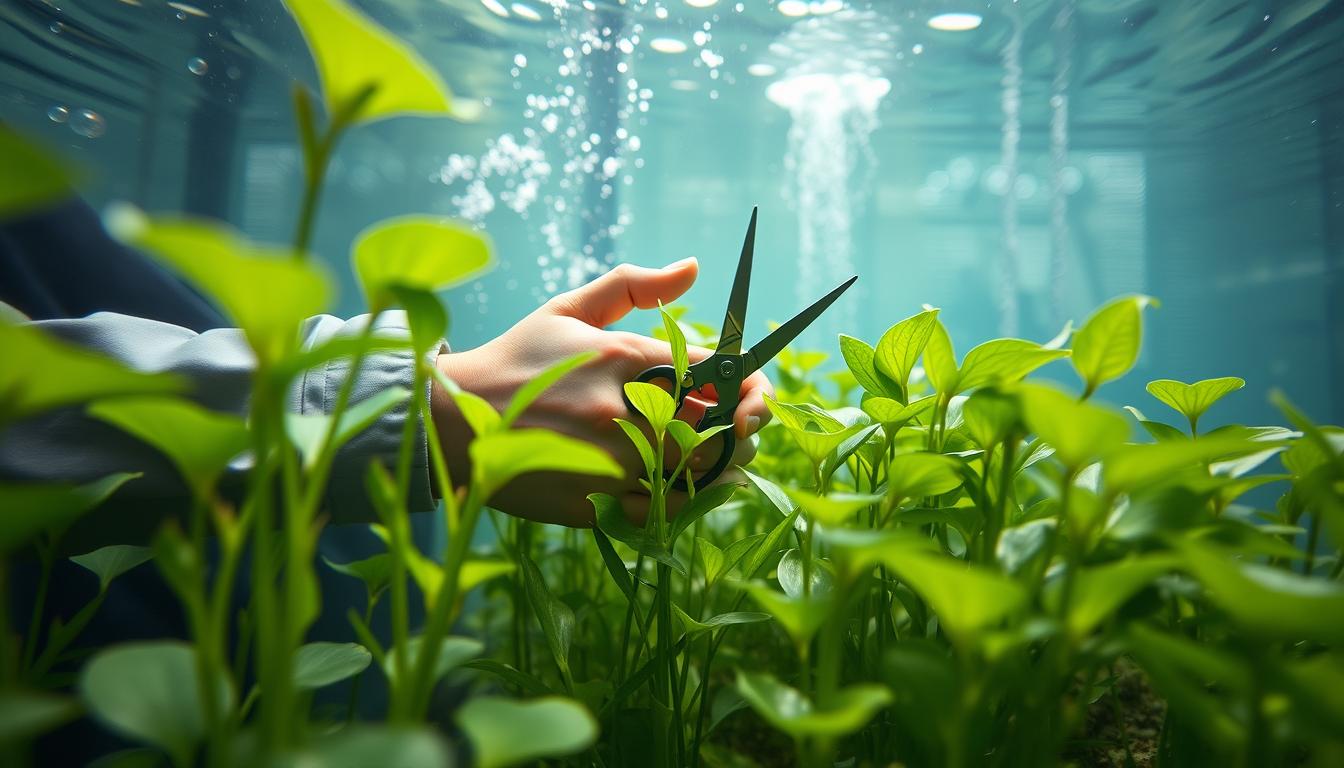
    Stay proactive with your tank care. Trim dead plants, watch your fish’s food intake, and don’t overstock. Use smart dosing systems to help, but remember, hands-on care is key.

    If your tank is really struggling, you might need to take bigger steps. In severe cases, change 50–75% of the water and use special products to fix the chemistry. Take it slow and steady to avoid making things worse.

    By following these tips, you can prevent old tank syndrome. Regular testing, small repairs, and proactive care will keep your nano tank healthy and thriving.

    The Role of Water Quality

    Testing key parameters often is key to protecting your nano system. Check nitrate, pH, GH, KH, and phosphate levels. Compare these to your source water.

    A tank pH that’s more than 0.5 different from source water is a warning sign. Nitrate levels should be close to source water, within about 40 ppm. Phosphate should be less than 0.5 ppm above source levels.

    KH depletion is an early sign of trouble. Low KH means weak buffering and a higher risk of sudden pH swings. Regular checks help catch KH drift early.

    Water changes are the best way to restore buffering capacity and lower nitrate. Plan changes based on test results, not just a schedule. Use reliable test kits like liquid kits or strips to avoid missing checks.

    Know your source water well. Tap water and reverse osmosis blends act differently. If using RO water, remineralize it to match target GH and KH for your fish and corals. Products like Tropic Marin Remineral Tropic help set proper levels.

    • Use quick-check strips such as Tetra EasyStrips for routine monitoring.
    • Support bacterial populations with products like FritzZyme or Stress Zyme when needed.
    • Consider chemical nitrate removers or biological denitrification media as supplements to tank water changes.

    Good water quality management involves testing, knowing your source water, and targeted water changes. This routine reduces stress on inhabitants and helps prevent old tank syndrome.

    Follow simple steps: test regularly, compare to source water, correct KH and GH, and perform targeted water changes. These habits give you control over aquarium water chemistry and help avoid sudden declines in tank health.

    Importance of Bacterial Cultures

    Beneficial bacterial cultures are key to a healthy aquarium. In your filter, they turn ammonia into nitrite and then nitrite into nitrate. This process keeps fish safe but doesn’t remove nitrate.

    Biological activity changes pH by producing hydrogen ions and consumes carbonate hardness. It’s important to keep KH and GH steady for bacteria to work well. If filter media gets clogged or worn out, waste can leak back into the water, stressing the system.

    Using bacterial additives like Seachem Stability, FritzZyme, or Stress Zyme can help after filter changes or water exchanges. These products speed up the recovery of biological filtration. But, they don’t replace regular mechanical cleaning and water changes.

    Balance is essential when using bacterial cultures. Pair biological support with regular vacuuming of substrate and rinsing of filter foam. This approach reduces detritus and keeps the bacterial colony healthy.

    • Keep KH and GH stable for steady bacterial action.
    • Use reputable bacterial products to boost nitrifying colonies after maintenance.
    • Clean mechanically; do not skip water changes even when using additives.

    If nitrate levels rise despite strong nitrification, consider denitrifying media or nitrate-reducing resins. These solutions need careful setup and monitoring. They work best as part of a plan to Prevent old tank syndrome and maintain long-term water quality.

    Stocking Your Nano Tank Wisely

    Start with fewer fish. Too many can make your tank dirty and harm the environment. This can lead to problems and make it harder to keep your tank healthy.

    Choose fish that get along well. Some fish can be mean or too big for small tanks. Pick peaceful ones like rasboras or Endler’s livebearers. Use a stocking calculator to find the right number of fish for your tank.

    Quarantine new fish for two weeks before adding them to your tank. This helps them adjust and lowers the risk of getting sick. It also helps prevent problems in your tank.

    • Favor low-waste species suited to planted tanks.
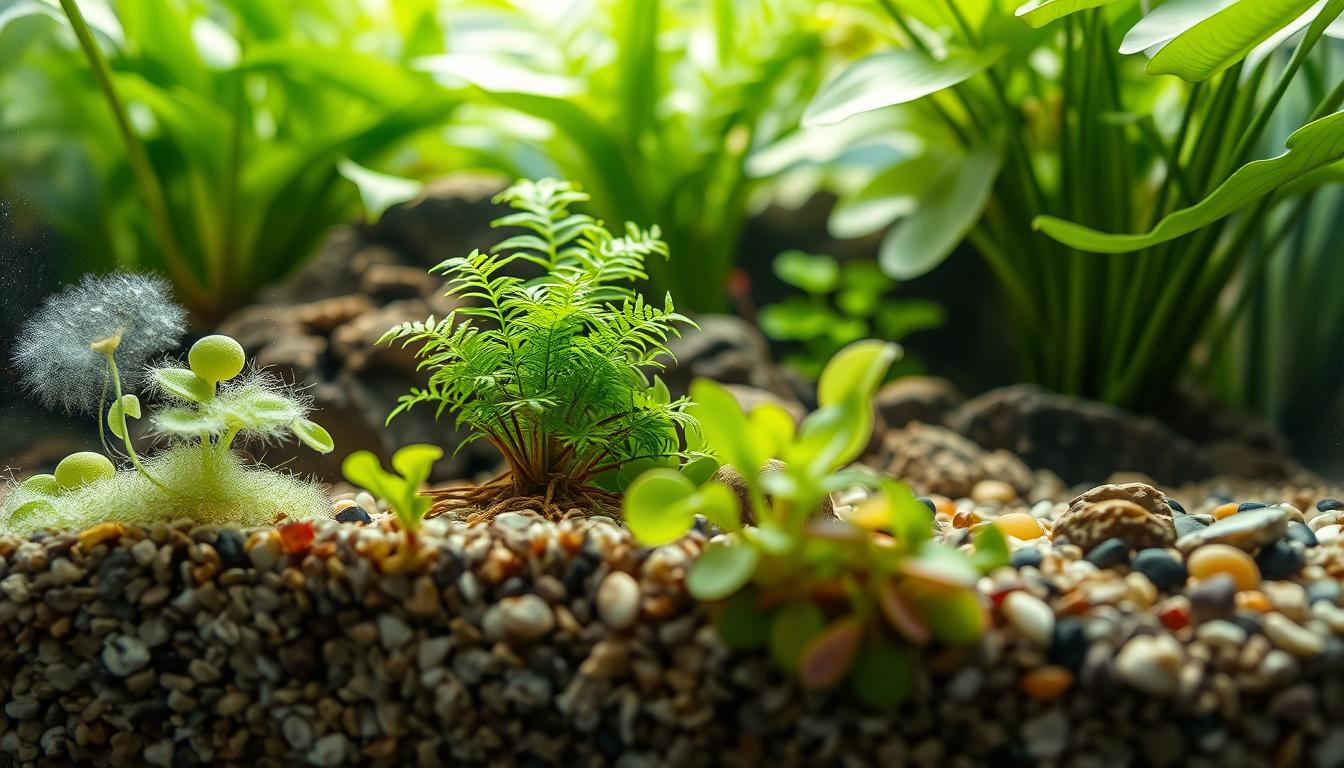
    • Add live plants to uptake nitrates, but remove decaying leaves promptly.
    • Consider snails and shrimp for detritus control while monitoring bioload.

    Use plants, algae-eating shrimp, and occasional cleaning to keep your tank balanced. Watch for signs of trouble and adjust your fish numbers if needed. This helps keep your tank healthy.

    Be careful when adding or replacing fish. Removing some can reveal hidden issues. Plan carefully, using quarantine and acclimation, to keep your tank in good shape.

    Emergency Measures for Mitigating Old Tank Syndrome

    If your nano system shows signs of a rapid decline, start by testing water. Look for high nitrates, low KH or GH, and pH drift. Quick diagnostics guide your response and reduce guesswork during a fish tank emergency.

    Begin a program of small, frequent tank water changes to stabilize conditions. Change about 25% daily or every other day until you see improvement. In extreme crashes, cautiously apply larger changes of 50–75% while monitoring fish for stress.

    • Use remineralizers such as Tropic Marin Remineral Tropic to restore KH and GH after fresh water additions.
    • Treat ammonia spikes with API Ammo Lock if tests show ammonia or nitrite elevations.
    • Add bacterial additives like Stress Zyme to support biological filtration while you perform water exchanges.

    Target nitrates carefully. If levels exceed 60 ppm, continue a series of small changes (no more than 25% per day) until readings fall toward 50 ppm or lower. Avoid one-time, drastic swaps that can cause further shock to fish and plants.

    Speed reductions in nitrate and phosphate loads by using specialized resin media in the filter. Nitrate- and phosphate-removing resins accelerate chemical cleanup and pair well with mechanical work.

    1. Vacuum gravel to remove hidden waste and accumulated detritus.
    2. Clean or replace exhausted mechanical media, avoiding full sterilization of all biological media at once.
    3. Remove decaying plant matter and any dead livestock to stop ongoing pollution.

    For stubborn problems, consider denitrifying biological media or chemical resins designed for sustained removal. Automated monitoring and smart alerts help you detect early shifts in aquarium water chemistry and reduce the chance of future fish tank emergency events.

    Acting fast with measured tank water changes, targeted media, and remineralizers gives the best chance of stabilizing the system. Preventing old tank syndrome becomes part of your routine maintenance plan.

    Conclusion and Best Practices

    To keep your aquarium healthy, focus on regular maintenance. Test water for nitrate, pH, and other important levels weekly or every two weeks. Doing small water changes and cleaning the gravel helps keep the tank balanced.

    Remember, filters help remove waste but can’t handle nitrates. Use water changes, plants, or special products to control nitrate levels. Keep nitrate below 50 ppm. If your tank gets out of balance, use bacterial additives and nitrate resins. Make small water changes daily if needed.

    Use modern tools like good test kits and bacterial products. Keep your tank’s fish population low. Change filter media and resins when needed. Set a regular maintenance schedule to avoid problems.

    Follow this checklist to keep your tank in top shape: test water, do water changes, clean the gravel, and maintain filters. Remineralize RO water and quarantine new fish. Act fast if nitrate, KH, or pH levels get too high. These tips will help you keep your aquarium healthy for years.

    FAQ

    What is Old Tank Syndrome and how does it differ from New Tank Syndrome?

    Old Tank Syndrome (OTS) is when water quality in an aquarium starts to decline. This can cause stress and death in fish. It’s different from New Tank Syndrome, which happens in new setups with an immature filter.

    OTS occurs in tanks that have been around for a while. It’s caused by the buildup of nitrates and phosphates. These substances can harm the water quality. Filtration helps, but it doesn’t remove nitrates. Only water changes, plant uptake, or denitrification can reduce nitrate levels.

    OTS might not be obvious until you add sensitive fish or see a sudden disease outbreak.

    What causes Old Tank Syndrome in nano systems?

    OTS in nano tanks is caused by the buildup of nitrates and phosphates. It’s also due to low carbonate hardness (KH) and general hardness (GH). Trapped organic waste plays a role too.

    Common causes include not changing enough water, overstocking, and not cleaning the tank. Uneaten food, dead fish, and decaying plants also contribute. Without regular maintenance, impurities build up, and the tank’s buffering capacity decreases.

    What are the key parameters to test to detect OTS early?

    Test for nitrate, pH, KH, GH, and phosphate regularly. Compare these values to your source water. High nitrate, low KH, and phosphate levels are warning signs.

    Testing weekly or biweekly helps catch problems before they get worse.

    What visible signs in fish and plants suggest OTS?

    Look for dull colors, lethargy, and poor growth in fish. Also, watch for frequent disease outbreaks and dying plants. Leggy plants and sudden fish deaths are red flags.

    Increased algae and persistent detritus in the substrate also indicate OTS. Healthy fish from low-nitrate systems may hide problems until introduced to your tank.

    How often should you perform water changes to prevent OTS?

    Regular water changes are key to preventing OTS. Aim for weekly or biweekly changes. Adjust frequency based on your tank’s needs.

    If you notice rising nitrates or low KH, do small, frequent changes. Avoid sudden large changes to avoid shocking the fish.

    How should you respond if nitrate readings are above 60 ppm?

    Start with small, frequent water changes—no more than 25% per day. Continue until nitrate levels drop below 60 ppm. This approach helps prevent further damage.

    Can filtration alone prevent nitrate buildup?

    No, filtration alone cannot prevent nitrate buildup. It converts ammonia to nitrate but doesn’t remove it. Regular water changes and mechanical cleaning are needed to dilute nitrates.

    Chemical resins and denitrifying media can help, but they’re not a replacement for regular maintenance.

    What role do KH and GH play in preventing OTS?

    KH (carbonate hardness) helps buffer pH and prevent swings. GH (general hardness) provides minerals essential for fish health. Low KH and GH can harm nitrifying bacteria and fish.

    Keep KH and GH levels near the target for your fish. Use remineralizers like Tropic Marin Remineral Tropic to restore these levels in RO/DI water.

    Are bacterial additives helpful for preventing or recovering from OTS?

    Yes, bacterial additives like Stress Zyme and FritzZyme support beneficial bacteria. They help re-establish biological filtration and speed recovery from OTS. But, they shouldn’t replace regular water changes and cleaning.

    How should you maintain filter media to avoid causing OTS?

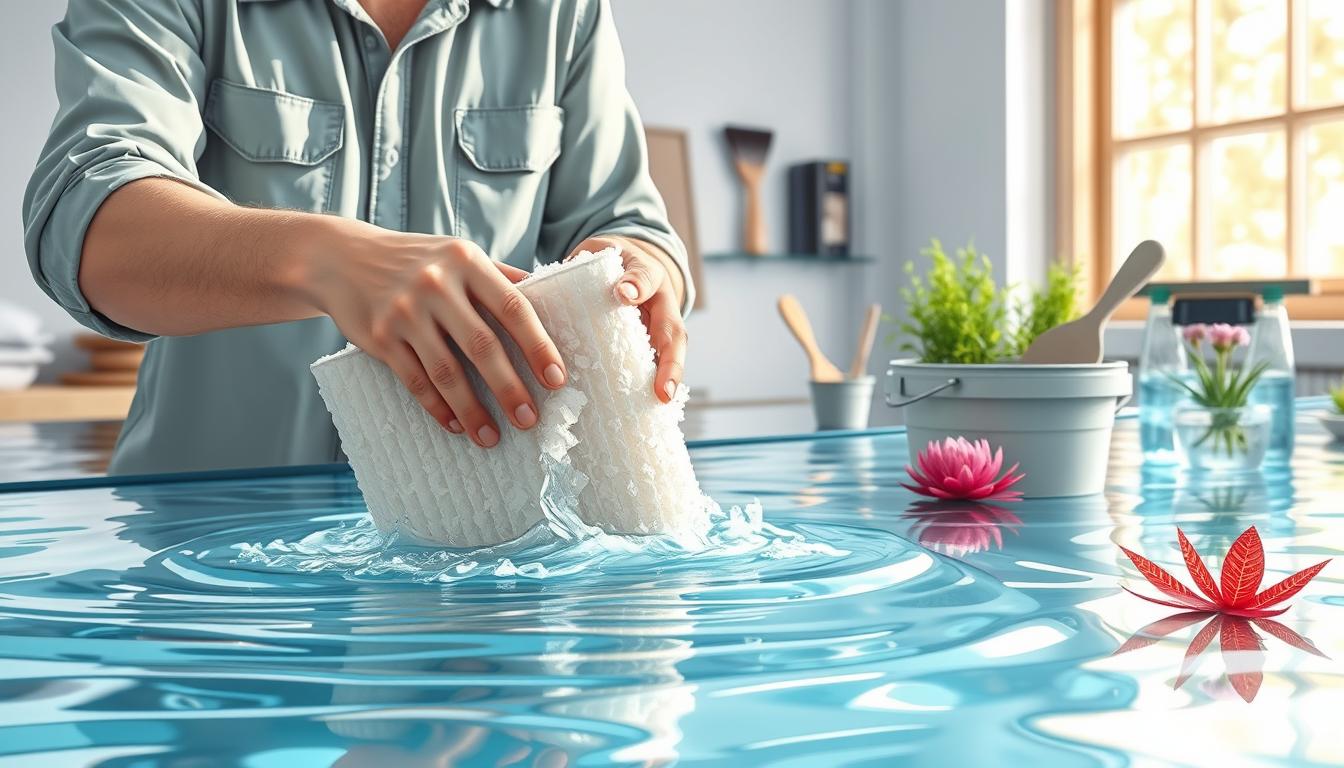
    Rinse mechanical media in tank water during water changes. Replace chemical resins when exhausted. Avoid cleaning all biological media at once to preserve beneficial bacteria.

    Check canister and cartridge filters for trapped waste and service them regularly. This prevents pollutants from getting back into the tank.

    What stocking and husbandry practices reduce the risk of OTS in nano tanks?

    Stock conservatively and choose compatible species. Keep feeding minimal and remove uneaten food promptly. Use live plants to help uptake nitrates.

    Trim dying plant foliage. Quarantine new fish and acclimate them slowly. Regular substrate vacuuming and maintenance are essential.

    Can live plants prevent OTS by absorbing nitrates?

    Live plants can help reduce nitrate levels. But, they’re not a complete solution. Plants can become a source of detritus if they die and decay.

    Use plants as part of a balanced plan. Regular water changes, substrate cleaning, and balanced stocking are also important. Fast-growing plants are better at consuming nitrates when well-maintained.

    What emergency measures help during a tank crash caused by OTS?

    First, test water to identify problems. Start with small, frequent water changes (25% daily/every other day). Vacuum substrate and clean filters carefully.

    Use remineralizers to restore KH/GH and API Ammo Lock if ammonia appears. Consider nitrate- and phosphate-removing resins in the filter. Add bacterial supplements like Stress Zyme. Quarantine stressed or new fish and avoid large water changes unless necessary.

    How should you use technology and automated tools without neglecting basic husbandry?

    Automation can help keep a maintenance schedule. But, it can’t replace hands-on tasks. Use test kits (Tetra EasyStrips or liquid kits) regularly.

    Schedule and perform gravel vacuums, replace exhausted resins, and remove decaying matter. Treat technology as an aid to consistent husbandry, not a substitute.

    Which tests and products are recommended for routine checks and recovery?

    Use reliable test kits or strips (for example, Tetra EasyStrips or liquid kits) to monitor nitrate, pH, KH, GH, and phosphate. For bacterial support, consider Stress Zyme or FritzZyme.

    Remineralizers like Tropic Marin Remineral Tropic restore KH/GH in RO water. For chemical assistance, nitrate- and phosphate-removing resins and denitrifying media speed recovery but should complement water changes and cleaning.

    How do I compare my aquarium water to source water and why does it matter?

    Test your tap or RO-mixed source water for nitrate, KH, GH, phosphate, and pH. Compare these values to your tank’s readings. If nitrate is more than ~40 ppm above source or pH differs by more than 0.5 units, it signals accumulation or buffering loss.

    A tank with KH several degrees lower than source is vulnerable to pH crash. Comparing values helps you decide whether to increase water changes, remineralize, or take other corrective steps.

    What long-term habits prevent Old Tank Syndrome?

    Test water regularly (weekly or at least biweekly), perform scheduled water changes, and vacuum substrate during changes. Maintain and rotate filter media correctly, replace exhausted resins, and prune dead plant matter.

    Quarantine new fish and stock conservatively. Use bacterial supplements when needed and remineralize RO water to target GH/KH. Combine modern tools with disciplined maintenance—prevention always beats recovery.

  • Feeding Holiday Guide: Managing Your Nano Tank While You Are Away on Vacation

    Feeding Holiday Guide: Managing Your Nano Tank While You Are Away on Vacation

    Planning ahead is key when you’re going on vacation. This guide helps you avoid common problems like flooding, coral die-offs, algae growth, and equipment failures. These issues often happen when hobbyists return from a trip.

    Preventing these disasters is easier than you think. Spread out tasks over a few days. Don’t introduce new fish or equipment two weeks before you leave. Also, do regular maintenance, refill ATO reservoirs, and have spare supplies ready.

    Small issues can turn into big problems when you’re away. Use tech like Hydros and Seneye monitors, cameras, and leak detectors. Find a trustworthy friend or service to help out. These steps are essential for keeping your tank healthy while you’re away.

    This article will guide you on how to care for your nano tank while on vacation. We’ll cover assessing tank needs, choosing feeding methods, and final prep tasks. You’ll also learn about writing sitter instructions, hiring professionals, maintaining water quality, controlling light and temperature, preventing algae, and recovering after your vacation.

    Assess Your Nano Tank’s Needs Before You Leave

    A serene, well-maintained nano tank sits on a wooden table in a softly lit room, reflecting a tranquil atmosphere. In the foreground, lush aquatic plants and colorful small fish are visible inside the tank, showcasing vibrant colors and intricate details. The middle ground features a person in modest casual clothing, thoughtfully examining the tank with a clipboard and pen, illustrating diligence in assessing the tank’s needs. In the background, a light source subtly illuminates the room, casting gentle shadows and enhancing the tank's features, creating a calm and focused mood. This scene embodies the importance of preparation and care for a nano tank while on vacation, emphasizing attention to detail and the harmony of aquatic life.

    First, count all the fish, corals, and invertebrates in your tank. Note which ones need to eat often and which can go without food for a bit. This helps you plan for their care while you’re away.

    Do a week of daily checks before you leave. Test for ammonia, nitrite, nitrate, pH, alkalinity, and temperature. Keep a record of these tests to see if your tank is stable. Also, do a partial water change and clean filters a week before to keep your tank healthy.

    Check your equipment and tank covers for any damage. Make sure everything is working right and that your tank is secure. Also, top off your auto top-off reservoirs and have extra saltwater ready for emergencies.

    Decide if it’s safe to travel based on your tank’s stability. Only leave if your tank’s parameters are steady and there’s no stress. Don’t add new fish or equipment two weeks before you go to avoid problems.

    Make a checklist for your caregiver. Include feeding times, tips for holiday feeding, and what to avoid. This will help your tank stay healthy while you’re away.

    Choose an Appropriate Feeding Method

    A serene, indoor scene showcasing a well-maintained nano aquarium as the focal point. In the foreground, a professional individual in modest casual clothing is gently dispensing food into the tank using a precise feeder tool. The middle layer captures the vibrant, colorful fish swimming eagerly towards the food, showcasing a variety of tropical species, including neon tetras and guppies. The background features a neatly organized setup with plants, aquarium decorations, and a care schedule pinned nearby. Soft, natural lighting filters through a window, creating a warm atmosphere, while a shallow depth of field focuses on the feeding process, lending an intimate feel to the image. The overall mood is calm and engaging, perfect for illustrating fish care during vacation planning.

    Choosing the right feeding method is key to keeping your fish healthy and your tank water stable while you’re away. Use the best holiday feeding tips to find the perfect match for your tank’s size, the types of fish you have, and how long you’ll be gone.

    1. Fasting

    Many community tanks can handle a short fast of up to five days. This is good for larger fish or tanks with lots of algae and snails. Don’t overfeed before you leave. Too much food can lead to pollution.

    2. Holiday foods

    Options like Tetra TetraMin Holiday, Fluval Bug Bites Holiday Food, and Dupla Gel-O-Drops can feed your fish for about seven days. Test these foods in your tank a few weeks before you leave to see how they dissolve in your water.

    3. Automatic feeders

    Automatic feeders are great for trips that last several days. Use feeds that won’t get soggy, like pellets or granules. The Fish Mate F14 is a reliable choice. Start using it a week before you leave to adjust the portions and make sure it works right.

    4. Fish sitter

    Having a fish sitter is the safest option for long trips or sensitive fish. Give the sitter pre-measured meals in sealed bags to avoid overfeeding. Ask them to check on the fish every few days and send you photos if anything looks off.

    Be aware of common issues that can ruin your plans. Holiday blocks might dissolve too fast or too slow, and automatic feeders can jam if they get wet. Sitters might also overfeed. Test any method you’re considering a few weeks in advance and choose the best one for your holiday schedule.

    Use this feeding holiday guide to pick the best method for your tank and make backup plans. A solid plan will help reduce stress for both you and your fish while you’re away.

    Prepare Your Aquarium Before Departure

    Begin maintenance a week before you leave. Do a partial water change and remove algae from the glass. Clean the skimmer cups and test it to avoid overflow.

    Avoid big changes the day before you go. Don’t install new equipment or swap filter media. Small systems don’t like big changes.

    Check your tank’s setup a few days early. Make sure corals are securely mounted. Tighten lids and screens to prevent fish from jumping out.

    Prepare emergency supplies that are easy to find. Mix a lot of saltwater and top up CO2 cylinders. Keep extra supplements and add a filter for extra cleaning.

    • Leave duplicate ATO reservoirs or a twin ATO setup so a single failure won’t drain the tank.
    • Mark locations of shutoffs, power strips, and spare parts for your sitter.
    • Label supplement doses and feeding windows clearly using simple notes.

    Test and document your tank’s water the day before you leave. Record salinity, nitrate, and other values. This helps your sitter check if something is wrong.

    Plan your meals for your sitter using frozen or dry foods. Include measured portions and feeding times. This helps avoid overfeeding.

    Share important feeding tips with your sitter. Give them emergency contacts and explain what to do and not to do. This ensures your tank is well taken care of while you’re away.

    Create a Care Plan for Your Tank Sitter

    Make a simple, written checklist for your sitter. Break down tasks into easy steps to avoid mistakes. This checklist will help them follow holiday feeding rules and handle unexpected situations.

    1. Make a daily feeding schedule with pre-measured food. Label containers for flakes, pellets, frozen cubes, and liquid supplements. Include exact portion sizes and feeding times.

    2. Create a storage map. Show where each food, additive, and medication is stored. Include fridge locations for frozen food and a cabinet for supplements like Seachem Stability.

    3. Explain the water top-off routine. Tell them how to use premixed saltwater or freshwater, how much to add, and where to find it.

    4. Provide pre-measured doses of NT Labs Disease Solve, Interpet Disease Away+, and Seachem Stability. Include clear instructions for common issues.

    5. Show them how to manage the light schedule. Explain how to read timers and which ones control the lights. Tell them what to do if a timer shifts or if they need to use a battery backup.

    Mark the circuit breaker panel. Use a labeled list for your sitter to follow. This will help them know which breaker controls pumps, heaters, and lights. Include steps for a tripped breaker or a shifted timer.

    • If a breaker trips: switch off labeled equipment first, reset the breaker, then switch devices back on one at a time. If it trips again, unplug the affected device and call your emergency contacts.

    • If a timer shifts: check battery backup, reset current time, and confirm programmed on/off slots. If programming looks wrong, call your tank buddy or maintenance service.

    Train your sitter on basic equipment tasks. Use short demonstrations and written steps for each job.

    1. Teach them about impeller care: remove the pump cover, pull out the impeller, rinse with tank water to avoid chlorine shock, inspect for debris, and replace in correct orientation.

    2. Show them how to remove carbon: open filter chamber and remove carbon before any medication dose, then replace or quarantine media after treatment ends.

    3. Explain topping off: use pre-mixed saltwater in labeled containers. Measure salinity if needed and add slowly to avoid stressing livestock.

    4. Teach them about timer battery use: show where batteries are stored and how to swap them. Run a test so the sitter sees lights or pumps respond.

    Provide an emergency plan with contacts and clear thresholds. List aquarium-savvy friends, local professional maintenance services, and your phone number. Tell the sitter to take photos of sick fish and send them immediately.

    • Include safe parameter ranges for ammonia, nitrite, nitrate, temperature, and salinity. Ask the sitter to call if any reading moves beyond safe limits.

    • Keep pre-measured medication and filter supplements accessible in a labeled box. Add simple instructions for use so the sitter can act quickly if a common problem arises.

    Wrap the care plan with the top feeding strategies for holidays. This way, your sitter knows when to feed, how much to feed, and which actions are urgent. Clear instructions reduce stress for you and your fish while you are away.

    Consider Using a Pet-Sitting Service

    Hiring a professional pet-sitting service can give you peace of mind when you leave your nano tank. A trained sitter follows expert holiday feeding guidance and checks equipment daily. This helps catch issues before they get worse.

    Start by vetting providers who list aquarium maintenance and nano tank experience on their profiles. Ask for references and examples of work with brands like Eheim or Fluval. Make sure they know how to manage ATO units, reactors, and controllers.

    Request a clear scope for visits. Your feeding holiday guide should include scheduled feedings, brief equipment checks, and small water changes if needed. Agree on emergency steps and a method for reporting back to you with photos and parameter readings.

    • Provide labeled supplies and keys so sitters can act without guessing.
    • Write documented parameter ranges for temperature, salinity, and pH.
    • List emergency contacts for parts or rapid consultation, like your local fish store or aquarium service.

    Pay fairly and set expectations upfront to protect goodwill. Fair compensation and a clear list of duties encourage reliability. This may secure a trusted sitter for future trips.

    When training a pro, show species-specific needs for corals, shrimp, or Betta fish. This keeps optimal holiday feeding practices consistent with your normal care. It reduces stress on livestock while you are away.

    Manage Water Quality While You’re Away

    Before you leave, set up real-time monitors like Hydros or Seneye-style devices. They track temperature, pH, ammonia, and alkalinity. Also, set up text or email alerts for when these levels get out of range.

    Install a leak detector tied to alerts to catch drips or overflows early. Pair that sensor with a remote camera. This way, you can see any issues and call for help if needed.

    Prepare a small kit with biological backups like Seachem Stability and chemical aids such as Arcadia Polyfilter. Leave clear instructions for your sitter on when to use these products. This is for when filter flow drops or if the water gets cloudy.

    • Show your sitter how to check and clean impellers on pumps.
    • Label spare pumps and heaters and leave them accessible for quick swaps.
    • Consider a battery backup or emergency power plan for critical tanks.

    Prevent nutrient spikes by following your holiday feeding guide. Make sure to stress measured portions to any sitter. Don’t overfeed before you leave, as this can raise ammonia and nitrite levels.

    Share the holiday feeding dos and don’ts in writing. This way, your helper knows exactly what to do. Include notes on optimal holiday feeding practices, like feeding once daily or using timed feeders.

    Leave contact info for a local aquatic shop or service. Also, leave brief steps for sump overflow checks. With clear instructions and monitoring tech, you’ll have the best chance of stable water while you’re away.

    Monitor Light Exposure During Vacation

    Keep your tank’s light schedule the same while you’re away. Use plug-in timers or a programmable controller. This way, lights turn on and off at the same times every day.

    Testing timers a few days before you leave is smart. Make sure your programmable LEDs from brands like Fluval or EcoTech work right. Also, check if your timer has a battery backup. This is important in case of a power outage.

    Think about camera visibility if you plan to check your tank remotely. Blue actinic light can make it hard to see. Use an orange filter on your webcam lens to see fish and equipment clearly.

    Don’t let too much light cause algae to grow too fast. If you have high-light corals or plants, they might need full light. But if not, you can shorten the light period a bit for the holiday.

    • Verify timers and backup batteries ahead of time.
    • Use an orange filter on webcams under actinic lighting.
    • Trim photoperiod slightly to curb algae if appropriate.

    Feeding your tank needs as much planning as lighting. Include tips for holiday meals and feeding strategies in your care notes. This helps your sitter or service keep things running smoothly while you’re away.

    Plan for Temperature Control

    Before you leave, check your heater to confirm steady operation and accurate calibration. Test the unit for a few days, clean mineral buildup from the surface, and avoid installing a brand-new heater the day you depart. Reliable gear lowers stress for fish and keeps your optimal holiday feeding practices on track.

    Label circuit breakers for your aquarium equipment so a sitter can reset them if needed. Summer heat waves can cause controller failures or tripped breakers. A long unreset breaker can lead to severe temperature swings and mass livestock loss, so clear instructions help prevent disaster.

    Keep backups ready. A spare heater stored nearby or a recommended replacement at a local pet store can save the system. Consider a battery-backed timer or a UPS for pumps and controllers to preserve schedules. These steps support the holiday feeding dos and don’ts you set before leaving.

    Share clear emergency steps with your tank sitter. Tell them the acceptable temperature range and show what to do if readings drift. Simple actions, like adding or removing a heater, calling a fellow aquarist, or switching on a backup heater, can stabilize conditions fast.

    • Verify heater calibration at least 48 hours before departure.
    • Label breakers and leave short troubleshooting notes.
    • Store a spare heater or list trusted local replacements.
    • Use UPS or battery-backed timers for critical controllers.
    • Provide acceptable temperature ranges and contact names.

    Following these steps makes your feeding holiday guide more robust. You reduce risk, protect stock, and give your sitter the tools to act quickly if temperatures change while you enjoy your trip.

    Address Possible Algae Issues

    Before you leave, clean the glass and hardscape well to remove algae. Siphon off the loosened algae during a partial water change. This stops nutrient-rich fragments from staying and causing more algae.

    Reduce feeding a few days before you go. Follow the holiday feeding guide by giving smaller portions and skipping a meal or two for hardy fish. This reduces nutrients and helps prevent algae while you’re away.

    Check your filter and think about adding a Polyfilter pad from brands like Fluval or API. It helps soak up dissolved organics. Make sure mechanical media is clear to keep the water flowing well and catch waste before it breaks down.

    Set your lights on a timer and shorten the light hours a bit if your fish can handle it. Less light means less algae growth, making your tank cleaner when you return.

    • Give your sitter a simple task list: remove visible holiday-food remnants, skim surface detritus, and siphon any concentrated waste.
    • Ask for photos if they see unusual green or brown blooms so you can advise next steps remotely.

    Plan for extra cleaning when you get back. You’ll need to clean the glass, rinse filter pads, and do a normal water change to remove algae. Use the best holiday feeding tips to adjust feeding routines and prevent algae in future trips.

    Post-Vacation Tank Maintenance

    When you get back, do quick water tests for ammonia and nitrite. These levels can rise quickly after overfeeding. Also, check the pH and general hardness of the water.

    Look for dead or stressed fish and remove any carcasses right away. This helps avoid more water quality problems.

    Start with gentle feeding again. Skip heavy feedings for a few days and then go back to normal. Do a partial water change and check the mechanical filter pads. Clean or replace them if they’re full of detritus to prevent ammonia issues.

    Make sure all equipment is working right. Check pumps, heaters, timers, and controllers. If there were circuit breaker trips, review them. Clean impellers and skimmer cups as needed to ensure good flow.

    If there was illness, compare photos and use treatments like NT Labs Disease Solve or Interpet Disease Away+ as directed. Remove activated carbon when using these treatments.

    Lastly, thank the person or service that cared for your tank. Pay them fairly, leave feedback, and save their contact for next time. These steps help keep your nano tank healthy after you’re away.

    FAQ

    How long can I safely leave my nano tank without feeding?

    Healthy community tanks can handle a five-day fast. Tanks with live rock or macroalgae might last longer. But, some fish and shrimp need food every day.

    Always check what fish you have before fasting your tank.

    Which feeding method should I choose for a one-week vacation?

    Pick a method based on your fish and how reliable it is. Holiday blocks or gel food can last about a week. Automatic feeders work for pellets but need testing.

    For vulnerable fish, a sitter is best. Test your method weeks before your trip.

    What are the most common feeding-related failures while I’m away?

    Overfeeding and automatic feeder jams are common. So is inexperienced sitters overfeeding. These can cause ammonia spikes and algae blooms.

    Pre-portion food and test your equipment. Give clear instructions to your sitter.

    When should I stop adding new livestock or equipment before travel?

    Don’t add new fish or equipment two weeks before you leave. New additions can bring disease or stress to your tank.

    What pre-trip maintenance should I perform the week before leaving?

    Do a partial water change a week before. Clean skimmer cups and filters but avoid deep cleaning the day before. Check impellers and test water daily.

    Scrape algae and siphon detritus into the change water.

    How do I prepare spare supplies for emergencies?

    Mix extra saltwater and store it for topping off. Top up ATO reservoirs or add a second one. Check CO2 cylinders for reactors.

    Have enough 2- or 3-part supplements. Leave biological boosters and chemical media accessible.

    What should I include in written sitter instructions?

    Write a clear feeding schedule with pre-portioned food. Include locations of all food and supplements. Tell them about daily tasks and acceptable water ranges.

    Show them the circuit breakers and emergency steps. Include phone numbers and photos for emergencies.

    How do I train a sitter who isn’t experienced with aquaria?

    Show them how to clean impellers and top off with saltwater. Teach them to remove carbon before medicating. Explain how to read test kits.

    Walk them through the circuit breaker layout and timers. Leave written steps and phone numbers for you and a backup. Pre-portion food to prevent overfeeding.

    Are professional maintenance services worth hiring for holidays?

    Yes, for long trips or vulnerable fish, pros provide consistent care. They can do small water changes. They cost more but reduce risk.

    Check their experience, references, and if they can handle your tank size and equipment.

    Which monitoring tech should I consider for remote oversight?

    Use real-time monitors for temperature, pH, and ammonia. They alert you remotely. Leak detectors and a camera with an orange filter help you see issues and call for help.

    How can I prevent algae blooms while I’m away?

    Reduce photoperiod slightly if safe for your fish. Verify timers and controllers. Avoid overfeeding and add a Polyfilter before leaving.

    Instruct sitters to remove food remnants and siphon detritus. Scrape algae and reduce nutrients before you leave.

    What should I do about lighting schedules during my trip?

    Keep lights on a consistent schedule with reliable timers. Consider a battery-backed timer or UPS for critical controllers. If corals need full light, maintain it; else, reduce hours to curb algae.

    Test programmable lights several days in advance.

    How do I prepare for heater or pump failures while away?

    Ensure heaters and pumps are working before you leave. Avoid installing new heaters last-minute. Leave spare pumps/heaters if possible.

    Label circuit breakers and instruct sitters on how to clean impellers and switch in spares. Use battery backups or UPS units for essential controllers.

    What emergency supplies and medications should I leave for the sitter?

    Pre-measure common medications and supplements with clear dosing instructions. Leave carbon removal instructions for medicated dosing. Make polyfilter and biological supplements accessible with written steps.

    What should the sitter do if they find a sick or dead fish?

    Take clear photos, remove carcasses immediately, and contact you and the aquarium backup. If photos suggest a treatable disease, follow the provided dosing instructions and remove carbon where required.

    If parameters are out of range, perform a small partial water change using your prepared saltwater.

    What immediate checks should I perform when I return?

    Test ammonia and nitrite first, then pH and alkalinity. Inspect for dead or stressed fish and remove them. Perform a normal partial water change, clean or replace mechanical filter pads, and check impellers and skimmer cups.

    Verify all pumps, heaters, and controllers are working.

    How do I recover the tank if I find elevated ammonia or nitrite on return?

    Remove any uneaten food and dead animals. Perform a partial water change and vacuum detritus. Add biological booster if needed (per instructions), reduce feeding, and monitor daily until levels normalize.

    If disease is present, consult photos and use pre-arranged medications following label guidance.

    Any final tips to reduce the risk of catastrophic failures while I’m away?

    Enter the trip with a stable, well-maintained tank. Avoid risky changes for two weeks prior, test feeding and monitoring methods in advance, create redundancy for supplies, and leave clear documented instructions for a sitter or pro.

    Combining monitoring tech, good preparation, and trusted help dramatically lowers the chance of flooding, RTN/STN, algae blooms, or equipment failure.

  • How to Safely Remove Algae from Rocks and Wood Decor

    How to Safely Remove Algae from Rocks and Wood Decor

    Rocks and wood ornaments bring character to your aquarium, garden, or patio. But, algae, lichens, and moss can make them look bad and slippery. This guide shows how to safely remove algae from rocks and wood decor. You’ll learn how to restore their look without harming them or nearby plants and pets.

    Choosing the right method is key. For example, aquarium-safe plastics can be cleaned with hot water and a toothbrush. Or, you can use Plastic Plant Cleaner tablets. Natural stone and wood, on the other hand, need gentle cleaning or a high-pressure rinse. The wrong cleaner can stain wood or damage stone.

    This guide aims to help you deep clean ornaments safely. It will cover step-by-step techniques, tools, and eco-friendly options. You’ll also get safety tips to keep your ornaments looking great.

    Understanding Algae Growth on Home Decor

    A close-up view of algae growth on various home decor items, including intricately-carved wooden sculptures and textured rock accents. The foreground features a vibrant green algae covering, showcasing its smooth, slimy texture contrasted against the rough surfaces of the wood and rock. In the middle ground, soft natural light filters through a nearby window, casting gentle shadows and enhancing the organic feel of the scene. The background includes a blurred, cozy interior setting with plants and warm-toned decor elements, adding to the sense of home. The overall atmosphere is calm and serene, inviting a sense of curiosity about the interplay between nature and interior design. Utilize a shallow depth of field to focus closely on the algae while softly blurring the backdrop.

    Algae grows on home decor when moisture, shade, and organic material meet. In aquariums, algae and detritus form thin films on plastic plants and ornaments. Even aquarium-safe paints and plastics resist leaching yet allow microscopic spores to settle and colonize.

    Outdoors, algae on rocks and wood often appears as green films or powdery patches. Lichens and moss may join the mix, producing crusts or cushion-like carpets in damp shade. Nostoc and other types can create jelly-like clumps on compacted gravel after wet winters.

    Different algae types need different responses. Pond algae thrives on excess nitrates and phosphates, while surface algae on stone and decking responds to poor drainage and low sunlight. This difference shapes how you address algae on rocks and wood and how you clean delicate ornaments without harming their finish.

    Your choice of cleaning method should hinge on material and environment. Plastic, natural stone, and wood react differently to scrubbing, cleaners, and soaking. Knowing the causes of algae on ornaments helps you pick gentle techniques that preserve paint, grain, and delicate details.

    • Check location: shade, humidity, and airflow affect growth.
    • Identify material: plastic vs. natural stone vs. wood needs different care.
    • Match treatment: select approaches for algae growth on home decor and learn how to clean delicate ornaments safely.

    The Importance of Deep Cleaning Ornaments

    A beautifully arranged scene focusing on deep cleaning ornamental decor items like rocks and wood pieces, showcasing the meticulous process of removing algae. In the foreground, a pair of hands, gloved and gently scrubbing an intricately carved wooden ornament with a soft brush, while a small basin of warm, soapy water is nearby. The middle ground features a collection of colorful, algae-covered rocks and wood, partially submerged in water, emphasizing their natural textures. The background is softly blurred, with gentle sunlight filtering through greenery, creating a serene atmosphere. The scene is bright and inviting, highlighting the importance of maintaining home decor. The image should capture the care and attention required in deep cleaning, making it appealing yet informative.

    You might use aquarium helpers like bristlenose catfish or nerite snails to fight algae. But, even they can’t stop algae buildup on plastic, stone, or wood. Regular deep cleaning of ornaments brings back their look and makes them safe to touch.

    For plastic ornaments, a special cleaner or a soft brush can revive their color. Natural stone and wood might need a brush or pressure washer to remove algae without harm.

    Think about safety on paths and decks. Algae, lichens, and moss might look nice but can be slippery. Learning why deep cleaning ornaments is important helps avoid falls and slow down surface damage.

    Deep cleaning stops nutrient imbalances in ponds and containers that lead to more algae. Start with soap, baking soda, or a stiff brush. Use harsher treatments only for tough problems, and pick safe products for pets and wildlife.

    Follow the best cleaning practices to make decorations last longer and keep places clean. You can clean most ornaments yourself. But, if they’re delicate, valuable, or hard to reach, consider professional cleaning services.

    • Inspect pieces regularly to catch buildup early.
    • Use gentle tools and nonabrasive cleaners first.
    • Test any chemical on a small area before full application.
    • Hire professional ornament cleaning services for fragile antiques or large installations.

    Tools and Supplies Needed for Cleaning

    First, match your tools to the material. For aquarium plastic ornaments, use hot water and old toothbrushes for gentle scrubbing. Use separate brushes for aquaria items to avoid harming fish health.

    For natural stone and wood, skip chemical cleaners meant for plastic. Use stiff brooms or wire brushes for stone. Test a small wood patch before using tougher tools. A pressure washer works well on outdoor rock decor, but wear goggles.

    • Stiff bristle brushes for patios, pots, and decking.
    • Narrow brushes and pointed tools for joints and cracks.
    • Pruners, rakes, and forks to improve drainage and airflow around decor.

    Home remedies are great for many surfaces. Mix dish soap, baking soda, and water for scrubbing patios and pots. For ponds and garden features, use barley straw bales or pond clearing treatments safe for wildlife, pets, and children.

    When dealing with delicate pieces, use soft brushes and gentle cleaners. Carry soft cloths and the right supplies to avoid scratching painted or glass surfaces.

    For deep cleaning aquarium plastic ornaments, use a two-step soak routine. Soak in 10 liters of water with a tablet for eight hours or more. Then, rinse and soak in 10 liters of fresh water with neutraliser for about 15 minutes.

    As you gather supplies for deep cleaning, include protective gear: gloves, goggles, and masks. Choose the best supplies for each job to avoid damage and save time.

    Keep maintenance simple to prevent regrowth. Brush regularly and use garden tools to improve airflow. Choose commercial products labeled safe for your setting. These steps help your cleaning tools and supplies last longer and work better.

    Step-by-Step Guide to Cleaning Rocks

    First, figure out what your ornament or garden stone is made of. Natural stone and plastic need different care. Knowing this helps you choose the right tools and avoid harming your rocks when cleaning.

    For plastic rocks, warm water and a toothbrush work well. You can also soak them in 10 liters of warm water with a cleaning tablet for eight hours. After, rinse and soak again in fresh water with a neutralizer for 15 minutes before putting them back outside.

    Natural stone needs a dry brush first. Use a stiff broom or wire brush to remove loose dirt and growth. Then, mix dish soap, water, and baking soda to make a paste. Scrub with a stiff brush to remove algae from patios, pots, and large rocks.

    1. Identify material: natural stone versus plastic ornament pieces.
    2. Plastic pieces: hot water + toothbrush, or soak in 10 L water + cleaning tablet for 8+ hours; rinse and neutralize.
    3. Natural stone: dry brush to remove loose growth, then wet scrub with soap and baking soda.
    4. If needed, use a pressure washer carefully on durable stone; avoid using it where drainage or mortar might be damaged.
    5. Let stones dry in direct sun to discourage regrowth and allow natural weathering to help cleanse surfaces.

    For hard surfaces, a wire brush can remove tough growths between paving stones. Use a weeding tool to pull weeds between joints to stop algae from settling. Regular brushing and spot cleaning prevent thick regrowth and reduce the need for harsh treatments.

    If DIY cleaning doesn’t work, try commercial cleaners labeled safe for stone. Avoid bleach on porous stone as it can damage the material and harm nearby plants. This guide helps keep your decorations safe while removing algae from rocks.

    Step-by-Step Guide to Cleaning Wood Decor

    First, figure out what kind of wood you have. Softwoods and older woods need gentle care. Knowing the finish helps you clean without damaging paint or patina.

    Always test a cleaning solution on a hidden area first. Use mild dish soap, water, and a bit of baking soda for everyday cleaning. For tough spots, a low-pressure rinse might work, but avoid power washers to prevent damage.

    Follow a simple five-step cleaning routine. 1) Sweep away loose dirt with a stiff broom or soft brush. 2) Apply your tested soap mix and let it sit for a bit. 3) Gently scrub with a soft brush on detailed areas. 4) Rinse well and let it dry in the sun. 5) Apply a wood sealant to protect against moisture and algae.

    For slippery surfaces, like benches or decking, use a wire brush on worn spots. Prune plants to improve airflow and light. Use tack-down materials or chicken wire for traction on walkways.

    When cleaning delicate ornaments, use soft brushes and gentle soap. Test first to avoid scratches. Choose cleaners that are safe for pets and plants if the ornaments are near ponds or landscaping.

    After cleaning, dry the wood completely. Sun and good airflow help reduce moisture and algae. Apply a quality exterior sealant to keep your wood looking great.

    Additional Tips for Maintaining Clean Decor

    Start a light cleaning routine to avoid heavy buildup on rocks, wood, and ornaments. Do quick checks often to catch algae and debris early. Small steps can make a big difference in keeping your decor clean.

    For monthly cleaning, use a soft brush during damp seasons. Rinse ornaments after storms and sweep surfaces to stop dirt from getting stuck in crevices. These easy steps are DIY cleaning tips that don’t need special tools.

    • Brush porous surfaces regularly to block algae, lichens, and moss from taking hold.
    • Improve drainage by loosening compacted soil and adding a slight slope to paved areas.
    • Keep drains clear of leaves and debris to reduce standing water that fuels growth.

    Follow ornament maintenance tips for seasonal displays. Store delicate pieces indoors in dry, ventilated containers between uses. This helps keep finishes in good shape and cuts down on deep cleaning needs.

    Use gentle home remedies like dish soap with baking soda for patios and pots when needed. Balance pond plants and fish, avoid overfeeding, and skim debris often to limit algae blooms. These are cost-effective ways to clean ornaments and outdoor decor.

    Plan a deeper clean before special displays or high-use periods. Rotate routine brushing, rinsing, and targeted cleaning to complement biological cleaners and aquarium janitors. A consistent schedule keeps your decor ready and reduces intensive work later.

    Eco-Friendly Alternatives for Cleaning Algae

    You can fight algae on rocks, wood, and ornaments with gentle methods. Begin with brushing, pruning, drying, and adding sunlight. These steps are often the most effective and safe for pets, fish, and plants.

    For plastic aquarium ornaments, follow the manufacturer’s advice. Many brands suggest using a Plastic Plant Cleaner to remove residues. This way, items can safely go back into the tank. Hot-water scrubbing is also a good eco-friendly choice for both plastic and natural decor.

    To clean patios, pots, and decking, mix dish soap, water, and baking soda. Use a stiff brush and rinse thoroughly. These DIY tips are effective on many surfaces without using harsh chemicals.

    If you manage ponds, try biological controls like barley straw bales. Also, balance plants and fish in your pond. Use commercial treatments only when needed and choose ones safe for wildlife, pets, and children. Garden centers can help find legal, suitable options for you.

    When using a product, pick biodegradable, wildlife-safe formulas for outdoor use. Avoid chlorine, bleach, or strong patio chemicals near water, soil, or pet areas. Safe cleaning alternatives reduce risks while keeping your decor looking good.

    • Prioritize brushing, drying, and improved drainage.
    • Use mild soap and baking soda solutions for most surfaces.
    • Choose wildlife-safe commercial products only if cultural controls fail.

    Safety Precautions When Cleaning

    Before you start, find out what each ornament is made of. Some need special care, like natural stone and wood. Use aquarium cleaners like Seachem or API for safety. But, don’t use them on plastic or wood.

    Always follow basic safety rules. Check the labels and test any mix on a small area first. Wear gloves, goggles, and a mask with chemicals or power tools. Clean in a well-ventilated area to keep pets and kids safe.

    Be careful with pressure washers. Wear goggles and move the nozzle to avoid damage. They use a lot of water and can harm drainage if not used right. For soft surfaces, avoid harsh chemicals like bleach.

    • Identify material before treatment.
    • Read and follow label instructions.
    • Use gloves, goggles, and a mask.
    • Work outside or ventilate indoor areas.
    • Keep pets and children away during treatment.

    Choose manual scrubbing when you can to avoid chemicals. Brushing and manual removal are safe with the right gear. If you must use products, make sure they’re safe for all living things.

    1. Test cleaners in a hidden spot to check for damage.
    2. Neutralize and flush aquarium ornaments thoroughly before reuse.
    3. Avoid runoff into storm drains or garden beds.
    4. Store cleaners out of reach of children and pets.

    Have a simple safety checklist for deep cleaning. It should remind you to identify materials, wear protection, ventilate, and prevent spills. These steps keep you safe and your decor in good shape.

    Dealing with Stubborn Algae Buildup

    Start with a gentle approach and move up to stronger methods for stubborn algae. Wash ornaments with mild soap and a baking soda scrub. Rinse and let items dry in sunlight to weaken remaining growth.

    When gentle scrubbing fails, use mechanical options for hard surfaces. A wire brush or a pressure washer will remove entrenched growth on stone and concrete. Test a small area first to avoid damage to softer materials like painted plastic or driftwood.

    For very fouled aquarium plastics, try a specialized plastic plant cleaner tablet. Soak one ornament in 10 liters of water with the tablet for at least eight hours, then neutralize by rinsing in fresh water for 15 minutes. This method can restore plastics that resist ordinary cleaning.

    Natural stone and wood may respond better to repeated manual scraping and prolonged sun exposure. Power washing can strip tough algae but may harm delicate surfaces. Balance pressure and distance to protect texture and finish.

    Garden and pond algae often need ecological fixes. Consider barley straw or pond-safe treatments to rebalance growth. Maintain good drainage, add sunlight where possible, and manage plant and fish populations to reduce recurrence.

    • Escalate from soap and baking soda to wire brushing and pressure washing.
    • Use pond-specific products only if they are safe for wildlife and pets.
    • Always test treatments on a hidden spot before full application.

    If DIY steps and commercial products do not remove tough algae, seek professional ornament cleaning services. Specialists experienced with conservation can use deep cleaning techniques for ornaments without risking fragile pieces.

    Protect surrounding soil and water from runoff during any treatment. Repeated mechanical removal and cultural changes such as improved drainage and added sunlight help prevent future problems and cut long-term cleanup needs.

    How to Prevent Future Algae Growth

    Combining small daily habits with seasonal work can limit algae. Use a monthly inspection schedule during damp months to spot early patches. Light brushing after storms stops spores from settling and helps prevent algae on ornaments.

    Keep areas drier and brighter. Prune overhanging plants to increase sunlight and airflow. Improve drainage by sloping surfaces slightly and keeping drains clear. These steps reduce standing moisture and make it harder for algae to gain a foothold.

    For water features, add biological helpers like bristlenose catfish, nerite snails, otocinclus, and freshwater shrimp to control algae naturally. Pair these with good pond care: avoid overfeeding fish, add oxygenating plants, and remove debris to maintain balance.

    Protect wood and porous stone with appropriate sealants before wet seasons. Store delicate ornaments indoors when heavy rain is expected. These actions reduce water uptake and help prevent algae on ornaments without harsh chemicals.

    Adopt best practices for cleaning ornaments to prevent regrowth. Schedule a seasonal deep clean, use gentle scrubbing to remove early film, and rinse thoroughly. When needed, follow DIY ornament cleaning tips prevention like using diluted vinegar or a mild bleach soak for non-porous pieces.

    • Monthly inspections in damp months
    • Brush after storms to remove spores
    • Prune and improve airflow around decor
    • Use biological janitors in ponds and aquariums
    • Seal wood and store sensitive items during wet seasons

    Keep a short log of corrective actions: pruning dates, drainage fixes, and deep-clean sessions. This habit helps you spot trends and refine your routine to better prevent algae growth over time.

    Conclusion: Keeping Your Decor Pristine

    To keep your decor looking great, choose the right cleaning method for each material. Plastic ornaments do well with hot water and a soft brush or special cleaner. Natural stone and wood need a gentle scrub or a careful rinse with power.

    For items from aquariums, always use safe practices to avoid harming the water when putting them back. Algae and similar growths are common but usually safe. They can make surfaces slippery and affect looks.

    Try non-chemical ways to manage algae, like brushing, improving drainage, and adding sunlight. Eco-friendly cleaners like dish soap and baking soda work well on many surfaces. But, ponds and living systems need safe, balanced products.

    If you’re dealing with tough or delicate items, think about getting professional help to avoid damage. Always follow safety tips and choose methods that are good for the environment. A simple cleaning routine will keep your decor looking good for a long time.

    FAQ

    How do I safely remove algae from plastic aquarium ornaments?

    For light buildup, remove the ornament and scrub with hot water and an old toothbrush. For heavy fouling, use a Plastic Plant Cleaner tablet: soak the ornament in 10 L of water with one tablet for a minimum of 8 hours, drain and rinse, then soak in 10 L of fresh water containing the manufacturer’s neutraliser for 15 minutes before returning the piece to the aquarium. Keep separate brushes for aquarium use to avoid cross-contamination. Do not use Plastic Plant Cleaner on natural stone or wood.

    What causes algae, lichens, moss, and similar growths on rocks and wood?

    These organisms thrive where surfaces are damp, shaded, and have poor air circulation. Algae form thin green films in wet areas; mosses create cushion-like carpets in deep shade; lichens can colonize exposed bright surfaces. Nutrient imbalances (for example, nitrates and phosphates in ponds) also promote algal growth. Understanding the environment and material helps determine the best cleaning approach.

    When should I deep clean ornaments instead of doing a light wipe-down?

    Deep cleaning is needed when buildup is visible, slippery patches form, odors or heavy detritus develop, or when algae persist despite routine maintenance. Deep cleaning is also advisable before special displays, when preparing aquarium ornaments for reintroduction, or if growth creates a slip hazard on walkways or decking.

    What tools and supplies should I have on hand for cleaning rocks and wood decor?

    Useful tools include stiff brooms and stiff-bristle brushes for hard surfaces, soft brushes for delicate items, an old toothbrush for small crevices, narrow brushes for joints, pointed tools or weeding knives for cracks, and a pressure washer for sturdy stone. Supplies include dish soap, baking soda, water, gloves, goggles, and masks if using power equipment or chemicals. For aquarium plastics, keep Plastic Plant Cleaner tablets and neutraliser if needed.

    How do I deep clean natural stone ornaments?

    Start dry: brush off loose dirt and debris with a stiff broom or brush. Mix dish soap with water plus a little baking soda and scrub with a stiff bristle brush for algae or green films. Rinse thoroughly with clean water. If stains remain, a careful pressure-wash can help—test a small area first to avoid surface damage. After cleaning, allow the stone to dry in sunlight to discourage regrowth. Avoid bleach on porous stones and prevent runoff into garden beds or drains.

    How should I clean wooden garden ornaments and decking without damaging the finish?

    Identify the wood finish and age first. Test a mild mix of dish soap, water, and baking soda in an inconspicuous spot. Use a soft to medium brush and scrub gently, then rinse and let the wood dry fully in sun. For stubborn growth, a low-pressure wash may work, but test to prevent stripping grain. After cleaning, consider applying an appropriate exterior wood sealant or preservative to reduce future moisture uptake. Avoid plastic-ornament cleaners on wood.

    What eco-friendly cleaning alternatives work well on patios, pots, and decking?

    A simple, effective mix is dish soap, water, and baking soda used with a stiff brush. For ponds and water features, non-chemical options include barley straw bales, balanced planting, debris removal, and managing fish numbers and feeding to reduce nutrient-driven algae blooms. Choose commercial products only if they are labeled safe for wildlife, pets, and children.

    What safety precautions should I follow when cleaning ornaments?

    Identify the material before you begin and always read product labels. Wear gloves, eye protection, and a mask when using chemicals or pressure washers. Work outdoors or in well-ventilated areas, keep pets and children away during treatment, and avoid letting chemical runoff enter storm drains or garden beds. For aquarium ornaments, neutralise and rinse thoroughly before returning items to the tank.

    How do I handle stubborn algae or lichens that won’t come off with scrubbing?

    Escalate in steps: begin with a soap and baking soda scrub, then use stiffer brushes or wire brushes for hard stone. For entrenched growth on sturdy surfaces, a pressure washer can be used carefully. For aquarium plastics, use Plastic Plant Cleaner per instructions. If DIY and garden-safe commercial products fail, or if items are fragile or valuable, consider hiring professional ornament cleaning services experienced in delicate materials and conservation techniques.

    Can I leave some algae or moss on outdoor stone for aesthetic or ecological reasons?

    Yes. Algae, lichens, and mosses can add character and habitat and are often harmless. But, leave them only where they don’t create slip hazards or harbor pests. For walkways, decking, and high-traffic areas, you should remove buildup for safety and aesthetics. Use selective cleaning so you preserve beneficial growth where appropriate.

    How often should I inspect and clean my outdoor ornaments to prevent buildup?

    Inspect monthly during damp seasons and after heavy storms. Light brushing or rinsing after storms and a seasonal deep clean are good practice. Store delicate ornaments indoors during extended wet periods, sweep or brush surfaces monthly in damp months, and apply corrective actions like pruning and drainage improvements as needed.

    How do I prevent future algae growth on rocks and wood decor?

    Prioritize mechanical and cultural controls: improve drainage, reduce compaction, prune to increase sunlight and airflow, and slope surfaces to avoid standing water. Use appropriate sealants on exterior wood. For ponds, maintain a balanced plant and fish population, remove debris regularly, avoid overfeeding, and use barley straw or wildlife-safe pond treatments if necessary. Regular brushing and timely maintenance prevent establishment of stubborn growth.

    Are commercial patio and moss-killer products safe to use around pets, children, and wildlife?

    Some commercial products are formulated to be pet- and wildlife-safe, but labels vary widely. Always choose products explicitly labeled safe for animals and aquatic life, follow instructions carefully, and avoid runoff into gardens and water features. When possible, prefer non-chemical methods first and use chemicals only when necessary.

    What should I do before returning cleaned ornaments to an aquarium or pond?

    Rinse thoroughly to remove any residues. For aquarium plastics cleaned with Plastic Plant Cleaner, follow the required neutraliser soak per the product instructions (10 L fresh water with neutraliser for 15 minutes). Ensure no cleaning agents remain that could harm aquatic life. Use separate brushes for aquarium and garden tasks to avoid contamination.

    When is it time to call a professional ornament cleaning service?

    Hire a professional when ornaments are fragile, valuable, historically important, or difficult to reach safely. Professionals can use conservation-grade techniques and equipment to preserve delicate finishes while removing stubborn biological growth. Also consider professionals if repeated DIY and garden-safe commercial treatments fail to resolve the problem.

  • The Importance of GH and KH Stability in Small Water Volumes

    The Importance of GH and KH Stability in Small Water Volumes

    In small aquariums like nano tanks, water chemistry can change fast. You need GH and KH stability to keep fish and plants healthy. Adding minerals and using the right supplements helps avoid stress from sudden changes.

    Electrolytes like calcium and magnesium help with balance and function. They boost the immune system and lower infection risks, like Columnaris. Without enough minerals, fish and plants can become weak and die quickly.

    KH, made of carbonate and bicarbonate ions, acts as a buffer. It prevents pH drops. In planted setups, it helps CO2 and pH work together for plants and animals to thrive. Not all pH changes are the same, and small spaces make big changes worse.

    This article will help you monitor GH and KH, add minerals safely, and choose the right supplements. It also teaches how to avoid overdoing it and protect sensitive life in small aquariums. Follow these steps for better mineral health in your water systems.

    Understanding GH and KH: Definitions and Importance

    A visually engaging illustration defining GH (General Hardness) 
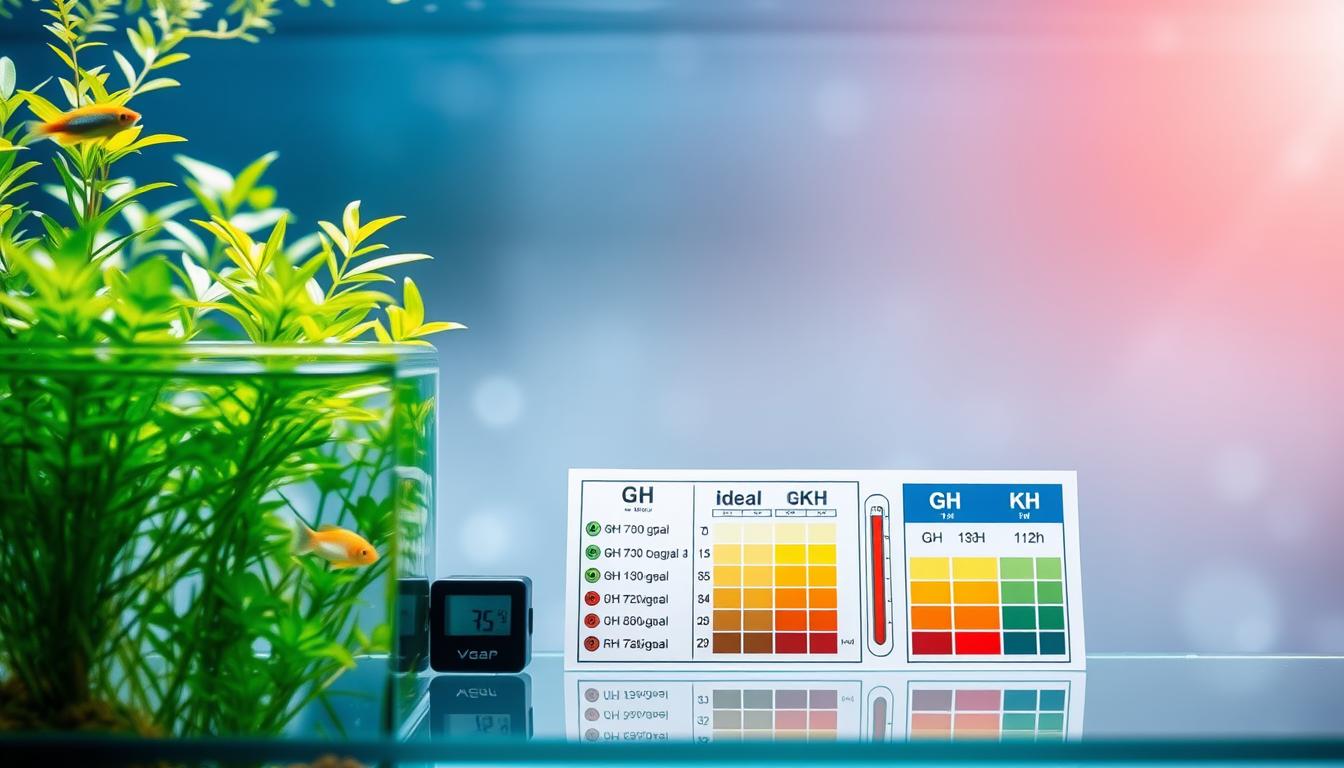
and KH (Carbonate Hardness) as essential parameters for water chemistry in small aquatic environments. In the foreground, prominently displayed, high-tech laboratory glassware filled with clear aqua-blue water, with colorful test strips/sticks indicating different levels of hardness. In the middle ground, a detailed infograph showcasing the chemical compositions of GH and KH, with molecular structures and images of aquatic life like fish and plants that depend on stable water chemistry. In the background, soft-focus imagery of a serene small aquarium, diffuse natural lighting creating a calm, scientific atmosphere. Capture the mood of exploration and understanding, emphasizing clarity and professionalism, ensuring no text or annotations disrupt the visual.

    GH stands for general hardness. It measures the calcium and magnesium in your water. These minerals are vital for your fish and plants to function well.

    KH, or carbonate hardness, is about keeping pH stable. It’s like a buffer that prevents sudden changes in water pH. This is important for your fish’s health.

    When you need to convert degrees German hardness, remember: 1 dH is about 17.9 ppm. This is useful for adjusting your water’s mineral levels. Always check the labels on test kits and supplements.

    GH helps fish and plants maintain balance. It’s essential for their health and growth. Without enough GH, plants may not grow well.

    KH keeps the pH in your tank stable. It protects your fish from sudden changes in water pH. This is important for their well-being.

    KH test kits measure how well your water can handle pH changes. They don’t always give a precise count. Always look at your GH levels and your tank’s overall health.

    When using mineral supplements, aim for balance. Balanced GH and KH levels are key for your fish and plants. They help in maintaining a healthy aquarium environment.

    The Role of Mineral Replenishment in Aquariums

    A vibrant aquarium scene illustrating the concept of replenishing minerals. In the foreground, a close-up of colorful aquarium plants and substrates is featured, with mineral supplements displayed attractively alongside a small measuring spoon. The middle ground showcases an aquarium filled with crystal-clear water, where various fish species swim gracefully, highlighting the importance of a balanced ecosystem. In the background, soft light filters in through the water surface, creating a serene ambiance with gentle ripples. Use soft, natural lighting to enhance the colors and textures, and employ a slight depth of field to draw focus to the foreground. The overall atmosphere is calm and educational, conveying the significance of mineral replenishment in maintaining aquatic health.

    In closed aquarium systems, you lose positive mineral ions all the time. Fish, plants, and bacteria take in calcium, magnesium, and carbonate. Regular water changes and substrate interactions pull more ions from the water. Replenishing minerals helps keep GH and KH within your target ranges so livestock and plants stay stable.

    Using RO/DI-treated water without remineralization can leave your aquarium nearly electrolyte-free. Reverse osmosis removes dissolved salts and carbonate hardness, while water softeners trade calcium and magnesium for sodium. That water cannot hold essential mineral ions long term. All RO water should be remineralized and buffered before it goes into your tank to prevent KH collapse and swings.

    Minerals deficiency lowers redox and weakens fish defenses. Low levels of calcium and magnesium upset osmotic balance, which stresses the gills and skin. Stressed animals become more susceptible to disease. Maintaining proper mineral cations supports osmotic equilibrium and long-term health for both fish and invertebrates.

    Practical forms of replenishment include mineral supplements and specific salts you can add directly to the water. Popular products used by hobbyists include Seachem Equilibrium for general hardness and SeaChem Reef Builder for marine systems. Wonder Shells, Cichlid Salt, calcium chloride, and magnesium salts are common tools for targeted dosing. Choose products that match the needs of your biotope and check dosing instructions carefully.

    For planted tanks, KH and mineral balance affect CO2 efficiency and nutrient uptake. If minerals are lacking, plants take up fewer nutrients and growth slows. That leads to poor plant health and less stable water chemistry for your livestock. Regular dosing and occasional tests help you keep both plants and animals thriving.

    Feeding mineral rich foods can help top up some elements. High-quality prepared diets and live foods supply trace elements that benefit fish. You should not rely on feeding alone, as in small or RO-based systems. Water column supplementation with mineral supplements remains necessary to maintain steady GH and KH in those setups.

    Use a simple plan: test GH and KH regularly, choose a remineralizing product suited to your water, and combine water additions with balanced feeding. That approach reduces the risk of minerals deficiency and stabilizes redox and osmotic conditions for healthier aquarium inhabitants.

    Key Factors Affecting Mineral Content in Small Water Volumes

    Changing water chemistry in your small aquarium can happen fast. Water changes with low-mineral water, like RO/DI, remove calcium and magnesium. This increases the risk of minerals deficiency for fish and plants.

    Plants and animals need minerals to grow. Substrate and some filter media can hold onto these minerals, making them less available. Biological processes like nitrification and organic acid production can slowly lower pH over time.

    • Nitrification makes nitric acid, which can lower pH if KH is low. It can cause sudden pH drops after big water changes or changes in bio-load.
    • Organic acids from tannins, humic acids, and decaying matter reduce alkalinity. They can shift GH and tint the water.
    • CO2 injection and photosynthesis cycles drive daytime pH rises and nighttime falls. This creates wide swings when buffer capacity is small.

    Small tanks have less buffering capacity. The same amount of acid or base causes bigger pH shifts than in a large tank. Low KH means poor resistance to those swings. Watch for pH crashes after a heavy feed, die-off, or large water change.

    Some additives have strong acids that shock livestock. Tannic acids from driftwood or leaves change pH gently without harming tissues. Water softeners and aggressive pH Down products can remove essential ions and harm sensitive species.

    Natural mineral sources offer gentler options for balanced minerals intake. Crushed coral, aragonite, or mineral-rich substrates like CaribSea Eco-Complete and Seachem Onyx Sand provide steady calcium and magnesium. Driftwood or peat can be used for controlled softening when you want lower GH and KH, but expect some color in the water.

    Plan water changes, substrate choices, and filtration with your livestock and plants in mind. Balancing source water and natural minerals inputs helps prevent minerals deficiency. It keeps GH and KH within safe ranges for your system.

    How to Monitor GH and KH Levels Effectively

    You can use liquid test kits or digital meters to check GH and KH levels. Liquid kits are easy to use and give accurate readings. Digital meters are quicker but need regular calibration.

    Remember, 1 dKH is about 17.9 ppm. This helps you compare results from different kits. It also helps when adding mineral supplements.

    Test KH often to keep pH stable. GH shows the level of important electrolytes. For small tanks or those with CO2 systems, test weekly.

    Always test before and after water changes and CO2 injection. Check KH right before and after CO2 to avoid pH crashes. Look out for signs like fish gasping or plant melting.

    • Keep a simple log of GH, KH, pH, and temperature for trend spotting.
    • Test immediately after any major change: new substrate, new additives, or large water swaps.
    • When using RO water, test the starting GH and KH so you can adjust remineralization accurately with mineral supplements.

    Be careful when reading KH kit results. Other anions can affect buffering capacity. Use these results as a guide, not a rule. Compare with GH to understand mineral balance.

    1. Choose a reliable liquid kit such as those from API for routine checks.
    2. Use a calibrated digital meter for precision during breeding or sensitive setups.
    3. Adjust dosing based on trends, not single readings, to avoid overcorrection and minerals deficiency or excess.

    Practical habits reduce risk. Test regularly, log results, and match mineral supplements to needs. This keeps minerals absorption steady and prevents harm to fish and plants.

    Best Practices for Replenishing GH and KH

    When adding minerals to small water volumes, do it slowly. This avoids shocking fish and plants. Try to change GH or KH by 1–2 dKH each day. This method keeps the water stable and helps minerals absorb better.

    Always test your water before adding anything. Mix additives well before adding them to the water. Use a slow drip method when mixing RO water. This helps keep the minerals balanced.

    Opt for products that buffer slowly instead of raw soda ash. Brands like Seachem have products like Alkaline Buffer and Equilibrium. These raise KH and GH in small steps. Use bicarbonates or balanced buffers to increase KH, not strong acid pH Down products.

    For calcium and magnesium, add them in small amounts. Use products like Seachem Equilibrium or Wonder Shells for easy dosing. This helps keep the minerals balanced. Use careful dosing to avoid sudden pH changes in CO2 tanks.

    If you have a CO2 system, aim for KH levels that keep pH stable. CO2 tanks usually do well at 3–6 dKH. Low-tech systems often have KH levels between 3–8 dKH. Keeping KH above 3 dKH helps prevent pH crashes during photosynthesis.

    • Test before and after dosing to track changes.
    • Raise KH with bicarbonates or balanced buffers, not concentrated alkali salts.
    • Raise GH with calcium chloride, magnesium supplements, or multielement remineralizers.

    Follow a simple dosing plan: measure, mix, dose slowly, and watch. When mixing RO water, use slow drip mixing and check parameters daily. This method ensures safe mineral replenishment.

    Don’t forget to feed your fish mineral-rich foods. Offer foods like frozen mysis, brine shrimp, and high-quality pellets. Good nutrition helps with mineral absorption for fish and invertebrates.

    Keep a record of your dosing and test results. Regular tracking helps refine your schedules. It keeps the water chemistry stable and your fish healthy.

    The Impact of pH on GH and KH Relationships

    pH levels can change for many reasons. For example, dissolved CO2 can turn into carbonic acid and lower the pH. When you add CO2 for plants, it can quickly change the pH unless the water’s kH buffers it. Try to keep the kH between 3–6 dKH in CO2-injected tanks to avoid big swings.

    KH, or carbonate and bicarbonate, helps by neutralizing acids. It does this by binding H+ ions. This action prevents sudden pH drops that can stress fish. Keeping alkalinity above about 50 ppm helps protect nitrifying bacteria and keeps the biological filtration stable.

    GH, which is mostly calcium and magnesium, doesn’t directly change the pH. But it does support ionic balance and affects redox. Stable GH helps steady minerals absorption at the gill and root surfaces for both livestock and plants.

    Not all pH changes are bad. For example, weak organic acids, like tannins from driftwood, lower pH slowly without harming fish. But be careful of pH products that use strong acids or bases. They can change the pH too much and harm tissue.

    For many freshwater setups, it’s better to focus on pH stability than a single target number. Match your KH and GH adjustments to the species you keep and your CO2 routine. Stable alkalinity and balanced hardness lead to better mineral health benefits for fish and plants.

    • Test CO2 and kH regularly if you inject CO2.
    • Use natural minerals sources, such as crushed coral or commercial reef sand blends, to raise kH slowly when needed.
    • Supplement calcium and magnesium carefully to support minerals absorption without causing sudden ionic shifts.

    Choosing the Right Products for Mineral Replenishment

    When picking products for your aquarium, make sure they match your water and fish. Tap water needs different treatment than RO water. Soft-water fish like discus need gentle remineralizers. But, African cichlids and marine tanks need more calcium and alkalinity.

    Think about these categories for a balanced plan:

    • Remineralizers like Seachem Equilibrium and TMC Bio-Calcium add many ions for marine setups.
    • KH and alkaline buffers, such as SeaChem Alkaline Buffer, keep pH stable and prevent swings.
    • Calcium sources, like calcium chloride, quickly boost calcium for coral or shell-building fish.
    • Magnesium supplements keep the Ca:Mg ratio right and prevent unwanted precipitation.
    • Mineral blocks, like Wonder Shells, slowly release Ca, Mg, and trace minerals.
    • Mineral-rich substrates, like aragonite, passively support hardness in tanks that need it.
    • RO remineralization blends offer precise control when starting with stripped water.

    Choose balanced mineral supplements instead of single ingredients. Single ingredients like soda ash can cause pH problems. SeaChem’s Marine Buffer and Alkaline Buffer are designed to avoid these issues.

    Use mineral blocks like Wonder Shells wisely. They can increase calcium, magnesium, and electrolytes. But, they’re not a quick fix. Follow the instructions and replace them when needed.

    Be careful with pH Up, pH Down, and neutral regulators. Some can cause calcium and magnesium to precipitate or add phosphates. Relying too much on these can upset the balance in your tank.

    Make your choices based on these factors:

    1. Your source water: tap, well, or RO.
    2. The needs of your fish and invertebrates.
    3. If you use CO2 for plants.
    4. The reputation of the brand and clear instructions.

    Test often and follow the dosing instructions. Regular testing helps keep mineral levels stable. Add mineral-rich foods and natural sources to support your tank’s health over time.

    The Effects of Over-Replenishment of Minerals

    Pushing GH and KH too high can stress fish that like soft water. This can make it hard to lower pH for acid-loving fish and plants. Sudden big changes are worse than small, steady ones.

    Look for signs of trouble. Fish might act stressed or lose their appetite. Shrimp could have trouble molting. Plants might look unhealthy or grow slowly.

    Using the wrong products can cause problems. Using too much alkalizer or the wrong neutralizers can remove calcium and magnesium. This harms the balance of minerals in the water.

    When there are lots of precipitates, plants and invertebrates can’t absorb minerals well. This makes it seem like there’s not enough minerals, even if the test strip says there is.

    • Symptoms to monitor: reduced growth, pale leaves, molting problems, lethargy.
    • Visible signs: white crusts, cloudy water, sudden hardness spikes on test kits.

    Fixing problems should be done carefully and slowly. Use water changes with the right minerals to adjust the water. Don’t add strong acids or bases suddenly.

    If you see precipitates, use sequestrants or dilute the water. Test often as you slowly lower the ionic content. Consider using products like SeaChem Reef Builder to avoid problems.

    Keep track of your changes and test results. Making small, steady adjustments helps everyone in the tank adjust better. This way, you avoid mineral deficiencies from too much dosing.

    Common Myths About Hardness in Aquariums

    Some people think GH changes are not important. But, calcium and magnesium do more than just strengthen shells. They help with osmotic functions, enzyme work, and keeping redox balance. Even if fish seem fine, GH is key to their health.

    Many believe pH is the only thing that matters. But pH and buffering are different. KH tests show buffering, not just carbonate levels. This can confuse hobbyists who only look at one test result.

    Some think GH salts work like table salt. But, calcium and magnesium are not the same. They support cell membranes, gill function, and ion transporters, which are vital for osmoregulation.

    There’s a myth that you must match wild water conditions exactly. But, wild waters vary and may lack important ions. Trying to replicate extreme conditions without adding these ions can harm your fish.

    Bicarbonates play a big role in acid-base balance and buffering. But, weak organic acids from driftwood or CO2 lower pH differently than strong acids. This confusion leads to poor management choices.

    • Use tested mineral supplements designed for aquaria instead of guessing with household salts.
    • Depend on accurate test kits and cross-check results to avoid misinterpreting KH and GH readings.
    • Adjust parameters slowly to let fish and beneficial bacteria adapt without shock.

    Stick to evidence-based practices when choosing mineral supplements and monitoring kits. This helps keep your water chemistry stable for the long term and fights common myths about hardness.

    How Fish and Plants Interact with GH and KH Levels

    Keeping GH and KH levels balanced is key for a healthy aquarium. GH provides calcium and magnesium, which are vital for fish. They help with bone health, scale strength, and enzyme function. Without enough GH, fish can get sick and have trouble reproducing.

    KH helps keep the water’s pH stable. This is important for fish gills and mucous membranes. It also helps fight off diseases by keeping electrolyte and calcium levels right.

    Look out for signs that your fish or plants might not be doing well. Fish acting strangely, not growing, or having trouble molting can mean GH/KH issues. You might also see dull scales or slow healing in fish.

    Plants react differently to GH and KH levels. High KH can block iron and phosphorus, causing plants to turn yellow or grow poorly. But, stable KH helps plants use CO2 better, which is good for photosynthesis.

    Each species has its own water chemistry preferences. For example, discus and German Rams like soft water. But, livebearers and African cichlids prefer harder water. Shrimp needs vary too, with Caridina needing very soft water and Neocaridina tolerating a wider range.

    • Check plants interaction GH KH when you see melting, spotty growth, or nutrient deficiency symptoms.
    • Consider mineral rich foods and water conditioners to boost minerals absorption for fish with high demands.
    • Use regular testing and small adjustments to avoid abrupt shifts that stress gills and roots.

    Keeping GH and KH levels balanced is essential for a healthy aquarium. Simple actions like feeding mineral-rich foods and adding electrolytes can help. This supports the health of both fish and plants.

    Addressing Mineral Replenishment in Breeding Environments

    Your breeding setups and fry tubs are small. A small mistake can greatly affect the water’s hardness or alkalinity. This can stress or even kill eggs and fry. So, you need to treat these systems differently than larger tanks.

    KH helps keep the pH stable and protects the bacteria that clean the water. GH is important for bone growth, controlling body fluids, and healthy development in young fish. Not providing enough minerals in the early stages can lead to deformities and low survival rates.

    When filling fry tanks, use pre-mixed, remineralized water. Avoid using strong pH-down chemicals. Instead, use weak organic buffers like peat or Indian almond leaves. They help change the pH slowly and are gentler on sensitive fry.

    Add mineral supplements slowly and test often. Small amounts help you reach the right mineral levels without going too high. Use products like Seachem Equilibrium or low doses of calcium chloride and magnesium sulfate for precise adjustments.

    • Mix RO with tap water for species needing soft conditions. This lets you hit a target GH/KH before remineralizing.
    • Keep KH high enough to prevent a pH crash, but keep both GH and KH within the species’ recommended range.
    • Consider low-dose Wonder Shells for shrimp or breeders that need trace elements during molting or spawning.

    Watch for signs of minerals deficiency like poor growth, curled fins, or molting problems. Test GH and KH, monitor pH, and observe behavior to catch issues early. Remember, KH test limits can be tricky, so verify results with multiple parameters.

    When choosing products for breeding mineral replenishment, go for gentle, ionic-balanced options made for small volumes. Dose carefully, keep a log of changes, and ensure a balanced minerals intake. This will give eggs and fry the stable chemistry they need.

    Conclusion: The Path to Stable Water Conditions

    You want stable water conditions, not just a number. GH and KH are key for minerals and pH balance. They can change fast, so it’s all about small, steady steps.

    Start with a simple plan: test your water, choose the right products, and make small changes. Use products like SeaChem buffers for better balance. For gentle changes, try peat or driftwood instead of strong acids.

    Don’t forget about Redox balance and how minerals help fight diseases and feed plants. Be careful with pH changes, as some acids are safer than others. Keep a detailed log of your tests and changes.

    Take it one step at a time: pick the right products, track your results, and adjust slowly. Focus on balanced minerals and steady replenishment. This will create a strong, healthy environment for your aquarium’s inhabitants.

    FAQ

    What is the importance of GH and KH stability in small water volumes like nano tanks, planted bowls, and fry containers?

    In small tanks, keeping GH and KH stable is key. Small changes in water can quickly affect the balance. This can harm eggs, fry, shrimp, or sensitive fish.

    It’s important to protect the buffering capacity (KH) and maintain electrolytes (GH). This helps keep the pH stable, balances redox, and fights diseases.

    How do you define GH and KH in plain terms?

    GH stands for General Hardness. It’s the amount of calcium and magnesium in the water. These minerals are vital for fish and plants.

    KH, or Carbonate Hardness, helps keep the pH stable. It’s made of carbonate and bicarbonate ions. Together, GH and KH keep the water balanced.

    How do GH and KH affect fish, plants, and redox balance?

    GH is important for fish health and plant growth. It helps with bone health and nutrient uptake. It also keeps the redox balance stable.

    KH keeps the pH stable. This is important for photosynthesis and protecting fish and plants from pH crashes.

    Why are RO/DI systems risky if you don’t remineralize?

    Reverse osmosis/deionized water removes minerals and alkalinity. Without remineralization, the water lacks essential ions. This can cause pH swings and harm fish and plants.

    Always remineralize RO water before use. Mixing and testing are key to avoid problems.

    How do you convert dGH/dKH to ppm?

    To convert dGH/dKH to ppm, use this formula: 1 degree (dH or dGH/dKH) ≈ 17.9 ppm. This helps when comparing different products or recommendations.

    What are common causes of mineral depletion or KH drops in closed aquaria?

    Mineral depletion or KH drops can come from several sources. Frequent water changes with low-mineral water, biological uptake, and substrate adsorption are common causes.

    Other factors include filtration media, organic acids, and water softeners. Also, adding acids or alkalizers can affect the balance.

    How do weak organic acids (tannins, CO2) differ from strong acids in terms of harm?

    Weak organic acids like tannins or CO2 lower pH but are less harmful. They don’t flood tissues with hydrogen ions. Strong acids, on the other hand, can cause rapid pH changes and harm fish and plants.

    It’s important to understand the difference. KH test kits measure buffering capacity and can respond to other anions, so interpret results with that context.

    How often should I test GH, KH, and pH in small systems?

    Test GH, KH, and pH frequently in small systems. For small tanks or CO2-injected planted tanks, test weekly. Consider testing before and after water changes or CO2 dosing changes.

    Keep a log of readings and changes. This helps spot trends before they become crises.

    What are reliable test options for GH and KH?

    Liquid colorimetric test kits are affordable and reliable for most hobbyists. Digital meters offer precision but require calibration and don’t directly read GH/KH.

    Use KH kits or titration-based kits for alkalinity, and GH kits for Ca/Mg. Remember, 1 dKH ≈ 17.9 ppm when converting.

    What practical forms of replenishment should I consider?

    Use balanced remineralizers and buffers. Seachem Equilibrium is a multi-element remineralizer. SeaChem Alkaline Buffer/Marine Buffer/Reef Builder are for alkalinity and ionic balance.

    Calcium chloride is for Ca raises, and magnesium supplements are available. Wonder Shells or mineral blocks offer slow-release electrolytes. Cichlid Salt is for certain species.

    Can feeding mineral-rich foods reduce the need to remineralize the water?

    Mineral-rich diets provide some minerals. But they can’t replace water-column supplementation in small or RO-based systems. Aquatic life and plants absorb ions from the water.

    Replenishing the water column is usually necessary for stable GH/KH.

    How should I raise KH and GH safely without stressing livestock?

    Make gradual changes. Raise or lower KH by no more than 1–2 dKH per day. Pre-mix additives and use slow drip or small incremental dosing.

    For RO blends, prepare pre-mixed water with remineralizer. Prefer balanced multicomponent buffers over single-ingredient soda ash, which can cause pH bounces and precipitation.

    What KH range should I target for planted tanks with CO2 injection?

    For CO2-injected planted tanks, aim for 3–6 dKH. Low-tech planted tanks typically do well in 3–8 dKH. Avoid KH below ~3 dKH to reduce the risk of pH crashes.

    Match KH to your CO2 routine—test KH before and after CO2 changes and watch for pH stability.

    What natural mineral sources can I use and what are the cautions?

    Crushed coral, aragonite, and mineral-rich substrates slowly release calcium and carbonate. They raise GH and KH. Crushed coral and aragonite will raise KH significantly and can tint water less than peat.

    Driftwood and peat can gently soften water and lower KH via weak acids but may add tannins and color. Use these thoughtfully: substrates alter long-term parameters and can be hard to reverse.

    What are signs that minerals or KH are too low or too high?

    Low KH/GH indicators include pH instability, fish gasping, poor molting in shrimp, increased disease susceptibility, stunted growth, and plant issues like melting. High GH/KH indicators include difficulty lowering pH for acid-loving species, iron or phosphorus deficiency symptoms in plants, and stress in soft-water-adapted fish.

    Watch for white cloudy precipitates when overusing carbonate products.

    What are the risks of over-replenishing minerals or alkalinity?

    Excessive GH stresses soft-water species and can reduce plant nutrient availability. Too-high KH makes it hard to lower pH for acidophilic livestock, can cause precipitation of calcium or magnesium when using improper buffers, and may produce white dusting or cloudiness.

    Over-alkalizing or using strong single-ingredient regulators can harm redox balance and remove essential trace elements.

    Which products are recommended for safe, balanced remineralization?

    Use balanced, multi-ingredient products to avoid pH bounces and precipitation. Examples include Seachem Equilibrium for GH, Seachem Alkaline Buffer, Marine Buffer, and Reef Builder for alkalinity and ionic balance, and Wonder Shells for slow mineral release.

    Avoid long-term reliance on soda ash, pure baking soda, or unbalanced neutral regulators that can precipitate Ca/Mg.

    How should I approach remineralization and water changes in breeding or fry setups?

    Use pre-mixed, properly remineralized water for fills. Avoid abrupt pH changes—blend RO with tap water as needed to target species’ GH/KH, then remineralize gently. Add minerals slowly in small increments and test frequently.

    Avoid strong acid pH-down products; prefer natural softening (peat, leaves) for gradual adjustments. Maintain KH above dangerously low levels to prevent pH crash, while keeping GH within species-specific targets.

    What practical protocol should I follow when adjusting parameters?

    Test source water first. Pre-dissolve and measure additives, dose incrementally, and use slow mixing or drip-in methods for blends. Conduct smaller, more frequent water changes.

    Log every reading and change. If precipitation occurs, reduce alkalinity dosing and consider ionic-balance products designed to minimize precipitation.

    How does KH chemically prevent pH crashes?

    KH (carbonate and bicarbonate ions) neutralizes added hydrogen ions by sequestering H+, which prevents rapid pH drops. Dissolved CO2 forms carbonic acid and can lower pH; adequate KH buffers that effect so that photosynthesis, respiration, or decomposition won’t create large swings.

    GH (Ca/Mg) doesn’t directly buffer pH but supports ionic balance and redox conditions.

    Do nitrification and organic acids cause KH to fall?

    Yes. Nitrification and the buildup of organic acids (from decomposition, humic substances, or tannins) consume alkalinity and can lower KH over time. In a low-KH system, that allows pH to drift downward. Regular testing and remineralization counteract this gradual depletion.

    How do CO2 injection and photosynthesis cycles interact with KH?

    CO2 dissolves to form carbonic acid and lowers pH. When KH is sufficient, it buffers those diurnal swings. In low-KH tanks, CO2 pulses from injection or photosynthetic uptake will produce larger pH swings, harming plants and livestock. Monitor KH closely if you run CO2 and aim for recommended KH ranges for your setup.

    Are KH test kits perfectly accurate? Any limitations?

    KH kits measure buffering capacity, not direct carbonate/bicarbonate concentration, and can respond to other anions. They’re useful and practical but not a complete chemical analysis. Interpret results with context, considering unusual dissolved organics or additives.

    What selection guidance should I use when choosing products?

    Choose based on your source water (tap vs RO), livestock needs (soft-water fish vs African cichlids), whether you use CO2, and brand reputation. Prefer balanced, multi-ingredient remineralizers and buffers. Read manufacturer directions, dose conservatively, and test frequently after application.

    How do I fix a pH crash or precipitate event?

    For pH crashes: perform gradual water changes with properly remineralized water to raise KH, avoid sudden acid dosing, and monitor closely. For precipitates (white cloudiness or dust): reduce alkalinity-raising carbonate dosing, allow settled precipitate to be removed mechanically or by partial water changes, and switch to ionically balanced products designed to minimize precipitation, such as Seachem Reef Builder for marine or balanced buffers for freshwater.

    What myths about hardness should I be aware of?

    Myth: “GH doesn’t matter.” Reality: GH supplies essential Ca/Mg that support osmotic function, redox balance, disease resistance, and long-term health. Myth: “pH number alone determines harm.” Reality: pH source matters—weak organic acids behave differently than strong acids. KH test kits measure buffering capacity, not specific carbonate concentration. Avoid simplistic rules and use evidence-based practice.

    How do species-specific needs factor into GH/KH choices?

    Species vary. Discus and Rams prefer softer, lower KH/GH; livebearers and African cichlids need higher GH/KH. Shrimp: Caridina often require very soft water with low GH, while Neocaridina tolerate higher GH. Match GH/KH to species needs but maintain KH above dangerously low thresholds to prevent pH crashes, specially in small volumes.

    What behavioral or health signs indicate GH/KH problems?

    Watch for gasping at the surface, sudden deaths, reduced activity or appetite, poor molting in shrimp, scale or skeletal issues, and plant problems like melting or interveinal chlorosis. These can signal ionic imbalance, pH instability, or nutritional deficiencies tied to GH/KH problems.

    What is an actionable checklist I can follow right now?

    Test your source water; log GH, KH, pH, and temperature. Choose an appropriate remineralizer and buffered product based on livestock and CO2 use. Make gradual adjustments (≤1–2 dKH/day). Prefer balanced products (Seachem Equilibrium, SeaChem buffers, Wonder Shells) over single-ingredient fixes. Use pre-mixed, remineralized water for water changes and avoid strong acid pH-down products in sensitive setups. Test before and after any change and keep a routine schedule.

    Where should I prioritize stability versus chasing a target pH number?

    Prioritize stability. Consistent KH and GH that suit your livestock and CO2 routine matter more than a single pH number. Stable buffering and balanced mineral intake protect fish, plants, and nitrifying bacteria more effectively than rapid attempts to hit a specific pH.

  • How to Clean Aquarium Glass Without Scratching or Using Chemicals

    How to Clean Aquarium Glass Without Scratching or Using Chemicals

    You want a clear view of your aquarium and healthy water for your fish. This guide offers tips on cleaning aquarium glass without scratching it. It uses only tools and methods safe for plants, shrimp, and fish, avoiding harsh chemicals.

    Green Aqua’s team and experienced hobbyists agree on the best glass cleaning method. It involves regular, gentle maintenance. You’ll learn eco-friendly steps to prevent algae and limescale buildup.

    Keeping glass clean enhances your tank’s look and water quality. Follow these easy tips for quick, safe, and effective cleaning. Your tank will stay crystal clear without the need for harsh chemicals.

    Understanding the Importance of Clean Aquarium Glass

    A crystal-clear aquarium glass reflecting natural light, showcasing vibrant aquatic plants and colorful fish swimming gracefully inside. In the foreground, focus on the smooth, immaculate surface of the glass, highlighting its transparency and clarity. The middle ground features lush green plants swaying gently in the water, while the background displays a soothing, subtle gradient of blue, suggesting depth and tranquility. Soft sunlight filters through the water, casting gentle ripples of light across the glass, creating a serene and refreshing atmosphere. Capture the scene from a slightly angled perspective to emphasize the pristine quality of the glass, evoking a sense of cleanliness and the importance of clear visibility for both the fish and the viewer.

    Clean glass lets you see your fish and plants clearly. It makes your aquarium more enjoyable. You get to see the colors, behavior, and details of your underwater world.

    Ignoring the glass can signal bigger issues. Algae, mineral deposits, and waste often appear first. These signs can mean your water quality is suffering, stressing your fish.

    Don’t use household cleaners or tools on your aquarium. They can harm your shrimp, corals, and fish. Instead, use tools made for aquariums to keep your glass clean and safe.

    Regular care protects your glass and your investment. Professionals use gentle methods to clean your glass. This care keeps your tank looking great and supports a healthy environment.

    • Spot-check glass weekly to maintain aquarium clarity.
    • Address white mineral deposits promptly to prevent buildup.
    • Choose aquarium-safe tools for streak-free glass cleaning.

    Simple habits now can prevent big problems later. Clear glass means healthier fish and a happier aquarium.

    Essential Tools for Cleaning Aquarium Glass

    A sleek, modern magnetic aquarium glass cleaner positioned on a clean, reflective glass surface, highlighting its dual-sided design with strong magnets. In the foreground, showcase the cleaner's ergonomic handle and soft cleaning pads, emphasizing texture and functionality. In the middle ground, include a well-maintained aquarium with vibrant aquatic plants and colorful fish, providing a lively backdrop to the cleaner. The background should feature a softly blurred home environment, creating a serene atmosphere. Use soft, natural lighting to enhance the clarity of the glass and the cleaner, evoking a fresh and inviting mood. Capture the scene from a slightly elevated angle to showcase both the aquarium and the cleaning tool effectively.

    Before you start, pick the right tools for cleaning your aquarium glass. A sharp algae scraper with stainless-steel blades is great for removing tough deposits and lime. When the blade gets worn, flip it over and use strokes from top to bottom to avoid getting substrate stuck.

    Also, keep about 0.5 cm away from the corners to protect the silicone seal. Make sure to store the scraper where kids can’t reach it.

    For a magnetic aquarium glass cleaner, choose one that fits your tank’s glass thickness. These cleaners have two parts that slide together. To clean, move the magnet in a circle. If the inner piece floats, it’s loose, and you can easily get it back.

    • Sponges made for aquariums are the best choice. Look for brands like Dennerle, which offers sponges with a stainless wool side for tough spots.
    • Melamine foam is safe for acrylic tanks. But, avoid using household sponges because they might have detergent residue.
    • Cleaning gloves, like JBL ProScape gloves, are great for reaching corners, silicone seams, and more. They also protect your hands.

    For tight spots, use a soft brush. The Green Aqua angled maintenance brush is perfect for corners and around decorations. A soft toothbrush is a good backup for detailed cleaning.

    To finish, use a soft, lint-free microfiber cloth. Dennerle microfiber cloths give a streak-free shine. Use a separate cloth for your aquarium to avoid contamination.

    Look into battery-operated cleaners and compact models like the Fluval edge algae cleaner for quick clean-ups. Choose non-toxic, residue-free cleaners and wipes that are safe for aquariums when needed.

    For removable decor and lids, use algae scrapers and toothbrushes for gentle scrubbing. For stubborn residue, soak items in hot water or boil them if the material can handle it. Never use soap on lids or decor that will go back into the tank for eco-friendly cleaning and a safe fish environment.

    Step-by-Step Guide to Cleaning Aquarium Glass

    First, turn off and unplug filters, heaters, and lights. This step is to keep electronics safe and prevent fish stress.

    Next, gather your cleaning tools: an algae scraper or magnetic cleaner, a soft sponge or microfiber cloth, a bucket, and your chosen cleaner. Remove decorations and plants to make cleaning easier.

    1. Start by cleaning the inside of the tank during a partial water change. Use an algae scraper from top to bottom. Lift at the substrate line to avoid stirring up sand or gravel. This method helps keep debris ready for vacuuming.

    2. For the magnetic cleaner, move it in small circles across the glass. When done, slowly pull the outer piece off. This lets the inner magnet float to the surface without disturbing the substrate.

    3. Vacuum the substrate and remove about one-third of the tank water. This step lowers debris and nitrates while keeping enough water for fish. Rinse sponge filters in tank water only during filter maintenance.

    4. Clean the outside glass with a microfiber cloth for streak-free results. For quick cleaning, a water-and-vinegar mix works well on outside surfaces. Always rinse reusable tools well after use to avoid residue buildup.

    5. Refill the tank with water that matches the tank temperature. Treat with a dechlorinator as needed. Turn on the filter and heater after refilling to restore water circulation and temperature control.

    Regularly use these glass cleaning tips to prevent algae and film buildup. This way, you can clean glass without scratching it or stressing your fish.

    Preventing Scratches During Cleaning

    Start by removing loose substrate from the glass rim when cleaning your aquarium. Sand and fine gravel can scratch the surface if trapped. Always move scrapers in one direction, from the glass to the substrate, to avoid scratches.

    Choose the right tools for the job. Soft melamine foam or an aquarium-specific Dennerle Clenator sponge are good for acrylic surfaces. They help prevent scratches. Avoid using household sponges or abrasive pads, as they can damage the surface.

    Magnetic cleaners are great for most aquariums. They let you clean without touching the water, reducing the risk of scratches. For a safer option, consider the Oase plastic scraper. Just remember, the plastic edge can’t be replaced.

    Understand the material of your tank. Tempered glass can handle more scrubbing than acrylic. For acrylic, use gentle pressure and soft tools. Melamine foam and nonabrasive brushes are best for keeping it clear.

    • Don’t force a blade into corners; keep scrapers at least 0.5 cm from silicone seals to protect the seam.
    • Use soft brushes for corners and silicone seams instead of metal or sharp blades.
    • Make sure the magnetic cleaner fits your glass thickness for safer use.

    Follow professional cleaning techniques for better results. Work in controlled strokes and use light pressure. Choose the right tool for your material and check for grit before each use. These steps will help keep your aquarium panels scratch-free and last longer.

    Natural Cleaning Solutions You Can Make

    You can clean aquarium glass without harsh chemicals. Use simple ingredients from your pantry. Mix equal parts distilled white vinegar and water for a vinegar glass cleaner. Spray it lightly, let it sit for a minute, then wipe with a soft cloth and rinse well.

    For tough grime, make a baking soda paste with water. Apply it to the stain, rub gently with a soft brush or cloth, then rinse off. This solution is great for outside surfaces and doesn’t leave harmful residues.

    Mineral or calcium deposits can be a problem. Citric acid in lemon juice or diluted vinegar can help soften them. Use these on drained tanks or removable parts only. A diluted vinegar rinse can also disinfect glass and plastic safely before rinsing well.

    For calcium on in-use equipment, use recommended wipes like Tetratec Easy Wipes for glass and plastic. These are safe for aquarium inhabitants when used as directed.

    Stay away from soaps or household detergents. Even a little can harm fish. After using DIY or vinegar glass cleaners, rinse all parts well with fresh water before putting them back in the tank.

    • DIY glass cleaner: equal parts distilled white vinegar and water for exterior cleaning.
    • Homemade glass cleaning solution: baking soda paste for scrubbing stains.
    • Eco-friendly glass cleaning: lemon juice or diluted vinegar for dried mineral deposits on empty tanks.
    • Safe wipes: use approved products like Tetratec Easy Wipes on in-place equipment when needed.

    Maintaining Your Aquarium After Cleaning

    Keep a steady water change routine to protect water quality and cut algae growth. Change 10–25% weekly based on test results. Test your water for nitrates, nitrites, and ammonia to know when bigger changes are needed.

    Do glass cleaning tips during a water change so loosened debris can be vacuumed away. Use a magnetic cleaner or soft scraper inside the tank, then siphon the substrate to remove particles. Clean outside glass once or twice weekly to avoid buildup on viewing surfaces.

    Make filter maintenance part of your schedule. Rinse sponge filters in tank water and replace cartridges as the manufacturer suggests. Check for slow flow, odors, or visible clogging and service filters monthly or as needed.

    • Stick to consistent lighting with timers to limit algae.
    • Include algae eaters like Amano shrimp or Otocinclus if suitable for your setup.
    • Keep nutrients balanced by avoiding overfeeding and monitoring plant growth.

    When you refill after vacuuming and a partial water change, use water at the same temperature and add dechlorinator in the bucket or tank. Turn filters and heaters back on; filters clear suspended debris within a few hours.

    Regular checks and a simple schedule make maintaining aquarium care manageable. Small, steady steps help your tank stay clear and healthy without major interventions.

    Dealing with Tough Stains or Deposits

    Start by figuring out what kind of stain you have. White, chalky film usually means it’s from hard water. This stuff is safe for fish but looks bad.

    To remove calcium deposits on parts you can take out, soak them in vinegar or lemon juice. These acids help break down the minerals. Then, you can wipe them off with a soft cloth or sponge without scratching.

    For tanks that are always filled, use safe cleaning tools. Tools like the Superfish Power Glass Cleaner or the FLUVAL EDGE ALGAE CLEANER are great. They remove algae without getting your hands wet. Make sure to pick the right attachments for your glass type to avoid damage.

    If the deposits are really bad, do a partial water change and vacuum. This helps get rid of the loosened debris. Tools like the Eheim Rapid Cleaner have brushes and sponges for different types of residue. For places where metal blades are too risky, use an Oase plastic cleaner to protect your glass and acrylic.

    • Soak removable items in vinegar for glass to loosen minerals.
    • Use battery-operated or blade-designed aquarium tools for in-tank cleaning.
    • Perform a water change plus vacuuming when residues are extensive.

    For tough calcium, try TetraTec Easy Wipes on parts you can use. They’re safe for fish. When you drain the tank, a fresh lemon rub can polish it well.

    For regular upkeep, use professional glass cleaning methods. Clean often but briefly to stop buildup. This way, you avoid harsh scraping and keep your aquarium clear with less stress on your fish.

    Common Mistakes to Avoid

    When cleaning your tank, stay away from mistakes that can harm fish. Never use household cleaners or bleach while the tank is running. These chemicals can stay in the water and hurt fish, even after rinsing.

    Don’t use soap on glass or equipment. Soap is toxic to fish and can be deadly. If you need to drain the tank for a deep clean, use white vinegar or lemon juice on the empty glass. Then, rinse it well before adding water back in.

    Choose tools that help avoid scratches. Sand and gravel can get stuck between a scraper and the glass, causing damage. Use soft pads or single-use sponges made for aquariums to prevent scratches.

    Always turn off and unplug filters, heaters, and lights before removing water or reaching into the tank. This step reduces the risk of electrical hazards and protects your equipment during maintenance.

    • Don’t use old household sponges that touched cleaners. They can spread toxins between tanks.
    • Avoid scraping too hard into corners. Aggressive scraping can weaken the silicone sealant and cause leaks.
    • Rinse any tool that touches the tank with tank water or clean, dechlorinated water. This removes any residues.

    Follow simple glass cleaning tips: work slowly, use gentle pressure, and rinse well. These steps protect your investment and keep your fish healthy. They also help you avoid common mistakes that hobbyists often make.

    Teaching Kids to Help with Cleaning

    You can make aquarium chores fun and safe for kids. Start by setting clear rules. Keep sharp tools like algae scrapers locked away. Also, never let kids handle chemicals or in-tank devices without an adult nearby.

    Give kids simple, supervised tasks to build their confidence and sense of responsibility. Tasks like wiping the exterior glass with a microfiber cloth, cleaning lids, and checking lights and timers are great. These tasks help them learn and feel involved.

    • Teach children to spot algae and report buildup instead of scrubbing the tank themselves.
    • Let them prepare replacement water using a clean bucket while you monitor temperature and conditioner dosing.
    • Show how to record basic readings from a test kit so they learn about water quality.

    Show kids how to clean outside surfaces safely and affordably. For example, mix vinegar and water for an eco-friendly glass cleaner. Teach them quick glass cleaning hacks like spraying onto a cloth instead of directly on the glass.

    When kids help with tasks like partial water changes or substrate siphoning, stay close and guide them. Keep water parameters in check and reduce fish stress by controlling timing and movements.

    Make cleaning fun and educational. Praise their careful work and explain why you avoid soaps and household cleaners on aquarium parts. Encourage their questions to help them learn solid skills in aquarium care that will last a lifetime.

    Conclusion and Final Thoughts

    Keep your cleaning routine simple. Use tools like algae scrapers and magnetic cleaners. Also, aquarium sponges and microfiber cloths are great. Clean the inside glass during water changes to remove loose debris.

    Use a top-to-bottom scraper technique. Save corners for softer tools to protect silicone seals and avoid scratches.

    Choose non-toxic cleaning methods when you can. A homemade glass cleaning solution of diluted white vinegar works well. It’s good for mineral and algae deposits on drained tanks.

    For live systems, use aquarium-safe wipes or gentle scrubbing. Never add household chemicals to the water. These methods keep fish safe and reduce residue.

    Regular care prevents big problems. Test water often for ammonia, nitrites, and nitrates. Keep levels right.

    Turn off equipment before big cleanings. Rinse well and refill with dechlorinated water at the same temperature. This prevents stress. Following these tips and maintaining regularly will give you clean glass and a healthy environment for your fish.

    FAQ

    Why is clean aquarium glass important for my tank and fish?

    Clean glass lets you see your fish and plants clearly. It also stops algae and minerals from building up. This keeps the water quality good.

    Regular cleaning is key. It helps your fish stay healthy and lets you spot water problems early. Plus, it keeps the glass safe for a long time.

    What tools should you use to clean aquarium glass without scratching it?

    Use tools made just for aquariums. For tempered glass, use algae scrapers with stainless blades. For acrylic, soft melamine foam or Dennerle Clenator sponges work best.

    Use magnetic glass cleaners that fit your glass thickness. Soft brushes are good for corners. And for the outside, use a soft, lint-free microfiber cloth.

    Avoid using household sponges or abrasive pads. They can carry detergent that’s bad for your tank.

    How do you clean the inside glass safely during a water change?

    Clean the inside glass when you’re changing the water. This way, you can vacuum up debris right away.

    Use a scraper in top-to-bottom strokes. Lift it at the substrate level before moving it. Don’t drag it across the substrate to avoid scratching.

    Turn off the equipment before taking out a lot of water. Vacuum the substrate when you remove about one-third of the water.

    What’s the best way to use a magnetic aquarium glass cleaner?

    Pick a magnetic cleaner that fits your tank’s glass thickness. Move it in circular or steady vertical motions.

    Many models float for easy retrieval. The outer magnet pulls off the cleaner. This way, you don’t have to put your hands inside and it’s gentle on the glass.

    How do you remove calcium or hard-water mineral deposits?

    For items you can remove or a drained tank, use diluted white vinegar or lemon juice. This softens the deposits. Then, rinse them well.

    For equipment you can’t remove, use Tetratec Easy Wipes. They’re safe for glass and plastic. But never apply vinegar or lemon juice directly to a full tank without rinsing and making sure there’s no residue left.

    Can you use vinegar on exterior glass and interior surfaces?

    Yes, a mix of equal parts distilled white vinegar and water is good for exterior glass. Spray it on, let it sit for a bit, then wipe with a soft cloth and rinse.

    For interior mineral deposits, use vinegar only on drained tanks or removable parts. Rinse them well before putting them back in the tank.

    How do you clean acrylic tanks differently from tempered glass?

    Acrylic scratches easily, so use gentler tools. Melamine foam or aquarium-specific soft sponges, soft cloths, and nonabrasive plastic scrapers are best.

    Avoid using metal blades and harsh scrubbing. Tempered glass can handle stiffer scrapers and stainless blades but be careful near silicone seams and corners.

    What should you avoid to protect aquatic life during cleaning?

    Never use household chemicals, soaps, or detergents in your tank. They can be deadly. Avoid tools that have touched chemical cleaners.

    Don’t use too much force that could damage silicone seals or scratch the substrate. And never use citric acid or vinegar on a full tank without rinsing and cleaning the items first.

    How often should you clean the external and internal glass?

    Clean the outside glass once or twice a week to stop buildup and streaks. How often you clean the inside depends on algae growth and water quality. Do it during water changes.

    Regular cleaning stops heavy buildup that needs harsh scrubbing.

    What steps should you follow after cleaning and refilling the tank?

    Fill the tank with water that’s the same temperature as the tank. Use a dechlorinator either in the bucket or tank. Then turn on the filters and heaters.

    The filter will clear debris in a few hours. Check the water parameters to make sure they’re safe for your fish.

    Are battery-operated or powered glass cleaners safe to use?

    Yes, battery-operated units like the Superfish Power Glass Cleaner and compact tools like the FLUVAL EDGE ALGAE CLEANER are safe. They remove algae without getting your hands wet.

    Choose models made for aquariums and fit your tank material to avoid damage or scratches.

    How can you prevent scratches while scraping algae near corners and silicone seams?

    Keep metal blades about 0.5 cm away from corners and silicone to avoid damage. Use soft brushes or cleaning gloves for corners and seams.

    Clean in one direction (surface to substrate) with blades. Avoid trapping sand or gravel between the tool and glass.

    What DIY cleaning solutions are safe and effective for aquarium glass?

    For exterior glass, mix equal parts distilled white vinegar and water or use a baking soda paste for stubborn stains. Rinse well.

    For interior cleaning, use aquarium-safe wipes like Tetratec Easy Wipes on in-use equipment. Use vinegar or citric acid only on drained tanks or removable decor.

    How do you handle heavily soiled tanks or severe algae blooms?

    Do a big water change, vacuum the substrate, and scrub the tank with the right tools. Consider soaking soiled decorations.

    Adjust the lighting, do more water changes, check nutrient levels, and think about adding algae-eating fish for long-term control.

    What common mistakes should you avoid when cleaning aquarium glass?

    Don’t use household sponges or cleaners that may carry chemicals. Avoid soap and detergents, too much force, and scraping into silicone corners.

    Never let substrate particles get between your tool and the glass. Don’t clean in a way that causes big changes in water chemistry—always check it after cleaning.

    How can you safely involve children in aquarium cleaning?

    Give kids safe tasks like wiping the outside glass with a microfiber cloth, preparing water, or helping with water tests. Keep sharp tools and chemicals away.

    Teach them not to use soaps on aquarium parts and to ask an adult before doing in-tank tasks.

    Which products are recommended for removing stubborn algae without harming fish?

    Use aquarium-specific algae scrapers, Dennerle Clenator sponges, melamine foam for acrylic, Tetratec Easy Wipes for in-use surfaces, and magnetic cleaners for glass thickness. Avoid household chemical cleaners and rinse tools well after use.

    What should you do if you see white mineral residue from evaporation?

    White residue from hard water is usually safe for fish but looks bad. Treat removable items or a drained tank with vinegar or lemon juice to loosen deposits, then rinse well.

    For in-place residues, gentle scraping during a water change and using aquarium-safe wipes can help remove buildup without stressing fish.

    How do you protect filters and equipment during cleaning?

    Turn off and unplug equipment before removing water to avoid hazards and damage. Clean filters as the manufacturer suggests—monthly or as needed—and rinse sponge filters in tank water.

    After refilling, add dechlorinator and restart equipment. The filter will clear suspended particles soon.

  • Using Paper Towels and Skimmers to Keep the Water Surface Clear

    Using Paper Towels and Skimmers to Keep the Water Surface Clear

    Keeping pools, ponds, and aquariums clean is easy with two tools: paper towels and skimmers. Surface scum is a thin layer of biofilm, oils, and other debris. It makes water look cloudy and swimming less fun.

    For daily cleaning, use a flat skimmer for light films or a deep-pocket skimmer for thick debris. The Aquario Neo Premium acrylic outlet pipe with an adjustable venturi skimmer is great. It removes biofilm and particles well and keeps filtration steady.

    For quick fixes, dampen a paper towel and lift the scum gently. Regular skimmer use reduces the need for spot cleanups. These methods are simple and effective, without the need for expensive tools or chemicals.

    Understanding Surface Scum and Its Impact on Water Quality

    A close-up view of surface scum formation on a tranquil pond, showcasing a thin layer of frothy, greenish-brown algae. In the foreground, delicate strands of filamentous algae are intertwined with tiny bubbles. The middle ground features scattered remnants of natural debris, such as leaves and twigs, partially embedded in the scum. In the background, blurred aquatic plants rise above the water's surface, bathed in soft, natural lighting that highlights the textures of the scum. The atmosphere is serene yet slightly concerning, suggesting an ecological imbalance. The lens captures the scene from a low angle, emphasizing the water's surface detail and creating a sense of immersion. The overall mood evokes contemplation about water quality and its environmental impact.

    Surface scum is made up of organic films, dust, pollen, oils, sweat, lotions, and microbial biofilm. It forms at the air-water interface. You might notice an iridescent sheen, a sticky film at the waterline, or small floating flakes and mats.

    Swimmer-introduced organics like soaps and sunscreens often start scum. Airborne debris and decomposing leaves add solids and nutrients. Poor filtration or infrequent skimming lets these materials concentrate at the water’s surface.

    Left unchecked, surface scum reduces clarity and can create odors. Organic films bind chlorine or bromine, making your sanitizer less effective. This ties chemicals up and raises the risk of algae and bacterial growth.

    Protein films are common in closed tanks and busy pools. To lower surface scum formation, cut organics at the source. Regular water changes and targeted surface syphoning help control buildup.

    When you focus on early scum buildup removal, you protect liners and pool finishes from staining. Simple, routine steps keep water clearer. This makes further surface scum cleaning tips more effective.

    The Importance of Regular Water Maintenance

    A tranquil outdoor scene featuring a crystal-clear pond surrounded by lush greenery. In the foreground, a pair of hands holding a paper towel, dabbing gently at the water's surface to illustrate maintenance. In the middle, a sleek skimmer tool poised at the edge of the pond, ready to capture floating debris. The background showcases gentle sunlight filtering through tree leaves, casting dappled shadows on the water. A few water lilies float serenely, enhancing the peaceful atmosphere. The focus is sharp on the hands and the skimmer, emphasizing the concept of regular water maintenance. Soft, natural lighting creates an inviting, calm mood, ideal for highlighting the importance of keeping the water surface clear.

    Keeping water clear starts with a steady routine. Skim the surface daily or as needed to remove leaves, bugs, and floating oils. Daily attention is the most effective surface scum prevention step you can take.

    Brush pool or pond walls once or twice each week to dislodge biofilm before it turns into a stubborn ring. Vacuuming the bottom about twice weekly for pools helps carry solids away and reduces the organic load that feeds scum formation.

    Use targeted syphoning to remove surface films and dissolved organics. Start the siphon with a hose, keep the line full of water, and avoid letting air break the flow. Proper syphoning is one of the scum removal techniques that delivers visible results without heavy chemical use.

    Plan periodic partial water changes for ponds and aquariums to dilute dissolved organics and lower protein films. Cutting the organic load makes sanitizer systems like chlorine or bromine work better and reduces the need for constant chemical corrections.

    • Skim daily for surface debris.
    • Brush once or twice weekly.
    • Vacuum twice weekly for pools; adapt frequency for ponds and tanks.
    • Siphon surface spots to remove films and oils.

    Maintain areas around the water. Clear decks, sweep away mulch, and trim overhanging plants so fewer leaves fall in. Reducing external inputs supports ongoing surface scum prevention and makes the best way to remove scum simpler—consistent, small actions.

    Combine these habits with appropriate skimmers and cleaning tools to complete a maintenance plan. Regular work keeps your water healthier and cuts down on tough scum removal techniques later on.

    Choosing the Right Tools for Removing Surface Scum

    There are many ways to clean scum from pools, ponds, or aquariums. For quick fixes, disposable paper towels are great. Manual flat skimmers are good for light debris and are easy to use when wet.

    Deep-pocket skimmers can hold more and save you trips to the trash. Telescopic skimmer nets are perfect for reaching far in large water bodies. Outlet-mounted venturi skimmers, like the Aquario Neo Premium, work with filters to catch biofilm and particles at the outlet.

    • Disposable paper towels — ideal for small patches and quick touch-ups.
    • Manual flat skimmers — light and simple to use for routine removing surface scum.
    • Deep-pocket skimmers — higher capacity, less frequent emptying.
    • Telescopic skimmer nets — extend reach for ponds and pools.
    • Outlet-mounted venturi skimmers — work with filters to remove biofilm directly.

    When shopping, compare flat versus deep-pocket skimmers. Flat skimmers are lighter when wet, making them easier to handle. Deep-pocket skimmers hold more debris, saving you time.

    Outlet-mounted skimmers that connect to your filtration system offer a special advantage. They remove floating particles and biofilm near the outlet. Units like the Aquario Neo Premium also expel trapped air back into the tank, avoiding air introduction into canister filters.

    Choose the right tool size for your water body. Smaller, lightweight skimmers are best for aquariums, while larger nets are better for pools and ponds. Select materials that won’t damage your surfaces; nylon-bristled brushes are safe for vinyl liners.

    Consider an automatic cleaner to reduce manual vacuuming. When picking equipment, think about your maintenance routine. The right skimmer selection can save you time and keep the water clear.

    How to Use Paper Towels for Scum Removal

    Paper towels are great for quick fixes like oil sheens or small biofilm patches. They’re perfect when you don’t need to skim the whole surface. This method is fast and doesn’t require heavy equipment.

    Here’s how to use them safely and effectively.

    1. Fold several plain, unscented, uncolored paper towels for extra strength. This avoids adding perfumes or dyes to the water.
    2. Move slowly towards the water to avoid disturbing the scum. Sudden movements can break it into smaller pieces.
    3. Place the folded towel gently on the scum. Let the surface tension help the film stick to the towel.
    4. Lift the towel slowly and throw it away in a sealed bag. Keep doing this until the scum is gone.

    Don’t rub or scrub too hard with paper towels. This can break the scum into smaller pieces, making it harder to remove.

    For bigger patches, use more towels or a hand skimmer. This saves supplies and works more efficiently. These tips help you know when to use towels and when to use tools.

    • Only use plain towels to avoid contamination.
    • Dispose of used towels in a sealed bag to prevent recontamination.
    • Don’t flush paper towels down the drain. Throw them away in regular trash.

    By following these steps, you can quickly clean surface scum. This keeps your waterline clean and sanitary.

    Utilizing Skimmers for Water Surface Cleaning

    Skimmers are key for clear water. You can choose from flat or deep-pocket handheld nets, depending on the debris. Built-in and outlet-mounted skimmers work with the pool’s system to remove film and leaves.

    To use skimmers well, clean the surface from one side to the other. Start when it’s calm outside so debris settles. Empty skimmer bags and nets often to keep the water flowing well.

    Automatic skimming systems make cleaning easier during busy times. They remove oils and biofilm, saving you time. Skim daily, and always after storms or windy days.

    • Check positioning and flow rates on built-in and outlet skimmers.
    • Adjust venturi settings to capture surface biofilm without stressing pumps.
    • Note that some outlet-mounted skimmers vent air into tanks to prevent air in canister filters.

    Regular maintenance keeps skimmers working well. Clean skimmer pockets, check nets and bags for damage, and replace worn parts quickly. Small fixes now prevent big cleaning jobs later.

    Stick to a routine: check gear weekly, skim daily when busy, and do a full check after storms. Regular skimmer use keeps your water clear and reduces the need for chemicals or mechanical fixes.

    Combining Methods for Optimal Results

    For the best results, mix quick fixes with regular care. Use paper towels for quick spot cleaning, then a skimmer for floating debris. This method is efficient and saves time.

    Begin by skimming off loose leaves and bugs. Then, vacuum or brush the settled grime to prevent clogged filters. Use paper towels for small spots near the waterline that skimmers can’t reach.

    Combine mechanical methods with balanced water chemistry. Keep chlorine or bromine, pH, and alkalinity levels right. This way, sanitizers work better and last longer.

    Think about using filtration and specific additives to tackle scum sources. Enzyme products break down oils and organics. Phosphate removers cut down on nutrients that algae feed on. These steps help remove scum over time.

    • Immediate: paper towels for tiny patches and tight corners.
    • Routine: daily or weekly skimming to prevent buildup.
    • Deep: brushing and vacuuming to clear settled deposits.
    • Supportive: filtration and enzyme or phosphate treatments.

    Start by removing floating debris, then treat or vacuum settled debris. Finish by targeting stubborn scum near the waterline. Stick to a regular cleaning schedule to avoid only reacting to scum and reduce its return.

    Troubleshooting Common Scum Problems

    If scum keeps coming back, start by making a list of possible reasons. Swimmers’ extra organics, not changing the water enough, and bad skimming can cause it. Also, clogged or too small skimmers, pollen, dust, and scented items can add oils that make a film.

    Do simple checks to find the problem. If scum comes back fast after cleaning, check the nutrients and how often you change the water. If the skimmer isn’t catching enough, it might need more flow or a new one.

    • Check if the skimmer is working right and if there are air leaks or low pump flow.
    • See how skimmate collects; if it’s thin or missing, the flow or pocket depth is off.
    • Test phosphate and metal levels when you see cloudiness or stains with the film.

    Fixing it is easy. Change the water and skim the surface more often for quick help. Adjust the skimmer’s spot or get a better one for better capture.

    Keep the area around the pool or pond clean. Sweep the deck, move scented things away, and limit activities that add oils. Clean or change the filter media to keep the water flowing right.

    1. When siphoning scum, keep the intake under water to avoid air. Keep the angle steady so the film goes into the tube without breaking the siphon.
    2. Use slow, even motions with paper towels or skimmers to lift the film instead of pushing it apart.
    3. Think about using enzyme treatments to break down organic stuff that’s hard to remove.

    If you see stains or cloudiness, test for copper, iron, and phosphate. Treat these before trying to remove scum again to stop it from coming back.

    Use this guide as a checklist for your next maintenance session. It helps you find the main problem, fix it, and keep your water clear between cleanings.

    Environmental Considerations in Scum Removal

    Dispose of removed scum and used materials properly. Bag paper towels and debris, then throw them away. Don’t rinse scum into storm drains or gutters, as it can harm streams and rivers.

    Try mechanical methods first, like skimming and using nets. These methods reduce the need for chemicals. They help keep your water clean without harming the environment.

    If chemicals are needed, test the water first. Always follow the product instructions. This way, you use the right amount and avoid harming the environment.

    Keep your yard clean to prevent organic runoff. Rake leaves, trim plants, and maintain your lawn. This simple step helps keep your water sources clean.

    Think about using enzyme products or phosphate treatments. Brands like BioGuard and Leslie’s offer these options. They break down organics without harming the environment. Always read labels and use them only when needed.

    • Bag and bin used towels and collected scum.
    • Do not wash rinse water into storm drains.
    • Check local rules before discharging pool or rinse water.

    Local rules on disposing of pool water vary across the U.S. Always check with your city or county before releasing water. This helps prevent pollution and protects our waterways.

    Understanding Water Chemistry and Scum Formation

    To stop scum from forming, keep the sanitizer and pH levels stable. Aim for free chlorine at 2–4 ppm and pH between 7.2 and 7.8. Also, keep total alkalinity near 80–150 ppm to prevent pH swings that weaken sanitizers.

    Body oils, lotions, and proteins can tie up chlorine, causing visible films. Regularly removing debris and changing the water helps. This makes it easier to clean the surface scum.

    • Test pH and free chlorine daily during heavy use.
    • Check alkalinity weekly to keep pH steady.
    • Run periodic tests for metals, calcium hardness, and phosphates.

    Metals like copper and iron, and high calcium, can stain and cloud the water. Test for these monthly. Use a sequestering product, like Aqua Cop-Out, to reduce staining without changing your system.

    Phosphates feed algae and increase scum risk. Keep phosphates below 1,000 ppb to lower algae pressure. When phosphates rise, consider a phosphate remover or enzyme treatments like Naturally Aqua Enzyme Plus to break down organics and remove surface scum.

    Enzymes and regular mechanical cleaning work together. Skimming, vacuuming, and targeted treatments reduce organics. This keeps sanitizers active longer, reducing the need to clean surface scum by hand.

    1. Maintain sanitizer and pH targets daily to prevent scum buildup.
    2. Control organics with skimming and occasional water change.
    3. Monitor metals, calcium, and phosphates monthly and treat when needed.

    By following a simple testing schedule and matching treatments to test results, you can manage water chemistry scum formation. Regular attention makes removing surface scum faster and keeps water clearer for everyday use.

    Educating Yourself on Pool and Pond Care

    Learn from trusted sources like local pool stores and certified technicians. Also, check out equipment manuals from Aquario. These resources teach you how to remove scum safely without damaging pumps or liners.

    Keep a simple maintenance log to track your progress. Update it after each check. Note the dates, water changes, skimming sessions, and test results for chlorine, pH, and more. A clear record helps you spot patterns and improve prevention over time.

    Use free or community services when available. Many professional pool stores offer computerized water analysis and advice. You can compare their findings to your own tests to refine your techniques.

    • Track equipment performance and cleaning frequency.
    • Record swimmer habits and external inputs like leaves or sunscreen.
    • Note any treatments you apply and their outcomes.

    Understand the causes of scum to target prevention. External debris, body oils, and poor circulation each need different responses. Knowing the source helps you choose the right techniques and focus on prevention.

    Stay updated on new products and tech. Enzymes, sequestering agents, automatic skimmers, and venturi systems can make maintenance easier. Read guides, watch demos, and ask local pros about performance.

    Teach family members simple tasks like daily skimming and reading test strips. Shared responsibility makes routine care easier. Use your log to assign chores and track progress, turning prevention into a habit.

    Engaging Your Family in Water Maintenance

    Make cleaning the pool a family affair with easy tasks. Assign daily jobs like skimming the surface, clearing decks, or checking chemical levels. This way, everyone contributes to keeping the water clean.

    Teach your family to reduce organic matter in the water. Encourage them to shower before swimming, use non-greasy sunscreens, and avoid soaps near the pool. These habits prevent scum and keep the sanitizer working well.

    • Rotate weekly chores so work feels fair and stays fresh.
    • Have older kids brush pool walls and empty skimmer baskets.
    • Let younger ones retrieve leaves with a net or hand skimmer.

    Use checklists and a calendar to keep maintenance on track. When everyone pitches in, the water stays clear, and algae blooms are less likely.

    Explain the importance of each task to your family. When they see the water is clearer and algae is gone, they’ll be more eager to help. They’ll understand how their efforts make a difference.

    Conclusion: Maintaining Clear Water Surfaces for Enjoyment

    To keep your pool, pond, or aquarium inviting, follow a consistent routine. Start with quick spot-cleaning using paper towels for surface scum. Then, daily skimming with a flat or deep-pocket skimmer helps remove scum before it turns into tough biofilm.

    Combine manual cleaning with system care: do water changes and surface siphoning to cut down on organics. Keep your filtration system working well and clean skimmer baskets often. An outlet-mounted venturi skimmer, like the Aquario Neo Premium, can also help remove biofilm and prevent air buildup in canister filters.

    Create a maintenance plan you can stick to: skim every day, brush once a week, vacuum as needed, change water to reduce organics, and test the water chemistry regularly. If problems keep coming back, get help from a professional for targeted scum removal and water treatment advice.

    Here’s a quick checklist to follow: skim daily, brush weekly, vacuum when needed, change water regularly, test chemistry often, and dispose of scum properly. With regular, informed care and the right tools, you can manage surface scum and keep your water clear and fun all season.

    FAQ

    What exactly is surface scum and why should I care?

    Surface scum is a mix of organic films, dust, pollen, leaves, and microbial biofilm. It collects at the air-water interface. You’ll see it as an iridescent sheen or a sticky film along the waterline.

    Left unchecked, it reduces water clarity and traps odors. It also ties up sanitizers and raises algae risk. Timely removal improves clarity and swimmer comfort.

    When are paper towels an appropriate tool for removing surface scum?

    Use plain, unscented, uncolored disposable paper towels for quick spot cleanup. Fold several towels for strength. Lay them lightly onto the film and lift slowly.

    Avoid rubbing, as it can break the film into smaller particles. For larger areas, switch to a skimmer.

    How do I remove larger patches of scum effectively?

    For routine and larger areas, use mechanical skimmers. Flat skimmer nets, deep-pocket skimmers, telescopic nets, or outlet-mounted venturi skimmers work well.

    Work methodically with wind calm, sweeping from one side to the other. Empty skimmer bags frequently. Deep-pocket nets hold more debris; flat nets are lighter and easier to handle.

    Outlet-mounted venturi skimmers remove biofilm and floats at the outlet. They can expel trapped air back into the tank instead of letting air build into a canister filter.

    What routine schedule should I follow to prevent scum buildup?

    Skim the surface daily or as needed. Brush walls once or twice per week. Vacuum bottoms about twice weekly for pools.

    Adapt the frequency for ponds and aquariums. Perform periodic water changes and targeted surface syphoning to lower dissolved organics. During heavy use or after storms, increase skimming frequency.

    How do I siphon surface scum and what should I watch out for?

    Surface syphoning targets dissolved organics and thin films. Use a soft tubing and position the intake gently at the film’s edge.

    Keep a steady downward angle to maintain the siphon. Avoid sucking in air — air breaks the siphon and disperses the film. Practice the angle and flow to remove film effectively.

    How do outlet-mounted venturi skimmers differ from other skimmers?

    Outlet-mounted venturi skimmers attach to an outlet pipe and use venturi suction to collect surface biofilm and floating particles at the source.

    A key advantage—when designed like the Aquario Neo Premium adjustable venturi skimmer—is that they can expel trapped air back into the tank. This reduces air accumulation in filtration systems and improves consistent skimming performance.

    What maintenance do skimmers and nets require?

    Clean skimmer pockets and empty baskets regularly. Check nets and bags for tears and replace worn materials to preserve capture efficiency.

    For telescopic poles, rinse and dry after use to extend life. Ensure built-in skimmer positioning and flow rates are correct and inspect venturi adjustments for outlet skimmers. Proper upkeep maintains skimmate production and performance.

    How does removing scum mechanically affect my chemical treatment needs?

    Mechanical removal lowers organic load so sanitizers like chlorine or bromine are less burdened. Protein films and oils bind sanitizer, so removing them improves sanitizer efficiency.

    Continue regular testing and adjust free chlorine, pH, and alkalinity to recommended ranges. For pools, aim for free chlorine 2–4 ppm, pH 7.2–7.8, and alkalinity 80–150 ppm.

    Are enzyme products or phosphate removers worth using for scum control?

    Enzyme products and phosphate removers can help reduce long-term scum sources. They break down organic matter and limit nutrients that feed algae.

    Use them as part of an integrated strategy—mechanical removal first, then targeted treatments when tests indicate need. Follow manufacturer directions and consider environmental impact and local disposal regulations.

    What should I do if scum returns quickly after cleaning?

    Diagnose common causes: excess organics from swimmers, infrequent water changes, poor skimming technique, clogged or undersized skimmers, or external inputs like nearby plants and decks.

    Check skimmate production—low skimmate may indicate inadequate flow or skimmer performance. Increase water changes and surface syphoning, adjust or upgrade skimmers, improve surrounding area housekeeping, and test water chemistry and nutrient levels.

    How should I dispose of removed scum and used paper towels?

    Bag used towels and collected debris and place them in your trash. Do not flush paper towels or wash scum into storm drains or waterways.

    For heavily contaminated rinse water, follow local regulations for disposal to avoid municipal water contamination.

    What tools should I have on hand for routine surface scum control?

    Keep plain unscented paper towels for spot cleanup, a flat skimmer net and a deep-pocket net for routine skimming, and a telescopic pole to reach across the surface.

    Consider an outlet-mounted venturi skimmer (example: Aquario Neo Premium) if you want continuous removal at the outlet. Add nylon-bristled brushes appropriate for your liner, a manual vacuum or automatic cleaner, testing kits for chlorine, pH, alkalinity, metals, and phosphates, and enzyme or phosphate treatment products as needed.

    How can I involve family members in maintaining a scum-free surface?

    Assign simple daily tasks: quick surface skimming, removing debris from decks, and checking chemical test strips. Rotate weekly chores like brushing walls, emptying skimmer baskets, and vacuuming.

    Educate swimmers to shower before entering and use non-greasy sunscreens. Shared responsibility increases consistency and reduces recurrence.

    Where can I get reliable advice or water testing help?

    Consult local pool stores, professional pool service technicians, manufacturer guides for equipment (such as the Aquario Neo Premium), and community resources.

    Many local pool retailers offer free computerized water analysis and advice. Keep a maintenance log of water changes, skimming frequency, and chemical test results to track patterns and get informed guidance when problems persist.

  • How to Handle Water Evaporation and Maintain Mineral Balance

    How to Handle Water Evaporation and Maintain Mineral Balance

    When water evaporates, you lose volume and see more minerals, metals, and salts. This happens because evaporation turns water into vapor, leaving minerals behind. It’s important to check these levels regularly.

    Pools outside can lose up to 3.5 inches of water a week in summer. This means you need to manage evaporation based on your pool’s size and where you live. Indoor pools also lose water, even with good dehumidifiers, so controlling evaporation is key.

    To keep water quality good and electrolytes balanced, take a few steps. Use less chemicals that leave byproducts, cover your pool, and add fresh water. Also, fix leaks to avoid false signs of water dilution.

    Your local water affects mineral balance. Spring and mineral waters have good minerals, but treatments can remove them. Check your water quality and add minerals if needed to keep it healthy.

    Seasonal pool care helps with evaporation and mineral balance. Clean your pool well in winter, keep the pH and alkalinity right, and manage TDS. Use a cover and reduce filtration time. These steps save chemicals and protect your pool and skin.

    Understanding Evaporation and Its Impact on Water Resources

    A detailed landscape depicting the concept of evaporation control in a serene, agricultural setting. In the foreground, a variety of lush plants and crops, visibly thriving, represent healthy water use. A modern irrigation system can be seen, showcasing precision technology managing water flow. In the middle ground, a calm pond reflects the sky, with subtle vapor trails rising from its surface, indicating evaporation. In the background, rolling hills under a bright, clear blue sky enhance the peace of the scene. Soft sunlight casts gentle shadows, creating a warm, inviting atmosphere. The image should have a wide-angle perspective, capturing both the intricacies of water management and the tranquility of nature, symbolizing balance and sustainability in water resources.

    Evaporation turns liquid water into vapor. Dry air makes this happen faster. So, Arizona pools lose water quicker than Florida pools at the same temperature.

    Indoor humidity also affects how fast your pool water evaporates. It can make disinfection byproducts release near the water’s surface.

    When water evaporates, only water vapor is left. But dissolved solids like cyanuric acid and calcium stay behind. These solids make the water chemistry change.

    This change can lead to scaling, corrosion, staining, and more chlorine needed. Your refill water is important too. It can change the mineral levels in your pool.

    If the refill water has low hardness, topping it up after evaporation can make scaling or corrosion worse. This is because the balance of minerals shifts over time.

    Accumulation of solids is clear. Stabilized chlorines add cyanuric acid. Calcium comes from tap water and calcium-based sanitizers. Metals come from source water or chemicals. Nitrates form from organic nitrogen from bathers and the environment.

    • You can manage evaporation by controlling indoor humidity, using covers, and scheduling maintenance to limit concentration spikes.
    • Good evaporation prevention reduces off-gassing and keeps dissolved solids steadier when you top up tanks or pools.
    • Evaporation control plays a role in long-term water quality and in minimizing chemical and energy costs.

    Seasonal changes, lower use, and environmental inputs like rain or debris affect evaporation rates. Regular monitoring and simple measures can help manage evaporation. This protects the balance of your water systems.

    Common Sources of Water Evaporation

    A serene outdoor scene depicting common sources of water evaporation. In the foreground, a small pond with gentle ripples reflecting sunlight, surrounded by lush greenery and mist rising from the surface. In the middle, a variety of natural evaporation sources, such as a gentle waterfall cascading over rocks and sun-drenched soil in a garden, with steam visible as water evaporates. The background features a clear blue sky with soft, fluffy clouds, and distant hills bathed in warm afternoon light. The atmosphere should convey tranquility and natural beauty, emphasizing the dynamic process of water evaporation in a vibrant ecosystem. The image should have a bright and inviting mood, captured from a slightly elevated angle to provide depth and perspective.

    Open-water surfaces like swimming pools, reservoirs, and lakes lose water quickly. The size of the surface area matters. A wider surface loses water faster than a narrower one.

    Indoor pools also lose water, but in a different way. They make the air around them more humid. This humidity makes evaporation happen more often. Extreme weather like hot temperatures and low humidity speeds up this process.

    • Pumping and circulation systems increase surface agitation and net loss.
    • Uncovered water features expose more area to air and light.
    • Leaks and splash-out add to overall water disappearance.

    Municipal and industrial systems don’t directly cause evaporation. But, their choices about water treatment affect the water’s mineral content. When you add new water, its chemistry changes the minerals in the pool.

    Not taking care of pools in winter can lead to more water loss. Not using covers or ignoring maintenance can cause problems. Keeping surfaces covered and maintaining equipment helps reduce water loss.

    People’s actions also affect evaporation. Activities like swimming and irrigation disturb the water’s surface. These actions don’t cause evaporation, but they change how fast water is lost. You need to manage the minerals in the water to deal with these changes.

    The Importance of Maintaining Mineral Balance

    Keeping mineral balance is key to protect equipment, surfaces, and health. As water evaporates, minerals get more concentrated. This changes the Langelier Saturation Index (LSI).

    Low LSI makes water aggressive, causing metal corrosion. High LSI leads to scaling, clogging pipes and fouling heaters.

    Too much stabilized chlorine can harm water quality. Cyanuric acid (CYA) reduces free chlorine’s effectiveness, causing stains. High calcium hardness promotes scaling and raises LSI.

    Metal contaminants like iron and copper increase chlorine demand. They also cause discoloration and staining.

    Nitrates feed algae growth, raising combined chlorine levels. High salt and total dissolved solids (TDS) speed up corrosion and make water cloudy. Targeted evaporation management can reduce these risks.

    Minerals like calcium, magnesium, potassium, sodium, and chloride are vital for hydration. They support muscle and nerve functions. Magnesium is essential for energy production.

    If treated water lacks minerals, you might need to add them. This is for health or process reasons.

    Mineral-based pool systems use gentler water for skin and hair. Regular testing and mineral topping keep water clear and comfortable.

    Combine water conservation with routine testing to slow concentration increases. Covering reservoirs and topping up with balanced water are helpful. Using calibrated dosing also improves outcomes.

    • Test LSI, calcium hardness, and metals regularly.
    • Top up with remineralized or balanced make-up water.
    • Adopt water conservation techniques to reduce frequent refills.
    • Use mineral supplements for pools or treatment systems when needed.

    Regular checks prevent equipment damage, staining, and cloudy water. They also reduce chemical demand and health risks from disinfection byproducts. Balanced water performs better, feels better, and lasts longer for systems and infrastructure.

    Strategies for Managing Water Evaporation

    Using solid or fitted covers on pools and tanks can reduce surface losses. A cover limits air contact, helping control evaporation quickly. It also keeps dust and debris out, saving time on chemical additions.

    Keep chemical use to a minimum. Avoid using stabilized chlorines like trichlor and dichlor if cyanuric acid buildup is a concern. One pound of trichlor in 10,000 gallons can raise CYA by about 6 ppm. This means you might need to dilute the water periodically to avoid chemistry shifts due to evaporation.

    • Drain and refill strategically to manage CYA, calcium, nitrates, salt, or TDS levels.
    • Use extended backwash cycles to discard water and achieve partial dilution without full drain.
    • Repair leaks promptly to prevent unintended volume loss and chemistry changes.

    For drinking water or larger systems, choose source water carefully. Plan controlled remineralization after aggressive filtration. This ensures the refilled water supports intended uses and health needs. Monitor hardness and total dissolved solids to keep supplies safe and useful.

    Adjust operations seasonally to minimize evaporation. In winter, reduce filtration run time to a few hours a day for recreational pools. Maintain mid-skimmer water level for circulation. Regular cleaning and filter maintenance prevent extra water loss.

    1. Apply winter shock treatments when organics rise and persistent contaminants need removal.
    2. Limit chemical additions that leave permanent byproducts; swap to nonstabilized options like sodium hypochlorite when appropriate.
    3. Track inputs: one pound of calcium hypochlorite raises hardness by about 8 ppm per 10,000 gallons; one gallon of 12% sodium hypochlorite can add roughly 30 ppm to TDS.

    Use these evaporation management strategies together for best results. This approach minimizes evaporation, preserves water chemistry, cuts operating costs, and keeps systems running as intended.

    Innovative Techniques to Reduce Evaporation

    There are simple, effective ways to lower evaporation in pools, reservoirs, and indoor pools. Start with physical covers. Solid and UV-stable covers reduce water loss and save energy.

    Control indoor humidity to slow water loss. Use dehumidifiers and adjust HVAC systems in swimming facilities. This method limits evaporation and protects buildings without harsh chemicals.

    Keep minerals balanced to prevent water loss. Use fewer chemicals and advanced filters like reverse osmosis. These methods improve water quality without frequent draining.

    Use partial dilution tactics when full draining isn’t needed. Rainwater and extended backwashing cycles are good options. They reduce the need for full refills.

    Consider remineralization after aggressive filtration. Use mineral cartridges or drops to restore lost minerals. Products like Trace Minerals’ ConcenTrace help maintain electrolytes and purity.

    Look into mineral-based systems for less chemical use. Mineral Swim and similar technologies keep water clear with less work. They help maintain mineral balance and prevent evaporation.

    By combining covers, climate control, targeted filtration, and remineralization, you create effective solutions. This layered approach protects water quality, extends system life, and reduces evaporation loss.

    Assessing Evaporation Rates and Their Effects

    Start with a simple test for pools. Use a bucket test to measure evaporation. Place a bucket at pool level, mark the waterline, and compare after 24 hours. If the pool loses more water, it might have leaks or higher evaporation.

    Know what to expect based on the season. In summer, outdoor pools lose about 0.25–0.50 inches of water per day. Indoor pools can lose a lot of water without proper controls, even with dehumidifiers.

    Watch how water chemistry changes over time. Evaporation concentrates minerals, making them more concentrated. Test for pH, alkalinity, calcium hardness, TDS, metals, and CYA monthly.

    • Trichlor raises CYA quickly (about 1 lb per 10,000 gal adds +6 ppm).
    • Calcium hypochlorite increases hardness (1 lb per 10,000 gal ≈ +8 ppm calcium).
    • Liquid sodium hypochlorite can raise TDS; roughly 1 gallon of 12% solution may add up to 30 ppm TDS.

    For water systems, check your local water quality report. This helps predict how refill water will affect your pool’s mineral levels. If refill water lacks minerals, you might need to remineralize.

    Do seasonal checks and a professional inspection before spring. Look for wear on covers, pumps, and systems due to mineral buildup. Also, check Hydroxinators and filters for buildup and replace parts as needed.

    1. Perform routine evaporation measurement with bucket tests and periodic calibrated gauges.
    2. Maintain a chemistry log to correlate rising minerals with water loss.
    3. Adjust fill strategies based on municipal water quality and health needs.
    4. Use professional inspections to verify equipment and cover performance.

    By measuring evaporation, tracking chemistry, and using local water data, you can better manage evaporation. This approach helps protect water quality, reduces equipment wear, and ensures proper dilution or remineralization.

    Understanding the Economic Impacts of Evaporation

    Evaporation can increase dissolved solids in pools or process water, leading to higher costs. You might need to refill water more often and use more chemicals. This can also mean more labor for upkeep.

    In places like California, there are rules about disposing of concentrated chemicals. This can mean extra costs for waste handling or special drains. Without a plan, chemicals like cyanuric acid can build up, leading to more frequent draining.

    For water meant for drinking, treatments like reverse osmosis or distillation can be expensive. They use a lot of energy and require maintenance. But, options like ConcenTrace can be cheaper and effective for remineralization.

    Investing in systems to control evaporation can save money in the long run. Pool covers, dehumidifiers, and mineral-based sanitizers can reduce chemical use. This also means less money spent on repairs from scaling and corrosion.

    When choosing options, think about the total cost over time. This includes the initial cost, installation, energy use, and reduced consumables. Making smart choices can help control evaporation while keeping costs down and systems running well.

    The Role of Climate in Water Evaporation

    Climate affects how fast water evaporates. Factors like air and water temperature, humidity, wind, and sunlight play a role. For example, Arizona’s dry air leads to more evaporation than Florida’s humid air, even with the same temperature.

    Indoor evaporation can be managed with HVAC and dehumidifiers. Good ventilation helps prevent harmful chemicals from evaporating. This approach improves air quality and saves water.

    Water from different sources has different minerals. Changes in weather, like snowmelt or drought, affect these minerals. When you add water to a pool or tank, these changes impact mineral levels. So, your treatment plans need to adjust to these changes.

    Seasonal management can help reduce water loss and chemical use. In winter, covering pools can lower evaporation. After rain, the water’s mineral balance can be safely adjusted.

    To keep mineral levels stable, follow these steps:

    • Use covers or floating devices to reduce surface area exposure.
    • Optimize dehumidifiers and HVAC for indoor pools to lower air saturation.
    • Monitor source water TDS and hardness seasonally and adjust treatment.
    • Schedule major top-ups after safe rainfall when dilution is appropriate.

    Choosing the right methods to prevent evaporation depends on your location and climate. Use local weather data and regular testing to find the best solutions for your budget and needs.

    Policy and Regulation Surrounding Water Management

    It’s important to know the rules from federal, state, and local governments about evaporation control. In places like California, there are limits on draining and refilling pools. This is because of chemicals like cyanuric acid and metals that can harm the environment.

    Local water treatment affects the quality of water you get. Cities use different methods to make water safe to drink. These methods can change what you need to add to your pool water, like calcium or corrosion inhibitors.

    Your plan must follow health and building codes for pools and indoor spaces. These codes cover things like ventilation and testing schedules. Following these rules helps keep the air clean and meets evaporation management goals.

    • Follow testing and reporting intervals set by local health departments to avoid fines and service interruptions.
    • Select chemicals that minimize persistent byproducts so drain events stay within permitted disposal windows.
    • Coordinate with municipal water suppliers when planning major fills, as treatment methods change water mineral profiles.

    Use water-saving techniques to meet drought or supply mandates. Keeping records of evaporation and makeup water helps show you’re saving water. These records can support your evaporation management strategies.

    Always review regulations before making big changes. This helps you avoid legal issues and keeps your operations running smoothly. It’s all about being prepared for changes in the rules.

    Resources for Further Information

    For more on evaporation control, check out ASHRAE publications. They cover indoor pool evaporation and dehumidification. The IPSSA Basic Training Manual also helps with chemical dosing impacts.

    Orenda and other experts provide detailed advice on dilution and byproduct management. They also explain the bucket-test method for measuring evaporation. For removing contaminants, consider metal-removing filters or reverse osmosis. Don’t forget to schedule professional pool inspections before the seasons change.

    Need help with remineralizing drinking water or adding electrolytes? Look at ConcenTrace Trace Mineral Drops and Daily Mineral Powder. Also, check local Consumer Confidence Reports to understand your area’s mineral levels. StatPearls and Environmental Research journals offer insights into electrolyte shifts and water treatment effects.

    If you manage mineral-based pool systems, Mineral Swim and other providers have valuable information. They offer vendor-specific protocols and winter care steps. For bigger projects, hire licensed pool pros for inspections and certified engineers for compliance. These resources will guide you in reducing evaporation and managing water chemistry in homes and businesses.

    FAQ

    What is evaporation and why does it matter for your water systems?

    Evaporation is when liquid water turns into vapor. This process leaves behind dissolved minerals and chemicals. This can change the water’s chemistry, making it cloudy or causing stains.

    It also means you’ll need to use more chemicals and water. This can increase your costs and water usage.

    How fast does a pool or open water body evaporate?

    Pools can lose up to 3.5 inches of water per week. This depends on the size of the pool, the weather, and how much sunlight it gets.

    Indoor pools can lose a lot of water too. They might lose as much water as the pool holds in a year. You can use a bucket test to see how fast your pool loses water.

    How does evaporation change mineral concentrations in my pool or reservoir?

    Evaporation leaves behind minerals like calcium and metals. This makes the water more concentrated. Over time, this can cause problems like scaling or corrosion.

    It can also affect how well the water is disinfected. This is because the minerals can change the water’s chemistry.

    How should you detect evaporation versus a leak?

    Use a bucket test to check for leaks. Place a bucket on a pool step and mark the water levels. After a few days, compare the water levels in the bucket and the pool.

    If the pool water level drops more, you might have a leak. Also, watch the levels of minerals in the water. If they keep going up, it’s likely evaporation.

    Which chemicals and inputs most rapidly increase persistent byproducts?

    Stabilized chlorine products, like trichlor and dichlor, raise CYA levels quickly. Calcium-based chlorine increases calcium hardness. Liquid chlorine and other oxidizers add salts and TDS.

    Using these chemicals can make the water chemistry worse. This is because they leave behind minerals and chemicals that don’t evaporate.

    What practical steps reduce evaporation and limit mineral buildup?

    Use a solid or UV-stable pool cover to reduce evaporation. For indoor pools, keep the air dry with proper HVAC and dehumidification.

    Try to use fewer chemicals that leave behind solids. Check the water chemistry often and dilute it when needed. Fix leaks and avoid uncovered water features.

    When should you consider draining and refilling versus targeted filtration?

    Draining and refilling can lower high levels of minerals and chemicals. But, it might not be allowed in some places and wastes water.

    For metals and high TDS, consider using metal-removing filters or reverse osmosis. These can clean the water without draining the whole pool.

    How does the mineral content of replacement water affect long-term balance?

    The minerals in the water you add back in matter. Tap water and spring water have different levels of minerals.

    If you add water low in minerals, it can lower the beneficial minerals in the pool. If the water is mineral-rich, it can cause scaling. Check the local water quality and plan how to add water back in.

    What role do remineralization products or mineral-based systems play?

    Remineralization products can add back beneficial minerals. They are useful after using reverse osmosis. Mineral-based pool systems can reduce the need for harsh chemicals.

    They can make the water feel better for your skin and hair. But, you need to test the water regularly and add minerals as needed.

    How do seasons and climate affect evaporation and mineral issues?

    The weather affects how fast water evaporates. Dry places evaporate faster than humid ones. Seasonal changes can also impact evaporation and mineral levels.

    In winter, using a cover can help protect the water. This is because there is less evaporation when it’s colder.

    What measurement and monitoring practices should you follow?

    Test the water regularly for pH, alkalinity, calcium hardness, CYA, TDS, nitrates, and metals. Use a bucket test to check for leaks and evaporation.

    Keep track of how much chemical you use. For indoor pools, check the HVAC and dehumidification system. This helps manage evaporation and air quality.

    How does evaporation affect indoor air quality and disinfection byproducts (DBPs)?

    Evaporation can make DBPs more concentrated in the air. This is because they are transferred from the water to the air. Poor ventilation makes this worse.

    Keep the air dry and use proper ventilation. This helps reduce DBPs and improves air quality.

    What economic impacts should you expect from unmanaged evaporation?

    Unchecked evaporation can increase water and chemical costs. It can also shorten the life of equipment and lead to disposal costs.

    Investing in covers, dehumidification, and targeted filtration can save money in the long run. These solutions can reduce the need for chemicals and water.

    Are there innovative or advanced evaporation-reduction techniques?

    Yes. There are new ways to reduce evaporation. These include engineered covers, surface films, and automated systems.

    Using less chemicals and water-saving circulation can also help. Consider using reverse osmosis or mineral systems to improve water quality without draining the pool.

    How do regulations and local policies affect evaporation management and draining?

    Local rules can limit draining and refilling. Some places have special rules for disposing of water with high chemical levels. Check with local authorities before draining a lot of water.

    Choose chemical programs that don’t leave behind a lot of byproducts. This helps you stay within the law and keeps the water safe.

    Where can you find technical references and professional guidance?

    For indoor pool issues, check ASHRAE resources. IPSSA and industry experts can help with chemical dosing. Look at product literature for remineralization options.

    Check local water quality reports for mineral levels. For complex problems, hire certified engineers or pool professionals for advice.

  • How to Prune Stem Plants for a Busier and Healthier Look

    How to Prune Stem Plants for a Busier and Healthier Look

    Pruning stem plants is about directing energy where you want it. Simple pruning and pinching techniques help. They make stems denser and bushier, just like in terrestrial gardening.

    Removing the top 3–5 inches or cutting just above a leaf node removes the terminal bud. This bud suppresses lateral growth. It usually stimulates two or more new shoots beneath the wound, leading to more stems and foliage.

    Always prune with purpose. Decide if you want to improve density, remove damaged tissue, control height, or boost vigor before you trim. Random cuts can stress plants, slow growth, or create gaps in the layout. Good planning reduces mistakes and keeps your aquascape healthy.

    Timing matters. Early-season or active-growth periods are usually best for encouraging branching. More aggressive cuts can cause a brief delay in flowering or vertical growth, but they often lead to stronger, fuller plants later. These timing basics will be covered in more detail in the section on when to prune your aquatic plants.

    Beyond appearance, denser stem plants enhance aquarium function. Thicker growth improves visual appeal, offers better habitat for fish and invertebrates, and can help even out light and water flow. Use these aquatic gardening tips and trimming aquatic plants techniques to lift both form and function in your tank.

    The Importance of Trimming Aquatic Plants

    A serene aquarium scene showcasing the meticulous process of trimming aquatic plants. In the foreground, a pair of hands, wearing gardening gloves, gently holds a pair of scissors, delicately snipping vibrant green stem plants, which are cascading gracefully in an explicitly clear tank. The middle of the image features lush, healthy aquatic plants in various shades of green, showcasing their lush foliage and intricate textures. In the background, soft ambient light filters through the water, creating gentle ripples and casting calming shadows. The overall atmosphere is peaceful and focused, inviting viewers to appreciate the beauty and care involved in maintaining a natural aquatic habitat. The angle is slightly top-down, emphasizing the action of trimming while capturing the lively underwater ecosystem without any distractions or clutter.

    Trimming aquatic plants helps them grow better. It moves energy from old tips to new shoots. This makes the plants stronger and more vibrant.

    Keeping plants trimmed keeps them bushy. This gives fish more places to hide and improves water flow. It also lets more light reach the leaves, reducing algae.

    Healthy plants mean clean water. Pruning out dead parts stops decay and disease. It keeps pests away too. A good plan for trimming helps you care for your plants without harming them.

    Trim plants regularly but not too much. Light cuts encourage growth, while heavy cuts rejuvenate. Always have a reason for pruning to avoid weakening your plants.

    • Biological benefit: energy moves from removed tips to healthy shoots.
    • Habitat gain: fuller stems provide shelter and better circulation.
    • Visual outcome: maintained shapes prevent spindly, sparse growth.
    • Management tip: plan cuts and follow underwater plant maintenance schedules.

    When to Prune Your Aquatic Plants

    A serene aquarium scene featuring a variety of healthy aquatic plants with vibrant greens and subtle hues. In the foreground, focus on a skilled aquascaper gently pruning stem plants with specialized tools, showcasing the process of careful maintenance. The middle ground displays lush plants, some with elongated stems and others with bushy growth, indicating different growth stages. The background consists of soft, diffused lighting that highlights the water’s clarity, enhancing the overall tranquility of the setting. The composition should evoke a sense of calm and dedication to plant care, captured at a slight upward angle to emphasize the beauty of the aquarium. The atmosphere should feel nurturing and serene, ideal for demonstrating the art of pruning aquatic plants.

    Prune your plants when they are actively growing. Spring and early growth phases are best. This lets them recover quickly and grow fuller.

    Don’t prune right before stressful events. Avoid pruning before moving plants, changing water chemistry, or big lighting changes. These times can cause infections and slow healing.

    Use two pruning methods: light trims and occasional big cuts. Light pinching every few weeks helps plants grow denser. For major thinning, cut up to one-third of top growth. Cut woody stems back by no more than one-third to avoid shock.

    Prune based on your plants’ life cycles. Some plants set flower buds at certain times. If you want blooms, don’t remove these buds. For more vegetative growth, prune before they flower.

    After big pruning, expect a recovery time. Growth or flowering might slow down. But, this pause often leads to stronger growth later. Keep plants in stable conditions with steady light, CO2, and nutrients.

    Here’s a quick guide for pruning your aquatic plants:

    • Time base: prune in active growth phases for fastest recovery.
    • Stress check: avoid pruning before transport or big water changes.
    • Trim strategy: use light pinches regularly; reserve heavy cuts for overcrowding.
    • Species note: preserve flower buds if you want blooms; cut earlier for vegetative growth.
    • Recovery plan: maintain stable conditions after pruning to encourage branching.

    Learning to prune your aquatic plants improves their health and your aquarium’s look. With the right timing, you’ll see better growth and fewer problems.

    Tools You’ll Need for Trimming

    Begin with essential hand tools. Sharp scissors and pruning shears are key for precise cuts. For stem plants, use long-bladed scissors and curved micro-scissors to avoid damage.

    For small growth, pinch stems with your fingers. This is good for light shaping. But for more, use scissors or pruners to prevent strain.

    For bigger cuts, loppers or saws are best. But be careful not to force thick cuts underwater. Remove big pieces outside the tank to protect roots and fish.

    Sanitation is critical. Clean and sharpen blades after each use to prevent disease. Dull tools can harm plants, so keep them sharp.

    Have a basic kit for regular care. Include spare blades, a brush, and a container for clippings. This helps keep your plants healthy and your space organized.

    If a job seems too hard, think about getting help. Professional services have the right tools and know-how for big jobs or delicate plants.

    • Long-bladed aquarium scissors for stem precision
    • Curved micro-scissors for close shaping
    • Pruning shears for thicker stems
    • Loppers or saws for woody material
    • Disinfectant, sharpening cloth, and cleaning brush

    Always follow the tool’s instructions and keep them dry and sharp. Good care means your plants stay healthy and you can keep them looking great.

    Step-by-Step Guide to Pruning Stem Plants

    Begin by carefully inspecting your plants. Look for stems that are too long, damaged, or block light. Choose whether to pinch for more branches, thin for less density, or cut for a fresh start. Planning helps make the process quicker and less stressful for your tank.

    Pinch small growth when stems are 8–12 inches long or have three to five leaf pairs. Cut off the top growth by three to five inches just above a node or leaf pair. This encourages new shoots and keeps the plant bushy.

    Use sharp scissors or aquascaping shears for clean cuts. Cut just above a growth node or lateral bud to promote new shoots. Avoid flush cuts that harm the plant’s recovery and invite decay.

    Thin and shape by removing crowded stems to the base or to a main stem. This improves light and water flow. Limit thinning to about one-third of major stems per year for multistem plants unless you plan a full chop.

    Remove damaged and dead tissue quickly. Brown, decaying, or diseased stems and leaves can harm water quality and spread problems. Pull trimmings out of the tank and dispose of them outside the aquarium to protect aquatic plant care and tank health.

    After cutting, monitor water parameters and expect a brief lag before new growth appears. Consider small water changes to remove excess nutrients released by decaying trimmings. Careful follow-up supports recovery and steady regrowth after trimming aquatic plants.

    Different Pruning Techniques for Various Plants

    Soft-stemmed plants can be shaped by pinching and topping. Cut the top growth just above a node to encourage side shoots. This method is great for multi-node stems and makes plants bushier with less stress.

    For dense stands and multi-stem shrubs, thinning and selective removal help. Remove stems at the base to let in more light and improve flow. When fixing an overgrown area, take out about one-third of major stems each year to avoid shocking the plants.

    Chop-back or rejuvenation cuts are good for overgrown beds. Cut stems back to 6–12 inches or near the substrate to get new shoots from lower nodes. In bad cases, a more aggressive chop might be needed, but expect a recovery time while new growth grows. Use this method carefully when keeping water plants healthy.

    Some plants don’t do well with pinching. Single-stemmed types and those grown for flowers or seed need different care. Don’t pinch if you want seed or blooms, and pick pruning methods that fit the plant’s growth habit.

    • Treat delicate carpeting plants with frequent, small trims to keep a tidy carpet without stressing roots.
    • For woody or thick-stemmed aquarium species, use staged reductions instead of one big cut to prevent dieback.
    • Adjust timing and intensity based on plant type and overall aquatic plant care routine.

    Use different pruning techniques for various plants. Thoughtful cuts keep plants strong and improve light penetration. This helps with oxygen levels and nutrient balance. Regular, targeted trimming is key to keeping water plants healthy.

    Managing Plant Health Post-Pruning

    After pruning, watch your stems for signs of stress like yellowing or softness. Remove any decaying cuttings quickly. This helps prevent infections and keeps your plants healthy.

    Keep the nutrients and light levels consistent to help your plants recover. Trimming plants means they need balanced care. Too much fertilizer or light can lead to algae. Stick to good aquatic plant care and adjust dosages based on plant needs.

    When thinning plants, remove about one-third each year. This gradual approach helps plants recover better. It also reduces transplant shock.

    • Use clean technique: disinfect or rinse scissors between tanks to prevent cross-contamination.
    • Make neat cuts at nodes instead of flush cuts to reduce tissue damage and disease entry.
    • Avoid over-pruning; leave healthy nodes so plants can send new shoots and stay resilient.

    Be on the lookout for fungal spots or slimy growth after pruning. If you find any, remove the affected area. Also, make sure water flow and filtration are stable. These steps are key to keeping your water plants healthy.

    Stick to a regular maintenance routine. Good water chemistry and careful care will help your plants recover. This will lead to a fuller, healthier aquascape.

    Boosting Buoyancy After Pruning

    Pruning stem plants removes leaves that kept stems upright. This change can cause stems to float, lean, or form mats. It’s important to understand this shift for good aquatic plant care.

    Replant trimmed stems quickly to stop them from drifting. Place cuttings at a slight angle and bury the lowest node. This helps roots grow and keeps stems in place during plant maintenance.

    • Use plant weights or fine tweezers to secure loose cuttings until roots develop.
    • Choose a stable substrate like ADA Aqua Soil or fine-grain sand to support new root growth.

    Trim plants in stages, not all at once. This method keeps the plant bed stable. It reduces the risk of sudden buoyancy shifts that cause floating mats.

    Encourage fast root growth by keeping nutrients balanced and CO2 levels consistent. Strong roots mean less need for frequent re-anchoring and easier plant care.

    • Provide a slow-release fertilizer near the roots for steady nutrient uptake.
    • Maintain gentle water flow to avoid dislodging new plantings while delivering nutrients.

    Use simple aquascape techniques to hide or support leaning stems. Place small stones, driftwood, or foreground plants like Hemianthu callitrichoides for support and cover.

    Follow these tips regularly. You’ll keep your plant beds neat, reduce floating, and help stems recover fast. Consistent care turns pruning into a chance for a fuller, healthier aquascape.

    Dealing with Common Issues After Pruning

    After pruning, act quickly to stop algae outbreaks. Trimmings and sudden changes in light or nutrients can cause algae to bloom. Remove cuttings fast, do partial water changes, and keep up with fertilization and CO2 to control algae.

    Check cut surfaces for rot or disease. Bad cuts and dirty tools increase infection risk. Make clean cuts above nodes and clean tools between uses. These steps help prevent disease spread in your plants.

    Floating trimmings can feed algae if left. Use a fine net or gentle siphon to remove debris. Quick cleanup helps keep water clear and your plants healthy.

    After heavy trimming, plants may grow slowly. They often pause to recover. Keep temperature, light, and nutrients stable. Avoid disturbing them too much so they can grow back on their own.

    • Remove cuttings right away to lower nutrient spikes.
    • Disinfect scissors or aquascaping shears between tasks.
    • Run small water changes after large pruning sessions.
    • Monitor for discoloration or soft tissue that signals infection.

    If problems don’t go away, it’s time to seek help. For tough diseases, big woody pruning, or a general decline, call aquarium experts or an aquatic plant trimming service. They can find the problem and do complex work safely for your system.

    Encouraging New Growth

    To get new growth in stem plants, cut just above growth nodes. This helps energy go to side buds, leading to more shoots from one cut. Learning to prune this way makes stems thicker and your display denser.

    Harvest or pinch plants regularly, like with herbs. Light pinches stop stems from getting too long and encourage bushy growth. Your plant care will improve with short, frequent trims instead of big ones now and then.

    Make sure trimmed plants have what they need to grow. Check the light, keep CO2 stable if you inject it, and balance nutrients. Poor light or nutrient balance can slow down growth, even with good pruning.

    For plants with many stems, thin them out slowly. Remove about one-third of older stems each year. This opens up the plant and encourages new growth from the base.

    Use healthy cuttings to grow more stems. Replant these cuttings to fill in gaps and speed up recovery after pruning. This method is great for expanding your plant coverage without buying new ones.

    • Cut above nodes to stimulate lateral buds.
    • Pinch lightly and often to keep plants compact.
    • Balance light, CO2, and nutrients for fast regrowth.
    • Thin old stems gradually to encourage basal shoots.
    • Replant healthy cuttings to propagate and fill gaps.

    Maintaining Your Aquatic Ecosystem

    To keep your tank balanced, make underwater plant care a regular part of your routine. Prune plants and do regular water changes, substrate upkeep, and filter checks. This way, plants and animals can live in a stable environment together.

    Pruning should match each plant’s needs. Some plants do well with light pinches often, while others need a full trim now and then. Always remove dead or damaged parts quickly to stop pests and diseases. Prune with a purpose, like controlling growth or shaping the plant, not just for the sake of cutting.

    Make sure you have the right number of plants for your tank size and how much time you can spend on care. If you’re always struggling to keep up, think about getting help from a pro or talking to someone who knows a lot about aquatic plants.

    FAQ

    What is the goal when you prune or pinch stem aquatic plants?

    The goal is to remove the top growth or damaged tissue. This redirects energy to the buds below. It leads to denser, bushier stems and more foliage.

    How much should you remove when pinching to encourage branching?

    Remove the top 3–5 inches of growth. Cut just above the terminal bud and a leaf node. This usually leads to 2+ new stems and a fuller structure.

    When is the best time to prune to encourage branching and limit stress?

    Prune during active growth periods. This is when plants recover faster and grow new shoots more readily. Avoid pruning before stressors like water changes or lighting shifts.

    Should you have a plan before you start cutting?

    Yes. Pruning should have a clear goal. This could be to improve density, remove dead tissue, or rejuvenate overgrown plants. Random cuts can weaken plants and invite disease.

    How often should you pinch versus perform major chop-backs?

    Pinch often for continuous growth. Schedule major cuts less often. Remove up to one-third of top growth for rejuvenation, and cut woody stems in stages.

    What tools do you need for precision trimming and sanitation?

    Use clean, sharp scissors and pruning shears. Long-bladed aquarium scissors and curved micro-scissors are best for stem plants. For large stems, use loppers or saws and remove big cuttings from the tank. Disinfect tools between tanks to prevent disease.

    Can you pinch small growth by hand, and when should you use tools?

    Pinch tender tips with your thumb and forefinger for small growth. Use scissors or pruners for larger jobs. Tools make cleaner cuts and lower infection risk.

    How do you make a cut that promotes new shoots?

    Cut just above a growth node or lateral bud. Avoid flush cuts that remove branch collars or leave stubs. A neat cut above the node encourages multiple new shoots.

    What should you do with trimmed material and why?

    Remove trimmed cuttings and debris from the tank promptly. Floating clippings decompose, raising nutrient levels and feeding algae. Use a fine net or siphon to collect trimmings, and dispose of waste outside the aquarium.

    How do you manage buoyancy and floating stems after pruning?

    Pruning reduces foliage mass that helps stems stay upright. Replant trimmed stems promptly into substrate or use plant weights to anchor cuttings. Stagger trimming across a stand to preserve structural support.

    What are the recovery expectations after a major cut?

    Expect a short lag in visible growth and possibly delayed flowering after significant pruning. Plants usually produce more vigorous branching afterward. Monitor water parameters and avoid further disturbance during recovery.

    How do you prevent disease or rot at cut surfaces?

    Make clean cuts with sharp tools and disinfect or rinse tools between tanks. Remove dead, decaying, or diseased tissue immediately and dispose of it outside the aquarium. Clean technique reduces entry points for pathogens and lowers the risk of secondary infections.

    How should you thin dense plant stands without stressing the population?

    Thin by removing selected stems at the base or cutting crowded stems back to the main stem. For multistem plants, remove about one-third of major stems per year when rehabilitating. Progressive thinning opens the canopy, improves light and flow, and stimulates basal shoots without shocking the stand.

    When is chopping back to near the substrate appropriate?

    Use chop-back or rejuvenation cuts when stands are overgrown or producing mostly leggy, shaded growth. Cut stems back to 6–12 inches or near the substrate to encourage fresh shoots. Expect a recovery period and consider staging cuts for woody species.

    Do all aquatic plants respond to pinching and topping?

    No. Soft, multi-node stem plants respond best to pinching and topping. Some single-stemmed or species that form reproductive structures won’t branch the same way, and pinching may remove flower buds if your goal is reproduction. Tailor technique to species response.

    How do you balance nutrients and light after pruning?

    Ensure trimmed plants have steady access to macronutrients, micronutrients, and adequate light to push new shoots. Avoid sudden fertilizer or light spikes that favor algae. Keep dosing proportional to plant uptake and follow a stable CO2 regimen where applicable to support vigorous regrowth.

    What signs of stress or disease should you watch for post-pruning?

    Watch for slowed regrowth, brown or mushy cut sites, fungal growth, and increased detritus. If you see spreading decay or systemic decline, remove affected tissue promptly and consider consulting an aquatic plant specialist for diagnosis and major remediation.

    Can you reuse healthy cuttings to fill the tank?

    Yes. Replant healthy cuttings to propagate more stems and densify the aquascape. Insert stems at a slight angle, bury the lower node, or use plant weights to encourage root formation. Replanting recycles growth and speeds restoration of fullness after trimming.

    How should you approach pruning to reduce algae risk?

    Promptly remove cuttings and perform partial water changes if large amounts of organic material were removed. Maintain balanced fertilization, stable CO2, and steady lighting. Avoid over-pruning that leaves excessive decaying matter or suddenly changes plant uptake of nutrients.

    When should you call a professional aquatic plant service?

    Contact a professional for stubborn diseases, major woody-pruning tasks, large-scale renovations, or systemic declines that exceed routine care. Professionals can safely remove large material, advise staged reductions, and help rehabilitate tank ecology with minimal risk.

    How do you tailor pruning frequency to different species?

    Observe each species’ response. Delicate carpeting plants benefit from frequent small trims to maintain compact growth. Woody or thick-stemmed species need staged reductions and less frequent but planned rejuvenation. Adapt schedules so plants recover steadily and maintain desired aquascape shapes.

  • Filter Cleaning Guide

    Filter Cleaning Guide

    This guide helps keep your aquarium water clean and healthy. It shows how to clean filters without harming the good bacteria. This is key for a strong water quality in your freshwater tank.

    Protecting the bio-media is important. It’s where the nitrogen cycle happens. This cycle turns ammonia into nitrate, thanks to healthy bacteria. We aim to clean out debris without harming these microbes.

    Here are some important tips. Use tank water for rinsing and clean one part at a time. Also, do partial water changes and plan your cleaning to avoid shocking the tank’s life.

    Different filters need different cleaning schedules. For example, nano sponge filters might need cleaning every month. But larger canisters can go 3–6 months without a big clean.

    After cleaning, you might see some cloudiness and a drop in water flow. But these issues usually clear up in a few hours. We’ll also share how to check your water’s health after cleaning.

    Follow our easy steps to clean your filters right. And get some DIY tips to keep your tank’s bacteria healthy. This way, your aquarium will stay balanced and thriving.

    Understanding the Importance of Filter Media

    A visually engaging scene showcasing the importance of regular filter cleaning in an aquarium setting. In the foreground, a close-up view of vibrant, healthy aquatic plants and colorful fish swimming near a clean filter, illustrating a thriving ecosystem. In the middle ground, a person in modest casual clothing is attentively cleaning a filter with a gentle touch, ensuring beneficial bacteria are preserved. The background features a well-maintained aquarium with clear water, inviting textures, and soft ambient lighting that highlights the natural colors of the fish and plants. A warm, inviting atmosphere conveys the sense of care and responsibility in maintaining a healthy aquarium environment, with a focus on the intricate balance of life within. Use a wide-angle lens to capture depth and detail, ensuring the focus remains on the filter and the person’s careful actions.

    Your filter media does three important jobs. It traps visible debris, removes dissolved organics and odors, and provides a home for beneficial bacteria. This keeps your tank healthy.

    Choosing the right filter media mix is key. Bio-rings and ceramic media offer lots of surface area for bacteria. Sponge media catches fine particles and supports beneficial bacteria. Filter floss catches small particles but has less space for bacteria.

    Beneficial bacteria in filters are vital. They convert toxic ammonia into nitrite and then into nitrate. This prevents harmful buildup in your tank.

    When you dry or rinse media with chlorinated water, you harm the bacteria. Always keep media wet and rinse in dechlorinated water. This preserves the bacterial populations and avoids sudden changes.

    Replacing all media at once can upset the water balance. Instead, do partial replacements and stagger maintenance. This keeps the water stable.

    Testing is critical after cleaning or media swaps. Check ammonia, nitrite, and nitrate levels regularly. Keeping records helps you spot issues early and protect your fish.

    Types of Filter Media Available

    A visually informative illustration showcasing various types of filter media for aquariums, prominently displayed in the foreground. Include a selection of filter types such as sponge filters, activated carbon, ceramic rings, and floss pads. Each type of media should have a brief, clear depiction showing texture and structure, with labels subtly integrated. In the middle layer, incorporate an assortment of aquarium elements, like plants and gravel, to create context, alluding to a clean and healthy aquatic environment. The background should feature soft-focus, shimmering water ripples to enhance the aquatic atmosphere, illuminated by gentle, natural light coming from a nearby window. The overall mood should be educational and inviting, ideal for readers interested in aquatic health and maintenance.

    When setting up or maintaining a filter, you have several options. Each type plays a specific role. This helps you choose the right media for your tank and cleaning schedule.

    • Sponge filter media — catches debris and supports beneficial bacteria. It’s great as a pre-filter and easy to clean in tank water.
    • Bio-rings and ceramic rings — offer lots of surface area for bacteria. Clean them gently in aquarium water to keep bacteria healthy.
    • Filter floss and fine filter pads — trap small particles and improve water clarity. These are usually thrown away and replaced to avoid clogs.
    • Activated carbon — removes odors, colors, and medicines. Change it monthly for the best results.
    • Biological blocks and bio-balls — are for nitrifying bacteria in canister and sump systems. They increase surface area without blocking water flow.
    • Mechanical pads and foam blocks — catch big debris first. Replace them when they wear out to avoid releasing fibers into the tank.

    Choose media based on your filter type. HOB and canister systems use mechanical, biological, and chemical stages. Sponge filters offer both mechanical and biological action but lack chemical media.

    Know when to replace each media. Filter floss and thin pads go in the trash when they get clogged. Sponges and ceramic media last longer but need replacing when damaged. When swapping out sponge or ceramic pieces, keep the old ones in the tank for a few weeks. This helps seed the new media with bacteria.

    Each media needs different care. Some must be replaced, while others should be rinsed gently in tank water. Following these guidelines ensures your filter works well.

    When to Clean Your Filter Media

    Look for clear signs before starting. Signs like reduced flow, clogged intake, swollen media, and cloudy water mean it’s time to clean. These signs help you avoid stressing your fish and plants.

    Set up a cleaning schedule based on your filter type. Nano sponge filters need cleaning about once a month. Larger canister filters can wait three to six months for a deep clean. Pre-filter sponges need more frequent checks and gentle rinsing.

    Your tank’s conditions also play a role. High bioload, heavy feeding, and few live plants mean more frequent cleanings. But, low stocking and well-planted tanks can go longer without needing a clean.

    • Keep a maintenance log to track your cleaning.
    • Clean or replace only one filter or sponge at a time to keep beneficial bacteria.
    • Avoid cleaning during big water changes or decor scrubbing to prevent losing bacteria.

    Act fast to protect your water quality. If flow slows, cloudiness appears, or ammonia/nitrite spikes, check your pre-filters and sponges right away. Quick spot cleaning can prevent a big problem.

    Follow the right steps when cleaning. Rinse media in tank water and rotate which pieces you clean. Avoid using tap water with chlorine, don’t clean all media at once, and don’t scrub biological media too hard. These steps keep your filter working well.

    Plan a cleaning routine that fits your tank. Create a written schedule, note any special tank factors, and adjust as needed. This helps you know when to clean and keeps your aquarium healthy.

    Safe Cleaning Methods for Filters

    Always use aquarium water when cleaning filters. Rinsing biological and sponge media in tank water keeps beneficial bacteria alive. This is one of the best ways to keep water quality steady.

    Make sure to keep bio-media wet between cleaning and putting it back in. Drying out sponge or ceramic rings can kill bacteria. This is a key step in cleaning filters without harming bacteria.

    • Always unplug electrical equipment before cleaning filters. Follow the manufacturer’s instructions for canisters and HOB units to avoid spills and damage.
    • Use tank water to rinse filters. Swish sponges and bio-rings in the water until debris loosens.
    • Replace disposable floss and activated carbon regularly. These remove mechanical debris and toxins but need fresh replacement often.

    For sponge filters, try a simple in-tank bag method. Place the sponge in a large Ziploc or fish bag underwater, lift it out and squeeze the sponge inside the bag several times using the tank water. Repeat until the squeezed water runs clear.

    When working with HOB or canister filters, remove prefilter sponges and media as the unit’s guide instructs. Swish biological media in the bucket of siphoned tank water and clean housings with a toothbrush if needed.

    Mechanical-only media can handle harsher cleaning. Outdoors, a high-pressure hose can clear coarse sponges, but avoid using it on biological sponges to protect beneficial bacteria.

    If you must use tap water, check chlorine levels first. Some hobbyists briefly rinse sponges in sink water at tank temperature to reduce shock. But, tank water is safer when possible.

    You can reuse bucket water on plants as fertilizer after cleaning. Refill the tank and expect brief cloudiness that should clear within a few hours when you follow these filter cleaning techniques.

    Use these DIY filter cleaning tips as a routine. They help maintain beneficial bacteria, protect filter function, and keep your aquarium stable while you clean with care.

    The Impact of Over-Cleaning

    Over-cleaning means removing or replacing all filter media at once. It also includes rinsing sponges in chlorinated water, using soap, or letting media dry. These actions can destroy the beneficial nitrifying bacteria on your media.

    The effects on your tank’s health are severe. Losing nitrifying bacteria can disrupt the nitrogen cycle. This can lead to sudden spikes in ammonia and nitrite, which are harmful to fish. You might see cloudy water, stressed fish, illness, or even death.

    Replacing entire media packs can cause operational problems. The biological filtration needs time to rebuild. To avoid long outages, seed new media with a bit of old media. Or, keep an old cartridge or filter running for four to six weeks to give bacteria time to grow.

    Plan your maintenance carefully to avoid combining big tasks. Don’t do full water changes, deep substrate cleaning, or heavy decoration scrubbing at the same time as filter work. Doing too much at once increases the risk to your fish.

    • Clean only one sponge or media component at a time.
    • Rotate which pieces you rinse so some bacterial colonies remain intact.
    • Monitor ammonia and nitrite for several days after any filter work.

    Never use soap, bleach, or other harsh chemicals on filter media. Also, avoid hot water that can kill bacteria. Following these filter cleaning dos and don’ts will help keep beneficial bacteria alive and prevent the dangers of over-cleaning.

    Steps to Clean Your Filter Media

    Here’s a simple guide to clean your filter. You’ll need a clean bucket, siphon, toothbrush, fish bag or Ziploc, towels, and a log. These tools make cleaning your filter easy.

    1. Start by checking your system. Look at the flow rate and the intake sponge. Also, check for any cloudiness or brown gunk. Decide which media to clean first, starting with the prefilter sponge.

    2. Next, turn off the unit. Unplug the filter and follow the manufacturer’s steps to avoid flooding when disconnecting hoses.

    3. Now, remove the media carefully. Start with the prefilter sponge. Place sponges in a bag or bucket of tank water to avoid releasing debris.

    4. Rinse the media in tank water. Use siphoned tank water to rinse bio-rings and sponges until the water clears. Squeeze the sponges a few times and replace the rinse water as needed.

    5. Replace any disposable media. Throw away fine filter floss or used activated carbon. Install fresh media as recommended by the filter maker.

    6. Clean the housing. Rinse the filter housing and the impeller with plain water. Use a toothbrush to remove slime, but avoid soap or detergents.

    7. Reassemble the filter carefully. Keep the media wet while reassembling. Follow the manufacturer’s instructions. If you removed water, refill the tank and start the filter again.

    8. Do a post-clean check. Watch for flow and expect some cloudiness. Test ammonia and nitrite in 24–72 hours to check stability.

    9. Record your service. Note which component you cleaned and plan the next cleaning. If you have multiple sponges or filters, clean a different one next time to protect beneficial bacteria.

    Remember to stay safe. Never leave fish without filtration for more than 8–12 hours. Avoid cleaning all filters at once, as this can stress your tank and harm biological filtration.

    Make cleaning your filter a routine. Learning how to clean filters properly saves time and keeps your aquarium stable. Use these tips to extend media life and protect your system.

    Alternative Cleaning Techniques

    There are many ways to clean filters without harming the biofilter. A UV sterilizer kills free-floating pathogens and green water with ultraviolet light. But remember, it doesn’t remove biofilm from media. So, use it with other cleaning steps when needed.

    Ammonia neutralizers and water conditioners help if beneficial bacteria drop. Always follow the product instructions. These products remove ammonia, nitrite, chlorine, and chloramine, keeping fish safe while bacteria recover.

    Commercial beneficial bacteria supplements can help after cleaning or adding new filter material. Use them as directed to speed up recovery and keep your nitrogen cycle steady.

    If fish get sick, quarantine them and use targeted medication or antibiotics. Use UV sterilizers or medicated baths carefully. They can reduce biofilter bacteria and change your system’s balance.

    Mechanical aids make cleaning easier and gentler. A gravel vacuum siphons tank water for rinsing media and removing debris. You can reuse this water on houseplants as a mild fertilizer.

    • Stagger cleanings of sponges and cartridges so only one is rinsed each cycle. This rotational approach preserves overall bacterial load.
    • Limit use of antibiotics and strong sterilizers to clear outbreaks. Those methods change microbial communities and should be a last resort.

    Use these effective filter maintenance methods as a toolbox. Combine physical cleaning, selective chemical aids, and biological supplements to maintain steady water quality. Test your water often and adapt your plan when parameters shift.

    Preventive Maintenance for Filter Longevity

    Keeping your filter in top shape is easy with a few simple steps. Start by checking the intake weekly and noting the flow rate. Also, test for ammonia, nitrite, and nitrate levels. This helps catch problems early and keeps your tank healthy.

    For monthly upkeep, swap out disposable media like activated carbon and filter floss. Rinse prefilter sponges in tank water to keep beneficial bacteria alive. These steps prevent clogs without harming your biofilter.

    Every three to six months, give your canister media a deeper clean. This depends on your tank’s bioload and the manufacturer’s advice. Clean impellers and housings with water and a soft toothbrush. Always follow the disassembly instructions to avoid damage.

    • Keep mechanical, chemical, and biological stages balanced in your setup.
    • Steady water parameters protect bacterial colonies.
    • Log and schedule tasks to avoid over-cleaning.

    When replacing sponges or pads, save a piece of the old media. This helps seed bacteria and speeds up recovery. If you have multiple filters, rotate which one you clean to maintain biological function.

    1. Avoid overfeeding and remove uneaten food quickly to reduce filter stress.
    2. Clean impellers with plain water to avoid chemical residue.
    3. Replace old media at the recommended intervals.

    Learn the right way to clean your filter to protect your fish and bacteria. Stick to a routine, track your tasks, and choose high-quality filters. These steps make filter maintenance easy for all hobbyists.

    Troubleshooting Common Filter Issues

    First, do a quick visual check. Look for kinks in hoses, loose fittings, or air in canister filters. Make a note of what you find to help solve problems later.

    If the filter is slow, try simple fixes. Clean the prefilter sponge and impeller with tank water. Check intake screens and ensure tubing is straight. For canisters, seal and prime if air is trapped.

    Cloudy water after cleaning is usually temporary. It should clear up in a few hours. This happens when you clean filters right and avoid rinsing all biological media at once.

    Test water for ammonia and nitrite if it’s cloudy or you suspect a spike. If levels are high, do partial water changes. Add a bacterial supplement or an ammonia neutralizer as a quick fix.

    • Clean impellers and housings to stop noise and vibration.
    • Replace worn sponges or pads; keep small pieces in the tank to seed new media for 4–6 weeks.
    • If clogging is frequent, re-evaluate feeding habits and add a pre-filter sponge or larger filter for the bioload.

    Follow a diagnostic routine: inspect visually, test parameters, and check equipment operation. Match each finding to corrective action and document results for future reference.

    To prevent problems, adjust maintenance intervals, reduce feed amounts, and add live plants. Consider upgrading to a larger filter if your tank is overstocked.

    Conclusion: Maintaining a Thriving Ecosystem

    Remember, the key is to protect beneficial bacteria. Rinse biological media in aquarium water, avoiding chlorinated tap water or soap. Clean only part of your filtration at a time. This keeps the bacteria that power the nitrogen cycle healthy, ensuring your fish stay well.

    Balance is essential. Regular, moderate cleaning keeps your mechanical filter working well while protecting the biological filter. Use partial water changes and staggered media cleanings to avoid losing too much bacterial mass at once.

    Keep a cleaning schedule and a maintenance log. Regularly test your water and use bacterial supplements or ammonia neutralizers only when needed. These steps help maintain a thriving aquarium ecosystem.

    By following these best practices and the tips in this guide, you can keep your water clear and your aquarium ecosystem stable. This will ensure a healthy environment for your fish and plants.

    FAQ

    What is the primary goal when cleaning aquarium filter media?

    The main goal is to remove debris and keep the mechanical flow going. It’s also important to protect the beneficial nitrifying bacteria. This helps keep the nitrogen cycle balanced.

    Which filter types are covered and how does cleaning frequency vary?

    We cover sponge, hang-on-back (HOB), canister, internal, and sump filters. Cleaning frequency depends on how much waste your tank produces, the size of your filter, and how often you feed your fish. Nano sponge filters need cleaning every month, while larger canister systems might only need a full media change every 3–6 months.

    Why should I use aquarium water to rinse biological media?

    Aquarium water is safe because it doesn’t have chlorine or chloramine. Rinsing bio-media in it helps keep the beneficial bacteria alive. Using chlorinated tap water or letting media dry can harm the bacteria and upset the nitrogen cycle.

    Can I clean all filter media at once to save time?

    No, it’s not a good idea. Cleaning or replacing all media at once can kill most of the good bacteria. This can lead to spikes in ammonia and nitrite. It’s better to clean one sponge or media component at a time and stagger your cleanings.

    What short-term effects should I expect after cleaning a filter?

    You might see the water get cloudy and the flow reduce right after cleaning. These issues usually clear up within a few hours. Keep an eye on ammonia and nitrite levels for 24–72 hours to make sure the biological filtration is working well.

    How do different media types function and how should each be treated?

    Mechanical media, like filter floss and pads, catches particles and is often replaced. Biological media, such as bio-rings and sponges, provides a surface for nitrifying bacteria and should be rinsed gently in tank water. Chemical media, like activated carbon, removes dissolved compounds and is usually replaced monthly. Only replace biological media if it’s deteriorated and seed new pieces with old media.

    What’s a safe step-by-step checklist for routine filter servicing?

    Start by preparing a bucket, siphon, toothbrush, and a bag. Observe the flow and media condition. Then, power down and follow the manufacturer’s instructions. Remove the prefilter sponge and place it in tank water. Rinse bio-rings and sponges in siphoned tank water until they’re clean. Replace disposable floss or carbon. Clean the housing and impeller with plain water. Reassemble, keeping media wet, and restart the filter. Test ammonia and nitrite levels over the next 24–72 hours. Record what you cleaned.

    How do I clean a sponge filter without dumping debris back into the tank?

    Use a large fish bag or Ziploc to catch the sponge. Submerge it underwater, then lift the bag out and squeeze the sponge in the tank water until it’s clear. Rinse other components with plain water as needed.

    Is it okay to rinse sponges in tap water if I match temperature?

    It’s risky. Matching temperature can reduce shock, but tap water often has chlorine or chloramine that can kill bacteria. If you must use tap water, treat it first to remove chlorine/chloramine. Better yet, use tank water for rinsing biological media.

    What counts as over-cleaning and why is it harmful?

    Over-cleaning includes replacing all media at once, using chlorinated water, or letting media dry. These actions can reduce or eliminate beneficial bacteria. This disrupts the nitrogen cycle, leading to toxic ammonia and nitrite spikes.

    What should I do if ammonia or nitrite spikes after cleaning?

    Test the water immediately and do partial water changes to dilute toxins. Consider adding a beneficial bacteria supplement to speed up recolonization. Use an ammonia neutralizer temporarily if needed. Monitor levels daily and avoid further major maintenance until stability returns.

    How should I schedule cleanings for multiple filters or sponges?

    Stagger cleanings so you only service one filter or sponge per maintenance cycle. Keep a maintenance log to rotate through sponges and media. This helps preserve overall bacterial populations.

    When should I replace biological media instead of just rinsing it?

    Replace sponges, foam blocks, or ceramic media only when they physically deteriorate or break down. When replacing, keep pieces of the old media in the tank for several weeks. This helps seed new media and maintain bacterial populations.

    What preventive tasks reduce filter workload and clogging?

    Feed less and remove uneaten food, vacuum substrate regularly, use prefilter sponges, add live plants to absorb nitrates, and check intake and flow weekly. These actions reduce debris and extend the interval between deep media cleanings.

    Should I use UV sterilizers, antibiotics, or bacterial supplements?

    Use UV sterilizers selectively to control free-floating pathogens or green water; they do not affect bacteria on media. Antibiotics and medicated treatments should be used cautiously and often in quarantine tanks because they can harm biofilter bacteria. Beneficial bacteria supplements can help recolonize media after partial cleaning—follow manufacturer directions.

    How often should I replace activated carbon and filter floss?

    Replace activated carbon about monthly and change fine filter floss or disposable pads as needed when clogged or discolored. Mechanical-only pads are disposable and should be replaced instead of being rinsed vigorously.

    What are signs that a filter or media needs attention right away?

    Immediate action is needed for clogged intake or prefilter sponges, noticeably reduced flow, persistent cloudiness, or elevated ammonia/nitrite readings. Check and clean prefilters and impellers promptly to restore flow and filtration.

    How can I avoid flooding when servicing canister filters?

    Follow the manufacturer’s disassembly steps, power down and disconnect carefully, use towels and a bucket for hose water, and keep media wet during handling. Take time to re-prime according to instructions to restore flow without airlocks.

    How should I monitor water parameters after filter maintenance?

    Test ammonia, nitrite, and nitrate daily for 24–72 hours after servicing. Keep records to detect trends. If levels rise, perform partial water changes and use bacterial supplements or neutralizers only as temporary support while the biofilter recovers.

    What are practical tips for long-term filter and tank stability?

    Maintain consistent pH and temperature, avoid overfeeding, keep a maintenance log and schedule, clean only portions of your filtration at a time, replace disposable media on schedule, and monitor water chemistry regularly. This protects the biological filter and ensures stable aquarium health.

  • How to Prevent and Remove Common Algae in Small Planted Tanks

    How to Prevent and Remove Common Algae in Small Planted Tanks

    Algae are simple organisms that grow using light and nutrients from fish waste. They make oxygen during the day and use it at night. Because they are simpler than plants, they can use more light and nutrients.

    You can’t have a tank without some algae. Many fish and invertebrates eat algae. It also helps with filtration and looks natural in your tank. The goal is to keep algae out of sight.

    Imbalances in light, nutrients, CO2, and circulation cause algae. To stop algae, aim for balance. Use healthy plants and an algae-eating crew.

    Use physical, chemical, and biological methods for algae control. Fast-growing plants like hornwort or water sprite soak up excess nutrients. This helps keep water quality stable, making algae control eco-friendly and lasting.

    Timers, regular care, and smart stocking help prevent algae in small tanks. Balanced lighting, nutrients, and a clean-up crew keep your tank healthy and beautiful.

    Understanding Algae: What You Need to Know

    A vibrant underwater scene depicting various types of algae in a small planted aquarium. In the foreground, clusters of green filamentous algae entwined around the decorative rocks and driftwood, showcasing their texture and delicate details. The middle ground features a lush substrate with small aquatic plants thriving amidst patches of algae, while tiny bubbles rise to the surface, enhancing the lively feel. In the background, soft, diffused lighting filters through the water, casting gentle shadows and highlighting the diversity of colors—from deep greens to soft browns—creating a serene and educational atmosphere. The overall mood should be calm and inviting, emphasizing the natural beauty and complexity of aquatic ecosystems, suitable for understanding algae's role in planted tanks.

    Ever wondered about algae in your planted tank? Algae are like plants but are actually tiny organisms. They use sunlight to make food and can eat organic matter too. They make oxygen in the day but use it at night, which can change your tank’s oxygen levels.

    Algae grow faster than plants because they grab light and nutrients better. Their simple design lets them live in tough conditions. This makes them both rivals and food for your tank’s creatures.

    Some algae are good because they feed fish and help clean the water. But getting rid of all algae is hard. Instead, aim to control it so plants and algae can coexist.

    Plants clean the water by removing bad stuff. They also compete with algae for resources. By picking the right plants and managing nutrients, you can keep algae under control without harsh chemicals.

    Start by making plants strong, adjust light and food, and watch the water. These steps help you manage algae and keep your tank healthy.

    Identifying Algae in Your Small Planted Tank

    A vibrant underwater scene showcasing a small planted tank filled with various aquatic plants and colorful fish. In the foreground, several types of algae are prominently displayed on the tank glass and on the substrate, allowing for clear identification. The middle layer features healthy green plants alongside patches of brown and green algae. In the background, soft, diffused lighting enhances the colors of the tank, creating a serene and educational atmosphere. The composition should capture the intricate details of the algae's textures and colors, with a macro lens effect emphasizing their uniqueness. Ensure the overall mood is calm and informative, suitable for a nature-focused article.

    To keep your planted tank healthy, you need a clear algae identification guide. Start by observing where growth appears and how it looks. Note texture, color, and location on plants, glass, decor, or substrate. These clues help you identify aquarium algae and pick effective algae control methods.

    Use this quick checklist to sort common issues:

    • Brown, dusty film on glass and decor: likely brown diatom algae. It rubs off and is common in new setups. High phosphates and silicates often cause it.
    • Black, bushy clumps on driftwood or stems: often Black Beard Algae. It resists simple removal and needs persistent treatment over months.
    • Long, stringy growth that looks like hair: hair algae. Fast growers appear when light and nutrients are out of balance.
    • Small, hard green dots on glass and slow plants: green spot algae. It resists soft scraping and may need a razor or snails that eat spots.
    • Slimy mats with a foul smell: blue-green algae or cyanobacteria. It forms blankets, avoids grazers, and calls for circulation fixes and targeted treatment.
    • Cloudy, pea-soup water: green water from free-floating phytoplankton. A UV sterilizer or a blackout can clear this quickly.

    Grouping algae into filamentous, planktonic, microalgae, and cyanobacteria makes diagnosis easier. Filamentous forms include thread-like mats and some BBA. Planktonic algae create green water. Microalgae include brown diatoms that settle on the bottom. Cyanobacteria form slimy blankets.

    Match visual signs to remedies in your algae identification guide. For example, brown diatom algae often fades with stable water chemistry and a cleanup crew. Black Beard Algae may need herbivorous fish like Siamese algae eaters or targeted topical treatments on removed items. Green spot algae often yields to manual scraping and phosphate control.

    Dense plant growth changes how algae appear. Healthy stem plants and fast growers compete for nutrients and light, shifting which types of algae dominate. Monitor plant health as part of your plan to identify aquarium algae and use effective algae control methods that fit the species you find.

    Factors Contributing to Algae Growth

    Algae grow when light, nutrients, and water movement are out of balance. Too much light or too many nutrients can cause algae. New tanks often see brown algae because of high phosphates and silicates.

    Lighting is key. Use timers to avoid too much light. Direct sunlight and bright LEDs can lead to algae. CO2 levels and water movement also play a role.

    Don’t overdo fertilizers. Too much can cause algae to bloom quickly. Feeding fish too much and not cycling the tank properly adds to the problem. Uneaten food and messy substrates increase the risk.

    • Water flow: slow or stagnant areas favor growth.
    • Temperature: warmer, shallow tanks tend to bloom faster.
    • Plant density: sparse planting leaves nutrients available for algae.

    Fast-growing plants help by taking up nutrients. Choose plants like Vallisneria, Hygrophila, or Ludwigia. Healthy plants also eat ammonia and nitrite, preventing algae.

    To prevent algae, monitor light, fertilize carefully, and keep CO2 levels steady. Regular pruning and adding fast-growing plants are good practices. Good filtration and gentle water flow are also important.

    By tracking algae growth factors and caring for your tank, you can prevent algae. Making small, consistent changes is better than big fixes.

    Algae Control Strategies: Preventive Measures

    First, balance light and nutrients. Use a reliable light timer for steady day lengths. Slowly adjust fertilizer dosing and wait two to three weeks for plant response. This steady approach is key to controlling algae.

    Keep your tank cycled and do regular water changes. Test water often and avoid too much fertilizer. Proper cycling and fertilization prevent sudden nutrient spikes that algae love.

    Build an algae-eating team. Amano shrimp, otocinclus, nerite snails, and Siamese algae eaters tackle different algae types. Use these helpers with other measures to avoid relying on one solution.

    Grow more plants, like Egeria densa and Java moss, to soak up nutrients. These plants compete with algae for space and nutrients. This is a top strategy for preventing algae.

    Ensure good water flow and aeration. Avoid direct sunlight and overstocking. Feed less and remove uneaten food to prevent excess nutrients. These steps are common among algae control strategies.

    Regularly prune and propagate plants to keep nutrient uptake high. Choose fast-growing plants like Bacopa caroliniana to fill gaps. Trimming reduces detritus and supports algae management.

    Keep beneficial bacteria stable through consistent routines. Use consistent maintenance and avoid sudden water changes. Add fast-growing floating plants to absorb excess nutrients. These steps create a strong defense against algae.

    Monitor results and adjust one thing at a time. Making measured changes keeps your system stable and teaches you what works. Over time, adopting new strategies helps you grow healthy plants instead of fighting algae.

    Natural Solutions for Algae Control

    You can fight algae without chemicals by mixing biology and plants. Start with algae-eating shrimp and snails that fit your tank size. Amano shrimp and otocinclus catfish tackle diatoms and some hair algae. Nerite snails are great at green spot algae but leave white eggs on hard surfaces.

    Siamese algae eaters help with hair algae and occasional black beard algae. Mollies and Florida flagfish offer extra grazing power. Pick species carefully to avoid plant nibblers. Some herbivores will eat tender stems.

    Monitor behavior after adding fauna. If a species targets your plants, reduce numbers or choose alternatives.

    Add dense plantings to outcompete algae. Fast-growing plants for algae control include Egeria densa, Hygrophila difformis, and hornwort. Floating plants like Salvinia natans and Red Root Floaters shade the water column.

    Stem and carpeting plants like Rotala and Java moss absorb nutrients quickly. This cuts nitrate and phosphate that feed algae.

    Use eco-friendly algae control solutions by combining fauna and flora. Dense vegetation stabilizes CO2 and reduces nutrient spikes. This lowers algal pressure while improving water quality and offers shelter for fry.

    Follow simple routines to support biological methods. Keep substrate clean, avoid overfeeding, and add beneficial bacterial supplements if needed. Emerging microbial cleaners show promise but lack full consensus. Focus on proven steps first and use microbial aids as a complement to natural algae removal techniques.

    • Introduce algae-eating shrimp and snails that fit your tank.
    • Plant fast growers to soak up excess nutrients.
    • Match livestock to plant choices to prevent herbivory.
    • Maintain light and feeding to limit algal blooms.

    These natural algae removal techniques create a balanced ecosystem. You gain clearer water, healthier plants, and fewer manual cleanings. This is when you use eco-friendly algae control solutions and the right mix of algae-eating shrimp and snails with fast-growing plants for algae control.

    Chemical Treatments: When and How to Use Them

    Chemical treatments for algae should be seen as tools, not quick fixes. First, identify the algae type and reduce light and excess nutrients. Use chemicals only after manual removal and correcting water chemistry.

    Follow safe algaecide use guidelines. Read product labels and safety data sheets. Make sure the product is safe for fish and plants before using it. Some algaecides work better at certain pH and alkalinity levels. Be careful with dosage and repeat intervals to avoid stressing your fish.

    For tough cyanobacteria and bacterial mats, use copper-based products and antibiotics like erythromycin (Maracyn). A common method for cyanobacteria is one packet of Maracyn per 10 gallons. Repeat after a week if needed, after manual removal and vacuuming the substrate.

    Hydrogen peroxide is good for spot treatments. Apply 3% hydrogen peroxide to infested decor or plants outside the tank. Let it sit for about five minutes, then rinse. Treated algae often turn red or clear, making it easier for your animals to remove remaining debris.

    • Consider copper sulfate, chelated copper, endothall, sodium carbonate peroxyhydrate, flumioxazin, and hydrogen peroxide as chemical options.
    • Use diluted bleach only for pond use or for treating items outside an aquarium; bleach can harm fish and plants if used improperly.
    • Never mix algaecides. Combining products can increase toxicity and harm beneficial bacteria.

    Be aware that chemicals can cause oxygen depletion as algae die and decompose. Boost aeration and monitor dissolved oxygen during and after treatment. Copper and antibiotics can disrupt nitrifying bacteria, so watch ammonia and nitrite closely.

    Legal and disposal issues matter for pond-scale products. Follow EPA or USDA guidance when applicable and dispose of unused chemicals per label instructions to protect the environment.

    Chemical treatments should fit into broader algae control strategies. Use them with corrective steps like trimming, substrate cleaning, balanced fertilization, and planting fast-growing species. Favor eco-friendly algae control solutions when possible for long-term stability.

    When you need a last-resort measure, plan a careful course: identify the algae, choose a labeled product, follow safe algaecide use, increase aeration, and combine treatment with maintenance. This approach keeps your tank healthy while addressing persistent outbreaks.

    Manual Removal Techniques

    Manual removal can make a big difference before using chemicals. Start by scrubbing the aquarium glass with an algae scrubber sponge. Use a razor blade on glass tanks and a stiff gift card on acrylic to remove stubborn algae.

    Keep a toothbrush handy for cleaning hair algae from plant leaves and tight spots on decor. If decor is heavily covered, remove it, treat it with 3% hydrogen peroxide outside the tank, and then rinse well before putting it back.

    • Siphons and gravel vacuums help vacuum substrate during water changes to remove BGA and detritus.
    • Scrapers and sponges tackle walls. Skimming the surface removes floating mats and debris.
    • For ponds or larger tanks, dredging and raking can extract compacted waste that feeds algae.

    Try the blackout method for planktonic blooms: limit light exposure for several days to a week by turning off lights and blocking external light. Combine this with skimming and siphoning to speed up recovery.

    Regular pruning of fast-growing plants prevents sudden shading changes and reduces nutrient hotspots. Use trimmings to propagate more plants or remove them to keep nutrient levels stable.

    1. Perform targeted scrubbing on affected areas first.
    2. Vacuum the substrate during water changes.
    3. Treat or discard heavily infested decor outside the aquarium.
    4. Prune and replant to increase healthy plant biomass.

    Use manual removal alongside other aquarium cleaning techniques to maintain clarity and balance. Pair these hands-on steps with effective algae control methods like UV sterilization for green water and careful light management for long-term results.

    Bag and dispose of removed algae instead of rinsing it down the drain to avoid pipe clogs and unwanted spread. Following best practices for algae management keeps your small planted tank healthy and reduces repeat outbreaks.

    Monitoring and Maintenance for Long-Term Success

    Make a routine you can stick to. Use a light timer and change water weekly. Also, keep track of light time and strength.

    Start with small changes in fertilizers. Use an all-in-one product. Wait two to three weeks to see results.

    Keep a log of water changes, CO2 levels, and chemical doses. Note the brand, amount, and when you use treatments. This helps you understand what affects algae and supports long-term control.

    Get algae-eating fish to help control growth. The right number of fish and how much you feed them matters. Too much food can lead to algae growth, so feed carefully.

    Focus on plant health to fight algae. Add fast-growing plants, trim them often, and move cuttings. This keeps nutrients in check. Use floating plants, carpeting species, and background plants to control light and reduce algae spots.

    Ensure good water movement and aeration. Watch temperature and flow, near filters and hardscape. Boost aeration when there’s decomposition to avoid low oxygen.

    • Track: lighting duration, fertilizer changes, CO2 levels, and water parameters.
    • Adjust: make one change at a time and give it two to three weeks to stabilize.
    • Document: chemical brand, dose, and timing for safe, repeatable use.

    Choose sustainable algae control like plant-focused nutrient uptake and regular care. This approach is safer and more effective in the long run.

    Don’t expect to get rid of algae completely. Aim to keep it under control with regular monitoring and care. This approach makes managing algae less stressful for you and your tank.

    Conclusion: Achieving a Healthy Balance in Your Aquarium

    Getting algae under control in a small planted tank is all about finding the right balance. Make sure the light matches what your plants need. Keep nutrients steady and remember, a little algae is okay.

    Use algae-eating snails or Amano shrimp to help clean up. They make it easier to avoid scraping algae off by hand. This helps keep your tank’s ecosystem stable.

    Combining physical, chemical, and biological methods is key. Focus on cycling, regular water changes, and good water flow. Also, fertilize wisely. Use chemicals only when algae gets really bad and follow the instructions carefully.

    This approach protects your plants and fish while reducing risks. It’s a smart way to manage algae.

    Plant fast-growing stem plants to beat algae and improve water quality. Start by setting a timer for your lights. Increase plant numbers by trimming and adding more. Introduce algae-eaters and stick to a regular maintenance routine.

    Be patient, as changes take time—weeks, even. With effort, you’ll find effective ways to prevent algae. Your tank will stay healthy and look great.

    FAQ

    What causes algae to appear in my small planted tank?

    Algae grow when light and nutrients are out of balance. They need nitrate, phosphate, and organic waste. If plants can’t use these fast enough, algae will.

    New tanks often get brown diatoms. Tanks with too much light or food get green water and hair algae.

    Is any algae beneficial or should I remove all of it?

    You don’t need to get rid of all algae. Some fish and invertebrates eat algae. A little algae makes the tank look natural and helps with filtration.

    It’s not possible to have a tank with no algae. The goal is to keep it under control. This means fixing the problems that cause algae to grow.

    How do I identify the common types of algae in freshwater planted tanks?

    Look for visual signs. Brown diatoms look like dust on glass and decor. Hair algae form stringy mats.

    Black Beard Algae (BBA) looks like thick black tufts on plants and wood. Green spot algae shows as hard green dots on glass and leaves. Blue-green algae is slimy and smells bad.

    Green water is a cloud of free-floating algae that makes the water look murky.

    What immediate steps should I take when I spot an algae outbreak?

    First, remove algae physically. Scrape glass, vacuum substrate, and brush off hair algae. Remove heavily infested decor for outside treatment.

    Check and stabilize lighting with a timer. Reduce direct sunlight. Do a partial water change. Add or trim plants to take up more nutrients.

    Consider adding an algae-eating species to help control the problem.

    Which preventive measures work best to keep algae under control?

    Prevent algae by balancing light and nutrients. Use a timer for consistent lighting and avoid direct sunlight. Dose fertilizers carefully.

    Keep good circulation and aeration. Do regular water changes and vacuum the substrate. Avoid overstocking and overfeeding. Keep CO2 stable if you use it.

    Increasing fast-growing plant mass is a key long-term strategy.

    What natural, eco-friendly methods can I use to reduce algae?

    Use biological and manual methods first. Add fast-growing plants like Egeria densa and Hygrophila difformis to absorb excess nutrients.

    Use algae-eaters like Amano shrimp and nerite snails for diatoms and hair algae. Siamese algae eaters and Florida flagfish target tougher algae. Mollies eat green algae.

    Regular pruning and plant propagation remove nutrient-rich trimmings.

    When are chemical treatments appropriate and which are safe?

    Chemical treatments should be a last resort. Options include hydrogen peroxide for decor treatment and sodium percarbonate products. Targeted antibiotics/chelates are for cyanobacteria.

    Many chemicals can harm plants, invertebrates, and beneficial bacteria. Always read labels and follow dosing precisely. Increase aeration during treatment.

    Consider the tank’s inhabitants before using any chemical.

    How do I treat stubborn Black Beard Algae (BBA)?

    BBA is tough and needs a long-term approach. Improve CO2 consistency and reduce lighting or duration. Increase flow in affected areas.

    Manually remove clumps and add grazing species like Siamese algae eaters. For localized infestations, remove affected decor and treat it briefly with 3% hydrogen peroxide outside the tank.

    Expect treatment to take months. Make gradual adjustments.

    What should I do about green water (free-floating algae)?

    Green water responds well to a blackout and increased water changes. A UV sterilizer clears green water quickly.

    Reduce nutrient inputs by cutting back feeding, vacuuming detritus, and increasing plant biomass. This outcompetes phytoplankton for nutrients.

    Can live plants really outcompete algae and which species work best?

    Yes. Fast-growing plants consume nutrients that algae rely on. Effective species include Egeria densa and Hygrophila difformis.

    Use a mix of floating, stem, and carpeting plants to manage light and nutrient distribution.

    Which algae eaters should I add, and will they harm my plants?

    Choose algae eaters based on the algae type. Otocinclus, nerite snails, and Amano shrimp work well on diatoms and hair algae.

    Siamese algae eaters and Florida flagfish target tougher algae. Mollies graze on green algae. Be cautious: some herbivores will nibble tender plants.

    Research species compatibility, stocking density, and tank size before adding livestock.

    How do water flow and CO2 affect algae growth?

    Stagnant or low flow creates pockets where algae settle and thrive. Adequate circulation ensures even nutrient and CO2 distribution.

    CO2 imbalances stress plants and indirectly favor algae. Aim for stable CO2 delivery and steady flow patterns.

    How often should I perform maintenance to keep algae in check?

    Establish a routine. Do weekly or biweekly partial water changes and substrate vacuuming. Regularly scrub glass and prune fast-growing plants.

    Check fertilizer dosing and lighting weekly and make small adjustments. Monitor livestock, feeding, and equipment monthly. Consistency and gradual changes are more effective.

    Are antibiotics and copper effective against cyanobacteria (BGA), and what are the risks?

    Antibiotics like erythromycin and copper products can suppress cyanobacteria. But they carry significant risks: harm to beneficial bacteria, invertebrates, and some fish, plus oxygen depletion as the cyanobacteria die off.

    Use them only after manual removal, improved circulation, blackout attempts, and careful research. If used, dose exactly per product instructions, monitor oxygenation, and be prepared for repeat or follow-up treatments.

    How long will it take to correct an algae problem once I start fixing root causes?

    Expect weeks to months. Small adjustments like stabilizing lighting and adding fast-growing plants often show improvement within 2–6 weeks.

    Tougher issues like BBA or chronic outbreaks can take several months of consistent management. Patience and maintaining a balanced, steady routine are essential for lasting control.