Category: Maintenance

  • Documenting Your Tank

    Documenting Your Tank

    Keeping a clear aquarium journal is key to success with a nano system. It helps you track changes and solve problems quickly. This is because small volumes show big changes in temperature, salinity, and chemistry.

    Before you start, choose a permanent spot for your journal. Decide if you’ll use an AIO or sump system. This choice affects your tank’s temperature and the health of your fish.

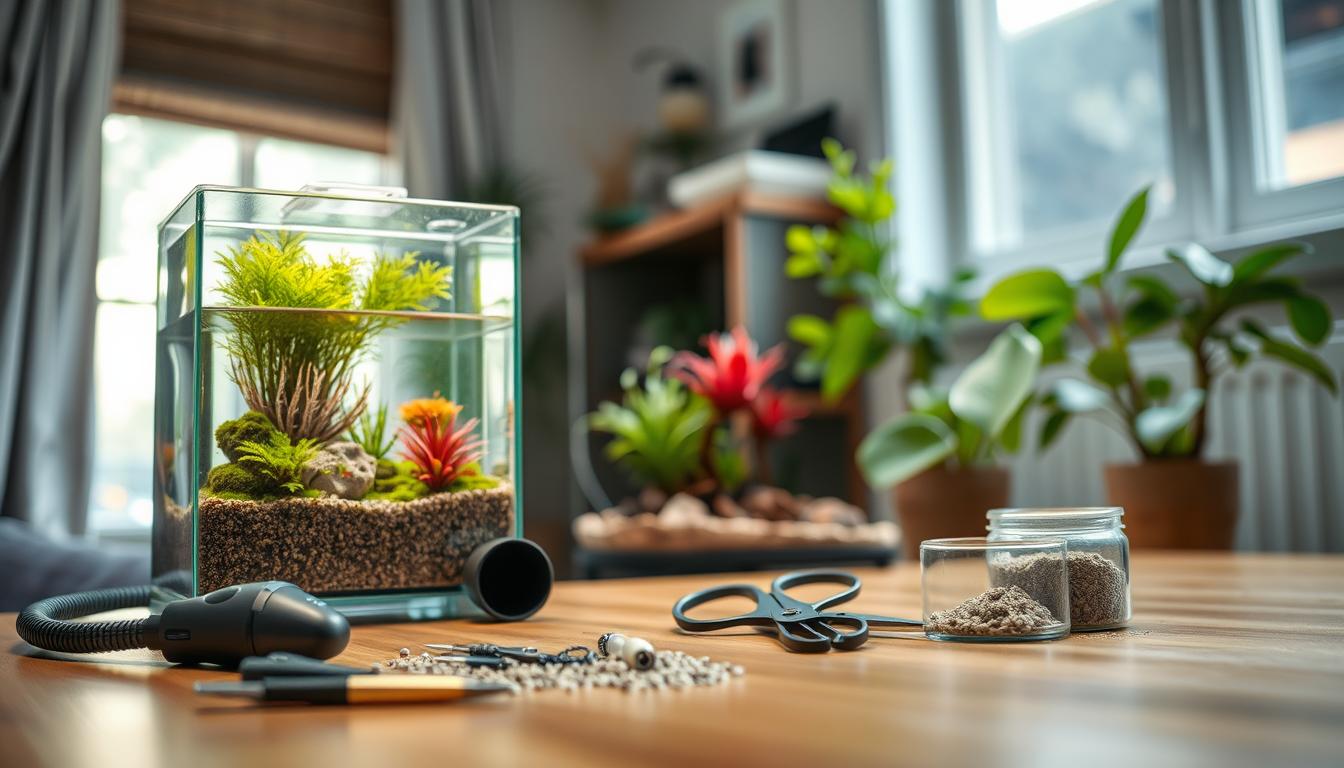
    Begin your journal with setup details. Note the tank size, substrate depth, and live rock mass. Also, record the details of your equipment, like lights and pumps.

    Record your initial decisions that shape your tank’s care. Mention if you’re keeping brackish or saltwater, and your water source. Include model numbers for important gear for easy replacements and troubleshooting.

    Starting your tank journal from day one helps solve problems faster. See this guide as the start of your aquarium journal and record-keeping routine.

    Understanding the Importance of a Nano Tank Journal

    A sleek, modern nano aquarium is the focal point, filled with vibrant aquatic life, including colorful fish and lush greenery. In the foreground, a near-transparent health tracking journal lies open, its pages filled with neatly written notes and data about water parameters and fish behavior. A stylish pen rests beside it. The middle ground showcases a computer desk cluttered with measuring tools, a water testing kit, and a digital monitor displaying graphs of tank health metrics. Bright, natural light streams in through a window, creating a calm and productive atmosphere. The background features shelves with various aquatic supplies and books on fish care, suggesting an organized, knowledgeable environment. The overall mood is one of clarity, diligence, and a commitment to maintaining a healthy nano tank.

    Keeping a tank maintenance log is key in nanos because small water volumes change quickly. You need to check salinity and temperature every day. Testing ammonia, nitrite, nitrate, and pH weekly helps you see trends.

    Writing down aquarium maintenance makes it easier to see changes. Note water changes, dosing, lighting changes, and new fish. This helps you spot issues like hair algae after temperature changes or dosing mistakes.

    Your journal also helps with tracking fish behavior. Log feeding times, notes on fish compatibility, and the order you added fish. This reduces the risk of fish not getting along or overstocking in a small tank.

    For reef nanos under 15 gallons, add calcium and phosphate tests to your routine. Record each test result. This helps you see how corals react to changes in water parameters and dosing schedules.

    Use your tank maintenance log to plan upgrades and budget. Write down plans for adding a chiller, auto top-off, or dosing pumps. Tracking costs and vendor advice helps you choose better gear from brands like Eheim, Tunze, or Aqueon to avoid failures.

    Save tips from manufacturers, forums, and books like the Nano Reef Handbook in your journal. This background helps you understand advice better when comparing it to your tank’s behavior. It’s all about tracking tank health and documenting aquarium maintenance.

    What to Include in Your Journal

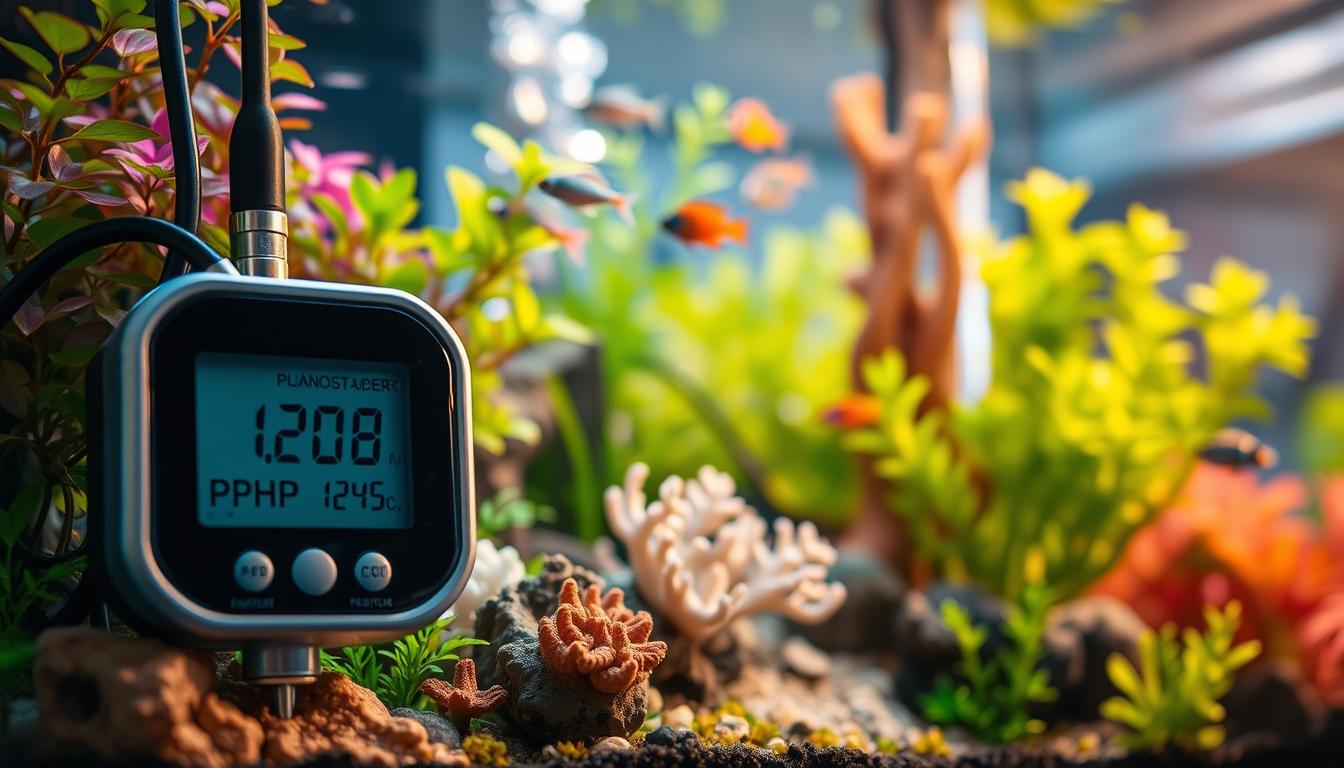
    Make your aquarium journal a reliable tool by keeping entries tight and consistent. Start each log with the date, time, water temperature, and specific gravity or salinity. Also, include pH, ammonia, nitrite, nitrate, phosphate, calcium, alkalinity (dKH), and magnesium if relevant.

    Record any dosing done that day and the units used. This helps track changes in your tank.

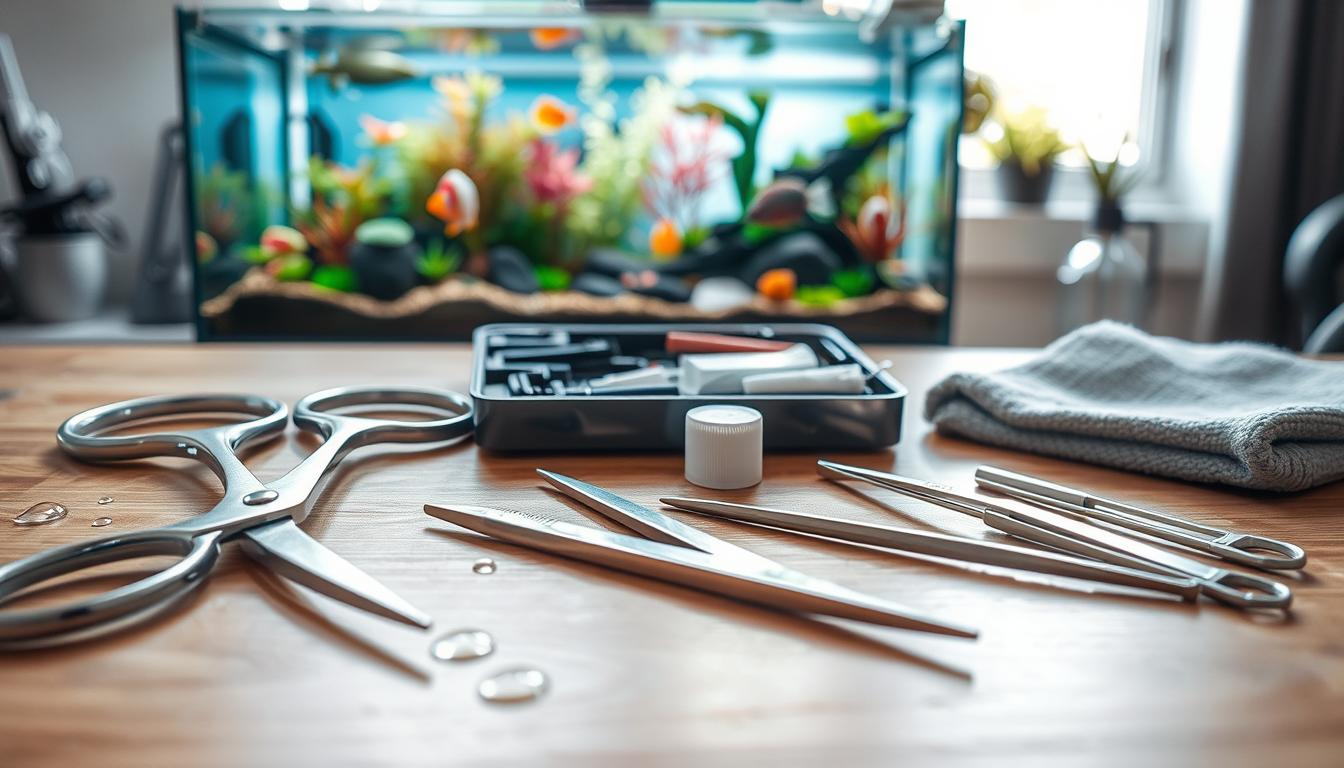
    Record equipment details clearly. List model numbers and settings for lights, protein skimmers, powerheads, pumps, heaters, chillers, auto top-off, and controllers. Note any quirks like a drilled overflow or AIO filter chamber layout.

    Keep a list of your tank’s inhabitants. Include scientific and common names, size at introduction, date added, and source. Also, note feeding preferences and frag locations for corals.

    Track maintenance actions carefully. Record water changes, gravel or sand cleaning, filter media swaps, skimmer cleaning, and light schedule changes. Note refugium photoperiod to manage pH swings and dosing regimens by brand and quantity.

    Keep notes on any issues you encounter. Describe symptoms and list immediate corrective actions. Record outcomes and ambient room temperature and location notes.

    Build a visual record by noting photo filenames, shot angles, and dates. Mark significant aesthetic changes like coral growth or color shifts. Keep before-and-after images to measure the impact of interventions.

    Consider adding optional extras to your tank documentation guide. Track budget and parts replaced, list forum threads or expert contacts referenced, and compile long-term metrics like monthly averages for key parameters. These extras help spot trends over time.

    Use consistent units and methods across entries. Prefer a refractometer for salinity and standardize pH and calcium test kits. A simple spreadsheet template or printable form makes record keeping straightforward and repeatable.

    A cozy, well-lit workspace filled with a variety of aquarium supplies. In the foreground, a beautifully designed journal, its pages open, displays neatly organized notes and diagrams about nano tank maintenance, featuring graphs, water parameters, and colorful sketches of fish and plants. In the middle layer, a small, brightly lit nano tank with vibrant aquatic life—tiny fish swimming among lush green plants and colorful pebbles, showcasing a thriving ecosystem. In the background, shelves filled with books and tools for aquarium care, softly blurred to create depth. Natural light filters through a window, casting warm tones across the scene, evoking a productive and serene atmosphere of dedication to aquarium hobbyism.

    Documenting Water Parameters Effectively

    Test key parameters regularly. Check temperature and specific gravity daily. Do ammonia, nitrite, nitrate, and pH tests weekly. For reef systems, measure calcium, alkalinity, and phosphate weekly. Test more often when you change dosing or add coral.

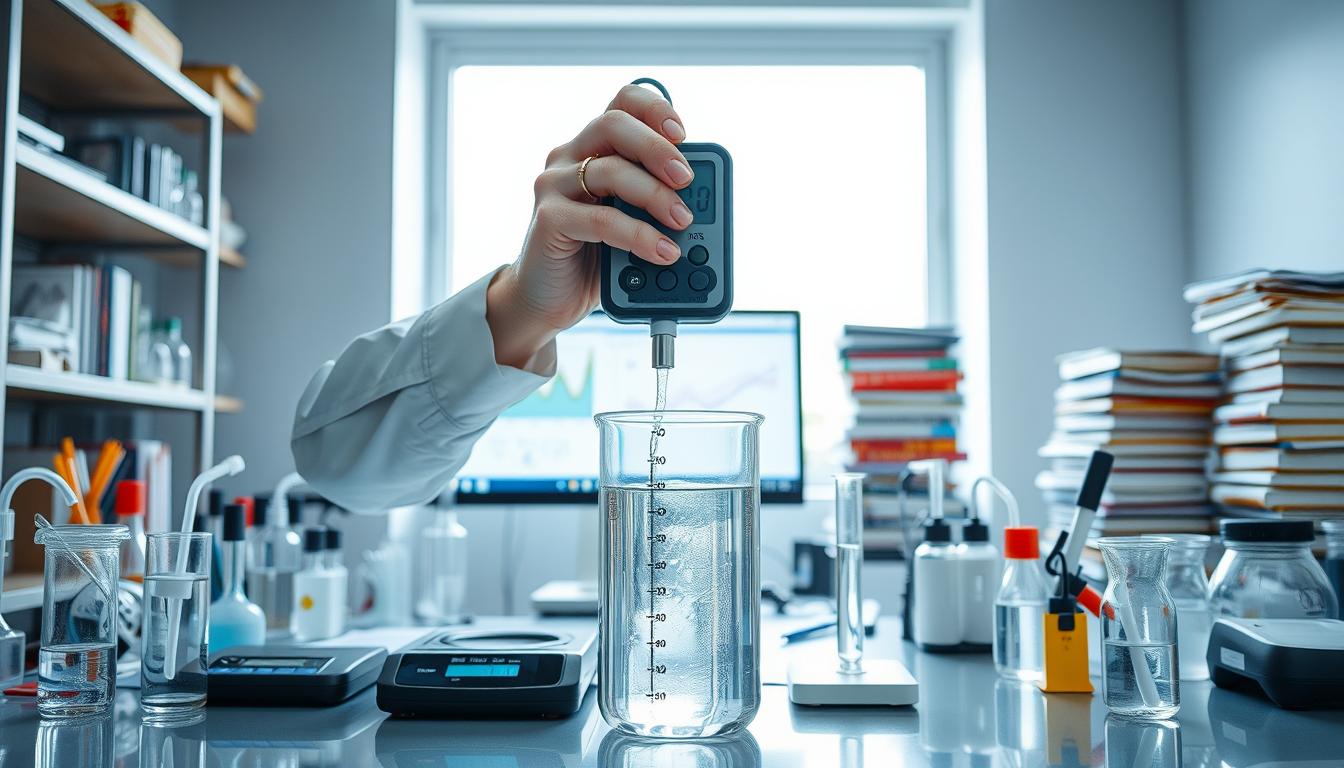
    Use reliable gear for accurate records. A quality refractometer gives precise salinity. Calibrated thermometers or a temperature controller limit drift. For nitrogen compounds, trust liquid test kits from API or Salifert, and use a Hanna meter for spot checks when needed.

    Record exact results with units and test kit brand. Note kit lot numbers or expiry dates if available. This habit makes it easier to verify odd readings later when you review your tank maintenance log.

    • Document ambient room temperature and nearby heat sources.
    • Note photoperiod, light intensity adjustments, and any cooling attempts.
    • If you use AIO lighting, watch for excess heat and log chiller or fan use.

    Plan redundancy for heating and control. Use an electronic controller or run two heaters so a heater that fails ON won’t overheat your aquarium. Log controller settings and heater models in your tank maintenance log.

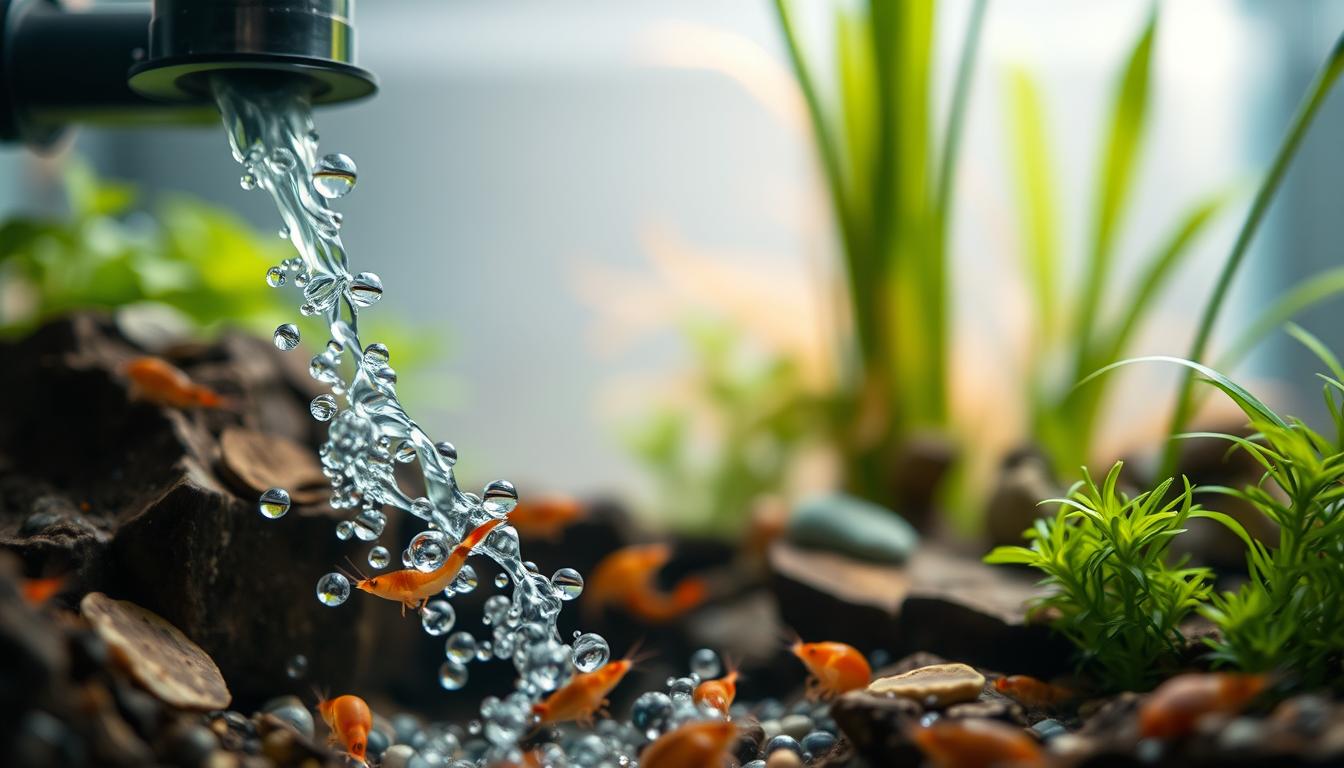
    1. Record water changes: percent changed, source (RO/DI or LFS premix), replacement temperature and salinity.
    2. Note if you added supplements via top-off or dosing and list brands and amounts.
    3. Timestamp each entry to link changes with test results.

    Create trend charts in your journal or spreadsheet. Plot alkalinity, calcium, salinity, and nitrate over weeks. Trends reveal slow drifts that single tests miss and help when tracking tank health against dosing schedules, livestock additions, or equipment swaps.

    Log anomalies with context. When you see a sudden spike or drop, note the timestamp and concurrent events like a power outage, maintenance, or heavy feeding. These entries make troubleshooting faster and improve your documenting aquarium maintenance over time.

    Keeping Track of Livestock

    Keep a living inventory that lists common and scientific names for every organism you add. Note entries like Amphiprion ocellaris, Gramma loreto, or Cirrhilabrus rubripinnis with the date introduced, length or size, and source such as a local fish store, frag swap, or GARF purchase.

    Record compatibility notes and behavior observations. Track territorial disputes, aggression, pairing, or signs of stress. Some damselfish are aggressive, while many invertebrates are sensitive and should be added only after system stability is confirmed.

    • For corals and inverts, log frag placements, lighting needs, flow preferences, and feeding routines.
    • Measure or photograph frags at intervals to track growth rates and changes in color or polyp extension.
    • Note special requirements, for example mandarinfish need abundant live copepods from an established refugium.

    Keep a feeding log that lists food type, frequency, quantity, and livestock response. Include notes on appetite, target feeding, and any supplementation such as nori, mysis, or enriched pellets.

    Document mortality and disease events in detail. Record symptoms, treatments used with brand names and doses, quarantine steps, and outcomes. Note any cross-contamination events and corrective actions taken to limit spread.

    1. Use the journal to plan stocking order and rationale.
    2. List why inverts may be introduced first in a reef tank and why many fish are added later.
    3. Record adjustments made after observing tank stability and livestock interactions.

    Make documenting your tank part of routine maintenance. Consistent fish tank record keeping and keeping aquarium records gives you a clear history to reference when making decisions about additions, treatments, or layout changes.

    Guidelines for Maintenance Logs

    Set a regular maintenance schedule and write it down. Do daily checks and top-offs. Weekly tests and small water changes are next. Then, bi-weekly larger water changes when needed.

    Monthly, inspect equipment and change media as needed.

    Use a simple checklist for each session. This makes documenting aquarium maintenance quick and consistent.

    • Check heater(s) and note setpoints; list backup heater presence.
    • Verify skimmer function and empty skimmer cup if needed.
    • Assess pump flow and ATO level.
    • Perform glass cleaning and siphon substrate as planned.
    • Clean mechanical media and inspect power strips/GFCI.

    Record every action taken on the tank. Note water change percentages and volumes. Also, record the source and salinity of replacement water.

    Mark if the skimmer cup was cleaned and if filter media was rinsed or replaced.

    If you have a larger setup with a sump, log sump water volume and media swaps. These details help spot trends and ensure consistent care.

    Take preventative steps and list them in your log. Use two heaters and temperature controllers to avoid swings. Regularly inspect for leaks and test new tanks immediately.

    Document cleaning products and methods used. Note tools like scrapers, siphons, and phosphate removers. Record chemical interventions, including brand names and contact time.

    Track time and cost for each maintenance session. Add these figures to decide if hiring professionals or investing in automation is worth it for your setup.

    Keep your tank maintenance log concise and consistent. Clear entries make documenting aquarium maintenance efficient. This makes keeping aquarium records a practical habit for years of care.

    Charting Algae Growth and Issues

    Begin by documenting your tank with dated entries for every algae sighting. Note the type—hair, cyanobacteria, diatoms, film algae—the coverage area, and any events that occurred nearby in time, such as heat spikes, feedings, or lighting changes.

    Use an aquarium journal layout that lists observations and actions. Record the cleaning crew composition, including snails, hermit crabs, and peppermint shrimp. Note how effective each species was and whether adding more improved control or led to overgrazing.

    When you spot hair algae after a heat spike or nutrient imbalance, log the full corrective plan. Include water change volumes, phosphate removers used, and if you shortened the photoperiod. TFH experience shows rapid response often requires multiple tactics together.

    Track nutrient control steps in your aquarium journal. List dosing reductions, phosphate- and nitrate-removal methods, refugium macroalgae use, and the refugium photoperiod. Running a refugium at night can minimize daytime pH swings; document the timing you used.

    If you try carbon dosing, record the product, dosage, and schedule. Add entries for collateral effects on corals and invertebrates. Note how long it took for algae cover to recede and whether the algae returned after treatment stopped.

    • Log dates and filenames for photos; use date-stamped filenames to measure progress visually.
    • Compare before-and-after images in your aquarium journal to spot slow trends.
    • Share clear photos with online forums when you need diagnostic help; include your documented actions and water data.

    Keep a concise timeline for each outbreak. Enter when it began, the measures you tried, and the outcome. This practice helps with tracking tank health over seasons and prevents repeating ineffective fixes.

    Maintain short, consistent notes. Use the same terms for algae types and the same units for parameters. That consistency makes documenting your tank entries searchable and useful when you revisit old logs for pattern recognition.

    Capturing Tank Aesthetics

    Set a regular photo schedule for your tank. Take pictures from the front, side, and close-up at the same time each day. Use the same lighting and camera angles. Remember to note your camera model, lens, exposure, and file names in your journal.

    Keep a record of your aquascape details in short notes. List where you placed the rocks, where you put the frags, the type of substrate, and its depth. Also, note if you used live sand. Log each change, including why you made it, to keep your timeline clear.

    Track your light schedules and intensity settings next to your photos. For AIO setups, note the watts per gallon. For LEDs, record the PAR or percent output. Describe how lighting changes affect your corals’ colors and growth in brief, dated entries.

    Document where your display sits in the room. Note any nearby windows, heat sources, or heavy foot traffic. These can affect your tank’s appearance or promote algae growth. Short, dated notes help you spot patterns in your journal.

    • Photographic checklist: front, side, close-up, macro of corals or plants.
    • Camera log: model, settings, file names, and editing steps.
    • Aquascape log: rock map, frag map, substrate type, and depth.
    • Lighting log: schedule, intensity, watts-per-gallon note, PAR reading when available.
    • Room placement note: window proximity, heat sources, and traffic effects.

    Keep a wishlist for future upgrades and budget estimates. Include plans to replace fixtures, buy better rock, add a background, or change the stand. Add tentative timelines to make your tank documentation guide a practical plan.

    Use short, dated entries and images together to build a visual history. This system helps you compare layouts, assess growth, and refine aesthetics over time in your aquarium journal.

    Analyzing and Troubleshooting Issues

    Begin by pinpointing a specific time frame. Look through your tank maintenance log for any changes in equipment, new fish, or shifts in water quality. Match these dates with photos and charts to find the first sign of trouble. This method turns keeping a maintenance log into a valuable tool, not just a chore.

    Link symptoms to possible causes. For example, brief heat spikes from lights can cause algae and stress in small tanks. If alkalinity drops, it might be due to inconsistent dosing. Without an automatic top-off system, salinity can fluctuate. Overfeeding or poor filtration often leads to high nitrates and phosphates. Your records help you quickly test these theories.

    1. Try to restore stable conditions from your log. Go back to the last known good state and note the date and time in your log.
    2. Do targeted water changes based on your past experiences. Record the water volume, salinity, and temperature before and after the change.
    3. Test phosphate, calcium, and alkalinity one by one. Record each result to see which parameter changes first.
    4. Remove suspect fish or substrate only after documenting symptoms and test results. Note the before-and-after effects in your log.

    Next, check your equipment. Make sure the return pump, skimmer, and heater are working right. Use a thermometer or chart recorder to check the heater. Consider adding a temperature controller or a second heater for extra safety. Write down any repairs or swaps in your log.

    If problems persist, seek help with your records. Include contact info for a trusted local fish store, reef forums, and authoritative resources in your journal. When you get advice, log who you talked to, the suggestion, the action you took, and the result. This helps speed up diagnosis and prevents unnecessary fixes.

    Keep every change well-documented and brief. A detailed tank maintenance log shortens troubleshooting time, reduces unnecessary replacements, and guides you back to stability. It also helps document aquarium maintenance and track tank health effectively.

    Sharing Insights with the Community

    When you share tank details online, make it easy for others to help. Start with the date, recent water tests, and before/after photos. List your equipment, like Fluval or API test kits, so people know what you’re using.

    Be clear about when the problem started and what you’ve tried so far. Reefers like Reef2Reef and TFH prefer quick, to-the-point posts. Mentioning test kit brands and recent results helps avoid repeated advice.

    Use simple templates to share your tank’s progress. Include a weekly water test table, a list of fish and invertebrates, and a maintenance log. Add photos with a ruler or a standard-size frag plug for size reference.

    Keep a journal for each big change in your tank. Note the exact amounts and products used, along with treatment timelines. This way, you can create case studies for future reference.

    Always follow community rules when sharing tank updates. Read the forum rules, give credit where it’s due, and don’t share personal contact info. Keep track of vendor or product recommendations in your journal for future reference.

    Share your successes by summarizing what worked for you. A short case study helps others and builds a useful archive for your future reference. Good posts combine clear data, real brands, and a timeline of actions.

    Encouraging Future Improvements

    Your journal should help you improve over time. Look over your notes each month and every quarter. This helps you see patterns in your tank’s water and how your fish are doing.

    Use these insights to plan for better things like an ATO, dosing pumps, or even a sump. These upgrades can make your tank better.

    Keep a detailed log of your tank’s upkeep. Note down the time and cost of each task. This helps you decide if buying automation is worth it.

    For example, you might compare the cost of a RO/DI setup to using pre-mixed salt. Or, you could track how dosing systems like AutoFeeder/Remote help with water chemistry. These records help you make better choices.

    It’s also important to record both your successes and failures. Note which fish or corals do well and which don’t. This helps you make better choices for your tank.

    When you try new things, like changing the light schedule to fight algae, document everything. This way, you can repeat successful experiments and avoid mistakes.

    Lastly, keep learning by adding new resources to your journal. This could be books, online forums, or even local fish store contacts. Update your journal as you learn more. This helps you make better decisions for your tank.

    FAQ

    What is the purpose of documenting your tank from day one?

    Documenting your tank from day one helps you troubleshoot faster. It creates a baseline record. This way, you can quickly find the cause of problems like algae outbreaks or temperature spikes.

    Why is a tank maintenance log specially important for nanos (under 15 gallons)?

    Nanos have small water volumes, so changes happen quickly. A maintenance log helps track these changes. It records daily and weekly checks, enabling early detection and action.

    Where should I place my journal and what system details should I decide before starting?

    Choose a permanent spot for your tank and decide on the system type. This affects the tank’s temperature and the health of your fish. Record the tank size, hardware, and location for stable conditions.

    What practical setup details should I record at the start?

    Start by recording the tank size, hardware, substrate, and live rock. Note if you use RO/DI water or pre-mixed salt. Include manufacturer and model numbers for quick troubleshooting.

    What mandatory fields should each entry include in a tank maintenance log?

    Each entry should have the date, water temperature, and specific gravity. Also, include pH, ammonia, nitrite, nitrate, and any dosing. Note the test kit brands and units for verification.

    How often should I test key parameters for a nano reef?

    Test temperature and specific gravity daily for nanos. Test ammonia, nitrite, nitrate, and pH weekly. For reef tanks, test calcium, alkalinity, and phosphate weekly or more often during dosing changes.

    What equipment details belong in an equipment log?

    Record model numbers and settings for lights, skimmer, powerheads, pumps, heaters, and chillers. Note any quirks or calibration information for quick troubleshooting.

    How should I document livestock and frag inventory?

    Keep a detailed inventory with common and scientific names. Include size, date added, source, and feeding preferences. Update with any changes or observations.

    What maintenance actions should be logged and how detailed should entries be?

    Log water changes, cleaning, filter swaps, skimmer cleaning, and dosing. Include exact volumes and salinity of replacement water. Note any supplements added.

    How do I chart algae growth and link it to causes?

    Note algae sightings, type, coverage, and related events. Attach photos and use trend charts to relate algae to dosing or temperature changes.

    What visual documentation should I include?

    Include photos taken under consistent lighting, with date-stamped filenames. Keep before/after images of interventions and note scale references.

    How should I structure troubleshooting notes for effective problem-solving?

    Describe symptoms, corrective actions, and outcomes. Cross-reference with parameter logs and photos. Isolate timelines to identify triggers.

    What redundancy and preventive measures should I document?

    Record redundant equipment and regular inspections. Document reasons for upgrades and cost/time entries to evaluate automation.

    How do I log medications, treatments, and disease outbreaks?

    Record symptoms, medications used, and outcomes. Include dates and treatment durations. Note whether treatments were prophylactic or reactive.

    What additional optional fields improve long-term value of a journal?

    Include budget tracking, parts replaced, and forum threads referenced. Add monthly averages and time spent per session. Note any upgrades or advice.

    How should I record test results and ensure they remain trustworthy?

    Record exact test results with units and test kit brand. Use quality refractometers and calibrated thermometers. Note calibration dates for electronic equipment.

    How can I prepare journal entries for sharing on forums or with LFS for help?

    Provide dates, a concise timeline, parameter logs, photos, and equipment list. State steps already tried to avoid repetitive suggestions. Use anonymized templates.

    What are common nano-specific problems and typical logged responses?

    Common issues include heat spikes, salinity swings, low alkalinity, and nitrate/phosphate rises. Log corrective steps and recovery times.

    How often should I review and update the journal format?

    Review monthly and create quarterly summaries. Update templates as needed. Use documented outcomes to refine practices over time.

    How do I track feeding and cleaning crew effectiveness?

    Log food type, frequency, quantity, and livestock response. For cleaning crews, record species, counts, and effectiveness. Note any unintended consequences.

    What checklist should each maintenance session include?

    Include a checklist of checks: heater, skimmer, pump flow, ATO level, glass cleaning, and media cleaning. Record water change percentage and media actions.

    How can I use the journal to plan stocking order and compatibility?

    Use documented behavior and compatibility notes to decide stocking order. Record reasons for each decision and any adjustments made.

    When should I escalate an issue to a trusted LFS or online expert?

    Escalate when repeated interventions fail, see rapid deterioration, or face equipment failures. Include logs, photos, and steps taken when seeking help.

    How can I use the journal to justify upgrades or professional help?

    Track time and cost per session and parts replacement. Use monthly averages and trend charts to show the need for upgrades. Documented ROI helps decide between DIY or professional services.

  • Root Tabs vs. Liquid Ferts: Sustaining Plant Growth for Years

    Root Tabs vs. Liquid Ferts: Sustaining Plant Growth for Years

    You’re looking for reliable plant nutrition for both garden beds and potted plants. This article compares root tabs and liquid fertilizers. It explains how each delivers nutrients, how quickly roots can access them, and their role in sustainable gardening.

    Root tabs are slow-release capsules that need water to release nutrients into the soil. The timing of release depends on soil moisture and the number of tabs. Gardeners often see results over weeks or months.

    Liquid fertilizers work faster but need regular use to keep plants nourished. Social media, like Instagram, shares user experiences and tips for plant care.

    This article will look at how each method delivers nutrients, when they’re available, and their impact on soil health. We’ll also compare costs and environmental effects. Our aim is to help you keep your plants healthy for years through sustainable gardening practices.

    Understanding Long Term Plant Health

    A detailed close-up of healthy, thriving plant roots deeply embedded in rich, dark soil, showcasing vibrant green leaves stretching upwards. In the foreground, tiny fertilizer granules and root tabs are sprinkled around the base of the plant, indicating nourishment options. The middle section features resilient, glossy foliage, highlighting the plant's robust health and growth. In the background, a soft-focus garden scene with sunlight filtering through leaves creates a tranquil atmosphere, enhancing the sense of longevity and sustainability. The lighting is warm and natural, emphasizing the richness of the soil and the vibrancy of the plant. The angle is slightly elevated, providing a clear view of the interactive elements of soil and roots, suggesting a connection to long-term plant health.

    Long term plant health means steady nutrient supply, strong root systems, and balanced soil life. It supports growth year after year. You keep an eye on visible signs like leaf color and root vigor.

    Using tests to track changes in nutrient cycles is also important. This helps you understand how your plants are doing.

    Slow-release sources such as root tabs help with long term plant health. They release nutrients over months. How often and how much you apply affects soil nutrients.

    So, pair slow-release inputs with periodic soil tests. This way, you can check NH3/NH4 and NO3 levels.

    Practical plant care tips include consistent watering techniques and routine pest checks. Adding organic matter to the soil also helps. These steps support soil biology and reduce shock when you change fertilizers.

    Garden maintenance routines tie the plan together. Schedule soil tests, record plant responses, and adjust fertilization based on measured needs. Community practices, from forums to Instagram reports, show watering rhythms and maintenance routines that work in real gardens.

    Track outcomes with simple measures. Use soil health improvement methods like compost and cover crops. Watch for steady growth and log any shifts in disease or nutrient deficiency. This way, you can integrate fertilization into a broader plant nutrition management strategy.

    What Are Root Tabs?

    A close-up of several vibrant root tabs nestled into rich, dark aquarium substrate, with roots extending from the tabs into the surrounding soil. The foreground captures the texture of the roots and substrate, while the middle ground features lush, green aquatic plants thriving around the tabs, their leaves gently swaying in the water. The background displays soft, diffused lighting filtering through the water, creating a serene and tranquil environment. The entire scene is set underwater, emphasizing the nurturing essence of the root tabs. The colors are vibrant yet soft, evoking a sense of growth and vitality, as if showcasing the essential role root tabs play in sustaining plant health over time. Aim for a macro lens perspective to highlight the intricate details.

    Root tabs are small, hard pellets you put near a plant’s roots. They need water to break down and release nutrients. This can take some time after you put them in.

    These tabs usually have a mix of NPK, iron, and trace minerals. You put them in the soil near the roots. This creates a spot where plants can get nutrients steadily.

    How long they last depends on the brand and how active the roots are. Some can feed plants for weeks, others for months. You can find tips on where and how many to use on Instagram and forums. People share their experiences and advice.

    • Common placement: 1–3 inches from the root ball, spaced evenly around the plant.
    • Typical count: one to four tabs per small to medium plant, more for heavy feeders.
    • Release timeframe: measured in weeks to months depending on moisture and root uptake.

    Check how well the tabs are working by testing for certain nutrients. Do this every week. It helps you see if you need to add more tabs to avoid too much or too little nutrients.

    Root tabs work well with organic fertilizers. Using compost or organic tabs helps your soil. It keeps the nutrients focused on the roots without needing to water them often.

    Root tabs help plants grow strong roots. But, make sure to also feed the rest of the soil. This keeps the soil healthy for a long time.

    Exploring Liquid Fertilizers

    Liquid fertilizers give plants nutrients quickly because they dissolve fast. This makes nutrients available to roots and leaves right away. You can use simple test kits to see how quickly plants respond.

    There are many types of liquid fertilizers. You can find complete formulas, micronutrient mixes, and organic extracts like seaweed and fish emulsion. Each type has its own purpose, like quick fixes or regular feeding.

    There are different ways to apply liquid fertilizers. You can use a soil drench, foliar spray, or fertigation. Foliar spray is great for quick fixes because it goes through leaves.

    • Soil drench: good for root uptake and steady absorption.
    • Foliar spray: best for rapid correction and foliar feed techniques seen on Instagram demos.
    • Fertigation: integrates with irrigation systems for uniform distribution.

    Adjust how often you feed plants based on their growth. Fast-growing plants might need to be fed weekly. Slow-growing plants like succulents might only need a feed every month or two. Always start with half the recommended amount to avoid burning plants.

    Liquid fertilizers work well with your watering schedule. Apply the feed after watering to avoid shocking the roots. You can also mix it with your irrigation system for even distribution. Use less feed when you water less often.

    For safety, measure the fertilizer carefully and mix it in clean water. Too much can cause leaf tip burn and stress the roots. If you see burn, flush the soil with plain water and reduce the amount of fertilizer you use.

    Use liquid fertilizers for quick fixes and targeted nutrition during growth spurts. For regular care, mix in lighter feeds with occasional complete feeds. This keeps the nutrients balanced.

    • Keep records of dosing and response to refine plant care tips over time.
    • Use test kits to avoid nutrient swings and to tailor plant nutrition precisely.
    • When experimenting, follow manufacturer guidance from trusted brands like Schultz or Miracle-Gro for predictable results.

    Comparing Nutrient Absorption Rates

    Liquid fertilizers and root tabs have different ways of getting nutrients to plants. Liquids work fast, quickly increasing nitrogen, phosphorus, and potassium levels. This is shown in tests that spike soon after use, showing quick changes in plant nutrition.

    Root tabs, on the other hand, release nutrients slowly. This is because water must first break through a hard shell to reach the soil. This slow release gives plants a steady supply of nutrients. Testing for NH3/NH4 and NO3 helps track when nutrients start being released, depending on the number of root tabs and soil moisture.

    The type of roots and soil texture also affect how well each form works. Dense roots near root tabs absorb nutrients more efficiently. Sandy soils, on the other hand, let liquids move fast but can also lose nutrients, impacting plant health over time.

    How often you water affects nutrient absorption. Frequent watering helps liquids spread quickly but can also wash out nutrients. Less frequent, targeted watering helps root tabs release nutrients slowly, supporting steady plant nutrition.

    • Measure with simple soil or solution tests to track NO3 and NH4 over time.
    • Use visual checks for vigor, leaf color, and growth rate as a second indicator.
    • Adjust application based on readings to support soil health improvement and avoid excess peaks or shortages.

    By mixing quick-acting liquids with slow-release root tabs, you create a balanced nutrient environment. This balance supports consistent plant nutrition and improves soil health without harming plants in the long run.

    Best Uses for Root Tabs

    Root tabs are great for steady nutrition over months without needing to feed plants often. They slowly release nutrients, making it easier to plan your garden care. This is perfect when you need a long-term supply of nutrients more than a quick boost.

    For container gardens, put tabs near the roots when you plant. For a 6–8 inch pot, use one tab near the edge and one in the center. For 10–12 inch pots, use two to three tabs spaced evenly. For bigger planters or plants with deep roots, space tabs every 6–8 inches along the root zone.

    Plants like dahlias, cannas, and herbs in deep pots do well with root tabs. Gardeners on Instagram and at Proven Winners suggest them for plants that take nutrients from below. Tabs help keep nutrients where they’re needed, reducing waste.

    Put tabs 2–4 inches below the soil surface so roots can find them as they grow. Press the soil back gently to cover the tab. Add tabs when you plant, in early spring for perennials, and midseason for long-lived containers.

    • Use root tabs for long-term planted beds where you prefer fewer interventions.
    • Choose tabs in containers to limit nutrient leaching and mess.
    • Prefer tabs in planted aquariums to feed substrate-rooted species without clouding water.

    Root tabs help keep nutrients near the roots, improving soil health. They work well with organic fertilizers that release nutrients slowly. Adding compost or worm castings boosts soil life and structure.

    Check on your plants weekly and test the soil sometimes. This shows if the tabs are releasing nutrients slowly, not suddenly. Regular checks help catch any nutrient deficiencies early.

    Integrate root tabs into your garden care routine. They provide focused, long-lasting nutrition with less frequent feeding. Proper placement and spacing ensure reliable results without overfeeding.

    When to Choose Liquid Fertilizers

    Choose liquid fertilizers for quick fixes or a growth boost. They dissolve fast and reach roots or leaves quickly. This makes them perfect for short-term needs in houseplants, vegetable beds, or container gardens.

    Use them when plants show signs of stress, like yellowing or slow growth. Foliar feeding gives nutrients directly to leaves for fast results. Many gardeners on Instagram say liquids help plants recover quickly after transplant shock or pest damage.

    Adjust how often you feed based on the product and your watering habits. Most products need weekly to biweekly applications. If you use automated systems, liquids mix well with irrigation lines for steady feeding.

    Be careful mixing liquids with other fertilizers or beneficials. Always test for ammonia and nitrate after treatment. This ensures nutrients are improving plant health. Too much mixing or use can harm plants.

    • When to choose liquid fertilizers: quick fixes and foliar treatments.
    • Plant care tips: monitor leaf color and growth, keep records of applications.
    • Watering techniques: sync feedings with regular irrigation and avoid soggy roots.
    • Plant nutrition: test soil or runoff to track nutrient shifts after application.

    Begin with small doses and increase as needed. Regular checks and simple nitrate tests prevent overfeeding. With a strict schedule and proper watering, liquid fertilizers are a valuable tool in plant care.

    Cost Considerations for Both Options

    When picking between root tabs and liquid fertilizers, think about the initial cost and ongoing expenses. A 50-pack of root tabs from brands like Osmocote or API might cost more upfront than a single bottle of General Hydroponics liquid feed. Your choice depends on how many tabs you need and how often you’ll use them in your garden.

    Consider your seasonal spending. For four 12-inch containers, you might use 8–12 root tabs per season, costing about $10–$20. Liquid fertilizer, on the other hand, might cost $12–$18 for a 16-ounce bottle. You’ll use it weekly, which can last 2–3 months, depending on how much you apply. This shows how costs change based on the size of your garden and how often you tend to it.

    Don’t forget about the time and effort involved. Root tabs are easy to use once you’ve placed them, saving you time. Liquid fertilizers, though, need more frequent application and monitoring, which takes more time. If you value your time, using root tabs less often can save you money over time.

    Think about your long-term goals for your plants. Root tabs provide steady nutrition and support steady growth. Liquids, on the other hand, let you quickly address nutrient deficiencies and tailor the feed for specific plant needs. Your choice should align with the types of plants you have and your preferred maintenance routine.

    • Upfront cost: root tab packs vs. bottles of liquid fertilizer.
    • Recurring cost: reapplication frequency and how many tabs you need per pot.
    • Labor value: time spent dosing, monitoring, and adjusting nutrient levels.
    • Long-term value: impact on long term plant health and reduced replacement or rescue treatments.

    When calculating costs, consider sustainable gardening practices. Using measured liquid doses can help reduce waste if you keep track of it. Root tabs also help prevent runoff, which can save water and nutrients, benefiting your soil and reducing the need for frequent purchases.

    Here are quick seasonal estimates to guide you:

    1. Container garden (four 12-inch pots): root tabs ~ $10–$20/season; liquid ~ $24–$36/season if bottles are used up quickly.
    2. Raised bed (4′ x 8′): root tabs ~ $30–$60/season depending on spacing; liquid ~ $40–$80/season with regular feeding and targeted supplements.

    Choose the option that best fits your budget and schedule. Proper planning and consistent garden care will help keep costs down and ensure healthier plants in the long run.

    Environmental Impact of Fertilizers

    Think about how root tabs and liquid fertilizers affect your garden and waterways. Root tabs slowly release nutrients at the root zone, which helps prevent leaching. This slow release is good for the environment if you use the right amount for your plants.

    Using liquid fertilizers often means quick feeding for plants. But, it can also lead to runoff if you use too much or water too much after applying. This runoff can harm fish and plants in streams and lakes.

    Many gardeners on Instagram suggest using organic liquid fertilizers like compost tea and seaweed extracts. These options are better for the environment and support healthy soil. They contain beneficial microbes that help the soil, unlike synthetic fertilizers that can harm it.

    Improving soil health is key. Start by testing your soil and adding organic matter like compost. Cover crops also help by improving soil structure and holding nutrients. This way, you can use less fertilizer and your plants will grow strong.

    • Use correct dosing based on soil tests and plant needs.
    • Place root tabs near active roots to limit nutrient spread.
    • Choose organic liquid alternatives when you need quick feeds.

    Proper watering is also important. It helps prevent disease by keeping leaves dry. Water in the morning and avoid overhead watering to prevent fungal problems. This also helps prevent nutrient runoff by watering deeply and slowly.

    By using fertilizers wisely and improving soil health, you can reduce your environmental impact. Using root tabs, measured liquid feeds, compost, and cover crops leads to a more sustainable garden. This approach protects water, soil, and plant health.

    Ensuring Balanced Nutrition

    You must give plants the right mix of nutrients like N, P, K, and micronutrients. Start by testing the soil and plant leaves before changing your feeding routine. A soil test shows the nutrient levels in the soil. A tissue test tells you what the plant actually absorbs.

    Check the levels of NH3/NH4 and NO3 every week. This helps you know if your feeding method is giving the right kind of nitrogen. It also tells you how many root tabs to use and when to add liquid nutrients. Root tabs provide steady nutrients right where the roots are.

    For specific nutrient gaps, use liquid supplements or foliar sprays. Foliar sprays can quickly fix iron or magnesium issues, alongside the steady nutrients from root tabs. This way, you can quickly address any nutrient shortages.

    • Follow a mixing strategy based on tests, not guesswork.
    • Avoid overloading with one element; imbalances invite pests and disease.
    • Space root tabs to match root density for even nutrient access.

    Think about using organic fertilizers for slow release and better soil health. Compost, bone meal, and kelp add nutrients and improve soil structure. Use these along with targeted liquid products when tests show you need more micronutrients.

    By following this balanced approach, you can keep your plants healthy all year round. Test, monitor, and adjust your feeding to keep your plants strong and adaptable to changing conditions.

    Common Myths About Fertilizers

    Online, you’ll find many claims that seem true. Social media, like Instagram, shares quick tips and strong opinions. Always look for reliable plant care tips and don’t assume every tip is true.

    Some say root tabs work instantly. But, root tabs slowly release nutrients. They need water to work and time to break down. So, expect slow changes, not quick growth, with root tabs.

    Another myth is that root tabs are enough on their own. Root tabs focus on the roots, not the whole plant. Many growers use them with occasional liquid feeds for balanced nutrition.

    Some think liquids always harm plants. But, liquid fertilizers can burn plants if used too much. Proper dosing and diluting prevent this. Liquids are good for quick fixes or even distribution in containers or aquariums.

    Many believe more fertilizer means faster growth. But, too much fertilizer stresses roots and harms soil microbes. It can even slow growth. Use the right amount, test regularly, and watch your plants closely for the best results.

    • Test soil or water regularly to track nutrient levels.
    • Observe plant response before adding more fertilizer.
    • Match fertilizer type to species and growth stage.

    Using both root tabs and liquids can be effective. Follow trusted brands like Miracle-Gro or Osmocote for guidance. Regular observation is key for long term plant health and sustainable gardening.

    Tailoring Fertilization to Your Plants

    Start by identifying the types of plants in your garden or containers. Perennials, shrubs, and established plants do well with root tabs near their roots. It’s important to match the type of fertilizer to the plant’s growth and root depth.

    For seedlings and fast-growing annuals, liquid fertilizers are best. They provide quick nutrition that you can easily adjust. Use them monthly or after pruning to help new growth.

    Sandy soils lose nutrients fast, so root tabs are helpful. Clay soils hold nutrients longer but might need a different approach. Adjusting your fertilization based on your soil type can improve plant health and reduce waste.

    • Use root tabs at planting for perennials and shrubs.
    • Apply liquid ferts for seedlings and short-season annuals.
    • Combine both: root tabs for steady supply, liquids as monthly boosts.

    Adjust your watering schedule to match your fertilization routine. If you water often, use liquids. If you water deeply, root tabs work better. This ensures nutrients reach the roots when needed.

    Check plant nutrition weekly with tests for NH3/NH4 and NO3. Keep track of results and adjust feedings as needed. Small changes can prevent overfeeding and keep plants healthy.

    Learn from others on Instagram and gardening forums. Different plants have different needs. Test new methods in small areas before applying them everywhere.

    Keep a log of your fertilization efforts. Record the type of plants, soil, products used, and test results. This helps you refine your fertilization strategy over time and improve your gardening skills.

    Conclusion: Choosing the Best Option for Long Term Health

    To keep your plants healthy for a long time, match your tools to your routine. Root tabs slowly release nutrients as water hits them. Their power grows with the number you use.

    If you like easy, targeted feeding, focus on root tabs. Check your tank or soil weekly for NH3/NH4 and NO3. This helps you see how well they’re working.

    Liquid fertilizers are great for quick fixes or when you need to feed your plants often. Many growers use both methods. Use liquids for fast fixes and root tabs for steady nutrition.

    For better gardening, mix methods and follow simple care tips. Test often, pick the right products for your plants, and adjust as needed. Also, water carefully to reduce waste.

    Here’s a quick guide: test weekly, pick the right products, adjust as needed, and mix root tabs and liquids. Also, use sustainable gardening practices for long-term plant health.

    FAQ

    What is the main difference between root tabs and liquid fertilizers for long term plant health?

    Root tabs are slow-release pellets that provide nutrients over weeks to months. They need water to release nutrients. Liquid fertilizers, on the other hand, dissolve quickly and provide nutrients right away. They are best for rapid correction or precise dosing.

    How do root tabs affect soil health and nutrient cycles?

    Root tabs concentrate nutrients in the root zone, reducing leaching. This supports healthy root systems and balanced soil biology. The release of nutrients depends on soil moisture and the number of tabs used. Regular testing helps improve soil health over time.

    Which plants benefit most from root tabs?

    Heavy-rooted perennials, container shrubs, bulbs, and established plants in raised beds benefit most. Root tabs are ideal for long-duration feeding with fewer interventions. Insert tabs near active roots at recommended depths and spacing.

    When should you choose liquid fertilizers instead?

    Choose liquid fertilizers for quick correction of deficiencies or recovery after stress. They are great for seedlings, fast-growing annuals, and foliar feeding. Liquids act quickly but require careful dilution and monitoring.

    Can you combine root tabs and liquid fertilizers?

    Yes, combining root tabs and liquid fertilizers can be effective. Use root tabs for steady macronutrient supply and occasional liquid feeds for micronutrients or rapid correction. Balance NPK with essential trace elements and use weekly soil or tissue tests.

    How soon will I see results after placing root tabs?

    Expect gradual changes after placing root tabs. They require water to penetrate shells before nutrients become available. The timeline depends on the number of tabs used, soil moisture, and root density. Monitor weekly tests and visual plant health.

    How quickly do liquid fertilizers show effects?

    Liquid fertilizers often produce measurable changes within days. NH3/NH4 and NO3 readings usually spike shortly after application. Follow dilution guidelines to prevent nutrient burn.

    What monitoring methods should I use to track nutrient availability?

    Use simple weekly checks for ammonium and nitrate in soil or substrate. Combine those tests with visual inspections of leaf color, new growth, and root health. Periodic soil tests and occasional tissue tests provide deeper insight.

    How many root tabs should I use per pot or plant?

    Quantity depends on pot size, plant type, and product instructions. Larger, heavy feeders need more tabs; small pots need fewer. Follow manufacturer spacing guidelines and adjust based on weekly nutrient readings and plant response.

    Are root tabs or liquids more cost-effective long term?

    Root tabs often reduce application frequency and can be economical for low-maintenance container setups and perennial beds. Liquids may cost more over time but allow targeted, efficient use when needed. Compare upfront pack sizes and expected seasonal application rates to estimate cost per season.

    Which option is better for reducing environmental impact?

    Slow-release root tabs tend to limit immediate leaching and runoff. Proper dosing, soil testing, and watering techniques matter for both methods. Organic liquid options like seaweed or fish emulsion can reduce synthetic inputs, and combining compost and cover crops supports soil health improvement overall.

    What are common myths about root tabs and liquid fertilizers?

    Common myths include “root tabs eliminate all other feeding,” “liquids always burn plants,” and “more fertilizer equals faster growth.” In reality, root tabs are slow and localized—not a total replacement—liquids can burn if overapplied, and excessive fertilizer causes imbalances and pest or disease susceptibility. Use testing and observation instead of relying on anecdote.

    How do soil type and watering technique change your choice?

    Sandy soils benefit more from root tabs to reduce leaching; clay soils hold nutrients but may slow release. Watering frequency affects root tab activation—consistent moisture helps shells permeate—while foliar sprays and drenches integrate with watering schedules for liquids. Match fertilizer choice to your watering techniques to minimize waste and disease risk from excess foliage wetness.

    How should I balance macronutrients and micronutrients?

    Use root tabs for steady macronutrient (NPK) delivery and add occasional liquid micronutrient supplements or foliar sprays for iron, magnesium, manganese, and trace elements. Conduct soil and tissue tests to guide ratios and avoid creating conditions that invite pests or disease. Adjust feeds based on weekly NH3/NH4 and NO3 readings and plant symptoms.

    What best practices reduce runoff and protect waterways?

    Place root tabs near roots and follow recommended spacing to minimize leaching. Dilute liquids correctly and avoid overapplication. Use organic options when possible, integrate compost and cover cropping for soil health improvement, and adopt proper watering techniques to reduce runoff. Regular testing helps you apply only what plants need.

    How often should I test soil after applying either method?

    Weekly checks for ammonium and nitrate are useful to monitor short-term nutrient dynamics after application. Perform fuller soil tests seasonally or when symptoms appear. Combine testing with visual observation and maintain a feeding log to correlate applications with plant response and refine your maintenance routines.

    Can social media practices like those on Instagram help inform my fertilization plan?

    Yes. Instagram and gardening communities share real-world brand experiences, placement techniques, and anecdotal timelines that can inform expectations. Treat these as supplementary to scientific testing and product instructions—use community tips to adapt strategies, then verify with weekly nutrient tests and visual monitoring.

    What final checklist should I follow when choosing between root tabs and liquids?

    Test your soil, define plant types and root behavior, pick root tabs for long-duration, localized feeding and liquids for rapid correction. Monitor weekly for NH3/NH4 and NO3, adjust quantities based on readings, avoid overapplication, integrate micronutrient foliar sprays as needed, and adopt sustainable gardening practices like compost addition and proper watering techniques to support long term plant health.

  • How to Identify and Fix Areas of Low Circulation in Your Tank

    How to Identify and Fix Areas of Low Circulation in Your Tank

    You want your tank to be clear, healthy, and beautiful. This guide will help you find and fix low circulation spots. This way, your freshwater or saltwater tank will flourish.

    Good flow is key. It moves waste to filters, spreads nutrients, and boosts oxygen. It also keeps the water surface clean.

    Every hobbyist needs to tackle dead zones. Some fish, like rainbow shiners, need strong currents. Others, like bettas, prefer gentle flow. Knowing what your fish need helps you choose the right equipment and avoid health issues.

    This article will guide you through the process. You’ll learn how to spot dead zones, troubleshoot, and fix them. We’ll cover using filters, powerheads, and air stones. You’ll also get tips on placement, maintenance, and when to ask for help.

    By improving circulation, you’ll create a thriving tank. Follow these steps to see real improvements for your fish and plants.

    Understanding Dead Zones in Aquariums

    A detailed illustration of an aquarium showcasing a "dead zone in circulation." In the foreground, include a beautifully designed aquarium with vibrant aquatic plants and a few visible fish near strong water flow areas. The middle section should depict a stagnant area with debris settled on the substrate, indicating low circulation, possibly showing algae buildup. The background features soft, diffused lighting to create a serene underwater atmosphere, highlighting the contrast between flowing and still water. Use a slight top-down angle to capture the entire scene's depth, allowing for an educational perspective on water movement dynamics. The overall mood should convey tranquility while emphasizing the importance of circulation in maintaining a healthy aquatic environment.

    A dead zone is where water barely moves. You’ll find these spots behind big decorations, under rocks, in caves, and in corners. These areas lack oxygen, heat, and nutrients for plants, corals, and fish.

    Several things can cause dead zones. Big rock stacks or dense plants block water flow. Tank shape, like outlets at the top, also plays a role. Plus, small or clogged filters and powerheads reduce circulation. Too many fish in the tank can make things worse.

    The effects are serious. Debris and waste build up, causing ammonia spikes. Without oxygen, anaerobic bacteria produce harmful gases. Plants and corals struggle, and fish may get stressed or die.

    Knowing why dead zones form is the first step. After finding the problem spots, you can fix them. This might mean moving equipment, getting better pumps, or changing the layout. This way, you can prevent dead zones from happening.

    Signs of Low Circulation

    A close-up view of an aquarium tank with distinct signs of low water circulation. In the foreground, unhealthy, wilting aquatic plants with yellowing leaves are slumped over, showcasing poor growth. The middle ground features visibly stagnant patches of algae and sediment collecting on the substrate, while air bubbles remain trapped near the surface, indicating insufficient water movement. A backdrop of blurred tank decorations adds depth to the scene, creating a sense of unease. Soft, natural light filters through the water, casting delicate shadows and illuminating the tank imperfections. The image captures a calm yet concerning atmosphere, emphasizing the vital need for improved circulation in aquatic environments. Capture this scene with a macro lens from a slightly elevated angle to focus on the details of neglect and despair.

    Spotting signs of low circulation early keeps your tank healthy and cuts down on dead zone troubleshooting later. Look for visible piles of detritus or settled waste in the same corners or behind decorations. These patches tell you water is not sweeping the substrate evenly.

    Algae often reveals flow problems. Patches of blue-green algae or black beard algae concentrated in one area point to poor water movement. If plants in a specific spot grow slowly, turn pale, or stretch toward light while the rest of the tank thrives, that area may lack proper flow and nutrient exchange.

    • Fish behavior: fish avoiding corners or hiding from currents may be reacting to low oxygen or local pollutant buildup.
    • Invertebrates and bottom-dwellers: snails, shrimp, or catfish that constantly congregate and stir substrate can indicate a slow pocket where food and waste collect.
    • Equipment hints: filters or powerheads with reduced output, or heater/gadget “low flow” alerts that cycle often, suggest clogging, wear, or misplacement causing poor dead zone coverage.

    Use simple tests to reveal subtle flow issues. Drop a flake of food, a small piece of paper, or a floating test particle and watch where it drifts and settles. A gentle dye plume or tannin spot can act like a smoke-test analog to show recirculation paths and slow pockets.

    When you connect these observations to dead zone troubleshooting, you gain a clear action plan. Early detection makes fixes quick: reposition equipment, clean intake screens, or add a circulation pump to improve dead zone coverage and protect fish and plants from stress or localized ammonia spikes.

    Identifying Dead Zones in Your Tank

    Start by slowly looking around your tank. Look for where debris gathers, algae blooms, and plants seem weak. Also, notice where fish don’t want to go. These signs help you find dead zones and fix them.

    Try simple tests to see how water moves. Drop food flakes or dye near the filter return to track its path. Use a cup to create a stream towards corners and see if water reaches.

    Then, check how well your equipment works. Look at the filter return’s direction and strength. Feel the power of pumps and powerheads; less flow means clogs or too small sizes. Tanks with one return side often have less flow to the far ends.

    • Move decorations briefly to test hidden pockets behind rocks and driftwood.
    • Leave a 5–10 cm gap behind hardscape and observe any change in water movement.
    • Probe bottom corners with a soft tool to find slow zones where detritus builds.

    Keep a checklist of what you find: debris spots, algae, areas fish avoid, and weak equipment. Use this list to fix dead zones and improve water flow.

    Tools for Enhancing Water Flow

    Choose filters that match your tank’s needs. Sponge filters are great for fry and bettas because they have gentle flow. Canister and hang-on-back (HOB) filters offer stronger flow and help break surface biofilm.

    Powerheads are submersible pumps that create directed jets to move water. They’re good for larger tanks or to raise turnover. For example, an Aquarium Co-Op powerhead can push roughly 211 GPH (800 LPH) at 10 W. Pairing a powerhead with a sponge filter speeds up mechanical filtration and offers dead zone remedies.

    Wave makers produce alternating currents that mimic natural waves. They spread circulation more broadly than a single jet. This alternating motion reduces repetitive flow patterns that create stagnant corners and acts like improving signal strength for water movement.

    Air stones and air pumps are a low-cost fix to stir stagnant corners. They add surface agitation without stressing slow-moving species. Use them where gentle movement is needed, not strong jets.

    • Spray bars: disperse output along a line to diffuse force and cover more area.
    • Discharge against walls: bounce flow off glass to spread circulation and avoid direct blasts.
    • Attach powerheads to sponge uplift tubes: increase filtration speed but expect more frequent foam maintenance.

    Follow basic sizing guidance to avoid underpowered setups. Aim to circulate the tank volume at least 4× per hour. Some systems or livestock need 5–10× per hour. For instance, a 100-gallon tank would need roughly 400 GPH; a 250-liter tank may require 1,250–2,500 LPH.

    When mixing tools, think of combinations as layered dead zone solutions. A HOB filter plus a wave maker or a powerhead with an air stone will enhance wireless connectivity of currents across the tank. Small adjustments in placement often yield big improvements.

    Use these tips to target problem areas without stressing fish. Test different setups, monitor flow patterns, and keep maintenance simple to maintain effective dead zone remedies over time.

    Strategically Placing Equipment

    When placing equipment, aim devices at stagnant spots. Put powerheads near where debris or algae often come back. Angle returns slightly down to clean the substrate and move water to lower areas.

    Use pumps and powerheads at the top for surface agitation. This breaks oil slicks and biofilm and aids gas exchange. It’s like optimizing network coverage, where a few key nodes cover more ground.

    • Keep powerheads away from the substrate if they stir up sand or gravel.
    • Direct flow toward walls or use spray bars to diffuse force and avoid creating cloudy pockets.
    • Position powerheads by heaters that show low-flow signs so warm water spreads evenly and hot or cold pockets are minimized.

    For better dead zone coverage, use opposing or offset flow sources. Place a powerhead at each end or use wave makers for cross-currents. This setup is like a mesh of nodes, optimizing coverage inside the tank.

    Hide equipment without losing function. Tuck pumps behind tall plants or decorations, or match them to a dark background. This keeps the tank tidy and circulation effective.

    Adjusting Tank Layout

    Small changes to your hardscape can improve flow quickly. Leave a 5–10 cm gap behind large rocks so water moves through instead of stagnating. Elevate driftwood or carve channels under rock piles to let currents pass.

    Plant placement matters for dead zone prevention. Spread dense plants into clusters spaced across the tank instead of packing them into corners. Move slow-growing or delicate species from likely low-flow pockets to areas with steady circulation.

    • Trim and remove unhealthy leaves in persistent low-flow beds.
    • Boost fertilization and CO2 where plants lag after improving flow.
    • Watch plant recovery for two weeks after layout changes.

    Adjust outlet orientation and add secondary returns or powerheads when one end of the tank stays calm. In long tanks, position flow devices opposite each other to avoid one-sided coverage. Changing angles often fixes far-end stagnation without extra filtration.

    Use biological helpers as part of dead zone remedies. Corydoras catfish sift substrate, Amano shrimp pick at detritus, and Nassarius snails keep sand moving. These additions work with layout changes to reduce buildup in low-flow areas.

    1. Inspect problem spots with a sheet of paper or flow tester to locate dead zones.
    2. Make incremental hardscape shifts and recheck flow.
    3. Add plants or animals to help clean remaining pockets.

    Adjusting tank layout is a practical, low-cost dead zone prevention strategy. Often, a few thoughtful moves give the best long-term results for clearer water and healthier plants and fish.

    Routine Maintenance to Prevent Dead Zones

    Start a simple maintenance routine to keep water flowing well. Clean or replace filter wool pads and hose filters to avoid clogs. A clogged filter can slow down water flow, leading to dead zones.

    Follow the manufacturer’s guide to take apart powerheads and pumps. Clean out impellers and intake screens to improve flow. Often, a quick clean can fix flow issues instead of needing a new part.

    • Vacuum substrate during water changes to remove detritus.
    • Check corners and behind decorations for trapped waste.
    • Move décor seasonally to prevent hidden buildup.

    Check flow devices weekly for any performance drops. Clean them monthly or as the product suggests. Be careful with foam filters when adding high-flow attachments, as they can clog faster.

    Regularly trim plants to prevent shading and decay. Keep the right number of fish to avoid waste overload. These steps help prevent dead zones for a long time.

    If you notice low-flow areas, start troubleshooting. Isolate the area, test nearby equipment, and clean or adjust parts until flow is restored. Regular maintenance makes fixing problems easier and keeps your tank healthy.

    Monitoring Water Flow Regularly

    Start a simple routine to check your tank’s water flow. Use food flakes, a drop of dye, or small floating tracers to observe the current. These visual checks help spot new detritus and areas needing dead zone troubleshooting.

    Measure the flow rates of each pump and powerhead. Record the gallons per hour (GPH) or liters per hour (LPH). Compare these numbers to the recommended turnover for your tank. Aim for at least 4x per hour for general tanks and up to 5–10x per hour for species needing stronger circulation.

    Keep a log of your equipment maintenance. Note the dates for cleaning, changes in output, and any repositioning. A brief entry after each visit helps spot trends before they become big problems.

    Think about using simple tech like inline flow meters or smart plugs. They track power draw and can warn of issues before they’re visible. These tools help with dead zone troubleshooting and alert you to failing parts.

    After moving a pump or rearranging decorations, watch your tank for at least two weeks. Look at plant health and substrate for signs of recovery. This time tells you if your changes worked and if you need to improve signal strength between devices or control systems.

    • Daily: quick visual check with a tracer
    • Weekly: note GPH/LPH and clean intake strainers
    • Monthly: review log, test inline meters, inspect fittings

    Benefits of Improved Water Circulation

    Good flow spreads oxygen, heat, nutrients, and CO2. This keeps your fish, plants, and corals healthy. It also cuts down on ammonia spikes and stops anaerobic bacteria from growing.

    Clearer water comes when filters get a steady supply of stirred waste. You’ll see fewer algae patches and stronger, evenly colored plants. This is a big win for any aquascape.

    Even heat distribution prevents hot and cold pockets that stress your fish. Pumps and mechanical filters run better with balanced water delivery. This means less need for repairs over time.

    Routine care gets easier with fewer algae outbreaks and less buildup. You’ll save on maintenance by needing fewer deep cleans and simpler weekly tasks. Small efforts now can lead to big savings later.

    When flow is right, tank behavior changes. Fish stop avoiding corners, bottom-dwellers forage more confidently, and detritus no longer piles up. Improved circulation is like a wireless network for your ecosystem, making sure everything communicates well.

    • Biological balance: better oxygen and nutrient spread
    • Visual benefits: clearer water and uniform plant growth
    • System stability: consistent temperature and filter performance
    • Lower upkeep: fewer deep cleanings and algae events
    • Behavioral perks: more even use of the tank by livestock

    Common Mistakes to Avoid

    Too much flow can hurt plants and stress fish. If water is too strong, it can damage leaves or harm small fish. To fix this, slow down the pump or add a spray bar to spread out the current. This keeps the water moving well without harming your plants or fish.

    Using only one return outlet is a big mistake. This setup often leaves corners with very little water flow. To solve this, use two return outlets or a small powerhead. This balances the water movement and helps avoid dead spots.

    Not keeping up with maintenance can also cause problems. Filters and pumps can get clogged or dirty over time. Regular cleaning keeps them working well and prevents dead zones from forming.

    • Don’t push rocks or decorations too close to the glass. Leave some space for water to flow behind them.
    • Don’t pack decorations too tightly. This lets water move freely and prevents dirt buildup.
    • Make sure your pump is the right size for your tank. A pump that’s too small can cause low water flow, which is bad for your tank.

    Ignoring what your fish need can also cause problems. Too much turbulence can hurt delicate fish like fry or bettas. For these fish, use sponge filters or gentle air circulation.

    When fixing dead zones, test each change one at a time. Try swapping a pump and watch how it affects your tank for a few days. Keep track of how each change impacts your tank’s flow and your fish’s behavior. This helps you find the best solution for your tank.

    Seeking Professional Help

    If you’re dealing with ongoing algae, dead plants or corals, or constant ammonia and nitrate spikes, it’s time to get help. Big tanks and reef setups often have hidden flow issues that DIY fixes can’t solve.

    Start by documenting what you see. Note the symptoms, recent changes, and equipment specs. Also, keep track of stocking levels and maintenance history. Clear records help the professional diagnose and fix the problem faster.

    • Local aquarium store specialists can test water and suggest targeted gear upgrades.
    • Experienced aquascapers will evaluate layout and recommend aesthetic, flow-friendly changes.
    • Certified aquatic veterinarians help when livestock show stress or disease linked to poor circulation.
    • Professional aquarium maintenance services handle plumbing, pump sizing, and ongoing upkeep.

    Professional work starts with a full circulation audit. Expect flow rate measurements, plumbing and pump inspections, and a detailed plan. They might suggest or install powerheads, wave makers, extra returns, or a sump for better circulation.

    Costs depend on the scope of work. A diagnostic visit includes a visual check, basic tests, and a written plan. Major changes like adding pumps or reworking plumbing cost more but solve problems for good.

    1. Prepare: gather records and photos to show exact trouble spots.
    2. Ask for measured flow numbers and a written maintenance schedule.
    3. Request options with costs for immediate fixes and longer-term dead zone solutions.

    Getting professional help gives you a clear plan for fixing dead zones. It turns guesswork into effective solutions, keeping your tank healthy and stable.

    Conclusion: Keeping Your Tank Healthy

    Keeping your aquarium stable requires constant care. Watch how fish act and use dye tests to find dead spots. Choose the right tools like sponge filters and powerheads to improve water flow.

    Here’s a quick plan: check filter returns, run a dye test, clean or replace clogged gear, add a powerhead or wave maker, and give plants time to adjust. These steps help fix dead zones and prevent them from coming back.

    Think about the future too. Mix the right equipment, plan your tank’s layout, and maintain it regularly. Always check the flow and how living things in the tank react. If dead zones keep coming back, get help from a pro to keep your tank healthy.

    FAQ

    What exactly is a dead zone and why does it matter in my aquarium?

    A dead zone is an area where water barely moves. It’s often found behind decorations, under rocks, and in corners. This lack of movement leads to poor oxygen, heat, and nutrient distribution.

    As a result, debris builds up, ammonia spikes, and harmful bacteria grow. This can stress or kill fish, plants, and corals. Fixing dead zones improves your tank’s health and beauty.

    What are the earliest signs that a dead zone is forming?

    Look for detritus piles and algae patches in one spot. Also, check if plants in corners are pale or stretched. Fish might avoid certain areas, and bottom-dwellers may gather in low spots.

    Filters or powerheads might show reduced output. This could mean they’re clogged.

    How can I visualize flow to find slow pockets?

    Use food flakes, paper bits, or dye to see water movement. Drop dye near returns to see where it stops. Cup-streams and bubble streams can also help spot slow areas.

    How do tank layout and hardscape cause dead zones?

    Layout choices, like placing rocks against glass, trap water. Tall tanks with returns near the top and single-side returns also block flow. Make sure to leave gaps behind decorations for water to flow.

    Which pieces of equipment help most with dead zone solutions?

    Use sponge filters for gentle flow, and canister and HOB filters for stronger flow. Powerheads, wave makers, and air stones also help. Choose based on your tank’s size and species.

    How do I size pumps and filters to avoid chronic low circulation?

    Aim for at least 4x tank volume circulation per hour. Some systems need 5–10x for stronger flow. For example, a 100-gallon tank needs about 400 GPH.

    Always account for plumbing losses and add extra for real-world flow.

    Where should I place powerheads, wave makers, and returns to target dead spots?

    Place devices to sweep substrate and target problem areas. Angle returns to move water to lower zones. Use opposing flow sources to eliminate corners of low movement.

    Top placement helps agitate the surface and prevent biofilm.

    What are simple layout changes that often fix dead zones long-term?

    Leave gaps behind decorations and elevate hardscape. Spread out dense plant clusters. Small changes can improve circulation and reduce maintenance.

    How should I balance flow needs for different species (e.g., rainbow shiners vs. bettas)?

    Consider species-specific needs. Rainbow shiners and hillstream loaches prefer strong flow. Use sponge filters or air-driven devices for delicate species. Diffuse strong jets with spray bars or redirect flow if needed.

    How often should I inspect and maintain pumps and filters to prevent dead zones?

    Check flow devices weekly and clean monthly. Rinse or replace filter media and clear impellers and intake screens. Vacuum substrate in problem corners during water changes.

    Clogged filters can drastically reduce turnover. Regular cleaning is key.

    Are there biological helpers that reduce detritus in low-flow areas?

    Yes. Corydoras catfish, Amano shrimp, and Nassarius snails help stir and consume detritus. They complement mechanical solutions by keeping substrate cleaner.

    What mistakes commonly make dead zones worse?

    Common errors include relying on a single return outlet and undersizing pumps and filters. Neglecting maintenance and forcing reef-style flow in tanks with fry or bettas also worsens dead zones. Avoid burying hardscape and ensure equipment matches your stocking and aquascape.

    How long after improving flow should I expect to see plant or coral recovery?

    Visual recovery should start within two weeks after restoring circulation. Ensure lighting and nutrients are adequate. Trim unhealthy leaves and add targeted fertilization or CO2 for plants if needed.

    Monitor for reduced algae and clearer water as filters capture stirred waste.

    How can I measure and log flow performance over time?

    Track turnover rates (GPH/LPH) for each device and compare to recommended targets. Keep a maintenance log noting cleaning dates, flow changes, and placement adjustments. Use inline flow meters or smart plugs to watch power draw changes.

    Perform periodic particle/dye tests to visualize circulation.

    When should I call a professional for persistent dead zones?

    Seek professional help if algae or die-off continues despite adjustments. If you have chronic ammonia/nitrate spikes or a complex system, get expert advice. Local aquarium store specialists, experienced aquascapers, and certified aquatic veterinarians can help.

    What immediate steps can I take right now to address a suspected dead zone?

    Quick checklist: inspect filter returns and powerheads for reduced output. Run a particle or dye test to locate stagnant corners. Clean clogged equipment and add or reposition a powerhead, wave maker, or air stone to target the problem area.

    Leave changes for two weeks to observe plant and livestock response.

    Will improving circulation also reduce algae and improve aesthetics?

    Yes. Better circulation distributes nutrients and CO2, prevents detritus buildup, and improves mechanical filtration efficiency. This usually results in clearer water, fewer algae patches, and more uniform plant growth.

    It makes your aquascape healthier and more visually pleasing while reducing long-term maintenance.

  • How to Prevent pH Swings in Small, Low-Buffered Nano Tanks

    How to Prevent pH Swings in Small, Low-Buffered Nano Tanks

    You love your nano tank for its size, beauty, and challenge. But its small size means it can’t handle big pH changes well. Even small changes in CO2, oxygen, temperature, or dosing can cause big pH swings. So, focus on keeping pH stable, not just aiming for a specific number.

    For marine-style nano tanks, aim for stable conditions. Keep the temperature between 77–79°F (up to 79–81°F is okay). The salinity should be near 1.026 specific gravity (35 ppt), checked with a refractometer. Alkalinity should be about 8–11 dKH, calcium 375–425 ppm, and magnesium around 1380–1400 ppm.

    This guide will help you understand causes, monitoring, and how to stabilize pH. You’ll learn about substrate choice, live plants, dosing timing, routine maintenance, and troubleshooting. You’ll know how to watch your fish, read pH trends, and act fast to keep pH stable without over-dosing buffers.

    Understanding pH Levels and Their Importance

    A serene, close-up view of a precisely calibrated pH meter displaying balanced readings amid a nano aquarium. In the foreground, the sleek, modern pH meter is prominently showcased, reflecting soft light that highlights its digital screen. In the middle, the nano tank is filled with vibrant aquatic plants and small, colorful fish, indicating a healthy ecosystem, with subtle bubbles rising to the surface. The background features a blurred laboratory setting with scientific equipment, reinforcing a sense of professionalism and research. The mood is calm and focused, with natural daylight filtering in, casting gentle shadows. Emphasize clarity and detail in textures, such as the shimmering water surface and the fine details of the plants, presenting an informative yet visually appealing composition.

    pH measures the hydrogen ion concentration in your tank water. It shows if the water is acidic or alkaline. In aquariums, pH affects many activities like breathing and photosynthesis.

    Small nano tanks are very sensitive. They have low water volume and can’t buffer changes well. A small change in CO2 or O2 can cause a big pH swing. So, keeping pH stable is very important.

    Daily cycles cause predictable pH swings. During the day, plants and algae use CO2, raising pH. At night, pH falls as CO2 increases. You might see a peak in pH about five to six hours after lights on, then a drop.

    To control these swings, aim for steady pH levels. This keeps your fish and plants healthy. Regular monitoring helps you adjust without shocking the system.

    Practical steps include measuring alkalinity and stabilizing carbonate hardness. Plan your light and feeding times to avoid sudden CO2 changes. These steps help keep your nano tank’s pH balanced.

    Common Causes of pH Fluctuations

    A visually engaging illustration depicting the common causes of pH fluctuations in aquariums. In the foreground, showcase a vibrant nano tank filled with colorful aquatic plants and small fish, emphasizing the balance in a thriving ecosystem. The middle layer features elements such as water chemistry equipment, such as a pH meter, and icons representing common causes like evaporation, overfeeding, and algae growth. In the background, illustrate a blurred out environment of a cozy home aquarium setup with natural light streaming in, creating a warm atmosphere. The lighting should be soft and inviting, mimicking the tranquil feel of a well-maintained tank. The angle should be slightly above eye level to capture the depth of the tank while remaining clear and focused on the specific elements.

    Small, low-buffered nano tanks are very sensitive. They can swing a lot when basic processes change. The main reasons for pH swings include changes in gas exchange, photosynthesis, temperature, and human mistakes.

    CO2 and oxygen cause many short-term changes. During the day, photosynthesis uses CO2 and raises pH. At night, respiration lowers pH as CO2 builds up. Knowing this helps manage pH in small tanks.

    Temperature affects oxygen levels. When water gets too warm, oxygen levels drop. This can make pH drop. Keep an eye on your heater and room temperature to avoid sudden pH drops.

    Alkalinity is key for long-term stability. Without enough alkalinity, tanks are hard to keep stable. Avoid over-dosing buffers. Focus on slow, steady adjustments to pH.

    Human mistakes cause many pH swings. Quick water changes, adding chemicals too fast, and poor mixing can cause spikes. Always dose chemicals slowly and mix well.

    Measurement errors can hide real trends. Bad probes, old test strips, and expired kits give wrong readings. Make sure probes are calibrated and store test strips sealed and fresh.

    • CO2 buildup from respiration and poor gas exchange
    • Photosynthesis cycles that raise pH by day and lower it at night
    • Temperature increases that reduce dissolved oxygen
    • Low alkalinity reducing buffer capacity
    • Dosing mistakes and poor chemical mixing
    • Inaccurate measurement from uncalibrated or degraded tools

    To manage pH well, you must tackle both biological and human factors. Keep track of light cycles, control temperature, adjust alkalinity correctly, and maintain your testing tools. This approach helps keep pH stable and predictable.

    The Role of Water Source in pH Stability

    Your source water is key to pH stability in a nano tank. Tap, well, and RO/DI water have different levels of alkalinity and hardness. These factors affect how well your water can resist pH changes.

    Soft water, with low carbonate hardness, has weak buffering. This makes pH swings more likely. On the other hand, harder water resists changes better, helping with pH stabilization.

    When CO2 levels change, the pH drop is similar across different hardness levels. A good rule is to design your system to handle about a 1.0 pH drop. This target works well across various water sources, helping to stabilize pH levels daily.

    Many hobbyists choose reverse osmosis/deionized water for better control over minerals and particles. RO/DI water gives you a clean slate for pH regulation. For marine systems, you must remineralize to add back alkalinity, calcium, and magnesium. Poor remineralization can remove buffering, making pH stabilization harder.

    • Test your source water for alkalinity and general hardness before mixing saltwater or topping off.
    • Adjust your mixing protocol so newly prepared water reaches the target alkalinity before you add it to the tank.
    • Measure the pH of mixed saltwater with a calibrated meter to verify pH level regulation is within range.

    By following a steady prep routine and matching remineralization to your livestock needs, you can have better control over pH levels. This leads to long-term stability in your water source.

    Selecting the Right Substrate for Stability

    Your choice of substrate is key to the long-term chemistry of your nano tank. Calcareous substrates like aragonite and crushed coral slowly release minerals. They add carbonate hardness and calcium, helping to keep the pH stable.

    Inert options, such as silica sand or bare glass, don’t buffer. If you use these, you must manage water chemistry yourself. This means you’ll need to remineralize or dose regularly to keep the pH right.

    Live rock and dry rock change alkalinity levels over time. Porous live rock can create areas where CO2 builds up at night. This can cause small pH swings. Yet, live rock generally helps stabilize chemistry by supporting biological processes that keep alkaline levels steady.

    • Choose calcareous substrate for low-maintenance buffering and steady pH stability.
    • Pick inert substrate if you plan to use RO/DI water and precise dosing for pH stabilization.
    • Use live rock to support biological buffering while watching for nighttime CO2 pockets that can affect alkaline levels.

    Match your substrate to your system’s goals. For a simple setup, go with aragonite or crushed coral. If you want full control with RO/DI and dosing, inert substrates are good but need careful monitoring and steps to maintain optimal pH.

    Using Live Plants to Balance pH

    Photosynthetic plants and macroalgae take in CO2 and release oxygen when it’s light. This action increases the pH and aids in balancing it in small, low-buffered nano tanks.

    At night, plants switch to respiration and release CO2 back into the water. This can lower the pH. So, it’s important to plan light cycles to prevent sudden drops.

    Setting up a refugium on a reverse light cycle is a smart move. Run macroalgae lights from 11 p.m. to 8 a.m. This way, the refugium produces oxygen when the display tank lights are off.

    A small planted refugium or a heavily planted display can buffer daily swings. It cuts CO2 accumulation overnight. This helps stabilize pH levels and supports better water chemistry.

    Live plants also eat nutrients like nitrate and phosphate. This nutrient uptake improves water quality and helps manage pH.

    • Stagger photoperiods so peak photosynthesis in the refugium occurs when the display is dark.
    • Choose quick-growing macroalgae like Chaetomorpha for refugia to maximize oxygen output.
    • Monitor plant health and trim regularly to keep nutrient uptake steady.

    By managing light timing and using plants wisely, balancing pH with plants becomes a key part of nano tank care.

    Chemical Solutions for pH Stabilization

    There are several chemical options for pH stabilization in small nano tanks. You can use alkalinity buffers like soda ash, two-part dosing systems, or kalkwasser. Commercial pH buffers are also available.

    Focus on alkalinity dosing to a target dKH, not just pH. Aim for a stable range of 8–11 dKH. Raising alkalinity often raises pH too. Dose when pH is lowest, usually between 4 and 8 a.m.

    Use slow, controlled methods for pH control. Peristaltic dosers and timed drip systems are good for adding chemicals gradually. This method avoids sudden pH jumps that stress fish.

    • Dose Part A (alkalinity) and Part B (calcium) in different locations or at different times. For example, add alkalinity in the morning and calcium roughly 12 hours later to cut down on precipitation.
    • When using kalkwasser, run it at night to use the aquarium’s natural respiration cycle and limit rapid pH rises during the day.

    Be careful not to over-dose. Many aquarists chase a pH number and end up raising alkalinity too high. Measure alkalinity and calcium regularly. Avoid sudden changes with powdered buffers, as they can harm invertebrates and corals.

    Magnesium is also important for balance. You can dose magnesium at any time. It rises slowly if depleted and remains stable once you reach about 1380–1400 ppm. Keeping magnesium steady helps with stabilizing pH levels long term.

    Keep chemical test kits calibrated and stored properly for accurate readings. Commercial pH buffers can mask underlying problems if used just to force a number. Use them sparingly while you address the root causes of swings.

    Monitoring Your Nano Tank’s pH Levels

    It’s important to keep an eye on your tank’s pH levels all the time. Spot checks can miss the daily changes in small tanks. By regularly checking pH levels, you can catch any slow changes before they harm your fish.

    Choose reliable tools for accurate pH readings. Handheld pH meters are great for quick checks. For ongoing monitoring, consider using probes from brands like Neptune Apex. But, avoid pH test strips as they can be less accurate.

    Proper care of your probes is key for good pH control. Make sure to calibrate them often with the right solutions. Always follow the manufacturer’s instructions. If a reading seems off, check it with a handheld meter and recalibrate if needed.

    Keep a record of your pH readings to spot patterns. Whether it’s through a controller graph or a simple log, tracking your data helps. This way, you can plan when to add new water or adjust lighting and circulation.

    • Check new mixed saltwater before adding it to the tank.
    • Measure pH in bags when buying livestock to avoid surprises.
    • Verify unexpected changes by cross-checking instruments.

    Having consistent data helps you move from quick fixes to planned pH control. This approach makes it easier to keep your tank’s pH stable. It also helps prevent sudden changes that can harm your corals and invertebrates.

    Natural Methods to Prevent pH Swings

    Simple steps can help reduce CO2 buildup. Try increasing surface agitation or adjusting the protein skimmer air intake. This improves gas exchange, letting CO2 escape and boosting oxygen levels.

    Ensure steady circulation to mix oxygen-rich water with areas where alkalinity is added. This even distribution helps regulate acidity and prevent pH swings. For nano systems, use small powerheads to create soft currents.

    Setting up a refugium with macroalgae on a reverse light cycle is beneficial. It produces oxygen when your display is dark, reducing CO2 spikes and supporting pH balance. Adding live plants in the main tank extends oxygen production into off-hours.

    If pH drops follow high respiration or heavy feeding, consider reducing stocking and feeding. Gradual stocking and conservative feeding reduce stress and make pH prevention easier. Monitor your fish’s behavior to confirm stability after changes.

    • Use a modest skimmer or air-driven surface agitator for constant gas exchange.
    • Add macroalgae in a refugium on a reverse photoperiod to lower nighttime CO2.
    • Maintain steady circulation so dosing and oxygen distribute evenly.
    • Reduce feedings and add livestock slowly to manage respiration-related pH shifts.

    Many tanks can handle small daily pH swings, like 7.7–7.9 in reef setups, as long as other parameters are stable. If corals and fish grow well and behave normally, avoid using chemicals. Trust the signs of a healthy tank while keeping an eye on pH balance.

    Adjusting Tank Conditions Gradually

    When changing tank conditions, do it slowly. This protects delicate life and helps manage pH. Big changes can cause sudden pH swings or lead to carbonate buildup.

    Use a timed dosing plan for stable pH. Add alkalinity when pH is low, best in the early morning. Wait 12 hours before adding calcium to avoid precipitation. If you have a peristaltic doser, use it to spread chemical input evenly.

    Match water parameters before adding it to the tank. Mix replacement seawater and test its alkalinity and salinity. Bring the temperature to match the tank’s and check pH or CO2 levels if possible. Gradual water changes help keep pH stable.

    • Adjust alkalinity in small steps; test after each change.
    • Add calcium slowly and on a staggered schedule to aid pH stabilization.
    • Use peristaltic dosers or dosing pumps for steady, low-volume delivery.

    Keep temperature changes small to protect pH. Aim for changes of 1–2°F. Avoid letting the tank get too hot, as high temperatures can lower dissolved oxygen and cause pH to drop.

    1. Plan dosing times: alkalinity early morning, calcium about 12 hours later.
    2. Mix and test replacement water before use; match temperature and salinity.
    3. Use low-rate dosing and place outputs in high-flow zones.

    By making slow adjustments and checking each parameter, you reduce stress on your fish. Small, consistent changes are better than big, rare ones for keeping pH stable in a low-buffered nano tank.

    Regular Maintenance Practices for Stable pH

    Keep a simple, repeatable routine for pH control and aquarium health. Test alkalinity, calcium, and magnesium weekly. This helps you catch trends early.

    Log your results and adjust small amounts when needed. This keeps your aquarium balanced.

    Calibrate probes and test kits as the manufacturer suggests. Use fresh pH probes for accurate readings. Also, check and calibrate your refractometer often to keep salinity right.

    Stick to a water change plan. Use RO/DI water for freshwater tanks or saltwater for marine ones. Regular changes help keep pH stable.

    Keep your equipment in good shape. Clean protein skimmers, impellers, and pump housings. This ensures proper flow and gas exchange.

    Service powerheads and return pumps regularly. This prevents low-oxygen zones that can upset pH.

    Take care of refugia and filter media. Replace carbon or phosphate media as needed. Refresh bio-media only when necessary to keep beneficial bacteria healthy.

    Watch your fish and corals for signs of pH balance. Healthy corals and steady fish behavior mean your chemistry is good. Use these signs to guide your decisions and avoid sudden changes.

    Follow a weekly checklist:

    • Test alkalinity, calcium, magnesium.
    • Calibrate pH probe and refractometer as needed.
    • Perform scheduled water change with remineralized or mixed water.
    • Clean pumps, skimmer, and check refugium health.
    • Note livestock condition and tank appearance.

    Regular maintenance makes pH management easier. Small, consistent steps lead to the best pH control in low-buffered nano tanks.

    Troubleshooting Persistent pH Problems

    Start by checking your measurement tools. Make sure your probe is calibrated right and use a good handheld meter for checks. Get rid of bad test strips and take many readings over a day to find patterns. Having accurate data is key for managing pH levels.

    Then, check if your water meets the right standards. Look at temperature (77–79°F), salinity (1.026 sg), alkalinity (8–11 dKH), calcium (375–425 ppm), and magnesium (~1380 ppm). Make small changes to avoid sudden shifts. This helps keep pH stable and improves overall water management.

    Look at how water moves and gas is exchanged. Boost surface activity, adjust skimmer air, and increase flow to remove CO2 pockets. Also, stop chasing pH swings and dose alkalinity to fix dKH levels. Slow or staggered dosing helps with long-term pH control.

    Lastly, check biological and source water impacts. Cut back on feeding or bioload if CO2 is high. Consider adding a reverse-lit refugium or more plants. Test source water hardness and ensure mixed saltwater has the right alkalinity before water changes. If you’re using inert substrate or rock, increase remineralization or dosing. If problems persist, get help from local aquarium experts or online forums with your data.

    FAQ

    What pH should I aim for in a small marine-style nano tank?

    Aim for pH stability, not a single number. For marine nano systems, keep the temperature between 77–79°F. The salinity should be around 1.026 sg, and alkalinity between 8–11 dKH. Calcium levels should be 375–425 ppm, and magnesium around 1380–1400 ppm.

    Keeping these parameters steady helps reduce pH swings. This makes your daily pH cycle more predictable and natural.

    Why do nano tanks experience bigger pH swings than larger tanks?

    Nano tanks have low alkalinity and small water volumes. Small changes in CO2, O2, temperature, or dosing cause bigger pH swings. In a nano, a CO2 increase that barely affects a large tank can drop the pH a lot.

    Managing stability and buffering is better than chasing a single pH target.

    How do daily photosynthesis and respiration cycles affect pH?

    Photosynthesis in the light period consumes CO2 and produces O2, raising pH. At night, respiration and CO2 buildup lower pH. pH usually peaks in the morning and drops at night.

    Aim for a consistent daily pattern and an acceptable range, not eliminating the cycle.

    What are the main causes of pH fluctuations I should watch for?

    Main causes include CO2 buildup and poor gas exchange, photosynthesis cycles, and oxygen changes. Temperature increases, low alkalinity, dosing mistakes, and inaccurate measurement also cause swings.

    Human errors like over-dosing buffers and rapid water parameter changes also trigger swings.

    How does my source water affect pH control?

    Source water supplies alkalinity, hardness, and dissolved gases. Soft water has low buffering capacity and is prone to pH drops. Harder water resists change.

    Use RO/DI for maximum control but remember to remineralize for marine systems. Failure to do so undermines buffering.

    Should I test my source water before mixing saltwater?

    Yes. Test source water for alkalinity and other minerals. Adjust your mixing protocol to achieve the right alkalinity in the saltwater. Measure the pH of mixed saltwater with a calibrated meter and match temperature and salinity to the tank before adding it.

    How do substrate choices influence pH stability?

    Calcareous substrates like aragonite and crushed coral dissolve slowly, adding carbonate hardness and calcium. This supports pH stability. Inert substrates do not add buffering, increasing reliance on water chemistry management and dosing.

    Live rock helps stabilize chemistry long-term, though porous rock can create microenvironments with nighttime CO2 pockets.

    Can live plants or macroalgae help reduce pH swings?

    Yes. Photosynthetic plants and macroalgae remove CO2 and produce O2 during light periods, raising pH. At night, they respire and add CO2, so plan light cycles carefully.

    A refugium on a reverse light cycle can produce oxygen during your display tank’s night, reducing the nocturnal pH dip.

    What chemical options are safe for stabilizing pH?

    Common options include alkalinity buffers (soda ash/sodium carbonate), two-part dosing systems (Part A alkalinity, Part B calcium), and kalkwasser (calcium hydroxide) dosed carefully at night. Commercial pH buffers are also available.

    Dose to maintain target dKH (8–11 dKH) instead of chasing a pH target. Use slow, well-mixed additions and avoid rapid “dumping.”

    When is the best time to dose alkalinity and calcium?

    Dose alkalinity when pH is typically lowest—usually in the early morning window. Dose calcium about 12 hours later to reduce carbonate precipitation risk. Use peristaltic dosers or slow drip additions into high-flow areas and separate Part A and Part B dosing locations/times.

    How should I monitor pH and avoid measurement errors?

    Prioritize reliable tools: quality handheld pH meters and controller probes (Neptune Apex, etc.) for continuous readings. Calibrate probes regularly with fresh calibration solutions and follow manufacturer storage instructions. Avoid relying on test strips because they degrade with oxygen exposure.

    Recalibrate if readings seem off and confirm with a handheld meter.

    How often should I test alkalinity, calcium, and magnesium?

    Test alkalinity, calcium, and magnesium weekly and adjust gradually as needed. Keep refractometer calibration current for salinity checks. Regular testing helps you trend chemistry and schedule dosing or water changes before problems arise.

    What natural methods help reduce nighttime pH drops?

    Increase gas exchange (surface agitation, skimmer air intake), ensure adequate circulation to mix oxygenated and dosed water, use a reverse-lit refugium with macroalgae, add live plants, reduce overfeeding and excessive stocking, and maintain steady temperature. Even a small planted refugium or heavily planted tank can dampen overnight CO2 buildup.

    How should I handle dosing to avoid local pH spikes or precipitation?

    Dose slowly in high-flow areas using peristaltic dosers or timed drips. Mix powdered buffers before adding and avoid “dumping” chemicals. Separate alkalinity and calcium dosing by time and location. If you use kalkwasser, feed it slowly at night to slowly raise alkalinity and pH without causing precipitation.

    How can I troubleshoot persistent pH problems step by step?

    Start by verifying measurement accuracy—recalibrate probes and confirm with a handheld meter. Check target parameters: temperature (77–79°F), salinity (1.026 sg), alkalinity (8–11 dKH), calcium (375–425 ppm), magnesium (~1380 ppm). Inspect gas exchange and circulation, review dosing practices (stop chasing pH), evaluate biological causes (reduce feeding/bioload), test source water and mixed saltwater, and consider substrate contributions. Log data and trends; if issues persist, consult local professionals or reputable forums with calibrated logged data.

    How much pH swing is acceptable in a nano reef?

    Daily swings are normal. Many successful systems tolerate modest daily swings—often within about a 1.0 pH range—so long as parameters like alkalinity, calcium, magnesium, salinity, and temperature remain stable and livestock appear healthy. Consistent patterns and trending are more important than eliminating all movement.

    What maintenance tasks support long-term pH stability?

    Keep a consistent water change schedule using properly remineralized RO/DI or prepared saltwater; test and adjust alkalinity, calcium, and magnesium weekly; calibrate refractometers and pH probes regularly; clean protein skimmers and maintain pumps/powerheads for good circulation; and maintain refugium/macroalgae health. Observe livestock for growth and behavior as a practical stability indicator.

    When should I seek outside help for pH issues?

    If you’ve followed the troubleshooting checklist—verified instruments, corrected parameters gradually, improved gas exchange and dosing, and logged trends—and yet can’t stabilize pH, seek help. Provide calibrated probe/controller logs, recent test results for temperature, salinity, alkalinity, calcium, magnesium, and a description of dosing and stocking so professionals can diagnose from trends.

  • Total Dissolved Solids: Why This Metric Matters for Shrimp Keepers

    Total Dissolved Solids: Why This Metric Matters for Shrimp Keepers

    Total Dissolved Solids (TDS) are the combined concentration of salts, minerals, and small amounts of organic matter in your aquarium water. They are reported in parts per million (ppm). You can also get them from conductivity readings in microsiemens.

    As a shrimp keeper, you should care because TDS affects osmotic balance and mineral availability. This includes calcium and magnesium, which shrimp need for molting and growth. Keeping TDS consistent supports reproduction and reduces stress. Sudden changes in TDS can be as harmful as extreme values.

    TDS is connected to other parameters you monitor, like pH, KH, GH, and nitrate. But it’s not a replacement for those specific tests. Think of TDS as a quick indicator of dissolved ions and organics that helps you spot changes fast.

    Regular TDS testing gives you an early warning for problems. Handheld TDS meters and conductivity meters are common tools in the hobby. They offer quick diagnostics. Use them alongside targeted tests: nitrates should stay below 20 ppm and ideally under 10 ppm. Elevated nitrates raise TDS and signal the need for water changes or biological adjustments.

    Understanding TDS measurement methods and the importance of TDS testing helps stabilize your tank environment. It protects sensitive species. Keep readings steady, check regularly, and use the right TDS measurement methods to maintain healthy shrimp colonies.

    Understanding Total Dissolved Solids (TDS)

    A detailed illustration of various methods for measuring Total Dissolved Solids (TDS) in a laboratory setting, focusing on an arrangement of equipment on a clean, modern lab table. In the foreground, a digital TDS meter displays readings, with a beaker containing clear water and dissolved solids beside it. In the middle ground, a scientist in professional attire uses a refractometer, carefully reading the measurement through an eyepiece. The background features shelves lined with scientific books and glassware, with soft, focused lighting highlighting the equipment. The atmosphere conveys a sense of professionalism and precision, with a serene color palette of blues and whites, underlining the importance of accurate water quality assessment for shrimp keepers. The image is crisp and clear, shot from a slightly overhead angle to provide depth.

    TDS measures the total dissolved ions and small organics in your aquarium water. It’s like a broad gauge for dissolved substances like calcium and magnesium. It also includes sodium, potassium, and some dissolved organics from food or plant decay.

    Most hobbyist TDS meters measure electrical conductivity to estimate concentration. This means readings show ionic content more than nonionic organics. When you learn how to test for TDS, expect meters to report parts per million based on conductivity, not a chemical inventory.

    TDS does not tell you which ions are present. To know calcium and magnesium, you need GH (general hardness) tests. Use KH test kits for carbonate hardness. Specific ion tests reveal nitrate, phosphate, and other contaminants. Use TDS measurement methods as a quick screen, not a substitute for targeted assays.

    Remember conversion factors and temperature. Many meters convert conductivity to ppm using a fixed factor. Temperature affects readings, so look for devices with automatic temperature compensation for consistent results. Follow manufacturer guidelines when you practice how to test for TDS.

    • Nitrate (NO3–) adds to TDS and can be a major inorganic contributor.
    • Aim to keep nitrate below 20 ppm and ideally under 10 ppm for shrimp systems.
    • High nitrate will raise ionic TDS and stress shrimp over time.

    High organic load from uneaten food, decaying leaves, or driftwood can raise dissolved organics. Those organics may not conduct well, yet they can worsen water quality and indirectly affect TDS readings. Regular maintenance, filtration, and targeted testing for nitrate and phosphate help you interpret TDS measurement methods correctly.

    The Importance of TDS for Shrimp Health

    A serene underwater scene showcasing the importance of Total Dissolved Solids (TDS) for shrimp health. In the foreground, a vibrant aquascape features healthy, colorful shrimp actively exploring lush green plants and fine substrate. The middle ground includes a clear testing kit with a TDS meter displaying a reading, symbolizing monitoring. Bubbles rise gently from a filter, emphasizing water quality. The background reveals a soft diffused light filtering through the water surface, creating a tranquil atmosphere. The scene is captured with a shallow depth of field, enhancing the shrimp’s vivid colors and the clarity of the TDS meter. The overall mood is one of serenity and health, underscoring the essential role of TDS in maintaining a thriving shrimp habitat.

    Shrimp need stable ionic levels and minerals to molt and grow shells. Low calcium and magnesium can lead to failed molts. This shows why TDS testing is key: it alerts you to any imbalances before they cause problems.

    Reproduction in shrimp is also tied to water chemistry stability. Berried females and young shrimp struggle with changes in their environment. Regular TDS testing helps keep the minerals right for breeding and growing young shrimp.

    Behavior can hint at stress in shrimp. Quick changes in TDS can cause them to hide, stop eating, or even die. Watching their behavior and testing TDS regularly helps you catch and fix issues fast.

    Even with good TDS numbers, microorganisms can be a problem. Bacteria, hydra, and vorticella grow in dirty water. They stress shrimp and can hide TDS issues.

    To fight these issues, use TDS tests with better feeding and filtration. Reducing food and improving biological filters helps. These steps help control organic matter and support TDS testing goals.

    Make sure to have a TDS test kit and an electronic meter for regular checks. Also, test for nitrate, GH, and KH to get a complete picture. Following best practices for TDS testing helps you manage your tank better and prevent health issues.

    Optimal TDS Levels for Different Shrimp Species

    Knowing the right TDS ranges is key for your water setup. For Neocaridina like Cherry shrimp, aim for 150–300 ppm TDS. Some strains can handle up to 400–450 ppm if other water conditions are just right.

    Caridina species, like Crystal and Caridina cantonensis, need even lower TDS levels. Hobbyists often aim for 80–200 ppm. Wild bee shrimp prefer very soft water, closer to the lower end of this range.

    Amano shrimp and larger species can handle higher TDS levels. But, it’s more important to keep mineral levels stable than to focus on high TDS numbers.

    Don’t forget to check GH and KH levels along with TDS. Calcium and magnesium are key for molting and successful broods, not just TDS.

    • Use Best practices for TDS testing: log TDS versus life events like molts and spawning to find species-specific setpoints.
    • Follow TDS testing guidelines when mixing RO water and tap water to reach target ranges.
    • Learn How to test for TDS with a reliable meter, calibrated regularly for accurate reads.

    Acclimate shrimp slowly when moving them between tanks with different TDS levels. Sudden changes can stress them and increase mortality.

    High TDS levels can be a sign of neglect or forgotten water changes. A case showed amano shrimp dying in such conditions.

    To keep TDS levels optimal, do regular water changes and mix RO water when needed. Monitor GH, KH, and TDS together to fine-tune your water for your shrimp’s needs.

    Testing Methods for TDS

    You can test TDS with simple, affordable tools. Hobbyists often use handheld digital TDS meters and conductivity meters. These are sold for aquaria and hydroponics. Brands like Milwaukee, Hanna Instruments, and Apera are common choices for reliable readings in ppm or µS/cm.

    Before you test, prepare a clean sample. Rinse the probe with tank water to avoid contamination. Dip the probe a few inches below the surface, away from film or scum. Wait for the readout to stabilize, then record the value as part of your TDS testing process.

    Follow the device instructions for cleaning and storage. Many meters recommend rinsing with distilled water and storing the protective cap with fluid. Replace probes or send the meter for service when accuracy drifts after months of use.

    Calibrate meters periodically using manufacturer-specified solutions. Calibration keeps readings accurate across the TDS testing process. If your meter lacks automatic temperature compensation (ATC), test at a consistent tank temperature or apply a manual correction to avoid skewed results.

    Use TDS testing equipment alongside chemical test kits for a fuller picture. A TDS test kit gives a quick total solids snapshot. Pair it with a nitrate test kit and GH/KH kits to identify specific ions that affect shrimp health.

    Keep this routine simple for daily monitoring. TDS meters offer fast guidance for water changes and RO/DI blending. Use the data to spot trends and adjust your maintenance schedule before small shifts become problems.

    • Handheld digital TDS meter: quick ppm readouts
    • Conductivity meter: useful for µS/cm and cross-checks
    • Calibration solution: required for periodic accuracy checks
    • Complementary kits: nitrate, GH, KH for detailed chemistry

    Proper care and a clear TDS testing process will keep your readings meaningful. Regular checks make it easier to protect sensitive shrimp species and to respond fast when water chemistry changes.

    Maintaining Appropriate TDS Levels

    Make changes slowly to protect your shrimp. Big changes in TDS can shock them, hurting Caridina species. Try to change TDS levels over hours or days, not all at once.

    Test the water before making changes. Check the TDS of your source and tank water. Keep a record of these tests. This helps you mix tap and RO/DI water and know how much remineralizer to add.

    Here are some ways to adjust TDS:

    • Change the water with low-TDS water or mix RO/DI with tap water to reach your goal.
    • Use remineralizers or commercial buffers from brands like Seachem and ADA to raise GH or TDS.
    • Feed less and remove extra leaf litter or driftwood to avoid high organic levels.

    Change some water regularly. Weekly or biweekly changes are good for many tanks. Do more often if you feed a lot, have a lot of fish, or nitrates are high.

    When increasing GH or KH, do it slowly. For example, a 10-gallon tank’s TDS rose to 1800 µS, causing shrimp loss. After stabilizing KH at about 4 dKH and GH around 7–8 (about 60 ppm), the keeper mixed RO water to target TDS near 600 µS. The shrimp then recovered.

    Use a reliable meter to test for TDS. Also, use test strips or lab kits for extra checks. Test before big water changes and keep a log to guide your mixing and remineralization.

    When increasing TDS, add GH boosters in small amounts and test after each addition. When decreasing TDS, plan water changes and measure until you reach a safe level for your species.

    Troubleshooting High or Low TDS Readings

    Start by checking your TDS meter. It can lose accuracy over time. Calibrate it before testing water or adding chemicals. This ensures your readings are correct.

    High TDS can come from not changing the water often. It can also happen if you overfeed or use hard water. Check your substrate and filters for trapped waste that adds to TDS.

    • Immediate fixes for high TDS:
    • Do partial water changes with low-TDS water. Aim to replace 20–50% of the water, depending on your shrimp’s sensitivity and the TDS level.
    • Reduce feeding, vacuum the substrate, clean filters, and remove rotting leaves or excess driftwood that leach organics.
    • Check nitrates; if they’re over 20 ppm, increase water changes and boost biological filtration.

    Low TDS often results from using RO/DI water without adding minerals. It can also come from using too much distilled water or softening tap water too much. Low minerals can harm shrimp molting and reproduction.

    • Fixes for low TDS:
    • Add a reputable remineralizer or measured aquarium salts and calcium-magnesium supplements to increase GH and TDS slowly.
    • Keep an eye on GH and KH as you adjust TDS to ensure mineral ratios are right for shrimp health.

    Follow TDS testing guidelines closely when making changes. Make small adjustments and test daily. Sudden changes can stress shrimp and lead to death.

    A hobbyist once stabilized GH and KH, aiming for a TDS of 600–800 µS. They learned the hard way that sudden water changes and improper acclimation can kill amano shrimp. Always acclimate slowly and double-check mineral and TDS levels before making changes.

    Troubleshooting TDS involves both measurement and aquarium care. Use the TDS testing process and guidelines as your guide. Confirm meter accuracy, find the cause, make small fixes, and watch until things stabilize.

    Regular Monitoring: A Must for Shrimp Keepers

    It’s important to test your aquarium water regularly. For small, stable tanks, do it once a week. If you make big changes or add new fish, test more often, like two or three times a week.

    Keep a log or digital record of your tests. Write down the date, TDS reading, and other important details. This includes water changes, feeding, and any new shrimp or algae problems.

    • Test source water—tap and RO—to know baseline values.
    • Test after water changes to confirm mixing ratios.
    • Test before adding sensitive shrimp or making big adjustments.

    Looking at trend data is very helpful. It shows slow changes in TDS levels. This helps you plan when to do water changes.

    For accurate TDS testing, use a meter and also check nitrate and GH/KH levels. This gives a complete picture of your water’s health.

    Be consistent with your TDS testing and follow guidelines. This helps you make smart decisions and avoid overreacting to one reading.

    1. Record baseline values for source and tank water.
    2. Schedule routine tests and log each result.
    3. Compare trends, not single numbers.
    4. Adjust feeding and filtration to control ion buildup.

    If TDS levels are rising, cut back on feeding. Good biological filtration helps keep the water clean and prevents problems.

    Follow simple TDS testing guidelines and keep detailed records. Your notes will guide you to a healthy environment for your shrimp. Regular checks make caring for your tank easier and more predictable.

    Professional Help for TDS Issues

    If you notice many shrimp deaths or molting problems, even with stable TDS readings, it’s time to get help. Take water samples from your source and tank to the experts. They can test both for you.

    Seeing high TDS levels that don’t go away with water changes or RO blending is a red flag. Visit local aquarium stores with shrimp experts. They can test your water, suggest RO/DI units like APEC or iSpring, and recommend remineralizers from Seachem or AquaVitro.

    For complex tanks and sensitive shrimp, getting the mineral balance right is key. Reach out to experienced hobbyists or forums for your shrimp species. They can guide you on TDS testing and acclimation.

    • Use a TDS test kit at home, then share those readings with professionals for faster diagnosis.
    • Consider a water testing lab if you suspect specific contaminants; they provide detailed ion analysis that a basic TDS meter cannot.
    • Ask professionals to help select and calibrate TDS testing equipment so your meters stay accurate over time.

    Before you meet with experts, keep a record of your water parameters and care actions. Note any dosing, substrate changes, and water sources. This helps professionals spot patterns and rule out simple errors.

    When looking for help, choose places that show they know how to use TDS test kits and follow guidelines. This approach cuts down on uncertainty and helps you get your shrimp’s water stable again.

    Conclusion: The Role of TDS in Successful Shrimp Keeping

    Testing for TDS is key to keeping your shrimp healthy. It shows you the dissolved ionic load in the water. This helps prevent osmotic stress, failed molts, and reproductive issues.

    It’s also important to test for nitrate, GH, and KH. This gives you a full picture of your water quality. It helps avoid surprises that single metrics can miss.

    To test TDS well, use a reliable TDS meter. Calibrate it and log your readings. Test regularly, matching the schedule to your tank’s stability.

    Control feeding and organic inputs. Use targeted water changes or RO blending to adjust TDS levels. This keeps them in the right range for your shrimp.

    Remember, different shrimp species need different TDS levels. Neocaridina can handle higher ranges, while Caridina need lower, more stable levels. Keep your filtration good and feed wisely to prevent problems.

    Treat your water chemistry as a whole. If you face ongoing issues, get professional help. This can help solve unexplained problems and protect your shrimp.

    FAQ

    What is Total Dissolved Solids (TDS) and how is it reported?

    Total Dissolved Solids (TDS) is the sum of salts, minerals, and some organic matter in water. It’s usually shown in parts per million (ppm). You can also see it in microsiemens per centimeter (µS/cm) from electrical conductivity.

    TDS meters measure dissolved ions, not all organic matter. This means they show ionic content better than nonionic organics.

    Why should you, as a shrimp keeper, care about TDS?

    TDS affects the balance of minerals in water, which is key for shrimp. It helps with molting, growth, and reproduction. Keeping TDS stable prevents sudden changes that can harm shrimp.

    TDS is a quick way to check dissolved ions and organics. But, it’s not a substitute for specific tests like pH, GH, KH, or nitrate.

    How does TDS relate to other water quality parameters like pH, GH, KH, and nitrate?

    TDS is connected to GH and KH because they measure mineral content. Nitrate also adds to TDS. Aim for nitrate levels below 10 ppm.

    What are the common TDS measurement methods and TDS testing equipment?

    Most hobbyists use handheld digital TDS meters and conductivity meters. These tools show ppm or µS/cm readings. Some meters have automatic temperature compensation (ATC).

    TDS test kits are available, but meters are the usual quick check. Popular brands and general-purpose meters are widely used by shrimp keepers.

    How do TDS meters work and what are their limitations?

    TDS meters estimate concentration from electrical conductivity. They accurately show ionic content but are less sensitive to nonionic organics. Temperature affects conductivity, so meters with ATC adjust for this.

    TDS meters can’t tell you which ions are present. Use GH/KH and specific ion or nitrate tests for that detail.

    What TDS ranges are appropriate for common shrimp groups?

    Neocaridina shrimp, like Cherry shrimp, usually tolerate 150–300 ppm TDS. Some strains can handle up to 400–450 ppm. Stable midrange values are best.

    Caridina shrimp, such as Crystal shrimp, often need lower TDS ranges, commonly 80–200 ppm. Some wild bees require very soft water. Amano and larger driftwood-associated species are often more tolerant of higher TDS but need balanced minerals.

    How should you test TDS step-by-step with a handheld meter?

    Rinse the probe with tank water to avoid contamination. Dip the probe into a sample away from surface scum and wait for the reading to stabilize. Record the value. Rinse and store the meter per the manufacturer’s instructions.

    Calibrate periodically with the recommended calibration solution. Replace probes or recalibrate after months of use if accuracy drifts.

    How often should you test TDS?

    Test at least once a week in stable, lightly stocked tanks. Increase frequency to 2–3 times weekly during water-chemistry adjustments, after adding livestock, or while troubleshooting problems.

    Test source water (tap and RO) and after water changes to verify mixing ratios when adjusting TDS.

    What are best practices for TDS testing and record keeping?

    Maintain a log of date, TDS reading, GH, KH, nitrate, recent water changes, feeding changes, and any notable life events (e.g., molts, spawnings). Record trends to spot slow drift caused by evaporation, ion buildup, or overfeeding.

    Test source water before changes and mix RO/DI and tap water according to recorded target TDS. Calibrate and verify meter accuracy before acting on unusual readings.

    What causes high TDS and what immediate fixes can you use?

    Common causes include infrequent water changes (nitrate/ion buildup), overfeeding and organic breakdown, hard tap water, or adding salts/minerals too freely. Immediate fixes: perform partial water changes with low-TDS or RO/DI-mixed water (replace 20–50% depending on sensitivity), reduce feeding, clean filters and substrate, and remove decaying organics.

    Check nitrate—if >20 ppm (ideally >10 ppm), increase water changes and biological filtration. For severe or persistent high TDS, seek professional testing of source water or expert help.

    What causes low TDS and how do you safely raise it?

    Low TDS often results from using pure RO/DI or distilled water without remineralization. To raise TDS gently, use aquarium remineralizers or GH boosters (brands like Seachem, ADA, AquaVitro are commonly used) to add measured amounts of calcium and magnesium.

    Monitor GH and KH while raising TDS to ensure proper mineral balance for molting and reproduction.

    How quickly should you change TDS when adjusting tanks with sensitive shrimp?

    Adjust TDS gradually. Sudden large changes can cause osmotic shock. Change TDS incrementally over hours or days when possible—

    especiall

    y for delicate Caridina species. When performing water changes, match temperature and aim for small stepwise changes in mineral concentration and TDS to avoid stress, failed molts, or mortality.

    How do organic loads and microorganisms affect TDS and shrimp health?

    High organic load from uneaten food, decaying plant matter, leaf litter, and driftwood increases dissolved organics and can indirectly raise perceived water-quality issues even if ionic TDS is moderate. Microorganisms (bacteria, hydra, vorticella) proliferate in tanks with high organic load and poor maintenance, complicating shrimp health. Cut back feeding, remove excess organics, and improve biological filtration to reduce blooms that can affect TDS-related conditions.

    What equipment should you pair with a TDS meter for thorough monitoring?

    Pair a reliable TDS or conductivity meter with a nitrate test kit and GH/KH test kits. Use RO/DI units (brands like APEC or iSpring) if you need low-TDS source water, and consider remineralizers (Seachem, AquaVitro) to adjust minerals. Professionals or hobby shops can help select and calibrate equipment.

    What are the recommended actions if your tank shows very high TDS readings?

    Verify meter accuracy via calibration. If confirmed high, reduce TDS with partial water changes using low-TDS or RO-mixed water, reduce feeding, clean filters and substrate, and remove decaying organics. Monitor nitrate—if >20 ppm, perform more frequent water changes and improve biological filtration. For severe or persistent high TDS, seek professional testing of source water or expert help.

    When should you seek professional assistance for TDS-related issues?

    Seek help if you experience repeated unexplained mortalities or widespread molting failures despite stable readings, persistent high TDS that doesn’t respond to standard water changes and RO blending, or complex multispecies tanks where delicate breeding stock require precise mineral composition. Local aquarium stores, water-testing labs, and experienced hobbyist communities can offer targeted diagnostics and solutions.

    Can you give practical tips and an example showing the consequences of neglected TDS?

    Test source and tank water before changes, log trends, calibrate your meter, and adjust slowly. Reduce feeding and maintain good biological filtration to prevent organic buildup. For example, a hobbyist reported TDS climbing to very high values (reportedly ~1800 µS), which correlated with livestock losses, including amano shrimp. After stabilizing KH and GH (KH ≈ 4 dKH, GH ≈ 7–8) and lowering TDS by mixing RO to a target ~600 µS, the tank recovered. The lesson: slow, measured corrections and attention to mineral balance matter.

    How should you combine TDS testing with other routine maintenance?

    Use TDS meters for quick daily or weekly checks, and combine them with regular nitrate, GH, and KH tests. Maintain scheduled partial water changes (weekly or biweekly sized to stocking and feeding). Cut feeding if nitrate or organic load climbs. Log chemistry and life events (molts, spawnings) to find your species-specific ideal TDS setpoints and follow best practices for TDS testing and adjustment.

    What are the top takeaways about TDS for shrimp keepers?

    Regular Testing for TDS gives a fast, actionable indicator of dissolved ionic load and helps prevent osmotic stress, failed molts, and reproductive issues. Use a reliable TDS meter, calibrate it, test regularly, and log trends. Combine TDS readings with nitrate and GH/KH testing, control feeding and organic inputs, and adjust TDS gradually via water changes or RO blending. Match TDS and mineral balance to the shrimp species you keep—Neocaridina are more forgiving, Caridina often need lower and more stable TDS—and seek professional help when problems persist.

  • How to Safely Remove Planaria and Hydra from a Shrimp Tank

    How to Safely Remove Planaria and Hydra from a Shrimp Tank

    Keeping a planted shrimp tank adds calm and color to your home. But, when pests like planaria and hydra show up, they disrupt this peace. This guide offers a safe way to remove these pests without harming your shrimp and snails.

    The method involves adding aquarium salt and using Fenbendazole (Panacur-C) carefully. Start by adding 2–3 grams of salt per liter slowly over eight hours. This helps avoid shocking your fish. For U.S. tanks, use an online calculator to convert grams per liter to grams per gallon.

    Accuracy is key. The team used a digital scale to measure 225 mg of Fenbendazole per dose. They mixed it with water conditioner, a special blend, and a vitamin/amino acid supplement. This mixture took about 15 minutes to dissolve and was then applied to the tank.

    The treatment plan was straightforward: one full dose followed by another 24 hours later. This was done over 48 hours. All pests were seen to die and detach from the glass. Thankfully, no shrimp or snail died, though nerite snails were removed as a precaution.

    This case shows a successful way to handle pests. But, always be careful with medication and salt. Make sure to measure accurately, mix well, and watch closely. Different shrimp and invertebrates may react differently. So, think about your tank’s inhabitants before starting. If unsure, seek advice from pest control services or an aquatic vet.

    Understanding Planaria and Hydra: The Pests in Your Tank

    A detailed and intricate depiction of planaria and hydra in a vibrant aquarium setting. In the foreground, several translucent planaria with a pearlescent sheen, displaying their flat bodies and characteristic shapes, are creeping across a richly textured substrate of sand and small pebbles. In the middle ground, delicate hydra rise from the rocks, showcasing their elongated bodies and tentacles extended toward light, capturing the essence of their predatory nature. The background features lush aquatic plants softly illuminated by warm, natural lighting, creating a serene atmosphere. The image is captured from a close-up angle, highlighting the fascinating details of these small organisms. The overall mood is educational and captivating, perfect for enhancing understanding of these freshwater pests.

    You might see tiny, soft creatures on plants, glass, or the bottom of your tank. Planaria are flatworms, often from the genus Dugesia, that move smoothly across surfaces. Hydra, on the other hand, are small cnidarians with a long body and stinging tentacles. Both are common in planted tanks and might seem harmless at first.

    Understanding planaria biology helps you see why they spread quickly. They reproduce by splitting themselves and can grow back from pieces. This makes it hard to control them if you ignore early signs. Hydra biology shows another risk: they make clones and can catch small shrimp or fry with their tentacles.

    These pests act like common pests in your tank. A big problem is they stress shrimp, compete for food, and lower the survival rate of baby shrimp. Hydra can hurt or eat shrimp larvae, while planaria show there’s too much organic matter that feeds more pests.

    Both pests do well in tanks with too much waste, too much food, or poor care. They can come in on live plants, substrate, or decorations. Spotting them early is key when dealing with pests, so you can stop their spread and damage.

    • Observe behavior: hydra attach to surfaces and extend tentacles to feed.
    • Watch movement: planaria glide smoothly and flatten when touched.
    • Check tank history: recent plant additions or used decor raise the risk.

    Knowing what pest you have is important for effective management. The urgency and method differ between planaria and hydra. Take time to confirm which pest you face before you choose treatments or make changes to your maintenance routine.

    Assessing the Infestation Level in Your Aquarium

    A close-up view of a healthy shrimp tank with signs of aquarium pests, specifically planaria and hydra. In the foreground, sharp focus on the shrimps navigating through lush aquatic plants, while a few small planaria worms cling to the glass and substrate. In the middle ground, the vibrant colors of the aquatic plants contrast with the subtle, translucent forms of hydra visible on the leaves. The background features a gentle blur of the tank’s filtration system and soft bubbles rising, creating a peaceful atmosphere. Soft, natural lighting filters through the tank, highlighting the details of the pest signs. The overall mood is calm but alert, emphasizing the need for observation and maintenance in aquatic habitats.

    Begin by slowly looking over your tank. Check the glass, plants, substrate, filter intake, and decorations for pests. Look for planaria, which move like flat worms, and hydra, which look like small stalks with tentacles or detached forms. Mark any signs of pests you find.

    Count how many pests you see and where they are. If pests are all in one spot, you might be able to remove them by hand. But if they’re everywhere, you’ll need more serious methods to get rid of them.

    Keep a close eye on your shrimp and shrimp fry. Look for any missing or injured shrimp, less feeding, or sudden changes in behavior. These signs can tell you if hydra are eating your shrimp.

    Check the water quality and organic load in your tank. Test the ammonia, nitrite, and nitrate levels. Also, lift the substrate to see if there’s a lot of detritus. A high organic load often means more pests, helping you decide how to tackle the problem.

    • Think about any new additions to your tank, like plants or fish. These can bring pests with them.
    • Check the filter and intake areas for debris. These spots can hide a lot of pests.
    • Keep track of when and how often you see pests. This can help you understand their habits.

    Use what you’ve learned to pick the best way to deal with pests. For small problems, you might just need to remove them by hand or use DIY methods. But for bigger issues, you might need to use chemicals like fenbendazole, as explained later in the article.

    Preparing Your Tank for Pest Removal

    First, move sensitive animals to a safe place. Remove delicate snails and other weak invertebrates. Many keepers take out nerite snails to lower risk during treatments.

    Calculate your tank’s volume carefully. Convert gallons to liters to plan the right amount of salt and Fenbendazole. This avoids overdosing and ensures safe pest removal.

    Use precise tools for measuring. A digital scale with 0.01 g accuracy is best for weighing Fenbendazole. Don’t guess from a packet without knowing the active ingredient percentage.

    Get your carrier solution and mixing tools ready before adding medication. Use a water conditioner like Seachem Prime and a commercial blend like Microbe-Lift Special Blend. Adding a vitamin or amino acid supplement can help dissolve Fenbendazole; it usually takes about 15 minutes.

    Introduce salt slowly to avoid osmotic shock. Plan to raise salinity gradually over eight hours or more. This slow approach reduces stress on shrimp and surviving snails while you deal with pests.

    Check how sensitive your species are to salt and Fenbendazole. Look up the tolerance for your shrimp strain and other invertebrates. Be prepared to remove certain species if risks are too high to keep the treatment safe.

    Have monitoring tools ready and set a schedule. Keep test kits for ammonia, nitrite, nitrate, and pH on hand. Watch shrimp behavior and signs of pest die-off closely during treatment. This way, you can act quickly if conditions change.

    • Quarantine plan for sensitive livestock
    • Volume calculations and dosing conversions
    • Accurate weighing equipment
    • Carrier solution and dissolving supplies
    • Gradual salt introduction via trickle
    • Species sensitivity checklist
    • Monitoring schedule and test kits

    By following these steps, you can effectively prevent pests and work with professionals if needed. This ensures a safe and healthy environment for your tank’s inhabitants.

    Natural Removal Methods for Planaria and Hydra

    You can fight planaria and hydra without harming your shrimp. Start with gentle methods that target their food and home. Reduce feeding, clean up leftover pellets, and vacuum the substrate to remove organic matter.

    Introduce predators for biological control if your tank can handle them. Assassin snails and certain small loaches eat flatworms. Make sure they are safe for your shrimp before adding them.

    • Use DIY pest prevention traps with inverted cups baited with shrimp pellets or liver to catch planaria overnight.
    • Manually remove hydra by siphoning or gently scraping them from plants and décor during routine maintenance.
    • Reduce light slightly to limit algal growth that feeds pests, but avoid extreme temperature or light shifts that could stress shrimp.

    Quarantine and dip new plants to stop pests from entering the main tank. This is a key part of integrated pest management to prevent infestations.

    Treat mild problems with natural pest repellents first. If the problem gets worse, you might need to use chemicals. But always keep your shrimp safe. Using a mix of natural and chemical methods is the best way to control pests in your shrimp tank.

    Chemical Treatments: Options and Precautions

    When natural methods don’t work, chemical treatments can be effective. Experienced hobbyists use Fenbendazole, sold as Panacur-C, for planaria and hydra in shrimp tanks. It’s important to weigh the risks and follow strict protocols before using it.

    Getting the dosage right is key. Panacur-C packets have different active percentages. You need to calculate the Fenbendazole active ingredient accurately. Use a digital scale that’s accurate to 0.01 g. Don’t just rely on the packet weight.

    A documented protocol used 225 mg of Fenbendazole active ingredient per dose. The powder was mixed with Prime, Microbe-Lift Special Blend, and a vitamin/amino acid solution. It took about 15 minutes to dissolve fully before adding it to the tank.

    Adding a second dose 24 hours after the first helps. This ensures a 48-hour coverage window. It’s useful when dealing with pests that reproduce quickly.

    Using salt as a co-treatment also helped. Aquarium salt was added slowly over eight hours or more. This increased osmotic stress on pests. Add salt gradually to avoid stressing shrimp or snails.

    Keep a close eye on your livestock during treatment. Some shrimp species and sensitive invertebrates may react differently. Be ready to remove or quarantine fragile inhabitants if unsure about their tolerance.

    Remember, Fenbendazole is an off-label veterinary drug for aquarium use. Check local regulations before using it. Follow safe drug-handling practices. Research species-specific sensitivity and consult an aquatic veterinarian or experienced aquarists when in doubt.

    If you’re unsure about medicating your tank or the infestation persists, consider professional pest removal. Aquarium maintenance services that use integrated pest management techniques can help. They can assist with dosing, monitoring, and long-term management.

    Chemicals should be part of a broader plan. Include regular observation, cleanup, and habitat control. Careful application, precise dosing, and planning will improve your chances of dealing with pests in a shrimp aquarium.

    Manual Removal Techniques

    Begin by carefully siphoning hydra and planaria from the substrate. Use a small siphon or turkey baster to remove visible pests from gravel and glass. Do this in short sessions to avoid stressing shrimp or plants.

    Scrape fragile hydra gently off plants and decorations. Hold the item steady and use the siphon tip to draw the pest away. For heavy spots, remove the decoration temporarily for cleaning or quarantine.

    • Place baited planaria traps on the substrate overnight. An inverted cup with a small amount of liver or shrimp pellets will attract and concentrate planaria for easy pickup.
    • Check traps at first light and dispose of captured pests outside the tank.
    • Repeat traps nightly until counts drop noticeably.

    When plants or ornaments show heavy infestation, take them out and rinse in a separate container. Inspect leaves and crevices, then reintroduce items only after a short quarantine. This step reduces hitchhiking pests without chemicals.

    Keep frequent partial cleanings to lower organic load and break pest life cycles. Small water changes and targeted gravel siphoning remove eggs, segments, and food that sustain populations. Combine this habit with reduced feeding for best effect.

    1. Perform a light siphon of substrate twice weekly while you monitor shrimp behavior.
    2. Use baited planaria traps two to five nights in a row depending on infestation level.
    3. Quarantine or clean infested decor until no pests appear for several days.

    Pair manual pest removal with natural controls and aquarium maintenance routines. Reducing excess food, quarantining new plants, and regular tank checks keep reinfestation risk low. This hands-on approach works well when you’re dealing with pests early and want to avoid chemicals.

    Preventing Future Infestations

    Quarantine new plants, substrate, and décor before adding them to your tank. Use a separate tank or a quick plant dip to stop pests like planaria and hydra. This step helps avoid bigger problems later.

    Keep the tank clean by not overfeeding and doing regular water changes. Vacuum the substrate during these changes to remove food and waste. A clean tank makes it less likely for pests to come back.

    Check the glass, plants, and filter inlets weekly for pests. Early detection means you can use gentler treatments. Keep a record of what you find and when you treat it to spot patterns.

    • Use biological controls with care. Make sure they’re safe for your shrimp. The wrong choice can cause more problems.
    • Try natural pest repellents like plant dips or safe extracts for regular care. These methods are safe for shrimp when used right.
    • Adopt integrated pest management practices. Mix monitoring, habitat control, biological options, and targeted treatments as needed. This way, you use fewer chemicals.

    Keep your tank clean by cleaning filters, removing dead plants, and keeping water stable. Healthy shrimp are more able to fight off pests, reducing the need for frequent treatments.

    If pests come back, look for recent changes like new plants or different feeding. Use your records to find the cause quickly and adjust your prevention plan.

    Long-term Strategies for a Healthy Shrimp Tank

    Keep a mindset of integrated pest management for your shrimp tank. Use cultural controls like careful feeding and regular maintenance. Also, add mechanical methods like manual removal and traps.

    Include biological options, such as compatible predators. Use chemicals only when necessary.

    Make a schedule for water testing and adjustments. Stable water parameters help reduce stress on shrimp. This makes the tank less welcoming to pests.

    Monitor ammonia, nitrite, nitrate, pH, and temperature regularly. This prevents sudden population booms.

    Create a routine maintenance plan and stick to it. Include weekly water changes, monthly filter checks, and plant trimming. These actions keep your tank clean and predictable.

    Have an emergency plan ready for recurring outbreaks. Keep supplies like a siphon, aquarium salt, and a digital scale on hand. A step-by-step checklist is helpful during pest emergencies.

    • Use mechanical removal first when practical.
    • Introduce compatible biological controls with caution.
    • Reserve chemical treatment for targeted interventions only.

    Educate yourself and use community resources. Ask at local fish stores like Petco or Aquatic Arts. Consult aquarium forums and consider professional pest removal firms for tough cases. Expert help can save time and protect your shrimp.

    Track your results and adjust your plan. Document dates of interventions, water readings, and shrimp behavior. Over time, this record will improve your pest management plan.

    Conclusion: A Thriving Shrimp Environment

    You can take back control of your tank by following safe steps to deal with pests. For removing planaria and hydra, a mix of salt and fenbendazole worked well. Start by adding 2–3 g/L of salt slowly over eight hours. Then, use 225 mg of fenbendazole in a water mix with supplements, repeating the dose after 24 hours.

    Begin with mild infestations by removing pests manually and using natural methods. Use chemicals only for bigger problems or when you’re sure of the dosing. Keep sensitive invertebrates safe by quarantining them during treatment and watching water and fish closely.

    To keep pests away, use a mix of methods. Quarantine new items, feed less, and stick to a regular cleaning schedule. Always have a plan and supplies ready for emergencies. Being proactive and watching your tank closely is key to a healthy shrimp home.

    Next, figure out how bad the problem is and decide on a plan. If you’re unsure, ask experts or professionals for help. This way, you can make sure your tank and its creatures stay safe and happy.

    FAQ

    What are planaria and hydra, and why are they a problem in shrimp tanks?

    Planaria are flatworms and hydra are small cnidarians. They live in freshwater tanks and eat biofilm and detritus. They can reproduce fast and are pests in shrimp tanks.

    They compete with shrimp for food and can harm shrimp fry. Their presence also means there’s too much organic matter in the tank.

    How can I tell whether I have planaria or hydra?

    Look at their behavior and appearance. Hydra attach to surfaces and have tentacles. Planaria are flat and glide across surfaces.

    Check glass, plants, and substrate to see which pest you have. This will help you choose how to remove them.

    How serious should I consider an infestation — when do I escalate treatment?

    Check how many pests you have and where they are. A few might be removed by hand or traps. But if there are many, you need a stronger plan.

    Also, check the water quality. High nitrate levels often mean a big infestation problem.

    What basic assessment steps should I perform before any treatment?

    Look for pests on glass, plants, and substrate. Watch your shrimp for stress or missing fry.

    Test the water and check the substrate for detritus. Think about recent additions to the tank. And know your tank’s size in liters or gallons.

    Are natural or manual methods effective for planaria and hydra?

    Yes, for light infestations. Cut down on feeding and clean the substrate well. Use traps for flatworms and scrape off hydra.

    Biological controls like predators or assassin snails can also help. But make sure they won’t harm your shrimp.

    When should I consider chemical treatments?

    Use chemicals for moderate to severe infestations. They can be effective but are risky to shrimp and snails.

    Be careful with dosing and monitor your tank closely. Always check if it’s legal and safe before using chemicals.

    What chemical protocol has been reported to achieve 100% eradication of planaria and hydra?

    A successful method used Fenbendazole and aquarium salt. It involved two doses of Fenbendazole with salt added slowly.

    This method killed all pests without harming the shrimp or snails. But it’s important to follow the exact steps and be careful.

    How do I calculate and measure Fenbendazole correctly?

    First, find out how much active ingredient is in your Panacur-C. Use a digital scale to measure 225 mg of Fenbendazole for each dose.

    Don’t guess based on the package weight. Mix the measured Fenbendazole with a carrier solution and add it to your tank evenly.

    How do I add aquarium salt safely with shrimp present?

    Add salt slowly over 8 hours to avoid shocking your shrimp. Start with 2–3 g per liter and adjust for your tank size.

    Watch your shrimp and water chemistry closely. If your shrimp are very sensitive, consider removing them or finding another treatment.

    What safety precautions should I take when using Fenbendazole and salt?

    Use a precise digital scale for measuring. Check if your shrimp and snails can tolerate Fenbendazole and salt.

    Quarantine sensitive invertebrates if unsure. Mix the medication well before adding it to your tank. Monitor everything closely during treatment.

    I don’t want to medicate. What ongoing prevention practices reduce reinfestation risk?

    Use integrated pest management. Quarantine new plants and decor. Reduce feeding and clean up uneaten food.

    Do regular water changes and vacuum the substrate. Keep your filters working well and check your tank regularly. Have an emergency kit ready.

    Can I use biological predators to control planaria without harming my shrimp?

    Some predators eat planaria but might also eat shrimp. Assassin snails and certain loaches are good at eating planaria.

    But make sure they won’t harm your shrimp. Always test them in a quarantine tank first.

    How should I monitor results after treatment or manual removal?

    Watch your shrimp and check for missing or injured fry every day. Look for dead or surviving pests on surfaces and in the filter.

    Test the water chemistry often after using chemicals. Keep a record of everything you do. If pests come back, find out how they got in and start again.

    If I’m uncomfortable performing chemical treatment, what professional help is available?

    Look for aquarium maintenance services or local fish stores with experienced staff. They can help with treatments and pest management.

    They’ll make sure your shrimp and other invertebrates are safe.

    What immediate supplies should I have on hand to respond to an outbreak?

    Keep a digital scale, water conditioner, a commercial blend, aquarium salt, and baited planaria traps ready. Also, have test kits for water and containers for snails or plants.

    Having these supplies and a plan helps you respond quickly and safely.

  • When and How to Perform a Full Rescape and Reset of Your Nano Tank

    When and How to Perform a Full Rescape and Reset of Your Nano Tank

    Resetting a nano tank means taking it apart and starting over. You remove everything, including water, substrate, and even fish. This is more than just cleaning up.

    Do a full rescape for a big change or when water quality suffers. It’s also good for swapping out old equipment or when the tank’s ecosystem fails. If algae keeps coming back or the substrate is too dense, it’s time for a reset.

    Full rescapes are big deals, so don’t do them too often. In the U.S., most people reset their tanks once a year. For daily care, focus on water changes, filter upkeep, and trimming plants.

    This guide will help you through the process. You’ll learn about planning, draining, cleaning, and choosing new substrate and decorations. You’ll also find out how to replant, refill, and cycle the tank. Plus, how to safely add fish and invertebrates back in. With careful planning and a temporary quarantine, you can make the transition smoother and increase your chances of success.

    Understanding the Importance of Resetting Your Nano Tank

    A detailed nano tank maintenance scene, showcasing a small aquarium on a light wooden table surrounded by cleaning tools. In the foreground, a pair of gloved hands carefully adjusting plants and decorations within the tank, ensuring meticulous care during the rescaping process. The middle features vibrant aquatic plants, colorful fish, and detailed substrate, reflecting a healthy aquatic environment. In the background, appropriate lighting enhances the colors, creating a serene atmosphere, with soft natural daylight filtering in through a nearby window. The focus is sharp on the tank, with a shallow depth of field blurring the less significant elements, emphasizing the importance of diligent maintenance. The overall mood is calm and focused, underscoring the significance of resetting the nano tank.

    Resetting a nano tank is more than just a new look. It’s needed for big changes like new plants, stones, or substrate. Serious dirt buildup can hide under the surface, out of reach of regular cleaning.

    Replacing big equipment like filters or heaters often means a full breakdown. This gives you full access to the tank.

    Your fish and shrimp’s health should guide your decision. If the work will take a long time, moving them to a holding tank is best. This reduces stress and risk of injury or disease.

    It’s risky to move a filled nano tank. Draining and moving dry parts prevents spills and stress on animals. It also protects glass and seals from damage.

    When you restart a nano tank, biology is key. A full teardown can upset the biological balance. This can lead to spikes in ammonia and nitrite. It’s important to save or transfer filter media to keep beneficial bacteria.

    Big rescapes are not for routine maintenance. They should only be done when really needed. Regular care and small water changes can keep most tanks healthy without a full reset.

    • Core reasons to reset: redesigns, deep detritus removal, major equipment replacement.
    • Welfare: use a holding tank for prolonged work to protect fish and shrimp.
    • Moving the tank: disassemble and transport dry parts to lower risk.
    • Biological caution: preserve media to reduce ammonia/nitrite spikes when restarting a nano tank.
    • Frequency: limit full rescapes to essential situations to protect biological balance.

    Knowing when and why to reset helps you plan better. Good planning protects your fish, speeds up recovery, and avoids surprises during maintenance and care.

    Preparing for a Full Rescape

    A beautifully arranged nano tank setup showcasing an aquatic ecosystem. In the foreground, vibrant aquatic plants like Java moss and Anubias grow alongside small pebbles and fine substrate, creating a lush environment. The mid-ground features a small driftwood sculpture, artfully positioned to mimic natural underwater landscapes. Miniature creatures such as shrimp and tiny fish swim gracefully among the greenery. In the background, a faint view of the tank's filtration system can be seen, emphasizing the technical aspects of nano tanks. Soft, natural lighting filters through the tank, casting a gentle glow that highlights the colors of the plants and fish. The overall atmosphere is tranquil and inviting, embodying the beauty of a well-maintained aquascape. The scene is shot from a slightly elevated angle to capture the depth and layering of the tank.

    Begin by getting a temporary aquarium for your pets. A 5-gallon glass tank from Petco or PetSmart is perfect for small animals. It keeps them safe while you work on the main tank.

    Set up a simple filter and aeration in the temporary tank. Use a sponge filter and an air pump for gentle filtration and oxygen. If you’ll keep animals for more than a day, seed the sponge filter in advance.

    Move the heater to the temporary tank when you start. Make sure the temperature is the same as the main tank to avoid shock. Use a reliable heater from Eheim or Fluval if needed.

    • Nets, buckets, and water conditioners (Seachem Prime or API Stress Coat)
    • Syringes or a small siphon for precise water moves
    • Plant containers such as glass baking dishes or Tupperware
    • Trimmed scissors, plant weights, and cyanoacrylate gel for attaching Anubias or small rhizome plants
    • Substrate buckets and spare sponge filter or seeded media
    • Paper towels or cloths and aquascaping tweezers

    Plan a timeline to avoid stress and mistakes. Try to do the job over two days. Day one is for removing plants and animals to the temporary tank. Day two is for cleaning, rearranging, and refilling the main tank.

    If you need a longer quarantine, seed beneficial bacteria early. Install a sponge filter weeks before to let bacteria grow. Or, keep biological media moist in the temporary tank.

    Be gentle when handling animals. Remove plants first to protect fish. Separate plants by species and label them for easy replanting. Use nets carefully for fish, and scoop shrimp and snails gently.

    Follow these tips to reduce stress and keep your tank’s biology stable. Proper preparation and supplies make the rescape smoother for you and safer for your pets.

    Step-by-Step Guide to Draining Your Nano Tank

    Begin by draining half the water. This makes it easier to remove plants and access the tank. It also keeps enough water for your fish temporarily.

    Next, take out dense plants. Gently pull them from the base to save the roots. Place similar plants in shallow containers with some tank water to keep them moist.

    Then, net your fish into a quarantine tank. Start by removing hiding spots to make them easier to catch. Move snails and shrimp by pouring water through a fine net into the holding tank.

    Transfer the heater and filter media to the quarantine tank. This helps keep beneficial bacteria alive. Remove pumps and loose filter parts for cleaning later.

    Now, scoop the substrate into buckets. Once most of it is out, remove driftwood, rocks, and other decorations. Be ready to find leftover muck and small animals.

    Empty the tank by siphoning out the remaining water and sludgy detritus. Use a gravel vacuum or siphon hose until it’s mostly clean. Wear gloves for extra protection during cleaning.

    Work with a partner if you need to lift things. Have towels ready. Clean in a space like a bathroom or driveway if rinsing outside. These steps help you clean your nano tank safely and efficiently.

    Cleaning the Tank and Equipment

    Empty your nano tank and move compact aquariums like the Fluval Spec outside for a rinse. Use a garden hose to remove caked muck and loose substrate. For hard water rings, use an aquarium-safe scraper or vinegar soak, then rinse until clean.

    Clean filters and pumps by flushing flow tubes and impellers with fresh water. Don’t boil or use soap on motor parts. For mineral buildup, a diluted vinegar soak helps; rinse well after.

    Decide whether to reuse, replace, or wash substrate before regraveling. Some substrates, like Seachem Flourite, cloud heavily and need careful rinsing. Active aquasoils often leach ammonia and are usually replaced.

    Scrub driftwood and rocks to remove stubborn biofilm. A brief soak in dechlorinated water helps. For tough deposits, a dilute bleach bath works on non-porous stone or cured wood; rinse until scent is gone. Avoid bleach on fragile, porous decor unless fully neutralized.

    • Avoid detergents and household soaps; use only water, vinegar, or aquarium-safe products.
    • Rinse everything multiple times to remove chemical traces.
    • Dry outer surfaces and inspect silicone seams for damage before refilling.

    After cleaning, check seals and repair any worn silicone to prevent leaks. Good nano tank care at this stage reduces future headaches and keeps your setup healthy and stable for the next planting and stocking phase.

    Choosing New Substrate for Your Nano Tank

    Choosing the right substrate is key for your nano tank’s look and function. Options like ADA Aqua Soil Amazonia, Tropica Soil, or Dennerle are rich in nutrients, supporting plant growth. These soils may cause ammonia spikes or color changes, so plan a longer conditioning period before adding fish.

    For a quicker setup, inert substrates like pre-washed sands or gravels are good. They don’t leach nutrients, allowing for faster replanting and fish introduction. Mixing old substrate with new inert material can also speed up the tank’s recovery.

    • Seachem Flourite: mineral-rich, may cloud if not rinsed well.
    • Aquasoils (ADA, Tropica, Dennerle): nutrient dense, may leach initially.
    • Up Aqua Aquasand and inert sands/gravels: low maintenance, fast rescape friendly.
    • Laterite or peat granules: add for root feeding under planted substrates.

    Consider the planting needs and slope requirements when selecting substrate grain size. Fine-grain substrates are better for creating stable slopes and supporting carpeting plants. Coarser gravels are harder to shape and less suitable for small plants.

    For long-term stability, choose proprietary planted substrates with good cation exchange capacity. These substrates provide steady nutrients to plants over time. Always follow nano tank guidelines for handling and rinsing to prevent water-quality issues during the first days after a rescape.

    Preparation is key. Rinse clouding substrates like Flourite until the water is clear. For aquasoils, consider pre-washing or follow the manufacturer’s instructions. If using active soil, allow extra time for cycling and monitor ammonia and nitrite levels.

    1. Decide on planting goals: fast replanting or long-term growth.
    2. Match grain size to plant types and slope plans.
    3. Mix seeded substrate when you need biological continuity.
    4. Rinse or condition substrates to reduce initial leaching.

    When choosing substrate for your nano tank, balance aesthetics, plant needs, and timing. Follow these guidelines to avoid surprises and ensure a smooth return to a healthy aquarium.

    Selecting Hardscape Elements for Your Layout

    Begin by picking driftwood and rocks that fit your dream. Driftwood adds a natural touch. Lava rock offers a porous feel, while Seiryu or dragonstone adds dramatic lines. Smooth river stones bring calm contrast.

    These choices help you decide where to place plants. They guide the flow in your nano tank setup.

    Build your design outside the tank first. Attach driftwood to eggcrate panels or test heavy pieces. Use aquarium-safe glue for plants on rocks. A dry run helps avoid surprises when you add items to water.

    Think about weight and stability in small spaces. Use epoxy or stainless hardware to secure tall pieces. This keeps your layout steady and safe for fish and plants.

    Plan the depth, slope, and planting spots. Make room for foreground, midground, and background plants. Position rocks and wood to hide equipment without blocking water flow.

    Leave enough space for easy maintenance. This improves the health of your aquascape.

    Clean and treat your hardscape before adding it. Soak wood and scrub rocks to remove dirt. Avoid limestone or coral unless you want higher GH and pH.

    Get materials from trusted vendors or local stores. Avoid unknown wood without verification. Brands like Seachem and API offer tested driftwood and rocks.

    • Use eggcrate grids to anchor driftwood in tight spaces.
    • Pre-glue plant attachments and test placement dry.
    • Choose rock types based on texture, color, and chemical impact.

    Follow these steps to create a stable, beautiful hardscape. Careful selection and preparation prepare your tank for planting and a healthy life.

    Implementing Live Plants in Your Tank

    Before replanting, prepare your plants. Trim long roots and remove any yellowed leaves. Cut stem species back to healthy growth points to encourage new shoots.

    Break clumped Cryptocoryne into several parts to spread them across your tank. This helps cover the layout evenly.

    Place plants in shallow glass dishes or food-safe Tupperware with a bit of tank water. Grouping plants by species makes replanting faster and keeps them healthy during the reset.

    • Use plant weights for tall stems like Bacopa caroliniana to stop them from floating.
    • Attach Anubias nana petite to rocks with a dab of cyanoacrylate gel; wait for the rhizome to attach before burying.
    • Secure small crypts and carpeting plants with aquascaping tweezers and a gentle push into substrate.

    Add an inch of water above the lowest substrate points to hold plants in place. Use tweezers to place roots precisely without disturbing the hardscape. This method is less stressful for plants and reduces transplant shock.

    Choose plants that match your lighting and CO2 levels. Anubias and Cryptocoryne do well under moderate light without CO2. For bright areas, use hairgrass or dwarf sagittaria with high light and nutrient-rich substrate. Select plants that fit your nano tank setup for stable growth.

    Reuse healthy parts of removed plants to speed up reestablishment. Discard any diseased or decayed parts to protect water quality. Gentle handling and quick replanting limit shock and protect your tank’s inhabitants during the reset.

    Live plants do more than look good. Freshly replanted foliage provides new surfaces for beneficial bacteria. This helps stabilize water chemistry while your tank cycles after a reset. Applying these nano tank tips will speed recovery and improve long-term health.

    After planting, follow simple care steps. Monitor water parameters daily, keep light consistent, and trim fast growers to maintain balance. These routines protect your investment and keep your tank looking intentional and thriving.

    Adding Water and Aquascaping

    Start by adding water slowly to keep plants and substrate in place. Use a siphon or pour into the filter section for a gentle flow. This careful approach prevents plants from being uprooted and keeps the water clear.

    Use a reputable conditioner to treat tap water. This removes harmful chemicals and prepares the water for your tank. Try to match the water’s temperature and pH to your quarantine or seed tank. This helps plants adjust better and keeps the tank stable.

    Once the tank is partly filled, put back the pump, filter media, and heater. Move seeded filter media and sponges to your main filter. This keeps beneficial bacteria and ensures a smooth transition.

    Be ready for a brief ammonia spike if you’ve used fresh substrate. Test the water daily for ammonia, nitrite, and nitrate in the first week. Keeping seeded media helps control spikes and speeds up recovery.

    Make your final aquascaping touches when the water is deep enough. Use tweezers and spatulas to adjust plants carefully. Add plant weights and gently move driftwood or rock to avoid stressing plants.

    Take your time during this stage. Rushing can harm plants and cloud the water. This makes nano tank care harder and stresses your fish. Slow, careful steps lead to better results.

    Keep a record of your work with before-and-after photos. These photos help you see changes and spot problems like algae. Good records make future resets easier and improve your tank’s health over time.

    Introducing Fish and Invertebrates Post-Reset

    Wait for stable readings before you move livestock back. Aim for ammonia and nitrite near zero and low nitrate. If you saved seeded media or sponge filters, you may be able to reintroduce sooner, but test daily while restarting a nano tank.

    When conditions are steady, transfer fish, shrimp, and snails from quarantine into the display. Use a net or a pour-through method for tiny shrimp like Neocaridina davidi. Match temperatures and water chemistry slowly so you avoid shock.

    • Acclimate over 15–30 minutes if parameters differ.
    • Reattach filter sponges or media to keep beneficial bacteria strong.
    • Place shy or stressed animals into sheltered areas with plants or hardscape.

    Observe your tank closely for the first 24–72 hours. Look for signs of stress, unusual behavior, or mortality. Verify that pumps, heaters, and filters run correctly and that flow does not overwhelm small invertebrates.

    Shrimp need special care. Use fine nets or pour-through-nets to prevent escapes. Keep flow low near their grazing zones and keep hiding places available. These steps follow basic nano tank guidelines for fragile species.

    Do not add new animals until test results remain stable for several days. Consider a gradual reintroduction schedule for delicate species to reduce risk and to keep biological load manageable while restarting a nano tank.

    1. Test ammonia, nitrite, nitrate daily for a week after reintroduction.
    2. If levels spike, perform targeted partial water changes and reassess.
    3. Keep feeding minimal and observe waste buildup to protect water quality.

    Stick to these nano tank care habits and you will support a calm recovery. Patient steps and steady testing protect your livestock and help your aquascape thrive after a full reset.

    Performing Regular Maintenance After Resetting

    After a full rescape, create a short-term plan to care for your tank. Test the water daily for the first week. Look for ammonia, nitrite, and nitrate levels. If they go up, do small water changes often to keep the balance.

    Keep an eye on your plants as they grow back. Remove dead leaves and debris to stop algae. These steps help your plants recover and keep the water clean.

    Make a weekly plan for tank upkeep. Change 10–30% of the water based on how many fish you have and nitrate levels. Gently vacuum the substrate to protect plant roots. Clean filter sponges in tank water to keep good bacteria.

    Keep plant care simple and consistent. Trim fast-growing stems and use weights or glue to keep plants in place. Regular care stops overcrowding and keeps water chemistry good.

    • Check pumps, flow tubes, and heaters for debris every two weeks.
    • Rinse impellers and flow tubes in tank water to keep them working well.
    • Replace old parts as the manufacturer suggests, from Fluval, Eheim, or AquaClear.

    Keep a log of every water test, maintenance task, and treatment. A simple journal helps you see patterns and issues early. This habit is key for nano tank care.

    Plan for long-term rescapes carefully. Use regular maintenance to avoid frequent full tank resets. With careful routines and gentle care, your tank’s layout and ecosystem will last longer.

    Troubleshooting Common Issues Post-Rescape

    After a nano aquarium reset, you might see spikes in ammonia or nitrite. This can happen when biological media gets disturbed or a new substrate starts to leach. Try to keep seeded filter media intact, reuse a sponge filter from the display if you saved one, and do partial water changes to dilute toxins. Adding a reputable bottled nitrifying bacteria can help speed up cycling and lessen stress on your fish during nano tank troubleshooting.

    Cloudy water and substrate dust are common after replanting. If you used substrates like Flourite without a thorough rinse, let fine particles settle and run gentle mechanical filtration. Small, frequent water changes can help clear the water. For future resets, pre-wash the substrate to reduce this problem as part of your nano tank care routine.

    Plant losses, melting, or slow recovery can be due to transplant shock, nutrient changes, or a mismatch in substrate. Cryptocoryne melt is common after disturbance. Remove dying leaves, keep lighting and nutrient dosing stable, and use root additives like laterite or nutrient tabs for heavy root feeders. Adding fast-growing stem plants can help stabilize nutrients and reduce algae during a nano aquarium reset.

    Algae blooms and equipment flow problems can be caused by imbalanced nutrients or clogged intakes. Reduce light, perform targeted water changes, clean impellers and flow tubing, and preserve biological media during cleaning to avoid re-triggering cycles. If your fish show stress from temperature swings or water chemistry shifts, acclimate them slowly. Use a reliable water conditioner for chloramine removal, and consult a local fish store, experienced forums, or an aquatic veterinarian if instability or unexplained losses persist.

    FAQ

    What exactly does “resetting a nano tank” mean?

    Resetting a nano tank means taking it apart and putting it back together. You remove all the fish and plants, drain the water, and clean or replace the substrate and decorations. Then, you put everything back in and let it cycle again. This is a big job, not just cleaning.

    When is a full rescape appropriate versus routine maintenance?

    You should do a full rescape for big changes or when the tank’s biological system fails. Routine maintenance like water changes and cleaning filters is enough for everyday care. But, rescapes are needed for major changes or serious problems.

    How often should I perform a complete reset on a nano tank?

    You don’t need to reset a nano tank often. Many people do it only once a year. Doing it too much can stress the fish and plants, so plan carefully.

    How should I prepare livestock and plants before starting the reset?

    First, set up a temporary tank for the fish and plants. Move the heater and filter media to this tank to keep the good bacteria. Then, carefully remove the plants and animals from the main tank.

    What supplies should I have on hand before beginning?

    You’ll need nets, buckets, water conditioners, and siphons. Also, have plant containers, scissors, weights, and a special gel for decorations. Don’t forget a test kit for water quality.

    Should I schedule the reset across multiple days?

    Yes, it’s best to do it over two days. Day one is for taking everything out and cleaning. Day two is for putting everything back and finishing the setup. This helps avoid mistakes and stress for the animals.

    How do I remove substrate and hardscape safely without losing shrimp or snails?

    Start by scooping out the substrate and removing big decorations. Then, tilt the tank to pour out the rest through a net to catch any shrimp or snails. Work slowly and keep the water shallow to prevent escapes.

    How should I clean the empty tank and equipment?

    Rinse the tank outside if you can. Use a hose and scraper for the glass, and vinegar for mineral deposits. Clean the pumps and tubes without using soap. Keep the filter media moist to preserve the good bacteria.

    Can I reuse my existing substrate or should I replace it?

    It depends on the substrate. You can reuse inert sands and gravels after rinsing. But, mineral substrates and active aquasoils might need to be replaced. If you’re in a hurry, use inert substrates or mix old and new substrate to keep the bacteria.

    How do I sterilize or treat driftwood and rocks?

    Start by scrubbing and rinsing the driftwood and rocks. For tough biofilm, soak them in dechlorinated water or use a weak bleach solution. But, make sure to rinse them well afterward. Avoid bleach on porous items without proper treatment.

    What substrates work best for planted nano tanks and slopes?

    Fine-grain sands and aquasands are great for slopes and carpeting plants. Aquasoils offer nutrients but can leach and need conditioning. Coarse gravel is easy to maintain but not good for carpeting plants. Choose based on your needs and the look you want.

    What’s the recommended planting workflow during reassembly?

    Start by adding a shallow layer of water to help with planting. Use tweezers to place the plants, and attach Anubias or Java fern to decorations with special gel. Use plant weights for stems and separate clumps for better spread. This order helps with reassembly and reduces uprooting.

    How should I refill the tank to avoid disturbing the aquascape?

    Refill the tank slowly, directing the water into the filter section or using a siphon. Match the temperature and use a water conditioner to remove chlorine and chloramine. It may take over an hour to refill a delicate setup without disturbing the plants or clouding the substrate.

    How do I preserve biological filtration and avoid ammonia spikes after refilling?

    Keep seeded sponge filters and filter media moist to preserve the good bacteria. Transfer them to the display tank once it’s partially filled. If you seeded a sponge filter in the display tank, use it to jump-start the biology. Test daily for ammonia and nitrite, and perform partial water changes if needed.

    When is it safe to move fish, shrimp, and snails back into the display?

    Wait until the water parameters are stable. This means no ammonia or nitrite and low nitrate. If you preserved the seeded media and sponges, you can return the animals sooner. But, always test the water daily. Gradual acclimation can help reduce stress if the water chemistry is slightly different.

    What immediate post-reset testing and maintenance should I perform?

    Test the water daily for the first week for ammonia, nitrite, and nitrate. Do small water changes if the parameters spike. Check that all equipment is working right. Trim plants as needed, watch for algae, and keep a maintenance log.

    What common problems occur after a reset and how do I fix them?

    Ammonia or nitrite spikes can happen. Preserve the seeded media, do partial water changes, and consider adding bottled bacteria. Cloudy water can be fixed by letting it settle, running the mechanical filter, or doing gentle water changes. Plant melting can be prevented by being patient and removing dying leaves. Algae blooms can be controlled by reducing light, adding fast growers, and maintaining water changes. Flow issues can be fixed by cleaning the impellers and tubes. Stress in animals can be managed by acclimating them slowly and checking for contaminants.

    How should I handle red cherry shrimp and other small inverts during a reset?

    Use nets for larger shrimp and pour tank water through a fine mesh to catch small shrimp and snails. Move the heater and seeded sponges to the quarantine tank to maintain stable bacteria. Shrimp are sensitive to flow and chemical residues, so avoid sudden changes in temperature or water chemistry.

    Is it better to move the filled nano tank or disassemble it when relocating?

    Moving a filled, inhabited nano tank is risky. It’s safer to disassemble and transport the tank components dry or mostly dry. If you must move the tank, move the animals to quarantine containers and transport the tank parts empty and secure.

    When should I seek professional help after a reset?

    If you face persistent water problems, unexplained deaths, or aggressive algae, seek help. A local aquarium shop, experienced hobbyist forum, or fish veterinarian can provide guidance. Professional advice is necessary for repeated failures or complex disease outbreaks.

  • How to Clean and Store Your Aquascaping Scissors and Tweezers

    How to Clean and Store Your Aquascaping Scissors and Tweezers

    Starting with simple routines is key to keeping your nano tank tools in top shape. This includes rinsing, drying, polishing, sharpening, and storing them properly. These steps are essential for tools like stainless steel aquascaping scissors, tweezers, and scrapers used in planted and nano aquariums.

    Most tools today are made of stainless steel or alloys. They are designed to be slim, ergonomic, and precise. This precision is favored by aquascapers who aim to create natural-style aquascapes with minimal damage to plants and stress to shrimp and small fish.

    Proper maintenance offers clear benefits. It extends the life of your tools, keeps them sharp, and prevents rust. It also ensures your aquarium stays clean and healthy. This means paying attention to screws, blade points, and scraper edges, which are prone to wear.

    This guide will show you how to rinse tools after use, dry them, and polish them. You’ll learn about sharpening methods and when to replace scraper blades. It also explains why shorter scissors and tweezers are better for nano tanks. They make handling easier and allow for finer control around delicate plants and fish.

    Importance of Maintaining Your Nano Tank Tools

    A well-organized aquascaping tool setup showcasing a nano tank’s essential care instruments in a serene atmosphere. In the foreground, gleaming stainless steel scissors and tweezers with precision tips, sitting on a wooden surface, slightly angled for depth. The middle ground features a small, elegantly arranged nano tank filled with lush aquatic plants, with reflections of light dancing on its surface. The background should include soft-focus images of cleaning supplies like soft cloths and brushes. Natural sunlight streams through a nearby window, casting gentle shadows, enhancing the tranquil ambiance. The overall mood is one of meticulous care and professionalism, highlighting the importance of maintaining tools for aquascaping.

    You use stainless-steel scissors and tweezers for trimming plants and placing moss. Keeping these tools sharp and smooth is key. Regular care prevents corrosion that can ruin their function.

    Flash rust can form at connections like screws and blade pivots. Even stainless can rust if wet or contaminated. Debris makes rust stick, affecting tool movement and precision.

    Saltwater accelerates corrosion more than fresh water. Rinse tools in fresh water after use and dry them well. Salt residue can cause deep corrosion if not removed.

    Ignoring tool care leads to problems. Dull blades, stiff springs, and rusty flakes can harm your tank. These issues can damage plants and harm fish.

    Good tool care makes maintenance easier. When tools work well, you enjoy the process more. This leads to a healthier and neater tank over time.

    Tools You Will Need for Cleaning

    A set of precise nano tank cleaning tools, including a pair of finely crafted aquascaping scissors and tweezers, displayed prominently on a clean, reflective surface. The scissors should feature stainless steel blades with ergonomic handles, while the tweezers present a delicate yet sturdy design, both highlighting intricate details. In the background, softly blurred aquascaping elements like lush aquatic plants and colorful pebbles create a serene underwater atmosphere. The lighting is soft and diffused, emulating natural illumination, with a slight shimmer reflecting off the tools, adding to the overall polished feel. The image captures an organized and professional cleaning setup, ideal for aquascapers focused on precision and care.

    Start by gathering a small cleaning kit. You’ll need a soft towel for drying and fresh water to rinse off dirt and salt. Also, have isopropyl alcohol or a safe aquarium disinfectant ready for tough stains. But use these carefully to avoid damaging your tank’s finishes and seals.

    Don’t forget small brushes for getting into tight spots. A toothbrush or a small brush is great for cleaning around hinges and in small crevices. If you see light corrosion, have a container ready to soak non-stainless parts.

    • Polishing and rust-removal tools: look for multi-grit tools like Borneo Wild’s Polish Tip. Use them carefully near blade edges to avoid taking off too much material.
    • Sharpening tools: a household scissor grinder is good for straight scissors if used carefully. For curved blades, like Wave Cutters, use a small hone or whetstone to keep the angle right.
    • Replacement parts and consumables: keep spare scraper blades, replacement screws, and small O-rings on hand. They help when parts wear out or rust.

    Make sure to organize your tools for easy storage and transport. Many tool sets come with protective cases. You might also consider an ADA FC Tool Stand, a RÅSKOG-style serving trolley, or wall-mounted holders for easy access. Eheim maintenance boxes are great for storing wet tools during maintenance.

    Add more maintenance items to your kit. Use pipe brushes for filter hoses from Green Aqua or Chihiros, algae scrapers, soft brushes, dedicated towels, and gloves for handling marine salt. These make caring for your small tank easier and safer.

    When buying replacements or upgrades, choose trusted brands. Chihiros, DOOA, ADA, Green Aqua, JBL, and Oase offer reliable accessories and parts for your aquascaping tools.

    Step-by-Step Cleaning Process for Scissors

    Always rinse your scissors after each use. Run them under fresh water to remove plant sap, debris, and salt. This quick rinse stops residue buildup and corrosion, which is vital for keeping your tools in good shape.

    After rinsing, dry your scissors with a soft towel. Make sure to dry the pivot points, screws, and where the blades meet. If your scissors have removable blades, dry each part separately to avoid moisture getting trapped.

    1. Use a polishing tool like Borneo Wild’s Polish Tip to remove dirt and rust. Start with the pink side to lift off rust and dirt, then use the white side to smooth, and the grey to buff. Work in short strokes and follow one direction near the edge to keep the blades sharp.

    2. Sharpen your scissors only when they need it. For straight scissors, use a household scissor grinder carefully. For curved blades, like Wave Cutter or curved spring scissors, use a hone or small whetstone. Hand sharpening helps keep the blade curve and prevents uneven wear.

    3. If the pivot feels stiff, add a small amount of food-safe mineral oil. Apply a tiny drop to the screw or joint, then wipe off any extra. Use aquarium-safe lubricants and clean up well to prevent dirt attraction. This step is key for your tools to last longer.

    4. Check your scissors before storing them. Look for rust, loose screws, or chips on the blade edge. Replace or fix any damaged parts, like scraper blades. Only store your scissors when they are completely dry to prevent corrosion.

    By following this cleaning routine, your scissors will be ready for precise aquascaping work. Good care includes gentle polishing, careful sharpening, and the right lubrication. These steps are essential for maintaining your aquascaping scissors and other nano tank tools.

    Step-by-Step Cleaning Process for Tweezers

    1. Rinse tweezers right after use to get rid of debris and salt. A quick rinse in fresh water stops grit from getting stuck and lowers corrosion risk. This is key for keeping your nano tank tools in top shape.

    2. Dry tweezers gently with a soft towel. Focus on grooves, serrated parts, and spring areas. Keeping these areas dry helps avoid rust and damage.

    3. Use a small brush or soft toothbrush to clean serrations and jaws. This removes trapped debris from the jaw ridges. For tough spots, soak, brush again, rinse, and dry to keep the tweezers in good condition.

    4. Polish joints and surfaces if you notice discoloration or rust. Use a multi-grit polishing tool like Borneo Wild’s Polish Tip. This gently removes spots without harming the tweezers’ shape.

    5. Check if the tweezers are aligned and spring action is smooth. Make sure tips meet cleanly and the spring works well. If tips are bent, try to adjust them carefully. If you can’t fix it, it’s time to replace the tweezers.

    6. Store tweezers only when they are completely dry and safe. Use a protective case or tool stand to keep them dust-free and prevent bending. For nano tanks, choose shorter tweezers to fit the tank size and save space.

    How to Properly Store Your Aquascaping Tools

    Give your scissors and tweezers a special place to last longer and make upkeep simpler. A tool case designed for the job is perfect. The ADA FC Tool Stand is stylish and keeps tools in sight. For more flexibility, consider IKEA’s RÅSKOG trolley.

    Always store tools dry to stop rust. In humid places, add silica gel packets to cases. Use an Eheim MultiBox or similar for quick storage during tasks.

    If a tool stays wet, store it separately to avoid damage. Rinse and dry tools well before putting them away. This habit helps keep your tools in good shape and reduces corrosion.

    Organize blades and spares in labeled spots. Hang tools by their handles to prevent damage. Keep short scissors and tweezers within reach to encourage regular use.

    Use tip covers or foam-lined slots to protect fine tips. Avoid heavy items near precision tools to prevent damage. These steps help keep your tools sharp and your work precise.

    Create a small maintenance station near your storage. Keep towels, polishing cloths, and spare blades handy. Include brushes and tools from Green Aqua or Chihiros for a streamlined routine.

    • Dedicated case or ADA FC Tool Stand for display and access
    • RÅSKOG trolley or Eheim MultiBox for mobile organization
    • Silica gel in closed cases for humid climates
    • Tip covers, foam-lined slots, and labeled compartments

    Signs That Your Tools Need Replacement

    Look for deep rust and pitting on blades and pivots. Surface rust can be cleaned off, but deep corrosion weakens the tool. It also ruins its sharpness. At this point, it’s better to replace the tool than risk it breaking during use.

    If screws, springs, or joints stay stiff after drying, polishing, and lubricant, the tool might be failing. Seized pivots mean a new tool could save you time and frustration. This is important for your nano tank tool care routine.

    Check blades for chips, severe dulling, or warping. Curved and wave scissors are hard to regrind. If honing doesn’t restore a sharp edge, it’s time to replace the tool. This protects your plants and ensures clean cuts.

    Tweezers with misaligned or bent tips can bruise or tear delicate stems. If you can’t safely fix the tips, it’s best to replace the tweezers. This keeps your small tank tool care tasks precise.

    • Non-stainless scraper blades rust faster than stainless steel. Replace these blades regularly and unmount them to dry after each use.
    • Loss of serration or grip on tweezers makes handling plants and hardscape harder. If cleaning and light polishing don’t work, it’s time for a new one.

    Think about the tool’s value when deciding to repair or replace it. Premium sets from ADA, DOOA, or Chihiros might be worth part replacement or professional service. For entry-level or heavily corroded tools, full replacement often gives better value. It restores reliable performance for your nano tank cleaning tools and overall small tank tool care.

    Frequently Asked Questions About Nano Tank Tool Care

    How often should you clean your tools? Rinse them after each use and towel-dry right away. For deeper cleaning, polish and check weekly or after long use. Sharpen only when needed to avoid shortening tool life.

    Can you use the same set in freshwater and marine setups? Yes, but rinse with fresh water after marine use and dry well to prevent salt corrosion. Many hobbyists have a separate set for saltwater to avoid contamination and wear.

    Are all aquascaping tools stainless steel? Most high-quality scissors and tweezers are stainless or stainless alloys. Some scraper blades are not stainless and rust easily. Remove non-stainless blades and dry them separately to prevent damage.

    What is the best sharpening method? For straight scissors, use a household scissor grinder carefully. Curved or spring scissors do better with a small whetstone or honing rod. Avoid aggressive sharpening that removes too much material.

    How do you store tools in humid climates? Use silica gel packs in cases and ensure tools are dry before storing. An open-holder display, like an ADA FC Tool Stand, helps air circulation and lets you polish occasionally to prevent rust.

    When should scraper blades be replaced? Replace blades when sharpness drops or rust appears. Many blades are not stainless, so replacing them regularly keeps performance high and protects plants during mini tank maintenance.

    • Rinse and dry after each use to prevent corrosion and algae buildup.
    • Keep a separate set for marine tanks if possible to limit wear on nano tank care accessories.
    • Store with desiccants in a ventilated holder to extend tool life.

    Following these simple practices keeps your equipment ready and supports reliable mini tank maintenance without adding extra hassle to your routine.

    Environmental Considerations in Tool Care

    Opt for durable stainless-steel tools from brands like ADA, DOOA, Chihiros, or Green Aqua. This choice reduces waste and extends tool life. High-quality tools resist corrosion, making maintenance easier with simple care routines.

    Use chemicals wisely. Start with rinsing, brushing, polishing, and honing before using disinfectants. If you must use isopropyl alcohol or sanitizer, apply it sparingly and rinse well. This keeps plants and fish safe and water quality high.

    Organize and dispose of consumables properly. Recycle metal parts if your area accepts them. Store single-use blades in designated containers and follow local disposal rules. This reduces landfill impact and keeps tools clean.

    Use separate tool sets for freshwater and marine tanks. This prevents corrosion and contamination between environments. Dedicated sets also reduce the need for frequent replacements, making maintenance easier.

    Save water during cleaning. Use short, effective rinses and dry tools with a clean cloth. This method removes residue efficiently, saving water and being eco-friendly.

    Choose repair over replacement when tools are safe and functional. Small fixes can extend tool life and save the environment. Replace tools only when they are no longer safe or functional.

    • Pick durable brands to reduce turnover.
    • Use mechanical cleaning first, chemicals sparingly.
    • Recycle metals and dispose of blades responsibly.
    • Keep dedicated sets for freshwater and marine use.
    • Rinse briefly and dry to save water.
    • Repair minor issues instead of discarding tools.

    Conclusion: Keeping Your Tools in Top Shape

    To keep your aquascaping scissors, tweezers, and accessories in good shape, make a simple routine part of your maintenance. Rinse tools right after use, and dry them well with a towel. For light dirt or rust, use a multi-grit polish gently. Sharpen only when needed for better cutting or alignment.

    Replace non-stainless scraper blades regularly to protect plants and glass. This prevents damage and keeps your tank looking great.

    Store your nano tank cleaning tools and accessories in a dry place to avoid corrosion. Keep cleaning supplies close to your storage to clean tools right away. Choose tools that fit your nano tank well. Short scissors and tweezers offer better control and reduce wear from hard angles.

    Investing in premium brands like ADA, DOOA, Chihiros, or Green Aqua can make your tools last longer and feel better in your hand. Proper care keeps your tools sharp, aligned, and corrosion-free. This makes your work easier and more enjoyable. By following these steps, your tools will stay in top condition, helping you keep your aquascapes healthy and beautiful.

    FAQ

    How often should I clean my aquascaping scissors and tweezers?

    Rinse your tools right after each use to get rid of plant sap and other stuff. Dry them with a towel immediately. Do a quick polish and check them weekly or after a long session. Only sharpen when really needed to avoid shortening their life.

    Can I use the same tools in freshwater and marine tanks?

    Yes, but be extra careful with marine use. Rinse them under fresh water right away to remove salt. Dry them well and polish the contact points. It’s best to have a separate set for marine work to avoid contamination.

    What are the essential items I should have for nano tank tool care?

    Keep a soft towel, fresh water, and isopropyl alcohol or a safe aquarium disinfectant. Also, have a small brush, a multi-grit polishing tool, a hone or whetstone, spare scraper blades, and replacement parts. Don’t forget protective cases or a tool stand for storage.

    How do I remove flash rust and surface dirt without damaging blade edges?

    Use a three-grit polishing aid. Start with the coarse (pink) surface to remove rust and dirt. Then, use the smoothing (white) surface, and finish with the fine (grey) surface. Work gently and in one direction near the edges.

    Which sharpening method is best for my scissors?

    For straight scissors, use a scissor grinder carefully. For curved or spring scissors, a small hone or whetstone is best. Sharpen only a little to keep the blades in good shape.

    My pivot is stiff—what should I do?

    First, rinse and dry your tools well. Then, try polishing the pivot gently. If it’s too stiff, apply a small amount of food-safe oil or aquarium-safe lubricant. If it’s seized, the tool might need to be replaced.

    How should I store tools between sessions and for long-term?

    Keep tools dry and store them in protective cases or on a tool stand. Use silica gel in humid climates. Hang tools by their handles or use foam-lined slots to protect tips. Never store damp tools.

    What are the common failure points to watch for?

    Watch out for screws, blade pivots, and contact points. Also, check spring mechanisms, serrations on tweezers, and scraper blades. Flash rust often forms at these spots and can affect tool performance.

    When should I replace scraper blades or other consumables?

    Replace scraper blades when they lose sharpness or rust. Use a new blade if it’s not stainless. Replace screws, O-rings, or tools with pitting when small repairs don’t work anymore.

    Are premium brands worth the investment for nano tank tools?

    Yes, high-quality tools from brands like ADA, DOOA, and Chihiros last longer. They resist corrosion better. For nano tanks, choose shorter tools for better precision and less stress on plants and fish.

    What differences should I consider for nano tank tool sizes?

    Nano tanks need shorter scissors and tweezers for easier handling. Choose slim, ergonomic tools with fine tips for better precision in small spaces.

    How do I prevent flash rust after rinsing tools?

    Dry tools immediately with a soft towel, focusing on pivots and screws. For mild rust, use a multi-grit polish. Store tools dry, and in humid climates, include silica gel packets in cases.

    Can polishing tools damage my blades?

    Polishing tools remove surface rust and dirt if used right. Work gently and use the right grit progression. Avoid aggressive grinding near edges. Don’t use coarse polishing on fine tips or curved blades without experience.

    How do I clean serrations and jaw ridges on tweezers?

    Use a small brush or toothbrush to remove trapped debris. For stubborn spots, soak briefly in fresh water, brush again, rinse, and dry. If serrations wear out, consider replacing the tweezers.

    What should I do if I see deep corrosion or pitting?

    Deep rust and pitting mean the tool is damaged beyond repair. Replace it to avoid harming plants or fish with broken fragments.

    Is it OK to use disinfectants or isopropyl alcohol on tools?

    Use isopropyl alcohol or aquarium-safe disinfectants sparingly for tough organic residues. Rinse well with fresh water before using the tools in the aquarium to avoid harming plants or animals.

    How should I handle wet storage during long maintenance sessions?

    If tools must stay wet, keep them in a designated box or organizer. Rinse with fresh water and dry thoroughly before storing long-term to prevent rust.

    How can I reduce water waste while rinsing tools?

    Use brief, thorough rinses instead of long running water. Remove debris first with a quick shake or tap. Flush important points and dry immediately. This saves water and removes salt and organic residues effectively.

    What repair options are viable before deciding to replace a tool?

    Minor repairs like replacing screws, tightening pivots, or swapping scraper blades can fix premium tools. If corrosion, seized mechanisms, warped blades, or misaligned tips can’t be fixed safely, replace the tool.

    Any tips for organizing replacement parts and consumables?

    Store spare blades, screws, and O-rings in labeled compartments and original packaging. Keep spare blades separate to avoid injury or contamination. Recycle metal parts where possible and dispose of used blades according to local regulations.

    What additional accessories help with nano tank maintenance?

    Useful accessories include protective cases, tool stands, RÅSKOG-style trolleys, Eheim maintenance boxes, pipe brushes, algae scrapers, soft brushes, and dedicated towels and gloves for marine work.

    How does saltwater affect stainless-steel tools?

    Saltwater speeds up corrosion. Even stainless alloys can rust and pit if salt residues stay. Quick rinsing in fresh water and drying after marine use prevent damage.

    How do I keep fine tips from bending or dulling in storage?

    Use tip covers, foam-lined slots, or hang tools by the handle to prevent damage. Store delicate tips separately in protective cases. Avoid placing heavy objects on top of precision tools.

    What is the core routine I should follow after every maintenance session?

    Rinse tools immediately after use, dry them well, and inspect for rust. Polish lightly, sharpen only when needed, replace scraper blades, and store tools dry in protective cases or stands.

  • How to Tell if Your Filter Flow is Too Strong for Nano Inhabitants

    How to Tell if Your Filter Flow is Too Strong for Nano Inhabitants

    Keeping your nano tank healthy depends on the right flow. A clean filter and the correct turnover rate are key. They help maintain biological flow and prevent oxygen loss in filter media.

    First, check the pump’s ratings and the actual flow after head pressure. Manufacturers list flow at 0′ head, but elbows, lift, and clogged sponges reduce it. Use a bucket-timing test or a flow meter to measure the real nano aquarium current at the outlet.

    Biological and chemical media do best with four turnovers per hour or less. Mechanical media can handle higher flow. But, if flow drops under 1x/hour from clogging, beneficial bacteria face oxygen deprivation and toxin release.

    Think about your fish too. Species like bettas, cherry shrimp, and fry prefer slow water. Too much energy flow from oversized pumps or multiple units can stress and injure them. Simple fixes include sponge prefilters, baffling the output, spray bars, or aiming flow at the surface to diffuse current.

    In short, balancing optimal vitality and holistic wellness is possible. Measure real flow, match pump capacity to tank needs, and use gentle solutions when nano aquarium current is excessive.

    Understanding Biological Flow in Aquariums

    A tranquil aquarium scene illustrating "Maintaining Biological Flow." In the foreground, delicate nano inhabitants like small shrimp and vibrant neon tetras swim gracefully amidst swaying aquatic plants. The middle ground features a gentle water current created by a well-positioned filter, with ripples reflecting light. The background shows lush green moss covering rocks and the soft illumination of a natural sunlight beam penetrating the water’s surface, creating a serene atmosphere. A macro lens effect highlights the intricate details of the nano fauna and flora, emphasizing the balance between movement and calm in the habitat. The overall mood is peaceful and vibrant, showcasing a healthy aquatic ecosystem.

    Biological flow is about the water movement that brings oxygen to the biological media. It also carries waste towards mechanical filters. You should aim for a biological turnover rate that supports both oxygen exchange and nutrient export without harming delicate inhabitants.

    If the flow is too low, about 1x per hour, biological media can lack oxygen. This can lead to the release of toxins. Keep your media clear and check it regularly to avoid these problems.

    A good rule of thumb is to aim for an average turnover of 4x per hour for many tanks. At this rate, both biological and chemical media work well. The sump, skimmer, and filter socks also efficiently process waste. Proper turnover helps keep the temperature stable and supports oxygen exchange at the surface.

    • Match flow patterns to your livestock. Species from slow-moving waters need gentle currents that preserve their body’s equilibrium.
    • Use sponge filters or low-flow returns when you want to keep natural balance without stressing small fish or shrimp.
    • Watch for stagnant areas in sumps or tanks; poor circulation reduces skimmer efficiency and hinders energy flow within the system.

    Good circulation keeps nutrient export steady and prevents pockets of low oxygen. By controlling the biological turnover rate and tailoring flow to your animals, you support maintaining biological flow and the overall natural balance of your aquarium.

    The Role of Filtration in Nano Aquariums

    A visually captivating nano aquarium featuring a sophisticated filtration system, showcasing the balance between technology and nature. In the foreground, vibrant aquatic plants sway gently in the water, with fine details on leaves capturing the light. The middle ground highlights a sleek, modern filter that brings clarity, illustrating water movement while not disturbing the tiny fish swimming amidst the greenery. The background consists of soft, blurred pebbles and a subtle gradient of blues, mimicking the depths of an underwater habitat. Bright, natural lighting enhances the colors and reflects off the water surface, creating a serene ambiance, while a slight depth of field focuses on the filter, emphasizing its importance in maintaining a healthy ecosystem for nano inhabitants.

    Filtration is key to keeping your nano tank clean. It helps maintain a natural balance. Mechanical media catches visible debris, making the water clear.

    Biological media supports beneficial bacteria. These bacteria break down waste, keeping fish and shrimp healthy.

    When choosing filtration, aim for a balanced turnover rate. A common goal is 4x/hour for biological media. This lets nitrifying colonies grow well. But, too fast can harm bacteria or stress slow swimmers.

    Sump setups need matched return pumps and devices like skimmers or reactors. If a pump is too strong, skimmer efficiency drops. This can lead to microbubbles or turbulence. Match flow to the needs of all filtration stages for steady nutrient export.

    Sponge filters are great for nano tanks with delicate fish. They filter gently and provide surface area for bacteria. Hang-on-back or canister filters can also work if you adjust their output to avoid strong currents.

    • Choose a mix of mechanical, biological, and chemical media for holistic health.
    • Set turnover to favor biological processes without overwhelming your inhabitants.
    • Use baffling, pre-filters, or adjustable outlets to soften flow where needed.

    Always watch your inhabitants and water readings. This feedback helps you adjust filtration turnover. It keeps your nano community healthy and balanced.

    Identifying Strong Filter Flow

    First, compare your pump’s flow rating to what you see in the tank. Adding tubing, elbows, or increasing head height lowers the flow. These changes cause turbulence that you can see at the surface.

    Look for signs of strong current near outlets. Microbubbles, noisy overflow sounds, and visible spray or salt creep are signs of too much flow. Also, watch the sump for water level changes and erratic skimmer foam.

    Fish and invertebrate behavior can quickly tell you if the flow is too strong. If bettas, shrimp, or fry are constantly hiding or have torn fins, it’s a sign of strong filter flow. They might also cluster behind decorations or avoid nozzle areas to escape the strong stream.

    • Surface agitation that is uneven or excessive suggests pressure points in plumbing.
    • Detritus buildup and weak surface movement point to too-low flow, not high flow.
    • Listen for splashing and overflow noise as signs of mismatched plumbing and pump capacity.

    Try simple tests to check the current strength. Place floating food or a light plastic strip by the outlet. If it spins wildly or moves fast across the tank, the current is too strong. A gentle drift means the flow is balanced.

    Keep a record of your observations over several days. Note any microbubbles, turbulence near return fittings, and changes in your fish’s behavior. These signs will help you decide if you need to adjust your plumbing or reduce the flow for your nano tank’s long-term health.

    Impact of Strong Flow on Nano Inhabitants

    Strong flow can change how your filter moves water around the tank. If currents bypass biological media, the filter’s efficiency drops. Waste can collect in dead zones, harming the tank’s balance.

    Uneven circulation affects the habitat. You may see fish and shrimp fighting the current. Constant exertion raises metabolic demand and leads to chronic stress from current.

    Long-finned species and tiny fry often show erratic swimming. This makes them more vulnerable to illness.

    Turbulence and microbubbles form when flow is too high. These conditions can reduce equipment performance in sumps and skimmers. This creates unstable water levels.

    Unstable systems undermine the body’s equilibrium of each animal. They lead to degraded water quality over time.

    Low effective flow causes nutrient buildup in some spots. Excessive flow forces animals into nonstop movement. Both extremes reduce optimal vitality and make immune systems less effective.

    • Observe behavior: increased hiding or being pushed into corners signals stress from current.
    • Check filtration paths: ensure biological media get steady, even circulation to preserve the filter’s role.
    • Provide refuges: gentle zones let inhabitants rest and support holistic wellness of fish and invertebrates.

    Small adjustments to flow patterns protect your tank’s residents. When you aim for balanced circulation, you help maintain the body’s equilibrium for each animal. This promotes lasting optimal vitality.

    Adjusting Filter Flow Settings

    Remember, pump specs are for zero head. But real flow drops with vertical lift, tubing, and elbows. Clean and size tubing, and use straight runs to keep flow steady.

    Test flow with a bucket-timing method or a flow meter. See how long it takes to fill a known volume. Then, compare it to the pump performance curve and head pressure. This gives you real data for adjusting energy flow.

    Balance mechanical and biological media for the right turnover. Use biological media that’s about four times tank volume per hour for stable flow. If you slow the pump, keep enough media for beneficial bacteria.

    • Use DC pumps for fine control with their controllers.
    • Throttle AC pumps with gate valves for smooth changes.
    • Check for blockages, clogged filters, or excessive head if flow is too low.

    Soften strong outputs with prefilter sponges, spray bars, or by aiming return jets at the glass. Add sponge blocks, craft mesh, or a small soap dish with marbles and moss in waterfall openings. These methods dampen flow without harming turnover.

    If outputs are too strong, consider downsizing the filter for sensitive species like bettas or tiny nano fish. Mix mechanical edits with energy flow adjustment through pump speed or throttling. This will restore the tank’s balance.

    Choosing the Right Filter for Your Setup

    First, match the filter’s size to your tank’s volume and how often you want water to flow through it. Aim for about 4x per hour if you focus on biological filtration. But, if you need more mechanical filtration, you might need a higher flow rate. Just make sure it’s not too high for your small fish or slow swimmers.

    Before buying, check the manufacturer’s flow curves. Consider the height of your filter and how it will handle plumbing resistance. Remember, real-world flow will be less after you add fittings, bends, and prefilters. For sump systems, choose a return pump that you can adjust or a DC model with variable output. Make sure the overflow and drain can handle the return flow.

    If you have delicate fish, look for a filter that provides gentle, controlled water flow. Sponge filters with adjustable air pumps are great. Low-flow hang-on-back units with adjustable outputs also work well. Canisters with spray bars or valves let you adjust the flow across the tank.

    • Choose filters that accept baffles or prefilter sponges to reduce velocity.
    • Prefer units with adjustable outlet direction to create calm zones.
    • Factor in media space for biological growth to support holistic health.

    When picking equipment, think of your aquarium as a living ecosystem. The right gear helps keep the balance of beneficial bacteria, stable water, and happy fish and plants. This balance is key to the health and vitality of your underwater world.

    Conducting a Flow Test

    Remember, pump GPH is rated at zero head. But, actual output drops with lift, elbows, narrower tubing, and clogged media. This is important for keeping biological flow through filter media and bio-balls.

    For a quick flow measurement, use a bucket-timing test. Place a known-volume container under the return, run the pump, and time how long it takes to fill. Then, calculate gallons per hour from that time. This shows the real flow after head loss.

    If you want precise results, add a handheld flow meter for energy flow testing and long-term monitoring. Compare your measured flow against your tank’s target turnover. Aim for about four times the tank volume per hour for many planted nanos, higher for sump or reef systems.

    Watch your animals while you test. If shrimp, bettas, or small gobies avoid areas near the return or struggle in the current, reduce output. Also, observe filtration devices such as protein skimmers and prefilters for unstable operation and adjust until performance steadies.

    Make adjustments using a pump controller, gate valve, baffle, or prefilter to tune the flow. Check flow measurement again after each change to confirm you are maintaining biological flow and meeting wellbeing metrics.

    • Simple test: known-volume bucket + stopwatch = quick GPH estimate.
    • Precise test: inline flow meter for energy flow testing and repeatable readings.
    • Behavior check: use inhabitant reactions as a live wellbeing metric.

    Repeat tests after cleaning media or rerouting plumbing. Regular checks keep your system balanced and protect sensitive inhabitants while you fine-tune flow for optimal health.

    Creating Shelter for Sensitive Inhabitants

    You can shape flow and give timid species a nano inhabitants refuge by using plants and hardscape. Place stems, moss, and rockwork in front of filter outputs to dissipate jets. Dense planting reduces surface agitation and helps retain CO2 in planted tanks while creating shelter for shrimp, fry, or bettas.

    Direct strong return flows toward the surface or a back wall so kinetic energy is lost on impact. A spray bar or multiple small outlets spreads force across several holes. For sump returns, angle the outlet away from open swimming areas to avoid strong currents.

    Simple baffles and prefilter sponges cut force at the source. Fit sponge inserts or craft mesh into waterfall openings on hang-on-back units. Soap dishes or custom sponge blocks serve as discreet flow dampeners without harming maintaining biological flow.

    Add low-light plants, caves, and ornaments to form resting zones. Moss balls and driftwood provide cover and visual breaks that promote natural balance. These features let occupants find quiet pockets and support inner harmony in the tank.

    • Place tall stems near outputs to break the current.
    • Use spray bars to disperse return flow evenly.
    • Install prefilter sponges on strong outlets.
    • Create hiding spots with caves, plants, and decor.

    Small adjustments keep your setup livable while maintaining biological flow for filtration and gas exchange. By combining flow control and thoughtful layout, you build a safe, calm space that helps sensitive animals settle and thrive.

    Signs Your Inhabitants Are Thriving

    A healthy tank is easy to care for. The water is clear, the skimmer works well, and there’s little waste. This shows your tank’s biological flow and filtration are on track.

    Healthy fish and invertebrates act normally. They forage, rest, and graze as they should. This means your tank is good for them.

    See how they react to food and each other. If they eat well and act naturally, they’re likely happy. No hiding and no fin damage are also good signs.

    • Stable temperature and gentle surface agitation for gas exchange.
    • Balanced turnover that keeps biological media working without sweeping inhabitants away.
    • Plants that hold CO2 and grow without torn leaves.

    Look for long-term signs of health, not just one-time issues. Steady skimmer work and water chemistry are key. When these stay consistent, your nano species thrive.

    If you notice changes, tweak the flow and shelter. Adjusting these helps keep your community lively and healthy.

    Regular Maintenance for Optimal Flow

    Keep a simple filter cleaning schedule to protect flow and the health of your tank. Clogged mechanical media and tight tubing cut output fast. Clean or replace sponges and floss pads before flow drops below recommended levels.

    Use the bucket method or a small flow meter to test return pump output every few weeks. Note any drift from the pump performance curve and inspect impellers, controllers, and gate valves for wear. Matching measured flow to expected flow helps you avoid surprises.

    Balance mechanical cleaning with maintaining biological flow. Over-cleaning biological media can harm beneficial bacteria. Rinse mechanical media in tank water while keeping biological media intact so oxygen transfer and nitrification stay steady.

    Watch plumbing and prefilters for blockages. Spray bars, airline valves, and skimmer outlets can clog from salt creep or debris. Replace or rinse sponges as needed and clean spray bars to prevent erratic output that stresses inhabitants.

    • Check impellers and tubing for wear.
    • Test return flow with a bucket or flow meter.
    • Rinse mechanical media in aquarium water.
    • Schedule sponge and spray bar upkeep.

    Think of maintenance as energy flow upkeep for the whole system. Small, regular tasks support holistic wellness in your nano aquarium and reduce the risk of oxygen loss or biological collapse.

    Future Challenges and Considerations

    When planning tank upgrades, remember to recalculate turnover needs. This is done by multiplying the tank’s volume by the desired turnover rate. Also, keep in mind that pump flow ratings decrease with higher head heights and more complex plumbing. So, it’s important to re-evaluate your pump choice when increasing the tank size to avoid any surprises.

    Switching to reef setups or heavy coral systems requires special considerations. For many reef tanks, aim for a 5–10x/hour return after head pressure. Make sure the overflow and drain capacity match the increased return flow. Adjust popular drain styles, like Herbie or Bean Animal, to the pump speed.

    Adding fry, shrimp, bettas, or long-finned fish changes the flow profile needed. You might need to downsize filters, add baffles, or build more refuges. This is to protect sensitive species and keep the body’s equilibrium of your aquarium.

    Think about using DC pumps for fine control and quieter operation. They allow for small adjustments that help maintain biological flow long-term. This reduces stress on your aquarium’s inhabitants.

    • Recalculate turnover after any change in tank volume or livestock.
    • Account for head pressure and plumbing when choosing pumps.
    • Prepare overflow and drain capacity before increasing return flow.
    • Add baffles or shelters when introducing delicate species.
    • Choose controllable pumps and plan routine checks to support holistic health planning.

    Set a clear maintenance and monitoring routine. Track flow rates, observe behavior, and log adjustments. This way, you can anticipate future challenges and keep your system balanced as it grows.

    Conclusion

    Keeping the right flow in a nano aquarium is key. It affects how well your equipment works and how healthy your fish and invertebrates are. Aim for a turnover of about four times per hour for biological media.

    Remember, real-world losses can happen due to head pressure, tubing, and clogging. Use simple tests, a flow meter, or a bucket method to check pump output. Adjust with controllers or gate valves for a smooth return.

    For small systems, gentle filtration is best. Use sponge filters, baffled hang-on-back units, and spray bars. These methods keep biological flow steady without harming your fish.

    Add plants, rocks, and driftwood to create hiding spots. They also help break currents. This keeps your tank balanced and peaceful.

    Routine maintenance and watching your fish’s behavior are vital for success. Make sure mechanical and biological media work well together. Check your plumbing for any blockages and aim for slightly lower return strength if needed.

    These steps help keep your nano community healthy and happy. They also make sure your filtration is efficient and reliable.

    FAQ

    How can you tell if your filter flow is too strong for nano inhabitants?

    Look for signs like fish or shrimp being swept around. If they hide a lot or have frayed fins, the flow is too strong. Also, watch for microbubbles, splashing, and erratic skimmer foam.

    What is biological flow and why does it matter for your tank’s wellbeing?

    Biological flow is important for oxygen and cleaning your tank. Aim for about four times your tank’s volume per hour. Low flow can harm your tank’s balance and health.

    How does filtration support a healthy body and natural balance in nano aquariums?

    Filtration keeps your tank clean and supports beneficial bacteria. It removes waste and supplies oxygen. The right flow keeps your tank balanced and healthy.

    What are common signs that filter flow is overly strong in your display?

    Signs include animals getting tossed by currents and hiding too much. Look for spray near outlets, noisy overflows, and microbubbles. Also, check for unstable sump water levels.

    How does strong flow affect the health and behavior of nano inhabitants?

    Strong flow can stress and harm your fish and shrimp. It can also hurt their fins and make them tired. This can lead to poor health and behavior.

    What steps can you take to adjust filter flow settings safely?

    First, measure your flow with a bucket test or flow meter. Then, adjust your pump speed or use a gate valve. Add baffles or change the return direction to reduce flow.

    How do you choose the right filter for a nano or slow-water setup?

    Look for sponge filters, low-flow HOBs, or canisters with spray bars. Choose based on your tank’s size and the needs of your fish. Use pumps that can be adjusted for the best flow.

    How do you perform a reliable flow test on your return pump?

    Use the bucket-timing method to measure flow. You can also use a flow meter. Remember to account for head pressure and plumbing when comparing to the manufacturer’s ratings.

    What are easy ways to create calm refuges for sensitive inhabitants?

    Use plants, caves, and dense hardscape to break currents. Add prefilter sponges and spray bars at the return. Position outputs to dissipate energy and keep your tank calm.

    What signs indicate your inhabitants and system are thriving with current flow?

    Look for normal feeding and activity, no hiding, and healthy plants. Also, check for steady skimmer foam and stable sump levels. These signs show your tank is healthy and balanced.

    What maintenance keeps flow optimal and prevents biological media from failing?

    Clean mechanical media regularly to avoid low flow. Check and replace tubing, remove salt creep, and clear prefilters. Test flow and replace worn impellers to keep your tank healthy.

    What should you consider when changing tank size or livestock to preserve flow balance?

    Recalculate turnover when upgrading or adding species. Consider added head and plumbing complexity. Use DC pumps for control and plan for overflow/drain capacity.

    How can you balance mechanical, biological, and chemical media while keeping inhabitant comfort?

    Aim for a turnover that supports biological media (around 4x/hour) while ensuring mechanical media gets adequate flow. Use separate stages for gentle trapping and biological chambers. This keeps your system balanced and healthy.

  • Liquid Fertilizers for Nano Tanks: How to Dose Without Algae Spikes

    Liquid Fertilizers for Nano Tanks: How to Dose Without Algae Spikes

    This article will teach you how to dose liquid fertilizers for nano tanks. Your plants will thrive without algae spikes. Nano tanks, under 10 gallons, react quickly to nutrient changes. So, precise dosing is key.

    You’ll learn how to fertilize nano plants effectively. This includes choosing the best fertilizers and balancing nutrients with light, CO2, and maintenance. Follow these steps for healthier plants, fewer nutrient deficiencies, and less algae.

    Remember, liquid fertilizers are just part of nano plant nutrition. Light, CO2, and regular water changes also matter. This guide focuses on methods and products for effective fertilizing without algae spikes.

    Understanding Nano Tanks and Their Needs

    A well-maintained nano tank set up on a modern wooden desk, showcasing a vibrant aquascape filled with lush, healthy aquatic plants and colorful small fish. In the foreground, display a small bottle of liquid fertilizer, emphasizing its importance in nutrient dosing. The middle ground should feature a detailed view of the nano tank, with crystal-clear water, a gentle filter flow, and bubbles rising to the surface. In the background, softly blurred greenery and natural light filtering through a nearby window creates a serene, inviting atmosphere. The scene should capture the essence of tranquility and the care needed for maintaining a thriving nano environment, using soft natural lighting to enhance the colors and details of the tank and its inhabitants.

    Nano tanks are small, usually ten gallons or less. They react quickly to water changes. This means pH, ammonia, and nutrient levels can shift fast.

    Plants in nano tanks need stable water and balanced nutrients. They also require the right amount of light. Make sure to provide enough CO2 for your plants. This helps keep them healthy and prevents algae.

    New nano setups often face challenges. It takes time for beneficial bacteria and plant roots to grow. During this time, you might see changes in ammonia or nitrate levels that algae can exploit.

    Early maintenance is key. Regular water changes help control ammonia and algae. Many experts suggest doing partial water changes to keep the tank balanced while your biofilter and plants get established.

    Plant a lot at the start. Fast-growing plants quickly use up nutrients. This competition with algae for nitrates and phosphates helps control algae growth.

    Keep the temperature right for your plants, between 72°F and 78°F. Good circulation and a clean filter help move nutrients and oxygen. This supports plant health and makes it harder for algae to grow.

    By focusing on stability in nano tank care, you set up your plants for success. Use nano plant care tips to make smart choices early on. Only add nano plant health supplements and fertilizers when your tank’s parameters are steady.

    The Role of Liquid Fertilizers in Aquatic Ecosystems

    A vibrant underwater scene showcasing the role of liquid fertilizers in aquatic ecosystems. In the foreground, colorful aquatic plants exhibit lush growth, with droplets of liquid fertilizer visibly enriching their leaves. In the middle ground, a school of small fish swim among the plants, illustrating a healthy and balanced ecosystem. The background features a well-maintained nano tank, with clear water that reflects soft, natural lighting filtering from above, creating a serene and uplifting atmosphere. Use a wide-angle lens to capture the depth of the tank, focusing on the interaction between the plants and fish, highlighting the essential relationship fostered by liquid fertilizers in promoting aquatic life without algae spikes. The overall mood conveys harmony and vitality within the aquatic environment.

    Liquid fertilizers add nutrients directly to the water. This helps plants grow fast without needing roots. It’s great for small spaces or places where roots can’t reach.

    In nano tanks, plants need nutrients quickly. Liquid fertilizers provide these nutrients fast. This helps new plants grow quickly.

    Using liquid fertilizers regularly keeps plants healthy. They grow strong and look good. This makes plants better at competing with algae.

    Adjust the amount of fertilizer based on your tank’s light and CO2. Too much can feed algae instead of plants. It’s all about balance.

    There are many types of liquid fertilizers. You can choose from complete blends or specific products. Brands like Seachem Flourish and API Leaf Zone are good options.

    For extra care, use special growth enhancers. They help plants grow faster and look better. This leads to healthier plants and a better tank.

    • Fast-acting delivery of nano plant nutrients to the water column
    • Useful when substrate root-feeds are limited or inert
    • Helps prevent macronutrient and micronutrient deficiencies
    • Supports plant growth that can outcompete algae

    Know how liquid fertilizers work in your tank. Choose the right products and dose them right. This will make your plants thrive and keep your tank healthy.

    Key Nutrients for Healthy Nano Plants

    Your nano plants do well with the right mix of nutrients. Start with the big three: Nitrogen (N) for leaf growth, Phosphorus (P) for energy, and Potassium (K) for overall health.

    Don’t forget Calcium (Ca) for strong cell walls and Magnesium (Mg) for photosynthesis. Sulfur (S) is key for proteins. These nutrients are the foundation of good nano plant care.

    • Nitrogen (N): lush leaves and fast growth.
    • Phosphorus (P): strong roots and energy flow.
    • Potassium (K): stress tolerance and enzyme support.
    • Calcium (Ca) & Magnesium (Mg): structure and photosynthesis.
    • Sulfur (S): amino acids and proteins.

    Trace elements are important too. Iron (Fe) helps with new growth and chlorophyll. Boron (B) is for cell walls. Manganese (Mn) aids photosynthesis.

    • Iron (Fe): prevents yellowing and supports shoots.
    • Boron (B): aids tissue strength and growth.
    • Manganese (Mn): assists photosynthesis.
    • Zinc (Zn), Copper (Cu), Molybdenum (Mo): trace metabolic roles.

    Look out for signs of nutrient lack in your tank. Iron deficiency shows as yellow leaves. Lack of N, P, or K means slow growth and pale leaves. Spotting these early stops decay and algae growth.

    For most setups, a regular fertilizer schedule is best. Use low doses often to keep nutrients balanced. This avoids algae growth caused by sudden nutrient spikes.

    Choose fertilizers made for nano plants. Follow the recommended doses for your tank size and plant number. Small, steady doses keep water clear and plants healthy without sudden changes.

    Choosing the Right Liquid Fertilizer for Your Nano Tank

    Choose a liquid fertilizer with all the nutrients your plants need. Look for clear N-P-K values and chelated iron to keep colors bright. The best fertilizers for nano plants are balanced to avoid nutrient gaps.

    Decide between a concentrate or a daily formula based on your testing schedule. Concentrates are good for infrequent use if you dilute them right. Daily formulas are better for steady feeding and easier measurements.

    For an easy start, try all-in-one mixes like Seachem Flourish or Tropica Plant Growth Nutrient. They’re favorites among hobbyists because they’re easy to use. For specific needs, add a targeted supplement instead of increasing a general mix.

    Organic nano fertilizers are great if you prefer natural products. But, be aware that they release nutrients at different rates. Make sure they’re safe for your shrimp and snails.

    Use small dosing tools for your tank. Droppers, small syringes, or tablets are perfect for nano tanks. Avoid big dosing pumps unless you have a special micro-doser.

    • Check phosphate levels before buying; avoid products high in phosphorus if your tank is phosphate-sensitive.
    • Never add full-strength doses intended for larger tanks; diluted or fractional doses reduce risk of sudden parameter swings.
    • Always confirm compatibility with shrimp, snails, or delicate invertebrates listed on the product label.

    If you’re unsure, start with half or a quarter of the recommended dose. Slowly increase it while testing the water and watching your plants. This careful approach helps you use fertilizers without stressing your mini ecosystem.

    Proper Dosage Guidelines for Nano Tanks

    When adding nutrients to nano tanks, precision is key. Use a small syringe or glass dropper to measure accurately. This method prevents algae growth while keeping plants healthy.

    It’s better to dose in small amounts often. Daily or every-other-day doses keep nutrients steady. Large doses can cause algae to grow. This approach helps plants grow better and reduces stress.

    Begin with a small amount, about 25–50% of what’s recommended for bigger tanks. Watch your plants for a week or two. If they look healthy, you can slowly increase the dose.

    • Log every dose, water change, and plant response.
    • Note any algae appearance, changes in water clarity, or pH shifts.
    • In new setups, keep doses low and prioritize regular water changes to control ammonia and leached nutrients.

    If you use CO2 and bright lights, your plants will need more nutrients. Stick to a balanced plan that includes NPK and trace elements. For low-tech, low-light tanks, dose more carefully to avoid excess nutrients.

    Choose fertilizers that are easy to dose. Brands like Seachem, API, and Easy Green offer clear instructions. This makes fertilizing your nano tank safer and easier.

    Keep a simple log of your dosing. Write down the date, amount, and any plant changes. This log will help you adjust your fertilizing routine for better plant health.

    Strategies to Prevent Algae Growth

    Algae outbreaks happen when we forget to maintain our tanks or when plants don’t grow well. Too many nutrients, ammonia spikes, and too much light are common causes. To avoid these, keep nutrients balanced and encourage healthy plant growth.

    Begin by changing the water regularly. During the early stages, change it daily for the first week. Then, gradually reduce the frequency over four weeks. This helps manage nutrients and prevent ammonia spikes, which are good for preventing algae.

    • Plant densely. Use fast-growing helper plants and floating species to consume excess nutrients and shade algae-prone surfaces.
    • Set a proper light schedule. Aim for 6–8 hours with a timer. Lower intensity suits low-tech setups; bright light needs more CO2 and fertilizer control.
    • Keep temperature moderate, around 72°F–78°F, and maintain filter cleanliness to avoid stagnant zones that favor algae.

    Include a small cleanup crew such as Amano shrimp or nerite snails. These animals remove surface algae with minimal waste. Avoid large algae-eating fish in nano tanks because their waste can worsen problems.

    When using fertilizers, follow nano plant care tips. The benefits of nano plant fertilization include faster plant growth and improved nutrient uptake, which leave fewer resources for algae.

    If algae appear, act quickly. Remove visible mats and trim affected leaves. For spot treatment use 3% hydrogen peroxide at about 3 ml per 1 gallon when treating localized patches.

    1. For stubborn BGA try a 72-hour blackout to starve the bloom.
    2. As a last resort, perform full-tank treatments after removing livestock and preserving filter media: a 10% bleach dip or full peroxide regimen can clear severe outbreaks.

    Consistent habits and informed dosing keep algae prevention nano tanks practical and doable. Follow nano plant care tips, use the benefits of nano plant fertilization, and maintain stable conditions to protect your tank.

    Timing Your Fertilizing Schedule

    Match your fertilizing schedule to the light period for best results. Dose when plants start their active growth phase, like just before or after lights-on. This way, nutrients are ready when plants need them most.

    For consistent growth, choose small, frequent doses over big weekly ones. Daily or every-other-day micro-doses keep nutrient levels steady. This also reduces the risk of algae growth from nutrient spikes.

    Start slow with a new tank. Wait until plants are well-rooted and the water chemistry stabilizes after many water changes. This avoids feeding algae during the tank’s initial cycle.

    If you use CO2, dose fertilizers with CO2 injection and light schedule. A daily routine helps plants absorb nutrients quickly. It also makes growth enhancers more effective and lowers algae risk.

    • Time pruning and major water changes just before you resume regular dosing.
    • Remove visible algae first, then perform larger water changes to avoid reintroducing nutrient spikes.
    • Use consistent micro-doses to maintain balanced nano plant nutrition between maintenance tasks.

    Follow these tips to fine-tune your timing: track plant growth, keep a simple log, and adjust frequency as needed. Small, measured changes lead to steady growth without upsetting the system.

    Adjusting Fertilizer Doses Based on Plant Type

    Match fertilizer strength to your nano plant types’ needs. Fast-growing stems like Hygrophila and Rotala need more nutrients. Carpet plants such as Hemianthys and Staurogyne require steady, low-dose feeding and CO2.

    Follow this guide to safely adjust fertilizer doses in nano tanks.

    • Fast growers (stem plants): increase dosing within safe nano limits. Focus on nitrogen and potassium. Keep trace elements ready to avoid quick depletion.
    • Carpet and high-demand foreground species: favor steady micro-dosing. Balance potassium and iron for vibrant colors. Consider CO2 supplementation for better nutrient use.
    • Low-demand plants (Anubias, Java Fern, Bucephalandra): minimal dosing is often enough. These plants absorb nutrients through leaves and tolerate lower fertilizer rates.

    Monitor your tank after any changes. Yellowing or slowed growth indicate a need for more nutrients. If algae blooms, reduce feeding and check light and CO2 levels before increasing nutrients again.

    Address clear deficiencies by targeting the missing element. For example, use iron chelates for chlorosis instead of boosting all nutrients. This can fuel algae growth.

    Keep notes on your fertilizers and results over time. Small, measured adjustments help fine-tune nano plant nutrition. This way, you can find the best fertilizers for nano plants for each setup.

    Monitoring Plant Health and Fertilizer Effectiveness

    Start a simple routine to check on your nano plants. Look at the color of the leaves, how fast they grow, and for any damage. Also, watch for algae and the health of stems and leaves.

    Use basic tools for this task. A weekly check, a growth log with photos, and notes on water and fertilizer are key. Test kits for PO4 and NO3 help spot nutrient issues that might not be obvious.

    • Record dosing amounts and timing.
    • Take close-up photos of problem leaves to compare over days and weeks.
    • Keep a short log of light hours and CO2 method if used.

    Check how well your fertilizer works by watching plant responses. Look for new growth, deeper colors, and less damage to older leaves.

    Be careful of unexpected problems. If algae grows fast after you increase dosing, it might mean you have too much light or CO2. Change one thing at a time to find the problem.

    Think about more than just single doses of fertilizer. A balanced mix of nutrients helps plants grow steadily and reduces stress damage.

    Keep your tank clean by changing filter media and removing rotting leaves. These can cause algae and confuse your plant health checks.

    If you use supplements, track them separately from regular fertilizer. This helps you see which one boosts plant health and which might cause too much nutrient.

    Every week, follow a checklist: inspect plants, update photos, record dosing, and do basic tests. This keeps your checks on fertilizer effectiveness reliable and consistent.

    Troubleshooting Fertilizing Issues

    If algae flare up after you dose, cut the next dose in half and raise water-change frequency. Add fast-growing stem plants like Hygrophila or Limnophila to outcompete algae. Check light hours and intensity, plus CO2 levels, to find imbalances that trigger blooms.

    When plants show deficiency signs despite dosing, review both product makeup and schedule. Ensure your liquid mix supplies macronutrients and micronutrients. Test pH and hardness, as these affect nano plant nutrition and nutrient uptake.

    Small tanks are prone to rapid swings. Use smaller, more frequent doses and dilute concentrated supplements before adding. Keep a simple log of every addition so you can link any parameter change to a specific dose and solve nano fertilizers problems faster.

    • For persistent cyanobacteria or BGA, vacuum the substrate and perform a 72-hour blackout. Check nitrate levels; low nitrogen can favor BGA. Consider targeted peroxide treatments as a next step.
    • Manual removal and spot H2O2 can curb local outbreaks before they spread. Remove affected leaves to reduce the source of re-infestation.

    In emergencies with severe algae, you may need aggressive measures such as a controlled bleach or hydrogen peroxide treatment. Remove all livestock first and preserve filter media in cycled tank water to keep beneficial bacteria alive during the process.

    Prevention beats crisis. Research products like Seachem Flourish or API Leaf Zone to match your plants. Plant densely early, follow steady maintenance, and use nano plant care tips to keep your system stable. That routine cuts the chance of nano fertilizers problems and supports balanced nano plant nutrition.

    Conclusion: Building a Balanced Nano Tank

    Start by focusing on the basics when setting up a nano tank. Use liquid fertilizers for balanced nutrients. Begin with a small dose, about 25–50% of what you would use in a bigger tank. Then, slowly increase it based on how your plants react.

    Follow some key care tips for your nano plants. Make sure to dose nutrients when you turn on the lights and CO2. Keep your plants close together and choose fast-growing ones to fight algae. Dose a little at a time and change the water regularly, watching your plants closely.

    If you notice any problems, tackle them one step at a time. Keep a record of what you do and how it affects your tank. If algae shows up, cut back on light or nutrients. Also, check your tank’s circulation and temperature.

    With the right fertilizers and careful dosing, your nano tank can thrive. Stick to these care tips and enjoy healthy plants without algae troubles.

    FAQ

    What exactly is a nano tank and why does dosing matter more than in larger aquaria?

    Nano tanks are small, usually 10 gallons or less. Because they’re small, any changes in water can cause big swings. This means you need to dose carefully to keep the tank stable.

    What outcomes should I expect if I follow conservative liquid-fertilizer dosing for a nano tank?

    You’ll see healthier plants, fewer nutrient problems, and less algae. This is because the right amount of fertilizer helps plants grow well and fight off algae.

    How do liquid fertilizers differ from substrate root-feeds, and when should I use them in a nano tank?

    Liquid fertilizers give nutrients directly to the water for plants to use quickly. They’re good for nano tanks with limited root zones. Root-feeds slowly release nutrients and are better for plants with lots of roots.

    Which macronutrients and micronutrients should I worry about most for nano plants?

    You should focus on Nitrogen, Phosphorus, Potassium, Calcium, Magnesium, and Sulfur. Also, Iron, Boron, Manganese, Zinc, Copper, and Molybdenum are important. Each nutrient helps plants grow and stay healthy.

    What are typical deficiency signs to watch for in a nano tank?

    Look for yellow leaves (iron deficiency), slow growth (N, P, or K shortage), and dead spots (trace shortages). Catching these early can prevent algae problems.

    How should I dose liquid fertilizers in a nano tank to avoid algae spikes?

    Use small, consistent doses daily or every other day. Start with 25–50% of the recommended amount. This helps keep nutrient levels steady and prevents algae.

    Are there specific product types you recommend for nano tanks?

    Beginners can use all-in-one fertilizers like Seachem Flourish. For specific needs, use iron chelates or potassium boosters. Organic fertilizers are also an option, but they release nutrients slowly.

    How do light and CO2 affect my fertilizer strategy?

    Light and CO2 levels affect how much fertilizer you need. High light and CO2 mean you need more nutrients. In low-light tanks, dose more carefully to avoid algae.

    How can I measure and keep dosing repeatable in a tiny tank?

    Use a small syringe or dropper for precise doses. Keep a log of your dosing and plant responses. This helps you avoid mistakes and make adjustments.

    What maintenance and prevention tactics reduce algae risk when fertilizing nano plants?

    Change water often, plant densely, and use the right light. Keep temperatures stable and ensure good circulation. A cleanup crew like Amano shrimp helps too.

    What should I do if algae spikes after increasing fertilizer doses?

    Cut back or stop the fertilizer increase. Change water more often and remove algae. Use 3% hydrogen peroxide for tough algae. Adjust light and CO2 if needed.

    How should I dose—daily or weekly?

    Dosing daily or every other day is best for stable nutrients. Weekly dosing is okay if doses are small and you monitor closely. Small doses prevent algae spikes.

    When should I delay or reduce fertilizer dosing in a new nano tank?

    Wait until plants are established and water chemistry stabilizes. Start with 25–50% of the recommended dose and increase slowly based on plant response.

    How do I adjust dosing for different plant types?

    Fast growers need more nutrients. Carpeting plants require steady micro-dosing and CO2. Low-demand plants need minimal dosing and tolerate lower fert rates.

    Should I use fertilizers with high phosphorus in a nano tank?

    Avoid high-phosphorus products in sensitive setups. Excess phosphorus can lead to algae. Choose balanced formulas or targeted supplements for specific deficiencies.

    How do I sync dosing with lights and CO2 for best uptake?

    Dose during the photosynthetic period, often in the morning. For CO2 tanks, keep dosing and CO2 levels stable for rapid uptake and algae prevention.

    What simple tests or tools should I use to monitor nutrient levels and plant response?

    Use visual checks, a growth log, and basic test kits. Track water changes, dosing, and plant observations. These tools help you make accurate adjustments.

    How do I evaluate whether a fertilizer change worked?

    Compare plant growth over 1–3 weeks. Look for new shoots, deeper color, and faster growth. If algae appears, revert doses and reassess light and CO2.

    What emergency measures should I take for severe algae outbreaks in a nano tank?

    Start with manual removal, blackout, and 3% hydrogen peroxide treatments. For persistent problems, vacuum substrate and consider severe measures like bleach. Prevention is better than emergency fixes.

    Can organic nano fertilizers be used safely in small tanks?

    Yes, organic fertilizers are safe. But they release nutrients slowly and variably. Start very conservatively and monitor water chemistry and algae closely.

    What are the root causes of algae in nano tanks beyond fertilizer use?

    Algae problems often stem from poor maintenance and plant growth. Causes include nutrient imbalances, ammonia spikes, excessive light, poor CO2, stagnant zones, and decaying plant matter. Addressing these basics prevents algae.

    What final dosing rules should I follow for consistent success?

    Start with 25–50% of the recommended dose. Use small, frequent doses and measure precisely. Sync dosing with light and CO2, plant heavily, and keep a log. Make gradual adjustments and correct imbalances promptly for a stable tank.