Author: caiopereira

  • The Best Places to Position a Small Aquarium in a Tiny Apartment

    The Best Places to Position a Small Aquarium in a Tiny Apartment

    Choosing the right spot for your nano tank is key. It impacts water temperature, algae, fish stress, and daily care ease.

    Tank size and type limit your choices in small spaces. Beginners often start with 5–10 gallon desktop tanks or 10–20 gallon nano tanks. These smaller tanks are cheaper and fit well, but change faster with room conditions.

    Shape is also important: rectangular tanks offer good swimming space, while corner or triangular tanks fit tight spots. Bow-front tanks enhance depth, and cube tanks blend in seamlessly. Choose a shape that suits your fish and space.

    Before deciding, check the environment. Look at natural light, distance from heat sources, drafts, floor strength, and access for feeding and cleaning.

    Try a temporary setup first. Use a strong stand or a box to test light, traffic, and noise for days. This simple test is a practical guide for finding the best spot for your nano tank.

    Understanding Nano Tanks and Their Benefits

    A beautifully arranged nano aquarium positioned on a sleek, modern coffee table in a cozy, small apartment living room. In the foreground, the transparent glass nano tank showcases vibrant aquatic plants and small colorful fish, creating a focal point. In the middle ground, the coffee table is adorned with minimalist decor, including a stylish vase and a stack of books. The background features a comfortable couch with soft cushions and a window allowing natural light to filter in, casting gentle reflections on the tank. The atmosphere is warm and inviting, evoking a sense of tranquility and charm. Utilize soft, diffused lighting to highlight the tank and create a serene ambiance, capturing the idea of living harmoniously with nature in limited space.

    Nano tanks are small aquariums, usually between 5 and 20 gallons. They fit tight living spaces. You get movement, color, and a calming focal point without a big tank.

    Their compact size makes them flexible. You can place them in studios, alcoves, and on shelves.

    In tiny apartments, a well-placed aquarium reduces stress. It introduces natural motion and subtle color shifts. You can use the optimal positioning of nano tank to frame seating areas or brighten a kitchen counter without blocking traffic paths.

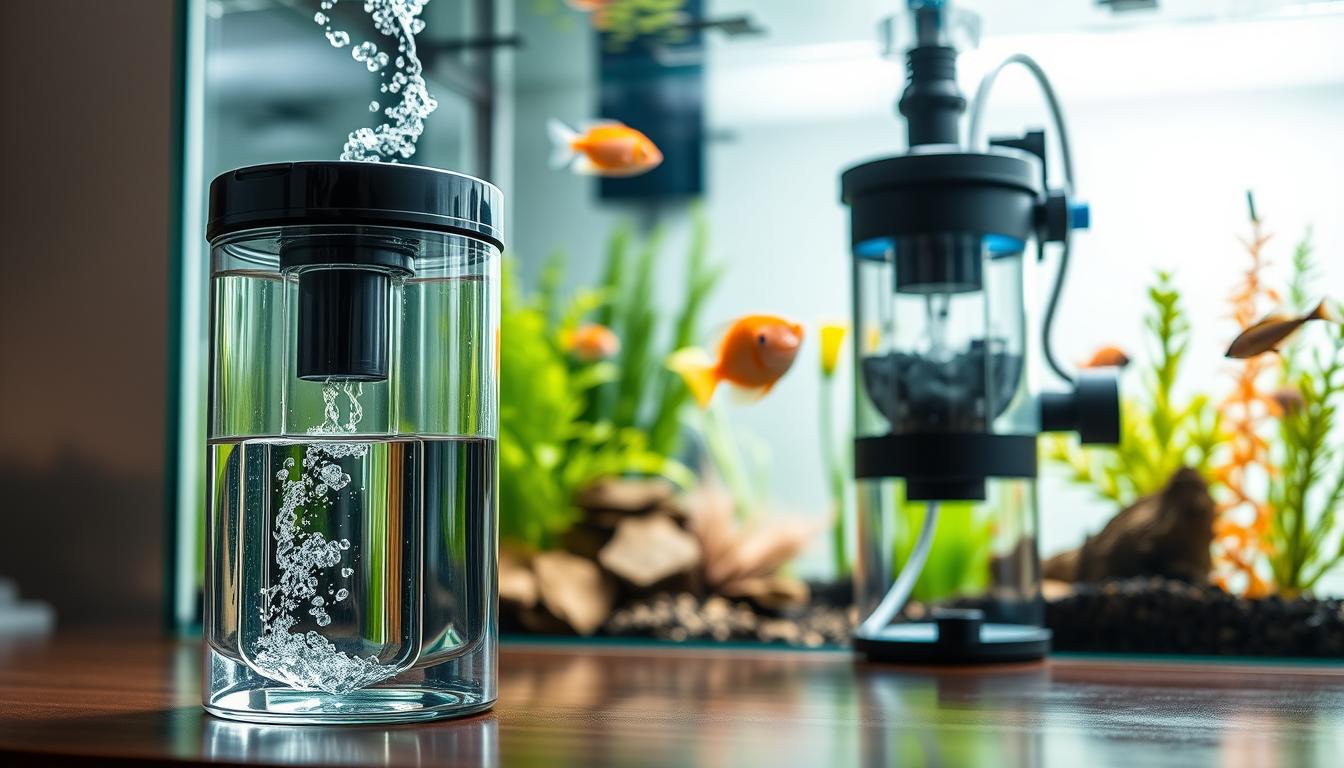
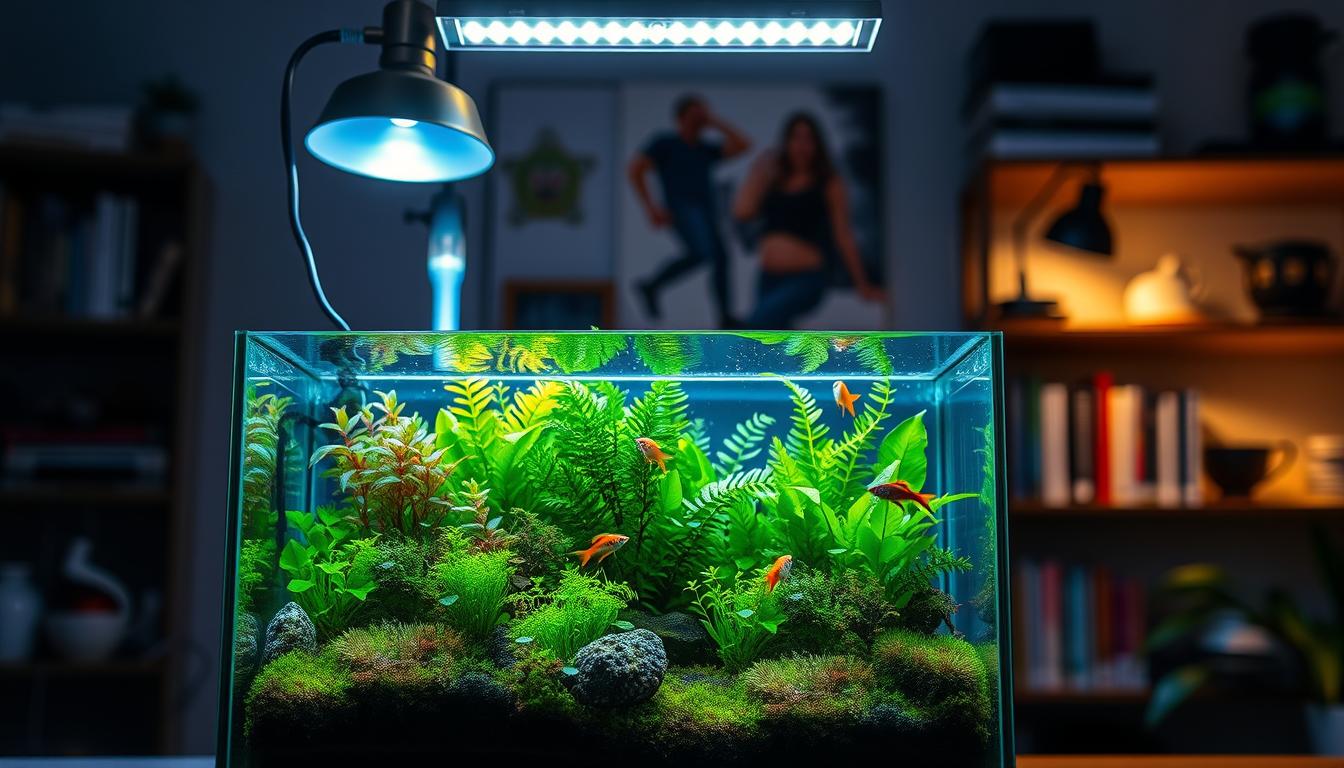
    Modern tech makes maintenance easier. LED lighting from brands like Fluval or Kessil uses less power and ages well. Compact filters and integrated hoods simplify care, so your nano tank setup tips focus more on balance than constant tinkering.

    Stocking limits mean aquascaping matters more than fish numbers. Emphasize plants, stones, and driftwood for big visual impact with small bioload. This approach keeps water chemistry stable and makes your nano tank placement less demanding.

    Styling advantages are clear in subdued interiors. A small, well-composed aquarium complements wood and stone finishes. Use the optimal positioning of nano tank to create an accent that blends with neutral palettes while drawing the eye.

    • Design: favor planted hardscape over heavy fish loads.
    • Maintenance: choose compact filtration and low-energy LED lighting.
    • Placement: test lighting and traffic flow before finalizing nano tank placement.

    Follow simple nano tank setup tips to balance aesthetics and care. Start with a plan for location, filtration, and plant choices. That planning will help your small aquarium thrive in a tight apartment without overwhelming your space.

    Assessing Your Apartment Space

    Start by checking each room. Look at the living room, bedroom, kitchen, home office, and any outdoor spaces. See where sunlight hits and where air might blow from vents.

    Measure the size of every surface. Note the length, depth, and height of each spot. Then, figure out how much the tank and its accessories will weigh. Make sure the floor or furniture can handle this weight.

    Find out where the electricity is. You’ll need a special power strip for your tank’s equipment. Make sure it’s not near water or sensitive electronics. Plan how to run the cords to avoid tripping.

    Think about noise and vibrations. Identify any loud appliances or areas with a lot of foot traffic. Place your tank where it won’t be disturbed by noise or vibrations.

    If your tank will be in a closed space, think about ventilation. You might need fans to control humidity and prevent mold. Make sure you can easily get to the tank for maintenance.

    A cozy living room in a tiny apartment featuring a beautifully set up nano aquarium on a minimalist shelf. The foreground shows the colorful fish swimming within vibrant aquatic plants, creating a serene focal point. In the middle ground, a cheerful indoor plant sits nearby, enhancing the green aesthetic, while a small, rustic coffee table holds a few simple decorative items. The background reveals a stylish couch with soft cushions, subtly contrasting the aquarium’s blues and greens, complemented by warm ambient lighting from a nearby lamp. A large window allows natural daylight to flood the space, casting gentle reflections in the glass of the aquarium. The overall mood is inviting and tranquil, perfect for beginners assessing their apartment space for placing a small aquarium.

    • Room audit: list sun, heat, and traffic for each space.
    • Surface check: measure dimensions and load capacity.
    • Electrical plan: locate outlets and add GFCI protection.
    • Noise scan: avoid vents, speakers, and busy walkways.
    • Ventilation plan: provide airflow for enclosed installations.

    Use this guide to compare different spots in your apartment. Score each location based on sunlight, support, access, noise, and power. This will help you find the best spot for your nano tank.

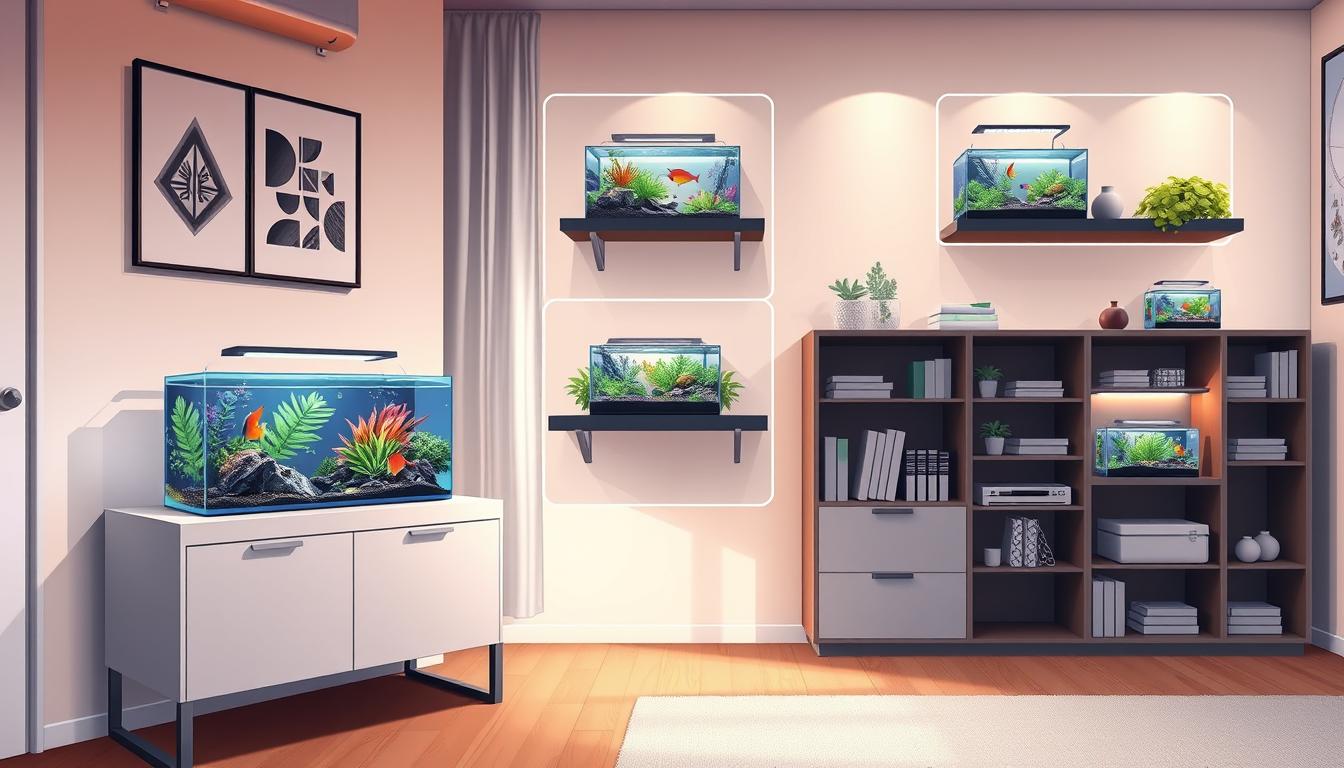
    Ideal Locations for Your Nano Tank

    Place your nano tank against a solid wall to create a strong focal point. A wall-mounted or stand-supported setup hides cords and gear, keeps the tank stable, and gives a clean visual anchor. Make sure the wall and stand can bear the weight and that you can reach the back for service.

    Integrate the aquarium into a media unit or atop a TV console to tie the tank into your living room design. Leave a gap or thermal barrier to protect the glass from heat and vibration produced by speakers and TVs. These nano tank positioning ideas work well when you want the tank to feel built-in.

    • Use a heat-resistant mat or foam between the tank and electronics.
    • Plan service access so filters and cords remain reachable.

    Use a low or narrow tank as a room divider to define open-plan spaces without blocking light. Place it where both sides allow service access and ensure a stable base on either side. This approach offers stylish nano tank layout suggestions that help zone living and dining areas.

    Set the tank near east-facing or shaded windows to enjoy soft morning light while avoiding direct sun. Direct sunlight causes algae and temperature swings. Install blinds or sheer curtains to filter light when needed and keep the environment steady.

    Desktop and shelf tanks work well in offices, kitchens, and bedrooms. Keep them away from stoves, steam, and bright monitors. Verify that desks and shelves are flat and rated for the weight. Tidy wiring and surge protection improve safety and function.

    1. Against a solid wall for a focal point and hidden equipment.
    2. Built into or atop media units with thermal protection.
    3. As a room divider with service access on at least one side.
    4. Near, but not in, windows—prefer east-facing or shaded spots.
    5. On desks, shelves, or counters that are flat and stable.

    Use these nano tank positioning ideas and layout suggestions to match the tank to your space. When you evaluate options, ask whether the placement supports maintenance, lighting control, and structural safety. That approach helps you choose the best location for nano tank success.

    Proximity to Electrical Outlets

    Start by finding the closest GFCI-protected outlets for your nano tank. This ensures the filter, heater, and lighting can plug in easily. It also keeps maintenance safe by avoiding water damage to unprotected sockets.

    Managing cables is key for safety and looks. Hide cords behind the stand and use drip loops to prevent water damage. Cable channels or Velcro ties help keep everything neat. This makes your setup safer and more attractive.

    Consider the location of other electronics. Don’t place your aquarium under a TV or next to a computer. Heat, vibration, or glare can harm both devices. Make sure there’s enough space for airflow to prevent overheating and for easy access.

    Use a surge protector rated for aquariums and a timer for your lighting. This keeps your equipment safe during power issues. Timers also help plants grow and reduce algae by maintaining a consistent day/night cycle.

    Make sure outlets are easy to reach for quick maintenance or emergencies. You should be able to access plugs without moving the tank. This makes upkeep faster and less stressful, which is important for weekend cleanings.

    By following these steps, you can create a safe and beautiful nano tank setup. Good power planning and cable management are essential for a long-lasting and safe aquarium in small spaces.

    Safety Considerations for Nano Tanks

    Keep your nano tank away from direct sunlight and heat sources. Sunlight fuels algae and causes temperature swings that stress fish. Avoid windows with afternoon sun and stay clear of radiators, gas stoves, and space heaters.

    Use sturdy stands rated for aquarium weight. If you place a tank on furniture, secure it with anti-tip hardware to prevent spills. Place tanks out of high-traffic paths and away from curious pets and children to lower the risk of accidental knocks.

    Protect floors and electronics by using a waterproof mat or tray beneath the stand. Check seals, fittings, and tubing often to catch slow leaks before they damage hardwood or laminate. Small drips can cause big repairs if left unchecked.

    If you live on an upper floor, confirm floor load limits for heavier setups. Contact your building manager or hire a licensed structural engineer when in doubt. This step avoids structural problems and keeps you compliant with local codes.

    Ensure cabinets that house tanks have ventilation. Enclosed spaces trap humidity and condensation, which can warp wood and invite mold. Install a small fan or passive vents to maintain airflow and protect cabinetry.

    • Follow nano tank placement for beginners tips: choose low-risk areas and secure the base.
    • Adopt nano tank placement strategies: use mats, anti-tip brackets, and ventilated enclosures.
    • Plan the optimal positioning of nano tank with weight and access in mind for safe maintenance.

    Enhancing Your Nano Tank’s Visibility

    Put your nano tank where you can see it easily. Think about placing it behind seats, across from the main door, or as part of a media wall. This makes a small tank a daily highlight and supports many placement ideas.

    Use special LED lights for your tank. They make plants and fish colors stand out without needing sunlight. You can even set them to change colors like dawn and dusk. This lighting fits well with display-focused tank layouts.

    • Choose subdued backgrounds like white, black, stone, or wood tones. These make aquatic colors pop.
    • Avoid bright or patterned backdrops that compete with the aquascape.
    • Position the tank against a contrasting wall to frame it like art.

    Small tanks can be accents or modest focal features. Place them on side tables, shelves, or built-in niches. This adds color and movement without overwhelming the space. These ideas work well in living rooms, bedrooms, or home offices.

    Keep equipment hidden while ensuring easy access for upkeep. Hide cords and filters in cabinets or behind panels. Use stands with good airflow. Smart hiding supports both practical layouts and a clean setup.

    Balance visibility with care. Keep the tank away from busy areas and direct heat. With the right sightlines, lighting, and hiding, your tank will enhance both your space’s look and your daily joy.

    Avoiding Common Placement Mistakes

    You want your nano tank to be stable and healthy. Putting the aquarium in direct sunlight is a common mistake. Light from a south-facing window can cause fast algae growth and big temperature swings. Choose a shaded spot or use blinds to keep light levels steady.

    Another error is ignoring the weight of a filled tank. Calculate gallons × 8.34 lb/gal before you set the tank down. Make sure your floor or stand can support that load. If you doubt the structure, add reinforcement to prevent sagging or damage.

    • Leave room to reach the back and sides for filter and glass cleaning.
    • Design with removable panels or plan at least 12–18 inches of clearance for routine work.

    Poor access leads to skipped maintenance. Limited service access is a common nano tank placement mistake that raises cleaning time and stress for you and your fish.

    Ventilation matters when you place a tank in a cabinet or nook. Enclosed installations without airflow cause humidity and condensation. Electronics can run hot. Add vents or a small fan to keep equipment cool and air moving.

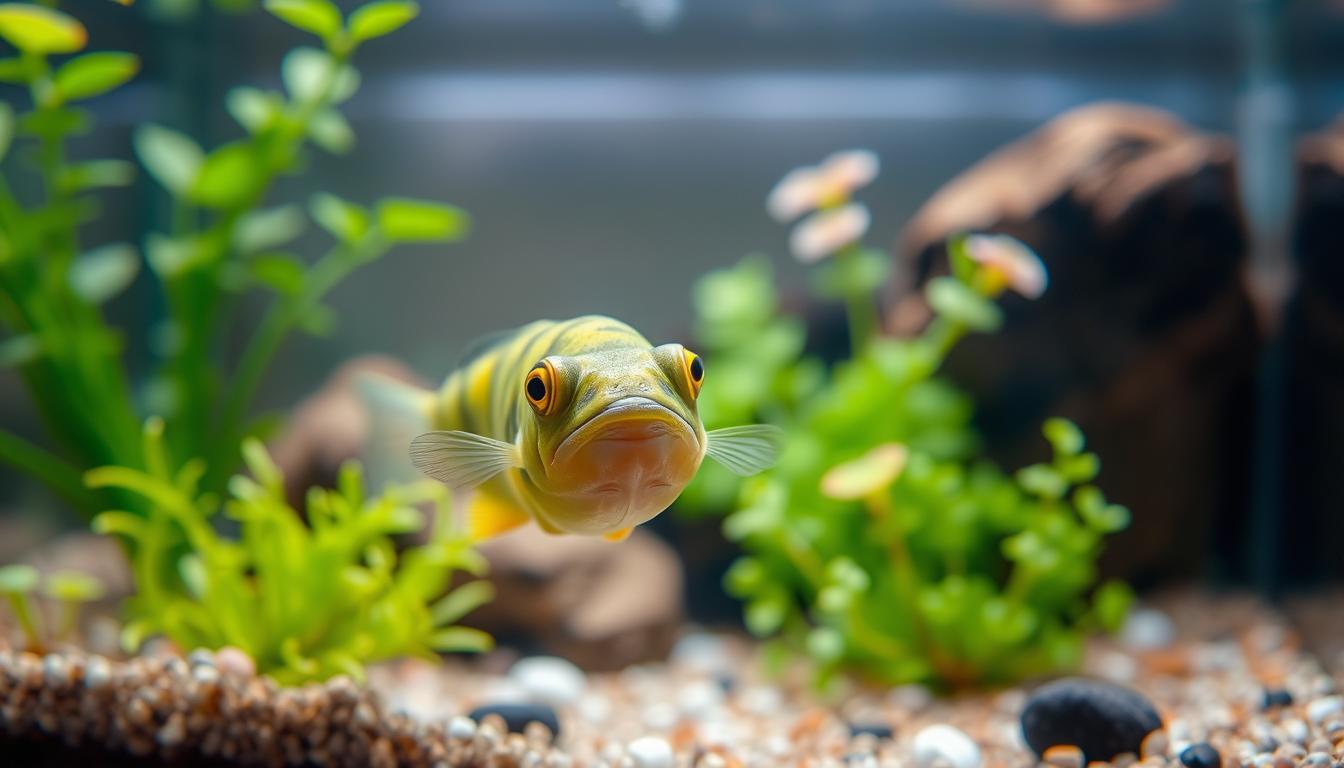
    Stocking levels deserve special care in small tanks. Overcrowding stresses fish and increases maintenance needs. For beginners, the rule is to understock and focus on a simple aquascape. This tip helps you avoid a common nano tank placement mistake tied to tank size and ecosystem balance.

    Noise and traffic affect fish behavior. Avoid locating your aquarium next to loud appliances or in heavy foot-traffic zones. Constant vibration and sudden motion make fish shy and create more audible filter noise for you.

    1. Keep sunlight controlled to prevent algae and heat spikes.
    2. Verify floor and stand capacity with the weight calculation.
    3. Ensure clear access for routine maintenance and emergency work.
    4. Provide ventilation for enclosed setups to reduce humidity and heat buildup.
    5. Choose conservative stocking to protect water quality and animal health.
    6. Place the tank away from noisy appliances and busy walkways.

    For nano tank placement for beginners, follow these checks before you set the tank in place. That way you avoid early mistakes and find the optimal positioning of nano tank for long-term success.

    Maintaining Your Nano Tank in a Tiny Space

    Keep a simple routine to protect water quality. Do partial water changes of 10–30% weekly, depending on how many fish you have. Also, test pH, ammonia, nitrite, and nitrate often to catch any changes early.

    Choose compact gear that fits your space. Opt for a hang-on-back or small canister filter, a low-wattage heater, and an LED light that fits in the hood. These choices make maintenance easier in tight spots and fit well with nano tank setup tips for small apartments.

    • Check filter media every two weeks to monthly and replace or rinse as needed.
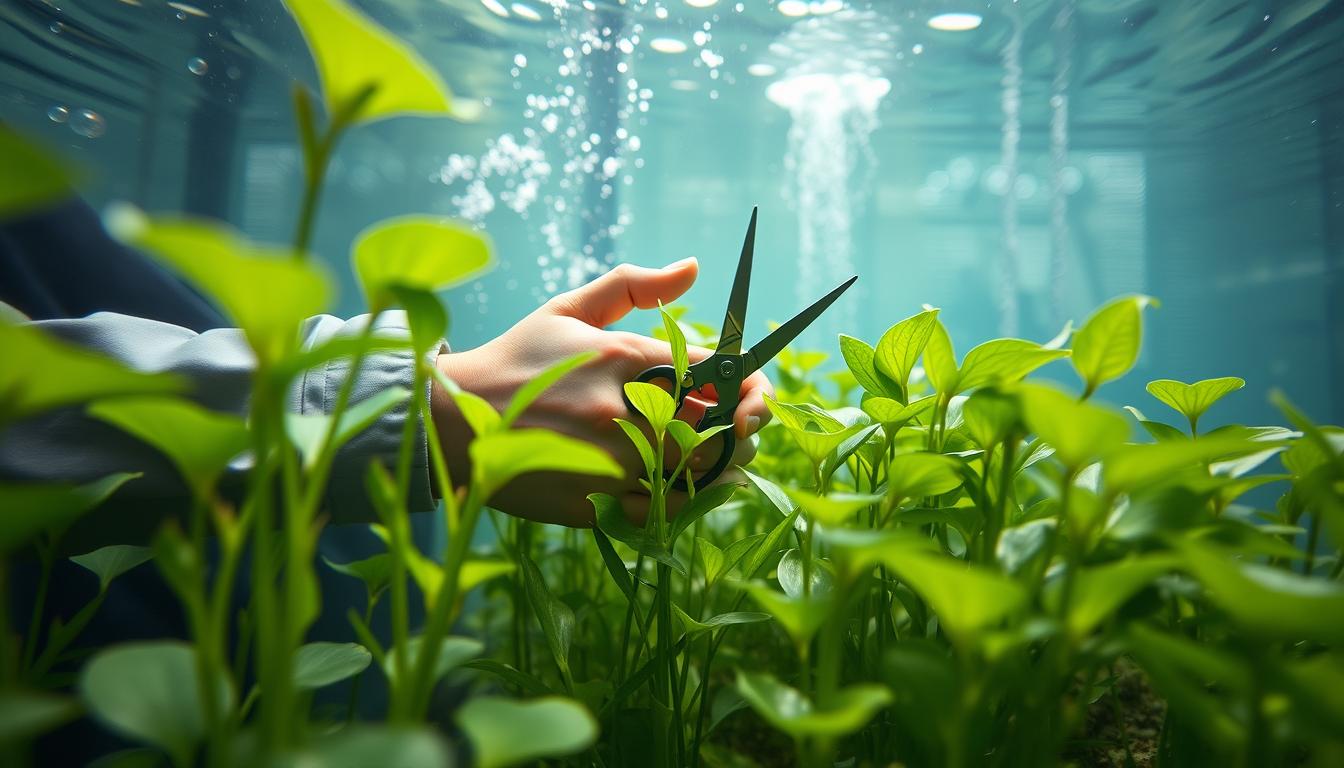
    • Trim plants and remove debris during water changes to reduce bioload.
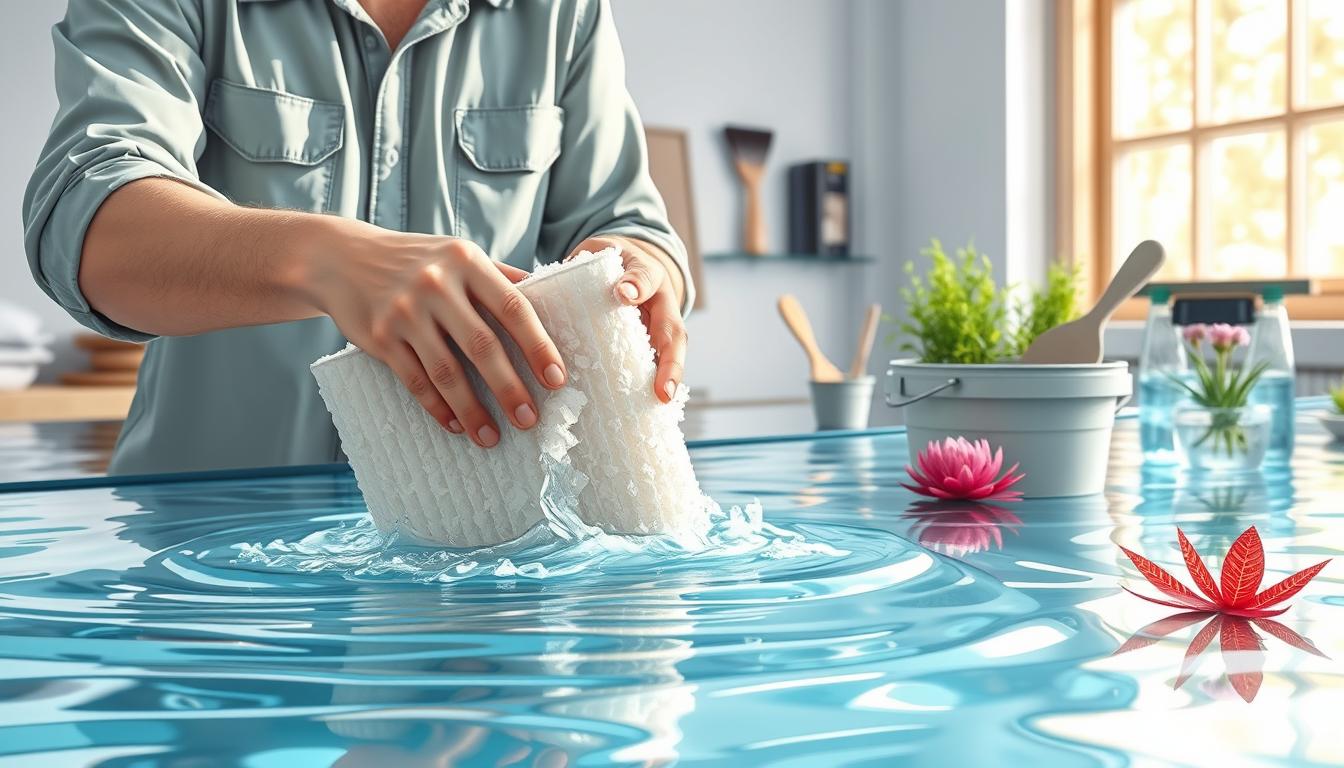
    • Use a small gravel vacuum and soft brushes to keep glass and substrate clean.

    Organize supplies near the tank to cut clutter. Store food, test kits, nets, and cleaning tools in a cabinet or a stand compartment. This keeps your living area tidy and follows practical nano tank placement strategies.

    Watch microclimates closely. Small tanks react faster to room changes. Keep room temperature steady around 72–78°F for tropical setups. Avoid drafty windows or direct AC vents. Place the tank where heating and cooling sources won’t cause swings.

    1. Plan service access so you can reach all sides for water changes.
    2. If built into furniture, use removable front panels or a slide-out shelf for easy reach.
    3. Leave clearance above and behind the tank for lights, cords, and tubing.

    Follow a clear maintenance checklist and adapt it to your fish and plants. Small, steady efforts pay off in stable chemistry and healthier inhabitants. Use this nano tank placement guide to set up access paths that make care fast and stress-free.

    Tips for Styling Your Nano Tank

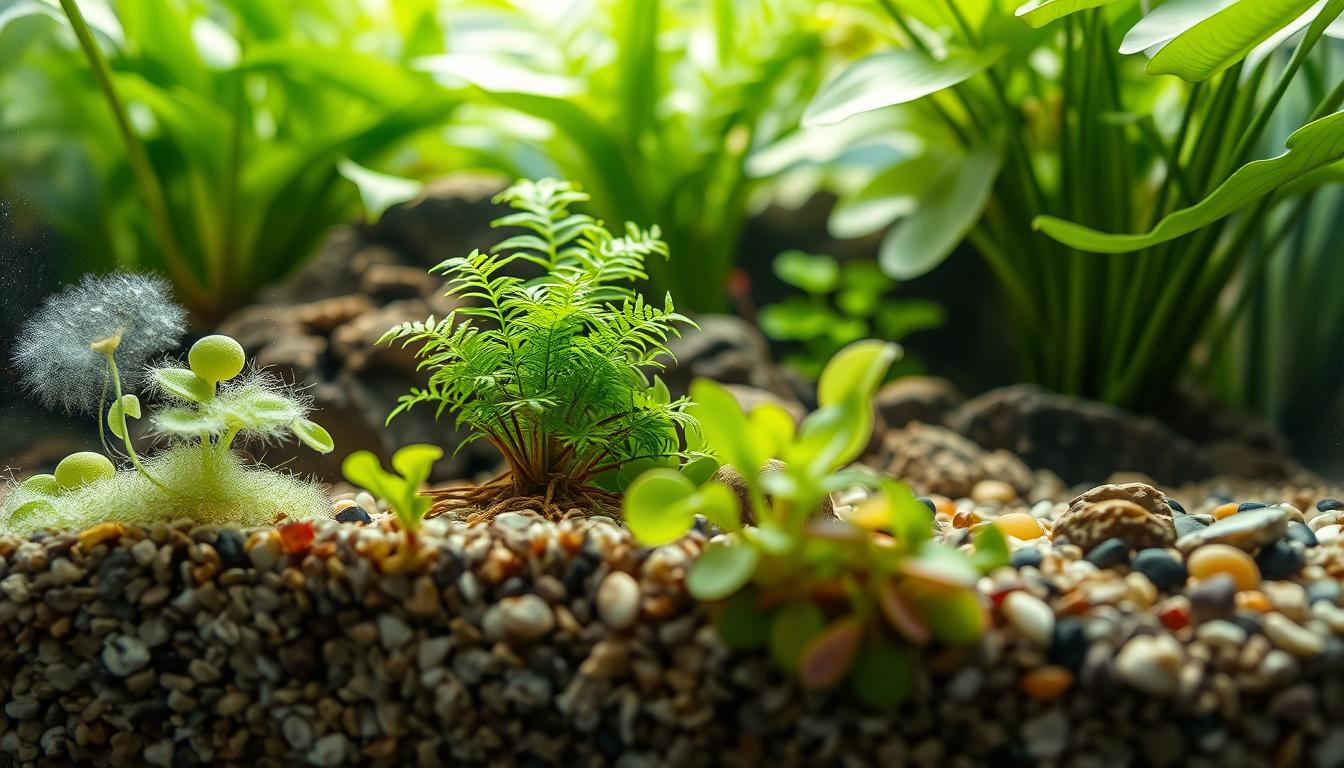
    When styling your nano tank, focus on the aquascape first. Use wood, rock, and a clear substrate layout. This makes each element look small and balanced.

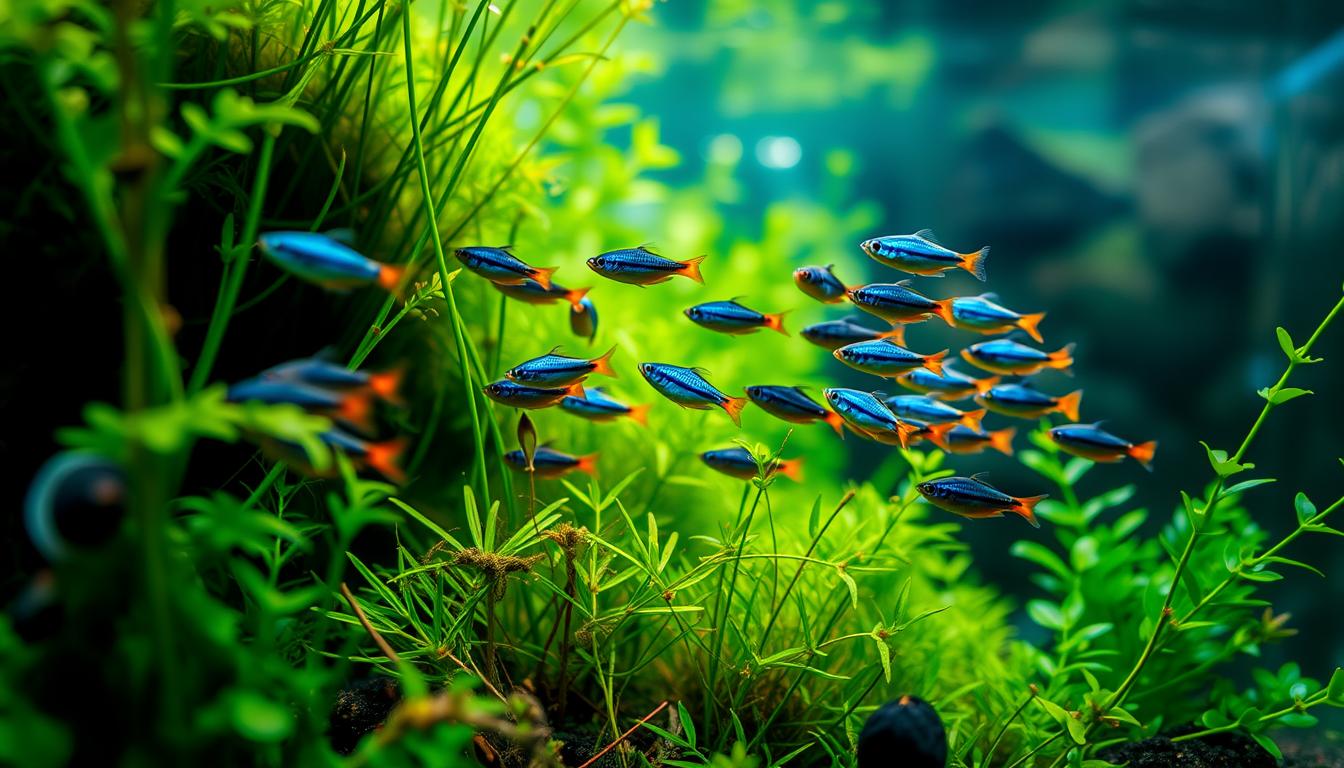
    A planted focus with Anubias, Java fern, and moss adds depth. It often needs less care than setups with lots of fish.

    Match your tank’s colors with your room’s palette. Place it against stone, natural wood, or black-and-white walls. This makes the plants and hardscape stand out.

    Avoid bright decor nearby. It helps keep the focus on your nano tank.

    Consider custom cabinetry and shelving for a seamless look. Built-in media units or floating shelves are stylish and practical. They allow for easy maintenance.

    Try out your nano tank layout on a temporary stand. This helps test sightlines, light, and traffic flow.

    For tiny apartments, choose low-maintenance themes. Hardy plants and small fish like rasboras or guppies are great for beginners. Use a mock-up for a few weeks before deciding on a permanent spot.

    This test helps refine your layout and access for maintenance. It saves you from costly changes.

    FAQ

    What is a nano tank and why choose one for a tiny apartment?

    Nano tanks are small aquariums, usually 5–20 gallons. They add movement, color, and calm to small spaces. They’re affordable, save space, and fit well with furniture.

    Thanks to new LED lights and filters, they’re easier to care for. You’ll focus on plants and decorations, not too many fish, to keep things balanced.

    How do I decide the best location for a nano tank in my apartment?

    First, check each room for sunlight, heat, and foot traffic. Use a stand or box to test spots for a few days. Look at light, noise, and how often you’ll see the tank.

    Make sure the surface is flat and strong enough for the tank and equipment.

    Which room in a small apartment is usually best for a nano tank?

    The living room or office is best because you’ll see it often. Place it against a solid wall or on a media unit. Bedrooms can be calm if you control noise and light.

    But avoid kitchens near stoves or bright windows to prevent temperature changes.

    Can I place a nano tank near a window to get natural light?

    Yes, but not directly in the window. East-facing or shaded windows are okay. Direct sun causes algae and temperature issues.

    Use blinds or curtains for shade, or LED lights for aquariums instead of sunlight.

    What floor and furniture concerns should I check before placing a tank?

    Measure the surface and calculate the tank’s weight to check if it’s strong enough. For heavy tanks or upper floors, get advice from a builder or check local codes.

    Use a sturdy aquarium stand and consider anti-tip hardware on furniture.

    How important is electrical access and what should I plan for?

    Electrical access is very important. Map out outlets and plan for a GFCI-protected source for your equipment. Keep outlets easy to reach for maintenance and emergencies.

    Use a surge protector for aquariums and timers for lights to keep a day/night cycle and reduce algae.

    How do I manage cords and prevent water from reaching outlets or electronics?

    Organize cords neatly and create drip loops to keep water away from outlets. Hide cables or use channels for a clean look. Avoid placing tanks over sensitive electronics and ensure good airflow.

    What ventilation or humidity control is needed if I enclose a nano tank in cabinetry?

    Enclosed tanks need fan-assisted ventilation or vents to control humidity. Plan for removable panels for service and ensure airflow to prevent overheating and mold.

    How does placement affect fish health and maintenance?

    Placement affects temperature, algae, and fish stress. Avoid drafts, direct sunlight, and loud appliances. Choose a spot with stable temperatures (around 72–78°F) and easy access for maintenance.

    What are common placement mistakes to avoid?

    Avoid direct sunlight, ignore floor/stand capacity, and limit service access. Don’t enclose tanks without ventilation, overcrowd fish, or place near noisy appliances. These mistakes increase maintenance and risk.

    What maintenance schedule should I plan for a nano tank?

    Do partial water changes regularly, usually 10–30% weekly. Check filter media every two to four weeks and test water often. Keep supplies nearby for quick access.

    Which nano tank shapes work best in small apartments?

    Rectangular tanks are versatile and offer good swimming space. Corner or triangular tanks fit tight spots well. Bow-front tanks add depth, and cube or cabinet-style tanks blend with decor.

    Choose based on sightlines, available space, and service access.

    How should I plan sightlines and styling so the tank complements my decor?

    Place the tank where you’ll see it most, like behind seating or across from an entry. Use simple room colors to make aquarium colors stand out. Choose aquarium-specific LED lights and neutral backgrounds to highlight your aquascape.

    What equipment is best for tight spaces?

    Opt for compact filters, low-wattage heaters, and LED lights that fit lids. Use integrated hoods and low-profile equipment for a clean look while keeping things functional.

    Can a nano tank be used as a room divider in an open-plan apartment?

    Yes. Low or tall tanks can zone spaces without blocking light. Ensure one side is accessible for service and provide a stable base for both sides. Plan for ventilation if the tank is enclosed.

    How do I protect floors and electronics from water damage?

    Use a waterproof mat or drip tray under the stand, like on hardwood floors. Regularly check seals and plumbing, and use GFCI-protected outlets. Keep cables tidy and have towels and a spill kit ready.

    What fish and plants are recommended for low-maintenance nano setups?

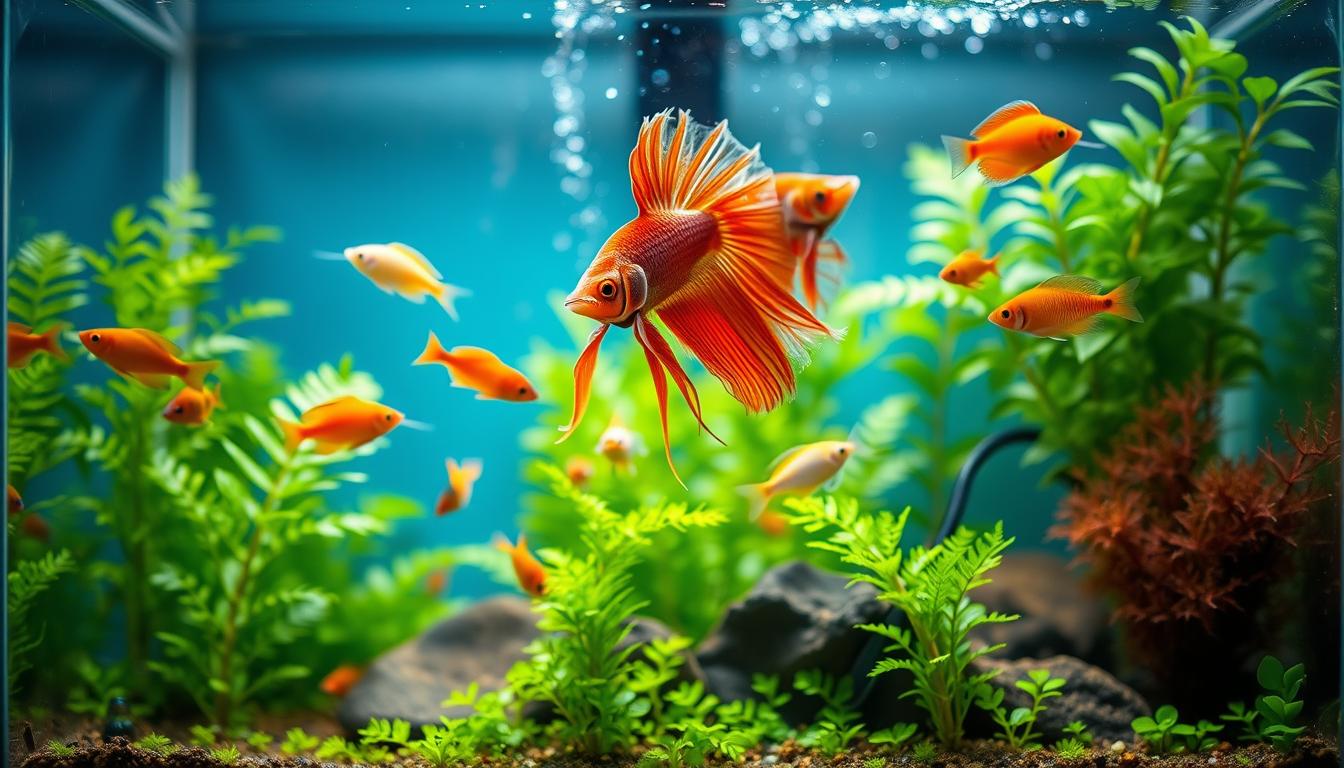
    Choose hardy plants like Anubias, Java fern, and mosses. Select low-bioload fish such as neon tetras, small rasboras, and guppies. Focus on aquascape elements over heavy fish stocking for balance and less maintenance.

    Should I test my chosen spot before committing to a permanent installation?

    Yes. Use a temporary stand or mock-up for a few weeks to check light, traffic, noise, and viewing frequency. This helps avoid costly moves and ensures the tank fits your design and fish health needs.

  • Comparing Internal vs. External Filtration for Limited Spaces

    Comparing Internal vs. External Filtration for Limited Spaces

    You keep an aquarium for the life and color it adds, not the clutter. In small spaces, picking the right filter is key. You might face tight spots or want to hide equipment for a clean look.

    Poor filtration in small tanks can cause water quality to drop fast. With less water, ammonia and nitrite levels rise quickly. This means your filter must handle all tasks well, without taking up too much space.

    This article looks at internal and external filters. We’ll compare them on important points like space, filtration, maintenance, noise, cost, and how they fit with your tank and fish. You’ll learn which filters work best in tight spaces and which are top choices for small tanks.

    By the end, you’ll know how to pick a filter that fits your space, needs, and maintenance routine in the United States.

    Understanding Filtration in Small Tanks

    An informative layout showcasing aquarium filtration systems suitable for small tanks. The foreground features a compact internal filter with visible cartridges and air pump, elegantly positioned beside a small, well-planted aquarium. The middle ground displays the aquarium filled with vibrant fish, demonstrating the filtration system's efficiency. In the background, softly blurred shelves lined with various external filters highlight the contrast. Natural light filters through the scene, creating a serene and educational atmosphere. The angle captures the setup slightly from above, emphasizing the details of both internal and external filtration options. The overall mood is tranquil and engaging, inviting viewers to understand the essentials of filtration in small tanks.

    Filtration in small aquariums does three main things. It removes visible debris through mechanical filtration. It also hosts beneficial bacteria on media to break down ammonia and nitrite. Lastly, it uses media like activated carbon to clear dissolved organics and improve water clarity.

    Small tanks have less water, so waste can quickly build up. This means ammonia and nitrite levels can spike fast. You need reliable small tank water filters and regular maintenance to keep these levels stable. Regular water testing and timely cleaning help avoid sudden water-quality issues.

    When choosing a filter for small tanks, look at flow rate and surface area for bacteria. More surface area means more nitrifying bacteria can grow. This improves the biological capacity of your tank. External filters often have more media volume and surface area than internal ones.

    Your filter must run all the time. If it stops, oxygen levels drop, and bacteria suffer. Bacteria populations can fall within 45 minutes of inactivity. This increases the risk of water-quality problems. Make sure your filter has reliable power and consider backup options for critical tanks.

    Upgrading your filter’s media can boost its performance quickly. Replace basic media with higher-quality options like Seachem Matrix and Purigen. This increases biological capacity and water polish. Choosing the right media is key to keeping small tanks stable with modern filters.

    Types of Filtration Systems Available

    A small tank filtering system showcased prominently in the foreground, featuring a clear canister, filter media, and tubing for water intake and output. The filtration system should display intricate details like the mesh filter and pump mechanism, emphasizing its compact size suitable for tight spaces. The middle ground features a sleek aquarium partially filled with water, showcasing aquatic plants and small fish for context. In the background, a softly blurred modern living space highlights the practicality of the filtering system, with natural light streaming from a window, creating a bright and inviting atmosphere. The shot should be taken from a slight angle to capture the dimensions of the tank and filtration system effectively, with a focus on clarity and demonstration of the filtration technology.

    There are many options for filtering small tanks. Internal filters are inside the tank and come with sponges and basic media. Models like the Sicce Shark Pro and Oase Bio Plus are great for shallow tanks. They have horizontal housings and magnetic chambers for easy removal.

    External filters, like canister and sump units, sit outside the tank. They use hoses for water flow and hold more media. They are more powerful and flexible for higher flow and varied media.

    For small tanks, you can choose sponge filters, hang-on-back (HOB) filters, or small internal powerhead-based filters. Each has its own balance of space, flow, and maintenance. Choose the one that fits your tank best.

    • Internal filters: easy to mount with suction cups, require room inside the tank and care to avoid blocking plants or hardscape.
    • External filters: need cabinet space and hose routing, offer greater media volume and service options.
    • Sponge and HOB filters: budget-friendly, simple to maintain, work well with community or fry tanks.

    Small tank filter media includes coarse mechanical pads to fine-pored sponges. High-porosity biological media like Seachem Matrix support beneficial bacteria. Chemical options like Purigen or activated carbon handle discoloration and dissolved organics.

    When choosing, consider installation constraints. External units need space for plumbing and a stable surface. Internal units must fit without blocking aquascaping and ensure proper circulation.

    Match your chosen filtration to your tank’s size, stocking levels, and the types of fish or plants. Thoughtful media selection and placement will keep your small tank’s water clear and stable.

    Advantages of Internal Filtration

    Internal filters for small aquariums come with several benefits. They are cheaper than canister units, which is great for those on a budget. This means you can set up your aquarium without spending a lot of money upfront.

    Internal filters fit inside the tank, so they don’t take up much space. This is perfect if you have limited room or your tank is on a shelf. Their small size makes it easier to plan your setup without worrying about hoses or plumbing.

    • Easy installation and removal: most internal filters come pre-assembled and are simple to position and detach for cleaning.
    • Reduced leak risk: with no external hoses, you avoid common leak points that affect external systems.
    • Air inlet options: some models include an air input to boost oxygenation without extra gear.

    You can use two small internal units placed on opposite sides to improve flow and add redundancy. This approach is similar to what professionals do when they need the best filters for small tanks. It’s also great for beginners because it makes starting up and maintaining your tank easier than more complex systems.

    The main benefits of internal filtration are simplicity, cost-effectiveness, and compact design. These qualities make maintenance easy and keep your tank running well without needing a lot of plumbing or extra space.

    Disadvantages of Internal Filtration

    Internal units often have less media than external systems. This means your mechanical and biological stages might be cramped. With less space, the cleaning power of your tank can suffer.

    Water clarity might be lower in tanks with only internal filters. There’s less room for polishing media and biological volume. This can make it hard to achieve the water purity you desire.

    Internal filters take up space inside the tank. They can interfere with your aquascaping and make it hard to hide them, even with plants or decor.

    • Visual impact: internal hardware is harder to conceal and may distract from your aquascape.
    • Frequent cleaning: sponges and fine media clog fast and often need weekly or bi-weekly attention.
    • Debris release: removing chambers or media can stir up trapped waste and cloud the water.

    Small animals like cherry shrimp or fry are at risk near intake openings. Use suction guards or gentle flow models to protect them. This is important when using internal filtration for small tanks.

    Suction cup mounts rely on clean glass and lose grip over time. Check them often. Adhesion usually degrades in six to twelve months, and you might need to replace them to avoid falls.

    Advantages of External Filtration

    External filters offer more media space. Brands like Fluval and Eheim have larger capacities than internal filters. This extra room allows for more bio-media, supporting bigger colonies of good bacteria.

    This setup boosts biological surface area. It speeds up the process of removing harmful compounds. This is key for keeping water stable in small tanks.

    These filters are hidden from view. They fit in cabinets or stands, keeping your tank looking clean. This is great for tanks with plants or shrimp.

    Changing media is simpler without disturbing the tank. This reduces stress on fish and prevents cloudy water. It makes caring for your tank easier.

    External filters also have stronger flow rates. This means water moves through the media more efficiently. It helps keep water conditions consistent, which is important for small tanks.

    Some models hold a bit more water. This extra space helps small tanks handle sudden changes in water chemistry. It’s a big plus for those with limited tank size.

    You can mix different media to tackle specific problems. Brands like Seachem and API offer specialized media. This lets you fine-tune your filtration to meet your tank’s needs.

    • Greater media diversity and volume
    • Superior biological surface area
    • Out-of-sight installation preserves aquarium aesthetics
    • Easier, less disruptive maintenance
    • Higher flow rates for swift water turnover
    • Extra water buffering inside the filter body
    • Customizable media for targeted treatment

    Disadvantages of External Filtration

    Choosing an external canister or sump means a higher upfront cost. Brands like Fluval and Eheim charge more than basic internal filters. This can be a big factor if you’re on a tight budget.

    External filters need space outside the tank. You’ll need room in a cabinet, on a stand, or a shelf for the unit and hoses. This can limit where you can place your tank, making it harder to find a good spot.

    Setting up an external filter is more complicated. You’ll need to plan and use the right fittings to avoid leaks. If you’re new to this, it might feel overwhelming, and mistakes can be frustrating or even damage your tank.

    In small tanks, an external filter might be too much. High flow rates and large media volumes are often unnecessary. This can waste energy and lead to more maintenance than you need.

    Running costs are also higher. Stronger pumps use more electricity, and replacement parts can be expensive. Over time, this increases the total cost of owning a small tank filtering system.

    Replacing media is another expense. Larger canisters need more or special media like bio-rings and carbon blocks. Replacing these can cost more than swapping a basic internal sponge.

    There’s a higher risk of leaks with external plumbing. If hoses or fittings aren’t installed right, you could face problems. You’ll need to check connections often to keep your home and tank safe.

    • Higher upfront cost compared to internal units
    • Needs external space for placement and hoses
    • More complex plumbing and installation
    • Can be oversized for very small tanks
    • Greater electrical and media running costs
    • Additional leak points from hoses and fittings

    When considering these downsides, think if the benefits are worth it for your tank size. Many hobbyists find that the simplest small tank filtering system meets their needs best after careful comparison.

    Choosing the Right Filtration for Your Tank Size

    First, match the filter’s size to your tank’s volume and how much life it holds. Choose a filter that fits your tank’s gallons and the number of fish and plants. This way, you won’t have too little or too much filtration.

    Think about where you’ll put the filter. If you don’t have much space, look for internal or hang-on-back filters. They are compact. Or, if you want a clean look, consider canisters or a remote sump. They hide the equipment and keep your tank looking good.

    • Choose models with adjustable flow for delicate fish and plants.
    • Consider noise and vibration when deciding placement.
    • Assess how often you will service gear before buying.

    How easy it is to clean the filter matters too. Internal filters need cleaning often. External filters hold more media and can go longer without cleaning. If you want to clean less, choose an external canister or HOB with big media chambers.

    Upgrade your small tank filter media to increase its power without taking up more space. Replace cheap sponges with better options like Seachem Matrix or Purigen. This boosts both biological and chemical filtration. A mix of these types of media creates the best environment.

    If you have live plants or detailed setups, look for filters that don’t disturb the water too much. For lots of fish, choose filters that can handle more and have more media. By following these tips, you can find the perfect filter for your tank and your care routine.

    Maintenance of Filtration Systems

    Keeping your small tank water filters in good shape saves time and keeps fish healthy. Clean internal filter sponges every week or every two weeks. External units need less frequent attention because they hold more media, but you must inspect them regularly.

    When cleaning mechanical media, rinse sponges and pads in tank water, not tap water. This protects beneficial bacteria. Replace chemical media like activated carbon or Purigen as the maker instructs. You can also upgrade factory media with options like Seachem Matrix for better biological capacity.

    • Run filters 24/7 to avoid drops in oxygen and bacterial decline.
    • Expect bacterial populations to fall after about 45 minutes of no flow.
    • Use a drip tray for external filter service and follow priming steps to prevent airlocks.

    Handle internal units with care when you remove chambers. Sudden jerks can release trapped debris into the tank. For external filters, keep hoses and clamps secure during maintenance to avoid spills. Check mounting hardware and replace suction cups every six to twelve months or when they stop sticking.

    Protect small livestock by fitting inlet guards to block shrimp and fry from suction. Place outlets a few inches below the surface to provide steady surface agitation without excessive CO2 loss in planted tanks. These small adjustments are central to reliable small tank filtration solutions.

    Use a checklist for each service visit. Inspect seals and hoses, rinse mechanical media in tank water, replace chemical media as directed, and note any upgrades to biological media. This routine keeps your maintenance of filtration systems efficient and extends the life of your equipment.

    Noise Levels: Internal vs. External Filtration

    You want a quiet tank, right? The choice between internal and external filtration affects noise levels. Internal filters, being in the water, often muffle sounds. But, they can vibrate against the glass if the suction cups don’t hold well.

    External canister filters, on the other hand, keep the noise-making parts outside. The motor, impeller, and hoses can make sounds. To lessen these noises, place the unit on a rubber mat and keep hoses away from rubbing or kinking.

    When space or sound is a concern, look at compact tank filtration options. Powerhead-style internal filters might run hotter and louder than fully submerged ones. Small sponges can clog easily, making the motor work harder and louder over time.

    When choosing efficient small tank filtration, pick models with adjustable flow. This way, you can lower the RPMs when you don’t need full flow. Regularly clean the impellers and motors to avoid squeaks and growling sounds.

    • Install external units inside a cabinet to dampen sound.
    • Use rubber feet beneath canister filters to cut vibration.
    • Secure suction cups or replace them to stop glass transmission.
    • Check hoses so they don’t rub against edges or floorboards.

    For quiet rooms, consider premium canister brands like Fluval or Eheim. They’re known for their low-noise models. Also, look at compact tank filtration options that focus on silent operation.

    When choosing between noise and performance, think about your stocking levels. Regular upkeep and correct installation will help both internal and external systems run smoothly and quietly.

    Cost Comparison: Internal and External Filters

    When you look for filtration, the price is the first thing you notice. Internal filters like hang-on or sponge units are often cheaper at first. But, external canister or sump systems cost more upfront. They offer more space and flexibility for small tanks.

    Think about the ongoing costs after buying. Internal filters use less power and electricity. External filters, with stronger pumps, might increase your electricity bill over time. Consider gallons per hour when comparing long-term costs.

    Maintenance costs differ based on media and how often you need to replace it. Internal filters need regular cleaning or replacement of inexpensive sponges. External filters use more expensive media like Seachem Matrix and Purigen. These last longer and handle heavy loads better for small tanks.

    • Replacement parts: suction cups and small impellers for internal units may need replacing every 6–12 months.
    • Media upgrades: adding premium media increases expense but improves performance and stability.
    • Space-related costs: cabinets or cutouts to house an external canister or sump add hidden expense.

    Value depends on your goals. External systems offer stable water chemistry and less maintenance, despite being more expensive upfront. If you’re on a tight budget and have limited space, affordable small tank water filters are a quick and cheap start.

    Make a simple cost checklist when deciding. Include the initial cost, electricity use, media replacement, and setup costs. This will help you compare and choose the best option for your small tank filtering system.

    Impact on Water Quality in Small Tanks

    Understanding how filtration affects small aquariums is key. Biological capacity is the most important factor. External canisters and hang-on-back units offer more space for nitrifying bacteria. This helps process ammonia and nitrite faster, reducing toxic spikes in tight systems.

    Mechanical filtration improves water clarity. External systems use larger mechanical stages and media to trap fine debris. This results in clearer water compared to basic internal sponges that fill up quickly.

    Chemical polishing completes the process. External filters can hold more chemical media like activated carbon or Seachem Purigen. These options remove dissolved organics and polish water better than most internal units.

    Small tanks experience rapid changes. The larger media volume and higher flow in external filters buffer these changes. This lowers stress for fish. Yet, a well-maintained internal filter with quality small tank filter media can also keep a small tank stable.

    Practical adjustments help planted tanks. To reduce surface ripple and limit CO2 loss, place outlets a few inches below the surface. Angle them for gentle circulation. This protects plants while keeping water moving.

    • Maintain sponges frequently: neglect speeds water quality decline in small tanks.
    • Use biological media with high surface area for steady nitrification.
    • Add chemical media when you need extra polishing after feeding or trimming.

    When planning aquarium filtration for small tanks, match media volume to bioload and schedule routine cleaning. This keeps beneficial bacteria healthy and water parameters steady for your fish and plants.

    Conclusion: Which Filtration System is Right for You?

    Choosing the right filtration system for your small tank depends on a few things. You need to think about space, budget, and how clean you want the water. Internal filters are cheap, easy to set up, and save space. They’re good for beginners or when you have very little room.

    But, they can be ugly, need more cleaning, and hold less media. On the other hand, external canisters or sumps offer better water quality and look nicer. They have more media space and are easier to clean. But, they cost more and need extra space outside the tank.

    For shrimp or fry tanks, it’s important to protect the inlet. Use sponge filters or guarded internal filters to keep them safe. You can also use two small internal units for extra safety. Upgrading to better media like Seachem Matrix or Purigen can also help.

    Remember, no matter what you choose, always run the filtration 24/7. Keep up with maintenance, like cleaning sponge filters weekly and changing media for externals. Make sure the flow rate and media fit your tank’s needs. The key is to find a system that works for you and keep it up for a healthy tank.

    FAQ

    What are the core functions of a filter in a small aquarium?

    Filters in small tanks clean out solids and debris. They also help convert harmful compounds into safer ones. This is key because small tanks can quickly become polluted.

    How do internal and external filters differ in biological capacity?

    External filters can handle more biological work because they have more space. Internal filters can be improved with better media, like Seachem Matrix, to boost their performance.

    I have limited cabinet space—should I pick an internal filter?

    If you can’t use external space, internal filters are a good choice. They fit inside the tank and are less likely to leak. For very tight spaces, choose a compact internal filter and add more media for better performance.

    Are internal filters noisier than external filters?

    Noise levels vary by model and how it’s installed. Internal filters can be quiet but might vibrate the glass. External filters can be noisy, but placing them in a cabinet can help. Using rubber mounts and adjusting flow can also reduce noise.

    How often should I maintain filters in small tanks?

    Clean internal filter sponges every week to two weeks because they clog fast. External filters need less cleaning but should have mechanical media rinsed and chemical media replaced as needed. Always rinse media in tank water to keep beneficial bacteria.

    Can an internal filter handle a heavily stocked small tank?

    Internal filters might struggle with heavy loads. For these cases, use external canisters, sumps, or multiple internal filters. External systems have more capacity and can handle sudden changes better.

    Do filters need to run continuously?

    Yes. Filters need to run all the time to keep bacteria alive. If they stop, bacteria will die off in about 45 minutes, risking water quality problems. Always keep filters on and plan for uninterrupted power.

    What filter flow rate is appropriate for small tanks?

    Choose a flow rate that matches your tank’s size and the needs of your fish and plants. Too much flow can stress fish and plants and affect CO2 levels in planted tanks. Find a model with adjustable flow to fine-tune it.

    Are sponge filters a good alternative for shrimp or fry tanks?

    Yes. Sponge filters are great for shrimp and fry because they filter gently and protect against suction injuries. They’re also affordable and can serve as reliable backups or primary filters in low-flow setups.

    How can I improve the performance of a small internal filter?

    Upgrading media can greatly improve an internal filter’s performance. Use high-porosity bio-media like Seachem Matrix and Purigen for better water clarity and organic removal. Adding multiple small filters can also help spread out flow and protect small fish.

    What are the leak risks for internal versus external filters?

    Internal filters have less risk of leaks because they stay inside the tank. External filters have hoses and fittings that can leak if not installed or maintained properly. Regular checks and maintenance can help prevent leaks.

    How does filter choice affect aquascaping and swimming space?

    Internal filters take up space in the tank and can be distracting. External filters keep equipment out of sight, allowing for better aquascaping and more swimming space. This is important for both looks and fish mobility.

    Do external filters increase effective water capacity?

    Yes. Some external canisters and sumps hold extra water outside the tank. This can help stabilize water quality between water changes, even in small tanks.

    Which option is more cost-effective long term: internal or external?

    Internal filters are cheaper upfront but need more frequent maintenance. External filters cost more initially but need less maintenance, making them more cost-effective for heavily stocked or planted tanks.

    How should I protect shrimp and fry from filter intakes?

    Use sponge pre-filters or inlet guards on powerheads and internal filters. Sponge covers and shrimp-safe attachments can prevent injuries. Position intakes away from where small animals gather and keep flow gentle.

    What are common maintenance errors that harm small-tank water quality?

    Avoid over-cleaning media in tap water, removing all media at once, and letting filters off for too long. Always rinse media in tank water, clean different types staggered, and keep filters running during maintenance.

    Can upgrading media turn an internal filter into an adequate long-term solution?

    Upgrading media can significantly improve an internal filter’s performance. It can make it suitable for many small tanks. But, external filters are generally better due to more media space and flexibility. Upgrades can help if you can’t use an external filter.

    How do I choose between a HOB, internal, canister, or sump for a small tank?

    Consider space, aesthetics, maintenance willingness, bioload, and fish sensitivity. Choose internal or HOB for tight spaces or low budgets. Opt for canister or sump for hidden equipment, more media, and longer maintenance intervals. Match filter capacity to tank size and fish needs.

    What maintenance schedule should I follow for small-tank filtration?

    Check internal sponges weekly to bi-weekly for debris. External filters need monthly inspections, mechanical media rinsing every 4–8 weeks, and chemical media replacement as directed. Keep maintenance logs and water test records to spot issues early.

    Are there specific brands or models recommended for small-tank filtration?

    Look for reputable internal filters with compact designs and good support. External canisters and sumps should fit your tank size. Consider models with horizontal mounting and magnetic chambers for easy removal. Upgrading to Seachem Matrix and Purigen can improve performance regardless of brand.

    How important is redundancy in small tanks?

    Very important. Small tanks are prone to quick water quality changes. Running two small internals, combining a sponge with a HOB, or having a backup air-driven sponge reduces risk. Redundancy gives you time to fix or replace equipment without harming fish.

  • How to Prune Stem Plants for a Busier and Healthier Look

    How to Prune Stem Plants for a Busier and Healthier Look

    Pruning stem plants is about directing energy where you want it. Simple pruning and pinching techniques help. They make stems denser and bushier, just like in terrestrial gardening.

    Removing the top 3–5 inches or cutting just above a leaf node removes the terminal bud. This bud suppresses lateral growth. It usually stimulates two or more new shoots beneath the wound, leading to more stems and foliage.

    Always prune with purpose. Decide if you want to improve density, remove damaged tissue, control height, or boost vigor before you trim. Random cuts can stress plants, slow growth, or create gaps in the layout. Good planning reduces mistakes and keeps your aquascape healthy.

    Timing matters. Early-season or active-growth periods are usually best for encouraging branching. More aggressive cuts can cause a brief delay in flowering or vertical growth, but they often lead to stronger, fuller plants later. These timing basics will be covered in more detail in the section on when to prune your aquatic plants.

    Beyond appearance, denser stem plants enhance aquarium function. Thicker growth improves visual appeal, offers better habitat for fish and invertebrates, and can help even out light and water flow. Use these aquatic gardening tips and trimming aquatic plants techniques to lift both form and function in your tank.

    The Importance of Trimming Aquatic Plants

    A serene aquarium scene showcasing the meticulous process of trimming aquatic plants. In the foreground, a pair of hands, wearing gardening gloves, gently holds a pair of scissors, delicately snipping vibrant green stem plants, which are cascading gracefully in an explicitly clear tank. The middle of the image features lush, healthy aquatic plants in various shades of green, showcasing their lush foliage and intricate textures. In the background, soft ambient light filters through the water, creating gentle ripples and casting calming shadows. The overall atmosphere is peaceful and focused, inviting viewers to appreciate the beauty and care involved in maintaining a natural aquatic habitat. The angle is slightly top-down, emphasizing the action of trimming while capturing the lively underwater ecosystem without any distractions or clutter.

    Trimming aquatic plants helps them grow better. It moves energy from old tips to new shoots. This makes the plants stronger and more vibrant.

    Keeping plants trimmed keeps them bushy. This gives fish more places to hide and improves water flow. It also lets more light reach the leaves, reducing algae.

    Healthy plants mean clean water. Pruning out dead parts stops decay and disease. It keeps pests away too. A good plan for trimming helps you care for your plants without harming them.

    Trim plants regularly but not too much. Light cuts encourage growth, while heavy cuts rejuvenate. Always have a reason for pruning to avoid weakening your plants.

    • Biological benefit: energy moves from removed tips to healthy shoots.
    • Habitat gain: fuller stems provide shelter and better circulation.
    • Visual outcome: maintained shapes prevent spindly, sparse growth.
    • Management tip: plan cuts and follow underwater plant maintenance schedules.

    When to Prune Your Aquatic Plants

    A serene aquarium scene featuring a variety of healthy aquatic plants with vibrant greens and subtle hues. In the foreground, focus on a skilled aquascaper gently pruning stem plants with specialized tools, showcasing the process of careful maintenance. The middle ground displays lush plants, some with elongated stems and others with bushy growth, indicating different growth stages. The background consists of soft, diffused lighting that highlights the water’s clarity, enhancing the overall tranquility of the setting. The composition should evoke a sense of calm and dedication to plant care, captured at a slight upward angle to emphasize the beauty of the aquarium. The atmosphere should feel nurturing and serene, ideal for demonstrating the art of pruning aquatic plants.

    Prune your plants when they are actively growing. Spring and early growth phases are best. This lets them recover quickly and grow fuller.

    Don’t prune right before stressful events. Avoid pruning before moving plants, changing water chemistry, or big lighting changes. These times can cause infections and slow healing.

    Use two pruning methods: light trims and occasional big cuts. Light pinching every few weeks helps plants grow denser. For major thinning, cut up to one-third of top growth. Cut woody stems back by no more than one-third to avoid shock.

    Prune based on your plants’ life cycles. Some plants set flower buds at certain times. If you want blooms, don’t remove these buds. For more vegetative growth, prune before they flower.

    After big pruning, expect a recovery time. Growth or flowering might slow down. But, this pause often leads to stronger growth later. Keep plants in stable conditions with steady light, CO2, and nutrients.

    Here’s a quick guide for pruning your aquatic plants:

    • Time base: prune in active growth phases for fastest recovery.
    • Stress check: avoid pruning before transport or big water changes.
    • Trim strategy: use light pinches regularly; reserve heavy cuts for overcrowding.
    • Species note: preserve flower buds if you want blooms; cut earlier for vegetative growth.
    • Recovery plan: maintain stable conditions after pruning to encourage branching.

    Learning to prune your aquatic plants improves their health and your aquarium’s look. With the right timing, you’ll see better growth and fewer problems.

    Tools You’ll Need for Trimming

    Begin with essential hand tools. Sharp scissors and pruning shears are key for precise cuts. For stem plants, use long-bladed scissors and curved micro-scissors to avoid damage.

    For small growth, pinch stems with your fingers. This is good for light shaping. But for more, use scissors or pruners to prevent strain.

    For bigger cuts, loppers or saws are best. But be careful not to force thick cuts underwater. Remove big pieces outside the tank to protect roots and fish.

    Sanitation is critical. Clean and sharpen blades after each use to prevent disease. Dull tools can harm plants, so keep them sharp.

    Have a basic kit for regular care. Include spare blades, a brush, and a container for clippings. This helps keep your plants healthy and your space organized.

    If a job seems too hard, think about getting help. Professional services have the right tools and know-how for big jobs or delicate plants.

    • Long-bladed aquarium scissors for stem precision
    • Curved micro-scissors for close shaping
    • Pruning shears for thicker stems
    • Loppers or saws for woody material
    • Disinfectant, sharpening cloth, and cleaning brush

    Always follow the tool’s instructions and keep them dry and sharp. Good care means your plants stay healthy and you can keep them looking great.

    Step-by-Step Guide to Pruning Stem Plants

    Begin by carefully inspecting your plants. Look for stems that are too long, damaged, or block light. Choose whether to pinch for more branches, thin for less density, or cut for a fresh start. Planning helps make the process quicker and less stressful for your tank.

    Pinch small growth when stems are 8–12 inches long or have three to five leaf pairs. Cut off the top growth by three to five inches just above a node or leaf pair. This encourages new shoots and keeps the plant bushy.

    Use sharp scissors or aquascaping shears for clean cuts. Cut just above a growth node or lateral bud to promote new shoots. Avoid flush cuts that harm the plant’s recovery and invite decay.

    Thin and shape by removing crowded stems to the base or to a main stem. This improves light and water flow. Limit thinning to about one-third of major stems per year for multistem plants unless you plan a full chop.

    Remove damaged and dead tissue quickly. Brown, decaying, or diseased stems and leaves can harm water quality and spread problems. Pull trimmings out of the tank and dispose of them outside the aquarium to protect aquatic plant care and tank health.

    After cutting, monitor water parameters and expect a brief lag before new growth appears. Consider small water changes to remove excess nutrients released by decaying trimmings. Careful follow-up supports recovery and steady regrowth after trimming aquatic plants.

    Different Pruning Techniques for Various Plants

    Soft-stemmed plants can be shaped by pinching and topping. Cut the top growth just above a node to encourage side shoots. This method is great for multi-node stems and makes plants bushier with less stress.

    For dense stands and multi-stem shrubs, thinning and selective removal help. Remove stems at the base to let in more light and improve flow. When fixing an overgrown area, take out about one-third of major stems each year to avoid shocking the plants.

    Chop-back or rejuvenation cuts are good for overgrown beds. Cut stems back to 6–12 inches or near the substrate to get new shoots from lower nodes. In bad cases, a more aggressive chop might be needed, but expect a recovery time while new growth grows. Use this method carefully when keeping water plants healthy.

    Some plants don’t do well with pinching. Single-stemmed types and those grown for flowers or seed need different care. Don’t pinch if you want seed or blooms, and pick pruning methods that fit the plant’s growth habit.

    • Treat delicate carpeting plants with frequent, small trims to keep a tidy carpet without stressing roots.
    • For woody or thick-stemmed aquarium species, use staged reductions instead of one big cut to prevent dieback.
    • Adjust timing and intensity based on plant type and overall aquatic plant care routine.

    Use different pruning techniques for various plants. Thoughtful cuts keep plants strong and improve light penetration. This helps with oxygen levels and nutrient balance. Regular, targeted trimming is key to keeping water plants healthy.

    Managing Plant Health Post-Pruning

    After pruning, watch your stems for signs of stress like yellowing or softness. Remove any decaying cuttings quickly. This helps prevent infections and keeps your plants healthy.

    Keep the nutrients and light levels consistent to help your plants recover. Trimming plants means they need balanced care. Too much fertilizer or light can lead to algae. Stick to good aquatic plant care and adjust dosages based on plant needs.

    When thinning plants, remove about one-third each year. This gradual approach helps plants recover better. It also reduces transplant shock.

    • Use clean technique: disinfect or rinse scissors between tanks to prevent cross-contamination.
    • Make neat cuts at nodes instead of flush cuts to reduce tissue damage and disease entry.
    • Avoid over-pruning; leave healthy nodes so plants can send new shoots and stay resilient.

    Be on the lookout for fungal spots or slimy growth after pruning. If you find any, remove the affected area. Also, make sure water flow and filtration are stable. These steps are key to keeping your water plants healthy.

    Stick to a regular maintenance routine. Good water chemistry and careful care will help your plants recover. This will lead to a fuller, healthier aquascape.

    Boosting Buoyancy After Pruning

    Pruning stem plants removes leaves that kept stems upright. This change can cause stems to float, lean, or form mats. It’s important to understand this shift for good aquatic plant care.

    Replant trimmed stems quickly to stop them from drifting. Place cuttings at a slight angle and bury the lowest node. This helps roots grow and keeps stems in place during plant maintenance.

    • Use plant weights or fine tweezers to secure loose cuttings until roots develop.
    • Choose a stable substrate like ADA Aqua Soil or fine-grain sand to support new root growth.

    Trim plants in stages, not all at once. This method keeps the plant bed stable. It reduces the risk of sudden buoyancy shifts that cause floating mats.

    Encourage fast root growth by keeping nutrients balanced and CO2 levels consistent. Strong roots mean less need for frequent re-anchoring and easier plant care.

    • Provide a slow-release fertilizer near the roots for steady nutrient uptake.
    • Maintain gentle water flow to avoid dislodging new plantings while delivering nutrients.

    Use simple aquascape techniques to hide or support leaning stems. Place small stones, driftwood, or foreground plants like Hemianthu callitrichoides for support and cover.

    Follow these tips regularly. You’ll keep your plant beds neat, reduce floating, and help stems recover fast. Consistent care turns pruning into a chance for a fuller, healthier aquascape.

    Dealing with Common Issues After Pruning

    After pruning, act quickly to stop algae outbreaks. Trimmings and sudden changes in light or nutrients can cause algae to bloom. Remove cuttings fast, do partial water changes, and keep up with fertilization and CO2 to control algae.

    Check cut surfaces for rot or disease. Bad cuts and dirty tools increase infection risk. Make clean cuts above nodes and clean tools between uses. These steps help prevent disease spread in your plants.

    Floating trimmings can feed algae if left. Use a fine net or gentle siphon to remove debris. Quick cleanup helps keep water clear and your plants healthy.

    After heavy trimming, plants may grow slowly. They often pause to recover. Keep temperature, light, and nutrients stable. Avoid disturbing them too much so they can grow back on their own.

    • Remove cuttings right away to lower nutrient spikes.
    • Disinfect scissors or aquascaping shears between tasks.
    • Run small water changes after large pruning sessions.
    • Monitor for discoloration or soft tissue that signals infection.

    If problems don’t go away, it’s time to seek help. For tough diseases, big woody pruning, or a general decline, call aquarium experts or an aquatic plant trimming service. They can find the problem and do complex work safely for your system.

    Encouraging New Growth

    To get new growth in stem plants, cut just above growth nodes. This helps energy go to side buds, leading to more shoots from one cut. Learning to prune this way makes stems thicker and your display denser.

    Harvest or pinch plants regularly, like with herbs. Light pinches stop stems from getting too long and encourage bushy growth. Your plant care will improve with short, frequent trims instead of big ones now and then.

    Make sure trimmed plants have what they need to grow. Check the light, keep CO2 stable if you inject it, and balance nutrients. Poor light or nutrient balance can slow down growth, even with good pruning.

    For plants with many stems, thin them out slowly. Remove about one-third of older stems each year. This opens up the plant and encourages new growth from the base.

    Use healthy cuttings to grow more stems. Replant these cuttings to fill in gaps and speed up recovery after pruning. This method is great for expanding your plant coverage without buying new ones.

    • Cut above nodes to stimulate lateral buds.
    • Pinch lightly and often to keep plants compact.
    • Balance light, CO2, and nutrients for fast regrowth.
    • Thin old stems gradually to encourage basal shoots.
    • Replant healthy cuttings to propagate and fill gaps.

    Maintaining Your Aquatic Ecosystem

    To keep your tank balanced, make underwater plant care a regular part of your routine. Prune plants and do regular water changes, substrate upkeep, and filter checks. This way, plants and animals can live in a stable environment together.

    Pruning should match each plant’s needs. Some plants do well with light pinches often, while others need a full trim now and then. Always remove dead or damaged parts quickly to stop pests and diseases. Prune with a purpose, like controlling growth or shaping the plant, not just for the sake of cutting.

    Make sure you have the right number of plants for your tank size and how much time you can spend on care. If you’re always struggling to keep up, think about getting help from a pro or talking to someone who knows a lot about aquatic plants.

    FAQ

    What is the goal when you prune or pinch stem aquatic plants?

    The goal is to remove the top growth or damaged tissue. This redirects energy to the buds below. It leads to denser, bushier stems and more foliage.

    How much should you remove when pinching to encourage branching?

    Remove the top 3–5 inches of growth. Cut just above the terminal bud and a leaf node. This usually leads to 2+ new stems and a fuller structure.

    When is the best time to prune to encourage branching and limit stress?

    Prune during active growth periods. This is when plants recover faster and grow new shoots more readily. Avoid pruning before stressors like water changes or lighting shifts.

    Should you have a plan before you start cutting?

    Yes. Pruning should have a clear goal. This could be to improve density, remove dead tissue, or rejuvenate overgrown plants. Random cuts can weaken plants and invite disease.

    How often should you pinch versus perform major chop-backs?

    Pinch often for continuous growth. Schedule major cuts less often. Remove up to one-third of top growth for rejuvenation, and cut woody stems in stages.

    What tools do you need for precision trimming and sanitation?

    Use clean, sharp scissors and pruning shears. Long-bladed aquarium scissors and curved micro-scissors are best for stem plants. For large stems, use loppers or saws and remove big cuttings from the tank. Disinfect tools between tanks to prevent disease.

    Can you pinch small growth by hand, and when should you use tools?

    Pinch tender tips with your thumb and forefinger for small growth. Use scissors or pruners for larger jobs. Tools make cleaner cuts and lower infection risk.

    How do you make a cut that promotes new shoots?

    Cut just above a growth node or lateral bud. Avoid flush cuts that remove branch collars or leave stubs. A neat cut above the node encourages multiple new shoots.

    What should you do with trimmed material and why?

    Remove trimmed cuttings and debris from the tank promptly. Floating clippings decompose, raising nutrient levels and feeding algae. Use a fine net or siphon to collect trimmings, and dispose of waste outside the aquarium.

    How do you manage buoyancy and floating stems after pruning?

    Pruning reduces foliage mass that helps stems stay upright. Replant trimmed stems promptly into substrate or use plant weights to anchor cuttings. Stagger trimming across a stand to preserve structural support.

    What are the recovery expectations after a major cut?

    Expect a short lag in visible growth and possibly delayed flowering after significant pruning. Plants usually produce more vigorous branching afterward. Monitor water parameters and avoid further disturbance during recovery.

    How do you prevent disease or rot at cut surfaces?

    Make clean cuts with sharp tools and disinfect or rinse tools between tanks. Remove dead, decaying, or diseased tissue immediately and dispose of it outside the aquarium. Clean technique reduces entry points for pathogens and lowers the risk of secondary infections.

    How should you thin dense plant stands without stressing the population?

    Thin by removing selected stems at the base or cutting crowded stems back to the main stem. For multistem plants, remove about one-third of major stems per year when rehabilitating. Progressive thinning opens the canopy, improves light and flow, and stimulates basal shoots without shocking the stand.

    When is chopping back to near the substrate appropriate?

    Use chop-back or rejuvenation cuts when stands are overgrown or producing mostly leggy, shaded growth. Cut stems back to 6–12 inches or near the substrate to encourage fresh shoots. Expect a recovery period and consider staging cuts for woody species.

    Do all aquatic plants respond to pinching and topping?

    No. Soft, multi-node stem plants respond best to pinching and topping. Some single-stemmed or species that form reproductive structures won’t branch the same way, and pinching may remove flower buds if your goal is reproduction. Tailor technique to species response.

    How do you balance nutrients and light after pruning?

    Ensure trimmed plants have steady access to macronutrients, micronutrients, and adequate light to push new shoots. Avoid sudden fertilizer or light spikes that favor algae. Keep dosing proportional to plant uptake and follow a stable CO2 regimen where applicable to support vigorous regrowth.

    What signs of stress or disease should you watch for post-pruning?

    Watch for slowed regrowth, brown or mushy cut sites, fungal growth, and increased detritus. If you see spreading decay or systemic decline, remove affected tissue promptly and consider consulting an aquatic plant specialist for diagnosis and major remediation.

    Can you reuse healthy cuttings to fill the tank?

    Yes. Replant healthy cuttings to propagate more stems and densify the aquascape. Insert stems at a slight angle, bury the lower node, or use plant weights to encourage root formation. Replanting recycles growth and speeds restoration of fullness after trimming.

    How should you approach pruning to reduce algae risk?

    Promptly remove cuttings and perform partial water changes if large amounts of organic material were removed. Maintain balanced fertilization, stable CO2, and steady lighting. Avoid over-pruning that leaves excessive decaying matter or suddenly changes plant uptake of nutrients.

    When should you call a professional aquatic plant service?

    Contact a professional for stubborn diseases, major woody-pruning tasks, large-scale renovations, or systemic declines that exceed routine care. Professionals can safely remove large material, advise staged reductions, and help rehabilitate tank ecology with minimal risk.

    How do you tailor pruning frequency to different species?

    Observe each species’ response. Delicate carpeting plants benefit from frequent small trims to maintain compact growth. Woody or thick-stemmed species need staged reductions and less frequent but planned rejuvenation. Adapt schedules so plants recover steadily and maintain desired aquascape shapes.

  • Dwarf Puffer Fish Care: The Unique Challenges of Keeping Pea Puffers in Small Tanks

    Dwarf Puffer Fish Care: The Unique Challenges of Keeping Pea Puffers in Small Tanks

    You’re about to get practical tips on caring for Dwarf puffer fish. This includes the title “The Unique Challenges of Keeping Pea Puffers in Small Tanks.” We’ll start with the pea puffer, a tiny freshwater fish from Kerala, India. They grow up to 1″ (2.5 cm) long when they’re fully grown.

    Pea puffers are loved for their small size, vibrant colors, and fun personalities. They love to interact with their owners, check out plants, and show off their social skills. This makes caring for them both rewarding and challenging.

    This article will cover setting up a dwarf puffer fish tank, keeping the water chemistry right, feeding them, understanding their behavior, breeding, and preventing diseases. You’ll find tips based on field ecology and hobbyist experiences. These are for U.S. aquarists looking for reliable care for their pea puffers.

    Also, remember that the fish sold as dwarf puffers can be different species. Males often have ridges or keels and darker belly bands. This affects how they interact with each other and how you care for them in a community tank.

    Understanding Dwarf Puffers and Their Needs

    A vibrant underwater scene showcasing the natural habitat of dwarf puffer fish, also known as pea puffers. In the foreground, several small dwarf puffer fish with their characteristic round bodies and spotted patterns are swimming playfully among lush aquatic plants like Java moss and riccia. The middle ground features colorful gravel and smooth pebbles, providing a comfortable substrate for these fish. In the background, soft light filters through the water, creating a serene atmosphere with shimmering effects. The scene is illuminated with gentle, dappled sunlight to enhance the colors of the fish and plants, conveying a sense of tranquility. The overall mood should be calm and inviting, reflecting the unique needs of dwarf puffers in their environment.

    Dwarf puffers belong to the genus Carinotetraodon. The most common species are Carinotetraodon travancoricus and C. imitator. There are four other Carinotetraodon species, each with its own temperament. Knowing the exact species is key to providing the right care for your dwarf puffer.

    Adult dwarf puffers are about 2.5 cm long, or one inch. Males have a keel, a dark belly band, and larger blotches. They also have iridescent wrinkles behind their eyes. Females and juveniles are golden-brown with reddish-brown speckles and white bellies. These differences help you tell males from females and plan for breeding.

    In the wild, dwarf puffers live in Kerala and the Western Ghats. They prefer slow-moving, densely vegetated rivers and wetlands. Places like the Pamba River and Vembanad lakes are their home. Submerged plants, leaf litter, and sunken wood help them hide from predators like herons.

    Wild waters are soft and slightly acidic to harder and more alkaline. Dwarf puffers can handle a range of water chemistry. But, it’s important to keep the water balanced to keep them healthy and active.

    Dwarf puffers are curious and intelligent. They explore surfaces and plants with care. They even recognize their keepers and may beg for food. Males can be territorial and show brood care. Providing hiding places and defined territories helps reduce aggression and mirrors their natural habitat.

    • Taxonomy and species differences to note for care
    • Sexual dimorphism that helps you identify males and females
    • Natural habitat features to recreate in the aquarium
    • Water variability and limits to guide routine maintenance
    • Behavioral traits that shape social setup and enrichment

    Ideal Tank Size for Dwarf Puffers

    A beautifully arranged dwarf puffer fish tank setup, showcasing a 10-gallon aquarium filled with lush greenery and delicate aquatic plants. In the foreground, several pea puffers swim gracefully among the vibrant green foliage, their unique round bodies and large eyes capturing attention. The middle ground features textured substratum with pebbles and small driftwood, creating hiding spots and enhancing the natural look. In the background, a faint, soft light filters through the water, illuminating the tank and casting gentle reflections. The overall mood is tranquil and lively, highlighting the ideal habitat for these charming fish. The scene is captured from a slightly elevated angle to provide a comprehensive view of the tank's ecosystem, ensuring clarity and detail in every element.

    For a stable dwarf puffer fish tank, aim for at least 45 L (10 gallons). Small tanks may look appealing, but they often lead to unstable water chemistry. This can stress the fish and make caring for them more challenging.

    Use a simple rule for stocking: plan roughly 10 L (2.5 gallons) per fish. This gives each puffer space to claim a territory and helps reduce aggression. If you keep a group, add hiding spots and plants to break sight lines.

    When you consider groups versus pairs, remember males get territorial. A pair can do well in a modest tank, while a mixed group or multiple males needs more volume and visual barriers. If you want several males, choose a larger aquarium to avoid fights.

    Filter and equipment sizing matter for caring for dwarf puffer fish. Strive for a filtration turnover of 4–6 times the tank volume per hour. That flow keeps water quality high and reduces ammonia and nitrite build-up.

    • Minimum recommended tank: 45 L / 10 gallons.
    • Stocking guideline: ~10 L / 2.5 gallons per fish.
    • Turnover rate: 4–6x tank volume per hour for reliable water quality.

    Stick to these guidelines when planning your dwarf puffer fish tank setup. Good sizing and proper filtration make caring for them much more predictable and rewarding.

    Tank Setup for Dwarf Puffers

    Begin by designing a tank that looks like their natural home. Use lots of plants like Java moss and Anubias. Add driftwood and rocks to create hiding spots and clear paths.

    Include floating plants for shade and to help keep nitrates down. Moss clumps are great for hiding places. Sunken wood and leaf litter add texture and encourage exploration.

    Keep the lights dim. Bright lights stress them out and promote algae growth. They prefer calm water, so place powerheads carefully.

    Choose a filter that changes the water 4–6 times an hour. Sponge filters are best because they provide gentle flow. Make sure to cover all intakes to keep the puffers safe.

    • Substrate: fine sand or smooth gravel with patches of moss.
    • Hiding spots: caves, dense plant clumps, and leaf litter.
    • Filtration: sponge filter or low-flow canister with protected inlets.
    • Lighting: low to moderate and timed for 6–8 hours daily.

    Make sure the tank has a tight lid. Dwarf puffers can jump if scared. This keeps them safe. Choose tankmates wisely to avoid too much stress. A well-thought-out setup helps keep them happy and healthy.

    Water Parameters for Dwarf Puffers

    Keep your tank heated to 77–82°F (25–28°C). Dwarf puffers need a warm environment to thrive. A stable temperature helps them stay healthy and active.

    For a general environment, aim for a pH of 7.5 and about 10°dH. For spawning, softer, slightly acidic water is best, around pH 6.5–7.0 and 5–10°dH. Always make slow changes to water conditions to avoid stressing your fish.

    Dwarf puffers are freshwater fish. Don’t add aquarium salt regularly. Most prefer no added salt and may not do well with it.

    Always keep ammonia and nitrite levels at 0 ppm. Nitrate levels should be under 50 mg/L, ideally below 20 mg/L. Regular testing helps catch problems early.

    • Filter turnover: 4–6× tank volume per hour.
    • Water changes: 25–50% weekly, depending on how heavily you stock and feed.
    • Remove uneaten food and siphon waste to control nitrate buildup.

    Small tanks can have big changes in pH and chemistry. A bigger tank is more stable. If you have a small tank, check pH often and avoid sudden changes in water conditions.

    For breeding and raising fry, keep the water extremely clean. Eggs and fry are prone to fungal infections in harder water. Regular waste removal and careful maintenance help them survive.

    Good care for dwarf puffers means consistent testing, gentle adjustments, and quick removal of contaminants. Follow these guidelines to reduce stress and improve their lifespan.

    Feeding Your Dwarf Puffers

    Your dwarf puffer fish are meat lovers. They need live or frozen foods to stay healthy. Flakes and pellets don’t give them enough nutrients.

    Give them a mix of foods like pond snails, Daphnia, and worms. Add earthworms, midge larvae, and live brine shrimp as treats. But remember, live brine shrimp are not a full meal.

    Use frozen or freeze-dried foods like bloodworms and krill. Rehydrate them for 20 minutes before feeding. A pipette or baster helps feed shy fish.

    • Feed small amounts two to three times daily.
    • Aim for gently rounded abdomens, not swollen bellies.
    • Remove uneaten food quickly to protect water quality.

    Keeping their beaks in check is key. Give them hard-shelled snails to chew on. If their beaks get too long, don’t try to trim them yourself.

    Teach your puffers to eat from your hand or a pipette. This makes feeding time less stressful. Watch how much you feed to avoid obesity and tank problems.

    Regular feeding times help keep them healthy and happy. Proper feeding makes their colors bright and keeps their beaks in shape. With a little planning, you can ensure their well-being in your aquarium.

    Social Behavior and Tank Mates

    Your dwarf puffer fish behavior will shape how you arrange the aquarium. Males are territorial and can be aggressive toward tankmates and conspecifics. Use rocks, bogwood, and dense planting to break sight lines so each fish can claim a small zone. Out of sight often means less chasing.

    If you keep a group, provide plenty of hiding spots and visual barriers. Group keeping can work, but males may escalate fights and pick at injured fish. Have a simple plan to isolate and treat any hurt puffer quickly.

    Think carefully before adding other species. Most tank mates raise the bioload and increase nitrate levels. Dwarf puffers are known fin nippers and may harass slow or long-finned species such as angelfish, gouramis, or livebearers.

    • Potential companions reported by hobbyists include Otocinclus catfish and some fast-swimming tetras.
    • Otocinclus need a proper diet, groups of six or more, and a larger aquarium—ideally 90 L (20 gal) or more.
    • Small shrimp like Amano or cherry shrimp may survive with adults, but juveniles are often eaten.

    For a stable dwarf puffer fish tank setup, the safest route is a species-only tank. This simplifies feeding, lowers disease risk, and makes water quality easier to manage. When caring for dwarf puffer fish, focus on space, cover, and monitoring behavior daily.

    Use regular observation to spot early signs of stress or aggression. Adjust décor or separate individuals if you see repeated attacks. Thoughtful planning will reduce conflict and keep your puffers healthier and less stressed.

    Health Issues Common in Dwarf Puffers

    Keeping water quality high is key to avoid dwarf puffer fish diseases. Make sure ammonia and nitrite levels are zero. Nitrate should be under 20 mg/L. Small tanks can quickly show water quality issues, so test weekly and change water as needed.

    Ich and fin rot are common in stressed fish. Good water quality and quick waste removal help prevent these infections. Quarantine new fish to avoid bringing in diseases to your main tank.

    Eggs and fry are more vulnerable to fungal infections. Keep the water clean and free of decaying matter to stop fungal growth. If you’re breeding, check eggs closely and separate fry when necessary.

    Aggression can lead to wounds, which can get infected. Other puffers might pick at these wounds, so keep injured fish separate. Treat wounds quickly and watch for signs of fin rot or bacterial infections.

    Some people think dwarf puffer fish are poisonous. But research shows this depends on their diet and the bacteria or algae on their food. Puffers raised in captivity and fed typical aquarium foods are safe for handlers.

    Dental problems can happen if puffers don’t eat hard foods. Their beaks can grow too long without snails or hard foods to wear them down. Give them shelled snails or hard foods often. It’s risky to trim their beaks yourself and should only be done by a vet.

    Preventive care is the best way to keep dwarf puffers healthy. Keep water quality high, vary their diet, quarantine new fish, and remove uneaten food quickly. A consistent routine helps prevent disease and keeps your puffers happy and active.

    • Test water weekly and act on any ammonia or nitrite rise.
    • Quarantine newcomers for two weeks before adding them.
    • Include snails or hard foods to prevent beak overgrowth.
    • Isolate injured fish to prevent pecking and infection.

    Breeding Dwarf Puffers

    Adult males show a keel, darker belly band, and brighter colors when ready. Females look round and full with eggs. Knowing these signs helps you breed without stressing the fish.

    Males claim territories in feathery plants and moss. Java moss and willow moss are best for egg laying. Create moss pockets for males to display and protect their sites.

    During courtship, males flare their keel and dance to attract females. Spawning is lively, and eggs fall into the moss. Then, the male chases the female away and cares for the eggs.

    Eggs hatch in about five days. Fry stay non-swimming for a week. Once free-swimming, they need tiny live foods like microworms and Cyclops nauplii. Fry grow to about 1 cm in two months with good care.

    Spawns thrive in slightly soft, mildly acidic water. Aim for pH 6.5–7.0 and 5–10°dH. Eggs are prone to fungal infections in harder water. Keeping the tank clean and removing waste helps survival.

    • Use dense moss in the breeding tank to catch eggs.
    • Isolate fry from adults once they are free-swimming.
    • Provide abundant live food to support rapid growth.

    Experienced hobbyists succeed in freshwater setups that mimic the wild. Paying attention to care and behavior during spawning boosts success. With dedication and careful monitoring, breeding dwarf puffers is possible.

    Regular Maintenance for Your Tank

    Check your tank every day. Look for changes in how your fish act and eat. Also, clean up any leftover food and check the filter for blockages.

    Use a small tool to remove waste and prevent ammonia buildup. This keeps your fish healthy and happy.

    Change 25–50% of the water once a week. This keeps nitrates low and water chemistry stable. Also, gently vacuum the bottom and trim plants to keep your tank looking good.

    Keep your filter clean by washing the sponge in tank water. This helps keep beneficial bacteria. Make sure the filter is working right by checking its speed.

    Test the water often for ammonia, nitrite, nitrate, pH, and temperature. Watch for pH changes, as they can happen in small tanks. Adjust your water changes to keep the water right for your fish.

    Follow the instructions for changing filter media. Watch your fish for signs of trouble like aggression or disease. Give them a varied diet to keep them healthy.

    Have a plan for emergencies. Keep a separate tank for sick fish. Have supplies like dechlorinator and treatments on hand.

    • Daily: observe, remove uneaten food, spot-clean waste.
    • Weekly: 25–50% water change, light substrate vacuum, plant maintenance.
    • Monthly/long-term: replace filter media as recommended, full equipment checks.

    Regular care helps your dwarf puffer fish stay healthy. Small steps each day prevent big problems. This keeps your tank perfect for your fish.

    Challenges of Keeping Dwarf Puffers in Small Tanks

    Keeping pea puffers in small tanks has its downsides. Small spaces make it harder to keep water stable. You need to watch for sudden changes in pH and spikes in ammonia or nitrite.

    Filtration is key in small tanks. Many desktop filters don’t provide enough turnover for dwarf puffers. Make sure to choose equipment that ensures continuous flow.

    Aggression can rise in tight spaces. Males may fight more when they can see each other all the time. Add lots of hiding spots to reduce stress.

    • It’s important to control bioload in small tanks. They can’t handle extra waste from other fish.
    • Snails or shrimp can’t clean the tank on their own. You’ll need to do regular water changes and clean the substrate.

    Breeding and raising fry is tough in small tanks. Eggs and fry need clean water and constant care to avoid infections. Doing small water changes can stress the adults.

    Experts often suggest bigger tanks for dwarf puffers. A 10-gallon/45 L tank can help manage water and territory issues. For groups, even bigger tanks are better for the fish’s well-being.

    Unique Considerations for Dwarf Puffer Care

    When you buy a pea puffer, make sure to confirm its species. Many places mix Carinotetraodon travancoricus and C. imitator. Look for a keel and male color patterns, but ID can be tricky.

    Managing teeth and diet is key to avoid dental issues. Puffers need to wear down their beaks. Offer small freshwater snails to help with this. It keeps feeding normal and avoids risky dental trimming.

    Plan for enrichment and regular observation. Dwarf puffers are curious and solve problems. Add hiding spots, floating plants, and change the tank layout every few weeks. Use a pipette or turkey baster for feeding to stimulate hunting.

    Be aware of toxin myths and diet-linked risks. Some studies suggest certain puffers can be poisonous. But, there’s no solid evidence for Carinotetraodon travancoricus in captivity. Risk depends on diet and environment, not just species.

    Protect the tank from escapes. Dwarf puffers can jump when scared. Fit a secure lid and avoid sudden noises near the tank. A covered tank reduces stress and injury risk.

    Prefer species-only tanks for most setups. Dwarf puffers may nip fins and stress other fish. This raises nitrate levels and disease risk. Keeping puffers alone simplifies feeding and reduces aggression.

    Know common disease signs and act fast. Look for color changes, lethargy, unusual breathing, or loss of appetite. Quick water tests, partial changes, and quarantine can help. Consult an aquatic vet or experienced aquarist if symptoms last.

    • Species ID: expect mixed stock from suppliers.
    • Teeth care: provide hard foods like snails.
    • Behavioral enrichment: change scenery and use targeted feeding.
    • Tank security: keep a tight lid to prevent jumps.
    • Housing: prefer species-only tanks to reduce stress and disease.

    Conclusion: Your Journey with Dwarf Puffers

    Keeping dwarf puffer fish in a small tank is rewarding but challenging. Make sure the water quality is stable. This means keeping ammonia and nitrite levels at zero and nitrates low through regular water changes.

    Use gentle filtration with a 4–6× turnover rate. Also, protect the inlets to avoid stressing your fish.

    Remember, a 10-gallon (45 L) tank is the minimum size needed. Add a well-planted aquascape and plenty of hiding spots. Feed them a diet rich in live and frozen foods, like snails. This helps meet their nutritional needs and reduces aggression caused by a poor diet.

    When setting up social groups, choose species-only setups unless you can ensure compatible tank mates and extra space. By following these guidelines, you’ll create a great environment. Here, your pea puffers will show lively, intelligent behaviors and might even breed under the right conditions.

    FAQ

    What is a dwarf puffer and how big do they get?

    Dwarf puffers, also known as pea puffers, are small freshwater fish. They belong to the genus Carinotetraodon. Adults grow to about 1″ (2.5 cm) in length. Males have a keel and a dark belly band, while females and juveniles are golden-brown with reddish speckles.

    Why are dwarf puffers popular with aquarists?

    Dwarf puffers are loved for their small size, vibrant colors, and smart behavior. They enjoy exploring plants and glass. They can even recognize and beg for food from their owners.

    What minimum tank size do you recommend for dwarf puffers?

    A good starting tank size is about 45 L / 10 gallons. Smaller tanks can be challenging to keep clean and stable. This increases the risk of health problems.

    How many dwarf puffers can I keep in a 10-gallon/45 L tank?

    The rule of thumb is about 10 L / 2.5 gallons per fish. This means 3–4 fish might fit physically. But, it’s important to provide plenty of hiding spots and watch for aggression, mainly between males.

    What filtration and flow do dwarf puffers need?

    You should aim for a filter turnover of 4–6× tank volume per hour. Puffers prefer gentle flow. Sponge filters are great because they filter without strong currents and are safe for small fish. Make sure to protect intakes with fine grilles to prevent injuries.

    What water temperature, pH, and hardness should I maintain?

    Keep the temperature between 77–82°F (25–28°C). For general care, aim for pH 7.5 and around 10°dH. But, for breeding, slightly soft and acidic water is preferred (pH 6.5–7.0, 5–10°dH). Avoid sudden changes and keep ammonia and nitrite levels zero.

    Should I add salt to dwarf puffer tanks?

    No, dwarf puffers are freshwater fish and don’t need salt. Adding salt can stress them unless you have a specific treatment plan. Generally, avoid making salinity changes for routine care.

    What’s the best aquascape for dwarf puffers?

    Create a densely planted tank with lots of cover. Use plants like Java moss, Java fern, and Anubias. Add driftwood, leaf litter, and rocks for caves and boundaries. Floating plants help control light and nitrate levels.

    What do dwarf puffers eat and how often should you feed them?

    Dwarf puffers are meat-eaters. Feed them a mix of live foods like small snails and frozen foods like bloodworms. Give them small amounts 2–3 times a day. Remove any uneaten food to keep the water clean.

    How do you manage the puffer’s teeth (beak) growth?

    Provide small hard-shelled snails for them to chew on. A varied diet helps prevent beak overgrowth. Avoid trimming their beaks yourself, as it can be risky. Instead, focus on preventing problems through diet.

    Can dwarf puffers live with other fish or in a community tank?

    It’s best to keep them in species-only tanks. Dwarf puffers can be territorial and may nip at other fish’s fins. Adding more fish increases the load on the tank and can lead to aggression. Some keepers have success with Otocinclus or fast-swimming tetras, but it’s not guaranteed.

    How do you manage aggression in groups?

    Make sure there are plenty of hiding spots and visual barriers. Use plants and decor to break lines of sight. Watch for territorial disputes, and if injuries happen, isolate and treat the fish quickly. Increasing the tank size can also help reduce aggression.

    What are the most common diseases and health risks?

    Puffers are sensitive to poor water quality. Issues like Ich, fin rot, and fungal infections can arise. Wounds from aggression can lead to secondary infections. Keep the water clean and quarantine new fish to prevent outbreaks.

    Are dwarf puffers poisonous to humans?

    There’s no evidence that pea puffers carry saxitoxin in captivity. Toxin production is linked to diet and specific bacteria or algae. Captive-raised puffers without these sources are not a risk to handlers.

    How do dwarf puffers breed and care for eggs/fry?

    Males display a keel and perform courting dances. They scatter eggs into moss. Eggs hatch in ~5 days; fry are non-swimming for about another week. Fry need tiny live foods. Spawns prefer slightly soft, acidic water and clean conditions to avoid fungal losses.

    What daily and weekly maintenance do dwarf puffers require?

    Daily, check their appetite and behavior, remove uneaten food, and clean the tank lightly. Weekly, do 25–50% water changes, vacuum the substrate, trim plants, and test water parameters to catch issues early.

    How should I set up filtration maintenance to preserve beneficial bacteria?

    Clean sponge filters with tank water to avoid chlorine and keep beneficial bacteria. Replace or rinse media as needed, but stagger changes to avoid large losses. Keep turnover at 4–6×/hour to maintain low ammonia and nitrate levels.

    What emergency supplies should I keep on hand?

    Have a quarantine tank ready, liquid dechlorinator, basic medications for Ich and bacterial issues, a pipette or baster, and extra sponge filter media. Quick action when a fish gets sick can greatly improve its chances of recovery.

    Why are small tanks specially challenging for dwarf puffers?

    Small tanks have limited capacity to handle changes in water quality. They concentrate waste, making it harder to keep ammonia and nitrite levels zero. Small tanks also intensify territorial behavior and reduce the margin for error.

    What practical trade-offs should I consider before keeping dwarf puffers?

    Small tanks are attractive but require careful maintenance. A 10-gallon/45 L tank is a good starting point. You’ll need to commit to regular water testing, changes, a varied diet, and careful social management to keep your puffers healthy and active.

  • Filter Cleaning Guide

    Filter Cleaning Guide

    This guide helps keep your aquarium water clean and healthy. It shows how to clean filters without harming the good bacteria. This is key for a strong water quality in your freshwater tank.

    Protecting the bio-media is important. It’s where the nitrogen cycle happens. This cycle turns ammonia into nitrate, thanks to healthy bacteria. We aim to clean out debris without harming these microbes.

    Here are some important tips. Use tank water for rinsing and clean one part at a time. Also, do partial water changes and plan your cleaning to avoid shocking the tank’s life.

    Different filters need different cleaning schedules. For example, nano sponge filters might need cleaning every month. But larger canisters can go 3–6 months without a big clean.

    After cleaning, you might see some cloudiness and a drop in water flow. But these issues usually clear up in a few hours. We’ll also share how to check your water’s health after cleaning.

    Follow our easy steps to clean your filters right. And get some DIY tips to keep your tank’s bacteria healthy. This way, your aquarium will stay balanced and thriving.

    Understanding the Importance of Filter Media

    A visually engaging scene showcasing the importance of regular filter cleaning in an aquarium setting. In the foreground, a close-up view of vibrant, healthy aquatic plants and colorful fish swimming near a clean filter, illustrating a thriving ecosystem. In the middle ground, a person in modest casual clothing is attentively cleaning a filter with a gentle touch, ensuring beneficial bacteria are preserved. The background features a well-maintained aquarium with clear water, inviting textures, and soft ambient lighting that highlights the natural colors of the fish and plants. A warm, inviting atmosphere conveys the sense of care and responsibility in maintaining a healthy aquarium environment, with a focus on the intricate balance of life within. Use a wide-angle lens to capture depth and detail, ensuring the focus remains on the filter and the person’s careful actions.

    Your filter media does three important jobs. It traps visible debris, removes dissolved organics and odors, and provides a home for beneficial bacteria. This keeps your tank healthy.

    Choosing the right filter media mix is key. Bio-rings and ceramic media offer lots of surface area for bacteria. Sponge media catches fine particles and supports beneficial bacteria. Filter floss catches small particles but has less space for bacteria.

    Beneficial bacteria in filters are vital. They convert toxic ammonia into nitrite and then into nitrate. This prevents harmful buildup in your tank.

    When you dry or rinse media with chlorinated water, you harm the bacteria. Always keep media wet and rinse in dechlorinated water. This preserves the bacterial populations and avoids sudden changes.

    Replacing all media at once can upset the water balance. Instead, do partial replacements and stagger maintenance. This keeps the water stable.

    Testing is critical after cleaning or media swaps. Check ammonia, nitrite, and nitrate levels regularly. Keeping records helps you spot issues early and protect your fish.

    Types of Filter Media Available

    A visually informative illustration showcasing various types of filter media for aquariums, prominently displayed in the foreground. Include a selection of filter types such as sponge filters, activated carbon, ceramic rings, and floss pads. Each type of media should have a brief, clear depiction showing texture and structure, with labels subtly integrated. In the middle layer, incorporate an assortment of aquarium elements, like plants and gravel, to create context, alluding to a clean and healthy aquatic environment. The background should feature soft-focus, shimmering water ripples to enhance the aquatic atmosphere, illuminated by gentle, natural light coming from a nearby window. The overall mood should be educational and inviting, ideal for readers interested in aquatic health and maintenance.

    When setting up or maintaining a filter, you have several options. Each type plays a specific role. This helps you choose the right media for your tank and cleaning schedule.

    • Sponge filter media — catches debris and supports beneficial bacteria. It’s great as a pre-filter and easy to clean in tank water.
    • Bio-rings and ceramic rings — offer lots of surface area for bacteria. Clean them gently in aquarium water to keep bacteria healthy.
    • Filter floss and fine filter pads — trap small particles and improve water clarity. These are usually thrown away and replaced to avoid clogs.
    • Activated carbon — removes odors, colors, and medicines. Change it monthly for the best results.
    • Biological blocks and bio-balls — are for nitrifying bacteria in canister and sump systems. They increase surface area without blocking water flow.
    • Mechanical pads and foam blocks — catch big debris first. Replace them when they wear out to avoid releasing fibers into the tank.

    Choose media based on your filter type. HOB and canister systems use mechanical, biological, and chemical stages. Sponge filters offer both mechanical and biological action but lack chemical media.

    Know when to replace each media. Filter floss and thin pads go in the trash when they get clogged. Sponges and ceramic media last longer but need replacing when damaged. When swapping out sponge or ceramic pieces, keep the old ones in the tank for a few weeks. This helps seed the new media with bacteria.

    Each media needs different care. Some must be replaced, while others should be rinsed gently in tank water. Following these guidelines ensures your filter works well.

    When to Clean Your Filter Media

    Look for clear signs before starting. Signs like reduced flow, clogged intake, swollen media, and cloudy water mean it’s time to clean. These signs help you avoid stressing your fish and plants.

    Set up a cleaning schedule based on your filter type. Nano sponge filters need cleaning about once a month. Larger canister filters can wait three to six months for a deep clean. Pre-filter sponges need more frequent checks and gentle rinsing.

    Your tank’s conditions also play a role. High bioload, heavy feeding, and few live plants mean more frequent cleanings. But, low stocking and well-planted tanks can go longer without needing a clean.

    • Keep a maintenance log to track your cleaning.
    • Clean or replace only one filter or sponge at a time to keep beneficial bacteria.
    • Avoid cleaning during big water changes or decor scrubbing to prevent losing bacteria.

    Act fast to protect your water quality. If flow slows, cloudiness appears, or ammonia/nitrite spikes, check your pre-filters and sponges right away. Quick spot cleaning can prevent a big problem.

    Follow the right steps when cleaning. Rinse media in tank water and rotate which pieces you clean. Avoid using tap water with chlorine, don’t clean all media at once, and don’t scrub biological media too hard. These steps keep your filter working well.

    Plan a cleaning routine that fits your tank. Create a written schedule, note any special tank factors, and adjust as needed. This helps you know when to clean and keeps your aquarium healthy.

    Safe Cleaning Methods for Filters

    Always use aquarium water when cleaning filters. Rinsing biological and sponge media in tank water keeps beneficial bacteria alive. This is one of the best ways to keep water quality steady.

    Make sure to keep bio-media wet between cleaning and putting it back in. Drying out sponge or ceramic rings can kill bacteria. This is a key step in cleaning filters without harming bacteria.

    • Always unplug electrical equipment before cleaning filters. Follow the manufacturer’s instructions for canisters and HOB units to avoid spills and damage.
    • Use tank water to rinse filters. Swish sponges and bio-rings in the water until debris loosens.
    • Replace disposable floss and activated carbon regularly. These remove mechanical debris and toxins but need fresh replacement often.

    For sponge filters, try a simple in-tank bag method. Place the sponge in a large Ziploc or fish bag underwater, lift it out and squeeze the sponge inside the bag several times using the tank water. Repeat until the squeezed water runs clear.

    When working with HOB or canister filters, remove prefilter sponges and media as the unit’s guide instructs. Swish biological media in the bucket of siphoned tank water and clean housings with a toothbrush if needed.

    Mechanical-only media can handle harsher cleaning. Outdoors, a high-pressure hose can clear coarse sponges, but avoid using it on biological sponges to protect beneficial bacteria.

    If you must use tap water, check chlorine levels first. Some hobbyists briefly rinse sponges in sink water at tank temperature to reduce shock. But, tank water is safer when possible.

    You can reuse bucket water on plants as fertilizer after cleaning. Refill the tank and expect brief cloudiness that should clear within a few hours when you follow these filter cleaning techniques.

    Use these DIY filter cleaning tips as a routine. They help maintain beneficial bacteria, protect filter function, and keep your aquarium stable while you clean with care.

    The Impact of Over-Cleaning

    Over-cleaning means removing or replacing all filter media at once. It also includes rinsing sponges in chlorinated water, using soap, or letting media dry. These actions can destroy the beneficial nitrifying bacteria on your media.

    The effects on your tank’s health are severe. Losing nitrifying bacteria can disrupt the nitrogen cycle. This can lead to sudden spikes in ammonia and nitrite, which are harmful to fish. You might see cloudy water, stressed fish, illness, or even death.

    Replacing entire media packs can cause operational problems. The biological filtration needs time to rebuild. To avoid long outages, seed new media with a bit of old media. Or, keep an old cartridge or filter running for four to six weeks to give bacteria time to grow.

    Plan your maintenance carefully to avoid combining big tasks. Don’t do full water changes, deep substrate cleaning, or heavy decoration scrubbing at the same time as filter work. Doing too much at once increases the risk to your fish.

    • Clean only one sponge or media component at a time.
    • Rotate which pieces you rinse so some bacterial colonies remain intact.
    • Monitor ammonia and nitrite for several days after any filter work.

    Never use soap, bleach, or other harsh chemicals on filter media. Also, avoid hot water that can kill bacteria. Following these filter cleaning dos and don’ts will help keep beneficial bacteria alive and prevent the dangers of over-cleaning.

    Steps to Clean Your Filter Media

    Here’s a simple guide to clean your filter. You’ll need a clean bucket, siphon, toothbrush, fish bag or Ziploc, towels, and a log. These tools make cleaning your filter easy.

    1. Start by checking your system. Look at the flow rate and the intake sponge. Also, check for any cloudiness or brown gunk. Decide which media to clean first, starting with the prefilter sponge.

    2. Next, turn off the unit. Unplug the filter and follow the manufacturer’s steps to avoid flooding when disconnecting hoses.

    3. Now, remove the media carefully. Start with the prefilter sponge. Place sponges in a bag or bucket of tank water to avoid releasing debris.

    4. Rinse the media in tank water. Use siphoned tank water to rinse bio-rings and sponges until the water clears. Squeeze the sponges a few times and replace the rinse water as needed.

    5. Replace any disposable media. Throw away fine filter floss or used activated carbon. Install fresh media as recommended by the filter maker.

    6. Clean the housing. Rinse the filter housing and the impeller with plain water. Use a toothbrush to remove slime, but avoid soap or detergents.

    7. Reassemble the filter carefully. Keep the media wet while reassembling. Follow the manufacturer’s instructions. If you removed water, refill the tank and start the filter again.

    8. Do a post-clean check. Watch for flow and expect some cloudiness. Test ammonia and nitrite in 24–72 hours to check stability.

    9. Record your service. Note which component you cleaned and plan the next cleaning. If you have multiple sponges or filters, clean a different one next time to protect beneficial bacteria.

    Remember to stay safe. Never leave fish without filtration for more than 8–12 hours. Avoid cleaning all filters at once, as this can stress your tank and harm biological filtration.

    Make cleaning your filter a routine. Learning how to clean filters properly saves time and keeps your aquarium stable. Use these tips to extend media life and protect your system.

    Alternative Cleaning Techniques

    There are many ways to clean filters without harming the biofilter. A UV sterilizer kills free-floating pathogens and green water with ultraviolet light. But remember, it doesn’t remove biofilm from media. So, use it with other cleaning steps when needed.

    Ammonia neutralizers and water conditioners help if beneficial bacteria drop. Always follow the product instructions. These products remove ammonia, nitrite, chlorine, and chloramine, keeping fish safe while bacteria recover.

    Commercial beneficial bacteria supplements can help after cleaning or adding new filter material. Use them as directed to speed up recovery and keep your nitrogen cycle steady.

    If fish get sick, quarantine them and use targeted medication or antibiotics. Use UV sterilizers or medicated baths carefully. They can reduce biofilter bacteria and change your system’s balance.

    Mechanical aids make cleaning easier and gentler. A gravel vacuum siphons tank water for rinsing media and removing debris. You can reuse this water on houseplants as a mild fertilizer.

    • Stagger cleanings of sponges and cartridges so only one is rinsed each cycle. This rotational approach preserves overall bacterial load.
    • Limit use of antibiotics and strong sterilizers to clear outbreaks. Those methods change microbial communities and should be a last resort.

    Use these effective filter maintenance methods as a toolbox. Combine physical cleaning, selective chemical aids, and biological supplements to maintain steady water quality. Test your water often and adapt your plan when parameters shift.

    Preventive Maintenance for Filter Longevity

    Keeping your filter in top shape is easy with a few simple steps. Start by checking the intake weekly and noting the flow rate. Also, test for ammonia, nitrite, and nitrate levels. This helps catch problems early and keeps your tank healthy.

    For monthly upkeep, swap out disposable media like activated carbon and filter floss. Rinse prefilter sponges in tank water to keep beneficial bacteria alive. These steps prevent clogs without harming your biofilter.

    Every three to six months, give your canister media a deeper clean. This depends on your tank’s bioload and the manufacturer’s advice. Clean impellers and housings with water and a soft toothbrush. Always follow the disassembly instructions to avoid damage.

    • Keep mechanical, chemical, and biological stages balanced in your setup.
    • Steady water parameters protect bacterial colonies.
    • Log and schedule tasks to avoid over-cleaning.

    When replacing sponges or pads, save a piece of the old media. This helps seed bacteria and speeds up recovery. If you have multiple filters, rotate which one you clean to maintain biological function.

    1. Avoid overfeeding and remove uneaten food quickly to reduce filter stress.
    2. Clean impellers with plain water to avoid chemical residue.
    3. Replace old media at the recommended intervals.

    Learn the right way to clean your filter to protect your fish and bacteria. Stick to a routine, track your tasks, and choose high-quality filters. These steps make filter maintenance easy for all hobbyists.

    Troubleshooting Common Filter Issues

    First, do a quick visual check. Look for kinks in hoses, loose fittings, or air in canister filters. Make a note of what you find to help solve problems later.

    If the filter is slow, try simple fixes. Clean the prefilter sponge and impeller with tank water. Check intake screens and ensure tubing is straight. For canisters, seal and prime if air is trapped.

    Cloudy water after cleaning is usually temporary. It should clear up in a few hours. This happens when you clean filters right and avoid rinsing all biological media at once.

    Test water for ammonia and nitrite if it’s cloudy or you suspect a spike. If levels are high, do partial water changes. Add a bacterial supplement or an ammonia neutralizer as a quick fix.

    • Clean impellers and housings to stop noise and vibration.
    • Replace worn sponges or pads; keep small pieces in the tank to seed new media for 4–6 weeks.
    • If clogging is frequent, re-evaluate feeding habits and add a pre-filter sponge or larger filter for the bioload.

    Follow a diagnostic routine: inspect visually, test parameters, and check equipment operation. Match each finding to corrective action and document results for future reference.

    To prevent problems, adjust maintenance intervals, reduce feed amounts, and add live plants. Consider upgrading to a larger filter if your tank is overstocked.

    Conclusion: Maintaining a Thriving Ecosystem

    Remember, the key is to protect beneficial bacteria. Rinse biological media in aquarium water, avoiding chlorinated tap water or soap. Clean only part of your filtration at a time. This keeps the bacteria that power the nitrogen cycle healthy, ensuring your fish stay well.

    Balance is essential. Regular, moderate cleaning keeps your mechanical filter working well while protecting the biological filter. Use partial water changes and staggered media cleanings to avoid losing too much bacterial mass at once.

    Keep a cleaning schedule and a maintenance log. Regularly test your water and use bacterial supplements or ammonia neutralizers only when needed. These steps help maintain a thriving aquarium ecosystem.

    By following these best practices and the tips in this guide, you can keep your water clear and your aquarium ecosystem stable. This will ensure a healthy environment for your fish and plants.

    FAQ

    What is the primary goal when cleaning aquarium filter media?

    The main goal is to remove debris and keep the mechanical flow going. It’s also important to protect the beneficial nitrifying bacteria. This helps keep the nitrogen cycle balanced.

    Which filter types are covered and how does cleaning frequency vary?

    We cover sponge, hang-on-back (HOB), canister, internal, and sump filters. Cleaning frequency depends on how much waste your tank produces, the size of your filter, and how often you feed your fish. Nano sponge filters need cleaning every month, while larger canister systems might only need a full media change every 3–6 months.

    Why should I use aquarium water to rinse biological media?

    Aquarium water is safe because it doesn’t have chlorine or chloramine. Rinsing bio-media in it helps keep the beneficial bacteria alive. Using chlorinated tap water or letting media dry can harm the bacteria and upset the nitrogen cycle.

    Can I clean all filter media at once to save time?

    No, it’s not a good idea. Cleaning or replacing all media at once can kill most of the good bacteria. This can lead to spikes in ammonia and nitrite. It’s better to clean one sponge or media component at a time and stagger your cleanings.

    What short-term effects should I expect after cleaning a filter?

    You might see the water get cloudy and the flow reduce right after cleaning. These issues usually clear up within a few hours. Keep an eye on ammonia and nitrite levels for 24–72 hours to make sure the biological filtration is working well.

    How do different media types function and how should each be treated?

    Mechanical media, like filter floss and pads, catches particles and is often replaced. Biological media, such as bio-rings and sponges, provides a surface for nitrifying bacteria and should be rinsed gently in tank water. Chemical media, like activated carbon, removes dissolved compounds and is usually replaced monthly. Only replace biological media if it’s deteriorated and seed new pieces with old media.

    What’s a safe step-by-step checklist for routine filter servicing?

    Start by preparing a bucket, siphon, toothbrush, and a bag. Observe the flow and media condition. Then, power down and follow the manufacturer’s instructions. Remove the prefilter sponge and place it in tank water. Rinse bio-rings and sponges in siphoned tank water until they’re clean. Replace disposable floss or carbon. Clean the housing and impeller with plain water. Reassemble, keeping media wet, and restart the filter. Test ammonia and nitrite levels over the next 24–72 hours. Record what you cleaned.

    How do I clean a sponge filter without dumping debris back into the tank?

    Use a large fish bag or Ziploc to catch the sponge. Submerge it underwater, then lift the bag out and squeeze the sponge in the tank water until it’s clear. Rinse other components with plain water as needed.

    Is it okay to rinse sponges in tap water if I match temperature?

    It’s risky. Matching temperature can reduce shock, but tap water often has chlorine or chloramine that can kill bacteria. If you must use tap water, treat it first to remove chlorine/chloramine. Better yet, use tank water for rinsing biological media.

    What counts as over-cleaning and why is it harmful?

    Over-cleaning includes replacing all media at once, using chlorinated water, or letting media dry. These actions can reduce or eliminate beneficial bacteria. This disrupts the nitrogen cycle, leading to toxic ammonia and nitrite spikes.

    What should I do if ammonia or nitrite spikes after cleaning?

    Test the water immediately and do partial water changes to dilute toxins. Consider adding a beneficial bacteria supplement to speed up recolonization. Use an ammonia neutralizer temporarily if needed. Monitor levels daily and avoid further major maintenance until stability returns.

    How should I schedule cleanings for multiple filters or sponges?

    Stagger cleanings so you only service one filter or sponge per maintenance cycle. Keep a maintenance log to rotate through sponges and media. This helps preserve overall bacterial populations.

    When should I replace biological media instead of just rinsing it?

    Replace sponges, foam blocks, or ceramic media only when they physically deteriorate or break down. When replacing, keep pieces of the old media in the tank for several weeks. This helps seed new media and maintain bacterial populations.

    What preventive tasks reduce filter workload and clogging?

    Feed less and remove uneaten food, vacuum substrate regularly, use prefilter sponges, add live plants to absorb nitrates, and check intake and flow weekly. These actions reduce debris and extend the interval between deep media cleanings.

    Should I use UV sterilizers, antibiotics, or bacterial supplements?

    Use UV sterilizers selectively to control free-floating pathogens or green water; they do not affect bacteria on media. Antibiotics and medicated treatments should be used cautiously and often in quarantine tanks because they can harm biofilter bacteria. Beneficial bacteria supplements can help recolonize media after partial cleaning—follow manufacturer directions.

    How often should I replace activated carbon and filter floss?

    Replace activated carbon about monthly and change fine filter floss or disposable pads as needed when clogged or discolored. Mechanical-only pads are disposable and should be replaced instead of being rinsed vigorously.

    What are signs that a filter or media needs attention right away?

    Immediate action is needed for clogged intake or prefilter sponges, noticeably reduced flow, persistent cloudiness, or elevated ammonia/nitrite readings. Check and clean prefilters and impellers promptly to restore flow and filtration.

    How can I avoid flooding when servicing canister filters?

    Follow the manufacturer’s disassembly steps, power down and disconnect carefully, use towels and a bucket for hose water, and keep media wet during handling. Take time to re-prime according to instructions to restore flow without airlocks.

    How should I monitor water parameters after filter maintenance?

    Test ammonia, nitrite, and nitrate daily for 24–72 hours after servicing. Keep records to detect trends. If levels rise, perform partial water changes and use bacterial supplements or neutralizers only as temporary support while the biofilter recovers.

    What are practical tips for long-term filter and tank stability?

    Maintain consistent pH and temperature, avoid overfeeding, keep a maintenance log and schedule, clean only portions of your filtration at a time, replace disposable media on schedule, and monitor water chemistry regularly. This protects the biological filter and ensures stable aquarium health.

  • How Much Light Does a Nano Tank Really Need?

    How Much Light Does a Nano Tank Really Need?

    Setting up a small aquarium raises a key question: how much light does your nano tank need? The answer varies based on several factors. These include the plants you choose, the tank’s depth, the lighting fixture, and the desired look of your aquascape. Options range from nano tank LED strip lights to compact T5 or T8 fixtures, each affecting the light plants receive.

    Understanding lumens, watts, and PAR is key to comparing lighting options. Manufacturers often list lumen output and wattage. Yet, PAR (Photosynthetically Active Radiation) is more accurate in predicting plant response. Historically, hobbyists used watts-per-liter or watts-per-gallon rules. But these vary greatly with LEDs, T5s, and metal halides.

    Lumen guidelines can aid in planning: low-light plants thrive at 10–25 lumens per liter. Medium-light species prefer 20–50 lumens per liter, and high-light plants need 40–50+ lumens per liter. If possible, check PAR values. Community ranges suggest low-light plants need about 75–100 μmol/m²/s, medium-light species around 150 μmol/m²/s, and high-light plants 200+ μmol/m²/s.

    This article will guide you in choosing the best lights for nano aquariums. You’ll learn about using nano tank LED strip lights, setting light duration and position, and avoiding common lighting mistakes. You’ll also get tips on maintenance, budgeting, and the latest in nano tank lighting. This will help you plan a healthy, beautiful nano aquarium.

    Understanding Nano Tanks and Their Lighting Requirements

    A serene scene of a beautifully aquascaped nano tank illuminated by ambient LED lights. In the foreground, the nano tank showcases vibrant aquatic plants, intricate driftwood, and a few small fish gracefully swimming among them. The middle section features soft, colorful lighting emanating from above, creating a calming glow that highlights the textures of the plants and substrate. In the background, a blurred out room setting with natural light filtering through a window, suggesting an inviting home environment. Capture the image using a shallow depth of field, focusing on the nano tank while softly blurring the background. The overall mood should evoke tranquility and fascination with aquatic life, emphasizing the importance of proper lighting for nano tanks.

    A nano tank is small, under about 10 gallons (roughly 40 liters). It has a compact depth and small surface area. This size affects how light behaves, unlike larger tanks.

    Shorter distances in nano tanks mean bright light reaches the center fast. But, light falloff from center to corners can be sharp.

    When picking nano tank lighting, consider its footprint and depth. Deeper tanks need stronger lights and better beam spread. Wider tanks might need two smaller lights or a wide-beam fixture.

    Plant choice affects the light intensity needed. Easy plants like Java fern and Microsorum pteropus need about 10–20 lumens per liter. Medium-demand plants do best near 20–40 lumens per liter. Advanced plants and dense carpeting plants need over 40 lumens per liter.

    Match your lighting to the plant type. For low-light plants, choose modest output lighting. For carpeted scenes, go for higher output and check PAR at the substrate.

    Don’t forget about other factors. CO2, flow, and nutrients also affect plant health. High light without CO2 and proper nutrients can lead to algae and poor health. Balance your lighting with good filtration, circulation, and fertilization for the best results.

    • Define the tank: under ~10 gallons, compact depth and footprint.
    • Assess plants: Easy (10–20 lumens/L), Medium (20–40 lumens/L), Advanced (>40 lumens/L).
    • Consider layout: depth needs intensity, wide tanks need broader coverage.
    • Balance systems: CO2, flow, and nutrients must match light level.

    Look at nano tank lighting options before buying. Compare by lumen output, beam angle, and PAR. Choose reliable brands like Fluval, NICREW, or Finnex for your small aquarium.

    Types of Lighting for Nano Tanks

    A beautifully arranged nano tank featuring vibrant aquatic plants illuminated by sleek, modern LED lighting specifically designed for small tanks. In the foreground, the LED fixture highlights the tank with cool white and blue hues, creating a sparkling effect on the water surface. The middle ground showcases the colorful plants and small fish, providing a lively and dynamic scene, while the background features a subtly blurred home environment, suggesting a cozy living room setting. The overall atmosphere is tranquil and serene, emphasizing the importance of proper lighting in aquascaping. The picture is captured from a low angle, with a shallow depth of field to focus on the tank, enhancing the visual appeal of the lighting and aquatic life.

    You have many lighting options for a nano tank. Each has its own pros and cons. Choose based on your plants, fish, heat tolerance, and tank size.

    • Incandescent — not good for aquariums. They waste energy, get too hot, and stress fish. Don’t use them in a planted nano tank.

    • Metal halide — very bright but hot. It’s a big debate with LED. Metal halide is intense but hard to use in small tanks because of heat and maintenance.

    • Fluorescent (T12, T8, T5) — once common, now useful in some cases. T5 tubes are brighter than T8. For example, a 15W T8 makes about 900 lumens, while a 24W T5 makes 1600 lumens. Reflectors help a lot. But, fluorescents spread light and age faster than LEDs.

    • LED — the best choice for many nano tanks. LEDs are energy-efficient, cool, and last long. They can be as bright as metal halide but without the heat. You can find LED bars, strips, and fixtures to fit your tank.

    Where you place LEDs is key. A single bar can light the center well but leave corners dark. Using many small lights or bars spreads light evenly. Many people like using two bars or a strip to cover the whole tank.

    When buying, look for PAR charts on the packaging. Lumen numbers are common, but PAR is better for plants. If no PAR chart is available, read reviews and watch videos of tanks under that light.

    Choose your lighting based on your needs. For easy care and low heat, go for LED. For high-light species and managing heat, compare metal halide and LED.

    Factors That Influence Lighting Needs

    Choosing the right nano tank lighting involves several factors. The type of plants and your skill level are key. For example, easy plants like Java fern do well with low light. But carpet plants need more light and CO2 to grow well.

    The depth and size of your tank also matter. Deeper tanks block more light, and light spreads out from the center. This means light intensity drops off from the center to the corners.

    • The type and spectrum of light are important. Red and blue light are best for plants. Look at the spectrum, CRI, and color temperature to see how plants and the tank will look.
    • Reflectors and the design of the fixture can increase usable light. Good reflectors can make light up to 4 times more useful. Even simple reflectors help more than nothing at all.
    • The distance between the light source and plants affects how intense the light is. Moving lights 10 cm closer can increase center light intensity by about 40%. But corners may not get as much benefit because of the spread.

    Choosing the right lighting for your nano tank depends on CO2, flow, and nutrients. More light means you need more CO2, stronger flow, and regular fertilization. This helps prevent algae and supports healthy growth.

    Photoperiod and room light also play a role. The timing of your lighting affects plant stress and algae risk. Plan your lighting schedule carefully with your chosen setup.

    1. Match plant category to PAR targets: easy (low), medium (moderate), advanced (high).
    2. Consider depth and footprint when choosing and placing fixtures.
    3. Focus on spectrum and reflector quality when comparing lights.
    4. Balance light with CO2, flow, and nutrients for stable growth.

    Use this checklist to compare products and settings. It helps you find the right nano tank lighting that fits your setup, plants, and maintenance routine. It also helps keep algae under control.

    Measuring Light Intensity

    Setting up lighting for a planted nano tank starts with understanding lumens, lux, and PAR. Lumens show the total light output of a bulb and are easy to compare. They’re printed on the packaging.

    Lux measures light per square meter at a specific spot. You can use a light meter to get a lux reading. This helps judge how bright a tank corner will be.

    PAR measures photons in the 400–700 nm band that plants use. It’s the most useful for plant growth. PAR meters or manufacturer curves help set targets and choose fixtures.

    • Understand lumen vs PAR nano tank trade-offs: a high lumen rating can be misleading if the spectrum is poor for plants.
    • Use lux measurement for nano aquariums to check light distribution across the tank surface.

    Conversions from photon flux to lux vary by light type. For example, cool-white fluorescent light might use a factor near 74. Other sources range from about 33 to 106. This makes conversions imprecise. For accuracy, measure PAR directly.

    Don’t rely only on lumen values. Lumens favor green wavelengths, and plants reflect much of that light. A fixture with high lumens might not be as good for photosynthesis as one with stronger PAR output.

    1. If you lack a PAR meter, use lumen-per-liter as a rough guide for fixtures of the same technology.
    2. Ensure even spread and correct distance from the water to avoid hot spots and shaded areas.
    3. Refer to manufacturer PAR curves when available for better planning.

    By balancing lux measurement for nano aquariums with attention to lumen vs PAR nano tank differences, you will get closer to the light levels your plants need. Practical checks and simple meters will keep your setup efficient and stable.

    Ideal Lighting Duration

    Begin with a good starting point: 8 hours of light a day is great for planted nano tanks. Many people choose between 6 to 10 hours of light, based on the plants and algae risk.

    Use a timer to keep the light schedule the same. A steady light cycle helps plants grow better and keeps algae away.

    Don’t confuse longer light time with more intense light. More time and intensity can make plants grow faster. This means they need more nutrients and CO2.

    If you have a strong LED light, increase the light time slowly. Watch for algae during this time.

    Here’s how to deal with algae:

    • Shorten the light time by an hour or two.
    • Lower the light intensity before adding CO2 or extra fertilizers.
    • Only boost nutrients or CO2 after adjusting duration and intensity.

    For most setups, adjust the light time based on plant health. Trim or change the light schedule a little at a time. This keeps plants healthy and avoids common mistakes.

    Positioning Your Lights

    When placing your lights, make sure they’re low enough to light up plants well. But they should be high enough to avoid heat and glare. This way, you get more light in the middle of your nano tank. But, corners might stay a bit dim.

    Using reflectors or multi-source nano tank light fixtures helps spread light evenly. Good reflectors can increase usable light by up to four times. They also reduce dark spots in small spaces.

    For wide or long tanks, consider using two smaller bars or a set of nano tank LED strip lights. This setup prevents dark spots and ensures plants at the edges get enough light.

    Put high-light-demand plants in the middle and elevate them on stones or small stands. This way, they catch more light. Plants that prefer low light do well in corners where the light is softer.

    Remember, equipment like filters and heaters can cast shadows. Move your lights or add another nano tank LED strip lights module to overcome these shadows.

    • Test spread with a lux meter for objective readings.
    • Watch short-term algae or plant growth as a practical check.
    • Adjust over a week and record changes to find the best setup.

    Keep tweaking the position of your lights until the coverage is even. Plants should grow well without stress. Small adjustments in height and angle can make a big difference.

    Effects of Insufficient Lighting

    Plants that don’t get enough light show signs in weeks. They grow leggy and leaves stretch out. Colors also fade to pale green or yellow.

    Carpet plants lose their shape and don’t spread. This is because they don’t get enough light.

    Dead leaves and uneaten food build up. This is called detritus. It stresses plants and fish.

    Weaker plants can’t fight off algae and disease. They can’t compete for nutrients because of the lack of light.

    Photosynthesis slows down without enough light. This means less oxygen at night and less nutrient uptake during the day. Your planted setup won’t grow as planned.

    Not all plants are affected the same way. Some like Cryptocoryne, Java fern, Anubias, and many mosses can handle low light. These plants are great for beginners who are exploring nano tank lighting options.

    • Poor growth and stretched stems
    • Pale coloration and loss of form
    • Detritus buildup and weaker plants
    • Lower oxygen and reduced nutrient uptake
    • Some species thrive in low light

    Be mindful of the effects of low light in your nano aquarium. If you want lush growth, change your lighting instead of hoping plants will adapt.

    Overlighting and Its Risks

    Too much light can harm a nano tank. It can cause plants to grow too fast. This needs more CO2, nutrients, and water flow.

    If you don’t match the lighting with these needs, plants will weaken. Algae will also grow.

    Algae outbreaks are a big problem. Green water, hair algae, and diatoms grow when there’s too much light. Even plants like Hemianthius callitrichoides struggle without CO2 and better water flow.

    Too much light can also make the tank warmer. This can hurt fish and invertebrates. It makes the tank less stable.

    To avoid these problems, try a few things. Start by reducing the light or shortening the time it’s on. Add CO2 and balanced fertilizers for stronger lights. Use a better pump or spray bar for more water flow.

    If you can’t make these changes, choose plants that need less light. Anubias, Java fern, and crypts do well with less light. They also help keep algae away without constant care.

    • Lower intensity or shorten the daily light window.
    • Introduce CO2 and regular liquid or root fertilizers.
    • Improve water movement with a stronger filter or powerhead.
    • Choose low-light plants when using basic or top-rated nano tank lights that produce too much light.

    Watch your tank closely after changing the lighting. Look for signs of algae or plant problems. Small, gradual changes help keep your tank healthy and avoid big problems.

    Maintenance of Nano Tank Lighting

    Creating a simple maintenance routine is key to keeping your tank healthy. Clean the lenses and reflectors every few weeks. This removes dust, salt creep, and algae. A dirty lens can reduce light and make your fixtures work harder.

    Stick to the manufacturer’s schedule for bulb and driver replacements. Fluorescent tubes, like T5 and T8, lose brightness before they stop working. For LED setups, check the drivers and diodes every few years.

    Check your reflectors for any gaps or dark spots. A good reflector should reflect light evenly without breaks. Make sure reflectors are secure and mounting hardware is tight for even light distribution.

    Make sure your timers and dimmers are working right. Adjust the photoperiods with the seasons to match natural light cycles. Faulty timers can lead to algae growth or stress in your fish.

    Keep an eye on the temperature near your tank’s hood. Older fixtures and tight LED hoods can trap heat, reducing light output. Ensure good ventilation or move fixtures to avoid overheating and protect your equipment.

    • Clean lenses and reflectors regularly.
    • Replace bulbs and check warranties.
    • Inspect reflectors for continuous reflection.
    • Test timers, dimmers, and photoperiods.
    • Monitor heat and improve ventilation as needed.

    Keep a log of when you service your tank and replace parts. This helps you track trends and plan for future upgrades. It makes long-term maintenance easier to manage.

    Budgeting for Nano Tank Lighting

    Start by dividing costs into what you spend upfront and what you’ll spend later. Basic fluorescent lights are cheaper to buy. But, they use more power and need to be replaced more often.

    LED lights cost more at first but save money in the long run. They use less energy, produce less heat, and last longer. Look for PAR data from manufacturers to find the right LED for your tank.

    • Compare lumen and PAR specs instead of just wattage.
    • Choose well-known brands like Fluval, Kessil, or Nicrew for value.
    • Think about how much energy they use to estimate monthly costs.

    Remember, accessories like reflectors and timers also affect your budget. Reflectors can increase light use by up to four times. A timer keeps your tank’s schedule consistent and prevents algae.

    For high-light tanks, consider CO2 systems and dosing setups. They improve plant health but add ongoing costs. Weigh these costs against the benefits of better growth and color.

    1. Calculate the initial cost of the light.
    2. Estimate yearly electricity costs.
    3. Add in the cost of spare parts and accessories.

    Choose the best lights for your nano tank without spending too much. Look at warranties and real reviews to find the best options. Spending a bit more on a quality LED can save you money on electricity and replacements in the long run.

    Innovations in Nano Tank Lighting

    High-output LED fixtures now offer PAR levels like metal halides but use less power and heat. This means you can keep your small tank stable and cool. It also helps plants grow well and look vibrant.

    Tunable spectrum fixtures and programmable controllers let you control the light. You can adjust the red or blue light for plant health. Or, you can create natural-looking sunrise and sunset effects. Many brands offer smartphone apps for easy control from anywhere.

    Lighting for small tanks focuses on spreading light evenly and being low-profile. Compact LED arrays and slim bars fit well in nano tanks. This reduces shadows, making plants and corals look better.

    Reflector technology has also improved. New materials and shapes help use more light without using more energy. Pairing efficient reflectors with modern modules makes your tank lighting brighter and more even while using less power.

    • Compact fixtures tailored for nano tanks
    • Smart controllers with app integration
    • Clear PAR reporting from manufacturers

    Manufacturers now share PAR data and offer app control. This makes it easier to choose and adjust your nano tank lighting. You can find the right setup for your plants and schedule.

    Nano tank LED strip lights are great for rimless or shallow tanks. They offer flexible placement and color options. Use them for a thin, even glow without bulky hardware.

    When looking for upgrades, focus on energy efficiency, control, and light output. These trends help you create a healthy, attractive small aquarium. They fit your space and schedule perfectly.

    Conclusion: Optimizing Lighting for a Healthy Nano Tank

    To optimize nano tank lighting, match your fixture to plant needs and tank layout. First, sort plants by their light needs: easy, medium, or advanced. Then, pick a PAR or lumen level that meets those needs. Choose quality LED lights for their consistent output, energy savings, and control.

    Think about your tank’s depth and size to avoid light loss in corners. Place lights in the center and use reflectors or extra light bars for even light. Put high-light plants in the middle or on raised spots. These steps help light reach all areas evenly, preventing growth stunting.

    Keep your system clean and plan your budget wisely. Clean your lights often, replace old parts, and choose reliable LED brands to avoid frequent replacements. Use a timer to keep the light cycle steady and in sync with CO2, nutrients, and water flow. This helps prevent algae and promotes healthy plant growth.

    Here’s a quick guide for next steps: figure out your plants’ light needs, pick a PAR or lumen level, and choose the right LED lights. Install a timer and watch for algae and plant health. Adjust the light’s intensity or duration as needed, and add CO2 or nutrients when necessary. This will keep your nano tank healthy and thriving.

    FAQ

    How much light does a nano tank really need?

    The light needed for your nano tank depends on several factors. These include the type of plants, the tank’s depth, and the lighting technology used. Aim for PAR levels of 75–100 μmol/m²/s for low-light plants, 150 μmol/m²/s for medium, and 200+ μmol/m²/s for high-light plants.

    If measuring PAR is not possible, use lumen-per-liter guidelines. For low light, aim for 10–25 lumens/L. Medium light needs 20–50 lumens/L, and high light requires 40–50+ lumens/L. Remember, watts-per-liter is outdated for modern LED, T5, and other lighting technologies.

    What exactly defines a nano tank and why does lighting behave differently than in larger tanks?

    A nano tank is small, usually under 10 gallons (≈40 liters). Its compact size means light spreads unevenly. This requires using reflectors, distributed LED bars, or multiple light sources to avoid shadows and ensure even light.

    Which plants are best for low-, medium-, or high-light nano setups?

    For low light, choose plants like Cryptocoryne, Java fern, Anubias, and many mosses. They thrive in 10–20 lumens/L or 75–100 μmol/m²/s PAR. Medium-demand plants, such as many stem plants and larger rosettes, do well in 20–40 lumens/L or 150 μmol/m²/s PAR.

    For high-light species, like Hemianthu callitrichoides (HC) and many glosso strains, you need >40 lumens/L or 200+ μmol/m²/s PAR. These plants often require CO2, good flow, and robust fertilization.

    How do tank depth and footprint change my lighting choice?

    Deeper tanks need stronger LEDs with tighter beam control. Wider or longer tanks suffer from edge and corner falloff. Use multiple smaller bars or a distributed LED array for even coverage.

    Place high-light plants centrally or on raised stones to minimize depth penalties.

    What lighting types are best for nano tanks: LED, fluorescent, metal halide, or incandescent?

    LED lighting is the best choice for nano tanks. It’s energy-efficient, low heat, and long-lived. LEDs come in bars, strip lights, and integrated fixtures.

    T5 fluorescent is a good older option with good lumen output per length. Metal halide offers high PAR but too much heat for most nanos. Incandescent is outdated and should be avoided.

    Should I choose a single LED bar or multiple distributed fixtures?

    Distributed arrays or two smaller bars often provide better uniformity than a single central bar. They reduce corner shadows and give more even PAR across the footprint.

    For long or wide nano tanks, place lights to minimize center-to-corner dropoff. Use reflectors or multiple low-profile fixtures for balanced coverage.

    What’s the difference between lumens, lux, and PAR, and which should I use?

    Lumens measure total visible light output and are printed on packaging. Lux is lumens per square meter at a location. PAR (μmol/m²/s) measures photons usable by plants (400–700 nm) and best predicts plant response.

    Manufacturers often list lumens, but PAR charts or meters are more useful for planted tanks. Conversions from lux/lumens to PAR vary by spectrum and are imprecise—use PAR when possible.

    How long should I run my lights each day?

    Start with about 8 hours per day as a safe baseline. Many hobbyists run 6–10 hours depending on plant demand and algae control. Use a reliable timer for consistent photoperiod.

    Remember, increasing duration raises growth and nutrient/CO2 demand. Duration is not a substitute for appropriate intensity or CO2/nutrients.

    What happens if lighting is too low for my chosen plants?

    Underlighting causes poor growth, elongated stems, pale color, failed carpeting, and weakened plants that accumulate detritus. Some low-demand species will thrive, but if your aquascape targets dense growth or carpeting, inadequate light prevents reaching those goals and reduces photosynthesis-driven oxygen and nutrient uptake.

    What are the risks of overlighting a nano tank?

    Excessive intensity or long photoperiods drive rapid growth that demands matched CO2, nutrients, and flow. Without those, plants suffer and algae proliferate—green water, hair algae, diatoms. Overlighting can also raise tank temperature if fixtures are poorly ventilated.

    High-light carpet plants typically need CO2 and flow, not just more light.

    How do I mitigate algae if it appears after increasing light?

    First reduce photoperiod or intensity slightly, then add or increase CO2 and fertilization if you want to keep intensity. Improve flow and remove visible algae manually. Ramp lighting up gradually for high-light systems and monitor; adjust before algae becomes established.

    What mounting and spread strategies maximize usable light?

    Keep fixture distance minimal while avoiding heat and glare. Use reflectors or multi-source fixtures to improve uniformity—reflectors can boost usable light up to fourfold if well designed. For wide tanks, use two bars or a distributed array.

    Position high-demand plants centrally or elevated; move filters/heaters to reduce shadowing or add secondary lights if needed.

    How often should I maintain or replace lighting components?

    Clean lenses and reflectors periodically to remove dust, salt creep, and algae—dirty optics reduce usable light. Replace fluorescent tubes per manufacturer schedules because they dim before failing. LEDs degrade slower but check driver warranties and replace fixtures when output falls noticeably.

    Verify timers and dimmers regularly and ensure adequate ventilation to prevent heat damage.

    How should I budget for nano tank lighting?

    Entry-level fluorescent fixtures cost less up front but use more energy and require tube changes. Quality LED fixtures cost more initially but offer better efficiency, low heat, long life, and often PAR data—usually the best long-term value. Factor in reflectors, a timer, and possibly a PAR meter or CO2 system if you plan high-light planting.

    Are there any recent lighting innovations I should consider for nano tanks?

    Yes—high-output LEDs now rival metal halide in PAR while using much less power and heat. Tunable spectrum fixtures and programmable controllers let you emphasize red/blue bands or simulate sunrise/sunset. Slim distributed LED bars are built for nano footprints to reduce shadowing.

    Improved reflector materials and consumer-accessible PAR reporting and smartphone control apps also make selection and tuning easier.

    What immediate steps should I take when planning nano tank lighting?

    Identify your plants’ light category (Easy/Medium/Advanced). Decide on a target PAR or use lumen/L proxies if needed. Choose an LED fixture with good spread or multiple fixtures, install a timer, and monitor plant health and algae. If you go high-light, plan for CO2, fertilization, and good flow.

    Adjust intensity or photoperiod based on observations and consider investing in reflectors or a PAR meter for precision.

  • Micro Rasbora Guide

    Micro Rasbora Guide

    Micro rasboras are perfect for a vibrant, calm nano community in your freshwater tank. They belong to the Cyprinidae family, like barbs and goldfish. These small fish add color and movement to your tank without growing too big.

    Popular rasboras like harlequin and scissortail stay under 2 inches. They thrive in tanks starting at 10 gallons. Dwarf emeralds and Boraras, like the chili rasbora, are under 1 inch. They’re great for nano tanks of 3–10 gallons.

    Chili rasboras turn deep red once settled. Microdevario kubotai shines with shimmering greens and yellows. Both species look best in groups. Buy at least seven and aim for more to reduce stress and enhance color.

    This Micro rasbora guide will help you care for your nano tank. You’ll learn how to set it up, maintain it, and enjoy it with confidence.

    Overview of Micro Rasboras

    A vibrant aquascape featuring a school of Micro Rasboras gracefully swimming among lush aquatic plants in a well-maintained planted tank. In the foreground, the small, colorful fish exhibit their natural iridescent scales, showcasing hues of orange and red, contrasting with the green foliage. The middle ground reveals various types of aquatic plants, such as Java moss and Anubias, providing a natural habitat. The background features soft, diffused lighting filtering through the water, creating a serene and tranquil atmosphere, reminiscent of a peaceful underwater ecosystem. Capture this scene with a macro lens perspective to emphasize the details of the fish and plants, offering a glimpse into the charm of these tiny schooling fish.

    Micro rasboras live in south and southeast Asia, from Borneo to Thailand and Myanmar. They love shallow, plant-rich streams and floodplain pools. Their natural habitats often have tannin-stained, acidic water and dim light.

    Chili rasboras come from Indonesian and Bornean rainforests. Here, leaf litter colors the water and soft acidity is common. Kubotai rasboras live in calmer streams with clear water, driftwood, and dense vegetation. In captivity, you can create similar conditions for healthier fish.

    Most micro rasboras are under 1–2 inches tall. Genera like Boraras and Microdevario often stay under 1 inch. Their small size makes them perfect for nano setups, but remember their schooling needs.

    These fish are social and need to be kept in groups. This makes them feel secure and shows their natural behaviors. The recommended school size varies by species, but usually, 7–12 fish are suggested, with some doing best in 10 or more.

    Following basic nano fish care principles helps micro rasboras thrive. Stable water, gentle flow, and plenty of hiding spots are key. This approach reduces stress and brings out their best colors and activity.

    Ideal Tank Conditions for Micro Rasboras

    A beautifully aquascaped planted tank featuring Micro Rasboras swimming in small schools among lush, green aquatic plants. In the foreground, vibrant plants like Java Fern and Anubias create a natural habitat, while the middle ground showcases delicate dwarf baby tears and bright red cherry shrimp. The background features a soft blur of tall, swaying stems of Cabomba and a few smooth stones, evoking a serene underwater landscape. The lighting is soft and natural, mimicking dappled sunlight filtering through the water, casting gentle reflections. A slight upward angle captures the lively movement of the fish, emphasizing their iridescent scales and vibrant colors, creating a peaceful and inviting atmosphere perfect for caring for these tiny fish.

    To keep a stable fish tank, match the water chemistry to your fish. For most aquarium-bred rasboras, aim for pH 6.8–7.8. Alkalinity should be around 3°–8° dkH (50–140 ppm), and the temperature should be near 75–80°F. Wild-caught rasboras prefer softer, slightly acidic water. Target pH 5.0–7.0 with KH of 1°–3° (20–50 ppm).

    Chili rasboras and Boraras species can handle a wider pH range, about 6.0–8.0. They like temperatures from 72–82°F (22–28°C). These tiny fish do best with dim lighting and lots of low-light plants. A gentle flow is also important.

    Kubotai need clean, stable water. Keep pH between 6.0–7.5 and temperature 72–82°F. Monitor Total Dissolved Solids near 50–150. Only add fish to a fully cycled aquarium. Use liquid test kits and perform weekly water changes to keep the water quality high.

    • Filtration and flow: provide a gentle current to mimic slow streams; choose sponge filters or low-flow canister outputs.
    • Water changes: plan 10% weekly or 25% twice monthly, depending on stocking and plant load.
    • Conditioning: use a water conditioner like Aqueon Water Conditioner when adding tap water and a reliable heater such as the Aqueon Aquarium Heater in cooler rooms.

    Size your tank for the school. A 10-gallon long works well for modest groups. Active species like kubotai benefit from 15 gallons. Boraras and chili rasboras can thrive in planted nano setups of 3–10 gallons, but larger groups need more volume for stable parameters.

    Secure lids to prevent jumping. Keep monitoring and adjust slowly when changing parameters so your freshwater aquarium fish adapt without stress. Following these guidelines will make Nano fish care simpler and help you keep a healthy, vibrant community as part of your Micro rasbora guide.

    Choosing Compatible Tank Mates

    When setting up a community tank, choose calm, small fish that won’t see micro rasboras as food. Good picks include small tetras, celestial danios, guppies, platies, and some dwarf gouramis. These fish help keep the tank peaceful and the water balanced.

    Dwarf rasboras, like Boraras, do best in their own tanks. They’re small and can’t handle big fish. Dwarf rasboras and shrimp can live together, but big shrimp might get eaten by adult rasboras. Chili rasboras and ember tetras, rosy loaches, neon green rasboras, and dwarf cory catfish are good for a planted tank.

    Adding bottom dwellers like otocinclus, kuhli loaches, and small Corydoras species is a great idea. They stay near the bottom and don’t fight for food in the middle. They also help keep the tank clean by eating algae and waste.

    Keep micro rasboras in schools of at least ten to keep them calm. Stay away from loud or aggressive fish like big barbs and cichlids. Pentazona barbs can work if you watch them closely to stop fin nipping.

    • Choose tank mates that match water chemistry and temperature ranges.
    • Avoid species that outcompete for food or nip fins.
    • Consider single-species or densely planted community layouts to provide cover.

    Use this Micro rasbora guide to compare fish and plan your tank. Picking the right fish increases their chances of survival and makes your tank lively and fun.

    Nutrition and Feeding Requirements

    Your Micro rasbora guide begins with understanding their natural diet. Rasboras are small predators that eat tiny insects, zooplankton, worms, and small crustaceans. In your tank, give them a mix of high-quality flakes, tropical granules, and shrimp pellets. For the smallest fish, crush dried foods or use powdered fry formulas to match their mouth size.

    Feed a variety of foods to ensure they get all the nutrients they need. Use frozen and live foods like bloodworms, brine shrimp, Daphnia, micro worms, and rotifers as treats or to encourage breeding. Brands like Repashy gel and Easy Fry are great for soft, nutrient-rich foods for fry and small adults.

    Adjust the diet based on the species. Chili rasboras like fine foods that drift in the midwater column. Kubotai rasboras prefer meaty foods and do well with micro pellets and frozen brine shrimp. Rotate the foods daily to ensure each small fish species gets what it needs.

    Follow good feeding practices to keep your tank water clean. Feed only what your fish can eat in 2–3 minutes. Most micro rasboras need to be fed once or twice a day. Overfeeding can lead to waste and harm your Nano fish care and all freshwater aquarium fish.

    • Match food size to mouth gape; crush flakes or use powdered formulas for tiny species.
    • Offer multiple feeding spots and fine sinking or slow-drifting foods for timid eaters.
    • Condition adults with live/frozen foods to encourage breeding behavior.
    • Use infusoria, Golden Pearls, or powdered fry mixes for newly hatched fry, then move to baby brine shrimp as they grow.

    When planning your fish tank setup, remember to consider their diet. Small fish species produce less waste, but they live in small tanks that change chemistry quickly. Regular moderation in feeding helps keep the water stable and supports healthy Nano fish care for your community of freshwater aquarium fish.

    Breeding Micro Rasboras

    Most micro rasbora species lay eggs and don’t care for them. They scatter eggs among plants. Some, like harlequin and lambchop rasboras, stick eggs to leaves.

    To get them to spawn, add lots of plants and Java moss. Also, use Indian almond leaves for hiding spots. This setup helps eggs and fry survive. Soft, slightly acidic water is best for hatching.

    Feed the adults well with live or frozen foods. Give them baby brine shrimp, daphnia, or cyclops a few days before spawning. Keep at least six fish together for courtship. Remove the adults after eggs are laid or use a mesh to keep them out.

    • Set up a separate breeding container with water from the main tank when needed. Add Java moss or spawning mops to collect eggs.
    • Look for females that appear rounded with eggs and males that display; introduce these conditioned fish together for best results.
    • Expect eggs to hatch in about three days for many species. Fry start free swimming around day four and need tiny foods at first.

    Feed fry infusoria, vinegar eels, or powdered fry foods until they can eat live foods. Start with tiny amounts and feed often. This helps them grow fast.

    Breeding micro rasboras is tough, but rewarding. Keep your tank’s water stable and lighting soft. Change the water often but in small amounts. Keep eggs and fry safe from other fish and adults.

    With the right care and patience, you can breed micro rasboras. This will add more beauty to your aquarium. Follow these tips and enjoy the journey of raising these small fish.

    Common Health Issues in Micro Rasboras

    Following a Micro rasbora guide can help avoid common issues. These fish are tough but need consistent water conditions. Sudden changes in temperature, pH, or hardness can stress them out.

    Look for signs like color loss, lethargy, or odd swimming. Small fish often show early signs of illness. Catching it early makes treatment simpler.

    Poor water quality can lead to ich, infections, and parasites. Kubotai rasboras and others can’t handle bad water. Use a liquid test kit and change water weekly to catch problems early.

    • Quarantine new arrivals to stop disease spread.
    • Maintain stable parameters for the species you keep.
    • Avoid overcrowding; nano fish care depends on proper stocking.
    • Use gentle filtration to reduce stress on small fish species.
    • Feed a varied, high-quality diet to support immunity.

    If your fish get sick, act fast. For water-related issues, focus on water changes and adjusting parameters. Use treatments as needed and follow the instructions.

    Regular checks and simple care routines help your fish. Keeping up with maintenance and quick action can prevent many problems. This way, your small fish species will stay healthy and happy.

    Aquascaping Tips for Micro Rasbora Tanks

    Setting up a tank for micro rasboras means creating a planted, dim space. Think of it like a stream or forest pool. Use a dark substrate and plants in the background to make colors pop. Dense plants in the middle and back give hiding spots and break lines of sight.

    Choose plants that don’t need much light, like Java fern, Anubias, and Cryptocoryne. Floating plants like water sprite or Salvinia diffuse light and create shaded areas. Mosses and leaf litter help foster microfauna, which is good for Nano fish care and provides food for fry.

    Add natural elements like smooth river rocks, driftwood, and dried Indian almond leaves. These elements tint the water and encourage biofilm growth. Position them to create sheltered spots and narrow swim lanes that micro rasboras enjoy.

    Match the water movement to the fish you keep. Gentle currents from sponge filters or low-flow canisters mimic natural flow without stressing the fish. Moderate surface cover keeps light soft and helps maintain stable water conditions.

    • Use long aquariums when possible to give micro rasboras room to school.
    • Secure lids tightly; small rasboras may jump when startled.
    • Create a dark background to make shimmering colors stand out.

    Balance hardscape and plants to leave open swimming areas while providing dense refuges. This setup improves behavior, reduces aggression, and supports breeding. Follow these tips to enhance both the look and wellbeing of your tiny community.

    Regular Maintenance and Water Changes

    Keep your tank’s filtration system strong but gentle. Use sponge filters in nano tanks. Also, use prefilter sponges on hang-on-back or canister intakes to protect small fish. Rinse filter media in tank water during changes to keep beneficial bacteria alive.

    Follow a simple schedule for water changes. Change 10% of the water weekly or 25% twice a month. For very small tanks, do smaller changes but stay consistent. Only add fish to a fully cycled tank.

    • Use an Aqueon Aquarium Water Changer or a good siphon vacuum gravel cleaner to remove debris.
    • Treat tap water with Aqueon Water Conditioner or a similar product before refilling.
    • Keep a secure lid to prevent jumping from nervy micro rasboras.

    Test water often with a liquid test kit. Check ammonia, nitrite, nitrate, pH, and KH regularly. Micro rasbora species like kubotai are sensitive to poor water, so catch problems early.

    Monitor temperature with a reliable heater and thermometer. Choose an appropriately sized heater from trusted brands. Keep the temperature between 72–82°F based on the species in your tank. Stable heat lowers stress and disease risk.

    1. Test parameters weekly with a liquid kit.
    2. Do scheduled partial water changes.
    3. Vacuum substrate and remove uneaten food.
    4. Prune plants and clean glass as needed.

    For nano fish care, use gentler equipment and smaller, more frequent maintenance steps when possible. Nano systems need attention because a small mistake can change water quality quickly.

    Use a quality liquid test kit and trusted brands like Aqueon for water changers and conditioners. This will make your fish tank setup easier to manage. It will also keep your freshwater aquarium fish healthy over the long term.

    Understanding Behavior and Social Interactions

    Rasboras are true schooling fish. This guide teaches that keeping them in groups lowers stress and boosts color. It’s important to plan for groups, not singles, when keeping small fish species.

    Chili rasboras are curious and bold. They may approach the glass and feed in the mid-water column after acclimation. Keeping them in small numbers makes them timid. Aim for a school of 8–12 to encourage confident behavior.

    Kubotai rasboras show sparkling shoaling behavior. Males are often more colorful and smaller, while gravid females are rounder. Without a large enough school, they become skittish. A group of 10 or more keeps their natural shoaling patterns intact.

    Watch for stress signs like fading color, hiding, poor appetite, and erratic swimming. Common causes include low water quality, wrong tankmates, too few companions, lack of cover, and sudden parameter shifts. You can ease stress by increasing school size, adding dense plants, and stabilizing water conditions.

    • Keep groups to mimic wild shoals.
    • Provide dark substrate and planted hiding spots.
    • Choose peaceful tankmates that match size and temperament.
    • Feed mid-water drifting foods to suit natural habits.

    Reading social cues helps you manage tank dynamics. When you spot confident schooling and active feeding, your fish are likely comfortable. If behavior changes, check water chemistry and community balance first.

    This Micro rasbora guide section helps you interpret interactions and build a stable environment for these small fish species. Understanding behavior makes keeping them rewarding and keeps your tank lively.

    Frequently Asked Questions About Micro Rasboras

    Are micro rasboras good for beginners? Yes, many species are easy to care for. They are active and do well in stable conditions. A calm, planted environment is best.

    Dwarf species like chili rasbora need finer food. They also need careful tankmate choices. But, with some research, they fit well into a beginner’s routine.

    How many should you keep? Schooling species like micro rasboras need at least 7–12 individuals. Some, like kubotai, do best in groups of 10 or more. In nano tanks, scale the school size to space, favoring larger groups for natural behavior.

    Can you keep shrimp with micro rasboras and what do they eat? Many micro rasboras go well with Neocaridina and other dwarf shrimp in planted tanks. Adult shrimp are usually safe, but shrimp fry might be eaten. Adults eat micro pellets, crushed flakes, frozen Daphnia, or brine shrimp, and live micro foods.

    For fry, start with infusoria, vinegar eels, or powdered fry feeds. Then, move to baby brine shrimp as they grow.

    What if problems appear after transfer or in a small tank? If fish look pale after a move, give them one to two weeks to adjust. In nano setups, watch water quality closely. Perform smaller, more frequent water changes to keep stability.

    Use Aquascaping tips to provide cover and reduce stress. Choose compatible Tank mates for micro rasboras to keep a peaceful community.

    FAQ

    What species are considered micro rasboras and how big do they get?

    Micro rasboras are tiny fish from the Cyprinidae family. They include Boraras spp., Microdevario (kubotai), and small rasbora types like the chili rasbora (Boraras brigittae). Most stay under 2 inches, with some micro species reaching only 0.75–1 inch. Boraras and chili rasboras usually grow to 0.5–0.75 inch, while kubotai stay under 0.75 inch. This makes them perfect for small aquariums.

    What tank size do micro rasboras need?

    The tank size depends on the species and how many you keep. Boraras and chili rasbora do well in 3–10 gallon tanks. More active species like kubotai need a 10-gallon long or 15-gallon tank for comfortable swimming. Always increase the tank size for larger schools, preferring length over height.

    What water parameters should I maintain?

    For aquarium-bred micro rasboras, aim for pH 6.8–7.8, KH 3°–8° dkH (50–140 ppm), and temperature 75–80°F. Wild-type setups can have softer, slightly acidic water (pH 5.0–7.0, KH 1°–3°). Chili and kubotai tolerate 72–82°F and broad pH ranges. Kubotai are sensitive to water quality, so introduce them carefully and monitor with a liquid test kit.

    How many micro rasboras should I keep together?

    These fish are schooling and need company. A minimum school is 7–12, depending on the species. Kubotai and other active micro rasboras do best in groups of 10+. Larger schools (20–25+) are visually striking and reduce stress, but need bigger tanks and stable water chemistry.

    What filtration and flow do micro rasboras prefer?

    They prefer gentle filtration that mimics slow-moving streams. Use sponge filters or prefilter sponges on HOB/canister intakes to prevent fry and tiny fish from being sucked in. Moderate, diffuse flow and subdued surface agitation suit species from tannin-stained forest streams. Always secure the lid—micro rasboras can be jumpy.

    What should I feed micro rasboras?

    Feed a varied diet of appropriately sized foods. Use micro pellets, crushed flakes, powdered fry formulas, and frozen foods like Daphnia, baby brine shrimp, or cyclops. Live micro foods and Repashy or similar gel foods condition adults and trigger spawning. Feed what they can consume in 2–3 minutes once or twice daily and avoid overfeeding to protect water quality.

    Can micro rasboras live with shrimp or other tank mates?

    Many micro rasboras are peaceful with compatible small tank mates. Dwarf shrimp (Neocaridina) and adult shrimp generally coexist well, though tiny shrimp fry may be eaten. Suitable companions include small tetras, ember tetras, dwarf corydoras, otocinclus, and other calm microfish that share similar water parameters. Avoid larger, aggressive, or boisterous species that will stress or prey on tiny rasboras.

    How do I breed chili rasbora, Boraras, or kubotai?

    Most micro rasboras are egg scatterers. Use a mature, well-planted tank with Java moss, spawning mops, or dense plants and add leaf litter or catappa leaves for tannins. Condition spawning adults with live and frozen foods. For chili and Boraras, keep groups of at least 6–8 to ensure sexes. Protect eggs by allowing them to fall into moss/mops or using craft mesh; remove adults after spawning. Fry start on infusoria, Golden Pearls, or vinegar eels, progressing to baby brine shrimp.

    What are common health issues and how do I prevent them?

    Micro rasboras suffer when water quality is poor: signs include faded color, clamped fins, lethargy, rapid breathing, and erratic swimming. Prevent disease by quarantining new additions, maintaining stable parameters, performing regular partial water changes (10% weekly or 25% twice monthly), using a quality liquid test kit, and avoiding overcrowding. Treat specific illnesses with appropriate anti-parasitic or antibacterial medications following product directions.

    How should I aquascape a tank for micro rasboras?

    Recreate their forest-stream habitats: dark substrate, driftwood, leaf litter, dense mid- and background plants (Cryptocoryne, Anubias, Java fern), mosses, and floating plants to diffuse light. Tannins from catappa leaves or driftwood and subdued lighting bring out colors. For kubotai, include sandy patches, rounded river rocks, and moderate flow. Provide plenty of cover and open midwater for shoaling.

    How often should I do maintenance and water changes in a nano tank?

    Small-volume tanks fluctuate quickly, so be consistent: test ammonia, nitrite, nitrate, pH, and KH regularly and perform scheduled partial changes—10% weekly or 25% twice monthly is a common routine. For nano setups, smaller, more frequent changes help stabilize parameters. Rinse filter media in tank water, siphon detritus, prune plants, and monitor temperature and equipment.

    Why are my micro rasboras losing color or acting shy after transfer?

    Pale color and timidity usually indicate stress from transport, new water chemistry, or insufficient school size. Allow 1–2 weeks for acclimation, maintain stable water parameters, add plants and hiding spots, and keep them in adequate groups. Offer high-quality live/frozen foods to help recovery. If symptoms persist, test water for ammonia or nitrite and quarantine affected fish.

    Are micro rasboras suitable for beginners?

    Many rasbora species are beginner-friendly because they are peaceful and hardy when kept in proper groups and stable conditions. Dwarf species require attention to tiny food sizes, gentle filtration, and careful tankmate selection, but with basic water testing, routine maintenance, and proper schooling numbers, they make rewarding fish for new hobbyists and nano aquarium enthusiasts.

  • How to Prevent and Remove Common Algae in Small Planted Tanks

    How to Prevent and Remove Common Algae in Small Planted Tanks

    Algae are simple organisms that grow using light and nutrients from fish waste. They make oxygen during the day and use it at night. Because they are simpler than plants, they can use more light and nutrients.

    You can’t have a tank without some algae. Many fish and invertebrates eat algae. It also helps with filtration and looks natural in your tank. The goal is to keep algae out of sight.

    Imbalances in light, nutrients, CO2, and circulation cause algae. To stop algae, aim for balance. Use healthy plants and an algae-eating crew.

    Use physical, chemical, and biological methods for algae control. Fast-growing plants like hornwort or water sprite soak up excess nutrients. This helps keep water quality stable, making algae control eco-friendly and lasting.

    Timers, regular care, and smart stocking help prevent algae in small tanks. Balanced lighting, nutrients, and a clean-up crew keep your tank healthy and beautiful.

    Understanding Algae: What You Need to Know

    A vibrant underwater scene depicting various types of algae in a small planted aquarium. In the foreground, clusters of green filamentous algae entwined around the decorative rocks and driftwood, showcasing their texture and delicate details. The middle ground features a lush substrate with small aquatic plants thriving amidst patches of algae, while tiny bubbles rise to the surface, enhancing the lively feel. In the background, soft, diffused lighting filters through the water, casting gentle shadows and highlighting the diversity of colors—from deep greens to soft browns—creating a serene and educational atmosphere. The overall mood should be calm and inviting, emphasizing the natural beauty and complexity of aquatic ecosystems, suitable for understanding algae's role in planted tanks.

    Ever wondered about algae in your planted tank? Algae are like plants but are actually tiny organisms. They use sunlight to make food and can eat organic matter too. They make oxygen in the day but use it at night, which can change your tank’s oxygen levels.

    Algae grow faster than plants because they grab light and nutrients better. Their simple design lets them live in tough conditions. This makes them both rivals and food for your tank’s creatures.

    Some algae are good because they feed fish and help clean the water. But getting rid of all algae is hard. Instead, aim to control it so plants and algae can coexist.

    Plants clean the water by removing bad stuff. They also compete with algae for resources. By picking the right plants and managing nutrients, you can keep algae under control without harsh chemicals.

    Start by making plants strong, adjust light and food, and watch the water. These steps help you manage algae and keep your tank healthy.

    Identifying Algae in Your Small Planted Tank

    A vibrant underwater scene showcasing a small planted tank filled with various aquatic plants and colorful fish. In the foreground, several types of algae are prominently displayed on the tank glass and on the substrate, allowing for clear identification. The middle layer features healthy green plants alongside patches of brown and green algae. In the background, soft, diffused lighting enhances the colors of the tank, creating a serene and educational atmosphere. The composition should capture the intricate details of the algae's textures and colors, with a macro lens effect emphasizing their uniqueness. Ensure the overall mood is calm and informative, suitable for a nature-focused article.

    To keep your planted tank healthy, you need a clear algae identification guide. Start by observing where growth appears and how it looks. Note texture, color, and location on plants, glass, decor, or substrate. These clues help you identify aquarium algae and pick effective algae control methods.

    Use this quick checklist to sort common issues:

    • Brown, dusty film on glass and decor: likely brown diatom algae. It rubs off and is common in new setups. High phosphates and silicates often cause it.
    • Black, bushy clumps on driftwood or stems: often Black Beard Algae. It resists simple removal and needs persistent treatment over months.
    • Long, stringy growth that looks like hair: hair algae. Fast growers appear when light and nutrients are out of balance.
    • Small, hard green dots on glass and slow plants: green spot algae. It resists soft scraping and may need a razor or snails that eat spots.
    • Slimy mats with a foul smell: blue-green algae or cyanobacteria. It forms blankets, avoids grazers, and calls for circulation fixes and targeted treatment.
    • Cloudy, pea-soup water: green water from free-floating phytoplankton. A UV sterilizer or a blackout can clear this quickly.

    Grouping algae into filamentous, planktonic, microalgae, and cyanobacteria makes diagnosis easier. Filamentous forms include thread-like mats and some BBA. Planktonic algae create green water. Microalgae include brown diatoms that settle on the bottom. Cyanobacteria form slimy blankets.

    Match visual signs to remedies in your algae identification guide. For example, brown diatom algae often fades with stable water chemistry and a cleanup crew. Black Beard Algae may need herbivorous fish like Siamese algae eaters or targeted topical treatments on removed items. Green spot algae often yields to manual scraping and phosphate control.

    Dense plant growth changes how algae appear. Healthy stem plants and fast growers compete for nutrients and light, shifting which types of algae dominate. Monitor plant health as part of your plan to identify aquarium algae and use effective algae control methods that fit the species you find.

    Factors Contributing to Algae Growth

    Algae grow when light, nutrients, and water movement are out of balance. Too much light or too many nutrients can cause algae. New tanks often see brown algae because of high phosphates and silicates.

    Lighting is key. Use timers to avoid too much light. Direct sunlight and bright LEDs can lead to algae. CO2 levels and water movement also play a role.

    Don’t overdo fertilizers. Too much can cause algae to bloom quickly. Feeding fish too much and not cycling the tank properly adds to the problem. Uneaten food and messy substrates increase the risk.

    • Water flow: slow or stagnant areas favor growth.
    • Temperature: warmer, shallow tanks tend to bloom faster.
    • Plant density: sparse planting leaves nutrients available for algae.

    Fast-growing plants help by taking up nutrients. Choose plants like Vallisneria, Hygrophila, or Ludwigia. Healthy plants also eat ammonia and nitrite, preventing algae.

    To prevent algae, monitor light, fertilize carefully, and keep CO2 levels steady. Regular pruning and adding fast-growing plants are good practices. Good filtration and gentle water flow are also important.

    By tracking algae growth factors and caring for your tank, you can prevent algae. Making small, consistent changes is better than big fixes.

    Algae Control Strategies: Preventive Measures

    First, balance light and nutrients. Use a reliable light timer for steady day lengths. Slowly adjust fertilizer dosing and wait two to three weeks for plant response. This steady approach is key to controlling algae.

    Keep your tank cycled and do regular water changes. Test water often and avoid too much fertilizer. Proper cycling and fertilization prevent sudden nutrient spikes that algae love.

    Build an algae-eating team. Amano shrimp, otocinclus, nerite snails, and Siamese algae eaters tackle different algae types. Use these helpers with other measures to avoid relying on one solution.

    Grow more plants, like Egeria densa and Java moss, to soak up nutrients. These plants compete with algae for space and nutrients. This is a top strategy for preventing algae.

    Ensure good water flow and aeration. Avoid direct sunlight and overstocking. Feed less and remove uneaten food to prevent excess nutrients. These steps are common among algae control strategies.

    Regularly prune and propagate plants to keep nutrient uptake high. Choose fast-growing plants like Bacopa caroliniana to fill gaps. Trimming reduces detritus and supports algae management.

    Keep beneficial bacteria stable through consistent routines. Use consistent maintenance and avoid sudden water changes. Add fast-growing floating plants to absorb excess nutrients. These steps create a strong defense against algae.

    Monitor results and adjust one thing at a time. Making measured changes keeps your system stable and teaches you what works. Over time, adopting new strategies helps you grow healthy plants instead of fighting algae.

    Natural Solutions for Algae Control

    You can fight algae without chemicals by mixing biology and plants. Start with algae-eating shrimp and snails that fit your tank size. Amano shrimp and otocinclus catfish tackle diatoms and some hair algae. Nerite snails are great at green spot algae but leave white eggs on hard surfaces.

    Siamese algae eaters help with hair algae and occasional black beard algae. Mollies and Florida flagfish offer extra grazing power. Pick species carefully to avoid plant nibblers. Some herbivores will eat tender stems.

    Monitor behavior after adding fauna. If a species targets your plants, reduce numbers or choose alternatives.

    Add dense plantings to outcompete algae. Fast-growing plants for algae control include Egeria densa, Hygrophila difformis, and hornwort. Floating plants like Salvinia natans and Red Root Floaters shade the water column.

    Stem and carpeting plants like Rotala and Java moss absorb nutrients quickly. This cuts nitrate and phosphate that feed algae.

    Use eco-friendly algae control solutions by combining fauna and flora. Dense vegetation stabilizes CO2 and reduces nutrient spikes. This lowers algal pressure while improving water quality and offers shelter for fry.

    Follow simple routines to support biological methods. Keep substrate clean, avoid overfeeding, and add beneficial bacterial supplements if needed. Emerging microbial cleaners show promise but lack full consensus. Focus on proven steps first and use microbial aids as a complement to natural algae removal techniques.

    • Introduce algae-eating shrimp and snails that fit your tank.
    • Plant fast growers to soak up excess nutrients.
    • Match livestock to plant choices to prevent herbivory.
    • Maintain light and feeding to limit algal blooms.

    These natural algae removal techniques create a balanced ecosystem. You gain clearer water, healthier plants, and fewer manual cleanings. This is when you use eco-friendly algae control solutions and the right mix of algae-eating shrimp and snails with fast-growing plants for algae control.

    Chemical Treatments: When and How to Use Them

    Chemical treatments for algae should be seen as tools, not quick fixes. First, identify the algae type and reduce light and excess nutrients. Use chemicals only after manual removal and correcting water chemistry.

    Follow safe algaecide use guidelines. Read product labels and safety data sheets. Make sure the product is safe for fish and plants before using it. Some algaecides work better at certain pH and alkalinity levels. Be careful with dosage and repeat intervals to avoid stressing your fish.

    For tough cyanobacteria and bacterial mats, use copper-based products and antibiotics like erythromycin (Maracyn). A common method for cyanobacteria is one packet of Maracyn per 10 gallons. Repeat after a week if needed, after manual removal and vacuuming the substrate.

    Hydrogen peroxide is good for spot treatments. Apply 3% hydrogen peroxide to infested decor or plants outside the tank. Let it sit for about five minutes, then rinse. Treated algae often turn red or clear, making it easier for your animals to remove remaining debris.

    • Consider copper sulfate, chelated copper, endothall, sodium carbonate peroxyhydrate, flumioxazin, and hydrogen peroxide as chemical options.
    • Use diluted bleach only for pond use or for treating items outside an aquarium; bleach can harm fish and plants if used improperly.
    • Never mix algaecides. Combining products can increase toxicity and harm beneficial bacteria.

    Be aware that chemicals can cause oxygen depletion as algae die and decompose. Boost aeration and monitor dissolved oxygen during and after treatment. Copper and antibiotics can disrupt nitrifying bacteria, so watch ammonia and nitrite closely.

    Legal and disposal issues matter for pond-scale products. Follow EPA or USDA guidance when applicable and dispose of unused chemicals per label instructions to protect the environment.

    Chemical treatments should fit into broader algae control strategies. Use them with corrective steps like trimming, substrate cleaning, balanced fertilization, and planting fast-growing species. Favor eco-friendly algae control solutions when possible for long-term stability.

    When you need a last-resort measure, plan a careful course: identify the algae, choose a labeled product, follow safe algaecide use, increase aeration, and combine treatment with maintenance. This approach keeps your tank healthy while addressing persistent outbreaks.

    Manual Removal Techniques

    Manual removal can make a big difference before using chemicals. Start by scrubbing the aquarium glass with an algae scrubber sponge. Use a razor blade on glass tanks and a stiff gift card on acrylic to remove stubborn algae.

    Keep a toothbrush handy for cleaning hair algae from plant leaves and tight spots on decor. If decor is heavily covered, remove it, treat it with 3% hydrogen peroxide outside the tank, and then rinse well before putting it back.

    • Siphons and gravel vacuums help vacuum substrate during water changes to remove BGA and detritus.
    • Scrapers and sponges tackle walls. Skimming the surface removes floating mats and debris.
    • For ponds or larger tanks, dredging and raking can extract compacted waste that feeds algae.

    Try the blackout method for planktonic blooms: limit light exposure for several days to a week by turning off lights and blocking external light. Combine this with skimming and siphoning to speed up recovery.

    Regular pruning of fast-growing plants prevents sudden shading changes and reduces nutrient hotspots. Use trimmings to propagate more plants or remove them to keep nutrient levels stable.

    1. Perform targeted scrubbing on affected areas first.
    2. Vacuum the substrate during water changes.
    3. Treat or discard heavily infested decor outside the aquarium.
    4. Prune and replant to increase healthy plant biomass.

    Use manual removal alongside other aquarium cleaning techniques to maintain clarity and balance. Pair these hands-on steps with effective algae control methods like UV sterilization for green water and careful light management for long-term results.

    Bag and dispose of removed algae instead of rinsing it down the drain to avoid pipe clogs and unwanted spread. Following best practices for algae management keeps your small planted tank healthy and reduces repeat outbreaks.

    Monitoring and Maintenance for Long-Term Success

    Make a routine you can stick to. Use a light timer and change water weekly. Also, keep track of light time and strength.

    Start with small changes in fertilizers. Use an all-in-one product. Wait two to three weeks to see results.

    Keep a log of water changes, CO2 levels, and chemical doses. Note the brand, amount, and when you use treatments. This helps you understand what affects algae and supports long-term control.

    Get algae-eating fish to help control growth. The right number of fish and how much you feed them matters. Too much food can lead to algae growth, so feed carefully.

    Focus on plant health to fight algae. Add fast-growing plants, trim them often, and move cuttings. This keeps nutrients in check. Use floating plants, carpeting species, and background plants to control light and reduce algae spots.

    Ensure good water movement and aeration. Watch temperature and flow, near filters and hardscape. Boost aeration when there’s decomposition to avoid low oxygen.

    • Track: lighting duration, fertilizer changes, CO2 levels, and water parameters.
    • Adjust: make one change at a time and give it two to three weeks to stabilize.
    • Document: chemical brand, dose, and timing for safe, repeatable use.

    Choose sustainable algae control like plant-focused nutrient uptake and regular care. This approach is safer and more effective in the long run.

    Don’t expect to get rid of algae completely. Aim to keep it under control with regular monitoring and care. This approach makes managing algae less stressful for you and your tank.

    Conclusion: Achieving a Healthy Balance in Your Aquarium

    Getting algae under control in a small planted tank is all about finding the right balance. Make sure the light matches what your plants need. Keep nutrients steady and remember, a little algae is okay.

    Use algae-eating snails or Amano shrimp to help clean up. They make it easier to avoid scraping algae off by hand. This helps keep your tank’s ecosystem stable.

    Combining physical, chemical, and biological methods is key. Focus on cycling, regular water changes, and good water flow. Also, fertilize wisely. Use chemicals only when algae gets really bad and follow the instructions carefully.

    This approach protects your plants and fish while reducing risks. It’s a smart way to manage algae.

    Plant fast-growing stem plants to beat algae and improve water quality. Start by setting a timer for your lights. Increase plant numbers by trimming and adding more. Introduce algae-eaters and stick to a regular maintenance routine.

    Be patient, as changes take time—weeks, even. With effort, you’ll find effective ways to prevent algae. Your tank will stay healthy and look great.

    FAQ

    What causes algae to appear in my small planted tank?

    Algae grow when light and nutrients are out of balance. They need nitrate, phosphate, and organic waste. If plants can’t use these fast enough, algae will.

    New tanks often get brown diatoms. Tanks with too much light or food get green water and hair algae.

    Is any algae beneficial or should I remove all of it?

    You don’t need to get rid of all algae. Some fish and invertebrates eat algae. A little algae makes the tank look natural and helps with filtration.

    It’s not possible to have a tank with no algae. The goal is to keep it under control. This means fixing the problems that cause algae to grow.

    How do I identify the common types of algae in freshwater planted tanks?

    Look for visual signs. Brown diatoms look like dust on glass and decor. Hair algae form stringy mats.

    Black Beard Algae (BBA) looks like thick black tufts on plants and wood. Green spot algae shows as hard green dots on glass and leaves. Blue-green algae is slimy and smells bad.

    Green water is a cloud of free-floating algae that makes the water look murky.

    What immediate steps should I take when I spot an algae outbreak?

    First, remove algae physically. Scrape glass, vacuum substrate, and brush off hair algae. Remove heavily infested decor for outside treatment.

    Check and stabilize lighting with a timer. Reduce direct sunlight. Do a partial water change. Add or trim plants to take up more nutrients.

    Consider adding an algae-eating species to help control the problem.

    Which preventive measures work best to keep algae under control?

    Prevent algae by balancing light and nutrients. Use a timer for consistent lighting and avoid direct sunlight. Dose fertilizers carefully.

    Keep good circulation and aeration. Do regular water changes and vacuum the substrate. Avoid overstocking and overfeeding. Keep CO2 stable if you use it.

    Increasing fast-growing plant mass is a key long-term strategy.

    What natural, eco-friendly methods can I use to reduce algae?

    Use biological and manual methods first. Add fast-growing plants like Egeria densa and Hygrophila difformis to absorb excess nutrients.

    Use algae-eaters like Amano shrimp and nerite snails for diatoms and hair algae. Siamese algae eaters and Florida flagfish target tougher algae. Mollies eat green algae.

    Regular pruning and plant propagation remove nutrient-rich trimmings.

    When are chemical treatments appropriate and which are safe?

    Chemical treatments should be a last resort. Options include hydrogen peroxide for decor treatment and sodium percarbonate products. Targeted antibiotics/chelates are for cyanobacteria.

    Many chemicals can harm plants, invertebrates, and beneficial bacteria. Always read labels and follow dosing precisely. Increase aeration during treatment.

    Consider the tank’s inhabitants before using any chemical.

    How do I treat stubborn Black Beard Algae (BBA)?

    BBA is tough and needs a long-term approach. Improve CO2 consistency and reduce lighting or duration. Increase flow in affected areas.

    Manually remove clumps and add grazing species like Siamese algae eaters. For localized infestations, remove affected decor and treat it briefly with 3% hydrogen peroxide outside the tank.

    Expect treatment to take months. Make gradual adjustments.

    What should I do about green water (free-floating algae)?

    Green water responds well to a blackout and increased water changes. A UV sterilizer clears green water quickly.

    Reduce nutrient inputs by cutting back feeding, vacuuming detritus, and increasing plant biomass. This outcompetes phytoplankton for nutrients.

    Can live plants really outcompete algae and which species work best?

    Yes. Fast-growing plants consume nutrients that algae rely on. Effective species include Egeria densa and Hygrophila difformis.

    Use a mix of floating, stem, and carpeting plants to manage light and nutrient distribution.

    Which algae eaters should I add, and will they harm my plants?

    Choose algae eaters based on the algae type. Otocinclus, nerite snails, and Amano shrimp work well on diatoms and hair algae.

    Siamese algae eaters and Florida flagfish target tougher algae. Mollies graze on green algae. Be cautious: some herbivores will nibble tender plants.

    Research species compatibility, stocking density, and tank size before adding livestock.

    How do water flow and CO2 affect algae growth?

    Stagnant or low flow creates pockets where algae settle and thrive. Adequate circulation ensures even nutrient and CO2 distribution.

    CO2 imbalances stress plants and indirectly favor algae. Aim for stable CO2 delivery and steady flow patterns.

    How often should I perform maintenance to keep algae in check?

    Establish a routine. Do weekly or biweekly partial water changes and substrate vacuuming. Regularly scrub glass and prune fast-growing plants.

    Check fertilizer dosing and lighting weekly and make small adjustments. Monitor livestock, feeding, and equipment monthly. Consistency and gradual changes are more effective.

    Are antibiotics and copper effective against cyanobacteria (BGA), and what are the risks?

    Antibiotics like erythromycin and copper products can suppress cyanobacteria. But they carry significant risks: harm to beneficial bacteria, invertebrates, and some fish, plus oxygen depletion as the cyanobacteria die off.

    Use them only after manual removal, improved circulation, blackout attempts, and careful research. If used, dose exactly per product instructions, monitor oxygenation, and be prepared for repeat or follow-up treatments.

    How long will it take to correct an algae problem once I start fixing root causes?

    Expect weeks to months. Small adjustments like stabilizing lighting and adding fast-growing plants often show improvement within 2–6 weeks.

    Tougher issues like BBA or chronic outbreaks can take several months of consistent management. Patience and maintaining a balanced, steady routine are essential for lasting control.

  • The Art of Hardscaping: Using Rocks and Wood for Visual Depth

    The Art of Hardscaping: Using Rocks and Wood for Visual Depth

    You’ll learn how to use rocks, timber, and other materials for depth and structure in your yard. This intro explains the article’s purpose. It shows how hardscaping principles help place elements like walls, pathways, and boulders.

    By using these design ideas, you’ll create spaces that feel intentional and last long. The right choice of stone and wood improves looks and helps the environment. They aid in drainage, control erosion, and support plants and wildlife.

    Later, we’ll dive into practical topics for your projects. You’ll learn about picking materials, layering, color and texture, and more. We’ll also share tips from professional contractors and examples of their work.

    Understanding Hardscaping Principles

    A beautifully designed hardscaping scene showcasing key principles of landscape architecture. In the foreground, a well-structured stone pathway is bordered by lush greenery and strategically placed wooden benches, emphasizing natural materials. The middle ground features an elegant rock garden with varying stone textures and colors, complemented by small water features that reflect sunlight. In the background, a gently sloping garden transitions into a serene, manicured lawn enveloped by trees, casting soft shadows. The lighting is warm, suggesting late afternoon, with sunlight filtering through the leaves, creating a tranquil and inviting atmosphere. Shot with a slight tilt-shift lens to add focus on the details of the hardscape, evoking a sense of depth and harmony among the materials used.

    Start with scale and proportion. Make sure rock sizes and wood elements match your yard’s size. This way, features look natural, not forced. Small yards need modest boulders and slim timber, while big properties can handle dramatic stones and heavy beams.

    Balance is key in arranging elements. Symmetry creates a formal look, while asymmetry offers a relaxed, organic vibe. Use rhythm and repetition by repeating forms or materials. This leads the eye through the landscape and ties areas together.

    Choose focal points to anchor the view. A standout timber, a large boulder, or a water feature can draw the eye. Apply the rule of thirds and off-center placement to add natural interest and avoid static layouts.

    • Function matters: plan paths, seating, and retaining walls to shape movement and activity.
    • Hardscape features should anchor planting schemes and define outdoor living rooms like patios and terraces.
    • Consider wildlife: ledges and crevices offer shelter, while open spaces invite pollinators.

    Structural care prevents failure. Retaining wall construction needs proper footings, drainage, and the right rock choices for stability. In colder U.S. climates, design walls and terraces to withstand freeze-thaw cycles and seasonal shifts.

    When projects involve significant grading, complex walls, or built-in lighting, hire a qualified hardscape contractor. A professional ensures code compliance, durable construction, and correct drainage. This way, your hardscaping principles will create a lasting landscape design.

    The Role of Natural Elements

    A serene garden hardscape scene featuring a variety of natural elements. In the foreground, intricately arranged flat stones and rustic wooden planks create a pathway, complemented by a scattering of small pebbles. The middle ground showcases a gently curved stone wall, intertwined with lush greenery and ornamental plants, highlighting organic textures. The background consists of a soft-focus view of a vibrant garden filled with seasonal flowers and trees, casting delicate shadows. Capture this scene during the golden hour for warm, natural lighting that enhances the earthy colors and textures. The atmosphere is tranquil and inviting, encouraging a connection with nature and showcasing the art of hardscaping with rocks and wood. No text or watermarks present.

    You shape your garden hardscape by choosing natural elements. Rocks add texture and permanence. Wood brings warmth and vertical accents. Gravel and sand control drainage and help plants root.

    Use these rock types where each property helps your design:

    • River rock — rounded stones for a natural stream look and smooth walking paths.
    • Slate — flat layers that build ledges, steps, and clean platforms in rock patio designs.
    • Lava rock — porous, lightweight material that works well for drainage beds and accent zones.
    • Limestone — sturdy and pale; it can raise soil pH, so choose it carefully near sensitive plantings.

    Wood is versatile in outdoor living spaces. Timber retaining walls hold soil and define terraces. Sleepers form durable steps and raised beds. Decking creates level gathering areas. Driftwood-style pieces act as sculptural accents.

    Pick durable woods for lasting results. Pressure-treated lumber resists rot for buried structures. Cedar and redwood resist decay naturally, which makes them good for visible features and decking. Treat or season timber to limit leaching and extend life.

    Learn from aquascaping when you plan hardscaping materials. In aquaria, rocks and wood create focal points, hiding spots, and a sense of depth. Translate those principles outdoors by arranging stones and timbers to form niches, terraces, and layered sightlines.

    Take small prep steps that prevent problems later. Pre-soak driftwood to reduce tannin release in water features. Season or seal timber before installation to avoid rot and unwanted leaching into soil. Lay proper substrate and drainage layers under rock patio designs to protect plant roots and keep surfaces stable.

    Blend these elements with your plant palette so hardscaping materials support growth, guide movement, and enrich the look of your outdoor living spaces.

    Creating Visual Depth with Layers

    Layering adds depth to your yard. Think of it in terms of foreground, middle ground, and background. Place big, tall rocks and wood pieces in the back to anchor the scene.

    Use the rule of thirds for stone groups. Group rocks in threes or fives to look natural and create focal points. This trick works for both big and small designs.

    On sloped sites, create physical tiers. Terraces, rock terraces, and short walls add surfaces and depth. Each tier can have its own plants, seating, or stone feature.

    Paths guide the eye. Winding paths through layered beds make spaces feel bigger. Mix textures like gravel and stepping stones to mark transitions.

    • Start with big rocks, then fill gaps with smaller stones and plants.
    • Use big boulders, timber posts, or walls to break sightlines.
    • Group hard elements and soft plants in odd numbers for a natural look.

    Draw from rock-garden practice. Start with big stones, then add smaller rocks and drought-tolerant plants. This creates a layered, organic look that fits many patio designs.

    Vertical elements are key. A few upright boulders or timber posts guide the eye and add scale. Mixing these with groundcovers makes your garden look richer and more three-dimensional.

    Remember to balance proportions when designing. Too many tall elements can flatten the view. Mix height with low plants and let paths reveal views gradually for a stronger sense of place.

    Choosing the Right Materials

    Choose materials that fit your climate and project needs. Think about freeze-thaw cycles, summer heat, and rainfall. Durable materials mean less repair and upkeep over time.

    Consider color and texture to match your plants and building. Local stone is a good choice for its look and lower shipping costs. Slate is great for flat areas, while river rock is perfect for natural beds and water edges. Quarried stone is strong for walls that need to hold weight.

    For wood, pick durable types like cedar or redwood for outdoor use. Pressure-treated lumber is good for structural parts. Wooden sleepers can add a modern touch, but remember they need upkeep.

    Think about the weight and ease of use of your materials. Big, heavy blocks need special tools and strong footings. Lighter pavers might be faster to lay but must handle heavy use.

    • Use crushed stone or compacted gravel under patios and paths for drainage and stability.
    • Landscape fabric and sand layers help control weeds and manage water in rock gardens.
    • Test soil and stone interaction before using calcareous rocks like limestone, as they can raise soil pH and affect acid-loving plants.

    For tall retaining walls, you need a solid plan. Include drainage, backfill, and strong footings. Always hire a licensed contractor for safety and quality.

    Buying local materials helps the environment and fits your area’s style. Get quotes, ask for references, and check past work before choosing a contractor.

    Design Strategies for Effective Hardscaping

    Begin with a site analysis. Look at sun patterns, slope, soil, and drainage. Note where water pools. This helps place patios, paths, and beds in the right spots.

    Then, decide on the functions of your outdoor spaces. Choose where to put patios, seating, walkways, and plants. Make sure movement and activity flow well. This step helps create focal points and a natural flow.

    Start building with the biggest elements first. Build patios, major walls, and terraces first. Then, add pathways and larger rocks. Finish with plants, mulch, and small stones. Remember, place bigger rocks before smaller ones.

    • Site analysis: sun, slope, and drainage
    • Function layout: patio, seating, paths, beds
    • Focal points: fire pit, sculpture, water
    • Material selection and construction order

    Add water features for depth and sound. Use rock waterfalls, ponds, or streams. Line pools with stone and add aquatic plants for a unified look.

    Plan your lighting to highlight your hardscape at night. Use low LED lights to accentuate textures and focal points. Place lights to wash stone faces and light steps for safety and beauty.

    Don’t forget about drainage and grade control. Proper grading, gravel bases, and hidden drainage channels prevent water pooling and erosion. These steps protect your hardscape and save on maintenance.

    For big projects, hire a skilled hardscape contractor. They offer site-specific solutions, correct wall installation, and reliable drainage. Their expertise saves time and avoids costly errors.

    The Importance of Color and Texture

    Choosing colors and textures carefully can shape your garden’s depth. Darker pavers or stained wood make things seem farther away. On the other hand, lighter materials make things appear closer.

    Rough stone catches light and shadow, making it seem more three-dimensional. This is more noticeable than smooth surfaces.

    Pairing materials can create contrast that works well. Try warm-toned cedar decking or redwood benches with cool gray stones. Mixing smooth slate slabs with rough boulders adds a tactile element that invites exploration.

    Plants can complement hard materials in your garden. Succulents and ornamental grasses balance heavy walls and pathways. Low groundcovers brighten rock beds without blocking views, making your garden easy to navigate.

    Lighting is essential at night. Use LED fixtures to highlight rock walls and wooden posts, revealing their texture. Soft uplighting on retaining walls and steps keeps your patio lively after dark.

    Test materials in your garden before making a final decision. Check how they look at noon, late afternoon, and evening. This ensures your garden hardscape has the depth and richness you desire.

    Sustainable Hardscaping Practices

    Choosing local stone and reclaimed timber can cut your landscape’s carbon footprint. Local rocks reduce transport emissions and enhance your space’s regional feel. Many landscape firms prefer local materials for these benefits.

    Permeable surfaces allow rain to soak in, reducing runoff. Opt for crushed stone or permeable pavers for paths and patios. Pair these with good drainage to prevent erosion and protect plants in your garden hardscape.

    Native plants and succulents are great for rock gardens, needing less water. They add texture without frequent watering. These choices are good for local wildlife and keep maintenance low.

    Reuse and repurpose materials when possible. Reclaimed timber and salvaged stones make excellent borders and terraces. They save resources, add character, and are often cheaper than new materials.

    • Choose rot-resistant wood species for long life.
    • Compact bases correctly under stonework to prevent settling.
    • Design to minimize future disturbance so repairs are rare.

    Planning for durability reduces long-term resource use. Smart material selection and careful installation make your garden last longer. This also makes upkeep easier for years to come.

    Maintenance of Hardscape Features

    Keeping your hardscaping materials in top shape is key. Clear out leaves, twigs, and soil from paver joints and rock beds. This stops weeds and stains. Use hand-pulling or targeted weed control to protect plants.

    Cleaning stone and concrete surfaces is essential. Use a stiff brush or a low-pressure washer to remove dirt and algae. For wood decks, fences, and pergolas, check for rot and loose fasteners. Apply a sealant or stain every few years to protect the wood.

    Rock gardens and gravel beds need occasional topping up. Remove organic debris that traps moisture. Add fresh gravel or sand where it settles. Replace landscape fabric if it breaks down to keep drainage and weed control effective.

    • Inspect retaining walls for bulging, leaning, or mortar cracks.
    • Make sure weep holes and gravel backfill remain clear to relieve pressure from water.
    • Address minor movement early to avoid larger repairs later.

    Water features need constant care. Clean pumps and filters, check seals, and remove algae. Keep plantings balanced and maintain circulation to avoid stagnation. Winterize systems in cold climates to prevent freeze damage.

    Some upkeep tasks you can do yourself, but others require a pro. Call a licensed hardscape contractor for significant settling, major drainage failure, or structural damage. A skilled contractor can regrade surfaces, reset large units, or repair mortar and drainage systems safely.

    Keep a seasonal checklist and document repairs to your hardscaping materials. Regular inspections and timely action protect your investment. This reduces long-term costs and keeps your outdoor spaces looking great.

    Hardscaping for Different Climates

    Choosing the right hardscaping materials is key to your outdoor space. In cold areas, like the northern U.S. and Canada, use stones that resist frost. Also, make sure the footings of retaining walls are deep.

    For places with lots of snow, pick mortars and adhesives that can handle freezing and thawing. Adding drainage helps prevent damage from frost.

    In hot, dry places like the Southwest, choose light-colored pavers and stones. This helps keep the area cooler. Use surfaces that let water through and plants that don’t need much water.

    In wet areas, like the Pacific Northwest, focus on keeping water away. Use wood that won’t rot or composite materials. Make sure paths and patios are safe and water flows away from buildings.

    Coastal areas need materials that won’t rust or break down from salt. Avoid stones that can be damaged by salt. Use wood or composites for outdoor furniture and small walls near the sea.

    • Match materials and techniques to site-specific conditions.
    • Consult local nurseries, extension services, or a licensed hardscape contractor for regional guidance.
    • Test soil, check drainage, and plan for long-term maintenance when choosing hardscaping materials.

    Choosing the right materials and construction details is important everywhere. It helps your outdoor space last for many years.

    Inspiring Hardscaping Examples

    You can create a sun-exposed rock garden that’s both rugged and elegant. Start with big boulders, then fill in with smaller stones and plants like succulents. Use weed barrier fabric and gravel for easy care and drainage.

    On a slope, build a retaining rock wall for terraces and outdoor spaces. Make sure to add gravel backfill and drainage. Include steps and timber sleepers for seating and interest. Add stone patios at each level for a unified look.

    Make a calming focal point with a cascading rock waterfall. Use river rock and flat ledges for a natural flow. Line ponds with stones and add aquatic plants for a seamless blend of rock and water. Add winding pathways or gravel walkways for a guided walk through your landscape.

    For easy care, try a rock-and-succulent garden with local stones and drought-tolerant plants. Adapt these ideas to fit your space and budget. For bigger projects, hire a licensed contractor. Choose materials wisely, use layered designs, and focus on color and texture for a beautiful outdoor space.

    FAQ

    What are the core hardscaping principles I should follow?

    The key hardscaping rules include placement, scale, balance, and focal points. Use rocks and timber that match your yard’s size. Balance and rhythm help create flow. Make sure your design is functional, considering paths and drainage.

    How do rocks, wood, and other hardscaping materials create visual depth?

    Depth is achieved by layering elements. Place larger rocks and timber in the back. Use the rule of thirds for natural-looking groupings. Paths that wind through layers add depth and discovery.

    Which stone types work best for different hardscape uses?

    Choose stone based on its use and where you live. River rock is good for water areas. Slate works well for patios. Lava rock is light and porous for decorative beds. Durable stone is best for walls.

    What wood species or treatments are recommended for outdoor structures?

    Use cedar or redwood for exposed wood. Pressure-treated lumber is good for structural parts. Seal or season timber to prevent leaching. In coastal areas, use corrosion-resistant fasteners.

    How should I plan drainage and freeze-thaw concerns for retaining walls?

    Retaining walls need proper footings and drainage. Use frost-resistant stone in cold climates. Ensure backfill drains well and drainage channels stay clear.

    When should I hire a hardscape contractor?

    Hire a contractor for complex projects or those needing permits. They ensure durability and safety. Professionals handle heavy stone walls and structural terraces.

    How do I choose materials with climate-specific resilience in mind?

    Match materials to your local climate. In cold, wet areas, choose frost-resistant stone and wood. In hot, dry places, use light-colored stone and drought-tolerant plants. Locally sourced rock is better for the environment.

    What sustainable hardscaping practices should I use?

    Use permeable materials to reduce runoff. Source local stone and reclaimed timber. Design with native plants to save water. Reuse stones for borders to reduce waste.

    How do substrate choices affect drainage and plant health?

    The right substrate layers are key for drainage and plant health. Use crushed stone and gravel for stability. In rock gardens, add a sand/gravel layer and landscape fabric for drainage and weed control.

    What are practical sequencing and construction steps for a hardscape project?

    Start with site analysis and establish functions. Build primary structures first, then add pathways and rock groupings. Finish with plantings and details. For rock gardens, place large rocks first.

    How can lighting enhance hardscape materials at night?

    Use low-angle LED lights to highlight textures. Uplighting boulders and grazing light on stone walls create evening beauty. Position lights for safety and to highlight focal points.

    What maintenance do stone patios, wood features, and water elements require?

    Regularly remove debris and weeds. Clean stone surfaces to control algae. Inspect wood for rot and reapply sealants. Service water feature pumps and filters. Top up gravel in rock beds and check retaining walls for movement.

    Which plants pair well with rock gardens and hardscape beds?

    Choose drought-tolerant plants like succulents and sedums. Use natives to save water. Select plants that complement the materials, adding texture and color.

    How do color and texture choices affect perceived depth?

    Darker materials recede, while lighter ones advance. Rough textures create strong shadows, adding depth. Mix materials for contrast and variety. Test samples in-situ to confirm the effect.

    Are there special considerations for coastal or wet climates?

    In wet climates, focus on drainage and erosion control. Use rot-resistant woods and design to shed water. In coastal areas, choose nonreactive stones and corrosion-resistant hardware.

    Can reclaimed materials be used for durable hardscaping?

    Yes. Reclaimed timber and stones add character and reduce waste. Check structural integrity and treat wood as needed. Use reclaimed materials for borders and terraces, but hire a contractor for structural elements.

  • Choosing Peaceful Companions for a Male Betta in a Nano Tank

    Choosing Peaceful Companions for a Male Betta in a Nano Tank

    You love your male Betta for its vibrant colors and lively spirit. You also want a vibrant, safe community in a small tank. This guide will help you find the right tank mates for your betta. They should help reduce stress and let your betta enjoy the company of others.

    Bettas have strong territorial instincts, inherited from their Siamese fighting fish ancestors. This limits your choices in a small tank. Focus on invertebrates like snails and small, schooling fish. Make sure your tank is big enough and has good hiding spots.

    Design your tank to reduce stress. Use dense plants, lots of hiding spots, floating covers, and gentle water flow. Keeping the water stable and clean is also key to a peaceful tank.

    Always be ready for emergencies. Have a quarantine tank ready for new additions. If needed, move your betta to a safe place instead of introducing new fish. With careful planning, you can create a harmonious home for your betta and its tank mates.

    Understanding Your Male Betta’s Temperament

    A serene aquascape featuring a vibrant male Betta fish, showcasing its flowing fins and vivid colors, swimming peacefully among carefully chosen tank mates such as a school of small neon tetras and a group of friendly cherry shrimp. The foreground focuses on the Betta's intricate details, while the middle ground displays the colorful tetras darting around the plants. In the background, lush aquatic plants and smooth pebbles create a natural environment. Soft, filtered lighting enhances the colors and textures in the tank, casting gentle reflections on the water’s surface. The atmosphere is calm and harmonious, emphasizing the peaceful cohabitation of these species in a cozy nano tank setting. The camera angle is slightly elevated, providing a clear view of the tank's inhabitants and their interactions.

    Start by watching how your male betta acts in a quiet tank. They show off by flaring and chasing rivals. Things like mirrors or bright lights can make them display.

    Every betta is different. Some are calm and can live with other fish. But show-type bettas with long fins or bright colors might be more aggressive. Short-finned or less colorful bettas are usually calmer.

    Watch out for things that might upset your betta. Fast swimmers, fancy guppies, and brightly colored fish can make them attack. Also, if they can see other fish or feel cramped, they might get stressed.

    Keep the water in their tank stable to reduce fights. Aim for a temperature of 75–81°F (24–27°C) and gentle water flow. Also, keep the pH level close to 6.5–7.4. This helps when you try to add other fish to their tank.

    Try a short test to see if your betta gets along with other fish. Watch how they react to reflections and other fish through a divider. This helps you pick the right fish for your betta’s tank.

    Remember, some pairings are not safe. Male bettas should not be kept with other males, and male–female pairs need lots of space and experience. Plan carefully when adding new fish to your betta’s tank to keep everyone safe.

    Ideal Tank Size for Betta Mates

    A beautifully arranged nano aquarium showcasing a male betta fish in vibrant shades of blue and red, swimming gracefully amidst peaceful tank mates like neon tetra, ghost shrimp, and corydoras catfish. The foreground features lush green aquatic plants, such as Java fern and Anubias, providing a cozy habitat. In the middle ground, a small driftwood piece accentuates the natural environment, while a gentle current creates ripples in the water. The background should be softly lit with a warm glow, simulating sunlight filtering through the water, enhancing the colors of the fish. Use a wide-angle lens to capture the entire scene, creating a serene, harmonious atmosphere that evokes tranquility and safety for the aquatic life.

    When planning a community with a male betta, tank size is key. A common rule is one gallon per inch of fish. But, more space means better water stability and less stress for all.

    In nano tanks under 10 gallons, your choices are limited. The safest option is adding invertebrates like nerite snails, mystery snails, or cherry shrimp. They need little space and add interest without causing fights.

    For small schooling fish, aim for 10 to 15 gallons. Species like ember tetras or small rasboras do best in groups of five to ten. With a betta, a 15+ gallon setup allows for shoaling and hiding spots.

    Corydoras and similar bottom dwellers need space to forage. Plan for 10 gallons minimum for a small group of corys. For a multi-species community with tetras, rasboras, or larger bottom dwellers, choose 15 to 20 gallons or more.

    • 5+ gallons: single betta with snails or shrimp.
    • 10+ gallons: small groups of corydoras or a few peaceful livebearers.
    • 15+ gallons: comfortable shoaling of neon/ember tetras or harlequin rasboras with a betta.
    • 20+ gallons: mixed community with larger bottom dwellers and stable territories.

    Filtration and water changes help when space is tight. But, they can’t replace enough tank volume. Overdoing maintenance can hide stressors that cause aggression.

    Always have a quarantine or spare tank ready before mixing species. If a betta or any fish becomes aggressive, you must be ready to rehome or isolate it to protect others.

    Key Factors in Selecting Tank Mates

    First, think about where each fish likes to be in the tank. Betta fish like the top and middle. Choose fish that stay at the bottom, like corydoras or kuhli loaches, and midwater swimmers like rasboras and small tetras. This helps them live together peacefully.

    It’s also important to pick fish that are calm and won’t bother your betta. Stay away from fish that are too active or aggressive. They might fight over space or food.

    Some fish might look too much like another male betta. This can make your betta upset. Fancy guppies and some gouramis are examples of fish that might cause trouble.

    • Water parameters: match temperature (75–81°F), pH (~6.5–7.4), and low to moderate flow needs.
    • Shoaling safety: keep small schooling fish in groups of five to twelve so they feel secure and spread attention away from the betta.
    • Physical protection: consider snails and small plecos that offer armor or shells, but verify size suitability for your nano tank.

    Adding plants, caves, and floating cover helps. These create hiding spots and reduce stress. They also help lower aggression by blocking sight lines.

    Quarantine new fish for four to six weeks. This stops diseases from spreading. It keeps your betta and other fish healthy.

    When picking tank mates, consider everything. Think about where they like to be, their behavior, looks, water needs, and how they interact with others. This helps you choose the right fish for your betta tank.

    Best Fish Species for Betta Fish Tanks

    Choose species that reduce stress and match your betta’s space. Harlequin Rasbora (Trigonostigma heteromorpha) is a peaceful shoaler that swims calmly in midwater. Keep a group of 5–8 or more and plan for at least a 15+ gallon community setup when pairing with a male betta.

    Ember Tetra (Hyphessobrycon amandae) works well in planted tanks. These tiny orange fish stay low to mid-level, do not nip fins, and should be kept in schools of 8–15 or more. A 15+ gallon tank gives room for natural schooling and reduces territorial displays.

    Neon Tetra (Paracheirodon innesi) forms tight shoals and needs groups of six or more. In a 15+ gallon tank with hiding spots and plants, they maintain steady shoaling behavior that keeps both species calmer. You will find Neon Tetra a reliable pick among Betta fish tank mates.

    Corydoras catfish such as Panda and Pygmy varieties are excellent bottom-dwellers. They are non-aggressive and should be kept in groups of five to six. Use a soft substrate and feed micro-pellets and frozen foods to protect their barbels. A 10+ gallon tank suits smaller cory groups.

    Kuhli Loaches (Pangio) offer nocturnal activity and gentle bottom foraging. Keep them in groups of four to six and provide soft sand for burrowing. These loaches do best in 20+ gallon tanks where they have space to hide and forage without disturbing the betta.

    Bristlenose or Clown Plecos (Ancistrus sp.) are useful algae eaters with thick skin that lowers conflict risk. Small plecos need space to grow, so plan a minimum 20 gallon tank. Their nocturnal habit helps them avoid daytime interactions with your betta.

    Guppies can be an option if you take precautions. Use plain-finned guppies and keep a single gender to prevent breeding. Avoid long-finned or flashy males that might trigger fights. A 10+ gallon tank is the minimum, though larger setups are safer for mixed communities.

    Practical cautions matter when you select compatible fish for betta tanks. Avoid large cichlids, tiger barbs, red tail sharks, puffers, and any species known for fin-nipping or high aggression. These choices lower the chance of stress, injury, and continual chasing.

    Plan stocking by species, group size, and tank volume. Thoughtful selection of the best tank mates for betta fish and careful monitoring after introductions will help your community thrive.

    Invertebrates: Alternative Companions

    Invertebrates are great for betta tank mates because they don’t fight. Mystery snails are tough, eat algae, and have a hard shell. This shell helps them avoid being bothered by Bettas.

    Nerite snails have beautiful shells and eat algae well. They don’t breed in regular freshwater tanks, keeping things clean. Both snail types need calcium and balanced KH/GH to keep their shells strong.

    Amano shrimp are good at controlling algae. They’re big enough to avoid being eaten, but need a big tank. A 10+ gallon tank is best for them and a betta.

    Smaller shrimp like cherry, ghost, and glass shrimp can be eaten by Bettas. But, dense plants and leaf litter help them survive. Start with shrimp first to help them build a home.

    • Feed sinking foods at lights-out to reduce shrimp harassment.
    • Add moss, leaf litter, and driftwood to create micro-habitats.
    • Introduce shrimp in numbers and provide plenty of cover to lower predation risk.

    Choosing the right tank mates for Bettas is important. Small shrimp might get eaten. Amano shrimp are safer for larger tanks. With the right setup, invertebrates can be great friends for Bettas.

    Fish to Avoid in a Betta Tank

    When you think about adding companions, choose carefully. Male bettas are territorial. Never house two male bettas together. Severe fighting often leads to injury or death.

    Avoid aggressive or territorial species that will bully or chase your betta. Angelfish, tiger barbs, cichlids, red tail sharks, and puffers are common troublemakers. These fish can injure fins, outcompete your betta for food, and stress the tank community.

    Steer clear of known fin-nippers and flashy swimmers. Fancy guppies, some barbs, and certain danios often nip fins. Long, flowing tails can provoke a male betta to attack, which harms both parties and ruins tank harmony.

    Do not mix large cold-water species with tropical bettas. Goldfish need cooler water and different chemistry. Pairing them with bettas causes health problems for both types.

    • Gouramis and similar-looking labyrinth fish — visual similarity can trigger fights and competition for surface air.
    • Predatory species such as large puffers or moray-type predators — they may eat or harass small fish and invertebrates.
    • Most reptiles and amphibians — turtles and many frogs need special care and space. Even African dwarf frogs require careful feeding strategies and at least a 10-gallon setup.

    Think about the tank zones and behavior patterns when choosing compatible fish for betta tanks. Avoid combinations that cause scale, gill, or fin damage. Pick peaceful species that use different water levels and share similar temperature and chemistry needs.

    When cohabitating with bettas, prioritize safety and balance. Your betta will be less stressed if tank mates are calm, small, and unobtrusive. Match temperament and habitat, not just appearance, for the best long-term results.

    Environmental Enrichment for All Tank Mates

    Adding structure to your nano tank can help. Dense plants, driftwood, and small caves create zones for each fish. This makes betta tank companions feel safe and reduces aggression.

    Use a mix of floating and rooted plants. Floating plants like frogbit and salvinia offer shaded areas. Anubias, Java fern, and cryptocorynes provide mid-level cover. Java moss and moss walls are great for shrimp and microfauna.

    Make sure there are many hiding spots. Small caves, driftwood tunnels, and stacked rocks create separate areas. This reduces competition for hiding spots among Betta fish tank mates.

    Keep the lighting and water flow gentle. Bettas like calm water, so use sponge filters or spray bars. This helps keep plants healthy and benefits all tank mates.

    Choose a soft substrate for bottom dwellers. Fine sand protects their barbels and allows digging. Adding leaf litter or peat creates tannin-rich areas that many species enjoy.

    Keep the water temperature steady and clean. Aim for around 78°F (26°C) for comfort. Regular water changes and good filtration prevent water quality issues that stress fish.

    Small tanks need regular care. Test the water often and clean out detritus from caves and plants. Healthy conditions support calm behavior in Betta fish tank mates.

    Monitoring Compatibility and Behavior

    Watching your betta fish closely is key. Sometimes, they may flare or chase each other as they establish their space. But, if you see constant chasing, damaged fins, or hiding, it’s a sign of stress.

    Keep a close eye on your fish for 48 to 72 hours after introducing them. Take notes or photos of their behavior. This helps you see if they’re getting along.

    • Normal behaviors: brief displays, settling after feeding, mild curiosity.
    • Problem behaviors: repeated nipping, torn fins, constant hiding, refusal to eat.
    • Emergency signs: open wounds, severe breathing trouble, sudden lethargy.

    If you notice stress, try simple fixes first. Add more plants or cover to block their view. Also, reduce the light and change the layout to upset their territory plans.

    Feed bottom-dwelling fish separately to help them feel safe. This way, they get enough food without competition from the betta.

    If aggression doesn’t stop, it’s time to separate the fish. Use a breeder box or a spare tank to keep them safe. Also, quarantine new fish for 4 to 6 weeks before adding them to your tank.

    Check the water quality often, but even more so in the first week after adding new fish. Test for ammonia, nitrite, and nitrate every day until the levels are stable. Clean water helps reduce stress and fights.

    Make a plan to check on your fish regularly, like once a month. As they grow, their behavior can change. Be prepared to separate or rehome fish if aggression starts later. Regular checks keep your tank peaceful and your fish healthy.

    Importance of Gradual Introductions

    When you add new betta tank companions, start with quarantine. Keep new fish or invertebrates in a separate tank for 4–6 weeks. This helps you spot disease and lets them adjust to your water chemistry before they meet your established fish.

    Use proper acclimation to reduce shock. Float the bag for 10–15 minutes to equalize temperature. Then drip or slowly mix small amounts of tank water over 15–60 minutes. This step protects both water chemistry and the health of your betta fish tank mates.

    • Order of stocking matters. Add bottom dwellers and invertebrates first so they can find hiding spots and biofilms.
    • Next, add small shoaling mid-water fish. Let them settle before introducing territorial species.
    • Introduce the betta last to minimize immediate chasing and to let established animals hold territory.

    If you are adding a betta to an already established community, watch closely. Initial curiosity from the betta can turn to aggression. Keep a spare tank or breeder box ready to separate any injured or highly stressed fish.

    Try timing introductions to lower stress. Do new additions at lights-off or dusk and feed the tank first to distract your betta. Use a soft-start protocol by keeping newcomers in a breeder box or net pen inside the main tank for 24–72 hours as an observation buffer.

    Plan B matters for calm transitions. Have a spare tank, breeder box, or gentle net handy. Quick separation prevents injuries and protects the long-term stability of your community.

    Careful, stepwise introductions improve success with the best tank mates for betta fish. When you follow quarantine, acclimation, stocking order, and soft-start steps, your betta tank companions will have a better chance to thrive together.

    Maintaining a Healthy Community Tank

    To keep water quality good, stick to a strict maintenance plan. Change 25–30% of the water weekly. Also, vacuum the substrate when it gets dirty and check heaters and filters every month. In small tanks, you might need to change water more often to keep everything stable.

    Feed your fish a variety of foods to help them thrive. Give your male betta high-quality pellets. For bottom dwellers, use sinking wafers or frozen foods. Plecos and snails like blanched vegetables or algae wafers.

    Target-feed shy fish to make sure they eat. But don’t overfeed, as it can make the water dirty. Use gentle filters and manage oxygen levels carefully. This helps keep surface feeders happy and healthy.

    • Stock conservatively to prevent crowding.
    • Keep schooling fish in appropriate shoal sizes for health and comfort.
    • Prevent unwanted breeding by maintaining single sexes if you do not want fry, such as with guppies.

    Quarantine new fish for 4–6 weeks to lower disease risk. Treat illnesses quickly and keep sick fish separate. Overcrowding can spread diseases fast, so act fast if you see any signs.

    As fish grow, their behavior might change. You might need to adjust the tank layout to keep peace. Changing things up now and then can help keep everyone calm.

    1. Keep an emergency spare tank or breeder box ready.
    2. Have transport containers and basic medications or water conditioners on hand.
    3. Plan rapid moves to isolate stressed or injured fish.

    Regular routines, careful feeding, and quick action can make living with bettas easier. Follow these tips to keep your community tank healthy and balanced.

    Resources for Further Research

    For solid, science-backed guidance on compatible fish for betta tanks, check out Applied Animal Behaviour Science, Environmental Biology of Fishes, and Integrative and Comparative Biology. These journals cover betta aggression, stress responses, and color perception. This information helps you choose the right Betta fish tank mates.

    Balance scientific papers with reputable hobby resources and DVM-reviewed care sheets from established aquatic communities. Use those guides to compare species needs. Also, refer to aquarium calculators and water test kits to confirm stocking limits and water chemistry before adding any new fish.

    Join local aquarium clubs, Reddit aquarium communities, and specialized betta groups to learn from experienced keepers. They can share their knowledge on the best tank mates for betta fish in real setups. Start each new addition in a quarantine tank, stage introductions carefully, and provide dense planting and hiding places to reduce conflict while you monitor behavior.

    FAQ

    What is this guide’s purpose?

    This guide helps you pick peaceful, compatible tank mates for a male Betta fish in a small aquarium. It focuses on invertebrates and small schooling species. It also covers how to safely introduce them.

    Why are male bettas difficult to house with others?

    Male bettas are bred for aggression. They may flare and chase when they see rivals. Avoid mirrors and bright lights to prevent aggression.

    How does my betta’s personality affect compatibility?

    Betta personalities vary. Some are calm, others reactive. Watch your betta for a few days to see how it acts before adding tank mates.

    What tank size do I need for safe cohabitating with bettas?

    Small tanks limit your options. For a single betta, a 5-gallon tank is a good start. For more fish, you’ll need a bigger tank.

    What environmental parameters should I maintain?

    Keep the tank at 75–81°F (24–27°C). Aim for pH 6.5–7.4 and gentle flow. Regular water changes and good filtration help keep the tank stable.

    Which tank mates are safest in a small nano tank?

    In small tanks, choose invertebrates like snails and shrimp. Add plants and hiding spots for them. For slightly larger tanks, a few small fish might work.

    Which fish species are commonly compatible with male bettas in larger tanks?

    In bigger tanks, pick peaceful fish that don’t nip fins. Harlequin rasboras and ember tetras are good choices. Make sure to match the number of fish to the tank size.

    What invertebrates make good betta tank companions?

    Mystery snails and nerite snails are great. Amano shrimp are good algae eaters. Cherry and ghost shrimp need dense plants for safety.

    Which species should I avoid with a male betta?

    Avoid other male bettas and aggressive fish. Fancy guppies and fin-nippers are also bad choices. They may provoke aggression or have different water needs.

    How should I arrange the tank to reduce aggression?

    Add plants and decorations to make the tank more complex. Use gentle flow and soft sand. This helps reduce aggression by breaking sightlines.

    What is the correct order and method for introductions?

    Start with bottom dwellers and invertebrates. Add midwater fish next. Introduce the betta last. Use drip acclimation and introduce at dusk or lights-off.

    How long should I quarantine new additions?

    Quarantine new fish and invertebrates for 4–6 weeks. This helps prevent disease and acclimation issues.

    What should I watch for after introducing new tank mates?

    Watch for aggression signs like chasing and fin damage. Keep logs and test water frequently in the first week.

    What immediate steps should I take if aggression occurs?

    Add plants or rearrange decor to break territories. Use a breeder box if aggression persists. Always have a spare tank ready.

    How do shoaling fish affect betta behavior?

    Shoals can distract a betta and reduce aggression. Make sure the shoal is large enough and the tank is big enough.

    How should I feed a community tank with a betta present?

    Feed a varied diet to all fish. Target-feed bottom dwellers to ensure they eat. This reduces competition and aggression.

    Can I prevent breeding when adding livebearing species like guppies?

    Yes, keep single genders to avoid fry. Female-only groups or male-only groups are best. Be careful with breeding species.

    What maintenance schedule helps keep a peaceful community?

    Do weekly water changes and check equipment monthly. Monitor water parameters regularly. Good filtration and stable water reduce aggression.

    Are there scientific or hobby resources I should consult?

    Read scientific studies on betta behavior and enrichment. Also, check reputable care sheets and DVM-reviewed guides. Talk to local hobbyists for practical advice.

    What are practical tools to prepare for cohabitation attempts?

    Prepare a quarantine tank and breeder boxes. Have test kits, a spare heater, and gentle filters. Keep medications and conditioners ready. Plan for rehoming if aggression escalates.