Author: caiopereira

  • How to Prevent pH Swings in Small, Low-Buffered Nano Tanks

    How to Prevent pH Swings in Small, Low-Buffered Nano Tanks

    You love your nano tank for its size, beauty, and challenge. But its small size means it can’t handle big pH changes well. Even small changes in CO2, oxygen, temperature, or dosing can cause big pH swings. So, focus on keeping pH stable, not just aiming for a specific number.

    For marine-style nano tanks, aim for stable conditions. Keep the temperature between 77–79°F (up to 79–81°F is okay). The salinity should be near 1.026 specific gravity (35 ppt), checked with a refractometer. Alkalinity should be about 8–11 dKH, calcium 375–425 ppm, and magnesium around 1380–1400 ppm.

    This guide will help you understand causes, monitoring, and how to stabilize pH. You’ll learn about substrate choice, live plants, dosing timing, routine maintenance, and troubleshooting. You’ll know how to watch your fish, read pH trends, and act fast to keep pH stable without over-dosing buffers.

    Understanding pH Levels and Their Importance

    A serene, close-up view of a precisely calibrated pH meter displaying balanced readings amid a nano aquarium. In the foreground, the sleek, modern pH meter is prominently showcased, reflecting soft light that highlights its digital screen. In the middle, the nano tank is filled with vibrant aquatic plants and small, colorful fish, indicating a healthy ecosystem, with subtle bubbles rising to the surface. The background features a blurred laboratory setting with scientific equipment, reinforcing a sense of professionalism and research. The mood is calm and focused, with natural daylight filtering in, casting gentle shadows. Emphasize clarity and detail in textures, such as the shimmering water surface and the fine details of the plants, presenting an informative yet visually appealing composition.

    pH measures the hydrogen ion concentration in your tank water. It shows if the water is acidic or alkaline. In aquariums, pH affects many activities like breathing and photosynthesis.

    Small nano tanks are very sensitive. They have low water volume and can’t buffer changes well. A small change in CO2 or O2 can cause a big pH swing. So, keeping pH stable is very important.

    Daily cycles cause predictable pH swings. During the day, plants and algae use CO2, raising pH. At night, pH falls as CO2 increases. You might see a peak in pH about five to six hours after lights on, then a drop.

    To control these swings, aim for steady pH levels. This keeps your fish and plants healthy. Regular monitoring helps you adjust without shocking the system.

    Practical steps include measuring alkalinity and stabilizing carbonate hardness. Plan your light and feeding times to avoid sudden CO2 changes. These steps help keep your nano tank’s pH balanced.

    Common Causes of pH Fluctuations

    A visually engaging illustration depicting the common causes of pH fluctuations in aquariums. In the foreground, showcase a vibrant nano tank filled with colorful aquatic plants and small fish, emphasizing the balance in a thriving ecosystem. The middle layer features elements such as water chemistry equipment, such as a pH meter, and icons representing common causes like evaporation, overfeeding, and algae growth. In the background, illustrate a blurred out environment of a cozy home aquarium setup with natural light streaming in, creating a warm atmosphere. The lighting should be soft and inviting, mimicking the tranquil feel of a well-maintained tank. The angle should be slightly above eye level to capture the depth of the tank while remaining clear and focused on the specific elements.

    Small, low-buffered nano tanks are very sensitive. They can swing a lot when basic processes change. The main reasons for pH swings include changes in gas exchange, photosynthesis, temperature, and human mistakes.

    CO2 and oxygen cause many short-term changes. During the day, photosynthesis uses CO2 and raises pH. At night, respiration lowers pH as CO2 builds up. Knowing this helps manage pH in small tanks.

    Temperature affects oxygen levels. When water gets too warm, oxygen levels drop. This can make pH drop. Keep an eye on your heater and room temperature to avoid sudden pH drops.

    Alkalinity is key for long-term stability. Without enough alkalinity, tanks are hard to keep stable. Avoid over-dosing buffers. Focus on slow, steady adjustments to pH.

    Human mistakes cause many pH swings. Quick water changes, adding chemicals too fast, and poor mixing can cause spikes. Always dose chemicals slowly and mix well.

    Measurement errors can hide real trends. Bad probes, old test strips, and expired kits give wrong readings. Make sure probes are calibrated and store test strips sealed and fresh.

    • CO2 buildup from respiration and poor gas exchange
    • Photosynthesis cycles that raise pH by day and lower it at night
    • Temperature increases that reduce dissolved oxygen
    • Low alkalinity reducing buffer capacity
    • Dosing mistakes and poor chemical mixing
    • Inaccurate measurement from uncalibrated or degraded tools

    To manage pH well, you must tackle both biological and human factors. Keep track of light cycles, control temperature, adjust alkalinity correctly, and maintain your testing tools. This approach helps keep pH stable and predictable.

    The Role of Water Source in pH Stability

    Your source water is key to pH stability in a nano tank. Tap, well, and RO/DI water have different levels of alkalinity and hardness. These factors affect how well your water can resist pH changes.

    Soft water, with low carbonate hardness, has weak buffering. This makes pH swings more likely. On the other hand, harder water resists changes better, helping with pH stabilization.

    When CO2 levels change, the pH drop is similar across different hardness levels. A good rule is to design your system to handle about a 1.0 pH drop. This target works well across various water sources, helping to stabilize pH levels daily.

    Many hobbyists choose reverse osmosis/deionized water for better control over minerals and particles. RO/DI water gives you a clean slate for pH regulation. For marine systems, you must remineralize to add back alkalinity, calcium, and magnesium. Poor remineralization can remove buffering, making pH stabilization harder.

    • Test your source water for alkalinity and general hardness before mixing saltwater or topping off.
    • Adjust your mixing protocol so newly prepared water reaches the target alkalinity before you add it to the tank.
    • Measure the pH of mixed saltwater with a calibrated meter to verify pH level regulation is within range.

    By following a steady prep routine and matching remineralization to your livestock needs, you can have better control over pH levels. This leads to long-term stability in your water source.

    Selecting the Right Substrate for Stability

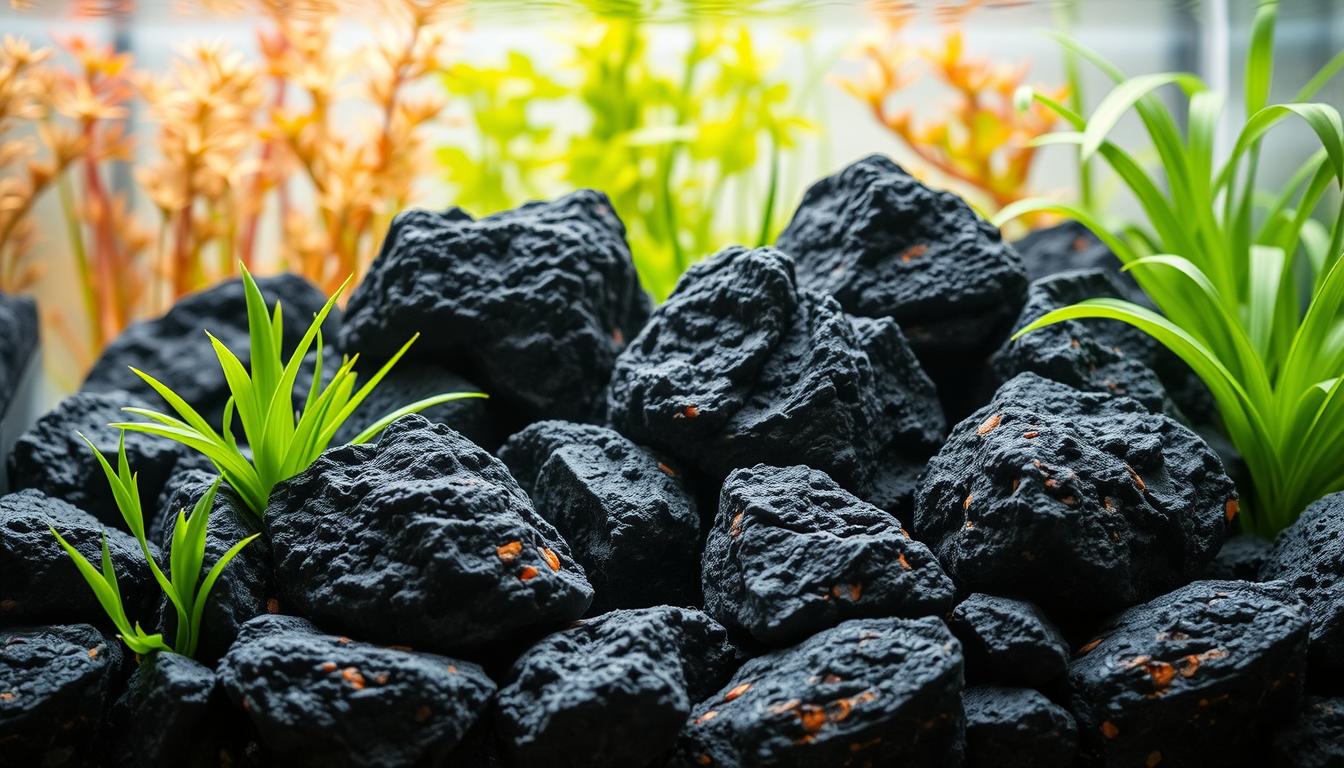
    Your choice of substrate is key to the long-term chemistry of your nano tank. Calcareous substrates like aragonite and crushed coral slowly release minerals. They add carbonate hardness and calcium, helping to keep the pH stable.

    Inert options, such as silica sand or bare glass, don’t buffer. If you use these, you must manage water chemistry yourself. This means you’ll need to remineralize or dose regularly to keep the pH right.

    Live rock and dry rock change alkalinity levels over time. Porous live rock can create areas where CO2 builds up at night. This can cause small pH swings. Yet, live rock generally helps stabilize chemistry by supporting biological processes that keep alkaline levels steady.

    • Choose calcareous substrate for low-maintenance buffering and steady pH stability.
    • Pick inert substrate if you plan to use RO/DI water and precise dosing for pH stabilization.
    • Use live rock to support biological buffering while watching for nighttime CO2 pockets that can affect alkaline levels.

    Match your substrate to your system’s goals. For a simple setup, go with aragonite or crushed coral. If you want full control with RO/DI and dosing, inert substrates are good but need careful monitoring and steps to maintain optimal pH.

    Using Live Plants to Balance pH

    Photosynthetic plants and macroalgae take in CO2 and release oxygen when it’s light. This action increases the pH and aids in balancing it in small, low-buffered nano tanks.

    At night, plants switch to respiration and release CO2 back into the water. This can lower the pH. So, it’s important to plan light cycles to prevent sudden drops.

    Setting up a refugium on a reverse light cycle is a smart move. Run macroalgae lights from 11 p.m. to 8 a.m. This way, the refugium produces oxygen when the display tank lights are off.

    A small planted refugium or a heavily planted display can buffer daily swings. It cuts CO2 accumulation overnight. This helps stabilize pH levels and supports better water chemistry.

    Live plants also eat nutrients like nitrate and phosphate. This nutrient uptake improves water quality and helps manage pH.

    • Stagger photoperiods so peak photosynthesis in the refugium occurs when the display is dark.
    • Choose quick-growing macroalgae like Chaetomorpha for refugia to maximize oxygen output.
    • Monitor plant health and trim regularly to keep nutrient uptake steady.

    By managing light timing and using plants wisely, balancing pH with plants becomes a key part of nano tank care.

    Chemical Solutions for pH Stabilization

    There are several chemical options for pH stabilization in small nano tanks. You can use alkalinity buffers like soda ash, two-part dosing systems, or kalkwasser. Commercial pH buffers are also available.

    Focus on alkalinity dosing to a target dKH, not just pH. Aim for a stable range of 8–11 dKH. Raising alkalinity often raises pH too. Dose when pH is lowest, usually between 4 and 8 a.m.

    Use slow, controlled methods for pH control. Peristaltic dosers and timed drip systems are good for adding chemicals gradually. This method avoids sudden pH jumps that stress fish.

    • Dose Part A (alkalinity) and Part B (calcium) in different locations or at different times. For example, add alkalinity in the morning and calcium roughly 12 hours later to cut down on precipitation.
    • When using kalkwasser, run it at night to use the aquarium’s natural respiration cycle and limit rapid pH rises during the day.

    Be careful not to over-dose. Many aquarists chase a pH number and end up raising alkalinity too high. Measure alkalinity and calcium regularly. Avoid sudden changes with powdered buffers, as they can harm invertebrates and corals.

    Magnesium is also important for balance. You can dose magnesium at any time. It rises slowly if depleted and remains stable once you reach about 1380–1400 ppm. Keeping magnesium steady helps with stabilizing pH levels long term.

    Keep chemical test kits calibrated and stored properly for accurate readings. Commercial pH buffers can mask underlying problems if used just to force a number. Use them sparingly while you address the root causes of swings.

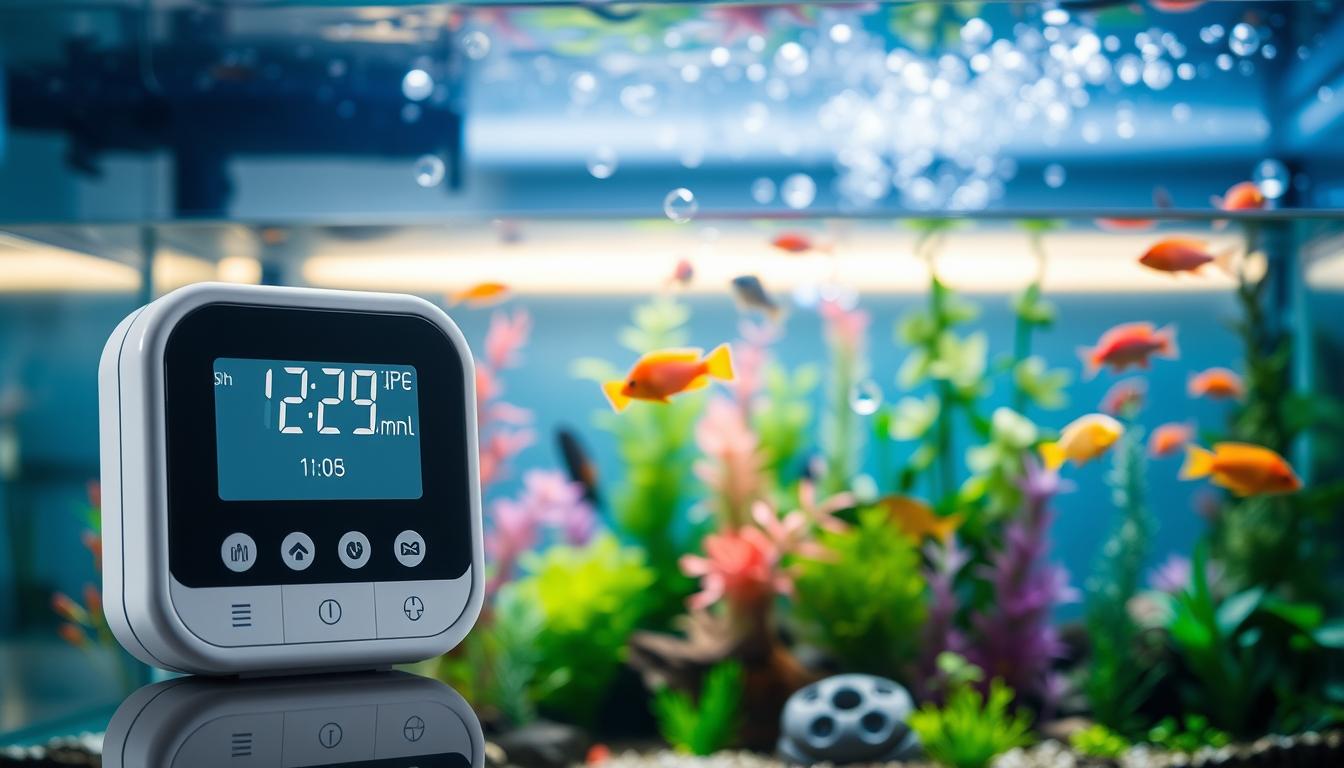
    Monitoring Your Nano Tank’s pH Levels

    It’s important to keep an eye on your tank’s pH levels all the time. Spot checks can miss the daily changes in small tanks. By regularly checking pH levels, you can catch any slow changes before they harm your fish.

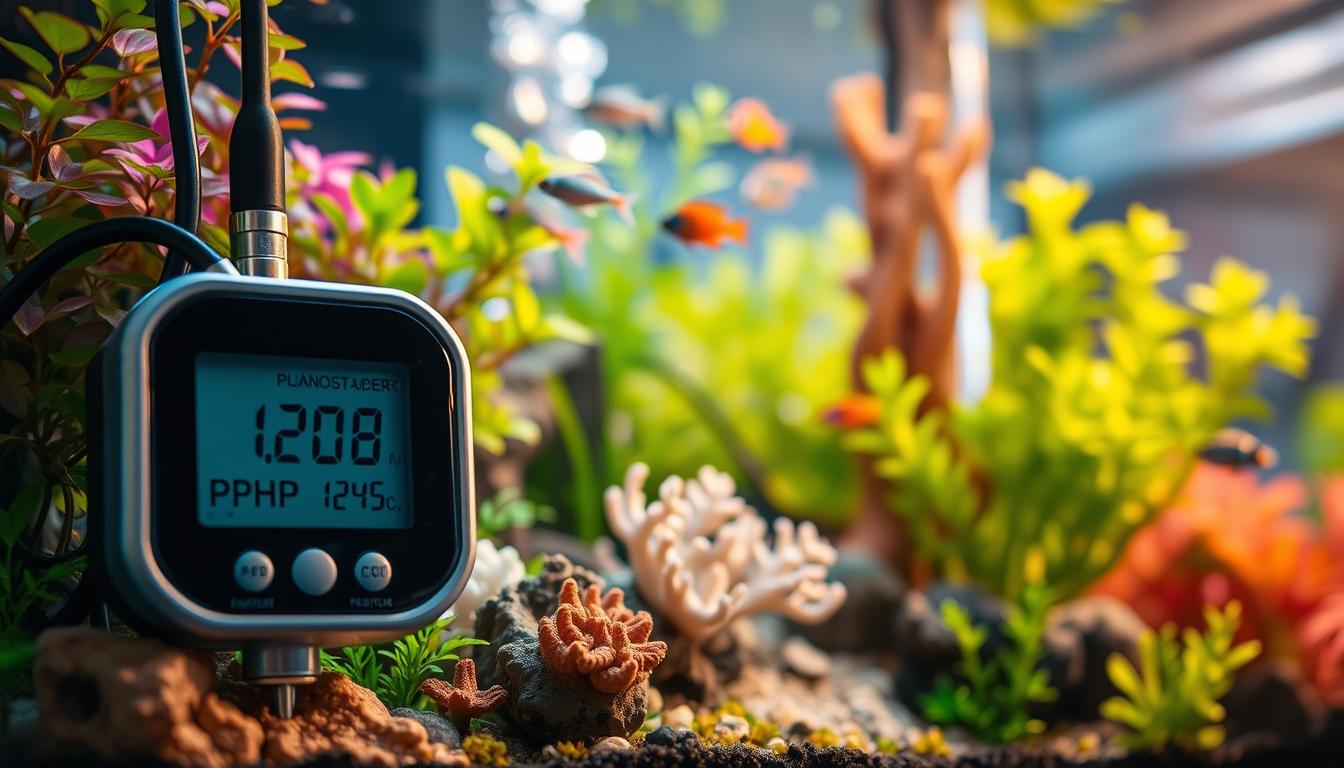
    Choose reliable tools for accurate pH readings. Handheld pH meters are great for quick checks. For ongoing monitoring, consider using probes from brands like Neptune Apex. But, avoid pH test strips as they can be less accurate.

    Proper care of your probes is key for good pH control. Make sure to calibrate them often with the right solutions. Always follow the manufacturer’s instructions. If a reading seems off, check it with a handheld meter and recalibrate if needed.

    Keep a record of your pH readings to spot patterns. Whether it’s through a controller graph or a simple log, tracking your data helps. This way, you can plan when to add new water or adjust lighting and circulation.

    • Check new mixed saltwater before adding it to the tank.
    • Measure pH in bags when buying livestock to avoid surprises.
    • Verify unexpected changes by cross-checking instruments.

    Having consistent data helps you move from quick fixes to planned pH control. This approach makes it easier to keep your tank’s pH stable. It also helps prevent sudden changes that can harm your corals and invertebrates.

    Natural Methods to Prevent pH Swings

    Simple steps can help reduce CO2 buildup. Try increasing surface agitation or adjusting the protein skimmer air intake. This improves gas exchange, letting CO2 escape and boosting oxygen levels.

    Ensure steady circulation to mix oxygen-rich water with areas where alkalinity is added. This even distribution helps regulate acidity and prevent pH swings. For nano systems, use small powerheads to create soft currents.

    Setting up a refugium with macroalgae on a reverse light cycle is beneficial. It produces oxygen when your display is dark, reducing CO2 spikes and supporting pH balance. Adding live plants in the main tank extends oxygen production into off-hours.

    If pH drops follow high respiration or heavy feeding, consider reducing stocking and feeding. Gradual stocking and conservative feeding reduce stress and make pH prevention easier. Monitor your fish’s behavior to confirm stability after changes.

    • Use a modest skimmer or air-driven surface agitator for constant gas exchange.
    • Add macroalgae in a refugium on a reverse photoperiod to lower nighttime CO2.
    • Maintain steady circulation so dosing and oxygen distribute evenly.
    • Reduce feedings and add livestock slowly to manage respiration-related pH shifts.

    Many tanks can handle small daily pH swings, like 7.7–7.9 in reef setups, as long as other parameters are stable. If corals and fish grow well and behave normally, avoid using chemicals. Trust the signs of a healthy tank while keeping an eye on pH balance.

    Adjusting Tank Conditions Gradually

    When changing tank conditions, do it slowly. This protects delicate life and helps manage pH. Big changes can cause sudden pH swings or lead to carbonate buildup.

    Use a timed dosing plan for stable pH. Add alkalinity when pH is low, best in the early morning. Wait 12 hours before adding calcium to avoid precipitation. If you have a peristaltic doser, use it to spread chemical input evenly.

    Match water parameters before adding it to the tank. Mix replacement seawater and test its alkalinity and salinity. Bring the temperature to match the tank’s and check pH or CO2 levels if possible. Gradual water changes help keep pH stable.

    • Adjust alkalinity in small steps; test after each change.
    • Add calcium slowly and on a staggered schedule to aid pH stabilization.
    • Use peristaltic dosers or dosing pumps for steady, low-volume delivery.

    Keep temperature changes small to protect pH. Aim for changes of 1–2°F. Avoid letting the tank get too hot, as high temperatures can lower dissolved oxygen and cause pH to drop.

    1. Plan dosing times: alkalinity early morning, calcium about 12 hours later.
    2. Mix and test replacement water before use; match temperature and salinity.
    3. Use low-rate dosing and place outputs in high-flow zones.

    By making slow adjustments and checking each parameter, you reduce stress on your fish. Small, consistent changes are better than big, rare ones for keeping pH stable in a low-buffered nano tank.

    Regular Maintenance Practices for Stable pH

    Keep a simple, repeatable routine for pH control and aquarium health. Test alkalinity, calcium, and magnesium weekly. This helps you catch trends early.

    Log your results and adjust small amounts when needed. This keeps your aquarium balanced.

    Calibrate probes and test kits as the manufacturer suggests. Use fresh pH probes for accurate readings. Also, check and calibrate your refractometer often to keep salinity right.

    Stick to a water change plan. Use RO/DI water for freshwater tanks or saltwater for marine ones. Regular changes help keep pH stable.

    Keep your equipment in good shape. Clean protein skimmers, impellers, and pump housings. This ensures proper flow and gas exchange.

    Service powerheads and return pumps regularly. This prevents low-oxygen zones that can upset pH.

    Take care of refugia and filter media. Replace carbon or phosphate media as needed. Refresh bio-media only when necessary to keep beneficial bacteria healthy.

    Watch your fish and corals for signs of pH balance. Healthy corals and steady fish behavior mean your chemistry is good. Use these signs to guide your decisions and avoid sudden changes.

    Follow a weekly checklist:

    • Test alkalinity, calcium, magnesium.
    • Calibrate pH probe and refractometer as needed.
    • Perform scheduled water change with remineralized or mixed water.
    • Clean pumps, skimmer, and check refugium health.
    • Note livestock condition and tank appearance.

    Regular maintenance makes pH management easier. Small, consistent steps lead to the best pH control in low-buffered nano tanks.

    Troubleshooting Persistent pH Problems

    Start by checking your measurement tools. Make sure your probe is calibrated right and use a good handheld meter for checks. Get rid of bad test strips and take many readings over a day to find patterns. Having accurate data is key for managing pH levels.

    Then, check if your water meets the right standards. Look at temperature (77–79°F), salinity (1.026 sg), alkalinity (8–11 dKH), calcium (375–425 ppm), and magnesium (~1380 ppm). Make small changes to avoid sudden shifts. This helps keep pH stable and improves overall water management.

    Look at how water moves and gas is exchanged. Boost surface activity, adjust skimmer air, and increase flow to remove CO2 pockets. Also, stop chasing pH swings and dose alkalinity to fix dKH levels. Slow or staggered dosing helps with long-term pH control.

    Lastly, check biological and source water impacts. Cut back on feeding or bioload if CO2 is high. Consider adding a reverse-lit refugium or more plants. Test source water hardness and ensure mixed saltwater has the right alkalinity before water changes. If you’re using inert substrate or rock, increase remineralization or dosing. If problems persist, get help from local aquarium experts or online forums with your data.

    FAQ

    What pH should I aim for in a small marine-style nano tank?

    Aim for pH stability, not a single number. For marine nano systems, keep the temperature between 77–79°F. The salinity should be around 1.026 sg, and alkalinity between 8–11 dKH. Calcium levels should be 375–425 ppm, and magnesium around 1380–1400 ppm.

    Keeping these parameters steady helps reduce pH swings. This makes your daily pH cycle more predictable and natural.

    Why do nano tanks experience bigger pH swings than larger tanks?

    Nano tanks have low alkalinity and small water volumes. Small changes in CO2, O2, temperature, or dosing cause bigger pH swings. In a nano, a CO2 increase that barely affects a large tank can drop the pH a lot.

    Managing stability and buffering is better than chasing a single pH target.

    How do daily photosynthesis and respiration cycles affect pH?

    Photosynthesis in the light period consumes CO2 and produces O2, raising pH. At night, respiration and CO2 buildup lower pH. pH usually peaks in the morning and drops at night.

    Aim for a consistent daily pattern and an acceptable range, not eliminating the cycle.

    What are the main causes of pH fluctuations I should watch for?

    Main causes include CO2 buildup and poor gas exchange, photosynthesis cycles, and oxygen changes. Temperature increases, low alkalinity, dosing mistakes, and inaccurate measurement also cause swings.

    Human errors like over-dosing buffers and rapid water parameter changes also trigger swings.

    How does my source water affect pH control?

    Source water supplies alkalinity, hardness, and dissolved gases. Soft water has low buffering capacity and is prone to pH drops. Harder water resists change.

    Use RO/DI for maximum control but remember to remineralize for marine systems. Failure to do so undermines buffering.

    Should I test my source water before mixing saltwater?

    Yes. Test source water for alkalinity and other minerals. Adjust your mixing protocol to achieve the right alkalinity in the saltwater. Measure the pH of mixed saltwater with a calibrated meter and match temperature and salinity to the tank before adding it.

    How do substrate choices influence pH stability?

    Calcareous substrates like aragonite and crushed coral dissolve slowly, adding carbonate hardness and calcium. This supports pH stability. Inert substrates do not add buffering, increasing reliance on water chemistry management and dosing.

    Live rock helps stabilize chemistry long-term, though porous rock can create microenvironments with nighttime CO2 pockets.

    Can live plants or macroalgae help reduce pH swings?

    Yes. Photosynthetic plants and macroalgae remove CO2 and produce O2 during light periods, raising pH. At night, they respire and add CO2, so plan light cycles carefully.

    A refugium on a reverse light cycle can produce oxygen during your display tank’s night, reducing the nocturnal pH dip.

    What chemical options are safe for stabilizing pH?

    Common options include alkalinity buffers (soda ash/sodium carbonate), two-part dosing systems (Part A alkalinity, Part B calcium), and kalkwasser (calcium hydroxide) dosed carefully at night. Commercial pH buffers are also available.

    Dose to maintain target dKH (8–11 dKH) instead of chasing a pH target. Use slow, well-mixed additions and avoid rapid “dumping.”

    When is the best time to dose alkalinity and calcium?

    Dose alkalinity when pH is typically lowest—usually in the early morning window. Dose calcium about 12 hours later to reduce carbonate precipitation risk. Use peristaltic dosers or slow drip additions into high-flow areas and separate Part A and Part B dosing locations/times.

    How should I monitor pH and avoid measurement errors?

    Prioritize reliable tools: quality handheld pH meters and controller probes (Neptune Apex, etc.) for continuous readings. Calibrate probes regularly with fresh calibration solutions and follow manufacturer storage instructions. Avoid relying on test strips because they degrade with oxygen exposure.

    Recalibrate if readings seem off and confirm with a handheld meter.

    How often should I test alkalinity, calcium, and magnesium?

    Test alkalinity, calcium, and magnesium weekly and adjust gradually as needed. Keep refractometer calibration current for salinity checks. Regular testing helps you trend chemistry and schedule dosing or water changes before problems arise.

    What natural methods help reduce nighttime pH drops?

    Increase gas exchange (surface agitation, skimmer air intake), ensure adequate circulation to mix oxygenated and dosed water, use a reverse-lit refugium with macroalgae, add live plants, reduce overfeeding and excessive stocking, and maintain steady temperature. Even a small planted refugium or heavily planted tank can dampen overnight CO2 buildup.

    How should I handle dosing to avoid local pH spikes or precipitation?

    Dose slowly in high-flow areas using peristaltic dosers or timed drips. Mix powdered buffers before adding and avoid “dumping” chemicals. Separate alkalinity and calcium dosing by time and location. If you use kalkwasser, feed it slowly at night to slowly raise alkalinity and pH without causing precipitation.

    How can I troubleshoot persistent pH problems step by step?

    Start by verifying measurement accuracy—recalibrate probes and confirm with a handheld meter. Check target parameters: temperature (77–79°F), salinity (1.026 sg), alkalinity (8–11 dKH), calcium (375–425 ppm), magnesium (~1380 ppm). Inspect gas exchange and circulation, review dosing practices (stop chasing pH), evaluate biological causes (reduce feeding/bioload), test source water and mixed saltwater, and consider substrate contributions. Log data and trends; if issues persist, consult local professionals or reputable forums with calibrated logged data.

    How much pH swing is acceptable in a nano reef?

    Daily swings are normal. Many successful systems tolerate modest daily swings—often within about a 1.0 pH range—so long as parameters like alkalinity, calcium, magnesium, salinity, and temperature remain stable and livestock appear healthy. Consistent patterns and trending are more important than eliminating all movement.

    What maintenance tasks support long-term pH stability?

    Keep a consistent water change schedule using properly remineralized RO/DI or prepared saltwater; test and adjust alkalinity, calcium, and magnesium weekly; calibrate refractometers and pH probes regularly; clean protein skimmers and maintain pumps/powerheads for good circulation; and maintain refugium/macroalgae health. Observe livestock for growth and behavior as a practical stability indicator.

    When should I seek outside help for pH issues?

    If you’ve followed the troubleshooting checklist—verified instruments, corrected parameters gradually, improved gas exchange and dosing, and logged trends—and yet can’t stabilize pH, seek help. Provide calibrated probe/controller logs, recent test results for temperature, salinity, alkalinity, calcium, magnesium, and a description of dosing and stocking so professionals can diagnose from trends.

  • Using Timers to Automate Lighting and Maintain Biological Rhythm

    Using Timers to Automate Lighting and Maintain Biological Rhythm

    Steady light cycles keep our homes and bodies in sync. Aquariums need the same to thrive. This article explores how smart timers automate lighting for fish, shrimp, and plants.

    Light affects our hormones, like melatonin and cortisol, through our brain’s clock. Morning light, daytime brightness, and evening dimness mimic natural cues underwater. Modern timers adjust intensity, color, and timing for the best effect.

    Consistent light and dark cycles reduce stress and promote healthy behavior. They help with breeding and photosynthesis. This also prevents algae from growing due to too much light.

    Automation saves time and prevents mistakes. A good timer and LED lights cut energy use and keep cycles steady. This means healthier fish and plants with less need for manual changes.

    This guide will cover smart timers, why lighting is key, and how timers work. You’ll learn about setting them up, common mistakes, and tips for different setups. It also talks about smart-home integration, monitoring, and user recommendations for the best timers.

    What Are Smart Aquarium Timers?

    A modern, smart aquarium timer displayed prominently in the foreground, showcasing its sleek, digital interface with clear buttons and vibrant LED lights. The timer is positioned on a stylish countertop next to a beautifully decorated aquarium filled with colorful fish and lush aquatic plants. In the middle ground, the aquarium glows with subtle, blue and warm white lighting, reflecting off the water's surface, creating a serene and calming atmosphere. The background features a softly blurred living room environment with minimalistic furniture and soft ambient lighting, enhancing the cozy vibe. Capture the scene with a warm color palette and a slight depth of field, evoking a sense of tranquility and innovation in aquarium maintenance.

    Smart aquarium timers help you set up a schedule for your tank’s lighting and other equipment. They come as standalone timers or are built into LED fixtures and controllers. Brands like Fluval, Kessil, Current USA, and Neptune Systems offer these.

    These timers have cool features like programmable schedules and gradual light changes. They also let you change light colors for day and night. You can control them remotely via Wi-Fi or Bluetooth.

    There are different types of timers for various needs. You can get a simple smart plug or a multi-channel controller. A wifi enabled aquarium timer lets you adjust settings from your phone.

    Some timers control more than just lights. They manage pumps, wave makers, and dosing pumps too. This makes it easy to sync all your devices without extra wiring.

    Why these timers are important: they help prevent algae growth and support plant and fish health. They provide the right light and warmth for your tank’s day-night cycle. This is key for your fish’s hormones and overall well-being.

    Importance of Lighting in Aquariums

    A modern digital aquarium lighting timer displayed prominently in the foreground, showcasing its sleek, touch-sensitive interface with vibrant LED indicators. The timer is set against the backdrop of a beautifully designed aquarium, filled with colorful fish and lush aquatic plants, illuminated by soft, dynamic lighting that simulates a natural underwater environment. In the middle ground, a gentle glow emanates from the timer, casting subtle reflections on the water's surface. The background features a serene room setting with ambient light, enhancing the calm atmosphere. The scene captures a sense of tranquility and innovation, emphasizing the role of technology in creating optimal lighting conditions for aquatic life. The image is taken from a slightly elevated angle, evoking a sense of depth and inviting viewers to explore both the timer and the aquarium.

    Lighting is key for plants and corals in your tank. It supports their growth and color. A digital timer ensures they get the right light.

    Light also guides fish and invertebrates. It helps them know when to eat, hide, and socialize. Smart timers automate these cues, making life easier for you.

    Science shows light affects hormones in animals. It helps keep their body clocks in sync. Stable light cycles reduce stress and keep them healthy.

    But, bad lighting can cause problems. Too much light can lead to algae. Unpredictable schedules can weaken their immune systems.

    Think of aquarium lighting like home automation. It helps animals feel more natural. Energy-efficient timers save you money while keeping your tank healthy.

    Practical steps can make a big difference. Match light to your species’ natural day. Use gradual ramps for sunrise and sunset. Choose the right colors for your tank.

    With the right design and timing, your tank will flourish. The right timer cuts waste and supports a healthy environment.

    How Smart Aquarium Timers Work

    Smart aquarium timers send precise commands to control lights and equipment. Basic units work like a clock switch. You set a schedule, and the timer turns things on or off at set times.

    Programmable fish tank timers create daily routines without manual switching. Advanced models use DMX or 1–10V outputs for variable control. This allows for gradual changes in light intensity and color.

    These timers can mimic dawn and dusk with time-specific lighting. They can also fade channels in and out for a natural light shift. This is good for fish and corals.

    Ramping and color tuning mimic sunrise and sunset. Morning ramps increase intensity with a warm color shift. Evening ramps do the opposite. These changes help reduce stress and support natural rhythms.

    Control methods vary to fit your needs. Some have LCD displays and buttons for direct programming. Others use smartphone apps or web dashboards for more features. Many integrate with smart home systems for voice commands and automated scenes.

    Multi-channel control allows for spectrum management. Timers can manage different channels for white, blue, and red LEDs. This lets you simulate complex spectra or add moonlight phases for coral spawning cues.

    Smart aquatic systems often control more than just lights. Many can run water pumps, heaters, and automatic feeders directly or through smart plugs and relays. This makes the unit a versatile appliance timer for the whole aquarium.

    • Simple schedules: on/off cycles using programmable fish tank timers.
    • Dynamic control: intensity and color ramps via smart aquarium timers.
    • Multi-device management: pumps, heaters, and feeders coordinated by an advanced aquarium timer.

    Benefits of Using Smart Timers

    Smart timers for fish tanks keep light cycles steady. This means your fish, plants, and corals have a predictable day and night. This predictability reduces stress and supports normal feeding and breeding rhythms.

    It also helps plants and corals get the light they need for photosynthesis. This is key for their health.

    Smart timers control light transitions and dimming. This lowers the risk of sudden spikes that can trigger algae. By limiting daily light hours, you prevent excess nutrient blooms.

    This helps keep your aquarium ecosystem balanced.

    Pairing a smart timer with LED fixtures makes your tank more energy-efficient. It reduces power use by adjusting intensity during low-need periods. This saves you money over time.

    A wifi enabled aquarium timer lets you control your tank from anywhere. You can adjust settings, maintain stable cycles, and troubleshoot without being there.

    Automated lighting also adds safety. It simulates occupancy when you’re away. Scheduled or randomized light patterns mimic home lighting routines for security.

    • Health: stable photoperiods support immune function and normal behavior.
    • Algae control: gradual ramps and limited hours reduce blooms.
    • Convenience: automation removes the need for manual switching.
    • Savings: an energy-efficient aquarium timer lowers electricity use.
    • Integration: a wifi enabled aquarium timer can join smart home routines.

    Choosing a quality smart timer for fish tanks gives you better control over lighting. It makes maintenance simpler and offers benefits for your tank’s inhabitants and your wallet.

    Setting Up Your Smart Timer

    Before you buy, do some research. Find out how much light your plants need. Freshwater plants usually need 8–10 hours of light. Reef systems might need more.

    Plan the light schedule you want. Think about the sunrise and sunset times you want to mimic. Also, decide which devices you’ll control, like lights and pumps.

    Choose the right hardware for your needs. An in-fixture controller like the Kessil A360X is great for controlling channels. Smart plugs work well for basic schedules. For more control, consider a dedicated aquarium controller like the Neptune Systems Apex.

    Install everything carefully. Mount fixtures and controllers away from water. Use GFCI-protected outlets and avoid wet areas. Make sure cables are safe from water.

    Program your lights to mimic natural light. Start with a 20–60 minute ramp for sunrise and sunset. Use blue light during the day for photosynthesis. In the evening, switch to warmer tones.

    Connect your devices to the network. Link them to your home network and enable remote access. Create scenes and save backups. Use the app to adjust light settings.

    • Run a 24–72 hour test cycle and watch behavior.
    • Look for changes in fish activity, plant health, and algae growth.
    • Adjust photoperiod length or intensity based on observations and water parameters.

    Test and verify until the system is stable. A short trial helps you find timing issues. Use a digital aquarium lighting timer for precise control. Regular checks keep your display healthy.

    Common Mistakes to Avoid

    When you install smart aquarium timers, keep schedules steady. Changing day length or overriding cycles too often confuses fish and other animals. Keeping daily cycles consistent helps maintain their natural rhythms and reduces stress.

    Avoid sudden on/off transitions. Sudden light changes can startle fish and don’t mimic natural day and night. Choose a smart timer that supports gradual light changes.

    • Don’t over-light. Running lights too long or too bright can fuel algae growth. Match light periods to species needs and use energy-efficient LEDs.
    • Watch color temperature. Blue-rich light late in the day can disrupt natural cues. Use warmer, lower-intensity tones in the evening.
    • Check placement and safety. Keep cords away from splash zones, use GFCI outlets, and keep electrical equipment dry to avoid hazards.

    Don’t just set and forget. Even the best timers can’t replace observation. Watch fish behavior, plant growth, and water quality. Make small adjustments when needed.

    1. Confirm your timer supports gradual ramps and seasonal changes.
    2. Set photoperiods that match the needs of fish, plants, and corals.
    3. Run periodic checks on wiring, outlets, and fixture placement.

    Choosing the right model is key. Look for a smart aquarium timer that offers reliable scheduling, ramping, and safety features. A well-chosen timer keeps your system stable and reduces common setup errors.

    Keep records of changes you make. Small, documented tweaks help you learn what works. Over time, an advanced aquarium timer paired with careful observation will help your aquarium thrive.

    Smart Timers for Different Aquatic Systems

    For a freshwater community tank, aim for 8–10 hours of light. Use timers to create a gradual sunrise and sunset. This helps prevent algae by keeping light levels moderate.

    Heavily planted tanks need bright light for 8–10 hours. Add good nutrients and CO2 control. Use a digital timer for a short ramp at dawn and dusk. A midday dim period helps control algae while keeping plants healthy.

    Reef and coral systems need precise control. Use an advanced aquarium timer or controller like Neptune Systems. Schedule ramps, color changes, and moon phases for natural behavior and fluorescence.

    Breeding setups benefit from mimicking seasonal day lengths. Smart timers can gradually change photoperiods to trigger spawning. This approach helps manage reproductive cycles without stress.

    For systems with refugia or pump controllers, coordinate them with main lighting. A smart timer can switch refugium lighting during main lights-off. This keeps nutrient export steady. Syncing pumps and lights balances filtration and nutrient cycles.

    • Freshwater community: 8–10 hours, gradual ramps with programmable fish tank timers.
    • Planted tanks: bright 8–10 hours, midday dimming with a digital aquarium lighting timer.
    • Reef tanks: multi-channel scheduling, actinic plus white control with an advanced aquarium timer.
    • Breeding: simulated seasonal day-length shifts using smart timers.
    • Systems with refugia: coordinate pumps and refugium lights using a smart aquatic appliance timer.

    Integration with Smart Home Systems

    You can connect a wifi enabled aquarium timer to Apple HomeKit, Amazon Alexa, Google Home, or IFTTT. This lets you create routines that match your home’s schedule. For instance, your aquarium lights can turn on when your bedroom lights do in the morning.

    Smart aquarium timers offer both local and cloud scheduling. Use local settings as a backup in case your network goes down. This way, your tank stays on schedule even without internet.

    Automation across devices makes your aquarium respond to your home’s needs. You can set lights to dim when you leave or play soothing music and moonlight at night. This creates a peaceful atmosphere for your fish.

    Some controllers have APIs or cloud integrations for more control. This lets developers and advanced hobbyists create custom scenes. These scenes can link your tank’s lighting, filtration, and feeders with your smart home.

    Remember to keep your aquarium devices secure when connected. Use a guest network, strong passwords, and update firmware often. Also, set your tank to a safe state if automation fails.

    • Use local schedules on your wifi enabled aquarium timer for redundancy.
    • Build coordinated scenes with smart aquarium timers and smart speakers.
    • Secure your smart timer for fish tanks on a separate network and update firmware.

    Monitoring and Adjusting Light Cycles

    Use simple tools to track light and behavior. A PAR or PPFD meter measures intensity for plants and corals. An aquarium camera lets you watch fish activity and feeding patterns. Many controllers and apps log on/off times so you can spot missed cycles when using a digital aquarium lighting timer.

    Watch biological signs daily. Active, well-fed fish and bright plant leaves suggest a healthy photoperiod. Coral polyp extension and stable coloration are good signs. If fish hide more or algae blooms increase, you may need to tweak settings on programmable fish tank timers.

    • Log water chemistry alongside light changes. High nitrate and phosphate can fuel algae under strong light.
    • If algae grows, shorten the photoperiod by 15–30 minutes or lower intensity for a few days.
    • If plants appear pale or leggy, raise intensity or add 15–30 minutes while checking nutrients and CO2.

    Make seasonal shifts slowly to mimic nature. Gradual changes over weeks reduce circadian stress and encourage natural behaviors, such as spawning. Use programmable fish tank timers to ramp dawn and dusk levels instead of abrupt switches.

    Balance husbandry with energy use. Schedule low-intensity periods during early morning and late evening. Use an energy-efficient aquarium timer and LED dimming to cut power draw without upsetting your tank’s rhythm.

    Keep notes and review them monthly. Small, consistent adjustments work better than large, sudden changes. That approach helps you protect livestock while getting the most from your digital aquarium lighting timer and energy-efficient aquarium timer choices.

    Customer Reviews and Recommendations

    Most users love the convenience of smart aquarium timers. They say their fish behave better and algae blooms decrease. Reef keepers also report healthier corals thanks to reliable ramping and control.

    But, some users face setup challenges and issues with wireless connections. Beginners might find the app hard to use. If you need smooth ramping, consider a smart aquatic appliance timer or a wifi enabled aquarium timer with a smart plug.

    • Top picks from experienced users: Neptune Systems Apex for advanced channel control; Kessil and Fluval for built-in ramping and spectral options; Current USA and Orphek for reef-grade spectrum.
    • Simple, cost-effective options: TP-Link Kasa and Wemo smart plugs for outlet-level scheduling when you do not need fixture-level control.

    When shopping, look for timers that offer ramping and spectral control for corals. Make sure they have local scheduling fallback and are GFCI-safe. Also, check if they work with your smart home system.

    Here are some tips: Start with short photoperiods and test new schedules for a few weeks. Keep schedule backups. Consider linking your lighting to HomePod Mini or the Home app for a coordinated look.

    1. Confirm ramping and spectral channels on product pages and manuals.
    2. Choose devices with reliable Wi‑Fi or local fallback to avoid gaps in your lighting cycle.
    3. For complex reef systems, consult experienced aquarists or a local aquarium service for PAR guidance and tailored programming.

    Overall, investing in smart aquarium timers or a smart aquatic appliance timer can save you time. They offer stability and easier care for your aquarium.

    Conclusion and Next Steps

    Smart aquarium timers help you create a natural light cycle for your fish and plants. They reduce algae, keep fish healthy, and save energy. Plus, they work well with smart home systems for extra convenience.

    First, check your tank’s lighting needs and what you want to control. This includes LEDs, pumps, and feeders. Pick a timer that can adjust light levels and colors smoothly, supports scheduling, and has separate channels.

    Begin with a simple schedule: a gentle sunrise, 8-12 hours of bright light, and a soft sunset. Run this for 2-4 weeks to see how your tank responds. Watch your fish, plants, and water quality closely. Then, adjust the light as needed.

    Make sure your setup is secure with local schedules and backups. Keeping a regular light cycle improves your tank’s health and cuts down on upkeep. Using smart timers makes this easy and consistent.

    FAQ

    What is a smart aquarium timer and how does it differ from a basic plug-in timer?

    A smart aquarium timer is a device that automates your aquarium’s lighting schedule. It can control other equipment like pumps or heaters. Unlike basic timers, smart timers offer programmable schedules and can adjust light intensity and color.

    They also have features like sunrise/sunset ramps and remote control via Wi-Fi or Bluetooth. Many models can control multiple lights or fixtures, allowing for precise lighting and color changes.

    Why should I automate aquarium lighting with a timer instead of switching lights manually?

    Automating lighting helps create a consistent daily cycle for your fish and plants. This cycle supports their natural behaviors and growth. It also reduces stress and improves feeding and breeding behaviors.

    By automating lighting, you avoid accidental prolonged lighting that promotes algae. It saves energy and frees you from daily adjustments.

    How do sunrise/sunset ramps and color tuning benefit my aquarium?

    Sunrise/sunset ramps gradually change light intensity to mimic natural day transitions. This avoids sudden changes that can stress your fish. It also supports their natural activity cycles.

    Color tuning shifts light color throughout the day. It helps regulate your fish’s behavior and supports photosynthesis. Together, they reduce stress and better simulate natural habitats.

    Which types of smart aquarium timers are available and which should I pick?

    There are various smart aquarium timers available. You can choose from plug-in digital timers, inline controllers, Wi-Fi/Bluetooth smart plugs, and dedicated aquarium controllers. Consider your needs and the features you require.

    For simple setups, a basic plug-in timer might be enough. For more complex setups, consider a dedicated aquarium controller. Make sure it offers local scheduling, ramping, and is GFCI-safe.

    Can smart aquarium timers control devices other than lights?

    Yes, many smart aquarium timers can control devices other than lights. They can operate automatic water pump controllers, heaters, feeders, and refugium lights. This allows for coordinated control of your aquarium’s equipment.

    For simple setups, smart plugs can provide outlet-level control. For more complex setups, consider a dedicated controller like Neptune Systems Apex.

    How do timers actually control intensity and color—do they just switch power on/off?

    Basic timers switch power on and off. Advanced timers send control signals to adjust intensity and color. They follow user-defined curves for gradual changes.

    Multi-channel controllers can handle separate LED channels. This allows for complex lighting schedules and spectral shifts.

    What photoperiod should I program for my type of tank?

    The photoperiod depends on your tank’s inhabitants. Freshwater community tanks often do well with 8–10 hours of light. Heavily planted tanks may need 8–10 hours of higher PAR.

    Reef tanks require precise schedules—10–12+ hours with controlled blue and white channels. For breeding or seasonal behaviors, simulate gradual day-length shifts.

    How do I set up a basic schedule that’s safe for fish and plants?

    Start with a conservative schedule: a 20–60 minute sunrise ramp, 8–12 hours of peak daylight, and a 20–60 minute sunset ramp. Use blue-enriched light during mid-day and warmer tones in the evening.

    Run a 24–72 hour test to observe fish activity, plant growth, and coral extension. Adjust the schedule based on these observations.

    What common mistakes should I avoid when using aquarium timers?

    Avoid inconsistent scheduling and frequent manual overrides. These disrupt your tank’s natural cycles. Use gradual ramps instead of abrupt on/off transitions.

    Don’t over-light, as this can promote algae growth. Avoid running blue-rich light in the evening. Ensure your timer is GFCI-safe and never route cords where water can drip into outlets.

    How do I adjust schedules if I see behavioral or growth issues after changing lighting?

    Make small, incremental changes to your schedule. If algae increases, reduce photoperiod or intensity. If plants look pale or leggy, increase duration or intensity while ensuring nutrient and CO2 balance.

    For stressed or nocturnal-disrupted fish, restore previous schedules and lengthen ramps. Track changes over 2–4 weeks to refine your schedule based on biological responses and water testing.

    Can smart timers simulate seasonal changes to encourage breeding?

    Yes, smart timers can gradually change daily photoperiod to mimic seasonal changes. This can trigger spawning in species that respond to day length. Implement slow transitions to avoid disrupting their natural cycles.

    Combine photoperiod adjustments with other seasonal cues like water temperature shifts and feeding changes. This better replicates natural triggers for breeding.

    Are there safety considerations when installing smart aquarium timers?

    Yes, use GFCI-protected outlets and keep electrical devices away from wet areas. Create drip loops on cords and avoid running them across aquaria rims. Use waterproof-rated fixtures where required.

    For Wi-Fi devices, secure them on a guest network and keep firmware updated. For complex rigs, ensure redundant local scheduling or UPS backup to maintain critical systems during power or network failures.

    How much energy can I save with an automated schedule?

    Automated schedules can save energy by reducing run hours and dimming LEDs during low-need periods. LEDs are already efficient, and using timers can further reduce consumption. The exact savings depend on fixture wattage and schedule changes.

    Time-specific lighting and dimming typically yield meaningful reductions compared to continuous high-intensity operation.

    Where should I start if I’m new to automated aquarium lighting?

    Start by auditing your tank’s needs: identify species, current light fixtures, and devices to control. Choose a timer or controller that supports ramping and local scheduling. Program a conservative initial schedule and test it for 2–4 weeks.

    Monitor behavior, PAR, and algae. Back up schedules, secure network access, and consult product manuals or experienced aquarists for reef-specific PAR recommendations if needed.

  • Total Dissolved Solids: Why This Metric Matters for Shrimp Keepers

    Total Dissolved Solids: Why This Metric Matters for Shrimp Keepers

    Total Dissolved Solids (TDS) are the combined concentration of salts, minerals, and small amounts of organic matter in your aquarium water. They are reported in parts per million (ppm). You can also get them from conductivity readings in microsiemens.

    As a shrimp keeper, you should care because TDS affects osmotic balance and mineral availability. This includes calcium and magnesium, which shrimp need for molting and growth. Keeping TDS consistent supports reproduction and reduces stress. Sudden changes in TDS can be as harmful as extreme values.

    TDS is connected to other parameters you monitor, like pH, KH, GH, and nitrate. But it’s not a replacement for those specific tests. Think of TDS as a quick indicator of dissolved ions and organics that helps you spot changes fast.

    Regular TDS testing gives you an early warning for problems. Handheld TDS meters and conductivity meters are common tools in the hobby. They offer quick diagnostics. Use them alongside targeted tests: nitrates should stay below 20 ppm and ideally under 10 ppm. Elevated nitrates raise TDS and signal the need for water changes or biological adjustments.

    Understanding TDS measurement methods and the importance of TDS testing helps stabilize your tank environment. It protects sensitive species. Keep readings steady, check regularly, and use the right TDS measurement methods to maintain healthy shrimp colonies.

    Understanding Total Dissolved Solids (TDS)

    A detailed illustration of various methods for measuring Total Dissolved Solids (TDS) 
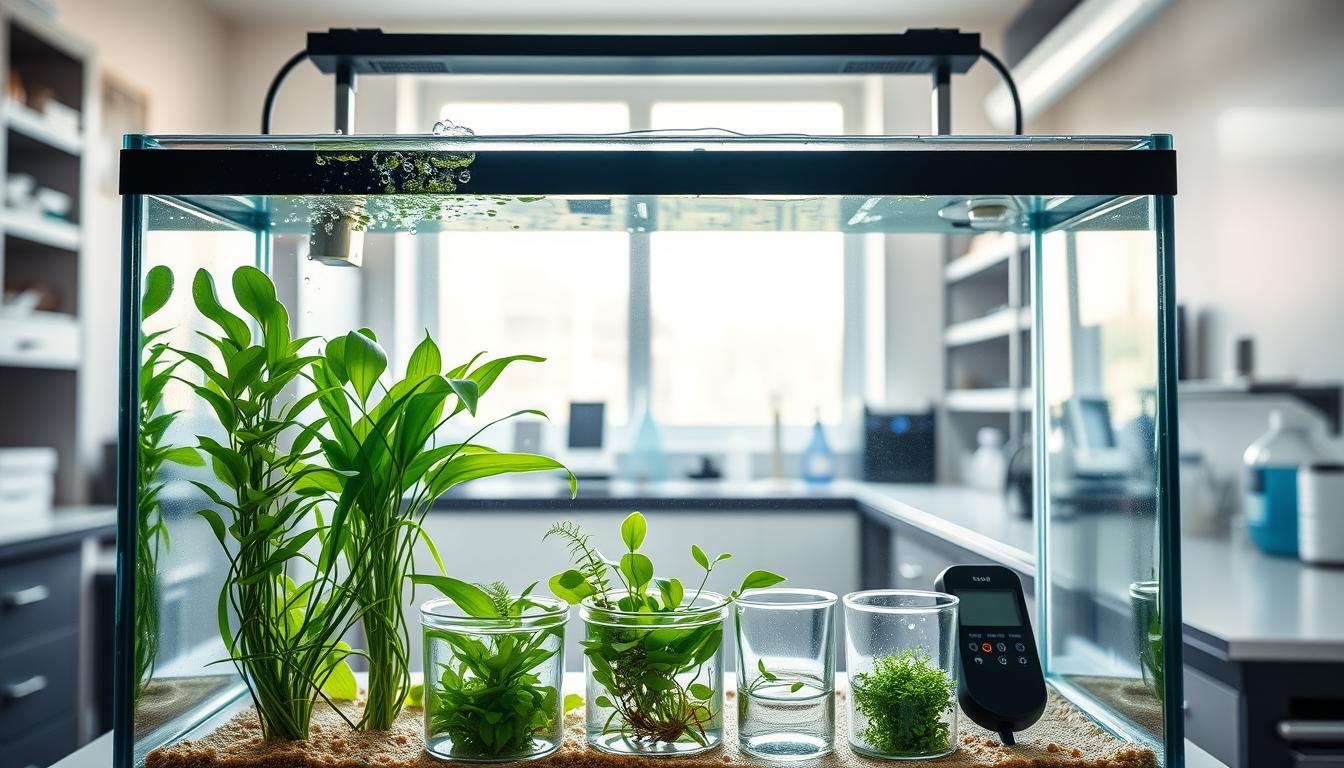
in a laboratory setting, focusing on an arrangement of equipment on a clean, modern lab table. In the foreground, a digital TDS meter displays readings, with a beaker containing clear water and dissolved solids beside it. In the middle ground, a scientist in professional attire uses a refractometer, carefully reading the measurement through an eyepiece. The background features shelves lined with scientific books and glassware, with soft, focused lighting highlighting the equipment. The atmosphere conveys a sense of professionalism and precision, with a serene color palette of blues and whites, underlining the importance of accurate water quality assessment for shrimp keepers. The image is crisp and clear, shot from a slightly overhead angle to provide depth.

    TDS measures the total dissolved ions and small organics in your aquarium water. It’s like a broad gauge for dissolved substances like calcium and magnesium. It also includes sodium, potassium, and some dissolved organics from food or plant decay.

    Most hobbyist TDS meters measure electrical conductivity to estimate concentration. This means readings show ionic content more than nonionic organics. When you learn how to test for TDS, expect meters to report parts per million based on conductivity, not a chemical inventory.

    TDS does not tell you which ions are present. To know calcium and magnesium, you need GH (general hardness) tests. Use KH test kits for carbonate hardness. Specific ion tests reveal nitrate, phosphate, and other contaminants. Use TDS measurement methods as a quick screen, not a substitute for targeted assays.

    Remember conversion factors and temperature. Many meters convert conductivity to ppm using a fixed factor. Temperature affects readings, so look for devices with automatic temperature compensation for consistent results. Follow manufacturer guidelines when you practice how to test for TDS.

    • Nitrate (NO3–) adds to TDS and can be a major inorganic contributor.
    • Aim to keep nitrate below 20 ppm and ideally under 10 ppm for shrimp systems.
    • High nitrate will raise ionic TDS and stress shrimp over time.

    High organic load from uneaten food, decaying leaves, or driftwood can raise dissolved organics. Those organics may not conduct well, yet they can worsen water quality and indirectly affect TDS readings. Regular maintenance, filtration, and targeted testing for nitrate and phosphate help you interpret TDS measurement methods correctly.

    The Importance of TDS for Shrimp Health

    A serene underwater scene showcasing the importance of Total Dissolved Solids (TDS) for shrimp health. In the foreground, a vibrant aquascape features healthy, colorful shrimp actively exploring lush green plants and fine substrate. The middle ground includes a clear testing kit with a TDS meter displaying a reading, symbolizing monitoring. Bubbles rise gently from a filter, emphasizing water quality. The background reveals a soft diffused light filtering through the water surface, creating a tranquil atmosphere. The scene is captured with a shallow depth of field, enhancing the shrimp’s vivid colors and the clarity of the TDS meter. The overall mood is one of serenity and health, underscoring the essential role of TDS in maintaining a thriving shrimp habitat.

    Shrimp need stable ionic levels and minerals to molt and grow shells. Low calcium and magnesium can lead to failed molts. This shows why TDS testing is key: it alerts you to any imbalances before they cause problems.

    Reproduction in shrimp is also tied to water chemistry stability. Berried females and young shrimp struggle with changes in their environment. Regular TDS testing helps keep the minerals right for breeding and growing young shrimp.

    Behavior can hint at stress in shrimp. Quick changes in TDS can cause them to hide, stop eating, or even die. Watching their behavior and testing TDS regularly helps you catch and fix issues fast.

    Even with good TDS numbers, microorganisms can be a problem. Bacteria, hydra, and vorticella grow in dirty water. They stress shrimp and can hide TDS issues.

    To fight these issues, use TDS tests with better feeding and filtration. Reducing food and improving biological filters helps. These steps help control organic matter and support TDS testing goals.

    Make sure to have a TDS test kit and an electronic meter for regular checks. Also, test for nitrate, GH, and KH to get a complete picture. Following best practices for TDS testing helps you manage your tank better and prevent health issues.

    Optimal TDS Levels for Different Shrimp Species

    Knowing the right TDS ranges is key for your water setup. For Neocaridina like Cherry shrimp, aim for 150–300 ppm TDS. Some strains can handle up to 400–450 ppm if other water conditions are just right.

    Caridina species, like Crystal and Caridina cantonensis, need even lower TDS levels. Hobbyists often aim for 80–200 ppm. Wild bee shrimp prefer very soft water, closer to the lower end of this range.

    Amano shrimp and larger species can handle higher TDS levels. But, it’s more important to keep mineral levels stable than to focus on high TDS numbers.

    Don’t forget to check GH and KH levels along with TDS. Calcium and magnesium are key for molting and successful broods, not just TDS.

    • Use Best practices for TDS testing: log TDS versus life events like molts and spawning to find species-specific setpoints.
    • Follow TDS testing guidelines when mixing RO water and tap water to reach target ranges.
    • Learn How to test for TDS with a reliable meter, calibrated regularly for accurate reads.

    Acclimate shrimp slowly when moving them between tanks with different TDS levels. Sudden changes can stress them and increase mortality.

    High TDS levels can be a sign of neglect or forgotten water changes. A case showed amano shrimp dying in such conditions.

    To keep TDS levels optimal, do regular water changes and mix RO water when needed. Monitor GH, KH, and TDS together to fine-tune your water for your shrimp’s needs.

    Testing Methods for TDS

    You can test TDS with simple, affordable tools. Hobbyists often use handheld digital TDS meters and conductivity meters. These are sold for aquaria and hydroponics. Brands like Milwaukee, Hanna Instruments, and Apera are common choices for reliable readings in ppm or µS/cm.

    Before you test, prepare a clean sample. Rinse the probe with tank water to avoid contamination. Dip the probe a few inches below the surface, away from film or scum. Wait for the readout to stabilize, then record the value as part of your TDS testing process.

    Follow the device instructions for cleaning and storage. Many meters recommend rinsing with distilled water and storing the protective cap with fluid. Replace probes or send the meter for service when accuracy drifts after months of use.

    Calibrate meters periodically using manufacturer-specified solutions. Calibration keeps readings accurate across the TDS testing process. If your meter lacks automatic temperature compensation (ATC), test at a consistent tank temperature or apply a manual correction to avoid skewed results.

    Use TDS testing equipment alongside chemical test kits for a fuller picture. A TDS test kit gives a quick total solids snapshot. Pair it with a nitrate test kit and GH/KH kits to identify specific ions that affect shrimp health.

    Keep this routine simple for daily monitoring. TDS meters offer fast guidance for water changes and RO/DI blending. Use the data to spot trends and adjust your maintenance schedule before small shifts become problems.

    • Handheld digital TDS meter: quick ppm readouts
    • Conductivity meter: useful for µS/cm and cross-checks
    • Calibration solution: required for periodic accuracy checks
    • Complementary kits: nitrate, GH, KH for detailed chemistry

    Proper care and a clear TDS testing process will keep your readings meaningful. Regular checks make it easier to protect sensitive shrimp species and to respond fast when water chemistry changes.

    Maintaining Appropriate TDS Levels

    Make changes slowly to protect your shrimp. Big changes in TDS can shock them, hurting Caridina species. Try to change TDS levels over hours or days, not all at once.

    Test the water before making changes. Check the TDS of your source and tank water. Keep a record of these tests. This helps you mix tap and RO/DI water and know how much remineralizer to add.

    Here are some ways to adjust TDS:

    • Change the water with low-TDS water or mix RO/DI with tap water to reach your goal.
    • Use remineralizers or commercial buffers from brands like Seachem and ADA to raise GH or TDS.
    • Feed less and remove extra leaf litter or driftwood to avoid high organic levels.

    Change some water regularly. Weekly or biweekly changes are good for many tanks. Do more often if you feed a lot, have a lot of fish, or nitrates are high.

    When increasing GH or KH, do it slowly. For example, a 10-gallon tank’s TDS rose to 1800 µS, causing shrimp loss. After stabilizing KH at about 4 dKH and GH around 7–8 (about 60 ppm), the keeper mixed RO water to target TDS near 600 µS. The shrimp then recovered.

    Use a reliable meter to test for TDS. Also, use test strips or lab kits for extra checks. Test before big water changes and keep a log to guide your mixing and remineralization.

    When increasing TDS, add GH boosters in small amounts and test after each addition. When decreasing TDS, plan water changes and measure until you reach a safe level for your species.

    Troubleshooting High or Low TDS Readings

    Start by checking your TDS meter. It can lose accuracy over time. Calibrate it before testing water or adding chemicals. This ensures your readings are correct.

    High TDS can come from not changing the water often. It can also happen if you overfeed or use hard water. Check your substrate and filters for trapped waste that adds to TDS.

    • Immediate fixes for high TDS:
    • Do partial water changes with low-TDS water. Aim to replace 20–50% of the water, depending on your shrimp’s sensitivity and the TDS level.
    • Reduce feeding, vacuum the substrate, clean filters, and remove rotting leaves or excess driftwood that leach organics.
    • Check nitrates; if they’re over 20 ppm, increase water changes and boost biological filtration.

    Low TDS often results from using RO/DI water without adding minerals. It can also come from using too much distilled water or softening tap water too much. Low minerals can harm shrimp molting and reproduction.

    • Fixes for low TDS:
    • Add a reputable remineralizer or measured aquarium salts and calcium-magnesium supplements to increase GH and TDS slowly.
    • Keep an eye on GH and KH as you adjust TDS to ensure mineral ratios are right for shrimp health.

    Follow TDS testing guidelines closely when making changes. Make small adjustments and test daily. Sudden changes can stress shrimp and lead to death.

    A hobbyist once stabilized GH and KH, aiming for a TDS of 600–800 µS. They learned the hard way that sudden water changes and improper acclimation can kill amano shrimp. Always acclimate slowly and double-check mineral and TDS levels before making changes.

    Troubleshooting TDS involves both measurement and aquarium care. Use the TDS testing process and guidelines as your guide. Confirm meter accuracy, find the cause, make small fixes, and watch until things stabilize.

    Regular Monitoring: A Must for Shrimp Keepers

    It’s important to test your aquarium water regularly. For small, stable tanks, do it once a week. If you make big changes or add new fish, test more often, like two or three times a week.

    Keep a log or digital record of your tests. Write down the date, TDS reading, and other important details. This includes water changes, feeding, and any new shrimp or algae problems.

    • Test source water—tap and RO—to know baseline values.
    • Test after water changes to confirm mixing ratios.
    • Test before adding sensitive shrimp or making big adjustments.

    Looking at trend data is very helpful. It shows slow changes in TDS levels. This helps you plan when to do water changes.

    For accurate TDS testing, use a meter and also check nitrate and GH/KH levels. This gives a complete picture of your water’s health.

    Be consistent with your TDS testing and follow guidelines. This helps you make smart decisions and avoid overreacting to one reading.

    1. Record baseline values for source and tank water.
    2. Schedule routine tests and log each result.
    3. Compare trends, not single numbers.
    4. Adjust feeding and filtration to control ion buildup.

    If TDS levels are rising, cut back on feeding. Good biological filtration helps keep the water clean and prevents problems.

    Follow simple TDS testing guidelines and keep detailed records. Your notes will guide you to a healthy environment for your shrimp. Regular checks make caring for your tank easier and more predictable.

    Professional Help for TDS Issues

    If you notice many shrimp deaths or molting problems, even with stable TDS readings, it’s time to get help. Take water samples from your source and tank to the experts. They can test both for you.

    Seeing high TDS levels that don’t go away with water changes or RO blending is a red flag. Visit local aquarium stores with shrimp experts. They can test your water, suggest RO/DI units like APEC or iSpring, and recommend remineralizers from Seachem or AquaVitro.

    For complex tanks and sensitive shrimp, getting the mineral balance right is key. Reach out to experienced hobbyists or forums for your shrimp species. They can guide you on TDS testing and acclimation.

    • Use a TDS test kit at home, then share those readings with professionals for faster diagnosis.
    • Consider a water testing lab if you suspect specific contaminants; they provide detailed ion analysis that a basic TDS meter cannot.
    • Ask professionals to help select and calibrate TDS testing equipment so your meters stay accurate over time.

    Before you meet with experts, keep a record of your water parameters and care actions. Note any dosing, substrate changes, and water sources. This helps professionals spot patterns and rule out simple errors.

    When looking for help, choose places that show they know how to use TDS test kits and follow guidelines. This approach cuts down on uncertainty and helps you get your shrimp’s water stable again.

    Conclusion: The Role of TDS in Successful Shrimp Keeping

    Testing for TDS is key to keeping your shrimp healthy. It shows you the dissolved ionic load in the water. This helps prevent osmotic stress, failed molts, and reproductive issues.

    It’s also important to test for nitrate, GH, and KH. This gives you a full picture of your water quality. It helps avoid surprises that single metrics can miss.

    To test TDS well, use a reliable TDS meter. Calibrate it and log your readings. Test regularly, matching the schedule to your tank’s stability.

    Control feeding and organic inputs. Use targeted water changes or RO blending to adjust TDS levels. This keeps them in the right range for your shrimp.

    Remember, different shrimp species need different TDS levels. Neocaridina can handle higher ranges, while Caridina need lower, more stable levels. Keep your filtration good and feed wisely to prevent problems.

    Treat your water chemistry as a whole. If you face ongoing issues, get professional help. This can help solve unexplained problems and protect your shrimp.

    FAQ

    What is Total Dissolved Solids (TDS) and how is it reported?

    Total Dissolved Solids (TDS) is the sum of salts, minerals, and some organic matter in water. It’s usually shown in parts per million (ppm). You can also see it in microsiemens per centimeter (µS/cm) from electrical conductivity.

    TDS meters measure dissolved ions, not all organic matter. This means they show ionic content better than nonionic organics.

    Why should you, as a shrimp keeper, care about TDS?

    TDS affects the balance of minerals in water, which is key for shrimp. It helps with molting, growth, and reproduction. Keeping TDS stable prevents sudden changes that can harm shrimp.

    TDS is a quick way to check dissolved ions and organics. But, it’s not a substitute for specific tests like pH, GH, KH, or nitrate.

    How does TDS relate to other water quality parameters like pH, GH, KH, and nitrate?

    TDS is connected to GH and KH because they measure mineral content. Nitrate also adds to TDS. Aim for nitrate levels below 10 ppm.

    What are the common TDS measurement methods and TDS testing equipment?

    Most hobbyists use handheld digital TDS meters and conductivity meters. These tools show ppm or µS/cm readings. Some meters have automatic temperature compensation (ATC).

    TDS test kits are available, but meters are the usual quick check. Popular brands and general-purpose meters are widely used by shrimp keepers.

    How do TDS meters work and what are their limitations?

    TDS meters estimate concentration from electrical conductivity. They accurately show ionic content but are less sensitive to nonionic organics. Temperature affects conductivity, so meters with ATC adjust for this.

    TDS meters can’t tell you which ions are present. Use GH/KH and specific ion or nitrate tests for that detail.

    What TDS ranges are appropriate for common shrimp groups?

    Neocaridina shrimp, like Cherry shrimp, usually tolerate 150–300 ppm TDS. Some strains can handle up to 400–450 ppm. Stable midrange values are best.

    Caridina shrimp, such as Crystal shrimp, often need lower TDS ranges, commonly 80–200 ppm. Some wild bees require very soft water. Amano and larger driftwood-associated species are often more tolerant of higher TDS but need balanced minerals.

    How should you test TDS step-by-step with a handheld meter?

    Rinse the probe with tank water to avoid contamination. Dip the probe into a sample away from surface scum and wait for the reading to stabilize. Record the value. Rinse and store the meter per the manufacturer’s instructions.

    Calibrate periodically with the recommended calibration solution. Replace probes or recalibrate after months of use if accuracy drifts.

    How often should you test TDS?

    Test at least once a week in stable, lightly stocked tanks. Increase frequency to 2–3 times weekly during water-chemistry adjustments, after adding livestock, or while troubleshooting problems.

    Test source water (tap and RO) and after water changes to verify mixing ratios when adjusting TDS.

    What are best practices for TDS testing and record keeping?

    Maintain a log of date, TDS reading, GH, KH, nitrate, recent water changes, feeding changes, and any notable life events (e.g., molts, spawnings). Record trends to spot slow drift caused by evaporation, ion buildup, or overfeeding.

    Test source water before changes and mix RO/DI and tap water according to recorded target TDS. Calibrate and verify meter accuracy before acting on unusual readings.

    What causes high TDS and what immediate fixes can you use?

    Common causes include infrequent water changes (nitrate/ion buildup), overfeeding and organic breakdown, hard tap water, or adding salts/minerals too freely. Immediate fixes: perform partial water changes with low-TDS or RO/DI-mixed water (replace 20–50% depending on sensitivity), reduce feeding, clean filters and substrate, and remove decaying organics.

    Check nitrate—if >20 ppm (ideally >10 ppm), increase water changes and biological filtration. For severe or persistent high TDS, seek professional testing of source water or expert help.

    What causes low TDS and how do you safely raise it?

    Low TDS often results from using pure RO/DI or distilled water without remineralization. To raise TDS gently, use aquarium remineralizers or GH boosters (brands like Seachem, ADA, AquaVitro are commonly used) to add measured amounts of calcium and magnesium.

    Monitor GH and KH while raising TDS to ensure proper mineral balance for molting and reproduction.

    How quickly should you change TDS when adjusting tanks with sensitive shrimp?

    Adjust TDS gradually. Sudden large changes can cause osmotic shock. Change TDS incrementally over hours or days when possible—

    especiall

    y for delicate Caridina species. When performing water changes, match temperature and aim for small stepwise changes in mineral concentration and TDS to avoid stress, failed molts, or mortality.

    How do organic loads and microorganisms affect TDS and shrimp health?

    High organic load from uneaten food, decaying plant matter, leaf litter, and driftwood increases dissolved organics and can indirectly raise perceived water-quality issues even if ionic TDS is moderate. Microorganisms (bacteria, hydra, vorticella) proliferate in tanks with high organic load and poor maintenance, complicating shrimp health. Cut back feeding, remove excess organics, and improve biological filtration to reduce blooms that can affect TDS-related conditions.

    What equipment should you pair with a TDS meter for thorough monitoring?

    Pair a reliable TDS or conductivity meter with a nitrate test kit and GH/KH test kits. Use RO/DI units (brands like APEC or iSpring) if you need low-TDS source water, and consider remineralizers (Seachem, AquaVitro) to adjust minerals. Professionals or hobby shops can help select and calibrate equipment.

    What are the recommended actions if your tank shows very high TDS readings?

    Verify meter accuracy via calibration. If confirmed high, reduce TDS with partial water changes using low-TDS or RO-mixed water, reduce feeding, clean filters and substrate, and remove decaying organics. Monitor nitrate—if >20 ppm, perform more frequent water changes and improve biological filtration. For severe or persistent high TDS, seek professional testing of source water or expert help.

    When should you seek professional assistance for TDS-related issues?

    Seek help if you experience repeated unexplained mortalities or widespread molting failures despite stable readings, persistent high TDS that doesn’t respond to standard water changes and RO blending, or complex multispecies tanks where delicate breeding stock require precise mineral composition. Local aquarium stores, water-testing labs, and experienced hobbyist communities can offer targeted diagnostics and solutions.

    Can you give practical tips and an example showing the consequences of neglected TDS?

    Test source and tank water before changes, log trends, calibrate your meter, and adjust slowly. Reduce feeding and maintain good biological filtration to prevent organic buildup. For example, a hobbyist reported TDS climbing to very high values (reportedly ~1800 µS), which correlated with livestock losses, including amano shrimp. After stabilizing KH and GH (KH ≈ 4 dKH, GH ≈ 7–8) and lowering TDS by mixing RO to a target ~600 µS, the tank recovered. The lesson: slow, measured corrections and attention to mineral balance matter.

    How should you combine TDS testing with other routine maintenance?

    Use TDS meters for quick daily or weekly checks, and combine them with regular nitrate, GH, and KH tests. Maintain scheduled partial water changes (weekly or biweekly sized to stocking and feeding). Cut feeding if nitrate or organic load climbs. Log chemistry and life events (molts, spawnings) to find your species-specific ideal TDS setpoints and follow best practices for TDS testing and adjustment.

    What are the top takeaways about TDS for shrimp keepers?

    Regular Testing for TDS gives a fast, actionable indicator of dissolved ionic load and helps prevent osmotic stress, failed molts, and reproductive issues. Use a reliable TDS meter, calibrate it, test regularly, and log trends. Combine TDS readings with nitrate and GH/KH testing, control feeding and organic inputs, and adjust TDS gradually via water changes or RO blending. Match TDS and mineral balance to the shrimp species you keep—Neocaridina are more forgiving, Caridina often need lower and more stable TDS—and seek professional help when problems persist.

  • How Water Temperature Affects the Activity and Health of Your Fish

    How Water Temperature Affects the Activity and Health of Your Fish

    Keeping your fish active and healthy depends on a stable aquarium temperature. Fish, being ectothermic, rely on water temperature to regulate their metabolism. Tropical fish thrive between 75°F and 80°F, while cold-water fish like goldfish prefer below 70°F. Temperate species fall in between.

    Temperature affects fish metabolism in your tank. Warmer water means fish eat and move more. Cooler water slows them down. This change impacts oxygen needs, feeding, growth, color, and breeding.

    Outside your tank, environmental changes like heat waves affect water bodies and fish survival. For example, warmer water in places like the San Francisco Estuary can increase swimming speed and predation risk. Similar effects happen at home: wrong temperatures can stunt growth, reduce spawning, and make fish more prone to disease.

    Remember this aquarium temperature guide: match species needs, avoid sudden changes, and watch your tank’s conditions. Temperature controls physiology, behavior, and ecosystem interactions. Controlling it is key to protecting your fish.

    Understanding Metabolism in Fish

    A detailed cross-section of a tranquil aquarium scene, illustrating the impact of water temperature on fish metabolism. In the foreground, vibrant tropical fish, such as neon tetras and guppies, swim gracefully, showcasing varied activity levels, with some darting energetically and others gliding leisurely. The middle ground features an aquatic plant garden, lush and well-lit, emphasizing healthy growth. In the background, a thermometer subtly indicates warmer water temperatures, with sunbeams filtering through the water, creating shimmering patterns. Use soft, natural lighting to enhance the serene atmosphere, with a slightly blurred background for depth. The viewpoint should be from an aquarium's side, providing a clear focus on the fish's behavior relative to their environment. The mood is enlightening and educational, reflecting the relationship between temperature and metabolic activity.

    Fish are ectotherms, meaning their body temperature is set by their environment. Changes in the aquarium’s temperature affect their metabolism. This, in turn, influences their activity, appetite, growth, and immune system.

    In colder water, fish move slower and eat less. Their immune system also weakens. On the other hand, warmer water speeds up their metabolism and oxygen needs. This can increase stress levels.

    Metabolic rate is how fast energy is used in fish. It affects their feeding, digestion, growth, and reproduction. Each fish species has a best temperature range for its metabolism.

    • When temperatures are off, stress hormones like cortisol rise. Energy shifts to coping with stress instead of growth and immunity.
    • Behavior changes when fish need to adjust to temperature changes. They might use thermogenesis or cooling strategies.
    • It’s important to match tankmates by their thermal needs. What’s good for one species might harm another.

    To keep your fish healthy, adjust their diet and tank conditions to their metabolic rate and thermal preferences. Knowing how temperature affects metabolism helps reduce chronic stress. This improves their long-term health.

    The Role of Temperature in Fish Metabolism

    A vibrant underwater scene depicting the impact of temperature on fish metabolism. In the foreground, various fish species are shown swimming energetically in warmer waters, showcasing active gills and bright colors. In the middle, a gradual gradient of water temperature is illustrated with subtle changes in lighting, transitioning from warm hues of orange and yellow to cooler blues and greens. The background features aquatic plants swaying gently, reflecting the metabolic effects of temperature changes. Soft, dappled sunlight filters through the water surface, creating a serene yet dynamic atmosphere. The overall mood is lively and educational, emphasizing the importance of temperature on fish health. The image is shot with a wide-angle lens to capture the depth and beauty of the underwater environment, ensuring clarity and vividness in all details.

    Water temperature controls how fast your fish’s body works. Warmer water makes fish move and eat more. On the other hand, colder water slows them down.

    Big changes in temperature can be hard for fish to handle. Slow changes let them adjust better. But sudden changes can be too much for them.

    Studies on fish like delta smelt show how temperature affects them. At 21°C, they swim faster and react more to alarm cues. This can lead to exhaustion and more chances of being eaten.

    Temperature affects how fish digest food, keep the right balance of salts, and get oxygen. Fish can adjust to some temperature changes, but big or sudden changes can cause stress.

    • Watch small changes: even a few degrees alter metabolic rate and oxygen needs.
    • Match feeding to temperature-driven energy budgets to avoid malnutrition or waste.
    • Improve aeration when you raise temperature to offset lower dissolved oxygen.

    When you take care of your aquarium, think about how temperature works with other factors. Light, how many fish you have, and water quality all play a part. Balancing these helps keep your fish healthy and their metabolism stable. The right temperature is key to good care and happy fish.

    Effects of High Temperatures on Fish

    When water gets warmer, fish breathe harder and their bodies work faster. Warmer water has less oxygen, so fish need more but get less. This can make them gasp at the surface or move their gills quickly, showing they’re stressed.

    High temperatures also make fish more likely to get sick. Heat raises stress hormones, weakens their immune system, and slows healing. In aquariums, bacteria that keep water clean die at temperatures over 90°F. This can lead to dangerous spikes in ammonia and nitrite levels, harming fish even more.

    Studies show that warm water changes how fish behave. Delta smelt and others swim faster, break away from groups, and don’t calm down after being scared. These changes make them more vulnerable to predators like largemouth bass. They also have a harder time surviving in the wild when it’s too hot.

    Heat also affects how fish reproduce and grow. Warmer temperatures can make embryos grow too fast, change when they spawn, and make it hard for larvae to find food. This can lead to a shift in the types of fish that live in an area, favoring fast-growing species that prefer warmer water.

    • Watch for signs of heat stress: faded color, lethargy, rapid breathing, or surface gasping.
    • In tanks, avoid placing setups near vents, windows, or heaters that raise temperature.
    • Use quality heaters, thermometer probes, fans, or chillers for sensitive species when needed.

    To help fish in natural systems, create cool spots for them to escape the heat. Restoring wetlands, protecting deep pools, and managing water releases can provide these safe areas. They help keep oxygen levels high, supporting fish health and metabolism.

    Effects of Low Temperatures on Fish

    Cold water slows down a fish’s metabolism and activity. They might eat less, show dull colors, and stop showing usual behaviors. This happens when the water gets too cold for them.

    When fish eat less, they grow slower. Young ones might not grow right, and adults might not breed well. Some trout need cold water to spawn, but very cold water can mess with their development.

    Low water makes fish focus on basic survival. Their immune system gets weaker, making them more prone to diseases like Ich. They also recover slower from stress and can’t avoid predators as well.

    Even though cold water has more oxygen, it’s hard for fish to digest food. Slowly changing the water temperature helps fish adjust. But, staying in cold water for too long can make them less able to handle changes.

    • Match replacement water temperature during changes to avoid sudden cold exposure.
    • Keep true cold-water species, like goldfish, in their recommended ranges (often under 70°F).
    • Provide seasonal cues if breeding is a goal, balancing natural cold needs with safe limits.

    Knowing how temperature affects fish helps you take better care of your tank. Making small changes and keeping the water stable can help your fish stay healthy and active.

    Importance of Temperature Stability

    In nature, fish adjust to temperature changes by moving. But in your aquarium, changes happen quickly. This can stress fish a lot.

    Small changes can cause big stress. This stress can weaken their immune system. You might see slower growth and more sickness.

    Stable water is key for fish health. It helps their metabolism and keeps good bacteria. But sudden changes can harm these bacteria and fish.

    Studies show that temperature changes affect fish behavior. They can impact schooling and survival. This is why keeping a steady temperature is critical.

    • Use a reliable heater sized for your tank.
    • Consider multiple heaters in large tanks to avoid total failure.
    • Ensure good circulation so heat distributes evenly.
    • Match temperatures during water changes to prevent shock.
    • Avoid placing tanks near vents, drafts, or sunny windows.

    Keeping the temperature stable is vital. It helps fish stay healthy and reduces stress. Stable conditions also protect them from diseases.

    How to Monitor Water Temperature

    Put accurate thermometers in your aquarium and check them regularly. Digital probe thermometers offer precise readings. Stick-on strip thermometers are good for quick checks but might not always show the real temperature.

    Place sensors where they accurately reflect the tank’s temperature. Avoid areas like windows, exterior doors, heating vents, fireplaces, and drafty spots. These can give false readings. Also, keep probes away from direct heater exhaust to avoid high readings.

    In bigger tanks, use more than one thermometer. The Aqueon Heater Guide and other manufacturer advice can help you choose the right size heaters. Using two smaller heaters can provide better redundancy and even heating than one big unit.

    • Calibrate thermometers often to keep them accurate.
    • Make sure there’s good water flow around heaters for accurate readings.
    • Match the temperature of replacement water to avoid shocking fish.

    For outdoor or complex setups, use data loggers or integrated controllers. These devices record temperature over time. They help track daily and seasonal changes linked to air temperature and climate.

    Regular monitoring lets you react to changes in your tank’s environment. Watch for trends to spot temperature changes that could stress your fish.

    Adjust your care routine when temperatures change. As water temperature affects your fish’s metabolism, you might need to change feeding, aeration, or filtration rates.

    • Think about using alarm systems for sensitive species.
    • Have backup heaters or chillers ready.

    Adjusting Water Temperature Safely

    When you change the water temperature in your aquarium, do it slowly. This helps your fish adjust without getting stressed. Try to change the temperature by just a few degrees each day.

    Use a heater that’s the right size for your tank. Look for brands like Aqueon that offer guides for heater wattage. Place the heater so the warm water circulates well, avoiding hot spots.

    To cool your tank, start with evaporative cooling. Open the lid a bit and use a fan to cool the surface. For cold-water fish, consider a chiller made for aquariums.

    When mixing fish with different temperature needs, plan your changes carefully. Set the heater to a middle range and watch your fish closely. Make sure they have enough oxygen as their metabolism changes.

    • Match replacement water temperature during water changes to avoid shocks.
    • Use dual-heater setups for redundancy and quicker recovery from failures.
    • Have emergency plans for power outages, such as battery-powered air pumps and insulating blankets for tanks.

    In bigger systems and wild places, managers use cool-water releases and restored wetlands. These help fish find cooler spots and reduce stress from heat.

    Be careful of chemical changes when you adjust the temperature. Higher temperatures can harm good bacteria and cause ammonia and nitrite spikes. Test your water often after changes and be ready to do partial exchanges if needed.

    1. Make changes slowly: a few degrees per day maximum.
    2. Ensure circulation and oxygenation as metabolic regulation shifts.
    3. Observe fish for stress signs and adjust strategy if needed.

    Think about where you place your tank long term. Avoid direct sunlight and heat sources. Room temperature and sunlight can undo your careful adjustments and stress your fish.

    The Impact of Temperature on Fish Behavior

    Temperature changes how fish behave, whether at home or in nature. Cold water makes them move slower, eat less, and show less interest in breeding. On the other hand, warm water makes them swim faster, want to eat more, and can even harm their health.

    When the temperature drops suddenly, fish may act differently. They might swim less, look duller, and stop schooling together. These signs can mean they’re stressed and might even get sick.

    Studies on fish like the delta smelt show how temperature affects them. Warmer water makes them swim faster, spread out more, and stay scared longer. This can make them more vulnerable to predators and change how they live together.

    Temperature also controls when fish have babies and migrate. Changes in temperature can mess up when they spawn, affect who eats whom, and make it hard for baby fish to grow. This can change how entire ecosystems work.

    • Look for erratic swimming, gasping at the surface, or sudden aggression.
    • Note changes in schooling tightness and feed response.
    • Check oxygen, ammonia, and nitrite when behavior looks abnormal.

    Wild fish adjust their behavior to stay comfortable. In tanks, you have to help keep things stable. Small changes can help fish avoid stress and keep their metabolism healthy.

    Watch for changes in how fish eat, move, and interact. Catching these signs early helps you fix the problem. This way, you can keep fish healthy and their metabolism in check.

    Temperature Considerations for Different Species

    Match tankmates by their preferred temperature ranges. Tropical fish like it around 75–80°F. Goldfish and cold-water species prefer it under 70°F. Temperate species fall in between.

    When two species’ temperature ranges overlap, neither might do well at a compromise temperature. Plan heaters to keep the middle of a shared range. Choose tankmates with similar needs.

    Check the temperature needs of each species before buying. This simple step helps avoid chronic stress. Stress can change how they eat and their metabolism.

    Wild species often adjust to small warming by changing where they live and how well they survive. For example, delta smelt in estuaries are very sensitive to temperature changes. This is because air and water interact and affect their food and home.

    • Note thermal optima and tolerance limits for each species.
    • Consider reproductive cues: trout need cold water for spawning.
    • Account for temperature-dependent sex determination in some species.

    For breeding or aquaculture, slowly change the temperature to mimic seasons. Sudden changes can mess with their metabolism and reduce chances of successful breeding. Slow changes help fish adjust and keep their metabolism stable.

    Remember, oxygen demand goes up with temperature. Warm-water tanks might need chillers or more aeration to keep oxygen safe. Plan your equipment to meet the needs of your species.

    Research the thermal needs of your species, avoid mixing incompatible ones, and monitor the environment. These steps help keep the right temperature ranges and reduce risks from temperature changes.

    Conclusion: Keeping Your Fish Healthy Through Temperature Management

    Keeping your aquarium or pond water stable is key. It helps your fish stay healthy. This means managing the temperature right.

    Place your tanks away from drafts and direct sun. Use the right size heaters, and match the water-change temperature. This avoids sudden changes that can harm your fish.

    Use accurate thermometers and data loggers to monitor the water. Make slow changes to protect your fish from shock. Have backup heaters and fans ready for emergencies.

    Good water flow and regular water changes also help. This keeps the water healthy for your fish.

    Remember, the environment outside your tank matters too. Rising water temperatures can harm fish and change ecosystems. Choose fish that like the temperature you can keep.

    Watch for signs that your fish are stressed. Have a plan ready to help them. This way, you can keep your fish healthy and happy.

    Here’s a checklist to help you: check the temperature needs of your fish, use reliable monitoring tools, ensure good water flow and oxygen, make water changes that match the temperature, and have backup plans. With these steps, you can keep your fish healthy, even when the environment changes.

    FAQ

    How does water temperature affect the activity and health of my fish?

    Water temperature affects your fish’s metabolism. Warmer water makes them more active and hungry. But, cold water slows them down.

    If the water is too warm, your fish might breathe faster. They need more oxygen, but the water can’t provide it. This can stress them out and make them sick.

    On the other hand, cold water can make them less hungry and slow their growth. It can also weaken their immune system.

    In aquariums, temperature changes quickly. Long-term or frequent changes can harm your fish. It can stunt their growth, dull their colors, and shorten their lives.

    What does “understanding metabolism in fish” mean for how I care for my tank?

    Metabolism is how fast fish use energy. Temperature controls this rate. So, you need to match feeding, oxygen, and temperature to what your fish need.

    Feeding should match their appetite and digestion speed. The right temperature keeps their hormones stable. It also helps them fight off diseases better.

    How does temperature regulate fish metabolism?

    Temperature controls how fast enzymes work and how much oxygen fish need. In the right temperature range, fish are healthy. But, outside that range, they get stressed.

    Acclimation helps fish adjust to new temperatures. But, sudden or extreme changes can harm them. It can affect their digestion and how they get oxygen.

    What are the main risks of high temperatures in an aquarium?

    High temperatures make fish breathe faster and need more oxygen. But, the water can’t provide enough. This is stressful for them.

    They might show signs like rapid breathing, gasping, or aggression. High temperatures can also kill good bacteria. This can lead to ammonia and nitrite spikes.

    Chronic heat stress can weaken their immune system. It can also cause organ damage or suffocation if not fixed.

    How does cold water affect my fish?

    Cold water slows down fish. It reduces their activity, appetite, and immune defenses. This makes them more likely to get sick.

    It can also stunt their growth and coloration. Breeding may stop. Cold water holds more oxygen, but it slows down their digestion and enzyme function.

    Why is temperature stability important in a tank?

    Stable temperature is key for your fish’s health. It keeps their metabolism in check. It also helps beneficial bacteria to thrive.

    Changes in temperature can stress fish. It can weaken their immune system. Stable temperatures also help with reproduction and prevent sudden outbreaks of disease.

    How should I monitor water temperature effectively?

    Use accurate thermometers to check the temperature. Digital probes, stick-on strips, or integrated controllers work well. Check them often.

    For critical setups, use data loggers to track temperature changes. Place sensors away from heaters to avoid false readings. Large tanks might need multiple sensors and loggers.

    What are safe methods to adjust water temperature?

    Gradually change the temperature to let fish adjust. Aim for a few degrees per day. Use a quality heater for heating and evaporative cooling or a chiller for cooling.

    Match the temperature of replacement water during changes. Increase aeration as metabolism changes.

    How does temperature influence fish behavior I might notice?

    Temperature affects how fish behave. Warmer water makes them swim faster and more spread out. It can also make them more aggressive.

    Cold water makes them less active and hungry. Look out for signs like erratic swimming, aggression, or loss of group cohesion. These are signs of thermal stress.

    How do I choose species and tankmates based on temperature?

    Choose fish whose temperature preferences overlap. Tropical fish like 75–80°F, while goldfish prefer below 70°F. Temperate species fall in between.

    Set heaters to the midpoint of the shared range. Avoid mixing species with different temperature preferences. Research each species’ needs before stocking.

    What emergency or long-term measures protect fish when temperatures spike due to weather or equipment failure?

    Move tanks away from windows and vents during heat waves. Increase surface circulation and aeration. Use fans or chillers as needed.

    Have backup power solutions like battery-powered air pumps and dual heaters. In wild systems, use cold-water releases and tidal-wetland restoration to protect vulnerable species.

    What practical checklist should I follow to manage temperature and metabolic health?

    Check the temperature preferences of your fish before stocking. Set the heater to the middle of their preferred range. Use accurate thermometers and consider a data logger.

    Ensure good circulation and oxygenation. Match water-change temperatures. Use fans or chillers when necessary. Watch for signs of stress and have backups for emergencies.

    Regular monitoring helps adjust feeding and aeration to match metabolic needs.

  • Powering a Nano Tank

    Powering a Nano Tank

    Powering a nano tank means giving reliable electricity to all parts of a small aquarium, usually under 10 gallons. Your lighting, filtration, heater, and pumps need steady, safe power. This keeps equipment working well and fish or corals healthy.

    You aim for three things: steady performance, safety, and predictable behavior. Follow the manufacturer’s instructions. Choose NRTL-listed devices like UL-listed power supplies and timers.

    Rules and advice are important. OSHA and the National Electrical Code warn against using extension cords and unlisted devices as permanent wiring (see OSHA 29 CFR 1910.303). Use listed, properly rated components and follow instructions to avoid legal and safety risks.

    Risk data is clear. The Electrical Safety Foundation International links roughly 3,300 home fires a year to extension cords, with about 50 deaths and 270 injuries. The National Fire Protection Association found electrical failures caused around 13% of home fires from 2012–2016. Safe wiring and proper nano tank accessories are key in the U.S. home.

    In the rest of this guide, you’ll learn about choosing nano tank equipment, managing cables safely, and when to use GFCI and surge protection. You’ll also get tips on wiring, troubleshooting, routine maintenance, and upgrade options. These will help keep your nano tank setup efficient and safe.

    Understanding the Basics of Nano Tanks

    A beautifully arranged nano tank setup on a modern desk, featuring a small glass aquarium filled with vibrant aquatic plants and a few colorful fish swimming gracefully. In the foreground, a sleek power strip is neatly organized, with cables cleverly managed and secured to minimize risks near water sources. The background shows soft, natural lighting filtering through a nearby window, creating a serene atmosphere. The tank's LED lights gently illuminate the colorful ecosystem within, casting delicate reflections on the glass. The scene is captured from a slightly elevated angle, emphasizing the harmony between technology and nature. The overall mood conveys tranquility and showcases careful management of cables in a safe, aquatic environment, ideal for beginners in nano tank care.

    When setting up your nano tank, think about the electrical needs. You’ll need low-wattage LED strips for lighting, which use 5–30 W. Also, small filters for filtration, pumps for circulation, and heaters for temperature control.

    Calculate the total wattage needed for your setup. For example, a 10-gallon tank with LED lights, a 10 W filter, a 5 W pump, and a 25 W heater might use 50–70 W. This leaves room for other devices but remember to account for startup surges.

    Some devices, like heaters and pumps, use more power when they start. Plan for these surges when choosing your electrical setup. This way, your tank’s maintenance won’t cause unexpected power outages.

    Make sure outlets near your tank are GFCI-protected. This is important for safety, as recommended by the U.S. Consumer Product Safety Commission. Ensure your tank’s outlet has GFCI protection.

    If your home lacks outlets, don’t try to fix it with temporary solutions. OSHA and electrical codes advise against using extension cords as permanent solutions. If you need a new outlet, hire a licensed electrician to install a GFCI-protected one.

    Choose devices for your tank that are NRTL-listed, like UL-listed heaters and pumps. Follow the manufacturer’s instructions for safe use. This keeps your tank safe and your maintenance simple.

    • List the expected wattages for each device in your nano tank setup.
    • Factor in startup surges when calculating amperage needs.
    • Use GFCI-protected outlets near water for added safety.
    • Replace extension cords with permanent wiring when necessary.
    • Buy NRTL-listed equipment and follow the manufacturer’s instructions.

    Essential Equipment for Powering a Nano Tank

    A well-organized workstation featuring essential equipment for powering a nano tank, set against a clean and modern backdrop. In the foreground, showcase a compact nano tank with vibrant aquatic plants and small fish, illuminated by soft LED lighting. In the middle, place neatly arranged power strips with surge protectors, clearly designed for safe use near water sources. Include cords discreetly tied with cable management clips to emphasize organization. The background should depict a serene home environment, with light streaming in from a nearby window, creating a warm and inviting atmosphere. Use a macro lens effect to focus on the details of the equipment while slightly blurring the background, enhancing the equipment's importance. Ensure a professional ambiance, reflecting careful management of cables and safety near water sources.

    Before you start your aquarium, make a list of must-haves. First, get UL, ETL, or NRTL-listed LED fixtures for safe light. Then, use GFCI-protected outlets or power strips to prevent shock near water.

    Choose surge-protected power strips with internal circuit breakers or fuses. Household power strips usually have 15 A (1,800 W) or 20 A (2,400 W) ratings. Make sure the total wattage of your devices doesn’t exceed the strip’s limit.

    • Aquarium-grade submersible pumps and heaters with clear watt and amp labels.
    • Quality silicone-insulated cords for durability and water resistance.
    • Heavy-duty power strips or dedicated wall circuits when you run higher loads.
    • GFCI outlets for any receptacle near the tank and surge protectors for sensitive LED drivers and controllers.

    Most nano tank equipment fits in a 15 A circuit if planned well. For big heaters or high-power devices, use a dedicated circuit to avoid overloading. Always check each device’s amp and watt labels before plugging in.

    Avoid short extension cords. Choose power strips with cord lengths between 3 and 15 ft to reach outlets safely. Too much slack can cause tripping hazards and tempt daisy-chaining, which you should avoid.

    Using efficient nano tank equipment like low-wattage LED drivers and energy-saving pumps can improve reliability. Pair these with surge protection to safeguard controllers and timers from voltage spikes.

    Don’t forget the right nano tank accessories: cable clips, drip loops, and mounting brackets. These keep cords tidy and reduce moisture exposure. They make your system safer and easier to maintain.

    Managing Cables Safely Near Water

    When setting up your nano tank, plan where cables will go. Make sure cords are above the waterline. Use cord clips or cable channels to keep them from falling into the tank.

    Every cord should have a drip loop. This means letting the cable sag below the tank edge. This way, any water will run off the cord, not into the outlet. Make this loop permanent and easy to see for quick checks during maintenance.

    Don’t run cords through windows, doorways, or under carpets. This can cause overheating and fire risks. Always follow safety guidelines and keep cords away from heavy furniture where heat can build up.

    • Use cord clips, zip ties, and cable channels to reduce stress on plugs and to keep wiring neat.
    • Do not suspend power strips by their cords or by items plugged into them; that creates connection stress and wear.
    • Never daisy-chain power strips or use extension cords as permanent wiring. These practices increase resistance and heat.

    Equip circuits near water with GFCI protection. Use power strips rated for wet or damp locations only when specified as IP-rated or intended for those conditions. Keep standard indoor strips dry and away from splash zones during nano tank maintenance.

    Regularly check cords and plugs for damage. Look for fraying, discoloration, or loose connections. Replace damaged cords right away to avoid shock and fire hazards and ensure your nano tank setup is safe.

    Choosing the Right Power Strips

    Look for power strips with UL or ETL certification. Make sure they have a clear amperage or wattage rating. The strip’s maximum wattage should match the total load of your equipment.

    For heaters, lights, and pumps, choose 15 A or 20 A ratings. This ensures your setup is safe and efficient.

    For a more permanent setup, go for strips with internal circuit breakers or fuses. These add an extra layer of safety. For sensitive devices like LED drivers and controllers, look for active surge protection.

    Avoid basic, unprotected power strips. They are not safe for permanent wiring near aquariums. Never daisy-chain strips or plug one into another or an extension cord. This can overload circuits and is against fire-code recommendations.

    Consider the size and spacing of the strip. Aquarium transformers and bulky adapters need space. Choose a strip that can fit large plugs without blocking other sockets.

    Choose a cord length that reaches the wall outlet without extra cords. A 3–15 ft cord is usually enough. Too much cord can be a trip hazard and make cable management harder.

    Check the environmental rating before using a strip near moisture. Indoor strips are not safe for wet or damp locations unless they are GFCI-equipped or IP-rated for outdoor use. For wet conditions, use an IPX6-rated outdoor strip.

    Buy from reputable brands like APC, Belkin, or Legrand. Make sure the strip has visible wattage or amp labeling. Also, confirm it has surge protection for your efficient nano tank equipment.

    Install a properly rated strip and pair it with careful cable routing. Regularly check the load and condition of your equipment. This reduces risk and keeps your equipment running reliably.

    Creating a Safe Power Setup

    Put your nano tank near grounded outlets to keep cords short and neat. If cords block walkways, add more outlets on walls or floors. This makes paths clear and lowers the risk of tripping.

    Always check if outlets are grounded. Use three-prong plugs and never remove the grounding prong. This keeps your equipment safe and ensures nano tank safety.

    Install a GFCI outlet near your aquarium, like in bathrooms or kitchens. A GFCI outlet cuts power fast if there’s a ground fault. This reduces the risk of shock near water, as recommended by the CPSC.

    Use a dedicated circuit for high-draw devices like heaters, lights, and filters. This prevents overloads and keeps your setup stable.

    • Get a licensed electrician to add permanent outlets instead of using extension cords.
    • Follow National Electrical Code and OSHA guidelines for any new wiring.

    Mount power strips on the stand base, off the floor, and away from leaks. Make sure they’re secure and won’t get wet.

    Use surge protectors rated for aquarium gear if you’re worried about power quality. Test GFCI outlets often and replace any damaged cords or strips to keep your tank safe.

    Guidelines for Wiring Your Nano Tank

    Always hire a licensed electrician for any permanent outlet work in your nano tank. Don’t try to do it yourself for new circuits, hardwired outlets, or changes to wiring. A professional will make sure everything follows the National Electrical Code and gets the right permits.

    Only use equipment that’s been tested by a recognized lab like UL or Intertek. Make sure to install and use these devices as the manufacturer says. This follows OSHA rules and makes your tank maintenance safer.

    • Never use extension cords as permanent wiring.
    • Do not daisy-chain power strips or extension cords.
    • Choose power strips with built-in surge protection and individual switches when possible.

    Match the wiring and outlets to the total load of your tank’s devices. Ensure the amp ratings for cords, outlets, and breakers are high enough for heaters, filters, lights, and pumps. This stops overheating and lowers fire risk.

    Keep cords safe from damage. Don’t run them through doorways, windows, or walls. Keep them away from foot traffic, metal stands, and sharp edges. Use cord covers or grommets where cords go through surfaces.

    1. Label each circuit that serves the nano tank so you can shut down power quickly during maintenance.
    2. Place GFCI-protected outlets within reach of the tank to prevent shock hazards in wet conditions.
    3. Inspect cords and connections regularly as part of your nano tank maintenance plan and replace any damaged components.

    Use extension cords only when absolutely necessary. In homes, avoid long-term cord use for a reliable setup. In workplaces, follow safety rules and replace temporary cords with permanent wiring as needed.

    Keep a record of your wiring layout and save the manuals for each device. Good documentation helps your electrician, makes troubleshooting easier, and supports safe maintenance over time.

    Troubleshooting Electrical Issues

    Spotting electrical trouble early protects your fish and gear. Look for common symptoms like frequent tripping breakers, pumps or lights that cut in and out, warm power strips or cords, and any corrosion or frayed wires on nano tank equipment.

    Match symptoms to likely causes before acting. Tripping breakers point to an overload or short circuit. Intermittent pump or light failures often come from loose plugs, damaged cords, or worn connectors. Hot power strips or cords mean overload or high resistance. Corrosion and frayed wires usually result from moisture exposure or pest damage.

    • Unplug all devices and test each one on its own to isolate the faulty item.
    • Check power strip indicator lights and the status of surge protectors.
    • Inspect cords and plugs closely for fraying, melted insulation, or greenish corrosion on metal parts.

    Take safe remedial actions when you find a problem. Replace damaged cords and worn power strips in place of attempting repairs with tape. Move cords away from splash zones and secure them with clips or raceways. Install GFCI outlets near tanks to cut ground-fault risk and improve nano tank maintenance safety.

    Call a licensed electrician if issues persist. Persistent breaker trips, burning smells, visible arcing, outlet discoloration, or repeated GFCI trips can signal faulty wiring or overloaded circuits that you should not attempt to fix yourself.

    Follow basic fire-safety steps around electrical faults. Do not use water on electrical fires. If it is safe, cut power at the breaker and use a Class C-rated fire extinguisher for electrical fires. If you feel unsure or the situation is unsafe, evacuate and call emergency services immediately.

    Maintenance Tips for Electrical Components

    Make a plan to check your nano tank’s electrical parts regularly. Look at cords, plugs, GFCI outlets, and power strips every month. Watch for frayed wires, color changes, bent prongs, or signs of heat.

    If a cord is damaged or a plug doesn’t fit right, change it right away. Also, replace surge protectors that won’t reset. And, get rid of power strips that get warm even when not in use.

    Keep outlets and strips clean and dust-free. Use clips, sleeves, and covers to protect wires. Don’t cover cords or power strips with rugs or insulation, as it can cause heat buildup.

    • Test GFCI outlets monthly with the built-in test button.
    • Replace any GFCI that fails to trip or reset correctly.
    • Label cords so you know which device each one serves.

    Keep all equipment manuals, specs, and when you bought them in one place. This helps you keep track of when to replace things and when warranties end.

    Take care of your power strips by unplugging and cleaning them with a dry cloth often. Never plug too many things into one outlet. Use good surge protectors from brands like APC or Belkin when needed.

    Watch for any strange electrical issues like flickering lights, warm plugs, or breakers that trip. Fix problems early to avoid losing equipment, getting shocked, or starting a fire. Your careful maintenance keeps your tank working well and your home safe.

    Upgrading Your Power Setup

    If you often trip breakers or use extension cords, it’s time to upgrade. Adding more devices means you need better power setup. Small changes can stop overloads and lower fire risk.

    Begin with easy upgrades you can see and feel. Add grounded outlets or GFCI outlets near your tank to fight moisture. A licensed electrician can set up a special circuit for your aquarium’s needs.

    • Swap cheap strips for heavy-duty, UL/ETL-listed power strips with internal breakers and surge protection.
    • Choose smart plugs or timed controllers rated for aquarium loads to automate lights and devices; confirm they are UL/ETL-listed and on GFCI protection.
    • Replace worn cords and avoid daisy-chaining strips and extension cords.

    Switch to efficient nano tank equipment to save power and heat. LED lights from Verilux or AquaIllumination use much less power than old lights. Choose pumps and heaters with good energy ratings for your tank size.

    When picking nano tank accessories, focus on quality and safety. Look for brands with UL or ETL listings for controllers, timers, and power gear. Durable accessories lower the risk of short circuits and extend upgrade time.

    1. Audit current load: list wattage for lights, pumps, heaters, and other gear.
    2. Decide if a dedicated circuit is needed based on total load and household wiring.
    3. Hire a licensed electrician for outlet or circuit work to meet the National Electrical Code.

    Getting professional help is key. An electrician will make sure outlets, GFCI protection, and conduit placement are right. This work cuts down on long-term risks and lets you add efficient nano tank equipment and accessories with confidence.

    Resources for Further Learning

    To learn more about setting up a safe nano tank, check out OSHA (29 CFR 1910.303) for wiring rules. The National Fire Protection Association offers advice on electrical fires. Also, the Electrical Safety Foundation International has data on extension-cord fires.

    The Consumer Product Safety Commission has tips on outlets near water. These resources make it easier to keep your home aquarium safe, just like in a workplace.

    For specific details on devices, read manuals from brands like Marineland, Fluval, AquaClear, and Kessil. When picking equipment, look for UL, ETL, or CSA marks. These confirm the products are safe.

    Use wattage and amp calculators to figure out your total device load. This helps you choose the right surge protectors and GFCI outlets.

    For permanent outlets or major upgrades, hire a licensed electrician. Check their credentials with your state licensing board. Always check for recalls and safety notices from the CPSC.

    Read home-safety blogs and reviews to compare power strips and wet-rated options. These steps help keep your nano tank safe and efficient over time.

    Keep your user manuals, inspection records, and a schedule for professional checks. By following official safety advice, trusted product info, and expert help, you’ll create a safe and efficient nano tank setup.

    FAQ

    What does “powering a nano tank” mean and what are the safety goals?

    Powering a nano tank means giving reliable power for lights, filters, heaters, and more in small aquariums. Your goal is to keep power steady and avoid fires, shocks, and equipment failures. Use NRTL-listed gear, follow the maker’s instructions, and avoid permanent extension cords. Install GFCI outlets near water sources.

    What typical electrical loads should I expect for a nano tank?

    Expect low-wattage LED lights (5–30 W), small filters (2–20 W), and pumps (2–15 W). Submersible heaters (5–50 W) and air pumps (1–5 W) also add to the load. Add these wattages together to size your power strips or circuits. Remember, many devices cycle and some have startup surges.

    Why should I avoid using extension cords or unlisted power strips permanently?

    Extension cords and basic power strips are for temporary use. They cause about 3,300 home fires a year. OSHA and the National Electrical Code say not to use them for permanent wiring. Use NRTL-listed devices and install permanent outlets or hire an electrician.

    What is GFCI and when do I need it for my nano tank?

    A Ground Fault Circuit Interrupter (GFCI) cuts power if current leaks to ground, reducing shock risk near water. Any outlet near a tank should be GFCI-protected. Use GFCI outlets, circuits, or power strips. Test GFCIs regularly with the built-in test button.

    How do I pick the right power strip or surge protector?

    Choose UL/ETL/NRTL-listed strips with internal circuit breakers or fuses. Look for visible amp/watt ratings. Most household strips are 15 A (1,800 W) or 20 A (2,400 W). Pick one that exceeds your device wattage. Prefer heavy-duty strips that accommodate transformer plugs and include surge protection.

    How long should the power strip cord be, and can I use an extension cord to reach an outlet?

    Choose a cord length (3–15 ft) that reaches a grounded outlet without an extension cord. Avoid excess slack that creates trip hazards. Extension cords should not be used as permanent wiring. If outlet placement is inadequate, hire a licensed electrician to add outlets or circuits.

    What cable-routing practices reduce the risk of water-related electrical problems?

    Route cords above the expected waterline and secure them to the stand or wall. This prevents plugs from falling into water. Create drip loops to ensure water drips off the cord. Avoid running cords through windows, doorways, under rugs, or behind heavy furniture. Do not cover cords where heat can build up.

    Are there special ratings I should look for in power strips used near a tank?

    For indoor use near water, use GFCI-protected outlets or strips designed for wet/damp environments. If you need outdoor/wet-rated gear, look for IP-rated strips (for example IPX6-rated models) and NRTL listings. Ensure the strip’s maximum wattage and amperage are printed on the device and exceed your planned load.

    What are common electrical symptoms and their probable causes?

    Frequent breaker trips indicate circuit overloads or short circuits. Intermittent device failures often come from loose plugs, damaged cords, or worn connectors. Warm or hot cords and power strips indicate overload or high resistance. Corrosion, frayed wires, or visible arcing point to moisture damage or physical wear.

    How should I troubleshoot intermittent power or tripping breakers safely?

    Unplug all devices and test each one individually on a known-good outlet. Check power-strip indicator lights and surge-protector status. Inspect cords and plugs for frays or melted insulation. Replace damaged cords or strips—do not try to repair them with tape. If problems persist, call a licensed electrician, for repeated tripping, burning smells, or visible arcing.

    What fire-safety steps should I know in case of an electrical fire?

    Never use water on an electrical fire. If safe, cut power at the breaker. Use a Class C-rated fire extinguisher for electrical fires. If the situation is unsafe or you cannot control the fire, evacuate and call emergency services.

    How often should I inspect and maintain electrical components for my nano tank?

    Visually inspect cords, plugs, GFCI outlets, and power strips monthly for damage, discoloration, or heat signs. Test GFCI outlets using their test button regularly. Replace any cords that are frayed, plugs that are bent, or surge protectors that won’t reset. Keep documentation of device wattage, purchase dates, and manuals for maintenance and warranty tracking.

    When should I hire a licensed electrician?

    Hire a licensed electrician to install permanent outlets, add dedicated circuits, or perform wiring that changes the home’s permanent electrical system. Also call a pro for persistent tripped breakers, burning smells, outlet discoloration, visible arcing, or repeated GFCI trips. Permanent wiring should never be a DIY project unless you are qualified and licensed.

    How can I size circuits and strips to avoid overloads?

    Sum the wattage of all devices and convert to amperage (amps = watts ÷ voltage; U.S. household voltage ≈ 120 V). Ensure the strip or circuit rating exceeds that load with margin for startup surges. Most nano setups fit on a 15 A circuit, but if your total load is high or you plan to add more gear, consider a 20 A circuit or a dedicated circuit installed by an electrician.

    What upgrades improve safety and efficiency for a nano tank power setup?

    Upgrade to NRTL-listed LED fixtures and energy-efficient pumps and heaters to reduce wattage and heat. Install additional grounded or GFCI outlets near the tank. Use heavy-duty UL/ETL-listed power strips with internal breakers and surge protection. Consider smart plugs and timed controllers that are UL/ETL-listed and used on GFCI-protected circuits to automate devices safely.

    What brands or resources can I trust for aquarium electrical equipment?

    Look for aquarium manufacturers and retailers such as Marineland, Fluval, AquaClear, Kessil, and reputable surge-strip makers that display UL/ETL/CSA marks. Verify equipment listings on product labels and consult manufacturer manuals for device-specific wattage and installation guidance. Refer to OSHA (29 CFR 1910.303), NFPA reports, ESFI data, and CPSC safety tips for authoritative safety guidance.

    What everyday practices help prevent electrical issues around my nano tank?

    Keep cords secured and off wet floors using cord clips and cable channels. Maintain drip loops and avoid running cords under rugs or through windows. Don’t daisy-chain power strips or plug strips into extension cords. Mount power strips on the stand off the floor and away from possible leaks. Replace damaged equipment promptly and stay current on recalls and manufacturer safety notices.

    How do I handle surge protection for LED drivers, controllers, and sensitive electronics?

    Use surge-protected power strips or whole-circuit surge protection that are NRTL-listed and sized for your load. Check surge-protector status indicators and replace units that show protection loss. Sensitive equipment benefits from both surge protection and GFCI-protected outlets where appropriate.

    What should I do if my power strip becomes warm or hot during normal use?

    Unplug devices and let the strip cool. Check total connected load against the strip’s rated amperage/wattage. Replace the strip if it feels hot under normal load, as that indicates overload or internal failure. Do not continue using a hot strip—replace it with a heavy-duty, NRTL-listed model with an internal breaker.

    Can I use smart plugs and timers with my nano tank equipment?

    Yes, if they are NRTL-listed and rated for the device loads. Use smart plugs and timers for lighting and non-critical devices on GFCI-protected circuits. Avoid using inexpensive, unlisted smart devices for heaters or high-draw pumps unless the device’s amp rating clearly exceeds the equipment’s startup and running currents.

    How do I verify that an outlet is properly grounded?

    Use a simple outlet tester available at hardware stores to check grounding, polarity, and GFCI wiring. If an outlet shows no ground or displays wiring faults, stop using it for aquarium equipment and have a licensed electrician diagnose and repair the issue.

  • How to Safely Remove Planaria and Hydra from a Shrimp Tank

    How to Safely Remove Planaria and Hydra from a Shrimp Tank

    Keeping a planted shrimp tank adds calm and color to your home. But, when pests like planaria and hydra show up, they disrupt this peace. This guide offers a safe way to remove these pests without harming your shrimp and snails.

    The method involves adding aquarium salt and using Fenbendazole (Panacur-C) carefully. Start by adding 2–3 grams of salt per liter slowly over eight hours. This helps avoid shocking your fish. For U.S. tanks, use an online calculator to convert grams per liter to grams per gallon.

    Accuracy is key. The team used a digital scale to measure 225 mg of Fenbendazole per dose. They mixed it with water conditioner, a special blend, and a vitamin/amino acid supplement. This mixture took about 15 minutes to dissolve and was then applied to the tank.

    The treatment plan was straightforward: one full dose followed by another 24 hours later. This was done over 48 hours. All pests were seen to die and detach from the glass. Thankfully, no shrimp or snail died, though nerite snails were removed as a precaution.

    This case shows a successful way to handle pests. But, always be careful with medication and salt. Make sure to measure accurately, mix well, and watch closely. Different shrimp and invertebrates may react differently. So, think about your tank’s inhabitants before starting. If unsure, seek advice from pest control services or an aquatic vet.

    Understanding Planaria and Hydra: The Pests in Your Tank

    A detailed and intricate depiction of planaria and hydra in a vibrant aquarium setting. In the foreground, several translucent planaria with a pearlescent sheen, displaying their flat bodies and characteristic shapes, are creeping across a richly textured substrate of sand and small pebbles. In the middle ground, delicate hydra rise from the rocks, showcasing their elongated bodies and tentacles extended toward light, capturing the essence of their predatory nature. The background features lush aquatic plants softly illuminated by warm, natural lighting, creating a serene atmosphere. The image is captured from a close-up angle, highlighting the fascinating details of these small organisms. The overall mood is educational and captivating, perfect for enhancing understanding of these freshwater pests.

    You might see tiny, soft creatures on plants, glass, or the bottom of your tank. Planaria are flatworms, often from the genus Dugesia, that move smoothly across surfaces. Hydra, on the other hand, are small cnidarians with a long body and stinging tentacles. Both are common in planted tanks and might seem harmless at first.

    Understanding planaria biology helps you see why they spread quickly. They reproduce by splitting themselves and can grow back from pieces. This makes it hard to control them if you ignore early signs. Hydra biology shows another risk: they make clones and can catch small shrimp or fry with their tentacles.

    These pests act like common pests in your tank. A big problem is they stress shrimp, compete for food, and lower the survival rate of baby shrimp. Hydra can hurt or eat shrimp larvae, while planaria show there’s too much organic matter that feeds more pests.

    Both pests do well in tanks with too much waste, too much food, or poor care. They can come in on live plants, substrate, or decorations. Spotting them early is key when dealing with pests, so you can stop their spread and damage.

    • Observe behavior: hydra attach to surfaces and extend tentacles to feed.
    • Watch movement: planaria glide smoothly and flatten when touched.
    • Check tank history: recent plant additions or used decor raise the risk.

    Knowing what pest you have is important for effective management. The urgency and method differ between planaria and hydra. Take time to confirm which pest you face before you choose treatments or make changes to your maintenance routine.

    Assessing the Infestation Level in Your Aquarium

    A close-up view of a healthy shrimp tank with signs of aquarium pests, specifically planaria and hydra. In the foreground, sharp focus on the shrimps navigating through lush aquatic plants, while a few small planaria worms cling to the glass and substrate. In the middle ground, the vibrant colors of the aquatic plants contrast with the subtle, translucent forms of hydra visible on the leaves. The background features a gentle blur of the tank’s filtration system and soft bubbles rising, creating a peaceful atmosphere. Soft, natural lighting filters through the tank, highlighting the details of the pest signs. The overall mood is calm but alert, emphasizing the need for observation and maintenance in aquatic habitats.

    Begin by slowly looking over your tank. Check the glass, plants, substrate, filter intake, and decorations for pests. Look for planaria, which move like flat worms, and hydra, which look like small stalks with tentacles or detached forms. Mark any signs of pests you find.

    Count how many pests you see and where they are. If pests are all in one spot, you might be able to remove them by hand. But if they’re everywhere, you’ll need more serious methods to get rid of them.

    Keep a close eye on your shrimp and shrimp fry. Look for any missing or injured shrimp, less feeding, or sudden changes in behavior. These signs can tell you if hydra are eating your shrimp.

    Check the water quality and organic load in your tank. Test the ammonia, nitrite, and nitrate levels. Also, lift the substrate to see if there’s a lot of detritus. A high organic load often means more pests, helping you decide how to tackle the problem.

    • Think about any new additions to your tank, like plants or fish. These can bring pests with them.
    • Check the filter and intake areas for debris. These spots can hide a lot of pests.
    • Keep track of when and how often you see pests. This can help you understand their habits.

    Use what you’ve learned to pick the best way to deal with pests. For small problems, you might just need to remove them by hand or use DIY methods. But for bigger issues, you might need to use chemicals like fenbendazole, as explained later in the article.

    Preparing Your Tank for Pest Removal

    First, move sensitive animals to a safe place. Remove delicate snails and other weak invertebrates. Many keepers take out nerite snails to lower risk during treatments.

    Calculate your tank’s volume carefully. Convert gallons to liters to plan the right amount of salt and Fenbendazole. This avoids overdosing and ensures safe pest removal.

    Use precise tools for measuring. A digital scale with 0.01 g accuracy is best for weighing Fenbendazole. Don’t guess from a packet without knowing the active ingredient percentage.

    Get your carrier solution and mixing tools ready before adding medication. Use a water conditioner like Seachem Prime and a commercial blend like Microbe-Lift Special Blend. Adding a vitamin or amino acid supplement can help dissolve Fenbendazole; it usually takes about 15 minutes.

    Introduce salt slowly to avoid osmotic shock. Plan to raise salinity gradually over eight hours or more. This slow approach reduces stress on shrimp and surviving snails while you deal with pests.

    Check how sensitive your species are to salt and Fenbendazole. Look up the tolerance for your shrimp strain and other invertebrates. Be prepared to remove certain species if risks are too high to keep the treatment safe.

    Have monitoring tools ready and set a schedule. Keep test kits for ammonia, nitrite, nitrate, and pH on hand. Watch shrimp behavior and signs of pest die-off closely during treatment. This way, you can act quickly if conditions change.

    • Quarantine plan for sensitive livestock
    • Volume calculations and dosing conversions
    • Accurate weighing equipment
    • Carrier solution and dissolving supplies
    • Gradual salt introduction via trickle
    • Species sensitivity checklist
    • Monitoring schedule and test kits

    By following these steps, you can effectively prevent pests and work with professionals if needed. This ensures a safe and healthy environment for your tank’s inhabitants.

    Natural Removal Methods for Planaria and Hydra

    You can fight planaria and hydra without harming your shrimp. Start with gentle methods that target their food and home. Reduce feeding, clean up leftover pellets, and vacuum the substrate to remove organic matter.

    Introduce predators for biological control if your tank can handle them. Assassin snails and certain small loaches eat flatworms. Make sure they are safe for your shrimp before adding them.

    • Use DIY pest prevention traps with inverted cups baited with shrimp pellets or liver to catch planaria overnight.
    • Manually remove hydra by siphoning or gently scraping them from plants and décor during routine maintenance.
    • Reduce light slightly to limit algal growth that feeds pests, but avoid extreme temperature or light shifts that could stress shrimp.

    Quarantine and dip new plants to stop pests from entering the main tank. This is a key part of integrated pest management to prevent infestations.

    Treat mild problems with natural pest repellents first. If the problem gets worse, you might need to use chemicals. But always keep your shrimp safe. Using a mix of natural and chemical methods is the best way to control pests in your shrimp tank.

    Chemical Treatments: Options and Precautions

    When natural methods don’t work, chemical treatments can be effective. Experienced hobbyists use Fenbendazole, sold as Panacur-C, for planaria and hydra in shrimp tanks. It’s important to weigh the risks and follow strict protocols before using it.

    Getting the dosage right is key. Panacur-C packets have different active percentages. You need to calculate the Fenbendazole active ingredient accurately. Use a digital scale that’s accurate to 0.01 g. Don’t just rely on the packet weight.

    A documented protocol used 225 mg of Fenbendazole active ingredient per dose. The powder was mixed with Prime, Microbe-Lift Special Blend, and a vitamin/amino acid solution. It took about 15 minutes to dissolve fully before adding it to the tank.

    Adding a second dose 24 hours after the first helps. This ensures a 48-hour coverage window. It’s useful when dealing with pests that reproduce quickly.

    Using salt as a co-treatment also helped. Aquarium salt was added slowly over eight hours or more. This increased osmotic stress on pests. Add salt gradually to avoid stressing shrimp or snails.

    Keep a close eye on your livestock during treatment. Some shrimp species and sensitive invertebrates may react differently. Be ready to remove or quarantine fragile inhabitants if unsure about their tolerance.

    Remember, Fenbendazole is an off-label veterinary drug for aquarium use. Check local regulations before using it. Follow safe drug-handling practices. Research species-specific sensitivity and consult an aquatic veterinarian or experienced aquarists when in doubt.

    If you’re unsure about medicating your tank or the infestation persists, consider professional pest removal. Aquarium maintenance services that use integrated pest management techniques can help. They can assist with dosing, monitoring, and long-term management.

    Chemicals should be part of a broader plan. Include regular observation, cleanup, and habitat control. Careful application, precise dosing, and planning will improve your chances of dealing with pests in a shrimp aquarium.

    Manual Removal Techniques

    Begin by carefully siphoning hydra and planaria from the substrate. Use a small siphon or turkey baster to remove visible pests from gravel and glass. Do this in short sessions to avoid stressing shrimp or plants.

    Scrape fragile hydra gently off plants and decorations. Hold the item steady and use the siphon tip to draw the pest away. For heavy spots, remove the decoration temporarily for cleaning or quarantine.

    • Place baited planaria traps on the substrate overnight. An inverted cup with a small amount of liver or shrimp pellets will attract and concentrate planaria for easy pickup.
    • Check traps at first light and dispose of captured pests outside the tank.
    • Repeat traps nightly until counts drop noticeably.

    When plants or ornaments show heavy infestation, take them out and rinse in a separate container. Inspect leaves and crevices, then reintroduce items only after a short quarantine. This step reduces hitchhiking pests without chemicals.

    Keep frequent partial cleanings to lower organic load and break pest life cycles. Small water changes and targeted gravel siphoning remove eggs, segments, and food that sustain populations. Combine this habit with reduced feeding for best effect.

    1. Perform a light siphon of substrate twice weekly while you monitor shrimp behavior.
    2. Use baited planaria traps two to five nights in a row depending on infestation level.
    3. Quarantine or clean infested decor until no pests appear for several days.

    Pair manual pest removal with natural controls and aquarium maintenance routines. Reducing excess food, quarantining new plants, and regular tank checks keep reinfestation risk low. This hands-on approach works well when you’re dealing with pests early and want to avoid chemicals.

    Preventing Future Infestations

    Quarantine new plants, substrate, and décor before adding them to your tank. Use a separate tank or a quick plant dip to stop pests like planaria and hydra. This step helps avoid bigger problems later.

    Keep the tank clean by not overfeeding and doing regular water changes. Vacuum the substrate during these changes to remove food and waste. A clean tank makes it less likely for pests to come back.

    Check the glass, plants, and filter inlets weekly for pests. Early detection means you can use gentler treatments. Keep a record of what you find and when you treat it to spot patterns.

    • Use biological controls with care. Make sure they’re safe for your shrimp. The wrong choice can cause more problems.
    • Try natural pest repellents like plant dips or safe extracts for regular care. These methods are safe for shrimp when used right.
    • Adopt integrated pest management practices. Mix monitoring, habitat control, biological options, and targeted treatments as needed. This way, you use fewer chemicals.

    Keep your tank clean by cleaning filters, removing dead plants, and keeping water stable. Healthy shrimp are more able to fight off pests, reducing the need for frequent treatments.

    If pests come back, look for recent changes like new plants or different feeding. Use your records to find the cause quickly and adjust your prevention plan.

    Long-term Strategies for a Healthy Shrimp Tank

    Keep a mindset of integrated pest management for your shrimp tank. Use cultural controls like careful feeding and regular maintenance. Also, add mechanical methods like manual removal and traps.

    Include biological options, such as compatible predators. Use chemicals only when necessary.

    Make a schedule for water testing and adjustments. Stable water parameters help reduce stress on shrimp. This makes the tank less welcoming to pests.

    Monitor ammonia, nitrite, nitrate, pH, and temperature regularly. This prevents sudden population booms.

    Create a routine maintenance plan and stick to it. Include weekly water changes, monthly filter checks, and plant trimming. These actions keep your tank clean and predictable.

    Have an emergency plan ready for recurring outbreaks. Keep supplies like a siphon, aquarium salt, and a digital scale on hand. A step-by-step checklist is helpful during pest emergencies.

    • Use mechanical removal first when practical.
    • Introduce compatible biological controls with caution.
    • Reserve chemical treatment for targeted interventions only.

    Educate yourself and use community resources. Ask at local fish stores like Petco or Aquatic Arts. Consult aquarium forums and consider professional pest removal firms for tough cases. Expert help can save time and protect your shrimp.

    Track your results and adjust your plan. Document dates of interventions, water readings, and shrimp behavior. Over time, this record will improve your pest management plan.

    Conclusion: A Thriving Shrimp Environment

    You can take back control of your tank by following safe steps to deal with pests. For removing planaria and hydra, a mix of salt and fenbendazole worked well. Start by adding 2–3 g/L of salt slowly over eight hours. Then, use 225 mg of fenbendazole in a water mix with supplements, repeating the dose after 24 hours.

    Begin with mild infestations by removing pests manually and using natural methods. Use chemicals only for bigger problems or when you’re sure of the dosing. Keep sensitive invertebrates safe by quarantining them during treatment and watching water and fish closely.

    To keep pests away, use a mix of methods. Quarantine new items, feed less, and stick to a regular cleaning schedule. Always have a plan and supplies ready for emergencies. Being proactive and watching your tank closely is key to a healthy shrimp home.

    Next, figure out how bad the problem is and decide on a plan. If you’re unsure, ask experts or professionals for help. This way, you can make sure your tank and its creatures stay safe and happy.

    FAQ

    What are planaria and hydra, and why are they a problem in shrimp tanks?

    Planaria are flatworms and hydra are small cnidarians. They live in freshwater tanks and eat biofilm and detritus. They can reproduce fast and are pests in shrimp tanks.

    They compete with shrimp for food and can harm shrimp fry. Their presence also means there’s too much organic matter in the tank.

    How can I tell whether I have planaria or hydra?

    Look at their behavior and appearance. Hydra attach to surfaces and have tentacles. Planaria are flat and glide across surfaces.

    Check glass, plants, and substrate to see which pest you have. This will help you choose how to remove them.

    How serious should I consider an infestation — when do I escalate treatment?

    Check how many pests you have and where they are. A few might be removed by hand or traps. But if there are many, you need a stronger plan.

    Also, check the water quality. High nitrate levels often mean a big infestation problem.

    What basic assessment steps should I perform before any treatment?

    Look for pests on glass, plants, and substrate. Watch your shrimp for stress or missing fry.

    Test the water and check the substrate for detritus. Think about recent additions to the tank. And know your tank’s size in liters or gallons.

    Are natural or manual methods effective for planaria and hydra?

    Yes, for light infestations. Cut down on feeding and clean the substrate well. Use traps for flatworms and scrape off hydra.

    Biological controls like predators or assassin snails can also help. But make sure they won’t harm your shrimp.

    When should I consider chemical treatments?

    Use chemicals for moderate to severe infestations. They can be effective but are risky to shrimp and snails.

    Be careful with dosing and monitor your tank closely. Always check if it’s legal and safe before using chemicals.

    What chemical protocol has been reported to achieve 100% eradication of planaria and hydra?

    A successful method used Fenbendazole and aquarium salt. It involved two doses of Fenbendazole with salt added slowly.

    This method killed all pests without harming the shrimp or snails. But it’s important to follow the exact steps and be careful.

    How do I calculate and measure Fenbendazole correctly?

    First, find out how much active ingredient is in your Panacur-C. Use a digital scale to measure 225 mg of Fenbendazole for each dose.

    Don’t guess based on the package weight. Mix the measured Fenbendazole with a carrier solution and add it to your tank evenly.

    How do I add aquarium salt safely with shrimp present?

    Add salt slowly over 8 hours to avoid shocking your shrimp. Start with 2–3 g per liter and adjust for your tank size.

    Watch your shrimp and water chemistry closely. If your shrimp are very sensitive, consider removing them or finding another treatment.

    What safety precautions should I take when using Fenbendazole and salt?

    Use a precise digital scale for measuring. Check if your shrimp and snails can tolerate Fenbendazole and salt.

    Quarantine sensitive invertebrates if unsure. Mix the medication well before adding it to your tank. Monitor everything closely during treatment.

    I don’t want to medicate. What ongoing prevention practices reduce reinfestation risk?

    Use integrated pest management. Quarantine new plants and decor. Reduce feeding and clean up uneaten food.

    Do regular water changes and vacuum the substrate. Keep your filters working well and check your tank regularly. Have an emergency kit ready.

    Can I use biological predators to control planaria without harming my shrimp?

    Some predators eat planaria but might also eat shrimp. Assassin snails and certain loaches are good at eating planaria.

    But make sure they won’t harm your shrimp. Always test them in a quarantine tank first.

    How should I monitor results after treatment or manual removal?

    Watch your shrimp and check for missing or injured fry every day. Look for dead or surviving pests on surfaces and in the filter.

    Test the water chemistry often after using chemicals. Keep a record of everything you do. If pests come back, find out how they got in and start again.

    If I’m uncomfortable performing chemical treatment, what professional help is available?

    Look for aquarium maintenance services or local fish stores with experienced staff. They can help with treatments and pest management.

    They’ll make sure your shrimp and other invertebrates are safe.

    What immediate supplies should I have on hand to respond to an outbreak?

    Keep a digital scale, water conditioner, a commercial blend, aquarium salt, and baited planaria traps ready. Also, have test kits for water and containers for snails or plants.

    Having these supplies and a plan helps you respond quickly and safely.

  • Why Even Nano Tanks Need a Quarantine Process for New Plants

    Why Even Nano Tanks Need a Quarantine Process for New Plants

    When you bring a new plant into your tank, it might look fine but could have hidden pests. A quarantine helps keep out algae, snails, snail eggs, hydra, planaria, and cyanobacteria. These can quickly take over a small tank because of its limited size and weak defenses.

    Quarantine uses a separate tank to watch and treat new additions before they join your main tank. This protects your plants, shrimp, and fish from outbreaks. It also serves as a treatment tank for future sick fish, keeping your main tank safe.

    Sticking to a routine makes your nano tank safer and less stressful for all living things. Quarantining new additions regularly keeps your tank’s ecosystem balanced. This saves you from the hassle of cleaning up big messes later.

    The Importance of Quarantine in Nano Tanks

    A cozy, brightly lit room featuring a nano tank set up for quarantine. In the foreground, the nano tank is filled with clear water and a few small, healthy aquatic plants, carefully labeled with tags. The middle layer includes a quarantine setup around the tank, displaying tools such as a thermometer, water test kit, and a small net, emphasizing a meticulous quarantine process. The background shows shelves lined with aquarium supplies, all under soft, warm lighting that creates an inviting atmosphere. A large window allows natural light to filter in, enhancing the overall clarity and vibrant colors of the plants. The scene conveys a sense of care and diligence, highlighting the importance of proper quarantine in maintaining a healthy aquatic environment.

    Your tiny aquarium is a delicate balance. A single pest, algae spore, or pathogen can spread quickly. This makes a nano tank quarantine essential when adding new plants, fish, or invertebrates.

    Quarantine keeps your established animals and water chemistry safe. You should isolate any new additions before they join your main tank. Exceptions include new tissue culture plants from trusted brands like Tropica and livestock in a freshly cycled tank with no existing animals.

    Transport stress and new water can trigger hidden illnesses. A mini tank quarantine gives you time to spot these issues before they spread. This way, you can treat problems early on.

    Using a small tank quarantine also helps avoid harsh treatments in your main tank. Such treatments can harm sensitive shrimp and plants. A calm quarantine allows for controlled treatments, protecting your long-term success.

    • Observe new arrivals for at least two weeks in a dedicated quarantine setup.
    • Keep quarantine conditions similar to your main tank to avoid stress during transfer.
    • Document behavior, appetite, and any surface growths to catch issues early.

    Following a clear mini tank quarantine protocol boosts nano aquarium safety. It lowers risk, protects existing animals, and keeps your display healthy and stable.

    Understanding Pests and Diseases

    A serene nano tank set in a dimly lit room, showcasing a beautifully arranged quarantine area for new aquatic plants. In the foreground, a small glass tank is filled with vibrant green aquatic plants, illuminated by soft, warm LED lights that enhance their color. Tiny white tags are attached to each plant to indicate quarantine status. In the middle ground, a clear divider separates the quarantine area from a healthy, established tank, where lively fish swim around playful rocks and plants. In the background, a window casts diffused light, hinting at a lush outdoor garden. The atmosphere is calm and focused, conveying the importance of careful monitoring and pest prevention. Capture this scene with a shallow depth of field to emphasize the nano tank and its contents while lightly blurring the background.

    When you bring new plants home, you’ll see algae and hitchhikers first. Black beard, hair algae, and staghorn algae can block leaves. Cyanobacteria, or blue-green algae, harms water quality by coating surfaces.

    Snails or snail eggs might hide in crevices and grow fast. Microfauna like hydra and planaria can also come with plants. They multiply quickly and need specific treatments.

    Plants with pests can harm your fish and shrimp. Parasites and contaminants stress them, making them sick. Common illnesses like ich and columnaris can then attack.

    Shrimp have their own dangers from fungi and bacteria. Look for dull color, inactivity, or weight loss. Green fungus and similar infections can get worse after exposure to contaminated plants.

    • Inspect new plants for visible algae and snail eggs.
    • Use a mini tank quarantine protocol to spot microfauna early.
    • Isolate suspect plants in an isolation tank for small aquarium until clear.
    • Treat hydra, planaria, and fungal issues before transfer to the display.

    Soak, inspect, and monitor new plants. Simple quarantine steps protect your fish and shrimp. Keeping your tank stable is key.

    Quarantine Procedures for Nano Tanks

    You need a separate quarantine container that can also be a hospital tank. The size depends on what you add. A 10-gallon (38 L) tank is often a good choice for many small fish and plants. Make sure the tank is not so small that it stresses your fish during quarantine.

    Set up the tank with a gentle filter, a heater, and minimal décor. Sponge filters are great because they protect beneficial bacteria and catch debris without strong currents. Try to avoid using substrate to make cleaning easier during quarantine.

    Use hardy or silk plants for hiding spots. Choose live plants that can handle common treatments. Anubias and Java fern are good choices. Always check new plants for pests like snails, hydra, planaria, and algae before adding them to the quarantine tank.

    • Keep a spare sponge filter and small air pump handy if you don’t have space for a permanent quarantine tank. You can quickly set up a quarantine by moving stored media and equipment into the tank when needed.
    • Keep the quarantine tank at a steady temperature and with gentle aeration. This helps reduce stress on both plants and animals.

    Keep the quarantine period at least two weeks for most additions. If new symptoms or pests appear, extend the quarantine by one week. For plants, watch closely for snails, eggs, and tiny pests throughout the quarantine period.

    During quarantine, do regular checks and easy maintenance. Change some water, siphon out detritus, and remove pests by hand. Treat only when necessary, and choose methods that won’t harm plants or beneficial bacteria.

    1. Inspect and rinse new plants before adding them to the quarantine tank.
    2. Run a sponge filter and heater; skip substrate to ease cleaning.
    3. Watch daily for pests, algae, or stress; keep a log for at least two weeks.
    4. Extend quarantine by one week after the last issue clears before introducing to your nano tank.

    Follow these quarantine procedures for nano tanks to protect your display tank and keep your aquatic community healthy. A well-done small tank quarantine saves time and prevents outbreaks that are harder to fix later.

    Monitoring New Plants During Quarantine

    Check new plants daily during quarantine. Look for black beard algae, hair algae, staghorn, and slimy mats. Also, search for small snails, snail eggs, hydra, and planaria in crevices.

    Use a magnifier, macro lens, or your phone camera to spot tiny pests and eggs. This is key to a good mini tank quarantine protocol. It helps catch hitchhikers before they reach your display tank.

    Watch for signs of plant health issues like discoloration, rot, or sliminess. These can be due to poor water quality or pathogens. Treat problems early and keep notes on what you observe.

    • Note the date each plant entered quarantine.
    • Record any treatments you apply and the dosage used.
    • Log when symptoms appear and when they stop.

    For livestock in the quarantine tank, monitor shrimp activity and look for fungal patches. For fish, check appetite, color, eye clarity, and activity levels. Watch for signs of ich or columnaris and act at the first sign of trouble.

    Keep quarantine records simple and consistent. Extend the nano tank quarantine at least one week beyond the last visible symptom. This strengthens nano aquarium safety and makes your quarantine procedures for nano tank more reliable.

    Introducing Quarantined Plants to Your Nano Tank

    Wait at least two weeks before moving plants. Make sure they show no signs of pests, algae, or other issues for seven days. This step keeps your tank safe and healthy.

    Before adding plants, rinse them in clean water. Remove any eggs, snails, or loose algae by hand. Trim damaged leaves and prune dense areas to prevent pests.

    • Use a clean net or dedicated tongs reserved for the mini tank quarantine protocol.
    • Never share tools between quarantine and display tanks without disinfecting first.

    Choose a quiet time to add the plant. Avoid feeding and big changes in the filter. This helps your fish stay calm and makes spotting problems easier.

    Keep a close eye on your tank for two weeks after adding the plant. Watch for new snails, unusual spots, or algae. If you see any issues, remove the plant and quarantine it again for treatment.

    1. Confirm two-week quarantine and one week symptom-free.
    2. Rinse and prune in dechlorinated water.
    3. Use dedicated transfer tools to avoid cross-contamination.
    4. Introduce during calm tank conditions.
    5. Monitor the main tank for 14 days after introduction.

    By following a strict quarantine plan, you keep your tank water clean and safe. This careful approach protects your plants and the rest of your aquarium.

    The Role of Water Quality

    Water quality is key to success in any small tank quarantine. You need to keep ammonia, nitrite, nitrate, pH, and temperature stable. This way, problems will show up quickly without stressing plants or animals.

    Start with a reliable filter and a heater that fits the tank size. A steady filter reduces swings, and a heater prevents cold shocks. These steps are vital for nano tank quarantine.

    Using no-substrate quarantine reduces detritus and makes water changes easier. Regular partial water changes cut waste and lower the risk of bacterial blooms. This makes it easier to spot issues when the water stays clear.

    If you need a faster biological start, add a sponge filter seeded with media from an established tank. This helps beneficial bacteria process ammonia and nitrite. It reduces spikes that can mask symptoms. Such seeding supports nano tank quarantine while protecting the main display.

    • Test frequently for ammonia and nitrite during quarantine.
    • Track pH and temperature daily to avoid sudden shifts.
    • Perform small, regular water changes to control nitrate and waste.

    Watch water quality after moving plants to the main tank. Unstable chemistry can hide or worsen pests and disease. Following quarantine procedures for nano tank care keeps plants and livestock healthy.

    Choosing the Right Quarantine Container

    Choose a container that fits the task. A 10-gallon tank is good for a few plants or small shrimp. For small fish groups or rotating livestock, a 54L tank is better.

    Think about future needs. If you plan to add more, pick a tank that grows with you. This way, your quarantine space stays effective without feeling cramped.

    Set up gentle filtration and steady heat. A sponge filter and small air pump provide safe flow. Use an adjustable heater to keep temperatures stable.

    Keep it simple. No substrate makes cleaning easy and reduces pest hiding spots. Add hardy plants like Anubias for stress relief during quarantine.

    Control escape and contamination. A tight-fitting lid prevents jumpers and reduces airborne risks. A small lid light helps plants grow without opening the tank often.

    • Essentials: sponge filter, heater, lid, thermometer.
    • Optional: a small sponge or bio-media to seed beneficial bacteria.
    • Storage tip: keep a compact sponge filter and pump ready for quick setup when new fish arrive.

    Make it portable for ease. A mobile quarantine container makes treatment and observation simpler. Having spare gear in a box helps keep quarantine procedures consistent.

    Size is key to success. Too-small containers can stress fish, undermining treatment. For multiple specimens, size up and follow best practices to protect your main tank.

    The Chemistry of Quarantine

    Think of quarantine as a series of quick chemical reactions. In a nano tank, the water is small. This means ammonia and nitrite levels can rise fast if the filter isn’t strong.

    Check ammonia, nitrite, nitrate, and temperature daily. Treat tap water to remove chlorine and chloramine before adding it. A dechlorinator from API or Seachem helps keep microbes and animals safe during water changes.

    Be careful with chemical treatments. Many can harm shrimp, snails, and plants. Make sure the medication is safe for the species you’re keeping. If it’s not safe, use a separate tank for those animals.

    Don’t treat the water without a reason. Most people prefer to watch and wait in quarantine. Treat only when you see pests, parasites, or odd behavior. Always follow the safe dosage and the manufacturer’s instructions.

    Starting a sponge filter with seeded media helps a nano tank quarantine. This brings good bacteria and reduces ammonia spikes. It means you can change the water less often and safely use chemicals.

    • Keep test kits on hand and log results daily.
    • Avoid copper if you plan to keep Neocaridina or Caridina shrimp.
    • Use targeted treatments for visible pests, not blanket cures.
    • Rinse hands and gear between quarantine and display to protect nano aquarium safety.

    Balance stability with careful watching. Good water chemistry in quarantine keeps your display tank safe. Following strict quarantine procedures for nano tanks ensures safety and health for your aquarium.

    Common Mistakes in Quarantine Practices

    Not quarantining new additions is a big mistake. Plants can bring snails, algae, and pests that spread fast. These can harm your main tank.

    Choosing a small quarantine space can stress your fish and hide illness. Make sure your quarantine has enough room for your fish to swim. It should also have enough surface area for oxygen.

    Keeping substrate in the quarantine can hide eggs and pests. Using no substrate makes it easier to clean and check for problems.

    Using strong medications without checking if they’re safe can harm your fish and plants. Always read labels and research before treating your tank.

    Sharing nets, siphons, or tools between tanks can spread disease. Use dedicated equipment or clean it well after each use.

    • Not watching your fish every day makes it hard to catch diseases early.
    • Mixing too many species in a small space can stress them out and hide symptoms.
    • Not changing the water often can lead to waste buildup and weaken your fish’s immune system.

    Follow a clear quarantine plan to avoid these mistakes. This way, your main tank stays healthy. Being careful and consistent is key to a successful quarantine.

    Benefits of a Proper Quarantine Process

    A good nano tank quarantine lets you spot pests, algae, and diseases early. This way, you can act fast before they spread to your main tank. It keeps your plants and animals safe and reduces stress on sensitive species like shrimp and small fish.

    It also saves you time and money. By stopping problems early in a small tank, you avoid expensive treatments and buying new fish. This makes your hobby more enjoyable and less wasteful.

    Having a quarantine or hospital tank is handy. It’s a place to treat sick fish and acclimate new ones. This way, you don’t mess up the balance of your main tank while you watch and learn.

    Sticking to a quarantine routine builds consistency in your care. A strict two-week quarantine, or longer after issues, boosts your confidence. It leads to healthier, more stable aquariums. This routine supports safety and makes adding new fish easier.

    • Early detection and targeted treatment for pests and disease.
    • Lower risk of major outbreaks in small systems.
    • Dedicated treatment space that protects your display.
    • Standardized care that improves long-term stability.

    Let these benefits guide your setup and habits. A careful quarantine practice and following best practices will keep your nano aquarium safe and thriving.

    Resources for Nano Tank Enhusiasts

    Local fish stores like April’s Aquarium and online forums are great resources. They offer health guarantees and expert advice. Before buying, ask about their quarantine process.

    Make a list of must-haves for a quarantine tank. A small sponge filter and air pump are key for quick setup. Also, include a heater, basic meds, and test kits for water quality.

    For tank planning, check out community threads and product reviews. Forums discuss quarantine sizes and filter options. Reviews help pick reliable quarantine tanks and best practices.

    • Talk to local hobbyists about successful mini tank quarantine protocol they follow.
    • Search product reviews for compact sponge filters and quarantine tanks before you buy.
    • Keep a list of medications and test strips that match common issues in nano setups.

    Buy tissue-cultured plants from trusted suppliers like Tropica for low pest risk. These plants are often sterile and don’t need quarantine, saving time.

    Use store staff, forums, and reviews to improve your quarantine routine. Combining advice with a clear protocol makes quarantine easier and more effective.

    Conclusion: Prioritizing Quarantine for Success

    Keeping a nano tank means you must have a strict quarantine routine. New additions often bring algae, snails, or diseases that can upset your tank. A simple quarantine setup with a sponge filter and heater helps keep your main tank safe.

    Have a small quarantine kit ready with a spare sponge filter and air pump. This way, you can quickly respond to any issues. Also, reach out to local fish stores for advice on treatments. These steps are key to keeping your nano tank safe and healthy.

    Following quarantine protocols saves you time, money, and stress. It helps you avoid problems with sensitive fish and keeps your tank’s water chemistry balanced. Make quarantine a regular part of your routine. Your nano tank will thank you with a stable and healthy environment.

    FAQ

    Why should you quarantine new plants for a nano tank?

    Quarantine keeps new plants separate. This lets you watch and treat them before they join your main tank. Plants can carry algae, cyanobacteria, snails, and pests.

    In a nano tank, small problems can grow fast. Quarantine helps protect your community and keeps the ecosystem balanced.

    What is the minimum quarantine duration for plants and when can you transfer them?

    Start with two weeks. If problems persist, extend quarantine by at least one week. Check plants daily and transfer them after they’re symptom-free for a week.

    Do you need a dedicated quarantine tank or can you use a temporary container?

    A dedicated tank is best. If you don’t have space, keep a sponge filter and air pump ready. This way, you can quickly set up a temporary tank.

    Make sure the container is big enough. Too small and it can stress plants and animals.

    Is a 10-gallon (≈38L) or 14.3-gallon (≈54L / 54L noted) tank sufficient for quarantine?

    Yes, for most plants and small groups of fish or shrimp. Choose a size based on what you plan to quarantine. A small tank can stress animals and defeat the purpose.

    What equipment is essential for a nano tank quarantine?

    You’ll need a gentle filter, a heater, and a lid. A sponge filter is best. Also, a heater to keep the temperature stable and a lid to prevent jumpers.

    Don’t use substrate. It makes cleaning harder and can hide pests. Keep a few hardy plants for cover if needed.

    Should you keep substrate in the quarantine tank?

    No. Substrate can build up detritus and hide pests. A bare-bottom tank is easier to clean and inspect.

    How often should you inspect quarantined plants and what should you look for?

    Check daily. Look for algae, cyanobacteria, snails, hydra, and planaria. Also, watch for plant health issues like discoloration or rot.

    Use a magnifier or phone lens to spot small pests and eggs.

    What monitoring should you perform for associated livestock during quarantine?

    For shrimp, watch for activity, color, and signs of fungal infections. For fish, check appetite, color, eye clarity, and activity level.

    Look for ich (white spots) or columnaris. Record all observations and treatments.

    Do you need to treat new plants prophylactically with chemicals or medications?

    Routine blanket medication is not usually needed. Treat only when symptoms or pests appear. Choose medications safe for your species.

    How do you remove hitchhikers like snails, hydra, and planaria during quarantine?

    Manually remove visible pests. Rinse plant parts in dechlorinated water. Treat targeted infestations with the right methods.

    Repeat treatments and inspections until pests are gone. Physical removal and careful observation work well for plant-borne pests.

    Should you rinse plants before moving them to the main tank?

    Yes. Rinse plants in dechlorinated or tank water. Trim affected leaves and remove visible pests or algae.

    Use dedicated tools to avoid contamination.

    What role does water quality play during quarantine?

    Water quality is key. Nano tanks have limited buffering, so test regularly. Use a seeded sponge filter to reduce ammonia spikes.

    Perform regular water changes to control waste and prevent bacterial blooms.

    Can you “instant cycle” a quarantine tank and how?

    Yes. Store a small sponge filter and an air pump. This lets you quickly seed a quarantine tank.

    Adding a seeded sponge provides beneficial bacteria. But, monitor parameters and manage water changes carefully.

    What records should you keep during quarantine?

    Log dates plants were added, daily observations, any pests or symptoms, treatments used, and when symptoms cleared. Extend quarantine one week beyond the last symptom before transfer.

    What treatments and tools should you have on hand for quarantine?

    Keep a small sponge filter and air pump, a heater, test kits, and nets and tongs for quarantine. Also, have common medications for ich and fungal infections ready.

    Make sure medications are safe for your species.

    Are tissue-cultured plants exempt from quarantine?

    Reputable tissue-cultured plants from brands like Tropica are often low-risk. They are produced in sterile conditions. But, inspect them and follow store guidance for the highest safety.

    What common mistakes do hobbyists make with quarantine?

    Skipping quarantine for plants is a big mistake. Using a small container can stress animals. Keeping substrate in quarantine makes cleaning hard.

    Reusing tools without disinfection can spread pests and disease. Using harsh medications without checking compatibility is also risky.

    How long should you watch your main tank after introducing a quarantined plant?

    Watch your main tank closely for two weeks after introducing a quarantined plant. Be ready to remove the plant quickly if problems appear.

    Use your records to trace recent additions.

    What are the long-term benefits of a disciplined quarantine routine?

    Proper quarantine reduces the risk of outbreaks in small systems. It lowers treatment and replacement costs. It protects sensitive species like shrimp.

    It also gives you a ready hospital tank for future needs. It standardizes care and boosts confidence in long-term aquarium success.

    Where can you find more guidance on quarantine procedures and treatments?

    For more guidance, consult local fish stores, aquarium forums, and community groups. They offer product recommendations, treatment tips, and real-world experiences.

    Reputable retailers often provide short guarantees and staff support when illness appears after purchase.

  • Breeding Nano Rasboras: An Informative Guide

    Breeding Nano Rasboras: An Informative Guide

    You’re about to get practical tips on breeding nano rasboras in a 10-gallon tank. These small, schooling fish are loved for their beauty in small aquariums. Breeding them well needs a well-set tank, stable water, good food, and watching them closely.

    Before you add fish, make sure the tank is fully cycled. Fishless cycling is best to avoid stress and loss. Regular water changes, like once a week, keep the water clean and help the fry grow.

    A 10-gallon tank is great because it’s small and easy to manage. You can have a colony just for breeding or a peaceful community. Use good heaters and filters, and affordable gadgets for lights and CO2 to help plants grow.

    Remember, breeding nano rasboras in a 10-gallon is possible but needs careful planning. Focus on the details, choose the right fish, and provide plenty of plants or a special spawning area. This guide will help you learn how to breed nano rasboras with confidence.

    Understanding Nano Rasboras and Their Habitat

    A beautifully arranged aquatic scene featuring a vibrant nano rasbora in a lush, planted 10-gallon tank. In the foreground, show the delicate, colorful nano rasboras swimming gracefully among fine-leaved aquatic plants like Java moss and Anubias. The middle ground includes scattered pebbles and sand, enhancing the natural habitat look, while hints of driftwood provide hiding spots. In the background, soft ambient lighting filters through the water, creating a serene atmosphere with gentle reflections dancing on the tank’s glass. Capture the essence of a thriving underwater ecosystem, emphasizing tranquility and the small size of these fish in their ideal environment, shot from a slightly elevated angle to highlight both the fish and the lush habitat.

    Nano rasboras like the Chili Rasbora, Microrasbora kubotai, and the exclamation point rasbora grow up to one inch. They love to school together and are very calm. This makes them perfect for small, peaceful tanks with lots of plants.

    In the wild, nano rasboras live in shallow, slow-moving waters. Their homes are filled with soft, acidic water, leaf litter, and lots of plants. Creating a similar environment in your tank can help them feel at home and encourage them to breed.

    When breeding nano rasboras, it’s important to get their water right. They prefer soft water with low mineral levels. The pH should be between 5.0 and 7.0, and the temperature should be between 72–80°F. Make sure to match these conditions to the specific species you’re breeding.

    Watching nano rasboras breed is fascinating. They lay their eggs on plants or special spawning mops. But, adults might eat the eggs or fry if they’re left together. So, it’s best to move the eggs to a separate tank for them to grow safely.

    Choosing the right tankmates is also important. Nano rasboras are small and peaceful, so they do well with calm fish. Keeping them with aggressive fish can stress them out. It’s best to keep them in a species-only tank for breeding.

    • Typical species: Boraras brigittae, Microrasbora kubotai, exclamation point rasbora
    • Natural habitat: blackwater streams, leaf litter, driftwood, dense plants
    • Water: soft, low GH/KH, pH 5.0–7.0, 72–80°F
    • Breeding: egg scatterers, use fine-leaved plants or spawning mops
    • Tankmates: peaceful or species-only for best breeding techniques for nano rasboras

    The Basics of Breeding Nano Rasboras

    A close-up scene showcasing the delicate breeding process of nano rasboras in a well-maintained 10-gallon aquarium. In the foreground, several tiny, colorful nano rasboras gracefully swim amidst lush aquatic plants and fine-gravel substrate. The middle-ground features spawning behavior, with a pair of rasboras entangled among green moss and floating plants, capturing the essence of their natural breeding ritual. The background displays soft, filtered light streaming through the water, creating a serene and inviting atmosphere. Use a macro lens effect to highlight the vibrant colors and intricate details of the fish and plants, emphasizing the tranquility of this underwater setting. The mood should evoke a sense of calm and harmony in a thriving micro-ecosystem.

    Most nano rasboras show clear differences between males and females. Males are brighter and more active, trying to attract females. They either scatter eggs or lay them on plants like Java moss.

    Eggs hatch in 24–72 hours, depending on the water temperature. After hatching, the fry need tiny food like infusoria or liquid fry foods. This is because they grow fast.

    Feeding them right is key. Start with very small foods, then move to tiny brine shrimp and crushed foods. Feed them often but in small amounts to keep the water clean.

    To breed nano rasboras well, manage their numbers and sex ratio. Keep small groups with more females than males. This helps reduce aggression and encourages more spawns.

    • Provide dense fine-leaved plants or Java moss for egg deposition.
    • Offer spawning mops or peat for extra hiding places for eggs.
    • Consider a dedicated breeding tank to boost survival rates.

    To trigger spawning, make small changes to the water. Softer, slightly acidic water and a small temperature change can help. Also, increase live or frozen foods before spawning.

    Protecting eggs is important. You can leave dense plants in place for hiding. Or, remove adults to a separate tank after spawning.

    By following these basics, you can see better results. Good conditions, the right cover, balanced sex ratios, and tiny first foods are essential. They help you breed nano rasboras successfully and repeatedly.

    Setting Up Your 10-Gallon Tank for Breeding

    Begin with reliable, adjustable equipment. A small heater is key for a stable temperature. Choose a gentle sponge filter or a low-flow hang-on-back unit. These options protect fry and provide biological filtration and mild circulation.

    Opt for dimmable LED lighting to support plants without stressing fish. An aquarium lid helps reduce evaporation and drafts. Soft, steady light promotes plant growth and natural behavior in breeding nano rasboras.

    • Substrate options: fine-grain sand or bare bottom work well. Many breeders prefer a dark substrate to boost color.
    • Hardscape: use driftwood to lower pH with tannins and to create hiding spots.
    • Plants: include Java moss, Christmas moss, Java fern (Windelov), guppy grass, and floating Amazon frogbit for cover and spawning sites.

    Choose dense, fine-leaved plants and mosses for egg attachment. Spawning mops or a layer of peat and leaf litter mimic natural conditions. This meets the needs of nano rasbora breeding setups.

    Keep the flow low to moderate. A sponge filter provides oxygen and gentle current, keeping fry safe. Test oxygen levels and ensure currents don’t sweep eggs away.

    Cycle the tank fully before adding breeders. Use a fishless cycle and test pH, GH, KH, ammonia, nitrite, and nitrate. If your tap water is hard, mix reverse osmosis water with tap water or use peat-filtered water. This will help achieve softer, slightly acidic conditions that suit most nano rasbora breeding tank requirements.

    Stock the tank conservatively in a 10-gallon. For small species, plan 8–12 fish for a colony, or keep a pair or trio for focused breeding. Follow 10-gallon stocking guides and choose between community or species-only setups. This depends on aggression and fry survival when breeding nano rasboras.

    Creating the Perfect Environment for Spawning

    To meet nano rasbora breeding tank requirements, start with stable water chemistry. Use RO water or peat filtration to soften water and lower GH and KH. Aim for a pH in the 5.5–6.8 range for many species. Keep temperature steady near 74–78°F unless your species needs a different range. Test often so ammonia and nitrite stay at 0 ppm and nitrates remain low with routine partial changes.

    Tannins help trigger spawning. Add Indian almond leaves or driftwood to tint the water and mimic blackwater habitats. These additions lower pH slightly and reduce stress, which encourages natural breeding behavior. Light tannin levels also make eggs and fry less visible to predators.

    Light should be moderate and consistent. Use plant-friendly fixtures and keep a daily photoperiod of about 8–10 hours to promote growth and calm behavior. Avoid intense lighting that drives shy spawners into hiding. Floating plants such as Amazon frogbit diffuse light and create shaded zones for timid fish.

    Select plants that offer fine cover for eggs and fry. Java moss, Christmas moss, guppy grass, and pearl weed supply adhesive surfaces and protection. Dense mats and spawning mops give parents places to deposit eggs. If adults are known to eat eggs, plan to remove adults or collect the eggs promptly.

    Conditioning and small temperature shifts can prompt spawning. Raise the tank temperature by 1–2°F for a short period or perform a slightly cooler water change depending on natural cues for your species. Feed frequent, protein-rich meals like daphnia, brine shrimp, or microworms for one to two weeks before breeding.

    Lay out a clear nano rasbora breeding setup with hiding places and gentle flow. Use fine-leaved plants and cavities to protect eggs. If you prefer to collect eggs, include a spawning mop or a slatted separator to keep eggs safe from adults. Thoughtful layout reduces egg predation and improves fry survival.

    Review breeding techniques for nano rasboras by observing behavior and adjusting variables incrementally. Keep records of water parameters, feed types, and any temperature changes. Careful notes help you refine your approach and repeat successful cycles in the future.

    Introducing Breeding Pairs

    Start by picking healthy fish for breeding nano rasboras. Look for active fish with bright colors. Females should have rounded bellies. Males often show more vivid colors.

    Avoid thin or pale fish to reduce disease risk. Buy from a reputable local fish store or a trusted breeder. They should document their captive-bred lines.

    Quarantine new arrivals for at least two weeks in a separate tank. Watch for parasites and signs of illness. Treat problems with targeted medications only when safe for future fry.

    Acclimate slowly to your tank’s water. Use drip acclimation or gradual mixing of water to prevent shock. This is vital if your water is soft and tannin-rich.

    Think about group dynamics and sex ratios when planning. Introduce a small group of six to twelve fish. A ratio of one male to two or three females reduces male harassment.

    Condition your chosen fish for spawning over several weeks. Feed a varied diet of micro pellets, frozen daphnia, mosquito larvae, and live or frozen brine shrimp. Keep up regular water quality maintenance during conditioning to support health.

    Place breeders in the prepared 10-gallon only after the tank is fully cycled and well planted. Provide ample cover with plants and fine-leaved moss so fish feel secure. Observe interactions closely for signs of chronic stress or aggression.

    If you see excessive chasing or hiding, adjust stocking levels or add more cover. Small tweaks at this stage follow nano rasbora breeding tips that increase the chance of successful spawning. Careful observation during introduction helps you learn how to breed nano rasboras with steady results.

    Monitoring the Breeding Process

    Watch how males and females interact. Males will show off their bright colors and chase the females. They might also bump into plants. By recording these moments, you can guess when they’ll spawn.

    Look for eggs stuck to leaves or hidden in moss. Spawning can happen in batches over a few days. Keep the water clean to prevent egg loss. Small water changes help keep the environment stable.

    • If adults eat eggs, move adults to another tank or use a breeder net.
    • Some keepers remove moss or spawning mops into a dedicated fry tank for safer incubation.
    • Remove cloudy or fungus-infected eggs promptly to protect healthy ones.

    Check the eggs after 24–48 hours. Healthy eggs are clear and show a tiny embryo. Cloudy eggs might have fungus. In a separate tank, use methylene blue to treat fungus, but do it carefully.

    Keep the environment stable. Avoid big changes in temperature and water movement. These can harm the eggs and fry. A stable environment helps them grow and survive.

    1. Log water parameters daily: pH, temperature, ammonia, nitrite, and nitrate.
    2. Record feeding routines and any spawning triggers you used.
    3. Note fry counts and survival to refine future attempts.

    Use your notes to improve your breeding techniques. Try small changes in temperature or add tannins. Keeping detailed records will help you find the best way to breed nano rasboras in your tank.

    Feeding and Care for Fry

    Start with infusoria or commercial fry foods for the first few days. These foods are the right size for fry and keep them active. This is a key step in a nano rasbora care guide for early survival.

    After three to seven days, introduce brine shrimp or microworms. Feed small amounts several times a day. Use micro pellets or finely crushed flake food as a supplement when fry grow bigger.

    Follow a gradual feeding schedule. Offer tiny portions often and increase amounts as fry get bigger. This helps fry grow without fouling the water.

    Keep the water pristine. Use a gentle sponge filter and do frequent small water changes of 10–20%. Rinse sponge filters in tank water to preserve beneficial bacteria.

    • Provide dense moss and plants for grazing and hiding.
    • Include floating plants to diffuse light and reduce stress.
    • Maintain low flow so fry can feed without being swept away.

    Expect fry to grow noticeably over weeks with good water quality and diet. Monitor growth and look for stunted individuals. If overcrowding occurs, move juveniles to a larger tank for healthy development.

    When fry accept larger foods, start weaning onto frozen daphnia and finely crushed pellets. Gradually transition to a varied adult diet while tracking growth rates. Good husbandry during this stage completes any solid nano rasbora care guide and secures long-term success for your school.

    Common Challenges in Breeding Nano Rasboras

    Egg and fry predation is a big challenge in breeding nano rasboras. Adults and bigger fish eat eggs and fry fast. Use a special breeding tank or move eggs to a separate incubator.

    Heavy moss, spawning mops, or dense plants help hide eggs and increase survival chances.

    Water quality issues are another big problem. Ammonia, nitrite spikes, high nitrates, and pH or hardness changes can kill eggs and fry. Keep the tank cycled, test water often, and do partial water changes. A sponge filter helps protect fry and filters the water.

    Diseases and fungus can quickly ruin a spawn. Fungal growth on eggs and parasites on adults need quick action. Quarantine new fish and treat sick adults before breeding. Remove fungus from eggs and use methylene blue in an incubation tank if needed.

    Algae and plant care also play a role. Too much algae can harm eggs or weaken plants. Control light and nutrients. Use nerite snails or small Amano shrimp for algae control if they fit your tank. Regular maintenance keeps plants healthy and reduces stress.

    • Stress and aggression can lower spawning rates. Overcrowding, poor sex ratios, or little cover increase tension among fish.
    • Adjust the number of fish and add plants for shelter and breeding sites.
    • Stable temperature and chemistry help keep fish calm and predictable.

    Equipment failures and outages are high-risk in small tanks. Power loss or heater failure can be deadly. Have a plan: use battery-powered air pumps, aquarium-safe backup heaters, or a neighbor for help. Modern hobbyists often use smart leak detectors and uninterruptible power supplies for peace of mind.

    Practical breeding techniques for nano rasboras can solve many problems. Use separate breeding vessels, keep low light and tannin-rich water for some species, and use slow, gentle filtration. These methods improve egg retention and fry health.

    Keep nano rasbora breeding tips handy and adapt as you learn each species’ quirks. Track water reports, note behavior changes, and refine your tank setup. Persistent observation and small, steady adjustments will increase your success rate over time.

    Ensuring Long-Term Success in Breeding

    Keep detailed records of your breeding efforts. Note down parentage, water conditions, feeding, spawn dates, hatch rates, and fry survival. These logs will show you the best breeding methods for your nano rasbora setup. Short, regular notes are more helpful than long, sporadic ones.

    Focus on breeding healthy, vigorous fish. Aim for natural colors and strong fry. Avoid close inbreeding by introducing new, unrelated fish. This keeps your breeding program diverse and successful.

    Plan carefully for the future of your fry. Rehome them through local stores, aquarium societies, or hobbyist groups. Never release fish into the wild. Regularly clean your setup, rotate plants, and check filters. Take breaks between breeding cycles to prevent disease.

    Stay updated with the latest in breeding. Use tools like water test kits, smart timers, and automation. Choose sustainable or captive-bred fish. Use eco-friendly equipment to care for your aquarium responsibly.

    FAQ

    What species of nano rasboras are best suited for breeding in a 10‑gallon tank?

    Many hobbyists breed Boraras brigittae, Microrasbora kubotai, and small Exclamation Point Rasbora relatives in a 10‑gallon. Choose species under an inch long with peaceful, schooling behavior. Match your setup to the species’ specific water preferences—some prefer very soft, acidic blackwater while others tolerate slightly higher pH. A species‑only colony often yields the best breeding results.

    Do I need to cycle the tank before introducing breeders?

    Yes. Fishless cycling is strongly recommended to fully establish beneficial bacteria and eliminate ammonia and nitrite spikes. A fully cycled tank with stable parameters (ammonia and nitrite at 0 ppm, low nitrates) protects eggs and fry and reduces stress on breeders.

    What are ideal water parameters for breeding nano rasboras?

    Aim for soft water (low GH and KH) and species-appropriate pH—many nano rasboras prefer 5.0–7.0, commonly 5.5–6.8 for breeding. Temperature usually sits between 72–80°F; many breeders use 74–78°F. Keep ammonia and nitrite at 0 ppm and keep nitrates low with frequent partial water changes.

    How should I stock a 10‑gallon for successful breeding?

    A 10‑gallon suits a small colony of 8–12 nano rasboras depending on species, or a focused trio/pair for breeders. Use a higher female:male ratio (about 2–3 females per male) to reduce male harassment. Avoid overcrowding and choose peaceful tankmates or run a species‑only tank.

    What tank setup and equipment do I need?

    Use a reliable adjustable heater and stable temperature control, a gentle sponge filter or low‑flow hang‑on‑back filter to protect fry, dimmable LED lighting for plants, and an aquarium lid. Consider RO water or peat filtration to soften water and driftwood or Indian almond leaves to add tannins for blackwater cues.

    Which plants and substrates encourage spawning?

    Dense, fine‑leaved plants and mosses like Java moss, Christmas moss, Windelov Java fern, guppy grass, and carpeting plants help. Floating plants such as Amazon frogbit diffuse light. Dark, fine‑grain substrate can enhance colors, while leaf litter or peat mimics natural spawning beds. Spawning mops are a practical alternative.

    How do I trigger spawning in nano rasboras?

    Common triggers include slightly softer, acidic water, a small temperature change (±1–2°F), and conditioning with high‑quality live or frozen foods (daphnia, brine shrimp, microworms) for 1–2 weeks. Adding tannins (almond leaves, driftwood) and providing dense moss or spawning mops also encourages egg laying.

    Should I remove adults after spawning to protect eggs?

    If adults are known to eat eggs, remove them or move the spawning substrate (moss or mop) to a fry tank. Or, provide very dense hiding places like thick Java moss so eggs can survive. Using a breeder net or dedicated breeding tank increases egg/fry survival.

    How long until eggs hatch and fry become free‑swimming?

    Eggs usually hatch in 24–72 hours depending on temperature. Fry often become free‑swimming several days after hatching. Timelines vary by species and water temperature—warmer speeds development within safe limits.

    What should I feed newly hatched fry?

    Begin with infusoria or commercial liquid fry foods until fry can take larger prey. After a few days to a week, introduce newly hatched brine shrimp (Artemia nauplii), microworms, and finely crushed micro pellets or flake. Feed small, frequent portions several times daily to promote steady growth.

    How do I maintain water quality with fry present?

    Perform small, frequent water changes (10–20%) with temperature‑ and parameter‑matched conditioned water. Use sponge filters rinsed in tank water to preserve bacteria. Test ammonia, nitrite, and nitrate regularly, and keep ammonia/nitrite at 0 ppm and nitrates low.

    Can I use RO water to breed nano rasboras if my tap water is hard?

    Yes. Mixing RO water with conditioned tap water or using peat-filtered water helps achieve low GH/KH and desired pH. Test and adjust slowly to match species requirements and avoid shock during acclimation and water changes.

    How do I prevent fungal infection on eggs?

    Remove unfertilized or cloudy eggs promptly. Good water quality and stable conditions reduce fungus risk. Some breeders incubate eggs in a separate tank and use methylene blue sparingly in that isolation tank, but avoid medications in the main breeding tank unless necessary.

    What are common causes of breeding failure and how do I fix them?

    Common causes include uncycled tanks, poor water quality, incorrect parameters (hardness or pH), inadequate cover or spawning sites, skewed sex ratios, and stress from aggressive tankmates or bright light. Corrective steps: ensure a fully cycled tank, soften water if needed, add dense plants/moss, adjust sex ratios, and minimize disturbances.

    Is selective breeding recommended for nano rasboras?

    Selective breeding can improve color and behavior, but prioritize health and avoid inbreeding. Maintain records of parentage, introduce unrelated stock periodically, and focus on vigor and natural coloration.

    How many fry can I reasonably raise in a 10‑gallon tank?

    A 10‑gallon can raise a moderate number of fry if filtration, food, and maintenance are excellent. Avoid overcrowding to ensure healthy growth. Consider moving large clutches to grow‑out tanks or sharing surplus with local hobbyists.

    What quarantine steps should I take before introducing new breeders?

    Quarantine new fish for at least two weeks in a separate tank to observe for parasites and disease. Treat visible illnesses in quarantine; avoid broad‑spectrum medications that could harm future fry. Observe feeding, activity, and body condition before introducing to the breeding tank.

    Which tankmates are safe with breeding nano rasboras?

    If you want to breed successfully, species‑only tanks are safest. If you include tankmates, choose tiny, peaceful species that won’t prey on eggs or fry—small snails like nerites or small shrimp (if compatible) may work. Avoid larger or aggressive fish that will eat eggs and fry.

    What recordkeeping helps improve breeding success?

    Keep a log of water parameters, feeding regimens, spawn dates, hatch rates, and fry survival. Note triggers used (temperature shifts, tannins, feeding schedules). Records help identify patterns that lead to successful spawns and inform iterative improvements.

    How should I acclimate breeders to my tank’s water?

    Use slow acclimation—drip acclimation or gradual mixing of bag water with tank water over 30–60 minutes—to minimize shock. This is essential when moving fish into softened, tannin‑rich water that differs from the seller’s conditions.

    What emergency preparations should I have for a small breeding tank?

    Plan for power outages and heater failures with a battery‑powered air pump, spare aquarium heater, or neighbor support. Consider smart outlets or UPS systems for critical equipment. Quick contingency actions protect eggs and fry during outages.

  • Common Nano Fish Ailments and How to Treat Them Safely

    Common Nano Fish Ailments and How to Treat Them Safely

    You love keeping a nano tank because of its compact size and delicate species like ember tetras or cherry shrimp. But, tanks under 10 gallons can quickly show changes in water chemistry. This makes fish diseases in nano setups appear and spread fast.

    Many issues you see are signs, not single diagnoses. Ammonia burns, nitrite stress, dropsy, and swim bladder problems often look similar at first. To diagnose correctly, you need to test your water first.

    Poor water quality, overcrowding, and sudden temperature drops are common causes of illness. Shipping stress or aggressive tankmates also weaken fish and invite infections. It’s key to address the cause to prevent diseases from coming back.

    Your first step should be practical: quarantine sick fish, test and stabilize water, and use medicines only when needed. Supportive measures like salt baths, better nutrition, and small water changes can help fish recover faster.

    Vets and experienced aquarists suggest keeping water quality high, cycling tanks fully before adding fish, and managing filter media carefully. If over-the-counter treatments don’t work, medicated food or professional care might be needed for effective treatment.

    Understanding Nano Fish and Their Vulnerabilities

    A serene underwater scene showcasing a variety of nano fish species displaying bright colors and intricate patterns, swimming among lush aquatic plants and vibrant corals. In the foreground, a school of tiny, delicate fish, like the neon tetra and guppy, exhibit signs of minor ailments through subtle postures, emphasizing their vulnerabilities. The middle ground features a soft focus on a hidden cave and gentle flow of water, enhancing the sense of depth. The background gradually fades into a soft blue light, symbolizing a calming underwater environment. Illuminate the scene with gentle, diffused lighting that highlights the textures of the fish and plants, creating a tranquil, educational atmosphere, perfect for illustrating the nuances of fish health and the impacts of ailments in nano aquariums.

    A nano aquarium is usually under 10 gallons. In such a small space, changes in temperature, pH, and other factors happen quickly. It’s important to monitor these closely because small changes can stress fish and make them more vulnerable.

    The nitrogen cycle is key to keeping water stable. Good bacteria convert harmful ammonia into safer compounds. But, new or poorly cycled tanks often have ammonia spikes. This can poison fish, so it’s vital to cycle the tank before adding fish.

    Stressors like temperature drops and waste buildup are more severe in nano tanks. Even a little overfeeding can cause big problems. To avoid this, feed sparingly and keep the tank clean.

    • Temperature swings from small heaters or room drafts
    • Oxygen fluctuations at night or in crowded tanks
    • Waste accumulation in gravel and on plants
    • Higher sensitivity to overfeeding and medications

    Many nano fish, like bettas and small tetras, are sensitive to their environment. They can’t handle big changes in salinity or chemicals well. When using treatments, it’s critical to follow the instructions carefully to avoid harming the fish.

    To manage diseases in nano tanks, cycle the tank first, do small water changes weekly, and avoid changing filter media and water at the same time. These steps help keep the environment stable and protect the fish.

    Understanding the risks in nano tanks and how to manage them can help prevent diseases. By keeping the tank cycled and monitoring parameters closely, you can ensure better health for your nano fish.

    Identifying Symptoms of Illness in Nano Fish

    A close-up view of a nano aquarium featuring several small tropical fish showing symptoms of illness, such as faded colors and frayed fins. In the foreground, focus on a sick fish, with a slightly blurred effect to emphasize distress. The middle ground includes a vibrant aquatic environment with plants and rocks, while the background shows the tank's water features softly illuminated by natural lighting, creating a serene atmosphere. The lighting should be warm and inviting, highlighting the fish's details while casting gentle shadows. The overall mood conveys concern and a sense of urgency, reflecting the importance of identifying nano fish ailments.

    Spotting illness in nano fish starts with regular checks. Look for behavior and appearance changes during feedings. A simple checklist can help you catch issues early.

    • Lethargy or hiding more than usual
    • Loss of appetite or refusing food
    • Clamped fins or frayed fin edges
    • Abnormal swimming: spinning, floating, or sinking
    • Gasping at the surface or rapid breathing
    • Flashing or rubbing against decor
    • White spots, cloudy patches, or cotton-like growths
    • Swollen abdomen, protruding scales (dropsy), or bulging eyes
    • Red streaks, inflamed gills, ulcers, or visible parasites
    • Raspberry-like growths (lymphocystis)

    Understanding these signs is key. White spots often mean ich. A yellow sheen suggests velvet. Cotton-like growths are fungal.

    Frayed fins with color changes usually mean fin rot or bacteria. Rapid breathing and red gills are signs of ammonia poisoning or gill flukes.

    When you see symptoms, test the water fast. Check ammonia, nitrite, nitrate, pH, temperature, and dissolved oxygen. Many symptoms come from bad water quality, not infections.

    Act quickly. Isolate sick fish in a separate tank if you can. Do partial water changes and test again until levels are good. Keep a log of symptoms and when they happen to help choose treatments.

    If symptoms are severe—like severe lethargy, bloating, or hemorrhage—get vet help. Some viral and internal bacterial issues need special care beyond basic treatments.

    For everyday care, learn about common nano tank diseases. Regular monitoring and early isolation help keep your fish healthy and reduce stress.

    The Most Common Nano Fish Diseases

    It’s important to know about common fish diseases in nano tanks. This way, you can react fast. Small tanks can make problems worse because of poor water quality, sudden temperature changes, and too many fish.

    • Ammonia Poisoning: not an infection but very common in new or uncycled tanks. Look for labored breathing, gasping at the surface, loss of appetite, lethargy, red streaks, inflamed gills, and bottom-dwelling behavior.
    • Ich (White Spot Disease): Ichthyophthirius multifiliis shows as tiny white cysts, flashing, lethargy, and reduced feeding. It spreads quickly among stressed fish.
    • Velvet (Gold Dust Disease): caused by Piscinoodinium or Amyloodinium. You’ll see a dusty yellow sheen, sudden flashing, lethargy, and appetite loss.
    • Columnaris (Cotton Mouth): a bacterial issue that produces cottony growths, raised patches, pale gills, and trouble swimming.
    • Fin Rot: frayed or rotting fins with inflammation at the base. Often follows poor water quality or fin nipping.

    Keep reading the list to spot less common but serious threats.

    • Bacterial Infections (Aeromonas and others): symptoms include swollen eyes, ulcers, hemorrhagic lesions, and ragged fins. These infections often follow injury or stress.
    • Dropsy: abdominal swelling with pineconing scales. This signals systemic bacterial infection or organ failure and needs urgent attention.
    • Flukes and Parasites: gill or skin flukes cause red spots, increased mucus, flashing, and labored breathing.
    • Fungal Infections: white, wool-like patches on body, mouth, or gills. They usually affect weakened fish.
    • Swim Bladder Disorder: buoyancy problems from constipation, infection, or organ issues that make swimming erratic.

    External parasites can be visible and dramatic.

    • Anchor Worms and Visible External Parasites: raised ulcers and attached crustaceans. Manual removal plus antiseptic care is needed.
    • Lymphocystis and Viral Conditions: raspberry-like growths that are often self-limiting but may need surgical removal when severe.
    • Hemorrhagic Septicemia and Severe Systemic Infections: bleeding, bulging eyes, and severe abdominal bloating. These bacterial infections respond to targeted antibacterial therapy when caught early.

    Use nano fish disease control strategies to reduce risk. Regular testing, partial water changes, sensible stocking levels, and prompt quarantine of new arrivals cut down on nano aquarium fish illness.

    When you spot symptoms, act quickly. Early diagnosis and correct treatment raise recovery chances in confined nano tanks.

    Treatment Options for Nano Fish Diseases

    When you see illness in a nano tank, act fast and stay calm. Start by improving water quality. Do partial water changes, clean the substrate, check the temperature, and add oxygen with an air stone. For ammonia spikes, change the water often and make sure the tank is ready for new fish.

    Use a quarantine tank to keep sick fish separate. This stops the disease from spreading and lets you treat the fish safely. A small hospital tank helps target the treatment and keeps the main tank healthy.

    • Antibacterials and antibiotics: vets often recommend injectable or medicated food like erythromycin or kanamycin. These are better than water treatments for nano tanks. Always follow the vet’s advice on how much to use and for how long.
    • Antiparasitics: formalin, malachite green, copper sulfate, praziquantel, chloroquine for velvet, and potassium permanganate fight different parasites. Each needs careful measurement. In nano tanks, the risk of toxicity and oxygen loss is higher.
    • Antifungals: use targeted antifungal meds, do a big water change (30–50%), remove carbon from filters, and keep sick fish separate.

    Metronidazole works well for Hexamita and some protozoa. You can mix it into food or add it to the water if fish won’t eat. For small tanks, use less than in bigger tanks, and check dosing charts or ask a vet.

    Supportive care is key. Aquarium salt baths, better food, gentle temperature changes, and more oxygen can help. But be careful: changing the temperature or adding formalin can lower oxygen levels, so increase aeration.

    Manual removal is good for visible pests like anchor worms. Use fine forceps to remove parasites, then treat the wound with a safe antiseptic. This combines physical removal with medical treatment in many cases.

    1. Measure carefully and change medications slowly. Small tanks can make chemicals more concentrated, making overdosing easy.
    2. If over-the-counter treatments don’t work, or if a fish shows serious signs like severe lethargy, bloody lesions, or loss of appetite, see a fish vet. Complex bacterial infections and cases needing medicated food often need professional help.
    3. Keep records of treatments, doses, and water parameters. This helps refine treatment plans and supports managing fish diseases in nano tanks.

    Quick action and careful dosing are key to stopping an outbreak. Use quarantine, targeted medications, and strong supportive care in a well-planned strategy for nano fish disease control.

    Preventative Measures for Healthy Nano Fish

    To keep your nano tank healthy, follow a simple checklist. First, cycle the tank before adding fish. Use fishless cycling or live nitrifying bacteria products from brands like Seachem or API. Don’t count on hardy fish to cycle the tank.

    Test your water often for ammonia, nitrite, nitrate, pH, and temperature. Use a good aquarium test kit and keep records. Small, regular water changes are better than big, infrequent ones.

    • Perform modest water changes; avoid changing more than 50% at once.
    • Do not change filter media on the same day as a water change to preserve beneficial bacteria.
    • Siphon substrate regularly to remove trapped organic waste.

    Avoid overfeeding. Feed the right amount for your fish and remove uneaten food quickly. Overfeeding leads to organic buildup, ammonia spikes, and poor fish health in nano tanks.

    Plan your stocking levels for when your fish are adults. Overcrowding increases stress and disease spread. Quarantine new fish for two to three weeks in a separate tank to treat infections before they reach your main tank.

    Choose the right filtration and oxygenation for your small tank. Make sure filters don’t create too much flow for calm-water species. Use reliable heaters and thermometers to keep the temperature stable and prevent sudden drops that stress fish.

    Feed high-quality, species-appropriate foods to boost your fish’s immune system. Remove sick or dead fish quickly. Use targeted nano fish disease management techniques when needed to limit disease spread.

    1. Cycle the tank first; use fishless methods or live bacteria products.
    2. Test water often; track ammonia, nitrite, nitrate, pH, temperature.
    3. Maintain small regular water changes; protect beneficial bacteria.
    4. Avoid overfeeding; match portions to species needs.
    5. Stock for adult size; quarantine newcomers 2–3 weeks.
    6. Use appropriate filtration and stable heaters; control flow.
    7. Feed quality diets; remove sick or dead fish quickly.

    By following these steps, you can prevent diseases in your nano tank. Regular care and practical disease management techniques will protect your fish. Simple, consistent habits lead to the best fish health in nano systems.

    The Role of Tank Mates in Fish Health

    Your choice of tank mates affects stress and disease in a nano aquarium. Aggressive or fin-nipping species can harm your fish’s fins. This makes them more likely to get sick with fin rot. Choose peaceful species that fit your nano fish’s size and temperament.

    Too many fish in the tank can lead to poor water quality. This makes it harder to keep fish healthy and increases disease risk. Always consider the mature size of fish when stocking your tank.

    New fish may bring parasites or diseases. Quarantine them for at least two weeks to prevent these issues. This is a key part of keeping your tank disease-free.

    Invertebrates like shrimp and snails react differently to treatments. Copper and malachite green can harm them. Use a separate tank for treatments to protect your sensitive tank mates.

    Social fish like rasboras and tetras need friends to feel safe. Solitary fish, like bettas, prefer to be alone. Mixing incompatible species can stress them out and make them sick. Match their social needs when setting up your tank.

    Here are some practical tips to keep your fish healthy:

    • Research compatibility before you buy. Know adult sizes and temperaments.
    • Watch for bullying and fin-nipping. Intervene early with a divider or separate tank.
    • Quarantine new fish and observe for signs of parasites.
    • Consider treatment impacts on snails and shrimp before medicating the display.

    By following these steps, you can reduce stress and keep your fish healthy. Your careful choice of tank mates and attention to their needs will help manage diseases in your nano tank.

    The Importance of Regular Tank Maintenance

    Keeping fish healthy in nano tanks is simple with a regular maintenance routine. Regular checks and small upkeep keep water chemistry stable. This reduces stress and lowers disease risks, supporting long-term health in nano setups.

    Follow a weekly checklist to catch problems early:

    • Test ammonia, nitrite, nitrate, pH, and temperature.
    • Do a 10–25% water change depending on your bioload.
    • Siphon substrate to remove detritus and uneaten food.
    • Trim and remove dead plant material promptly.

    On a monthly basis, inspect equipment and refresh media carefully:

    • Clean external filter parts and rinse filter media in tank water to save beneficial bacteria.
    • Check heater, air pump, and thermometer for steady operation.
    • Replace activated carbon only when not treating disease; during medication remove carbon so drugs remain effective.

    Avoid over-cleaning biological media and avoid pairing a large water change with media cleaning. Sudden loss of nitrifying bacteria can spike ammonia and trigger illness.

    When you face a disease outbreak, step up your routine:

    • Increase test frequency and water changes in a hospital tank.
    • Keep oxygen levels high and temperature stable during treatment.
    • Separate sick fish to limit spread while you treat and monitor water quality closely.

    Consistent maintenance is the most effective nano fish disease prevention you can do. Stable water chemistry cuts opportunities for pathogens and makes managing fish diseases in nano tanks easier and faster.

    Nutrition and Its Impact on Fish Health

    Your nano tank diet is key to your fish’s health. Choose high-quality flakes or pellets that match your fish’s needs. Bad food can make them sick, so pick the right stuff.

    Give your fish a mix of foods to keep them healthy. Add frozen or live foods like brine shrimp and bloodworms. This keeps their diet interesting and helps them get all the nutrients they need.

    When your fish get sick, try medicated food. It’s gentler than other treatments. This way, your fish stay healthy without getting stressed.

    Constipation and swim bladder problems can be fixed with diet changes. Try fasting your fish for a day or two. Then, give them a thawed, skinned pea to help them go back to normal.

    Be careful not to overfeed your fish. Too much food can make the water dirty. This messes up your fish’s health and makes it hard to keep them well.

    If your fish have ongoing health issues, talk to a vet. They might suggest special foods or supplements. These can help your fish stay healthy for a long time.

    • Feed species-formulated pellets or flakes.
    • Rotate in frozen or live foods for variety.
    • Use medicated food for treatable infections when appropriate.
    • Fast and offer peas for constipation-related issues.
    • Practice strict portion control to protect water quality.

    Stress Reduction Techniques for Nano Fish

    Small changes in your tank routine can help reduce stress and lower the risk of illness in nano aquarium fish. Start by arranging decor that’s right for the species. Provide hiding spots, live or silk plants, and a soft substrate to mimic their natural habitat.

    Keeping water parameters steady is key to supporting immune function. Use reliable heaters and a good thermometer. Check the temperature daily and do partial water changes on a set schedule. Sudden changes can trigger illness and undermine disease prevention efforts.

    • Match flow to species needs; some prefer gentle currents while others enjoy stronger movement.
    • Avoid overcrowding; respect the social needs of schooling species by providing shoal mates when required.
    • Limit bright or flashy lighting and reduce external disturbances around the tank.

    Quarantine new arrivals in a separate tank for at least two weeks. This reduces shipping and retail stress. Quarantine also helps prevent the introduction of pathogens to your display.

    Minimize handling and use careful transfer methods during maintenance. Move fish with soft nets, dim lights, and gradual water mixing to prevent shock. These habits support fish health in nano setups.

    1. Provide stable diet and frequent small feedings to keep fish well-nourished.
    2. Use gentle filtration and routine filter checks to maintain water clarity without strong suction stress.
    3. Create a predictable maintenance routine so fish are not routinely exposed to abrupt changes.

    Address retail or shipping stress by giving new fish a restful quarantine. Optimal water, quiet surroundings, and quality food improve recovery and strengthen resistance to disease.

    Follow these measures to reduce stress, protect immune systems, and support long-term fish health in nano aquariums. This helps prevent nano aquarium fish illness through good disease prevention practices.

    Breeding Nano Fish: Considerations for Health

    Begin by quarantining any fish you think might breed for 2–3 weeks. This ensures they are healthy and don’t have parasites or bacterial infections. Quarantine helps you treat any internal issues before they spread to the breeding tank.

    Ensure the water quality is top-notch during spawning. Do small water changes and clean the substrate gently. This keeps the pathogen load low for the eggs and fry. Good hygiene is key to preventing diseases and helping fry survive their early days.

    Avoid overcrowding the fry. Too many fish can stress them out and spread diseases quickly. Use separate containers or dividers if you have a lot of fry.

    Feed the fry the right foods, like infusoria or rotifers. This supports their immune system and prevents malnutrition-related illnesses. Proper nutrition is essential for preventing diseases and keeping the fry healthy.

    • Watch for pathogens passed from the parents to the fry.
    • Quickly isolate any sick parents to stop the disease from spreading.
    • Use medicated feed for internal parasites like Hexamita, but talk to a vet first.

    Be careful with chemical treatments around eggs and fry. Formalin, malachite green, and copper can harm them. Treat the parents in quarantine instead to protect the fry and make disease management easier.

    Keep track of how well your fry are doing and adjust your care routine as needed. Small, consistent changes in water care and feeding can help more than using strong drugs. By using careful disease management, you can improve your breeding success and keep your fish healthy.

    Understanding the Lifecycle of Nano Fish

    Knowing about the lifecycle stages of nano fish helps in preventing and treating diseases. Many parasites go through free-swimming and attached phases. Knowing which stage is active is key to choosing the right treatment.

    Freshwater ich and marine ich have a free-swimming tomont and a feeding trophont stage. By controlling the temperature, you can speed up the lifecycle. This makes treatments more effective when applied for the full lifecycle period.

    Protozoans like velvet and ich detach from the host to reproduce. Treatments targeting free-swimming stages work best when applied for 7–10 days. This ensures the parasite is fully affected.

    Bacterial and fungal problems are different. They often exploit wounds or stress. Early treatment and clean water are essential. Keeping nitrates low also helps.

    Quarantine and cleaning the substrate interrupt parasite cycles. Removing breeding grounds and replacing or vacuuming the substrate lowers reinfection risk. This simple step makes treatment more reliable.

    Plan treatments based on lifecycle knowledge. Choose the right medication and duration for the parasite stage. Matching timing with method makes treatments more effective and less disruptive.

    • Identify the likely parasite stage before treating.
    • Use quarantine to stop spread between tanks.
    • Maintain treatments for the full lifecycle period, usually 7–10 days.
    • Address wounds and stressors early to prevent bacterial and fungal growth.

    Following these steps improves your chances of success. Lifecycle-based decisions are the foundation of effective nano fish disease management. They help protect the delicate communities in your aquarium.

    Resources for Further Assistance and Learning

    If you need more help with nano fish disease control strategies, start by documenting what you see. Record symptoms, water-test results, and any treatments you try. This makes it easier when you consult an aquatic veterinarian, who can prescribe medicated food or perform injections for complex or systemic illnesses that tank treatments cannot fix.

    Use authoritative references for diagnosis and dosing. The Merck Veterinary Manual is a solid source for fish disease information. Practical guides from Modern Aquarium and Interpet cover water chemistry, medication dosing, and identification tips. For product options, look for trusted formulations such as kanamycin-based KanaPlex, Bactocide preparations, and metronidazole for protozoal infections—always follow label directions and remove carbon during treatment.

    Build local and online support. Established aquarium forums, local fish clubs, and knowledgeable retailers offer species-specific advice and shared experience you can apply. Invest in reliable test kits, accurate thermometers, and appropriately sized filters and heaters for your nano tank. These tools, along with quarantine practices, routine maintenance, and balanced feeding, are the cornerstone of long-term fish health in nano setups and effective nano fish disease management techniques.

    FAQ

    What defines a nano aquarium and why are nano fish more vulnerable to disease?

    Nano aquariums are small, usually under 10 gallons. Their tiny size means water changes and quality issues can quickly affect the fish. This makes the fish more likely to get sick from poor water, too many fish, or stress.

    Many symptoms look similar. How do I know if my fish has an infection or a water-quality problem?

    In small tanks, many signs can mean different things. First, test the water for ammonia, nitrite, nitrate, pH, and temperature. Look for signs like rapid breathing or lethargy. White spots usually mean ich, while a yellow sheen suggests velvet.

    Use these signs along with water test results to figure out what’s wrong. Then, isolate the sick fish and start treating it.

    What immediate steps should I take when I spot an ill fish in a nano tank?

    Move the sick fish to a separate tank if you can. Test the water in both tanks. Do small water changes if needed.

    Also, clean the substrate and make sure the water is the right temperature and oxygen level. Keep track of the symptoms and how long they’ve been there. Then, choose the right treatment and follow the instructions carefully.

    Which diseases are most common in nano tanks and what are their key signs?

    Common diseases include ammonia poisoning, ich, velvet, columnaris, fin rot, dropsy, and gill or skin flukes. Look for signs like labored breathing, white spots, or frayed fins.

    These diseases can be caused by poor water quality and stress. Keeping the tank clean and stable can help prevent them.

    How do nitrification and the nitrogen cycle affect fish health in nano aquaria?

    Nitrifying bacteria help keep the water safe by breaking down ammonia. But small tanks can’t handle much waste. This means ammonia can build up quickly, harming the fish.

    It’s important to cycle the tank properly before adding fish. This helps prevent ammonia poisoning.

    What treatment categories work best for nano fish, and what dosing cautions apply?

    Treatments include fixing water quality, using a quarantine tank, and choosing the right medications. Antibiotics and antiparasitics are often used, but they must be used carefully.

    Medicines can be given in food or as injections. Always follow the instructions and talk to a vet if needed. Be careful not to overdose the fish.

    Are there medications I should avoid in nano tanks because of small volume or inhabitants?

    Yes, some medicines can harm shrimp, snails, and certain fish. Copper, malachite green, formalin, and potassium permanganate are examples. Always consider the safety of your tank’s inhabitants.

    Remove invertebrates and treat the sick fish in a separate tank. Also, take out activated carbon from filters during treatment.

    How do I use medicated food or injections practically in a nano setup?

    Use medicated food for internal infections when fish are eating. It delivers the medicine directly. For severe cases, a vet can prescribe injections or special diets.

    Avoid using water-based antibiotics for serious illnesses when other options are available.

    What preventive measures are most important for disease control in nano tanks?

    Prevent disease by fully cycling the tank, quarantining new fish, and testing water often. Do small water changes and avoid overfeeding.

    Keep the tank clean and the temperature stable. Don’t change filter media and do big water changes on different days.

    How do tankmates affect disease risk in nano aquaria?

    Aggressive fish can hurt others, leading to infections. Overcrowding increases waste and disease risk. Some fish carry parasites without showing symptoms.

    Snails and shrimp are sensitive to many treatments. Social fish need friends, while solitary ones may get stressed by others. Research compatibility and use dividers if needed.

    What regular maintenance should I follow for a healthy nano aquarium?

    Test water weekly and do small water changes. Clean the substrate and remove uneaten food. Monthly, clean the filter and check the heater and air equipment.

    Replace activated carbon only when not treating disease. Avoid big changes in water and media at the same time.

    How does diet influence disease resistance in nano fish?

    Poor diet weakens the fish’s immune system, making them more prone to disease. Feed high-quality food and add supplements like frozen or live foods.

    Use vitamin-enriched foods when recommended. Avoid overfeeding to prevent waste and ammonia buildup. For internal parasites, medicated food is often better than baths.

    What are simple stress-reduction strategies that lower disease risk?

    Provide hiding spots and plants. Use gentle filtration and maintain stable water parameters. Avoid overcrowding and sudden changes.

    Minimize handling and disturbances. Quarantine new fish and stressed ones in a separate tank with good water quality.

    How should I approach breeding nano species with health in mind?

    Quarantine parent fish for 2–3 weeks before breeding. Keep water quality high and do frequent small water changes during breeding and fry care.

    Feed fry foods like infusoria and rotifers to prevent malnutrition. Avoid overcrowding and be cautious with medications around eggs and larvae.

    Why does knowing parasite and pathogen lifecycles matter for treatment?

    Understanding lifecycles helps choose the right treatment and duration. For example, ich and velvet need treatments that cover their full lifecycle.

    Early treatment and water-quality control are key for preventing systemic infections. Quarantine and clean the substrate to break life cycles.

    When should I consult an aquatic veterinarian?

    See a vet for severe symptoms like dropsy, hemorrhage, or neurological issues. Vets can prescribe treatments and provide guidance.

    They can also diagnose internal infections and recommend targeted antibiotic therapy.

    What testing equipment and products are recommended for nano tanks?

    Use reliable test kits for ammonia, nitrite, nitrate, pH, and a good thermometer. Choose the right filtration and heaters for your tank size.

    Trusted medications include kanamycin-based products and metronidazole for protozoans. Always follow the instructions and remove carbon during treatment. Consult the Merck Veterinary Manual and aquarium resources for guidance.

    How can I document illness to get better help from forums or professionals?

    Record symptoms, when they started, water test results, recent tank maintenance, and stocking list. Take clear photos or videos of the fish.

    Share tank size, filtration type, temperature, and if you have invertebrates. This information helps experts diagnose the problem faster.

  • The Benefits of Lava Rock for Filtration and Stability in Nano Tanks

    The Benefits of Lava Rock for Filtration and Stability in Nano Tanks

    You need reliable filtration and stable hardscape in a nano tank. Lava rocks offer both without adding heavy weight.

    Lava rock benefits include high porosity and rough surfaces. These let beneficial bacteria colonize. This helps break down ammonia and nitrite, supporting the nitrogen cycle.

    The porous cavities in lava stone landscaping also create tiny anaerobic zones. These pockets let denitrifying bacteria reduce nitrates over time. This improves long-term water quality for shrimp and small fish.

    Beyond filtration, lava rocks add structural stability. They anchor substrate, prevent shifting, and provide secure attachment points for plants and décor in compact setups.

    You’ll find habitat advantages too: holes and crevices serve as hiding spots, grazing surfaces, and feeding areas for shrimp. Red or black lava rock offers aesthetic versatility, letting you control your aquascape’s mood.

    Lastly, most lava rock is pH neutral and lightweight. This makes it safe and easy to arrange in nano tanks. Using lava rocks is a practical choice for efficient filtration and a stable, attractive layout.

    Introduction to Lava Rocks in Nano Tanks

    A serene nano tank with a clear glass structure, showcasing vibrant aquatic life among lush green plants. In the foreground, intricately shaped and textural lava rocks are strategically placed, providing natural filtration and stability, with a soft glow highlighting their porous surfaces. The middle layer features colorful fish gracefully swimming around the lava rocks, creating an active and dynamic scene. In the background, soft lighting casts a calm ambiance, with bubbles rising gently and a faint blue hue illuminating the water. The overall atmosphere is peaceful and lively, showcasing the essential role of lava rocks in enhancing the nano tank's ecosystem. The image captures the essence of nature's beauty and functionality.

    Lava rock is a volcanic rock that forms when lava cools and gas gets trapped. This creates a bubbly, porous texture. These pores are great for aquariums because they provide lots of space for beneficial bacteria.

    The rough, natural look of lava rock fits well in small aquascapes. It also serves a purpose beyond just looking good.

    Hobbyists choose lava rock for nano tanks because it’s stable and helps anchor plants. It also creates hiding spots for shrimp or small fish. Using lava rocks adds a rugged texture and boosts biological filtration.

    Lava rock comes in various sizes for different tank setups. Small stones are perfect for tiny tanks and the foreground. Medium stones work well for 10–20 gallon tanks, helping shape gentle slopes. Larger stones are great for taller aquascapes and provide focal points.

    Most lava rock is safe for freshwater tanks because it’s chemically inert. This makes it a better choice than reactive rocks like limestone, which can change water chemistry. To use lava rocks safely, rinse them and place them where they can help with flow and filtration.

    This guide is for nano-tank keepers and aquascapers in the United States. It focuses on low-maintenance, natural filtration and stable hardscape options. Volcanic rocks offer both beauty and practical benefits, helping you create a healthy, attractive miniature ecosystem.

    Key Benefits of Using Lava Rocks

    A close-up view of porous lava rock pieces arranged artistically in a landscaped nano tank setting, showcasing their texture and natural colors. In the foreground, highlight the dark, rough surface of the lava rocks with glistening, water droplets, emphasizing their filtration quality. The middle ground features small aquatic plants thriving among the rocks, symbolizing stability and life within the tank. In the background, include a soft-focused water surface with gentle ripples and hints of light filtering through, creating a serene atmosphere. Utilize natural lighting to enhance the textures and colors, capturing the beauty and functionality of lava rocks in a nano tank environment. The image conveys a sense of tranquility, highlighting the ecological benefits of using lava rocks.

    Lava rock boosts biological filtration in nano tanks. Its porous surface is perfect for nitrifying bacteria. They convert ammonia to nitrite and nitrate. Tiny pockets in the rock also support denitrifying bacteria, lowering nitrate levels.

    For plants, lava rocks are great for anchoring epiphytes like Anubias and Java Fern. The rough texture lets plants attach without glue. This makes it easy to position growth where you want it. The rock also helps keep driftwood and substrate in place.

    Lava rocks improve the welfare of fish and shrimp. They use the rock’s pores as grazing spots and shelter. This reduces stress and encourages natural behaviors, creating territories in crowded tanks.

    Designing your tank becomes easier with lava rock. Red lava adds warmth, while black lava creates a dramatic look. You can sculpt focal points and depth with its varied porosity and weight.

    Lighter lava rocks are easier to handle. Many red lava pieces are more porous and lighter. This makes it simple to place and stack them in small displays.

    Lava rock is also useful outside the aquarium. Use it as mulch in planters or around fire pits. This versatility means it can be used for both aquatic and terrestrial projects at home.

    • Enhanced biological filtration and cycling
    • Secure anchoring for epiphytes and décor
    • Improved shelter and grazing for livestock
    • Flexible visual design options
    • Lightweight handling for fine adjustments
    • Dual use as landscaping lava rock mulch

    How Lava Rocks Improve Water Quality

    Lava rocks in your nano tank offer a lot of surface area for beneficial bacteria. Their porous texture creates many spots for aerobic nitrifiers to grow. At the same time, deeper areas are perfect for denitrifying bacteria to thrive.

    This setup helps break down all nitrogen types. Nitrate is reduced as anaerobic zones in the rocks convert it to nitrogen gas. This keeps nitrate levels low, which is good for fish and shrimp.

    The rough surfaces also act as filters. They catch particles and detritus, allowing bacteria to break them down. This leads to clearer water over time, if you also do regular cleaning and maintenance.

    Lava rocks are mostly inert and don’t release many minerals. They don’t raise the pH like limestone does. This makes them safe for shrimp, small fish, and plants.

    • Biofilm control: Grazing by shrimp and microfauna helps manage biofilm thickness.
    • Detritus processing: Trapped particles are consumed by microbes, reducing suspended solids.
    • pH stability: Minimal chemical leaching preserves tank balance.

    Together, these benefits make your tank’s filtration system strong and easy to care for. Using lava rocks with other design elements like lava stone landscaping can create a consistent environment for microfauna and bacteria.

    Comparing Lava Rocks to Other Substrates

    Lava rock stands out because of its surface area. It has many pores and crevices that are perfect for beneficial bacteria. In contrast, sand and smooth gravel have less surface area and tend to compact. This limits water flow and root anchoring.

    Opt for lava rock if you need vertical structure and stable anchor points for plants. Sand is better for bottom-dwelling species and fines. Gravel is simple and low-maintenance.

    Limestone and tufa change water chemistry over time. They release calcium and carbonate, raising pH and hardness. This makes them great for African cichlid tanks. Lava rock, on the other hand, stays inert and won’t raise pH much. It’s better for most community nano tanks.

    When picking lava rock, choose aquarium-grade for aquascapes. Horticultural lava rock or mulch may have fines and dust. Make sure to rinse it well to avoid cloudiness.

    Weight and fragility differ by type. Red lava rock is lighter and more porous, aiding in filtration and adding contrast. But, some red pieces crumble easily. Black lava is heavier and more durable, making it easier to place and stable over time.

    Aesthetics matter too. Black lava creates a muted background that makes colors pop. Red lava adds warmth and contrast. You can pair either with driftwood, Anubias, or carpeting plants to enhance color and texture.

    • Biological activity: lava rock > sand/gravel
    • Water chemistry: limestone elevates pH; lava rock is inert
    • Preparation: rinse horticultural lava rock mulch before use
    • Durability: black lava denser; red lava lighter but more fragile
    • Visual impact: black for subdued tones; red for warm contrast

    Setting Up Your Nano Tank with Lava Rocks

    Begin by planning your tank’s layout and key spots. Place big stones, from 20 lb packs, as main anchors. Use 5 lb packs to add texture around plants and paths. This mix balances the tank’s look with swimming space.

    Before adding stones to the tank, rinse them well. Lava rock often has fines and dust. A clean wash stops clouding and saves your filter’s effort.

    Make sure wood and substrate have solid bases. Arrange stones to support driftwood and soil without unstable stacks. Black lava rock is great for strong bases in small tanks.

    Secure epiphytes and mid-ground plants to rock surfaces. Use thread, fine fishing line, or aquarium-safe glue to tie Anubias, Java Fern, or moss. Roots will grow into the rock over time.

    • Position stones to form shallow caves and tunnels for shrimp and small fish.
    • Leave grazing zones and hideaways near plants to encourage natural foraging.
    • Keep openings wide enough for water flow and animal movement.

    Don’t overdo it with rock. Too much can make the tank feel cramped and cut down on oxygen. In a small nano tank, keep a good balance between rocks and open areas.

    Lava rocks add beauty and function to your tank. Proper planning, rinsing, building stable supports, and anchoring plants will make your tank safe and attractive.

    Maintenance Tips for Lava Rock Filters

    Keep maintenance simple to protect the beneficial bacteria. Rinse stones gently in removed aquarium water during regular water changes. Light vacuuming around the substrate will remove loose detritus without stripping biological filtration.

    Avoid extreme cleaning. Do not boil or sterilize lava rocks, and never use bleach or household detergents on filter media. If you face a disease outbreak, follow quarantine protocols and plan to recolonize your filter with seeded media from a healthy tank.

    Monitor biofilm health by watching tank clarity and the behavior of grazers like shrimp. A light biofilm is normal and often helpful. If detritus builds up, target that area with a siphon instead of scrubbing every stone.

    When you must remove or replace a crumbly piece, add a portion of old lava rock or other seeded media back into the system. That step limits cycling setbacks and preserves the nitrogen-processing colonies that are central to volcanic rocks uses in aquaria.

    Inspect stones periodically for sharp edges, structural shifts, or breakage. Replace fragile pieces with denser lava rock to prevent injury to fish and invertebrates. Using lava rocks correctly will extend filter life and keep your nano tank stable.

    • Rinse gently in tank water during changes.
    • Use a siphon for targeted detritus removal.
    • Never use bleach or strong disinfectants on media.
    • Reintroduce seeded media when replacing stones.
    • Check for sharp edges and swap fragile pieces.

    Common Myths About Lava Rocks

    Some people think lava rock always changes your tank’s pH. But most lava rocks found at Petco or local garden centers are not like that. They are mostly neutral and don’t change the water’s hardness like limestone does.

    Another myth is that lava rock is dirty and clogs filters. But the holes in lava rock are actually good for your tank’s health. They help break down harmful substances. Just make sure to clean them regularly to avoid any buildup.

    • Porous pieces support bacteria and microfauna.
    • Surface detritus is manageable with siphons or shrimp grazing.
    • Use a pre-filter sponge if you worry about particles.

    It’s also believed that all volcanic rocks are the same. But red and black lava rock are different. Red rock is often lighter and more porous. Black rock is denser and adds a unique look to your tank.

    Some think lava rock can replace mechanical filters. But it’s actually meant to help with biological filtration. You’ll also need a mechanical filter to keep your water clean and clear.

    Lastly, there’s a worry that lava rock is bad for small tanks. But if you rinse and cure it properly, it’s perfect for nano tanks. It provides a safe place for plants and boosts beneficial bacteria.

    Using Lava Rocks with Aquatic Plants

    Lava rocks can anchor plants and make your nano tank look natural. Epiphytes like Java Fern and Anubias stick well to lava’s rough surface. Mosses and Bucephalandra also cling to crevices.

    Secure rhizome plants with thread or aquarium-safe glue until they root. For delicate stems, fill small rock crevices with substrate. This supports the base without covering the crown.

    Lava rock doesn’t provide much food for plants that feed on roots. Mix it with root tabs or a nutrient-rich substrate for these plants.

    Color can make your aquascape pop. Red lava rock contrasts with green leaves, while black adds depth and highlights colors.

    • Best matches: Java Fern, Anubias, Bucephalandra, aquarium mosses.
    • Anchoring: thread, glue, or small substrate-filled crevices.
    • Nutrients: pair with root tabs or substrate for root-feeding plants.
    • Maintenance: watch exposed rock for algae and manage with regular cleaning and algae eaters.

    Keep the lighting and fertilization consistent. Lava rocks don’t act as fertilizers. Watch your plants and adjust the light or fertilizer if needed.

    The Cost-Effectiveness of Lava Rocks

    Lava rocks are great because they do three things at once: filter, structure, and decorate. They come in different sizes: 5 lb for small tanks, 10 lb for medium tanks, and 20 lb for big displays. Choose the right size for your tank to save money.

    Using lava rocks means you don’t need to buy separate filter media and decorations. Black lava rocks are strong and last long. But red lava rocks are softer and might break down faster. So, pick the right color for your needs.

    Even though lava rocks cost money upfront, they save you money in the long run. They do many jobs at once, which means you spend less on extra stuff. This is good for people who keep their small tanks clean and efficient.

    But lava rocks aren’t just for your tank. You can use them in your garden or as mulch. They can even be used in a lava rock fire pit for your patio. This makes them even more valuable.

    • Buy the right pack size to match tank dimensions and design.
    • Choose denser black lava for durability and long-term use.
    • Reuse extras in gardens or a lava rock fire pit to extend value.

    Lava rocks are a smart choice for small tanks because they last long and do many things. They help keep your setup looking good without needing to replace them often. This makes them a cost-effective option for your aquarium.

    Conclusion: Why You Should Consider Lava Rocks

    Using lava rocks in nano tanks has many benefits. They offer strong biological filtration and extra space for beneficial bacteria. This helps with denitrification and keeps the water stable.

    The porous texture of lava rocks also creates hiding spots for shrimp and small fish. It provides grazing areas and anchors plants and hardscape well.

    Before buying, make sure to rinse the stones well. Choose a pack size that fits your tank, like 5, 10, or 20 lb. Pick between red or black stones based on your preference for look and porosity.

    Avoid using harsh chemicals that can harm the beneficial bacteria. These steps help maintain the filtration benefits of lava rocks.

    To set up, pair lava rocks with regular maintenance and a mechanical filter. Use denser stones for support and save porous ones for texture and grazing. Balance your setup with open water to ensure good circulation and animal health.

    For a compact, versatile filtration system and a natural look, lava rocks are a great choice. They are safe for aquariums and offer both function and beauty.

    FAQ

    What makes lava rock useful for filtration in nano tanks?

    Lava rock’s texture is full of holes, making it perfect for bacteria to grow. These bacteria help break down harmful substances in the water. This keeps the water clean and healthy in small tanks.

    Will lava rock change my tank’s pH or hardness?

    Most lava rock used in aquariums doesn’t change the water’s pH or hardness. It’s safe for small tanks because it doesn’t react with the water.

    How should I prepare lava rock before adding it to my aquarium?

    First, rinse the lava rock well to get rid of dust. Use tap water until it’s clear. Don’t use harsh chemicals to clean it. This helps keep the good bacteria alive.

    How do lava rocks compare to sand or gravel for biological filtration?

    Lava rock has more surface area than sand or gravel. This means it can support more bacteria. It also helps plants and decorations stay in place.

    Can lava rock replace my mechanical filter?

    No, lava rock is for biological filtration, not mechanical. It helps break down small particles but doesn’t replace the need for a mechanical filter.

    Is red lava rock different from black lava rock?

    Yes, red lava rock is lighter and more porous. It’s good for creating a warm look. Black lava rock is denser and more durable, perfect for a subtle background.

    What are the best uses of lava rock for plants?

    Lava rock is great for plants like Anubias and Java Fern. You can tie plants to it until they grow strong. For rooted plants, use lava rock with nutrient-rich soil.

    How should I arrange lava rock to benefit shrimp and small fish?

    Group lava rocks to create hiding spots and tunnels. This helps shrimp and small fish feel safe. Make sure there’s enough open space for swimming.

    How do I clean and maintain lava rocks without killing beneficial bacteria?

    Rinse lava rocks gently in tank water or use a siphon to clean them. Avoid boiling or harsh cleaners. If you need to replace a rock, use some of the old one to keep bacteria.

    Are there safety concerns like sharp edges or crumbling rocks?

    Check for sharp edges or fragile parts that could break. Use denser rocks for structures. Replace any broken rocks and watch for any changes in the setup.

    Can horticultural lava rock be used in aquariums?

    Yes, but make sure to rinse it well. Horticultural lava rock might have small particles that cloud the water. Aquarium-grade lava rock is usually cleaner.

    How much lava rock should I use for a nano tank?

    Choose the right size based on your tank and design. Small stones are good for details, while larger ones can be focal points. Don’t overcrowd the tank.

    Will lava rock lower my nitrates significantly?

    Lava rock helps lower nitrates over time. It’s not an instant fix. Use it with regular tank maintenance and good filtration for best results.

    How does lava rock benefit microfauna and grazing shrimp?

    Lava rock’s surfaces support biofilms that shrimp and small fish eat. This provides natural food and encourages natural behavior. It also helps control biofilm thickness.

    Can lava rock be reused in outdoor landscaping or fire pits?

    Yes, you can reuse it in landscaping or fire pits. It’s a cost-effective option for both aquatic and terrestrial projects.

    What are common myths about lava rock I should ignore?

    Ignore myths that lava rock always changes pH or clogs filters. Most are inert and support beneficial bacteria. Also, not all lava rock is the same. Use proper preparation and design to avoid problems.