This guide offers a simple schedule for testing ammonia, nitrite, and nitrate. It helps keep your fish and aquatic life safe. Regular testing spots problems early, preventing stress or illness.
The nitrogen cycle is straightforward. Fish waste and uneaten food turn into ammonia. Nitrosomonas bacteria then change ammonia to nitrite. Nitrobacter bacteria convert nitrite to nitrate. Plants and water changes remove nitrates, keeping the balance.
It’s important to know the safe levels. Aim for 0 ppm ammonia and nitrite. Keep nitrates low too. Act quickly if nitrates hit about 40 ppm to avoid fish stress.
A new tank cycle can take weeks to months. It depends on temperature, bio-load, and bacteria. Fishless cycling or using products like Dr. Tim’s One & Only can speed it up.
To boost biological filtration, add live bacteria products or transfer filter media. Fast-growing plants also help. But, adding too many fish can overwhelm bacteria and restart problems.
Understanding Water Parameters and Their Importance

Knowing the compounds that affect aquarium health is key. Ammonia is very toxic and can harm gills and skin. Nitrite is also toxic and blocks oxygen in fish. Nitrate is less toxic but can be harmful if it builds up.
The nitrogen cycle turns organic waste into these compounds. Waste and uneaten food break down into ammonia. Nitrosomonas bacteria then convert ammonia to nitrite. Nitrobacter bacteria turn nitrite to nitrate. Live plants and algae help lower nitrate levels naturally.
Biological filtration relies on beneficial bacteria. These bacteria live on filter media, substrate, decorations, and plant roots. The amount of surface area and oxygen available affects their growth and activity.
Temperature, oxygen, and disinfectants influence bacterial activity. Nitrifying bacteria grow best between 77–86°F. But, your fish must also be comfortable in this temperature. Higher oxygen levels help bacteria process waste. Chlorine and chloramine kill beneficial bacteria. Use conditioners like Seachem Prime or Tetra AquaSafe to protect your biofilter.
Poor water chemistry can cause many problems. These include new tank syndrome, chronic stress, disease, and mortality. Overcrowding and overfeeding can overwhelm even strong filters. Keeping load and feeding balanced with filtration capacity helps prevent these issues.
Regularly monitoring water parameters is essential. Testing pH and chemicals like ammonia, nitrite, and nitrate helps you act fast. Use water quality monitoring devices, test kits, and simple visual checks for a complete picture.
When levels rise, targeted water changes and adding fast-growing plants can help. Plants reduce nitrate and improve stability. Testing often and acting quickly keeps your tank healthy and your fish thriving.
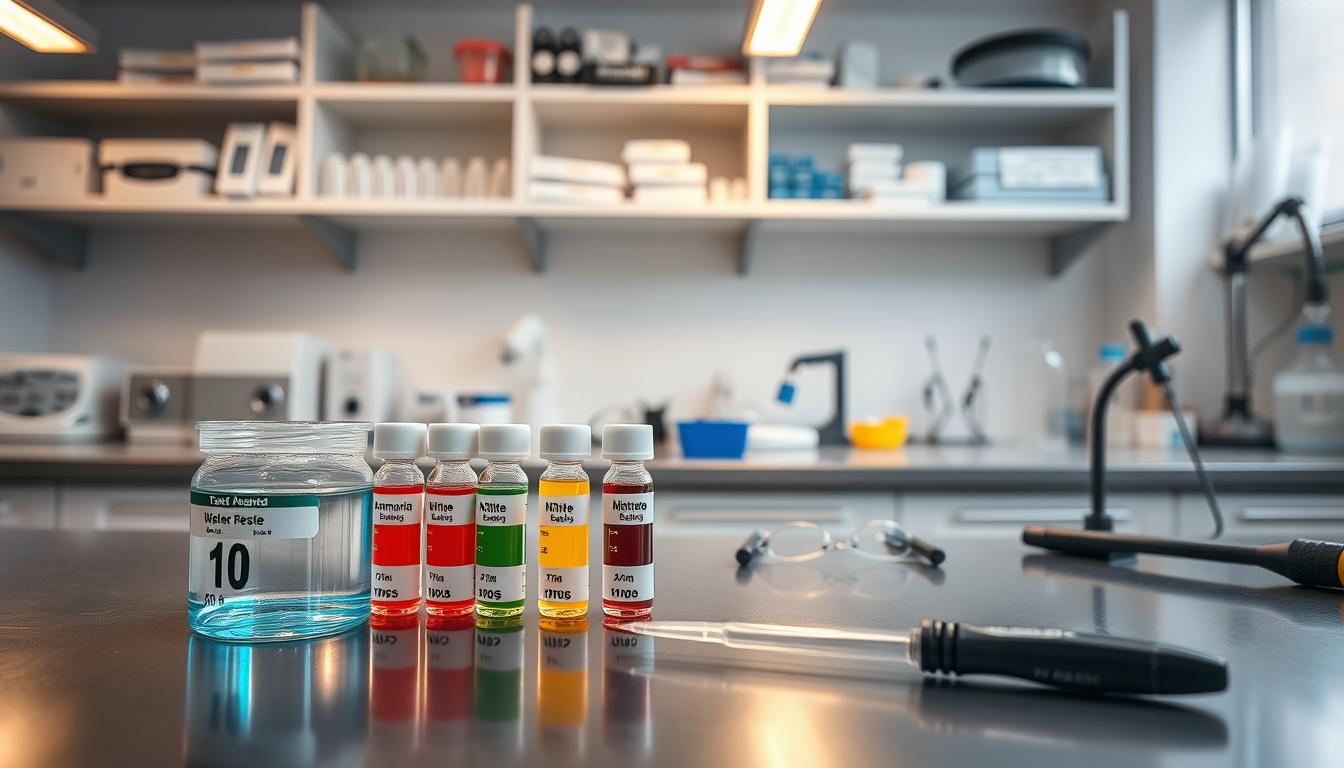
Identifying the Right Testing Kits for Your Needs

Choose a kit that fits your needs. Individual reagent test kits are great for checking ammonia, nitrite, and nitrate. They’re perfect for when you want to focus on specific areas.
Multi-parameter manual test sets, like the JBL Test Combi Set plus NH4, give a wider view. They’re good for regular checks. Test strips are quick and easy but might not be as precise.
Manual titration and colorimetric test kits are favorites for their accuracy and value. High-quality liquid reagent kits from brands like NT LABS often beat strips in reliability. Buying single-parameter kits can save money if you only check one value often.
Always follow the kit’s instructions for best results. Check the expiration dates of reagents and replace them when needed to avoid wrong readings. If your results seem wrong, double-check with another method to be sure.
For bigger or more sensitive systems, consider devices that monitor water quality continuously. Professional water analysis services can provide lab-level accuracy when needed. These services are great for before stocking or after big changes. They help keep your system in top shape.
- Advantages of individual kits: economical for targeted testing, easy to carry.
- Advantages of multi-parameter kits: broader overview, ideal for routine checks.
- Advantages of strips: fast, simple for quick spot checks.
Test more often during cycling, after medication, or after system changes. Once your tank is stable, keep regular checks to track changes. Use different tools and services to ensure reliable chemical testing and safe water for your fish.
Setting a Testing Schedule for Your Aquarium
Begin with a consistent schedule to track changes in your tank. During the initial cycling phase, test for ammonia, nitrite, and nitrate every 1–3 days. This step is key to monitoring bacterial growth and safeguarding your fish.
When introducing new fish or altering the tank’s bio-load, test more frequently. This could be daily or several times a week until the levels stabilize. Once your tank is established, adjust your testing routine to match.
- Routine maintenance: test ammonia and nitrite weekly.
- Test nitrate weekly or biweekly, depending on stocking and plants.
- Test pH and other less variable parameters monthly or when issues appear.
After water changes, using medications, or applying chemical treatments, test the water before and after. This ensures the parameters return to safe levels. Consistent monitoring helps confirm if a treatment was effective.
Cloudy water, fish gasping, sudden behavior changes, equipment failure, power outages, and temperature swings all require extra testing. In these situations, repeat tests until the results are consistent.
For fishless cycling, test ammonia and nitrite every 2–3 days initially. Once nitrifying bacteria are present, continue testing until ammonia is reliably converted to nitrate. This approach differs from fish-in cycling but follows the same water quality testing methods.
Keep a detailed log of your testing results. Include the date, time, readings, test kit used, recent maintenance, and any actions taken. A clear record helps you spot gradual changes and improves long-term monitoring.
If you have a critical setup or a remote tank, consider using digital or smart water quality monitoring devices. Brands like Hanna Instruments or Apera offer continuous alerts and help prevent unnoticed spikes.
Proper Techniques for Collecting Water Samples
Start by using clean gear. Rinse test containers with tank water, but don’t use soap. Keep bottles sealed to avoid contamination from hands or chemicals in the air.
Take water from the middle of the tank, not from the top or bottom. This method gives a more accurate reading and avoids contamination from debris or surface layers.
- Use the volume recommended by the kit maker for each test.
- Avoid touching the inside of caps or sample openings.
- Handle sample bottles by the neck to prevent contamination.
Test samples quickly. Take them to your testing area right away to prevent changes in readings. Many parameters change over time, so fast testing is more accurate.
Test at the same time every day if you can. Oxygen and pH levels change with light and photosynthesis, so consistent timing helps compare results better over time.
Think about how treatments affect your water. Wait the time suggested by the manufacturer before testing after adding conditioners like Seachem Prime. Know how medications might change the results of water testing kits.
Watch the temperature. Test at room temperature or follow the kit’s instructions for best results. Don’t let reagents freeze or get too hot, as extreme temperatures can mess up pH testing and other assays.
Have a clean, well-lit area for reading colors. Use a white background for easier color chart comparisons. Good lighting and a neutral background help avoid mistakes.
By following these water sampling techniques, you’ll get better data and make monitoring easier. Careful sampling helps spot trends in water quality and lets you act quickly when things change.
Testing for Ammonia: A Step-by-Step Guide
First, pick a good ammonia test kit from brands like API or Seachem. Make sure to read the instructions well. This ensures you take the right amount of water and wait the correct time. Getting the water sample right is key to testing well.
For liquid kits, fill the vial with tank water as directed. Add the right number of drops of reagent. Then, cap it, mix gently, and wait for the time shown. Test strips need a quick dip and then removal.
Match the color of your test to the chart in natural light. Aim for 0 ppm ammonia. Levels between 0.25–0.5 ppm might show during cycling. But, readings over 0.5–1 ppm mean you need to act quickly to save your fish.
- Do an immediate 25–50% water change to lower ammonia.
- Feed less and remove any uneaten food to reduce waste.
- Rinse mechanical filters in tank water, not chlorinated tap water, to keep beneficial bacteria.
- Add biological helpers like Fluval Cycle or API Quick Start, or move filter media from a mature tank.
- Boost aeration and oxygen because ammonia is more harmful in low-oxygen water.
Keep track of your results and test daily until ammonia levels are safe. Use both chemical tests and biological fixes for the best results.
To avoid ammonia spikes, don’t overstock your tank. Follow slow stocking rules during and after cycling. Regularly test your water to catch any ammonia rises early and keep your fish safe.
Testing for Nitrite: Tracking Its Levels
Nitrite forms when Nitrosomonas bacteria convert ammonia. Nitrobacter bacteria then turn nitrite into nitrate, making the water safe for fish. Even when cycling is normal, treat detectable nitrite as a warning.
Use a nitrite-specific liquid reagent or a combination kit for testing. Follow the kit steps for sample volume, reagent additions, reaction time, and color comparison. A reliable nitrite test aquarium kit gives clear color matches and helps with accurate water quality monitoring.
Target 0 ppm nitrite. Small amounts can appear during cycling, but levels above low ppm values become toxic fast. Spikes often follow ammonia increases or a sudden rise in bio-load after you add fish or overfeed.
If nitrite is elevated, start with a partial water change to dilute concentrations. For many freshwater species, a cautious dose of aquarium salt can reduce nitrite uptake, but check species tolerance first.
- Increase oxygenation to support beneficial bacteria and fish health.
- Add bio-media or seeded filter media to boost biological filtration.
- Consider a reputable bacteria booster to speed nitrite-to-nitrate conversion.
Slow adding new fish and cut back on feedings until nitrite returns to safe levels. Keep testing water parameters frequently after any intervention.
- Test using your nitrite test aquarium kit immediately after you detect stress or after a spike.
- Perform partial water changes and re-test every 1–3 days until nitrite reads zero.
- Use water analysis services or lab testing if you see persistent problems despite standard fixes.
Regular water quality monitoring helps you catch nitrite trends early. Consistent testing and prompt action protect your livestock and keep the aquarium stable over time.
Testing for Nitrate: Keeping It in Check
Nitrate is the last, less-toxic part of the nitrogen cycle. It builds up in your tank. Plants use it as food, but too much can harm fish and invertebrates.
To test water accurately, use nitrate kits from API or Seachem. Follow the instructions, match colors, and record your results weekly.
For precise readings, consider a photometer like the Hanna Checker. These devices help you control water quality better.
- Use nitrate test kits or combo panels and compare colors exactly as instructed.
- For higher accuracy, measure with a photometer or calibrated water quality monitoring devices.
- Log readings after water changes and maintenance to see trends.
Most community aquariums aim for nitrates under 40 ppm. Sensitive species need even lower levels, around 10–20 ppm. Adjust your goals based on your fish and plants.
To lower nitrate, start with regular water changes. During cycling, do 10–25% changes every few days. For established tanks, change water weekly or biweekly based on your testing.
Live plants help reduce nitrate. Use quality fertilizers like Seachem Flourish or Easy Green to help plants grow and remove nitrate.
In crowded tanks, add nitrate-absorbing media or denitrators. Advanced setups might use refugiums or deep sand beds for better denitrification.
Avoid overfeeding and overstocking to reduce nitrate. Vacuum the substrate often to remove detritus before it turns into nitrate.
- Test weekly and after any maintenance to confirm effectiveness of control steps.
- Adjust water change frequency, plant care, or filtration based on results from testing water parameters.
- Use consistent water quality testing methods so trends are reliable and actionable.
Interpreting Your Results and Taking Action
Keep a clear test log. Record date, time, readings, and what you did next. Use trend lines from water quality analysis to spot slow shifts instead of reacting to single tests.
Follow action thresholds when readings cross safe limits. Any measurable ammonia or nitrite calls for immediate steps: reduce bio-load, do a partial water change, add aeration, and bolster biological filtration. If nitrate sits near 20–40 ppm, schedule a water change and boost plant uptake. When nitrate tops 40 ppm, perform a larger or more frequent water change.
When you see sudden spikes, pause and inspect recent changes. Look for new fish, overfeeding, medication use, or a filter failure. Fix the root cause before treating symptoms to avoid repeated problems.
- Immediate: partial water change, cut feeding, add air.
- Short-term: dose beneficial bacteria, seed filter media with mature media.
- Long-term: increase filtration capacity, add live plants, reduce stocking density.
Note every intervention in your log with timestamps and follow-up test results. This helps you evaluate which water quality testing methods and responses actually work for your tank.
If issues persist despite sound steps, reach out for expert help. Consult water analysis services or a trusted aquarium shop such as Aquarium Co-Op or Petco’s aquatic team to review your data and recommend tailored fixes.
Maintain regular water parameter monitoring as part of weekly care. Consistent checks, clear records, and measured actions turn raw test numbers into safer, stable conditions for your aquatic life.
Maintaining a Healthy Aquatic Environment
To keep your tank thriving, create a simple routine. Do partial water changes regularly, check for ammonia and nitrite weekly, and test for nitrate every week or two. Use reliable testing methods like drop tests from JBL or NT LABS and keep a record of each test.
For pH testing, do a quick check during weekly maintenance. This helps you catch any changes before they stress your fish.
Clean filter media gently with tank water to keep beneficial bacteria alive. Replace mechanical media as needed. Make sure to match the number of fish to your tank’s biological filtration. Add fish slowly, as overloading can harm your tank.
Consider using quality filters, a dependable heater, and proper aeration. Air pumps from Eheim or TetraTec are great for boosting oxygen levels.
Live plants help reduce nitrates and support beneficial bacteria. Feed them with fertilizers like Easy Green when they need it. Use conditioners like Seachem Prime or Tetra AquaSafe during water changes to protect your tank’s health.
Water quality monitoring devices provide continuous data. They can alert you to problems before your fish get stressed.
Keep learning and improve your care routine. Follow established testing water parameters and compare results with trusted brands like Dr. Tim’s. If you’re unsure, ask for help from local aquatic stores or aquarium service professionals. Small, consistent steps are key to long-term health.
Leave a Reply