Category: Setup

  • The Minimalist Iwagumi Style: Principles for Nano Aquascaping

    The Minimalist Iwagumi Style: Principles for Nano Aquascaping

    The Iwagumi style is rooted in Japanese aquarium design. It focuses on a few key stones to mimic natural scenes. These stones, arranged in a hierarchy, guide the viewer’s eye.

    In this style, plants are few and low to the ground. This use of negative space, or Ma, adds depth and calm. It creates a peaceful, landscape-like scene in your room.

    Nano aquascaping takes these principles to small tanks. Here, every detail matters more. You need to carefully choose and place rocks and plants, and plan the layout to avoid mistakes.

    To achieve this, you’ll need stable lighting, CO2 management, and nutrient-rich soil. A reliable filter is also key to keep the tank clean and the design simple.

    An Iwagumi tank offers quiet beauty and shows the beauty of restraint and patience. It showcases the essence of Japanese aquarium style.

    Understanding Iwagumi Style Aquascaping

    Iwagumi style aquascape featuring a beautifully arranged layout with three focal stones in varying sizes, positioned using the rule of thirds. The foreground presents small, vibrant green aquatic plants like Hemianthus callitrichoides, creating a lush carpet. In the middle ground, the landscape is complemented by carefully selected driftwood and textured stones, enhancing the natural feel. The background features taller plants, adding depth without overcrowding the scene. Soft, diffused natural light filters through the water, creating gentle highlights and shadows, while reflections add a serene ambiance. The angle captures the scene slightly above the waterline, emphasizing the balance and tranquility typical of minimalist designs, evoking a sense of calmness and harmony in this aquatic sanctuary.

    Iwagumi, meaning “rock formation,” focuses on stones in your design. This Japanese style emphasizes the hardscape over plants or driftwood. It shapes the visual flow.

    Begin with a main rock, the Oyaishi, placed off-center. This follows the rule of thirds or golden ratio. Surround it with smaller stones in odd numbers to avoid symmetry.

    This method creates a natural rhythm and focus. It guides the eye through the layout.

    Consider the flow lines and rock angles. Matched angles suggest natural currents. Negative space adds calm and scale. Plants take a backseat to the hardscape.

    Patterns like Sanzon Iwagumi, with three stones, teach about hierarchy and proportion. Larger tanks can use five or seven stones, maintaining the same balance.

    • Stone selection: choose texture, color, and weight that pair well.
    • Placement: test off-center positions and align flow lines.
    • Substrate shaping: slope and terraces support perspective.
    • Plant restraint: use low carpets to maintain emphasis on rock.

    Iwagumi demands precision. Plan stone grouping, substrate, and plant placement carefully. Use photos and sketches to spot imbalances before finalizing.

    Core Principles of Iwagumi Design

    An intricately detailed iwagumi aquascape, showcasing the harmonious balance of stones, plants, and water. In the foreground, three carefully placed focal stones—one large, one medium, and one smaller—exemplify the principles of balance and proportion. The middle ground features lush green plants like Hemianthus callitrichoides and Eleocharis acicularis, creating a soft contrast against the rugged stones. In the background, the water glistens with gentle ripples reflecting the vibrant colors of aquatic plants. Soft, natural lighting filters through, casting delicate shadows and enhancing the tranquil atmosphere. The scene is captured from a low angle, inviting the viewer into the serene underwater world, evoking a sense of calm and contemplation.

    Your Iwagumi starts with a few key rules. Use an odd number of stones and place the Oyaishi off-center. Match stone flow lines and choose one to three plant species. These rules help keep your design balanced and clear.

    Use visual flow techniques to guide the eye. Tilt stones in the same direction and create invisible paths. This repetition with variation adds rhythm, making small changes feel intentional.

    • Odd stone counts keep the composition dynamic.
    • Oyaishi placed off-center becomes a true focal point.
    • Aligned flow lines make stone groups read as a single unit.

    Position focal points using the rule of thirds or golden ratio. Take photos from the viewing angle to spot any symmetry or clutter. This helps refine balance and make focal stones stand out.

    Negative space, or Ma, is key. Leave open areas to increase scale and calm. Empty spaces make the scene feel larger, even in small tanks.

    1. Plan sightlines: valleys and diagonals create movement.
    2. Control density: limit plant species to maintain clarity.
    3. Test composition by photographing and adjusting until rhythm feels natural.

    When you combine these elements, each choice supports the next. Achieving balance in iwagumi layout is a series of small, controlled decisions. You use proven techniques to guide placement and negative space to enhance scale. The result is calm, intentional, and three-dimensional, making creating depth in aquascape easy and repeatable.

    Essential Elements in Creating an Iwagumi Tank

    Start by picking a few stones that look alike and have clear features. Choose rocks with texture and colors that are not too bright. Don’t mix different rock types that don’t match. This helps keep your layout looking good.

    Use a special soil for planted tanks, like ADA Aqua Soil Amazonia or Tropica Aquarium Soil. Add a thin layer on top for carpeting plants. Make a gentle slope from front to back, about 1:3, for depth. The right soil supports plant roots and looks good.

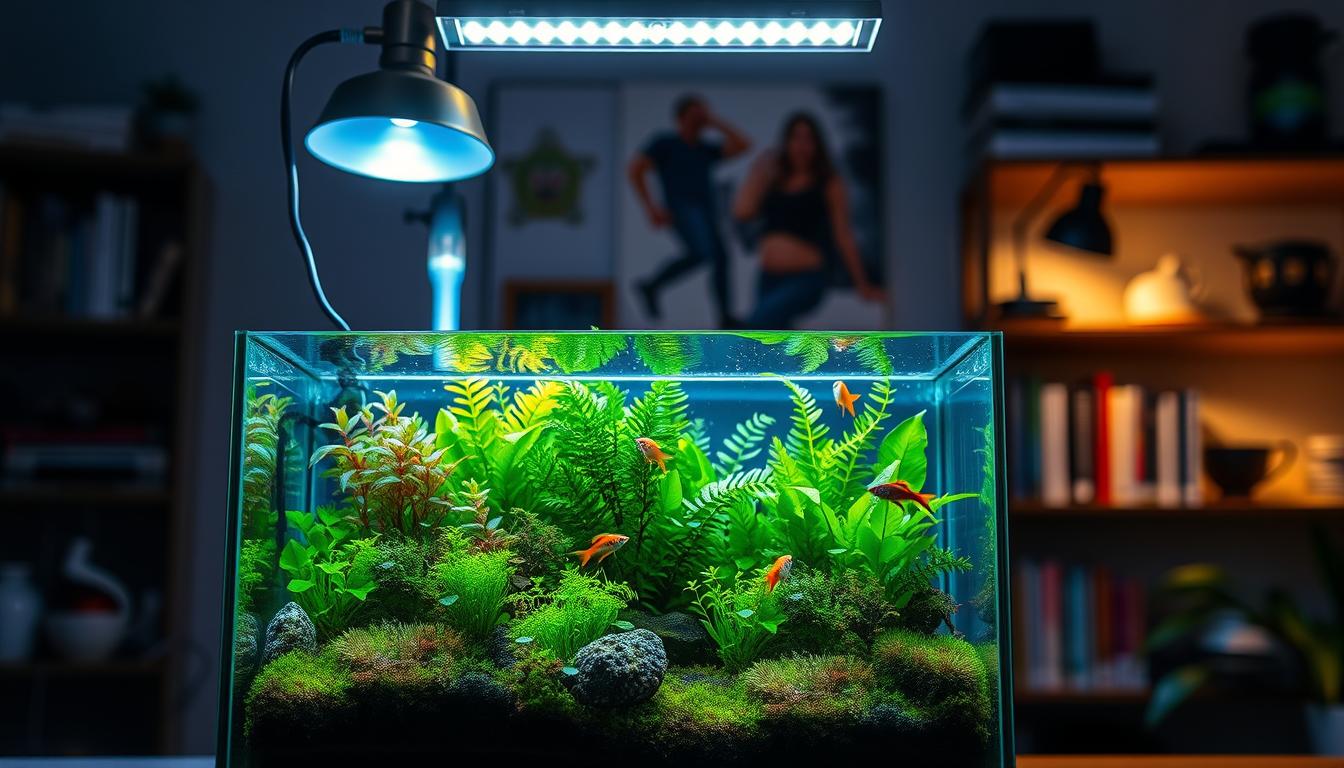
    Choose the right lighting for your plants. LED lights in the 6000–8000K range are good for carpets and midground plants. Make sure you have enough lumens and PAR for your plants. Use a timer for 6–8 hours of light a day.

    Think about using pressurized CO2 for dense carpets or fast-growing plants. A diffuser and drop checker help you keep CO2 levels right. Good filtration is key: a canister for bigger tanks, or a hang-on-back for smaller ones. These choices help your plants stay healthy.

    • Tweezers and long scissors for precise planting.
    • Algae scrapers and soft brushes for regular upkeep.
    • Water test kits for pH, GH, NO3, and PO4 to track conditions.
    • Root tabs for heavy feeders and liquid fertilizers for micro and macro nutrients.
    • Small stones, gel glue, or substrate packs to stabilize larger rocks.

    Follow simple tips for beginners: secure hardscape first, plant in small groups, and start fertilizing slowly. Regular care keeps your Iwagumi tank looking great. Use the right tools and supplies to make setup and care easier.

    With a good hardscape, nutrient-rich soil, proper lighting, and regular care, your Iwagumi layout will be clear and simple. These key elements let the stones and plants create a beautiful scene. As you get better at aquascaping, your tank will look even more amazing.

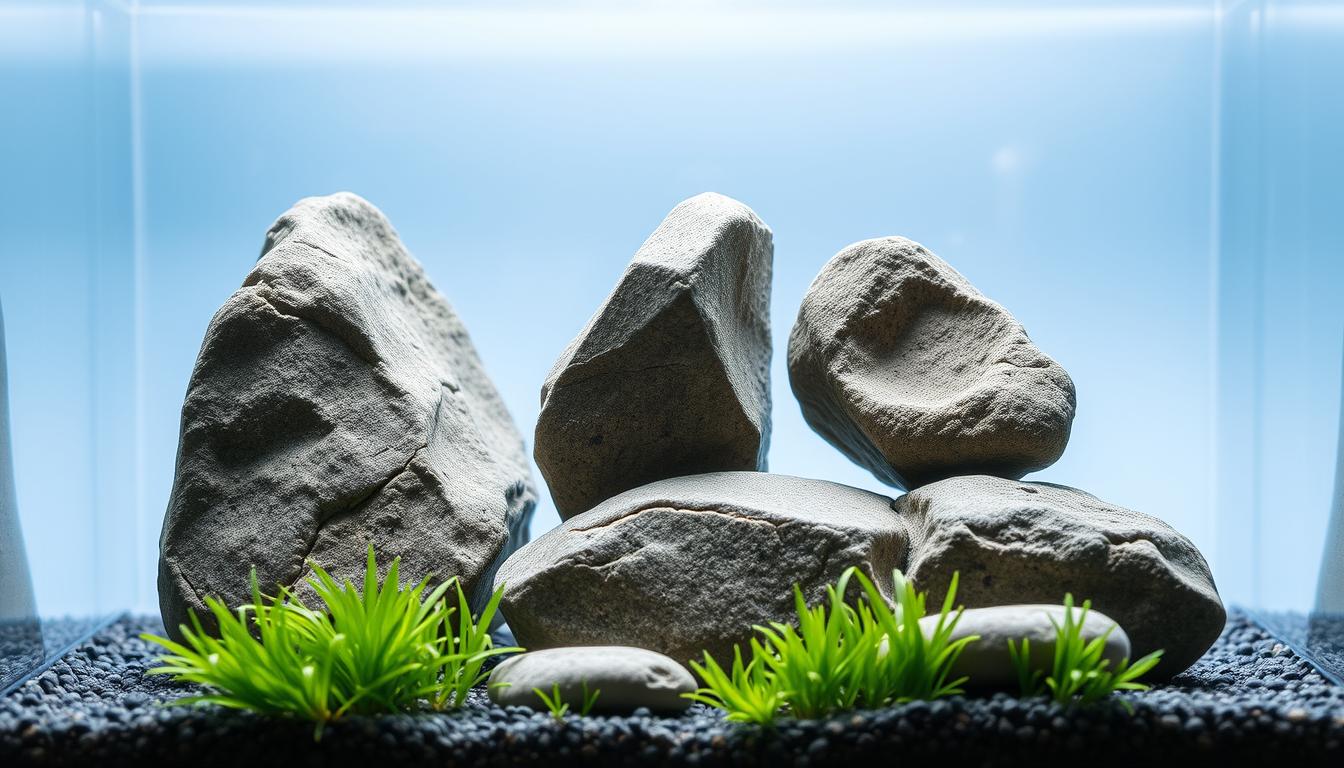
    Choosing the Right Rocks for Your Iwagumi

    Start by learning the rock hierarchy that defines Iwagumi style basics. The Oyaishi is the main stone and sets the scene. Fukuishi are supporting stones that echo the Oyaishi’s angle. Soeishi are minor accents that guide the eye. Suteishi are sacrificial or hidden stones that add natural imperfection.

    When selecting stones, think of each role. Pick an Oyaishi that feels dominant but fits your tank’s scale. For a nano ≤20L, plan one main stone plus one or two supports. For a medium 60–90cm tank, choose one main with three to five supports. For large setups 100cm+, use one strong Oyaishi with five or more supporting stones.

    Choose stone types that match your visual goal. Seiryu Stone gives blue-gray contrast with white veins. Ohko, also called Dragon Stone, is tan-brown and porous, great for moss attachment. Sado-Akadama brings warm reddish-brown tones. Ryuoh offers jagged dark faces for drama. Manten gives vertical striations that mimic mountains.

    Follow selection rules to keep coherence. Pick stones from the same visual family so color and texture stay consistent. Scale the stone count to tank volume. Make sure the Oyaishi’s height and shape remain proportional to your aquarium.

    Test rock placement in aquarium before finalizing. Arrange pieces on a table, photograph them from the intended viewing angle, and compare compositions. Move stones until the balance you want is clear.

    Consider water chemistry effects when choosing materials. Some stones, like limestone, can raise pH or hardness. Test a single stone in a jar of water for a few days, then measure pH and general hardness to avoid surprises.

    Use rock placement in aquarium to tell a simple story. Angle supporting stones toward the Oyaishi to create flow. Keep negative space around the main cluster so planted carpets and foreground species can breathe.

    Practice makes better results. Try different combinations, photograph each layout, and refine based on the images. This hands-on approach helps you master choosing rocks for iwagumi and apply Iwagumi style basics with confidence.

    Designing Your Aquascape Layout

    Before you start, make a detailed plan. Sketch your layout from above and from the front. This helps you see if everything looks balanced and flows well. A quick sketch also shows you where to place negative space.

    Begin with a substrate slope that’s higher in the back than the front. Aim for a 1:3 ratio. This slope is key for depth and better views. Use finer substrate at the back to make the area seem farther away.

    • Choose an off-center Oyaishi using the rule of thirds for a natural focal point.
    • Add Fukuishi and Soeishi that echo the Oyaishi’s tilt and texture to maintain directionality.
    • Leave breathing room around stone groups to create negative space and a clear line of sight.

    Place larger stones in the front and smaller ones in the back. This trick makes the space seem deeper. Choose plants that match the slope’s texture: coarse ones in the front, finer ones in the back.

    Work on your hardscape step by step. Start with the biggest stones, then add smaller ones. Use substrate or aquarium-safe glue to keep them stable. Make sure they’re secure before adding water.

    1. Form substrate slope and compact it.
    2. Place the Oyaishi off-center; view from front and top.
    3. Arrange Fukuishi and Soeishi to echo tilt and guide the eye.
    4. Adjust negative space; create a valley or diagonal path.
    5. Stabilize stones and photograph to spot awkward symmetry.

    Make sure all stones flow together for a cohesive look. Use lighting and plants to enhance depth and texture. Avoid straight lines and mirror placements to keep the scene interesting.

    Take photos from above and the front before you’re done. Check if everything looks right in scale and if there’s too much clutter. These tips will help you avoid mistakes and make your aquascape look great.

    Planting Strategies for Iwagumi Layouts

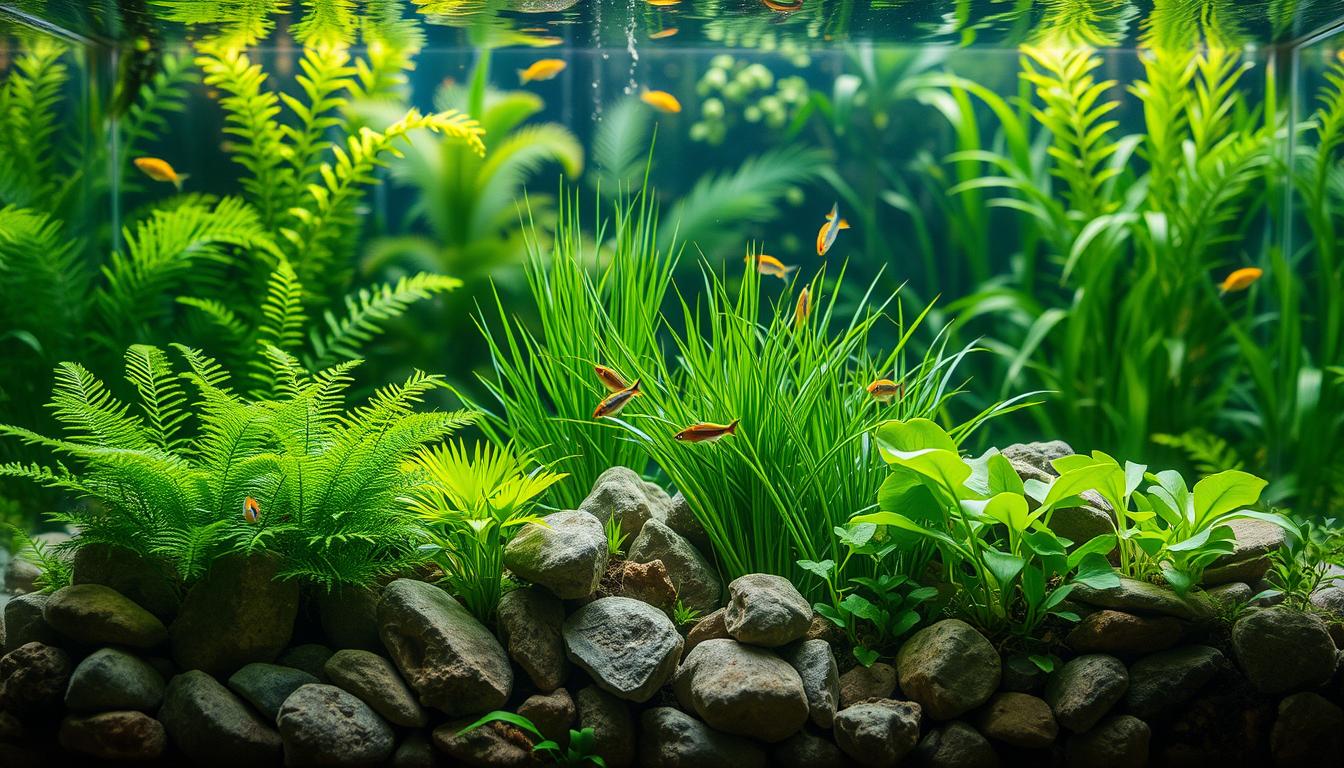
    Choose plants wisely to follow Iwagumi style basics. Pick one to three species to keep stones in focus. Use plants like Hemianthu callitrichoides (HC), Glossostigma elatinoides, and Eleocharis parvula for a fine carpet.

    Plant with care using long tweezers. Place plants close together, about 1–2 cm apart. This helps them spread evenly and quickly, keeping the look simple.

    Put taller plants behind or beside the main stones. This adds depth without blocking the stones. It helps keep the layout balanced by guiding the eye and preserving space.

    • Plant 1–3 species to maintain harmony.
    • Space carpet plants 1–2 cm for even growth.
    • Place vertical accents behind stones for depth.

    Try the Dry Start Method (DSM) for strong roots and less algae. Plant in a nutrient-rich substrate, mist daily, and cover the tank. Keep it humid for four to six weeks. Then, slowly add water to start growing plants.

    Watch light and humidity during DSM. Good light helps carpets grow but too much can cause algae. DSM helps you control early growth and follow beginner tips for steady progress.

    Keep carpets trimmed every two to three weeks. Trim to keep them low and even. Remove trimmings quickly to stop rot and prevent algae.

    1. Trim every 2–3 weeks to preserve the minimalist aesthetic.
    2. Remove clippings to prevent rot and nutrient imbalances.
    3. Use CO2 and consistent lighting to support dense carpets.

    Balance CO2, light, and fertilization to avoid algae. Proper CO2 and light help carpets grow dense and healthy. Follow tips for gradual changes to help plants adjust without stress.

    Plant with care and restraint to achieve a refined layout. Use precision techniques, DSM, and regular care to improve your success. This will help you keep your design simple and true to its roots.

    Water Parameters for a Healthy Iwagumi

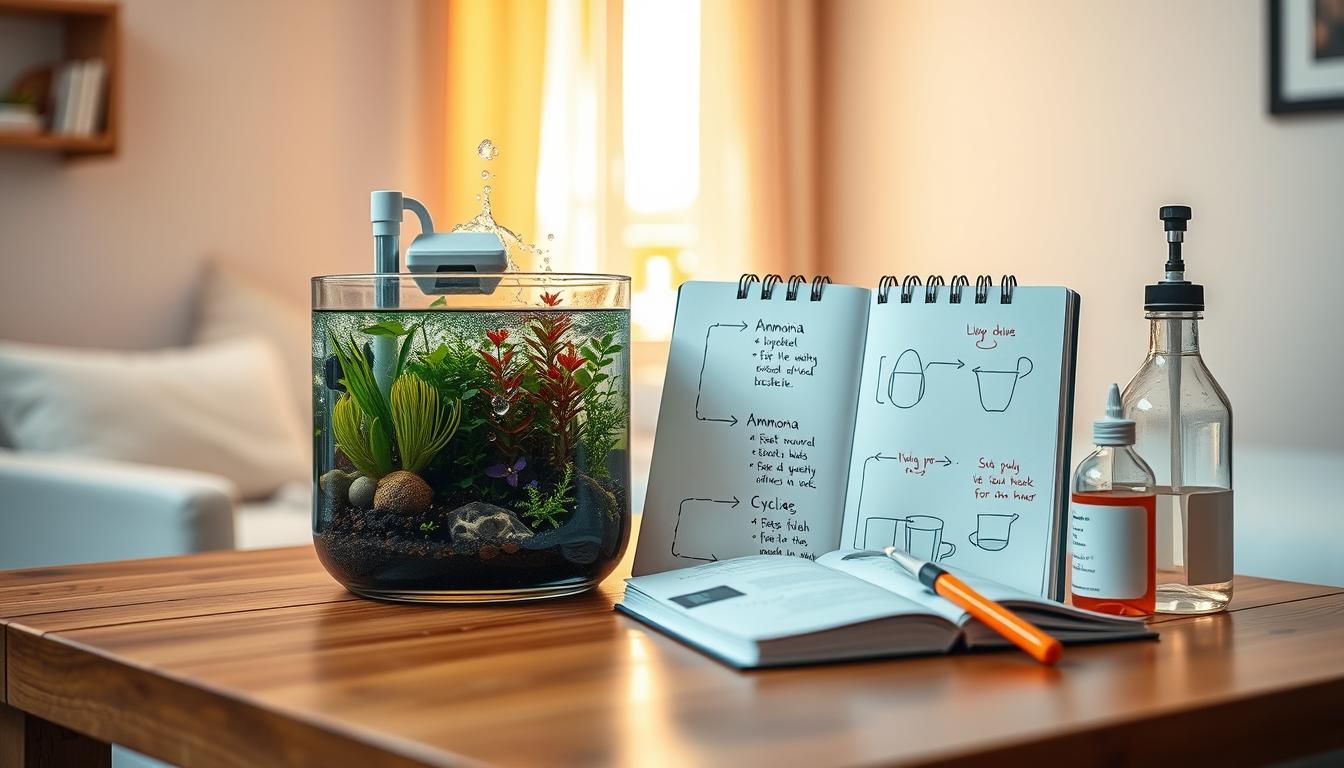
    To keep your Iwagumi looking great, you need to check the water chemistry often. Test pH, GH, KH, NO3, and PO4 regularly. This helps prevent algae and keeps shrimp like Amano and cherry shrimp healthy.

    CO2 is key for lush plants and greenery. Use a pressurized CO2 system for the best results. A diffuser, solenoid, timer, and drop checker help keep CO2 levels right.

    Lighting is important for a good carpet. Choose LED lights with adjustable spectrum in the 6000–8000K range. Aim for 6–8 hours of light a day. Use a lighting calculator to find the right PAR or lumen for your tank.

    Keep your tank clean and well-maintained. Trim stems weekly to prevent shading. Check for algae, CO2 diffuser clogs, and equipment issues regularly.

    • Water changes: plan 20–50% routine changes. Many hobbyists do a 30% monthly swap while increasing frequency if nutrient or stocking levels rise.
    • Parameter logging: record test results and photos to spot trends before they become problems.
    • Equipment checks: confirm the solenoid, diffuser, and regulator operate smoothly each week.

    Your aquascaping techniques should aim for balance between light, CO2, and nutrients. Too much light without CO2 invites algae. Too much CO2 without proper aeration stresses shrimp and fish. Match fertilization to plant demand and monitor NO3 and PO4 to keep growth healthy.

    When you dial in water parameters for iwagumi, expect a trial period. Small adjustments work better than big swings. Log data, adjust one variable at a time, and use photos to evaluate progress after each change.

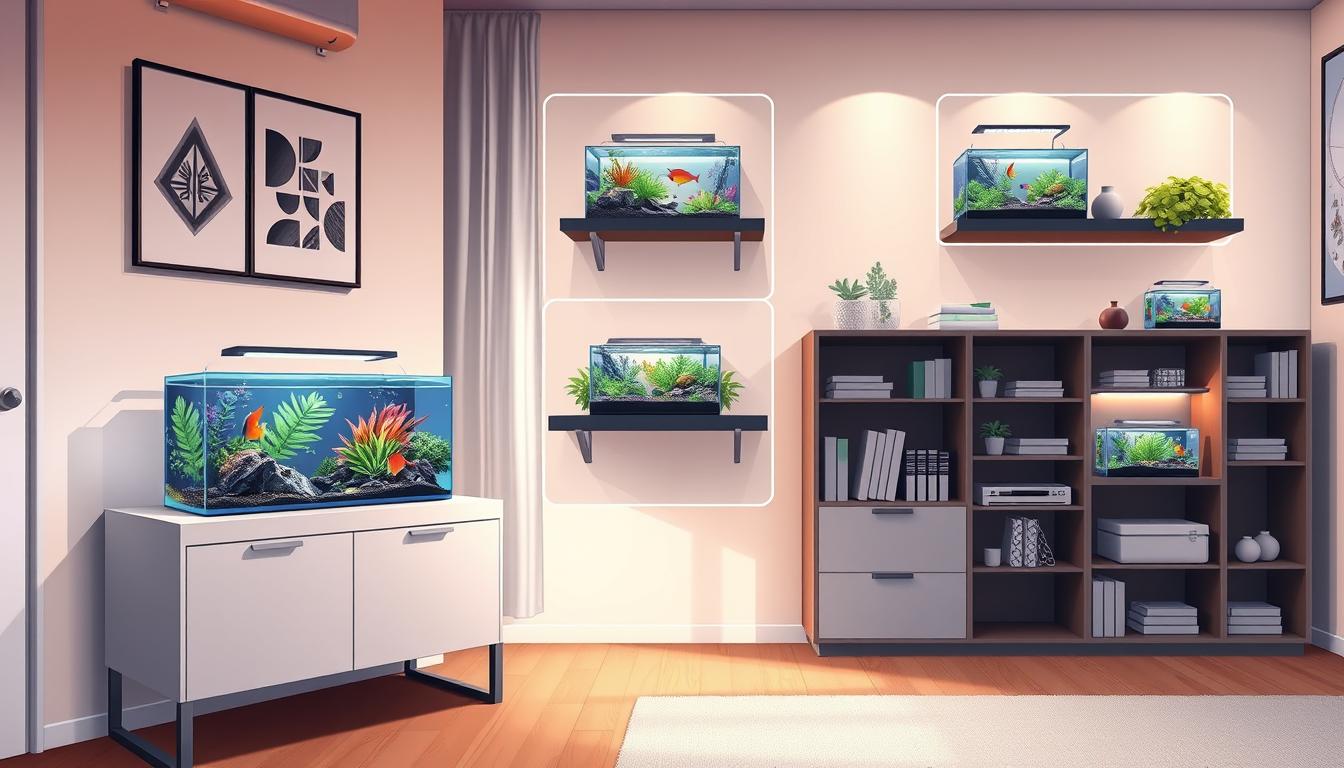
    Benefits of Nano Iwagumi Aquascaping

    A nano Iwagumi gives you a big visual punch from a small space. It focuses on the placement of rocks and empty space. This creates a peaceful, gallery-like spot in your room.

    There are practical benefits too. Nano tanks use less substrate, plants, and equipment than big tanks. This makes nano Iwagumi a great choice if you want to learn without spending a lot.

    It also teaches patience. Planning and pruning in a small space teach you discipline and attention to detail. Watching a well-balanced nano scene can be calming and therapeutic.

    • It’s easier to start and keep up with a nano tank because it needs less.
    • Small tanks help you learn faster about planting, trimming, and design.
    • The design focuses on the textures and shapes of rocks and plants you choose.

    But, there are technical challenges. You need to be precise with rock sizes and control CO2, light, and water quality. Small tanks can show changes quickly, so algae can spread fast if you don’t keep up with care.

    1. Start with the basics of Iwagumi: single or three-stone setups and a clean foreground.
    2. Choose small fish to keep the bioload low and maintenance easy.
    3. Do frequent, short maintenance sessions to keep everything stable and algae-free.

    By balancing beauty with careful care, nano Iwagumi aquascaping is both a creative hobby and a practical way to enjoy a minimalist aquarium in your home.

    Common Mistakes to Avoid

    Start simple when building an Iwagumi tank. Too many rocks can ruin the style’s negative space. Try out stone arrangements on a tray or carpet before placing them in the tank.

    Choosing the wrong rocks is a big mistake. Mixing stones with different colors or textures can mess up the look. Also, avoid rocks that change the water’s pH or add minerals.

    Managing algae is a challenge. Too much CO2, light, or nutrients can lead to algae. Keep CO2 levels steady, light for 6–8 hours, and fertilize carefully.

    Handling carpet plants wrong can be a problem. Planting too close, not trimming, or flooding too soon can cause issues. Use the dry start method, plant evenly, and trim every 2–3 weeks.

    Choosing the right fish is important. Big, digging, or aggressive fish can harm your setup. Opt for small schooling fish like ember tetras or harlequin rasboras. Add Amano shrimp, cherry shrimp, and nerite snails for cleaning.

    Follow beginner tips to avoid mistakes. Test layouts, keep hardscape simple, and maintain consistent CO2 and light. Plan your stocking with small, peaceful species in mind. These habits help protect your design.

    • Test rock arrangements on a tray before planting.
    • Pick uniform stone types and check for pH effects.
    • Keep lighting to 6–8 hours and stabilize CO2.
    • Use DSM for carpets and trim every 2–3 weeks.
    • Choose small, peaceful fish and useful invertebrates.

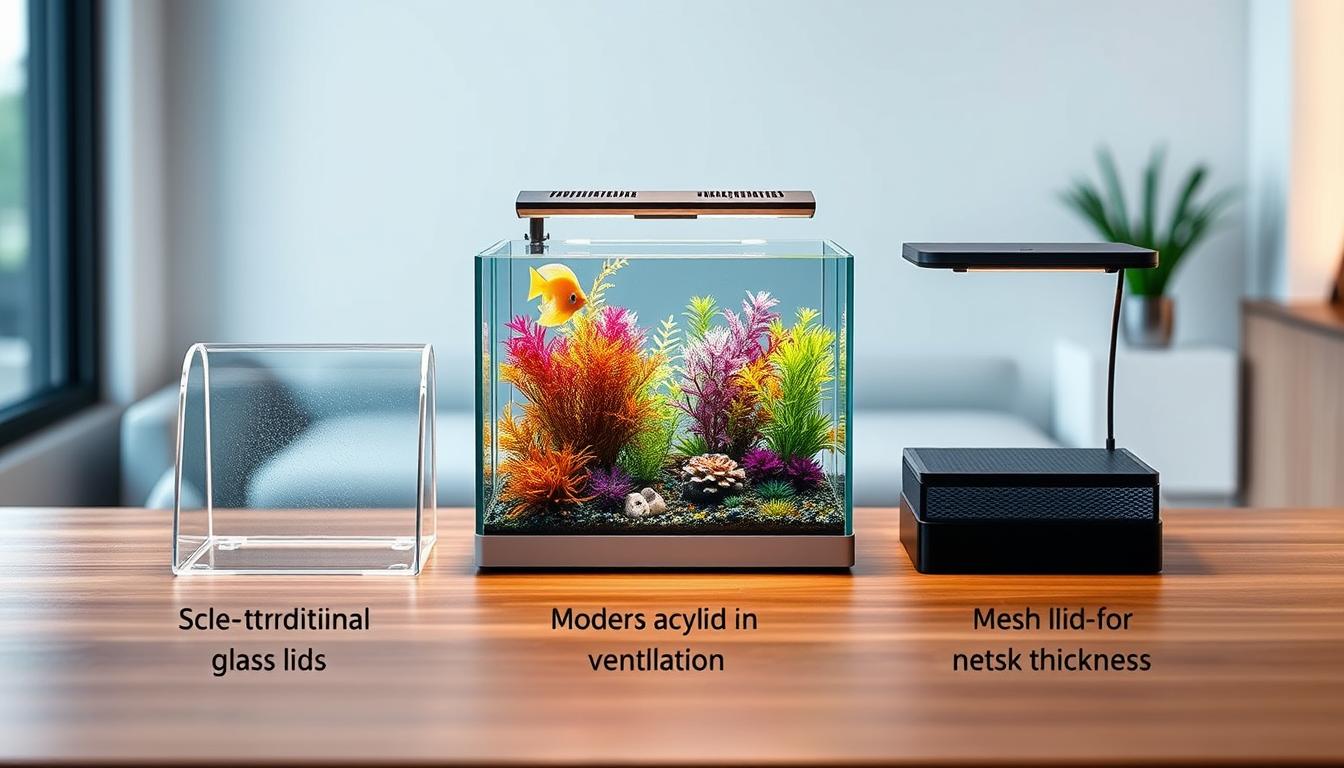
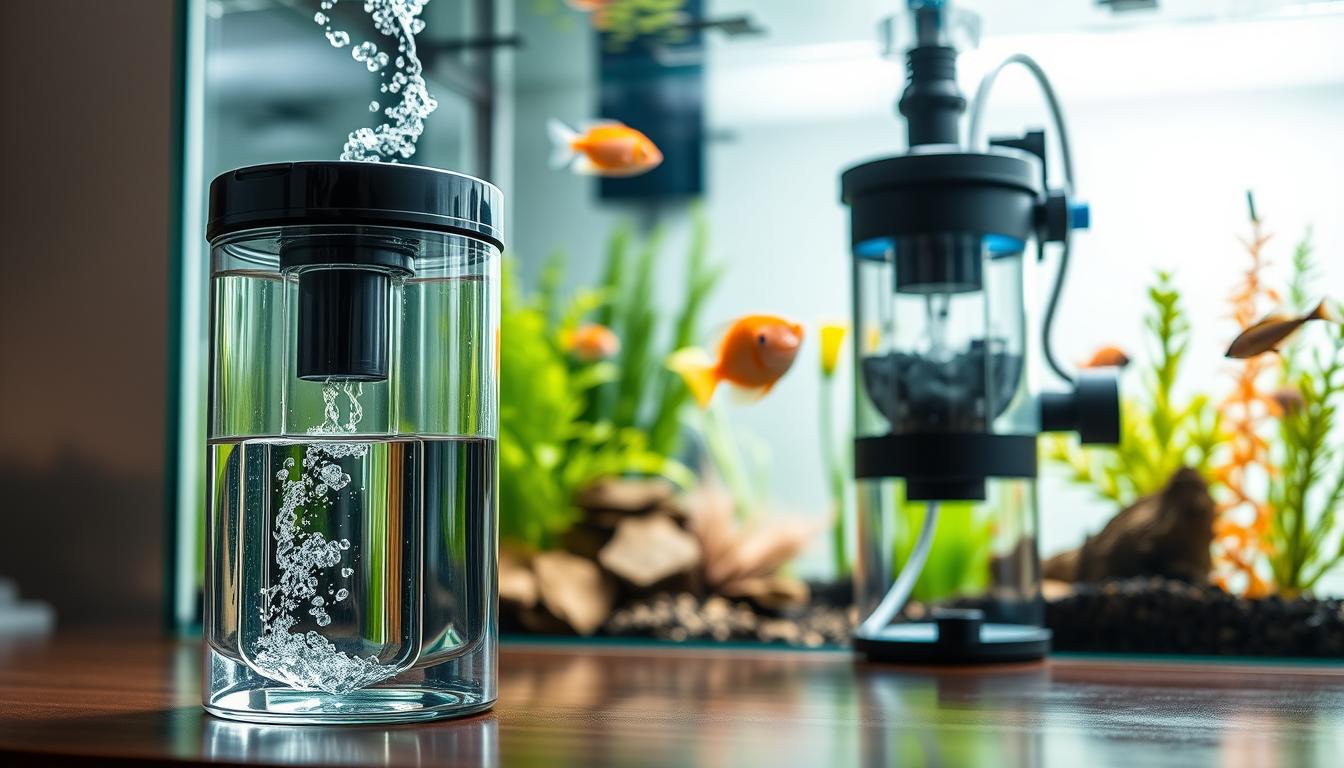
    Tools and Supplies for Iwagumi Aquascaping

    To create a serene iwagumi layout, you need the right tools. Start with precision tools: fine tweezers, curved scissors for carpet plants, and a roll-up tool kit. These tools make planting and pruning easier.

    Maintenance is key. Use algae scrapers, a siphon for water changes, and a tray for small parts. Keeping these supplies ready saves time and reduces stress during tank maintenance.

    • Filtration options: choose Eheim canister filters for quieter performance or a hang-on-back unit for small tanks.
    • CO2 systems: pressurized setups with diffusers, solenoids, and a drop checker help you control levels precisely.
    • Lighting: pick an LED fixture with adjustable spectrum and a timer to match plant needs.

    Substrate and fertilization are vital for plant health. ADA Aqua Soil Amazonia and Tropica Aquarium Soil are good choices. Add root tabs for heavy feeders and liquid fertilizers for nutrients. Use iron supplements for red-toned species.

    Stabilizing hardscape needs small tricks. Aquarium-safe glue gel secures stones. Use small pebbles or substrate packs to pin rocks while filling. Filter media bags or lava rock under the substrate reduce soil needed and help shape slopes.

    Monitor water chemistry. Keep test kits for pH, GH, KH, NO3, and PO4 ready. An aquarium lighting calculator helps estimate PAR and lumen needs for your plants.

    Assemble these tools for iwagumi aquascaping and choose reliable aquarium supplies from brands like Aqua Design Amano, Fluval, Eheim, or JBL. Good gear gives you more control over plant growth, rock stability, and long-term maintenance.

    Community and Resources for Iwagumi Enthuisiasts

    Studying Takashi Amano’s work and visiting galleries can help you learn. Photo journals and guides explain important concepts like rock hierarchy and planting techniques. They also cover maintenance in simple terms.

    For beginner tips, check out hobbyist sites and forums. Reddit, Facebook groups, and local aquarium clubs in the U.S. offer valuable feedback and help. They can critique your photos and solve problems.

    • Follow aquascaping contests and public aquarium showcases for inspiration.
    • Use online tools for planning lighting and CO2. Explore smart tank automation like timers and smart LED systems.
    • Try AI tools for diagnosing algae and measuring PAR for better results.

    Buy supplies from trusted retailers and local fish stores. Look for stones, ADA-style soils, CO2 kits, and LED fixtures from reliable sources. Research shipping and quarantine for invertebrates like Amano shrimp and nerite snails.

    For structured lessons, follow online guides on layout, planting, and care. Practice and get feedback from the community. This will help you improve and learn more about the Japanese aquarium style.

    Using community resources for iwagumi can speed up your learning. It connects you with others who share tips, product reviews, and contest entries. Regularly interacting helps refine your skills and keeps you updated with new trends and methods.

    Conclusion: Embracing the Art of Iwagumi

    The Iwagumi style is all about simplicity. It focuses on choosing the right stones and using simple plants. It also follows strict rules, like using odd-numbered stones and placing them off-center.

    In a small tank, these rules are even more important. The size and detail of the tank create the scene. Keep the plants few and focus on their flow to achieve balance.

    To start, draw out your ideas and take photos of your stone setups. Choose stones from the same family and create a gentle slope in the substrate. Consider using a dry start for carpeting plants.

    Make sure to stabilize CO2 and lighting early. Also, stick to a regular routine for trimming and water changes. These steps are key for beginners.

    While Iwagumi requires patience and technical skill, the results are worth it. You’ll get a peaceful and beautiful underwater scene that enhances your home. Begin with small projects, join clubs or forums for advice, and grow your skills over time.

    FAQ

    What is Iwagumi and why is it popular for nano aquascaping?

    Iwagumi means “rock formation” in Japanese. It’s a minimalist approach to aquascaping, focusing on rocks and plants. Nano tanks make it harder because you have less room for mistakes.

    What are the core design rules I must follow in an Iwagumi layout?

    Key rules include using odd numbers of stones and placing the main stone off-center. You should match stone lines and use negative space. This keeps the design simple and balanced.

    How does stone hierarchy work and what are the roles of each stone?

    Each stone has a role: Oyaishi is the main stone, Fukuishi support, Soeishi add rhythm, and Suteishi are hidden. They help with balance and story.

    Which stones are recommended and how do their looks affect the scape?

    Choose stones like Seiryu, Ohko, Sado-Akadama, Ryuoh, and Manten. They should look similar to keep the design unified.

    How should I scale and count rocks for different tank sizes?

    Scale stones to fit the tank size. Nano tanks use 1 main stone and 1–2 supports. Larger tanks can have more stones. Always check the layout from the viewing angle.

    What substrate and slope should I use to create depth?

    Use nutrient-rich soil and a fine top layer for plants. Create a slope from front to back for depth. A higher back and lower front help with perspective.

    What plants work best in Iwagumi, and for carpets?

    Use 1–3 plant species for a minimalist look. Popular carpet plants include HC, Glossostigma, and Eleocharis. Use vertical accents sparingly to add depth.

    Should I use the Dry Start Method (DSM) for carpets?

    Yes, DSM is best for carpets. Plant directly into nutrient substrate, mist, and cover for 4–6 weeks. Then, flood the tank.

    How important is CO2 and lighting for a successful Iwagumi?

    CO2 and lighting are key. Use a diffuser and solenoid for CO2 control. LED lights in the 6000–8000K range are common. Run lights 6–8 hours a day for consistency.

    What filtration and equipment are best for nano Iwagumi tanks?

    A reliable HOB filter works well for small tanks. Use quality LED lighting and consider CO2. Keep tools like tweezers and water test kits handy.

    How do I place rocks step-by-step to build an Iwagumi hardscape?

    Start with a sloped substrate. Place the Oyaishi off-center. Add Fukuishi and Soeishi to echo the main stone. Leave space to draw the eye. Stabilize stones with substrate or glue if needed.

    How can I create depth and forced perspective in a small aquarium?

    Use a slope and smaller plants and rocks in the back. Layer textures for depth. Tilt stones and create space to guide the viewer’s eye.

    What are common mistakes that ruin an Iwagumi scape?

    Avoid overcrowding and mixing stone types. Poor scaling and inconsistent CO2 or lighting can also ruin it. Choose the right fish to avoid disturbing the layout.

    How do I prevent and manage algae in an open Iwagumi layout?

    Keep CO2 steady, lighting consistent, and fertilization balanced. Use reliable filtration and perform regular water changes. Scrape algae and maintain a clean routine.

    What livestock is suitable for an Iwagumi tank?

    Choose small, non-digging species like Amano shrimp and ember tetras. Avoid large cichlids and bottom-dwellers that dig.

    What maintenance routine should I follow to keep the minimalist look?

    Trim plants every 2–3 weeks. Remove trimmings to avoid decay. Check CO2 equipment and filters, and perform regular water changes. Use root tabs and liquid fertilizers as needed.

    Which brands and tools do experienced aquascapers recommend?

    Many use ADA soils and products for predictable results. Accessible alternatives include Fluval, Eheim, and JBL. Use reliable LED lights, CO2 kits, and water test kits.

    How can I learn and get feedback while building my Iwagumi skills?

    Study Takashi Amano’s work and contest entries. Join online communities and local clubs to share photos and get critique. Read guides and start with small projects.

    Is Iwagumi suitable for beginners, and where should I start?

    Iwagumi teaches design discipline but can be challenging. Start small to practice stone selection and layout. Follow the dry start method and keep plant palettes simple.

  • How to Choose a Background to Make a Small Tank Look Larger

    How to Choose a Background to Make a Small Tank Look Larger

    Choosing the right background is a simple way to make a small tank look bigger. The right backdrop cuts down on visual clutter. It also hides equipment like filters and heaters, making the tank feel more open.

    Good backgrounds also help reduce stress in fish. This is true for both planted and planted-nano setups. While backgrounds are not required, they are highly recommended for both looks and health.

    Remember, the background you choose will affect how light, hardscape, plants, and substrate look. Also, think about where you’ll place the tank. Avoid direct sunlight and vents. Make sure the stand can handle the water’s weight.

    This article will cover realistic and creative backgrounds. We’ll also look at DIY and commercial options. You’ll learn how to add depth and an underwater theme to your small tank, making it feel spacious.

    Understanding the Role of Aquarium Backgrounds

    A serene underwater scene featuring a beautifully painted aquarium background. In the foreground, vibrant aquatic plants in varying shades of green sway gently, creating a lush environment. The middle layer showcases an array of colorful fish swimming gracefully among the plants, their scales shimmering under the soft, diffused lighting. In the background, a softly painted mural depicts a tranquil underwater landscape with coral reefs and distant underwater rock formations, enhancing the illusion of depth and making the small tank appear larger. The lighting is warm and inviting, casting gentle reflections on the tank's surface. The overall mood is peaceful and serene, evoking a sense of calm and beauty in an aquatic setting.

    Your tank background does more than look good. It hides heaters, filters, and tubing. This lets you keep open swimming areas and place taller plants at the rear without revealing equipment. When you tuck gear out of sight, the scene reads as a single, composed aquascape.

    Backgrounds also calm fish by blocking sudden motion outside the tank. This reduced stress helps shy species show natural behavior. It can also improve health over time. You can use a dark or textured backdrop to make colors pop and give plants and fish stronger visual contrast.

    Optical tricks in aquarium background painting can add perceived depth. A soft gradient, subtle rockwork, or layered imagery frames the layout. This makes a small tank feel larger. You can position midground and foreground elements to play off that painted depth for a cohesive effect.

    Materials matter for safety and upkeep. Choose aquarium-safe, non-toxic options whether you pick a vinyl backdrop, glued foam, or a printed panel. Three-dimensional backgrounds create texture and hiding places, but you should check durability. Expect extra algae buildup in crevices.

    Think about workflow when you plan planting and aquascaping. Place taller stems and background plants behind the visual plane the backdrop creates. Use the background to mask filter and heater placement. This lets more of the tank stay open for active swimmers and community interaction.

    Match background style to the tank type and your stocking choices. Natural aquarium decor suits planted tanks and biotope setups. Bold underwater aquarium themes work for cichlid rockscapes or theme tanks that highlight species-specific behavior. Make the background a supporting player that complements fish, plants, and hardscape.

    Types of Aquarium Backgrounds

    A vibrant and realistic aquarium backdrop featuring a stunning underwater scene. In the foreground, lush aquatic plants sway gently with soft currents, creating an inviting environment. The middle ground showcases a variety of colorful fish swimming through coral formations, while intricately textured rocks add depth and interest. In the background, a gradient of soothing blue hues mimics the ocean's depths, with subtle light rays penetrating through the surface, casting a serene glow on the scene. Use bright, natural lighting to enhance the vivid colors and textures, and employ a wide-angle lens to convey a sense of depth and spaciousness, making the small tank appear larger. The atmosphere should evoke tranquility and the wonder of underwater life.

    Choosing a background for your tank can be fun. You can pick from flat printed vinyl or photographic backdrops for an easy install. These backgrounds offer instant scenes, from underwater reefs to sunken ships. They’re perfect for beginners or small tanks needing a quick visual update.

    Painted backgrounds offer more control over color and gradients. Use acrylic paint or Plasti Dip rubber coating for durability. A deep black can make plants stand out and hide algae. Soft blues can create an open-water feel. Painted panels are great for a custom look or blending with plants.

    Three-dimensional backgrounds add texture and depth. Materials like resin, foam, or rock can mimic caves and ledges. These backgrounds change how you see space and provide hiding spots for shy fish. Make sure they’re safe for aquariums and check for algae or wear often.

    Natural backdrops use real driftwood, rock slabs, or dense plants for a living wall. Live plants improve water quality and create a natural feel. A planted green wall adds depth and natural light play.

    For a temporary setup, consider posterboard, adhesive vinyl, or tape-on backgrounds. These options are great for renters or short-term displays. Posterboard is cheap and easy to change, while adhesive vinyl can mimic more expensive options for a test.

    • Flat printed vinyl: quick install, instant scenery.
    • Painted panels: full color control, gradient options.
    • 3D molded pieces: texture, hiding spots, real depth.
    • Natural elements: driftwood, rock, live plant walls.
    • Temporary options: posterboard and adhesive vinyl for testing.

    For a unique setup, think about custom aquarium backgrounds. Mix a photographic backdrop with a 3D panel or blend live plants with molded rock. Creative backgrounds let you create a signature look while keeping function in mind.

    Choosing the Right Color for Your Background

    Choosing the right color can make your tank look bigger. Dark backgrounds like matte black make fish and plants stand out. They also hide algae growth. Use black or deep charcoal for a strong contrast and a gallery-style look.

    Cool tones make your tank feel more open. Deep blues and aquamarine suggest calm and depth. They’re great for creating a sense of expansive underwater scenes. Try a single cool hue for a clean look.

    Gradients add depth and guide the eye. A fade from darker edges to a lighter center creates a vanishing point. This draws the eye inward. You can paint this effect or buy a pre-printed gradient poster.

    In small tanks, keep patterns simple. Busy designs can make the space feel cramped. Opt for soft textures, gentle scenes, or minimalist prints. These pair well with natural decor like driftwood and live plants.

    • Use cool colors (deep blues, aquamarine) to suggest distance and open water.
    • Place darker tones at the perimeters and lighter hues at the center for a vanishing-point effect.
    • Avoid busy prints in small tanks; favor simple textures or soft photographic scenes.

    For durable results, consider rubberized coatings like Plasti Dip. Test them for aquarium safety first. Spray a base coat, let it cure, and add layers for texture. Always let coatings off-gas and cure before filling the tank with water.

    Buy pre-made backgrounds for speed and consistency, or paint your own. Match your color to your planting scheme. Small changes in hue can make a small tank look amazing.

    Using Vertical Lines to Add Height

    Vertical lines make a small tank look taller. Use tall plants, vertical rock formations, or printed patterns to achieve this. These elements work well with themes that highlight height and movement.

    Place taller plants at the back and mid-height plants in the middle. This creates clear layers. Choose plants like Vallisneria, Amazon swords, and tall stems for a good look.

    Use hardscape techniques to add to the vertical look. Stack rocks, anchor driftwood, or use slate slabs on edge. Add backgrounds with columns or streaked patterns to enhance the height.

    Choose the right fish for your vertical setup. Angelfish and tall-bodied fish look great in height-focused tanks. For species that like to hide, tall stems are perfect. But, avoid crowding tanks meant for active swimmers like tetras or danios.

    Combine natural decor like driftwood and stone stacks for a cohesive look. Natural textures make vertical elements seem real. With careful placement, a small tank can feel much bigger and more vertical.

    Utilizing Depth Illusions

    To make a small tank look bigger, arrange elements in layers. Start with a foreground of big, detailed pieces near the glass. Then, add a midground with open swimming space.

    Place smaller hardscape and plants toward the back. This helps the eye see distance. Use photographic or painted backdrops with vanishing points or soft, blurred shapes in the distance. These cues help create a natural depth effect.

    Lighting can also make a tank seem larger. Use directional LED strips across the front and dimmer lights in the back. This suggests depth. Add a timer to LEDs to keep the lighting consistent and prevent algae.

    Planting strategy is key for both depth and water quality. Dense, tall plants in the rear frame the scene. A midground with “negative space” lets fish swim freely. Live plants also reduce nitrates, making the tank look healthier and more expansive.

    • Layer layout: foreground, midground, background.
    • Backdrop choice: photographs or painted scenes with perspective.
    • Lighting tips: directional LEDs and timers for contrast and control.
    • Plant plan: thick rear planting, open midground for swimming.

    To create an immersive experience, mix these techniques with underwater themes that match your fish and decor. You can also use unique backgrounds like 3D rock panels or printed scenes to enhance realism and depth.

    Incorporating Natural Elements

    Use live plants as a living backdrop to craft beautiful underwater scenes in your small tank. A live planted aquarium background acts as a green wall, adds depth, and helps absorb nitrates while limiting algae growth.

    Start with beginner-friendly species like Java fern, Anubias, and Cryptocoryne. Plant denser clusters at the rear and midground to create the illusion of distance. Vary height and leaf shape to keep planted tank backgrounds from looking flat.

    Choose safe driftwood and aquascaping rocks to add texture and shelter. Arrange pieces to form caves and ledges that hide filters, heaters, and cords. Hardscape placement should help your plants thrive while providing hiding spots for fish.

    Follow simple steps for setup to avoid common problems. Rinse hardscape and substrate thoroughly with tap water only; do not use soap. Lay out your intended layout on the stand or a table before adding water to minimize disturbance.

    • Plant with tweezers to avoid uprooting nearby stems.
    • Use root tabs for heavy root feeders like Amazon swords.
    • Position taller species at the back and compact ones near the front.

    Match natural aquarium decor to the species you keep. If you favor biotope setups, research the fish’s native habitat and recreate that look with appropriate plants and rocks. This keeps fish stress low and promotes natural behavior.

    When planned well, natural elements create planted tank backgrounds that both look stunning and improve water quality. Your careful choices will produce a cohesive live planted aquarium background that highlights the tank’s inhabitants and produces truly beautiful underwater scenes.

    DIY Aquarium Background Ideas

    Try simple projects for a big visual impact without spending a lot. Use Plasti Dip or aquarium-safe acrylics for a quick change. Paint soft gradients or reef textures to make a small tank look bigger.

    Temporary options are great for testing layouts. Use posterboard or photographic prints taped to the tank for easy swaps. These options are cheap and let you try different colors and patterns before committing.

    Build light 3D layers for depth. Use cardboard or foam panels at staggered distances. Cover edges with aquarium-safe paint or adhesive rock to hide seams. These backgrounds add depth without heavy construction.

    • Make a living moss wall by attaching sheet moss to a plastic backing and securing it behind the tank.
    • Create textured rock using aquarium-safe foam, carved to shape, then sealed with silicone and coated in aquarium-safe grout or resin.
    • Use vinyl decals or photographic vinyl for realistic landscapes that resist moisture and are easy to clean.

    When crafting a 3D foam background, follow safety steps. Choose materials labeled aquarium-safe. Seal foam fully with silicone, then coat with an approved grout or resin. Let everything cure for the time the manufacturer specifies before exposing it to water.

    Adopt careful placement and setup practices. Rinse all materials to remove dust and residues. Position heaters, filters, and cords before finalizing the background so you leave access for adjustments. To add water without disturbing decor, pour slowly over a plastic bag or colander to disperse flow.

    1. Rinse materials and let dry.
    2. Test-fit pieces outside the tank, then inside without adhesives.
    3. Seal joins with aquarium-safe silicone and let cure fully.
    4. Fill slowly and monitor placement during the first hour.

    Plan for upkeep from the start. DIY backgrounds can trap detritus or encourage algae growth. Leave gaps or removable panels for cleaning. Use materials that tolerate gentle brushing and mild scrubbing so you can maintain a healthy display without harming plants or fish.

    Think of custom aquarium backgrounds as ongoing projects. You can refine color, texture, and depth in stages. Keep safety, access, and maintenance in mind while you test creative fish tank backgrounds that enhance scale and style in a small tank.

    Commercial vs. Homemade Backgrounds

    Commercial aquarium backgrounds are quick and reliable. Brands like Fluval and Marina offer professional finishes. They have realistic designs that look like rock, coral, or plants. These backgrounds are safe for aquariums and won’t fade or get damaged by water.

    They are easy to install, saving you time and avoiding mistakes.

    Homemade aquarium backgrounds let you control every detail. You can use posterboard, foam, or acrylic to create custom designs. This way, you can match your room’s color or theme. DIY backgrounds are budget-friendly and perfect for renters who need something easy to remove.

    Let’s compare the two options.

    • Commercial aquarium backgrounds: consistent quality, pre-sealed materials, lifelike textures, easier setup.
    • Homemade aquarium backgrounds: flexible sizing, lower cost, full personalization, and easy removal for renters.

    Each option has its downsides. Commercial 3D units might take up space and limit rearranging your tank. Some flat printed backgrounds can look artificial under bright lights.

    DIY projects can be risky if you use the wrong materials. Non-aquarium-safe glues or paints can harm your tank. Both types of backgrounds need regular cleaning and occasional touch-ups.

    Choose based on what matters most for your tank.

    1. Tank size: small tanks do well with subtle, flat, or painted backgrounds to avoid clutter.
    2. Fish behavior: some fish need 3D shapes for hiding spots.
    3. Maintenance: pick surfaces that are easy to clean without damaging them.
    4. Budget and style: for a unique look, DIY or custom backgrounds can match your exact color and theme.

    Match your choice to your tank’s size, your fish’s needs, and how easy it is to maintain. This way, you can pick the right background that enhances your tank’s look without hassle.

    Maintaining Your Background

    To keep your tank looking great, follow a simple cleaning routine. Check the background every week for algae and loose edges. Use a soft brush or algae scrubber to clean it. Avoid soaps and harsh chemicals that can harm your fish and plants.

    Control the lighting to prevent algae. Start with short light periods and use an LED timer. For planted tanks, use a little fertilizer at first. This helps control algae and balances nutrients.

    Good filtration and aeration are key for maintaining your background. A reliable filter and air stone improve water quality. They also reduce organic waste and algae-friendly conditions. Always check the filter media and flow weekly.

    • For 3D resin or foam backgrounds: scrub gently, rinse with dechlorinated water, and inspect for wear.
    • For painted backgrounds: touch up areas as needed with aquarium-safe paint that is fully cured before use.
    • For plant-based backdrops: prune and replant regularly, using tweezers and pruning scissors for fine work.

    When designing or installing the backdrop, plan for easy access. Leave removable panels or create space for rinsing or lifting the background. If you need to remove it, rinse with tank water. Avoid sudden temperature changes.

    1. Weekly: visual check, light timer review, and spot-scrub visible algae.
    2. Biweekly: rinse skimmer pads, test flow, and trim plant growth.
    3. Monthly: inspect background materials, perform gentle deep clean if needed, and touch up paints or sealants.

    Regular maintenance keeps your background colors bright and controls algae. Small, consistent steps make upkeep easier. This way, your clean background will continue to make your small tank look bigger.

    Final Thoughts on Maximizing Small Tank Aesthetics

    To make a small tank feel bigger, start with the right background. Choose colors and themes that match your fish and tank. Pick a background type that fits your care routine and fish behavior.

    Use vertical lines and layered decor to add height. This makes the tank look deeper without making it crowded. Place plants and hardscape carefully to enhance this effect.

    Lighting and where you place equipment are key. Hide filters and heaters behind decor or a textured background. Use LED lights with timers to control brightness and growth.

    Rinse all materials before putting them in the tank. Start with easy plants like Java fern and Anubias. Control fertilizer and light to prevent algae. Always place the tank on a level, sturdy surface.

    Try out temporary solutions before making a big change. Use tape-on prints or posterboard to test backgrounds. Once you find the perfect look, consider upgrading to a painted or 3D backdrop.

    Thoughtful decor and realistic scenes improve looks and reduce fish stress. They turn your tank into a living piece of art. Use these ideas to create unique backgrounds and scenes that make your tank look bigger and healthier.

    Experiment with different looks, adjust lighting and plant placement. Enjoy making your small tank a stunning, natural display.

    FAQ

    How does a background make a small aquarium look larger?

    A good background hides equipment and focuses your view on the aquascape. It also adds depth with colors and shapes. Darker edges with lighter centers make your tank seem bigger.

    Are backgrounds necessary for tank health or just aesthetics?

    Backgrounds are optional but good for your tank. They make it look better and reduce stress on fish. Live plants in the background also clean the water.

    What background types work best for small tanks?

    Flat backgrounds like vinyl or posters are best for small tanks. They add depth without taking up space. Choose subtle designs to avoid making the tank feel small.

    How do color choices affect perceived space?

    Dark backgrounds make plants and fish stand out. Cool colors like blue suggest open water. Gradients that get lighter towards the center make your tank seem deeper.

    Can 3D backgrounds make a small tank look bigger?

    Yes, 3D backgrounds add texture and depth. They can make your tank feel more immersive. But, choose them carefully in small tanks to keep enough swimming space.

    Are painted backgrounds safe and effective?

    Yes, if you use aquarium-safe coatings. You can spray or paint the back panel. This way, you can customize your background and keep it safe for your tank.

    What natural options can I use for a background?

    Use real driftwood or rock slabs for a natural look. Live plants also add depth and help clean the water. Place taller plants in the back for a layered look.

    How should I place plants and hardscape to maximize perceived size?

    Use a layered layout with plants and hardscape. Place taller elements in the back. This creates depth and makes your tank seem bigger.

    What are safe DIY background ideas for renters or beginners?

    Try posterboard or vinyl prints for a temporary look. Painting the back panel is also a good option. For a 3D effect, use foam panels and safe materials.

    How do I manage algae and maintenance on backgrounds?

    Use LED lights and a timer to control algae. Start with small amounts of fertilizer. Clean backgrounds gently and design them for easy maintenance.

    What are the pros and cons of commercial vs. homemade backgrounds?

    Commercial backgrounds offer a professional look and are safe for aquariums. Homemade backgrounds save money and let you customize. But, DIY can be risky if materials aren’t safe, and 3D pieces can be bulky.

    Which background is best for different fish or tank types?

    Choose a background based on your fish and tank type. Dark or green backgrounds are good for planted tanks. Textured 3D backgrounds work well for cichlid tanks. For community fish, use subtle backgrounds to keep swimming areas open.

    How do lighting and color work together to create depth?

    Use directional lighting and cool colors to suggest distance. Dimmer areas in the back help too. Highlighting foreground elements and using a gradient background creates contrast and depth.

    Any quick tips for installation and safety?

    Rinse hardscape and substrate well without using soap. Plan equipment placement to hide cords and heaters. Make sure all materials are safe for aquariums and fully cured before filling.

    How can I experiment with looks before committing?

    Use temporary options like posterboard or vinyl prints to test different looks. Try different plant placements and midground openings. Once you find a style you like, upgrade to a more permanent solution.

  • Nano Tank Lid Options: Lid vs. Rimless – Pros and Cons for Evaporation and Safety

    Nano Tank Lid Options: Lid vs. Rimless – Pros and Cons for Evaporation and Safety

    Setting up a nano aquarium means deciding between an aquarium lid or an open-top design. This choice impacts how much water evaporates, keeps your fish safe, and protects against dust and debris. Knowing the differences helps with planning your tank’s setup and maintenance.

    Tank lids prevent fish like wrasse and tangs from jumping out. Without them, many fish can escape, leading to losses. A good lid or cover is essential for keeping your fish safe.

    Evaporation is another big issue. Open tanks lose water fast, which can change the water’s chemistry. You’ll need to add water regularly to keep the balance right. Without a lid, salt can also creep into the tank.

    Lids also keep your tank clean by blocking dust and spills. They help maintain a stable humidity and temperature in your room. But, some people prefer open-top tanks for their clean look and ease of access.

    This article will explore your options for nano tank lids and discuss the pros and cons of each. We’ll also cover accessories and maintenance to help you choose the best cover for your tank. By understanding the trade-offs, you can set up a successful nano tank.

    Understanding Nano Tanks

    Create a detailed and visually appealing image showcasing various nano tank lid options arranged artistically on a sleek tabletop. In the foreground, display a selection of lids made from glass, acrylic, and mesh, highlighting unique features such as locking mechanisms and ventilation systems. The middle section should feature a well-maintained nano tank, demonstrating how these lids fit seamlessly, with aquatic plants and colorful fish visible inside. In the background, softly blurred, include elements of a modern aquarium setup, like filtration equipment and decorative stones, to set the aquatic theme. Use natural lighting to enhance the clarity of the materials, and employ a shallow depth of field to draw attention to the different lid textures and designs. The mood should be calm and informative, promoting a sense of innovation in aquarium care.

    Nano tanks are small aquariums, usually under 10–20 gallons. They fit on desks, bookshelves, and in small spaces. Many hobbyists use them for planted nano aquascapes, shrimp tanks, and tiny reef systems.

    These tanks have limits due to their small size. You need to top them off often because evaporation is faster. Temperature and pH changes are also more noticeable.

    Common inhabitants include bettas, small tetras, gobies, freshwater shrimp, and tiny reef fish. Some fish can jump, so a good lid is important. You’ll need to adjust feeding and filtration to the tank’s size.

    Choosing the right lid is key for stability and maintenance. Glass or acrylic tops can reduce evaporation and splash. Screen tops let in oxygen but can lose moisture. Custom lids and LED hoods add lighting and protection. A simple cover might be enough for a planted tank.

    The Importance of Tank Lids

    A detailed, close-up image of an aquarium lid made from high-quality glass, featuring a sleek and modern design that seamlessly fits onto a rectangular tank. The foreground includes the lid with its secure clips and a slight reflection on the glass surface, showcasing its clarity. In the middle, the aquarium tank reveals vibrant aquatic plants and colorful fish beneath the lid, emphasizing the protected environment. The background consists of a softly blurred room setting with warm, natural lighting streaming through a nearby window, creating a serene and inviting atmosphere. The scene captures the importance of tank lids in maintaining moisture and ensuring safety, reflecting a peaceful aquatic habitat.

    Choosing the right aquarium lid for a nano tank is key. It helps cut down on evaporation and keeps the water chemistry stable. In small tanks, changes in salinity and dissolved substances can happen quickly. A good lid means you won’t have to top off the water as often, helping you keep the water conditions stable for both reef and freshwater tanks.

    Lids also serve as a safety net. Many hobbyists have lost fish due to jumping, like rabbitfish and clownfish. Even calm fish can jump or get swept away by currents. In marine tanks, it’s important to watch out for invertebrates that might escape if the top is left open.

    They also protect your tank from outside contaminants. A cover keeps out dust, household chemicals, stray objects, and pets or children. This helps keep your tank’s filtration and skimmers clean and prevents pollutants from getting in.

    Temperature control is another benefit of a covered tank. Lids help insulate, reducing heat loss and the need for your heater to work harder. This means your tank’s temperature stays more stable, which is good for sensitive species.

    When picking a nano tank lid, think about how you’ll feed your fish and what equipment you’ll use. Look for lids that make feeding easy, fit heaters and filters, and allow for power cord passage. Clear tops are best for keeping light in, which is good for plants and corals.

    • Glass tank tops are sturdy and let light through well for most setups.
    • Acrylic tank covers are lighter and won’t break as easily, great for wall-mounted or portable tanks.
    • Think about adding extra panels or hinges if you have big skimmers or feeders.

    Choose a lid that fits your tank’s purpose and the fish you keep. Consider how it controls evaporation, keeps things in, protects from contaminants, maintains temperature, and fits your needs. Whether you prefer glass or acrylic, pick the best option for your nano tank.

    Types of Nano Tank Lids

    There are many lid options for a nano tank. Glass tank tops are clear and hard, resisting bowing and staying flat. You can get them cut to size from local glass shops. But, glass is heavy and can chip or shatter.

    Acrylic tank covers are lighter and more durable than glass. They can be shaped into various forms. But, they might scratch or flex if the sheet is thin or spans a wide area.

    Polycarbonate sheeting, like multiwall greenhouse panels, is a lightweight and strong option. It’s easy to cut and affordable for DIY projects. Always wear safety gear when cutting to avoid injury.

    Screen tops or mesh covers allow for good air flow while keeping jumpers out. They let less water evaporate than solid lids. You can place an LED tank hood on top for extra protection.

    LED tank hood systems combine lighting with a closed-top finish. They fit popular tank models and offer neat cable management. The light reaching plants might be a bit less than with an open tank.

    Custom solutions offer a clean look with fitted lids. They use clips and stainless steel strips for a frameless look. You can get custom-cut glass or polycarbonate with notches for equipment.

    Small tank cover options include partial panels and hybrid lids. These allow for quick maintenance and some gas exchange. They prevent most escapes while keeping a small footprint.

    • Glass tank tops: durable, flat, heavier
    • Acrylic tank covers: light, moldable, scratch-prone
    • Polycarbonate sheeting: strong, DIY-friendly, low-cost
    • Screen tops: ventilated, prevents jumpers, lowers evaporation less
    • LED tank hood: integrated lighting, neat finish
    • Custom tank lids: tailored fit, notched for gear
    • Small tank cover: partial or hybrid, easy access

    Rimless Tanks: An Overview

    Rimless tanks have no top frame for a clean look. They’re perfect for planted tanks and modern homes. You can see everything clearly without a big frame ruining the view.

    Many rimless tanks don’t come with lids or you can buy them separately. You might need special covers or custom lids to keep water in and prevent mineral marks. A fitted lid keeps your tank looking great and stops water loss and splashes.

    For a DIY fix, you can use clips or bent metal to hold a clear panel in place. You can also get a custom cut from a local glass shop. Polycarbonate panels are great for DIY projects because they’re light, don’t warp, and are easy to work with.

    For small fish that jump a lot, consider nano tank lids. Running a rimless tank without a lid can lead to fish escaping. Lowering the water level can harm the look and cause calcium stains. A hybrid setup is a good middle ground.

    • Full cover: keeps evaporation and jumps low but changes the look.
    • Partial or removable panels: useful for feeding and photos.
    • Custom tank lids: made to fit your brand and equipment cutouts.

    Think about what’s more important to you: looks or practicality. Rimless tanks look amazing, but choosing the right lid is key to keeping your fish safe and your tank looking good.

    Evaluating Pros of Tank Lids

    Adding an aquarium lid brings clear safety benefits. It stops fish from jumping and keeps pets or kids out. Many hobbyists say a good LED tank hood or glass lid works well, but no cover is perfect.

    Evaporation drops a lot with a small tank cover. Open-top tanks lose water fast, up to an inch a day. A nano tank loses water even quicker, so a lid helps avoid constant water top-ups.

    With the right nano tank accessories, maintenance is easier. Less water loss means less salt creep and humidity damage. This also lowers the risk of water damage to walls or electronics near the tank.

    Contaminant control is another big plus. A cover keeps dust and airborne debris out. This protects delicate corals, shrimp, and nano freshwater plants from harm.

    Integrated LED tank hood designs are both functional and stylish. A good LED tank hood offers efficient lighting and a clean look. Glass or acrylic lids are discreet for planted aquascapes and let light through.

    • Prevents escapes and reduces the risk of jumper losses.
    • Cut evaporation, which reduces top-offs and stabilizes salinity and temperature.
    • Blocks dust and contaminants to protect water quality.
    • Makes maintenance easier and limits salt creep and humidity damage.
    • Provides a polished appearance with options like an LED tank hood for integrated lighting.

    Analyzing Cons of Tank Lids

    Lids and hoods can block light for plants and corals. Reefco’s tests show open-top tanks get 10–15% more light. This light loss is key for high-demand corals or dense plants under LED or T5 lights.

    Glass and acrylic tank covers change light quality. Glass might diffuse and alter the spectrum a bit. Thin plastics can tint light over time. You should think about this when choosing fixtures and planning photoperiods.

    Surface gas exchange drops with a lid. Lids limit oxygen transfer and slow CO2 dispersion in planted systems. This can stress livestock in densely stocked tanks or with oxygen-demanding species.

    Maintenance gets harder with a lid. Feeding, trimming, water testing, and equipment access need more steps. Some add cutouts or hinged panels for easier access.

    Lid design also affects looks and plant options. Custom tank lids often block emergent growth and stop aquascapes from breaking the waterline. Open tops offer more freedom for tall stem plants or marsh-style layouts.

    Fit and durability are also risks. Poorly fitted lids can let fish jump or fail to stop evaporation. Glass tank tops can chip or crack. Acrylic tank covers may bow or yellow with time. Even sturdy screen tops can fail during unusual events, letting fish escape despite precautions.

    • Light reduction: plan fixtures and photoperiods for the loss.
    • Lower gas exchange: watch oxygen and CO2 for planted tanks.
    • Extra maintenance steps: choose hinged or removable panels if needed.
    • Limits on emergent planting and aesthetics.
    • Fit and failure risks: consider build quality and safety features.

    When choosing nano tank lid options, weigh the drawbacks against benefits like evaporation control and predator protection. Custom tank lids can solve specific issues, but they come with trade-offs. Understand these before you buy.

    Comparing Lids and Rimless Tanks

    When comparing lids and rimless tanks, evaporation is a key factor. An aquarium lid reduces evaporation, saving you from frequent top-offs. Rimless tanks, on the other hand, let more water evaporate, requiring more frequent top-offs and managing salt creep in marine tanks.

    Safety and containment also differ. A solid lid keeps jumpers and splash in. Rimless tanks require careful fish selection, lower water levels, or partial covers to prevent escape.

    Aesthetics and visual flow are important. Rimless tanks offer a clean view, perfect for emergent planting and modern layouts. Lids can be distracting, but clear glass or panels can maintain a sleek look while adding functionality.

    Light and plant growth are affected by the tank top. Open-top rimless tanks provide better light and gas exchange, aiding plant growth. Lidded setups, like those with hoods, may reduce light intensity or change its spectrum.

    Maintenance and access vary with your choice. Open-top tanks are easier for maintenance tasks. Lidded tanks, while limiting access, reduce dust and debris on the water surface.

    For a compromise, many nano tank lid options exist. Partial covers, mesh screens, and custom lids with notches offer a balance. They allow for feeding, photography, and maintenance while controlling evaporation and escapes.

    • Consider a removable glass panel for photography and water exchange.
    • Try a mesh insert under a hood to boost gas exchange while keeping light control.
    • Use a small tank cover with built-in notches for cords and filter intakes.

    Your choice should align with your priorities on evaporation control, safety, aesthetics, plant needs, and maintenance. Exploring hybrid solutions can offer the flexibility you need without a strict lid vs rimless decision.

    Choosing the Right Lid Option for Your Needs

    Match your fish to the lid type. For jump-prone fish like wrasse or bettas, choose secure lids. This prevents escapes. In marine setups, a snug fit keeps crabs or small cephalopods inside.

    Consider your tank’s location. If it’s near kids, pets, or where you use aerosols, a lid stops spills. It also keeps water conditions stable in rooms with changing temperatures or humidity.

    Think about light needs for your plants or corals. Open-top tanks offer the most light. For a rimless look with protection, use clear glass or polycarbonate lids.

    Consider daily maintenance. A lid means fewer top-offs and less dust. Open-top tanks are better for easy access for maintenance. Hybrid lids offer a balance between access and coverage.

    • For planted nanos with jumpers: use a clear polycarbonate or glass partial lid with notches for hoses and feeding.
    • For display aquascapes that include emergent plants or tall hardscape: use a removable custom tank lids piece or a custom-cut lid inset with discreet clips.
    • For reef nanos: consider an LED tank hood with good ventilation, or fit a fine mesh screen to allow gas exchange while preventing escapes.
    • For budget DIY builds: polycarbonate greenhouse panels clipped in place give a lightweight, low-bow option that works as a practical nano tank accessory.

    Balance looks with function. Rimless setups look seamless. Use low-profile acrylic covers or trimmed lids for a flush look. For show tanks, a sleek LED tank hood adds polish and integrated lighting.

    Choose durable, aquarium-safe materials. Tempered glass, acrylic, and polycarbonate are good choices. If cutting panels yourself, follow safe practices and use proper clips or seals to avoid leaks.

    Think of nano tank accessories as part of your decision. Hood mounts, clip-in feeding ports, and ventilation channels add functionality. Choose the right combination for your needs.

    Maintaining Your Nano Tank Lid

    Keep your nano tank lid options in top shape by cleaning them regularly. Use a microfiber cloth and a gentle cleaner to wipe down glass tank tops. This removes dust, algae, and watermarks.

    For acrylic and polycarbonate panels, choose plastic-safe cleaners and soft cloths. This prevents scratches that can block light and reduce clarity.

    Check the fit and seals of your tank lid every week. Make sure clips, hoods, and edges are secure. Also, inspect cutouts around heaters, filters, and LED mounts for any gaps.

    Seasonal changes require adjustments in maintenance. In warm months, lids help reduce evaporation but can trap heat. Add ventilation or fans for LED units.

    In cooler months, lids help keep the temperature stable. So, you might need to top off water less often. But, always check water levels. Replace damaged panels promptly to ensure safety and function.

    If you’re building a DIY cover, use the right tools and wear proper protective gear. Make sure lids are easy to open for feeding and water changes. Yet, they should be secure enough to prevent escapes.

    For daily care, consider a hybrid approach. Use a screen or partial cover for gas exchange. Then, swap in a solid hood or small tank cover overnight or when you’re away. This limits jumps and evaporation.

    FAQ

    What are the core trade-offs between using a lid or running a rimless/open-top nano tank?

    Lids help keep water in and dust out. They also keep the tank’s temperature stable. On the other hand, open-top tanks let in more light and have better gas exchange.

    In small tanks, losing water quickly changes the water’s chemistry. A single fish jumping can destroy the tank. Your choice depends on the fish, how it looks, and how much work you want to do.

    How much water does an open-top tank lose, and why does that matter for a nano?

    Open tanks can lose a lot of water. A 40-gallon tank might lose ½–1 inch a day. In small tanks, this loss changes the water’s chemistry fast.

    This means you need to add water often. It also stresses the fish and plants.

    Which aquarium inhabitants are most likely to jump or escape?

    Many fish can jump, like wrasses and tangs. Some gobies and Siamese fighting fish also jump. Even some clownfish and damsels might jump.

    In marine tanks, small animals can also escape. A good lid or mesh can help prevent this.

    What lid types are commonly used for nano tanks and how do they compare?

    There are many lid types, like glass panels and acrylic covers. Polycarbonate panels are light and easy to use. Mesh tops let in light but lose less water.

    LED hoods add light and cover but might trap heat. Choose based on your needs.

    Are mesh or screen tops a good compromise?

    Yes, mesh tops are a good choice. They stop fish from jumping and let in light and gas. They don’t block as much water as solid lids.

    Many people use mesh during the day and a solid cover at night. This balances keeping water in and letting in light.

    How do lids affect lighting, plant growth, and gas exchange?

    Lids can block some light, reducing it by 10–15%. They also limit gas exchange. This can hurt plants and corals.

    Make sure your tank gets enough light. You might need to add fans or ventilation.

    What should you consider if you own a rimless tank without a factory lid?

    Rimless tanks look nice but often lack lids. You can buy lids or use clips for a clear panel. Polycarbonate is a good DIY choice because it’s easy to work with.

    If you don’t have a lid, choose fish that don’t jump. Lowering the waterline can stain the tank.

    How do I design a functional lid that allows feeding and equipment access?

    Plan for notches or removable panels for equipment. Many use partial lids or clips for easy access. Make sure cutouts fit well to keep water in.

    What are the best budget DIY lid materials and techniques?

    Polycarbonate panels are affordable and easy to work with. Cut them carefully and use clips for a secure fit. Glass is clear but more expensive and heavy.

    Always measure carefully and plan for access to equipment.

    How often should I inspect and maintain my nano tank lid?

    Check the lid weekly for a good fit and seals. Clean it often to avoid light loss. Replace damaged panels and tighten clips as needed.

    In warm weather, watch for heat buildup under hoods and add ventilation if needed.

    Will a lid reduce humidity and furniture damage near my tank?

    Yes, lids reduce humidity and prevent damage to furniture and walls. They also block dust and splashes from pets or children.

    Do integrated LED hoods cause overheating or reduce light quality?

    LED hoods can trap heat, but some have ventilation. They might reduce light by 10–15%. Make sure they fit your plants’ needs.

    What are safe practices when making or modifying DIY lids?

    Use proper tools and safety gear when cutting. Secure panels well and deburr edges. Plan for snug notches to prevent water loss.

    If you’re new to DIY lids, ask a pro or a local glass shop for help.

    How should I decide between a full hood, partial lid, or no lid at all?

    Choose a secure lid for jumping fish. Hoods are good for light and looks, but watch for heat. Partial lids or mesh offer gas exchange and access.

    Go lidless only if your fish don’t jump and you’re okay with frequent water changes.

    Any final practical tips for everyday use?

    Use mesh or partial lids during the day for gas exchange. Cover at night or when away to stop jumping and water loss. Keep your tank clean and monitor levels and temperature.

    Replace damaged panels quickly to keep your tank safe and healthy.

  • How to Choose and Calibrate a Heater for Small Water Volumes

    How to Choose and Calibrate a Heater for Small Water Volumes

    Keeping delicate fish in a small tank means choosing and calibrating heaters is key. Heaters are cheap and simple to set up but can cause big problems. Knowing how to pick and use them can prevent sudden temperature changes that harm your fish and corals.

    For small tanks, a good rule is to use 3–5 watts per gallon. If your room is cool, go for the higher end. Using two heaters or a dual-element system can also help avoid big problems if one fails.

    Choose reliable brands and plan to replace heaters often. Cheap heaters might need a new one every year. But, more expensive models with titanium elements and external controllers can last 1–3 years with some care. Brands like Eheim Jager and BRS Titanium are known for their quality and ease of use.

    Calibration is very important because heaters can be off by up to 4°F. Test your heater in a small bucket or 5-gallon test volume before putting it in your tank. Also, make sure water changes match the temperature and salinity of your tank to avoid stressing your fish.

    Lastly, protect your power circuits and have spare parts ready. Use GFCI outlets for your pumps and heaters. Keep a backup heater on hand and follow the manufacturer’s maintenance tips to keep your heater safe and working well.

    Understanding the Importance of Heater Safety

    A detailed illustration of a nano heater setup in a laboratory environment, emphasizing safety precautions. In the foreground, a nano heater is shown with visible safety features like automatic shut-off switches and clear warning labels. A technician in professional attire inspects the heater, wearing safety glasses and gloves, signifying careful handling. In the middle ground, safety equipment such as fire extinguishers and first-aid kits are strategically placed. The background features an organized workspace with tools and an illuminated control panel showcasing temperature settings. Use soft, warm lighting to create a calm and responsible atmosphere, captured with a slightly elevated angle to provide a comprehensive view of the scene. The focus should draw attention to the importance of safety in using nano heaters.

    You work with small water volumes that change temperature quickly. This makes nano heater safety very important. A heater failure can quickly stress or kill animals in one night.

    Electrical faults are a common cause of heater failure. Issues like stuck relays or failed thermostats can lead to overheating, fire, or electrocution. Heater safety for nano setups is a top priority for both electrical and animal welfare.

    • Use redundant controls and alarms to prevent major failures.
    • Install independent temperature monitoring to catch errors; some heaters can be off by as much as 4°F.
    • Follow nano heater safety guidelines on placement and protection to reduce glass breakage and short circuits.

    Small tanks have little thermal inertia. This increases the risk during water changes or heater faults. Matching temperature when adding new water and preheating mixed saltwater lowers thermal shock and stress to your stock.

    Set a proactive replacement schedule for heaters and key components. For inexpensive units, plan annual swaps. For higher-end gear, replace parts every 1–3 years. Regular replacement reduces the chance of sudden failure and supports consistent heater safety for nano systems.

    Calibrate your controls and check them with a trusted thermometer. Independent measurement helps you verify setpoints and keeps your nano heater safety guidelines practical and evidence-based. Taking these steps explains why heater safety matters for every small-volume aquarium you maintain.

    Key Features to Look for in Small Heaters

    A well-lit workspace featuring a sleek, modern nano heater on a wooden workbench. In the foreground, the nano heater is depicted with clear labels on its safety features, highlighting the thermostat, water temperature gauge, and built-in safety shut-off. In the middle ground, a professional in business attire is observing the nano heater, taking notes and reviewing safety tips displayed on a clipboard. The background shows a faint image of a small water tank, emphasizing the context of small water volumes. Soft, diffused lighting creates a clear, informative atmosphere, while the angle is slightly overhead, showcasing both the heater's design and the user's engagement with it. The overall mood is one of professionalism and safety awareness.

    Match the wattage to your tank size. Aim for 3–5 watts per gallon. For colder rooms or winter, choose the higher end to avoid frequent heating cycles. The right wattage keeps the temperature stable and avoids stressing the heater.

    Look for built-in calibration. Models like Eheim Jager let you adjust the heater to a reliable thermometer. You can correct small temperature differences up to about 4°F. Calibration helps keep the temperature steady, making your nano heater safer.

    • Construction materials matter. Glass and plastic are cheaper. Titanium is compact, durable, shatterproof, fully submersible, and works well with external controllers. Titanium is a top choice for nano heater safety.
    • External controllers and replaceable probes extend life. If a probe fails, you can replace it instead of the whole unit. WiFi controllers like Inkbird offer remote alerts and better reliability for long-term use.
    • Mounting and submersion: the heater must stay submerged. Use suction cups, holders, or clip mounts to keep it in place in a display, sump, or filter chamber.
    • Cord length and warranty: choose heaters with practical cord length, such as 6 ft, and multi-year warranties. A longer cord and a three-year element warranty add convenience and peace of mind.

    Check alarm and monitoring compatibility. Heaters that work with Neptune Apex or GHL Profilux controllers send alerts when temperatures get out of range. This feature is a top nano heater safety measure because it warns you before problems start.

    Prefer physically robust designs for added reliability. Shatterproof housings and titanium construction reduce breakage risks and chemical exposure. Physical strength supports nano heater safety by reducing hazards from broken parts.

    When choosing a small heater, balance performance and safety. The best nano heaters have the right wattage, calibration, durable construction, replaceable parts, and monitoring options. These features are key to practical nano heater safety tips you can use today.

    Types of Heaters Suitable for Nano Applications

    When picking heaters for nano tanks, you have a few options. Glass or plastic heaters with thermostats are the cheapest. They’re good for beginners and small setups. The Eheim Jager is a reliable choice known for its steady temperature and easy controls.

    Titanium heaters with external controllers are pricier but last longer. They’re compact, shatterproof, and fully submersible. Adding a separate controller lets you upgrade to features like Wi-Fi control and stronger relays. This makes your nano system safer.

    Integrated systems combine top-notch titanium elements with controllers. For example, the Schego titanium element works well with the Helio PTC Smart Controller or Inkbird WiFi. These systems are great for hobbyists who want a complete, compact setup.

    Dual-element setups offer extra safety. They have a full-size primary element and a smaller standby element. This setup is perfect for nano tanks because it prevents sudden temperature changes. It’s a key part of nano heater safety.

    • Compactness: Choose elements that fit small spaces without taking up too much room.
    • Placement: Place the controller probe where it can get accurate readings, even if the element is hidden.
    • Materials: Titanium is durable against corrosion and physical damage, making it ideal for nano tanks.

    Consider the cost, longevity, and control features when choosing. Always follow safety tips like sizing elements right and placing probes correctly. If your display has sensitive fish, think about using redundant setups.

    Calculating the Right Heater Size for Your Needs

    Start with a simple rule: 3–5 watts per gallon for small tanks. If your room is cool or you live in a cold area, go for the higher end.

    For nano tanks, choose the lower end if your room is steady and well-insulated. Small tanks heat up and cool down quickly. Focus on keeping the temperature steady.

    • Use two smaller heaters instead of one large unit to add redundancy and reduce risk.
    • Size each heater to cover half the calculated need so the system can cope if one fails.
    • Place heaters where water flow distributes warmth evenly; avoid dead zones.

    When calculating heater size nano, remember that external placement changes effectiveness. Heaters in sumps or behind filters may not control display temperature precisely. If you use an external controller, put the probe in the display to match real conditions.

    Follow nano heater safety guidelines by planning for practical events. During water changes, cooler replacement water will mix into the system. Preheat mixed water in a separate barrel to within about 1°F of tank temperature when possible.

    1. Estimate total gallons accurately for heater wattage for small tanks.
    2. Select wattage using 3–5 W per gallon, adjusting for room temperature.
    3. Split wattage across two devices for heater safety for nano and redundancy.
    4. Position probes and elements to reflect display temperature, not just sump readings.

    Keep nano heater safety guidelines visible when you install equipment. Secure heaters, avoid obstructing flow, and pair heaters with thermostats or controllers for tight control. That approach reduces risk and keeps your small system stable.

    Effective Calibration Techniques for Small Heaters

    To calibrate a heater for a nano aquarium, start with a small test volume. Fill a 5-gallon bucket with water that matches your tank’s temperature. This lets you test settings without harming your fish.

    Use a high-quality digital thermometer or temperature probe and the heater you plan to install. A controller can help, but you can do it with just a thermometer and a mixing vessel. This setup supports effective calibration nano heater procedures.

    Put the heater and thermometer probe fully in the bucket. Let the heater sit for about 30 minutes before turning it on, to avoid thermal shock. After soaking, turn on the unit and set your target temperature.

    Let the system reach the set point and stabilize. When the heater shows it has hit the target, check the water temperature with your independent probe. If it’s different, adjust the heater dial or the controller offset to match the thermometer reading. Many brands, like Eheim, use a red indicator arrow on their adjustment dial.

    Keep adjusting until the display matches the independent thermometer. The bucket method is faster and safer than calibrating in the display aquarium. Once aligned, install the heater in its final position in your nano tank. Place any external probe where the controller will read it for accurate control.

    Watch the setup closely for 24–48 hours with an independent thermometer. Make sure the heater cycles on and off at the correct temperatures. If your controller allows hysteresis or variance adjustments, tweak those settings for smoother cycling and improved nano heater safety tips.

    Keep records of the calibration values and schedule regular checks. Re-calibrate after replacing controllers, probes, or heating elements, and during seasonal swings. Regular records help you know how to ensure nano heater safety over time.

    Maintenance Tips for Heater Longevity

    Set up a regular schedule for basic care to keep your heater running well. Replace simple heaters every year. For more advanced units, check the elements and controllers every 1–3 years, depending on how they’re doing.

    Regularly check relays, controllers, probes, and cables. These parts often fail, causing the heater to stay on. Focus on these to avoid sudden breakdowns.

    Use an independent thermometer to watch temperatures. This ensures the heater turns on and off as it should. Also, test alarms and notifications on your aquarium controller or Wi‑Fi system to catch any issues early.

    Always make sure the heater is fully in the water, even during water changes. If you need to remove it, unplug it first to avoid damage. Always follow safety rules when handling and putting back the heater.

    Clean the heater to remove any film or mineral buildup. This helps it work better. Also, check the suction cups and mounting hardware to ensure they’re secure and the heater heats evenly.

    Keep your RO/DI and salt mixing areas clean. Use a TDS meter to check the RO/DI water’s purity. Test the saltwater’s pH, salinity, and alkalinity after mixing to avoid stressing the heater.

    • Keep a spare heater ready and test it regularly.
    • Think about using two heaters set a degree apart for better control and backup.
    • Keep track of when you do maintenance, tests, and replace parts.

    Always follow the best safety practices for nano heater maintenance. Clear steps and regular checks will help your heater last longer and keep your tank safe.

    Safety Precautions When Operating Heaters

    Always mount heaters so they remain submerged even if pumps are off for maintenance or during water changes. A heater left in air can overheat, crack, and create an electrocution or fire hazard. This simple step ranks high among nano heater safety precautions.

    Before you plug in a heater, submerge the heating element and wait about 30 minutes for temperature equalization. Glass heaters are prone to thermal shock if powered while cold. That brief wait prevents glass breakage and protects your tank.

    Use GFCI-protected outlets and a quality power strip. A switched GFCI outlet with clear labels improves wet-room safety when you mix water or run pumps near electrical connections. These measures answer the question of how to ensure nano heater safety in everyday use.

    • Place temperature controllers and displays where they stay dry and visible.
    • Put probes in the display or return line so the controller reads true tank temperature, even if the heater sits in a sump.
    • Keep audible alarms and phone notifications active on devices like Inkbird or Neptune Apex for fast alerts.

    When you mix replacement saltwater, match temperature, salinity, and pH within about 1°F and the proper specific gravity before adding it to the tank. Use the same thermometer for both mixes to avoid calibration mismatches. This step is part of heater safety for nano systems and protects livestock from sudden changes.

    Turn off heaters before water changes that expose the element to air. Plug them back in only after they are fully re-submerged. This habit prevents overheating and reduces the chance of glass failure.

    1. Keep a spare heater on hand for quick replacement.
    2. Consider a dual heater setup or redundant controllers to avoid single-point failures.
    3. Test alarms and remote notifications regularly so you receive immediate alerts on temperature deviations.

    Follow expert tips for nano heater safety by combining good mounting, verified electrical protection, matched water parameters, and redundancy. These actions lower risk and keep your small-volume system stable and secure.

    Best Practices for Heater Installation

    Make sure your heater is always covered with water. You can attach it to the display, sump, or filter chamber. Use strong suction cups or a heater holder. Always check that the heater stays underwater, even when the pump stops or the power goes out.

    Before turning on the heater, let it sit in water for about 30 minutes. This helps prevent glass heaters from breaking. It’s a key safety rule for nano setups.

    • Use an external controller probe in the display where fish and corals live. Let the controller read the display temperature for accurate regulation.
    • Mount the controller in a dry, accessible spot away from splashes so you can read the LCD and change calibration settings.
    • Choose adequate cord length and organize cords to avoid accidental yanks. Route cords to a GFCI outlet for added protection.

    When mixing saltwater, heat the mixing barrel first. Let the water sit for 24 hours with circulation. Use a heater in the mixing vessel during cold months. Make sure the temperature, salinity, and pH match before adding water to the tank. These steps are important for nano heater safety and prevent shock to your fish.

    1. Secure the heater so it cannot fall or contact fragile décor.
    2. Keep cords tidy and labeled to reduce mistakes during maintenance.
    3. Place the controller where you can reach it without splashing the unit.

    Test your heater by watching the temperature closely for 24 to 48 hours. Use an independent thermometer. Make sure the heater cycles properly and adjust settings if needed. Regular checks are key to a good heater installation.

    Follow these safety guidelines to lower risks and improve stability. Proper placement, careful wiring, and a good controller setup will ensure reliable heat. This protects your tank inhabitants.

    Factors Affecting Heater Performance

    When choosing a heater, remember the room temperature and the season. Colder rooms mean your heater works harder. For cool basements or unheated areas, use more power, about 3–5 W per gallon.

    The size of your tank and how it heats up matter. Smaller tanks heat and cool faster. This means you need to be more careful with your heater settings.

    Where you put the heater and the probe is key. If the probe is far from the heater, it might not work right. Keep the probe close to what you want to heat to avoid problems.

    Build-up on the heater can block heat. Things like scaling and biofilm can make your heater less effective. Clean your heater regularly to keep it working well.

    The state of your controller and relay is important. Old relays can cause problems. Make sure your controller and relay are in good shape to avoid issues.

    How you change the water in your tank affects your heater. Use water that’s the same temperature and has the same salinity as your tank. This helps your heater do less work.

    Heaters and their sensors might not always be accurate. Use a good thermometer to check if your heater is working right. Adjust your settings if needed.

    • Check ambient temperature and size heaters correctly.
    • Place probe near the controlled zone to avoid false cycles.
    • Clean heating elements to prevent insulating build-up.
    • Inspect controllers and relays for wear at scheduled intervals.
    • Match replacement water temperature to prevent thermal shock.
    • Cross-check readings with a calibrated thermometer often.

    By following these tips, you can keep your heater running well and safely. These steps help you maintain a stable environment for your tank. They are key to keeping your nano heater safe and efficient.

    Troubleshooting Common Heater Problems

    If your heater won’t reach the setpoint, start with the basics. Check if the heater wattage is right for your tank size. Also, make sure the heater is fully in the water and the sensor is in the right spot. A small mistake or a cold room can make it seem like the heater isn’t working.

    When the readings are a bit off, try a small bucket test. Use a reliable thermometer to check the temperature. Some heaters, like the Eheim Jager, have a calibration dial. Others might need a new probe for better accuracy. These steps help keep your heater safe and working right.

    If your heater won’t turn off, it’s a sign of overheating. Check the controller relays and replace them if needed. Keep a spare heater ready and use systems like Neptune Apex for extra safety. If your heater breaks, unplug it and get a new one. Titanium heaters are a good choice for safety.

    When changing the water, don’t let the temperature drop too fast. Match the new water to the tank’s temperature. Preheat the water and let it sit for a bit. Watch the temperature for a day or two after changing the water. Use alarms on your controller to catch any sudden changes. Regular checks and using alarms are key to keeping your heater safe.

    FAQ

    How do you choose and calibrate a heater for a nano aquarium?

    Pick a heater that’s about 3–5 watts per gallon of your tank. For colder rooms, go for 5 W/gal. Choose compact, fully submersible elements for small tanks. Before putting it in your tank, calibrate it in a 5-gallon bucket.

    Use a trusted digital thermometer or probe. Let the heater acclimate for ~30 minutes, then power it on. Compare the readings and adjust as needed. After, install the heater and check it for 24–48 hours.

    Why is heater safety specially important in small water volumes?

    Nano tanks have low thermal inertia, leading to quick temperature changes. These changes can stress or kill your fish. Heaters are a common cause of failures in tanks.

    Stuck relays or failed thermostats can overheat the water. Glass heaters can break or cause electrical hazards. In small tanks, changes happen faster, so it’s more critical to prevent failures.

    What key features should you look for in heaters for nano tanks?

    Look for accurate temperature control and calibration. Choose sturdy construction, like titanium or shatterproof elements. Make sure it’s fully submersible and has a long cord.

    Reliable mounting hardware and a multi-year warranty are important. External controllers with replaceable probes and strong relays are safer. For budget builds, consider Eheim Jager glass heaters.

    Which heater types are most suitable for nano applications?

    Two good options are affordable glass/plastic heaters and compact titanium elements. Glass heaters are good for beginners and easy to replace. Titanium elements are more durable and shatterproof.

    For long-term reliability, use titanium elements with a separate controller. Choose small heaters that can be hidden and stay submerged during maintenance.

    How do you calculate the right heater size for your nano tank?

    Use the 3–5 watts per gallon rule. For stable, warm rooms, the lower end is fine. In colder rooms, size toward 5 W/gal.

    Consider using two smaller heaters instead of one big one. This provides redundancy and prevents rapid temperature drops.

    What are effective calibration techniques for small heaters?

    Calibrate in a 5-gallon bucket filled with tank-matched water. Submerge the heater and thermometer, then let it acclimate for ~30 minutes. Power it on and let the water stabilize.

    Compare the thermometer and heater readings. Adjust via the heater’s calibration dial or the controller’s offset. After calibration, install the heater and monitor for 24–48 hours.

    What maintenance keeps heaters reliable and long‑lasting?

    Regularly inspect heaters, clean deposits, and check mounts. Verify cord condition. Monitor controller relays and probe integrity.

    Replace inexpensive heaters annually. Higher-end units may need component replacement every 1–3 years. Keep a spare heater ready and test backups periodically.

    What safety precautions should you follow when operating aquarium heaters?

    Always plug heaters into GFCI-protected outlets. Keep cords tidy and secure. Mount heaters so they stay submerged even when pumps are off.

    Unplug heaters before maintenance or water changes. Wait until the element is fully re-submerged before powering on. Use alarms and remote notifications for quick responses.

    What are best practices for installing heaters in a nano aquarium?

    Position heaters where they stay submerged—display, sump, or filter chamber. Use secure suction cups or holders. If using an external controller, place the probe in the display.

    Mount controllers in a dry, accessible spot. Run cord to a GFCI outlet and label power lines. Test the system for 24–48 hours with an independent thermometer.

    Which factors most affect heater performance in small tanks?

    Room ambient temperature and seasonal variation, tank volume, and heater wattage matter. Placement of heater versus probe and buildup on the element also affect performance.

    Poorly matched replacement water can cause rapid temperature swings. Match temperature, salinity, and pH within ~1°F before adding.

    How should you troubleshoot a heater that won’t reach setpoint?

    First, confirm wattage is sufficient (3–5 W/gal guideline) and check ambient room temperature. Ensure the heater is fully submerged and the probe is in the display.

    Verify calibration by testing in a small bucket with a trusted thermometer. If wattage and placement are correct but the heater fails, inspect for scaling or fouling. Test the controller/relay and consider replacing the element or controller.

    What to do if a heater reads several degrees off the thermometer?

    Use a reliable digital thermometer or probe in a 5-gallon bucket to validate true water temperature. Adjust the heater’s calibration dial if available or set a controller offset to align readings.

    Reinstall and recheck in the display, then monitor for 24–48 hours. Periodically re-verify calibration, specially after replacing probes, controllers, or elements.

    How do you handle a heater stuck ON or overheating situation?

    Immediately unplug the heater. If using an external controller, inspect relays and replace the controller if relays are failing. Move livestock to backup tanks if necessary.

    Have a spare heater ready. To reduce risk, run redundant heaters or dual-element setups. Use controllers with alarm notifications for quick responses.

    What causes glass heater breakage and how can you prevent it?

    Glass heaters can crack when powered while out of water or from thermal shock. Prevent breakage by always submerging the heating element before powering on and allowing ~30 minutes for acclimation.

    During maintenance, unplug heaters before exposure to air. For greater physical robustness, consider titanium heaters, which are shatterproof and fully submersible.

    How should you prepare replacement saltwater to avoid temperature shock?

    Mix replacement water in a heated mixing vessel and use a heater in the mixing barrel during cold months. Age mixed water for 24 hours with circulation.

    Match temperature, salinity (specific gravity), and pH to the tank within about 1°F before adding. Use the same calibrated thermometer or probe to avoid calibration mismatches and prevent sudden temperature swings.

    How often should you replace heaters and controller components?

    Replace inexpensive glass/plastic heaters annually as a proactive safety step. Higher-quality titanium elements and external controllers often require component replacement every 1–3 years.

    Relays and controllers commonly fail before elements; watch for degraded relay behavior and replace controllers or relays when you see sticking or inconsistent cycling.

    Should you run two heaters in a nano tank?

    Yes—using two heaters (one primary and one standby) or two smaller elements sized to split the load provides redundancy and lowers single-point failure risk. For example, two heaters each sized to cover half the wattage need will keep the tank safer if one unit fails.

    Set the secondary slightly lower than the primary, or use separate controllers for extra protection.

    Which heater brands and systems are recommended for reliability and safety?

    Reliable options include the Eheim Jager glass heater for its built-in calibration and proven performance, and Schego-made titanium elements paired with controllers such as the BRS Titanium Aquarium Heater System with Helio PTC Smart Controller or Inkbird Wi‑Fi controller. Titanium elements are compact, shatterproof, fully submersible, and commonly come with multi-year warranties; controllers add replaceable probes, stronger relays, and alarm capability.

    How do alarms and monitoring improve nano heater safety?

    Alarms and remote notifications (via Inkbird Wi‑Fi, Helio, Neptune Apex, or GHL Profilux) alert you immediately to temperature deviations, giving you time to act before livestock are harmed. Use audible alarms and phone notifications, and test alarm behavior regularly.

    Independent temperature monitoring and redundant notifications reduce the chance a heater failure goes unnoticed.

    What everyday precautions reduce heater-related disaster risk?

    Use GFCI outlets, keep spare heaters ready, run redundant heaters when possible, place probes in the display, perform regular visual and functional checks, clean heater surfaces, and follow proactive replacement schedules. Always submerge heaters before powering on, match water during changes, organize cords to avoid accidental pulls, and enable alarms and remote notifications for rapid response.

  • Creating a Beautiful Planted Tank Without CO2 Injection

    Creating a Beautiful Planted Tank Without CO2 Injection

    A low-tech planted tank skips CO2 injection. It focuses on simplicity and natural balance. This approach is easier to care for than high-tech setups.

    Low-tech tanks are cheaper and require less daily work. They also avoid CO2 overdose risks. Plants grow slowly, so you don’t need to trim them often.

    This guide focuses on key elements for a low-tech tank. Choose plants that don’t need CO2, use a nutrient-rich substrate, and provide modest lighting. Add gentle filtration and use lean fertilization. Plant densely and follow a simple care schedule.

    If you’re starting with a simple tank or moving from a complex one, this guide helps. You’ll learn how to create a beautiful, low-maintenance aquarium without CO2 equipment.

    Understanding Low Tech Planted Tanks

    A serene low-tech planted aquarium, showcasing lush greenery and various aquatic plants thriving without CO2 injection. In the foreground, vibrant green plants like Java ferns and Anubias emerge from a soft substrate. The middle layer features tall, flowing Valisneria swaying gently in the water, while a few small, colorful fish swim gracefully between the foliage. The background includes a subtle, natural rock formation covered in moss, providing a sense of depth. Soft, diffused lighting filters through the tank, creating gentle reflections and a peaceful atmosphere. Shoot from a slightly elevated angle, using a macro lens to capture the intricate details of the plants and the lively fish, evoking a calm and organic ambiance.

    Building a low tech planted tank means no pressurized CO2. Plants get CO2 from fish breathing, organic matter, and the water’s surface. This natural process keeps plants healthy without needing fancy gear.

    Keeping things balanced is key in a low-tech tank. Fish and plant waste start the nitrogen cycle. This cycle removes toxins with the help of beneficial bacteria and plants.

    Low-tech plants are easy to care for. Anubias, Java fern, and Cryptocoryne can handle different light and water levels. They grow slowly, which means less work and fewer algae problems.

    The size of your tank matters too. Nano tanks are okay for beginners, but a 20-gallon or bigger tank is better. It gives you more space for plants, fish, and helps keep the water stable.

    Low-tech tanks might not grow as fast as those with CO2. You might not see as many bright colors. But, they’re simpler and cheaper. They’re perfect for beginners learning to care for their tank.

    Essential Materials for Your Low Tech Tank

    A beautifully arranged low-tech planted aquarium, featuring various lush, green aquatic plants such as Java fern, Anubias, and crypts, thriving without CO2 injection. In the foreground, display a variety of smooth river rocks and driftwood elegantly placed to create a natural habitat. The middle ground shows a rich tapestry of vibrant foliage contrasting shades of green. In the background, soft lighting filters through the water, casting gentle reflections and creating a serene underwater atmosphere. The scene should be captured from a slight angle to enhance the depth and beauty of the tank, evoking a sense of tranquility and relaxation. The image should have natural colors and a calm mood, inviting viewers to explore the beauty of a low-tech planted tank setup.

    Begin with a nutrient-rich substrate. Options like ADA Aqua Soil or Ultum Nature Controsoil slowly release nutrients. They also help build beneficial bacteria. This is perfect for a simple planted tank setup.

    Choose the right filtration for your tank size. A hang-on-back (HOB) filter is good for small to medium tanks. Canister filters are better for larger ones. Sponge filters offer gentle flow and strong biological filtration for nano setups.

    Opt for LED lighting that’s suitable for planted tanks. Avoid high-PAR fixtures without CO2. Use a timer for a consistent photoperiod of 6–8 hours daily. This helps control algae and supports plant growth.

    Make sure to have a reliable heater. Keep the temperature between 72–78°F (22–25°C). Most tropical plants and common fish thrive in this range. Stable temperatures reduce stress and simplify care.

    Use driftwood and natural rock to shape your aquascape. These elements add depth and provide attachment points for epiphytes. They help create focal points without needing high-demand plants.

    • Lean liquid fertilizers: Seachem Flourish or APT Complete for steady micronutrients.
    • Trace supplements: Seachem Flourish Trace or Aquatrition Trace Plus for iron and trace elements.
    • Root tabs for heavy root feeders such as Amazon Sword and Echinodorus.

    Keep a basic test kit for pH, ammonia, nitrite, nitrate, GH, and KH. For maintenance, have a gravel vacuum, trimming scissors, tweezers, and a small net. Regular testing and simple tools make care easy.

    Consider liquid carbon alternatives like Seachem Flourish Excel or Aquatrition Liquid Carbon. Use them carefully to avoid harming plants or invertebrates.

    Follow this checklist to gather the right gear. It supports stable growth, clear water, and easy upkeep for a low maintenance planted aquarium.

    Choosing the Right Plants for Your Tank

    Choose plants that fit a low-tech setup and your skill level. For beginners, pick species that do well in low light and need little food. This makes starting your aquascaping journey both easy and rewarding.

    Begin with hardy epiphytes and rosette root feeders. These plants are easy to root or attach to tank decorations. Anubias barteri and Java Fern (Microsorum pteropus) are great for attaching to wood or rock. They don’t need much light or food.

    Java Moss (Taxiphyllum barbieri) is perfect for creating a carpet or clump. It gives fish and shrimp places to hide. This makes your tank more interesting and safe for your fish.

    • Cryptocoryne (C. wendtii and others): rosette root feeders that prefer nutrient substrate or root tabs. Expect some initial melt, then regrowth of adapted leaves.
    • Amazon Sword (Echinodorus species): a larger root feeder ideal for background or centerpieces. Needs moderate light and nutrient-rich substrate or root tabs.
    • Vallisneria spiralis: tall ribbon leaves that spread by runners, making a natural background screen in many water conditions.
    • Water Wisteria (Hygrophila difformis) and Hornwort (Ceratophyllum demersum): fast-growing nutrient sponges that reduce algae by consuming excess nutrients.
    • Marimo Moss Ball (Aegagropila linnaei): a low-maintenance accent that absorbs nitrates and prefers low, indirect light.
    • Dwarf Hygrophila (Hygrophila polysperma) and Bucephalandra: hardy stem and epiphyte options for quick coverage or visual accents.

    Design your tank with layers. Use background plants like Vallisneria and Amazon Sword. Midground plants like crypts and Anubias add depth. Moss or dwarf species in the foreground complete the look.

    Plant densely from the start. Aim for about 50% coverage initially and grow toward 70% or more. Dense planting helps stabilize nutrients, outcompete algae, and supports long-term success with easy care aquatic plants.

    Use this selection and layout to keep your low-tech tank healthy and visually pleasing. These choices make beginner friendly aquascaping achievable without CO2 or complex routines.

    Setting Up Your Low Tech Planted Tank

    Start with a stable tank size. A 20-gallon or larger aquarium is best. It helps balance water chemistry and temperature. Nano setups can work too, but you need to watch water quality closely.

    Prepare the substrate and hardscape before planting. Rinse nutrient-rich soil lightly without soap. Add a thin cap of inert gravel or sand over the soil for less cloudiness and slower breakdown.

    • Place driftwood and rocks to create focal points and attachment sites for epiphytes.
    • Design depth by arranging foreground, midground, and background elements for a natural aquascape for beginners.
    • Leave space for planting and maintenance access.

    Plant densely from the start to reduce algae. Start with tall background species like Vallisneria or Amazon swords. Add midground plants like Cryptocoryne and Anubias next. Finish with foreground plants and mosses.

    Attach Anubias and Java fern to wood or rock. Do not bury their rhizomes. Secure them with thread or aquarium-safe glue until roots grip the hardscape.

    Fill the tank slowly to avoid disturbing the substrate. Use a plate or plastic bag to break the water flow as you pour. Start the nitrogen cycle before introducing fish.

    Cycle the tank using a fishless method or very gradual stocking. Test ammonia, nitrite, and nitrate until levels show a stable cycle.

    Set lighting to low–moderate and run it about 6–8 hours per day. Aim for gentle water movement. A sponge filter works well for small systems and heavily planted tanks because it provides filtration without strong flow.

    Add livestock slowly after the tank cycles. Choose hardy fish and invertebrates that match low tech planted tanks. Nerite snails and Amano shrimp are good for managing algae.

    Rely on the nutrient substrate and fish waste at first. Start lean with liquid fertilization once weekly or every other week. Place root tabs near heavy root feeders after a few weeks.

    Follow these steps and you’ll have a simple planted tank setup. It supports healthy plant growth while keeping maintenance manageable for an aquascape for beginners.

    Maintaining Water Quality in Low Tech Tanks

    Keeping water stable is key for a low maintenance planted aquarium. Test pH, ammonia, nitrite, nitrate, GH, and KH weekly or bi-weekly. Use a reliable liquid test kit to spot trends.

    Aim for pH near 6.5–7.5 for most plants and community fish. Ammonia and nitrite should read zero once the tank is cycled. Nitrate is good for plants, but keep it under 20–30 ppm for fish health.

    Regular water changes keep levels balanced. Do 20–30% changes weekly or every two weeks. This removes excess nitrates and replenishes trace elements. Always treat tap water with a dechlorinator before adding it to the aquarium.

    Temperature affects both plants and fish. Keep it steady at 72–78°F (22–25°C) for most low-tech plants and common community fish. Use a quality heater and place the tank away from drafts to avoid rapid swings.

    Hardness and buffering matter for plant nutrition and pH stability. Monitor GH for calcium and magnesium and KH for carbonate buffering. Some plants, like Vallisneria, prefer slightly harder, alkaline water.

    Inspect plants and fish daily for signs of stress. Yellowing leaves, holes, or stunted growth can point to nutrient or water issues. Watch fish for lethargy, gasping, or unusual behavior that indicates poor water quality.

    Maintain your filter properly to preserve beneficial bacteria. Rinse filter media in tank water during water changes and replace mechanical media when clogged. Avoid over-cleaning biological media to prevent bacterial loss.

    • Testing routine: weekly or bi-weekly checks of pH, ammonia, nitrite, nitrate, GH, KH.
    • Target ranges: pH 6.5–7.5, ammonia/nitrite 0 ppm, nitrate <20–30 ppm.
    • Water changes: 20–30% weekly or bi-weekly with dechlorinated water.
    • Temperature: 72–78°F (22–25°C) for most setups.
    • Filter care: rinse in tank water, avoid sterilizing biological media.

    Following these checks makes the low tech planted tank guide easier to use. It keeps beginner aquarium plants thriving. Consistent, small actions yield a stable environment with far less hassle over time.

    Fertilization Techniques Without CO2

    In a low tech planted tanks setup, you want to fertilize lightly and consistently. Too much fertilizer can lead to algae. Instead, use small, regular doses to keep your plants healthy without upsetting the water balance.

    For plants like Amazon Sword and Cryptocoryne, use root tabs like Seachem Flourish Tabs. Place them near the roots every few months. This method targets plants that absorb nutrients from the substrate, reducing the need for frequent water-column fertilizers.

    Along with root tabs, add a liquid all-in-one fertilizer every one to two weeks. Seachem Flourish or APT Complete are good options. Start with half or a quarter of the recommended dose to see how your plants react.

    Don’t forget about specific nutrients like potassium, chelated iron, and trace elements. Use supplements like Seachem Flourish Trace for yellowing or stunted growth.

    For non-CO2 setups, consider liquid carbon products like Seachem Flourish Excel or Aquatrition Liquid Carbon. Use them carefully and follow the instructions. They can enhance plant health, but they’re not a substitute for CO2 in demanding setups.

    Start with a small dose and gradually increase as needed. Avoid sudden changes in fertilization to prevent algae and stress in your plants.

    Fertilize your tank once or twice a week with lean doses. Watch for signs of nitrogen or iron deficiency and address them with targeted dosing. For Cryptocoryne, be cautious of transplant stress.

    Substrate plays a key role in nutrient supply. Nutrient-rich aquasoils can last for months. If using aquasoil, reduce water-column fertilizers and rely more on root tabs. This approach helps maintain balance and reduces maintenance.

    Monitor your plants and water parameters closely. A consistent routine, light fertilization, and proper root support will help your plants thrive. This method keeps your aquarium stable and visually appealing over time.

    Achieving Balanced Lighting

    Lighting sets the mood for a low tech planted tanks setup. Go for low to moderate light that’s good for non-CO2 species. Choose fixtures that spread light evenly and adjust intensity as needed.

    Set the light cycle to 6–8 hours a day with a timer. Shorten it if algae shows up too much. Keeping the timing steady helps plants grow well without stress.

    • Choose planted-tank LED lights with adjustable output.
    • Avoid high-output or high-PAR fixtures that push growth without CO2.
    • Place taller plants in the back and low-light species in front for even light use.

    Tank depth affects light distribution. Shallow tanks let light reach lower leaves better. In taller tanks, expect shaded areas and plan plant placement for balance.

    Controlling algae starts with light management. Use modest intensity and shorter light cycles with lean fertilization and regular water changes. If algae blooms, reduce light, increase water changes, and add algae grazers like Amano shrimp or Nerite snails.

    Monitor plant health closely. Healthy plants grow steadily without bronze tint or weak stems. Pale or yellow leaves often mean nutrient or iron issues, not too much light.

    For a simple setup, focus on even light, gentle intensity, and regular care. This keeps beginner plants healthy and makes care easy.

    Common Challenges and Solutions

    Algae outbreaks are a big problem in low tech tanks. Too much light or too many nutrients cause it. To fix it, reduce light, lower nutrient levels, and change 20–30% of the water weekly.

    Use less fertilizer and add algae eaters like Amano shrimp or Nerite snails. Plant more fast-growing plants to compete with algae.

    Crypt melt and transplant stress worry new hobbyists. If Cryptocoryne species lose leaves after moving, keep the rootball whole. Maintain stable conditions and add root tabs near the roots.

    Wait for new growth. Being patient usually solves this problem without big changes.

    Nutrient deficiencies show up in plant leaves. Yellowing between veins means iron deficiency. Pale leaves often mean not enough nitrogen. Holes or transparent patches suggest potassium shortage.

    Use iron chelates and potassium supplements. Add root tabs for plants that eat a lot of nutrients.

    Slow growth is common without CO2. Accept a slower pace or increase plant density. Ensure a nutrient-rich substrate. Consider safe liquid carbon products or slightly increased fertilization instead of CO2 injection.

    Gradual changes reduce the risk of algae spikes.

    Choose fish and invertebrates that fit planted setups. Avoid plant-eating species like goldfish or large cichlids. Select peaceful community fish and grazers that support plant health.

    Water parameter swings upset plants and fish. Use a reliable heater, follow a consistent maintenance schedule, and monitor KH and GH to buffer pH. Small, steady adjustments prevent shock and keep your tank stable.

    When problems overlap, start with simple fixes: adjust light, steady maintenance, and targeted fertilization. This routine keeps most issues manageable and helps your low tech tanks thrive.

    Promoting Healthy Plant Growth

    Prune fast-growing stems like Water Wisteria and Dwarf Hygrophila every one to two weeks. This keeps them bushy and prevents shading. Also, remove any decaying leaves right away to avoid nutrient spikes that fuel algae.

    Propagate stem plants by cutting healthy tops and replanting the cuttings. Anubias and Java Fern multiply through plantlets or rhizome division. Tie Java Moss to driftwood or rocks to form carpets. Vallisneria spreads naturally with runners, which you can separate to boost coverage.

    Aim for dense planting with 50–70% or more coverage. This stabilizes nutrients and limits algae opportunity. Use midground and foreground fillers like Java Moss, Dwarf Sagittaria, and small Cryptocoryne species. They create layers that support easy care aquatic plants and a balanced ecosystem.

    • Root tabs every few months replenish substrate nutrients for heavy root feeders.
    • Lean water-column dosing weekly or bi-weekly supports growth without excess.
    • Watch for micronutrient signs and dose trace elements if deficiencies appear.

    Healthy green growth and compact form are more realistic goals in low tech planted tanks. Balanced lighting and consistent nutrients keep plants vigorous. Some Ludwigia and Rotala may show limited color without CO2.

    Adjust pruning, fertilization, and light based on seasonal growth rates and observations. This responsive approach helps beginner aquarium plants adapt and thrive. It keeps care manageable in a low maintenance planted aquarium.

    Enjoying Your Low Tech Planted Tank

    Low tech planted tanks are easy to care for. They thrive with simple, consistent care. Choose peaceful fish like neon tetras and Amano shrimp. Avoid big fish that eat plants.

    Do weekly or bi-weekly water changes of 20–30%. Clean filters gently in tank water. Prune plants regularly to keep them healthy. Use a timer for light and make small changes to avoid stressing fish and plants.

    Start with a simple design. Use driftwood or rock as focal points. Add plants like Java fern for depth. This makes your tank look great with little effort.

    Watch your tank every day and be ready to solve problems. Try new plants and designs to find what works best. With smart choices and care, your tank will be a beautiful, calming part of your home.

    FAQ

    What does “low-tech” planted tank mean and how does it differ from CO2 (high-tech) systems?

    Low-tech tanks don’t use CO2 injection. They focus on simplicity and natural balance. Plants grow using CO2 from fish and organic matter. High-tech setups, on the other hand, use CO2, intense lights, and more water treatments for fast growth and color.

    Who should choose a low-tech planted aquarium?

    Beginners and those wanting a simple setup should choose low-tech tanks. They are easy to care for and don’t need CO2 equipment. You’ll enjoy lush plants and a stable environment for fish and invertebrates.

    What are the main benefits of a low-tech setup?

    Low-tech tanks are cheaper and easier to maintain. They avoid CO2 overdose risks and need less trimming. They’re great for beginners, providing a stable and forgiving environment.

    What core elements will I use throughout this guide?

    You’ll focus on the right plants, nutrient-rich substrate, and modest lighting. Gentle filtration and lean fertilization are key. Dense planting and regular maintenance keep the tank balanced and algae-free.

    What tank size works best for low-tech planted tanks?

    Nano tanks can work, but larger tanks (20 gallons or more) are better. They offer more stable water conditions, which is good for plants and fish.

    Which substrate should I choose for a low-tech planted tank?

    Use soil-based substrates like ADA Aqua Soil or Ultum Nature Controsoil. They slowly release nutrients and support beneficial bacteria. Top with inert gravel or sand to reduce cloudiness.

    What filtration is appropriate for a low-tech setup?

    Choose a HOB filter, canister filter, or sponge filter based on tank size. Focus on biological filtration and gentle flow. Sponge filters are great for small tanks and heavily planted layouts.

    How much and what kind of lighting should I use?

    Use low to moderate LED lighting for planted tanks. Avoid high-output lights without CO2. Set a timer for 6–8 hours of light per day. Choose fixtures with adjustable intensity to prevent algae.

    Do I need a heater and what temperature range is best?

    Yes, keep temperatures between 72–78°F (22–25°C) for most plants and fish. A reliable heater prevents temperature swings that stress both.

    Which hardscape materials are recommended?

    Use driftwood and inert rocks for depth and structure. They provide attachment sites for epiphytes like Anubias and Java Fern. Hardscape adds focal points without demanding high plant care.

    How should I fertilize a low-tech aquarium?

    Use lean, consistent dosing of all-in-one liquid fertilizers. Start with half or quarter of the manufacturer’s suggestion. Add trace supplements if needed. Use root tabs for heavy root feeders.

    Are liquid carbon products safe for low-tech tanks?

    Yes, liquid carbon alternatives like Seachem Flourish Excel are safe. They help plant health and limit algae when used carefully. Follow dosing instructions and start conservatively.

    What plants are best for low-tech planted tanks?

    Choose hardy plants like Anubias, Java Fern, and Cryptocoryne wendtii. Also, consider Amazon Sword, Vallisneria, Water Wisteria, and Hornwort. Use a mix of background, midground, and foreground plants for depth.

    How densely should I plant my tank initially?

    Plant densely, aiming for 50% coverage initially. Build up to 70%+ coverage. Dense planting outcompetes algae and stabilizes nutrients.

    How do I prepare and plant the tank?

    Rinse substrate and hardscape without soap. Lay a nutrient-rich aquasoil base, topped with inert material if desired. Place driftwood and rocks for focal points. Plant background species first, then midground, and foreground plants.

    How should I cycle the tank and add livestock?

    Start the nitrogen cycle before adding fish. Use fishless cycling or slow stocking to allow beneficial bacteria to grow. Monitor ammonia, nitrite, and nitrate levels until they are zero. Add hardy fish and invertebrates slowly after cycling.

    What water tests and maintenance tools do I need?

    Use a quality liquid test kit for pH, ammonia, nitrite, nitrate, GH, and KH. Keep tools like a gravel vacuum, trimming scissors, tweezers, and a small net. Test weekly or bi-weekly during startup and periodically after stabilization.

    What target water parameters should I maintain?

    Aim for pH 6.5–7.5 for most plants and fish. Ammonia and nitrite should be zero after cycling. Keep nitrate below 20–30 ppm for fish health. Maintain GH for essential minerals and KH for pH buffering as needed.

    How often should I perform water changes?

    Do weekly or bi-weekly water changes of 20–30% to replenish trace elements and remove excess nitrates. Use dechlorinator and match temperature and parameters when adding water.

    How can I avoid and treat algae outbreaks?

    Prevent algae by balancing light and nutrients. Keep light low to moderate, use a 6–8 hour photoperiod, and dose fertilizers leanly and consistently. If algae appears, reduce photoperiod or intensity, increase water changes, add algae grazers, and increase plant density.

    What is “crypt melt” and how should I handle it?

    Crypt melt is a common transplant stress where Cryptocoryne species lose leaves. It’s usually temporary. Keep the rootball intact, provide stable conditions, add root tabs, and wait for new leaves to emerge.

    How do I identify and correct nutrient deficiencies?

    Visual signs guide you: yellowing between veins often indicates iron deficiency; overall pale leaves suggest nitrogen deficiency; holes or transparent patches may indicate potassium deficiency. Correct with targeted dosing—iron chelates for iron, balanced liquid fertilizers for nitrogen and potassium, and root tabs for heavy root feeders.

    Will I get vivid red plant coloration without CO2?

    Deep red coloration in plants typically requires CO2 and higher light. In low-tech systems, you’ll get healthy green growth and compact form. Some species (Ludwigia, Rotala) may show limited coloration without CO2, but intense reds are unrealistic without pressurized CO2 and higher lighting.

    Which fish and invertebrates are compatible with low-tech planted tanks?

    Choose peaceful community fish and invertebrates that won’t uproot or eat plants. Good choices include neon tetras, harlequin rasboras, ember tetras, otocinclus catfish, Amano shrimp, and Nerite snails. Avoid goldfish and large cichlids that consume or disturb plants.

    How should I prune and propagate plants?

    Trim fast-growing stems (Water Wisteria, Dwarf Hygrophila) regularly to encourage bushier growth. Remove decaying leaves promptly. Propagate stem plants by cutting and replanting cuttings. Anubias and Java Fern propagate via division or plantlets. Java Moss can be tied to surfaces for carpets. Vallisneria spreads by runners.

    What long-term nutrient strategy works best for low-tech tanks?

    Rely on nutrient-rich aquasoils to supply many needs initially. Use root tabs every few months for heavy root feeders and continue lean water-column dosing weekly or bi-weekly with an all-in-one fertilizer. Monitor for micronutrient deficiencies and add trace supplements as needed. Adjust dosing gradually based on plant response.

    When should I consider moving to a CO2 system?

    Consider pressurized CO2 only if you want faster growth, more intense coloration, or to keep high-demand, high-light plants. Be prepared for higher equipment costs, tighter monitoring, and increased maintenance. Many aquarists find low-tech approaches sustainably rewarding and never need CO2.

  • Fishless Cycling Guide

    Fishless Cycling Guide

    This guide, “How to Cycle Your Nano Tank Without Fish: A Safe Step-by-Step,” helps you prepare a healthy nano aquarium. It does so without risking your fish. You’ll follow a clear fishless cycling guide, perfect for small setups.

    Fishless cycling is the safest way to cycle a fish tank. It protects future fish from harmful ammonia and nitrite spikes. With the right products, you can cycle your tank in 8–12 days. Or, it might take 2–6 weeks with traditional methods.

    This introduction sets the stage for what’s to come. You’ll learn about setting up your equipment, choosing an ammonia source, and dosing. You’ll also discover how to test regularly and use products like DrTim’s One & Only, Fluval Cycle, and Seachem Stability. The next sections will explain the nitrogen cycle and provide steps to cycle your tank quickly and confidently.

    Along the way, you’ll find tips for both planted and community nano tanks. There are also safety considerations and practical tips for lasting results.

    What is Fishless Cycling?

    A serene, well-lit home environment showcasing a vibrant nano tank filled with aquatic plants and natural decorations, depicting the concept of fishless cycling. In the foreground, a clear glass container of biofilter media and ammonia source is placed next to the tank, symbolizing the cycling process. The middle ground features the nano tank with healthy green plants and light bubbles indicating beneficial bacteria growth. In the background, sunlight filters through a nearby window, creating a warm, inviting atmosphere. Soft shadows enhance the details of the tank and its surroundings. Capture the mood of tranquility and careful nurturing, emphasizing the importance of patience and preparation in establishing a healthy aquatic ecosystem without fish.

    Fishless cycling is a way to start a new aquarium. Instead of fish, you use a controlled ammonia source. This helps grow beneficial bacteria.

    These bacteria break down ammonia, nitrite, and nitrate. This makes your tank safe for fish and plants later.

    Choosing fishless cycling has big advantages. It avoids the dangers of ammonia and nitrite spikes. This method is faster and safer, perfect for small tanks.

    How long it takes depends on the method and tank conditions. Live bacteria products can speed up the process to 8–12 days. Traditional methods might take 2–6 weeks or more.

    It’s great for new planted tanks or nano tanks. It’s also good when you can’t get filter media from another tank. Just follow simple steps to keep your tank cycling smoothly.

    • Define your ammonia target and add a measured source.
    • Test ammonia, nitrite, and nitrate regularly.
    • Keep temperature and aeration steady to support bacteria.
    • Consider adding seeded media to jump-start cycling a fish tank without fish.

    Preparing Your Nano Tank for Cycling

    A serene room setting showcasing the process of preparing a nano tank for cycling. In the foreground, a clear glass nano aquarium, elegantly filled with substrate, aquatic plants, and small rocks is being arranged. A pair of hands in modest casual gloves gently positions a delicate plant. In the middle ground, tools like a small water conditioner bottle, a thermometer, and a syringe for water testing are neatly organized on a wooden table. In the background, soft, natural light filters through a window adorned with sheer curtains, illuminating the scene and creating a calming atmosphere. The overall mood is peaceful and focused, emphasizing the careful preparation of the nano tank. The angle is slightly overhead, providing a clear view of the tank's intricacies while capturing the essence of the setup.

    First, set up your tank. Add substrate, a heater if needed, a filter, gentle lights, and decorations. Use dechlorinated water treated with Seachem Prime or Tetra AquaSafe. This prevents chlorine and chloramine from killing the bacteria needed for cycling.

    Run all equipment for at least a week before adding ammonia. This lets the filter trap dust and media degas. It also stabilizes temperatures and flows, making cycling steps more predictable.

    Keep the tank at 77–86°F (25–30°C) for bacteria growth. This range supports nitrifying bacteria. If you plan to keep cooler-water fish, adjust the temperature to their needs.

    Boost oxygen levels for better bacterial growth. Use an air pump or high-flow filters. The Eheim Air Pump 400 or TetraTec APS50 are good choices for aeration. More oxygen helps convert ammonia and nitrite faster.

    Adding live plants is a good idea. They absorb harmful substances and provide surfaces for bacteria. A planted tank can cycle faster, like a Walstad-style setup.

    Seeding the tank with used filter media or sponge from another aquarium is best. It brings active nitrifying bacteria. Just make sure the source is clean and free of pests or pathogens.

    • Complete physical setup and use dechlorinated water.
    • Run equipment 24/7 for one week before dosing ammonia.
    • Balance temperature for bacteria and future fish.
    • Increase oxygen with pumps or stronger flow.
    • Use live plants and seeded media to speed cycling.

    The Nitrogen Cycle Explained

    Learning about the nitrogen cycle helps keep your fish safe and your tank stable. It has three main stages. Each stage involves different bacteria and chemical changes you can check with test kits.

    Stage 1 starts with waste, uneaten food, and decaying matter releasing ammonia (NH3/NH4+). Ammonia is very harmful and can quickly increase in a new tank. It’s safer to cycle your tank without fish first.

    Stage 2 happens when Nitrosomonas bacteria grow in the filter and substrate. They turn ammonia into nitrite (NO2-). Nitrite is also harmful to fish, so you must watch its levels closely.

    Stage 3 comes when Nitrobacter and other bacteria start to work. They change nitrite into nitrate (NO3-). Nitrate is less harmful but you should keep it in check through water changes, plants, or denitrification.

    • Goal during fishless cycling: keep ammonia around 2–3 mg/L while dosing actively. Do not exceed about 5 mg/L.
    • Cycle complete when a full ammonia dose converts to nitrate and both ammonia and nitrite test near 0 mg/L within about 24 hours.
    • Alternate marker: consistent drop in nitrite with a steady rise in nitrate over several tests.

    New tank syndrome is when ammonia and nitrite levels get too high, harming fish. Avoiding this by cycling your tank before adding fish is key. Regular testing helps prevent surprises and saves lives.

    Temperature and oxygen are important for bacterial growth. Warmer water, within safe ranges for your fish, helps bacteria grow faster. Good aeration is also vital because bacteria need oxygen to work efficiently.

    Check readings every day during active cycling. Use this data to adjust your dosing, temperature, and aeration. This hands-on approach helps you control and feel confident as your tank becomes stable and healthy.

    Choosing Your Ammonia Source

    Starting a fishless cycling guide means picking a good ammonia source first. You need something that gives steady ammonia without extra stuff. Reagent-grade ammonium chloride solutions are best because they let you dose exactly and get the same results every time.

    Household cleaners can harm the good bacteria you need. If you’re looking for ammonia for your aquarium, go for products made for aquariums. Brands like DrTim’s offer these, with clear instructions on how much to use.

    Using fish food or decaying shrimp can also make ammonia. But these methods are slower and harder to control. They can also bring in unwanted stuff, so be careful.

    To make things faster, add bacterial starters to your ammonia. Products like DrTim’s One & Only Live Nitrifying Bacteria can help. They work with your ammonia to speed up the process and make it easier.

    • Target about 2–3 mg/L ammonia during fishless cycling.
    • Keep peaks below roughly 5 mg/L to avoid inhibiting bacterial growth.
    • Use a reliable ammonia test kit to dose accurately and adjust as needed.

    When looking for ammonia, choose products from trusted brands. Always read the instructions and follow the dosing charts. This way, your fishless cycling guide will go smoothly and effectively.

    Adding Ammonia to Your Tank

    Begin after a week of system operation. Use aquarium-grade ammonia to achieve 2 mg/L (2–3 ppm). Use a reliable test kit for this. For DrTim’s, follow the label instructions based on your tank size.

    Follow the fishless cycling steps carefully. This method helps build bacteria without harming fish. Start by dosing to 2–3 mg/L and test every 2–3 days. Re-dose when ammonia levels drop. You might need less ammonia as the cycle progresses.

    The One & Only rapid method combines ammonia with live bacteria on Day 1. Test daily and add ammonia when levels fall below 1 ppm. Many find it completes in 5–7 days with stable conditions.

    Keep a close eye on nitrite levels. If nitrite spikes, reduce ammonia and test often. Never exceed the recommended ammonia levels. High ammonia can slow down bacterial growth.

    Ensure steady temperature and good oxygen levels. These conditions help bacteria grow faster. They also improve the conversion of ammonia to nitrite and nitrate.

    • Initial dose: reach ~2 mg/L after one week of running.
    • Testing cadence: every 2–3 days for traditional method; daily for rapid methods.
    • Adjust dose: reduce to half or quarter as the cycle progresses.

    Do a final test by adding a full ammonia dose (2–3 mg/L). If ammonia and nitrite are 0 mg/L and nitrate is present within 24 hours, your tank is ready for fish.

    Testing Your Water Parameters Regularly

    Testing ammonia, nitrite, and nitrate is key for a successful fishless cycle. Use quality kits like JBL Test Combi Set plus NH4 or NT Labs individual tests for accurate readings.

    During active cycling, check levels every 24–72 hours. If using One & Only or a fast method, test daily. For standard fishless cycling, test every two to three days. Keep a simple log of date, time, and numbers to track trends.

    Watch for an ammonia spike in your tank. Any ammonia above 0 ppm means the source is present or bacteria are not established yet. A rising nitrite confirms Nitrosomonas activity.

    • Ammonia >0: source present or insufficient bacteria.
    • Nitrite >0: nitrosomonas established; expect a peak before decline.
    • Nitrate rising: conversion occurring; this is your final sign of progress.

    For accurate ammonia, nitrite, and nitrate testing, choose liquid test kits over cheap strips. Record each reading to know when nitrite drops and nitrate climbs. High nitrate above 20–40 ppm means it’s time for a water change before adding fish.

    When doing water changes, use dechlorinated water only. Chlorine or chloramine can harm the beneficial bacteria you need for success.

    Have your tools ready: test kit, notebook, and pen. If you see an unexpected ammonia spike, pause additions and repeat tests to confirm. This practice protects your future fish and keeps the cycle on track.

    Waiting for the Cycle to Complete

    When starting the cycle, patience is key. Test for ammonia, nitrite, and nitrate every day. Look for ammonia and nitrite to drop to 0 mg/L, while nitrate increases after adding ammonia. Stable readings for a few days mean you’re making progress.

    The time it takes to cycle a tank varies. Using a live bacterial product can finish in 5–12 days under perfect conditions. Traditional methods take 2–6+ weeks. Heavy planting can also affect the timeline, needing strong light and nutrients.

    Consider real-world factors when figuring out the cycle time. Warmer water speeds up bacterial growth, while cooler water slows it down. Good aeration and filter flow help nitrifiers. Adding established filter media or products like Seachem Stability can help if the cycle stalls.

    If the cycle is slow, check the temperature and oxygen levels first. A slight temperature increase and better aeration can help. Also, add seeded media if you have it. Avoid using antibiotics or chemicals that harm beneficial bacteria. A full ammonia dose of 2–3 mg/L can confirm the cycle is complete, as ammonia and nitrite should convert to nitrate overnight.

    • Signs the cycle is complete: ammonia = 0 mg/L, nitrite = 0 mg/L, nitrate present and stable.
    • When to act: persistent nitrite or ammonia, no nitrate rise, or inconsistent test results.
    • Quick fixes: add a trusted bacterial starter, seed with media from an established tank, or improve oxygen and temperature control.

    After stable readings, do a water change to lower nitrate levels. You might need to make small adjustments for future cycles or new setups. Regular monitoring makes the waiting period safe and controlled for a healthy aquarium.

    Adding Beneficial Bacteria

    When you add beneficial bacteria, you aim to quickly colonize your tank. This helps nitrosomonas and nitrobacter/Nitrospira grow on surfaces. Using a good bacterial additive can make the cycle shorter and safer for your fish. Always follow the product’s instructions and keep testing ammonia levels.

    DrTim’s One & Only, Fluval Cycle, and Seachem Stability are top picks. DrTim’s One & Only can speed up fishless cycling, finishing in under a week with proper ammonia management. Fluval Cycle and Seachem Stability are great for starting new setups with nitrogen-processing bacteria.

    Here’s how to cycle a tank with beneficial bacteria:

    • Read and follow the manufacturer dosing instructions for any bacterial additives aquarium product.
    • Add One & Only on Day 1 with your first ammonia dose if you choose that product; it is formulated to be safe without risk of overdose.
    • Keep dosing ammonia to provide a food source so bacteria can establish and multiply.

    Natural seeding is another way to start your tank. Move used filter media, ceramic rings, or bio-balls from a healthy tank to seed yours. But only take media from trusted sources to avoid pests or pathogens.

    Remember, bacterial additives are just a help, not a replacement for proper cycling. Keep testing until ammonia and nitrite levels drop to zero and nitrate rises. This shows your tank is fully cycled. Stick to a routine and closely monitor your tank’s parameters while cycling.

    Safety Considerations During Fishless Cycling

    When cycling a fish tank without fish, chemical safety is key. Use aquarium-specific ammonia like DrTim’s Ammonium Chloride. Household cleaning ammonia can harm bacteria and mess up results.

    Keep ammonia levels steady and safe. Aim for 2–3 mg/L and don’t go over 5 mg/L. Too much ammonia can harm bacteria and slow the cycle.

    Protect your beneficial bacteria during water changes. Treat tap water with a conditioner like Seachem Prime or Tetra AquaSafe. This neutralizes chlorine and chloramine, which can kill bacteria.

    Follow electrical and equipment safety rules. Run heaters, filters, and air pumps all the time. Check the manufacturer’s guidelines for safe use from brands like Eheim and TetraTec. Keep cords secure and power strips away from water.

    If you seed with media from another tank, be careful. Use healthy tank material to avoid pests and algae. This helps prevent new tank syndrome when you add fish.

    • Don’t use antibacterial medications or hydrogen peroxide during cycling. They kill good bacteria and mess up the process.
    • Keep records of ammonia, nitrite, and nitrate levels. Track doses and dates to spot trends and avoid ammonia spikes.

    Be patient and don’t rush to add fish. Wait for stable readings to confirm the cycle is complete. If you must add fish early, choose hardy species and monitor closely.

    Transitioning to Fish-Ready Conditions

    Before adding fish, make sure your tank is ready. Add 2–3 mg/L ammonia and watch it drop to 0 mg/L in 24 hours. This shows your biofilter is working well.

    Then, lower nitrate levels to safe amounts. Keep it under 20–40 ppm for most fish. If your fish are very sensitive, aim for under 20 ppm. You might need a big water change to get there.

    Check the water temperature and pH too. Make sure they match what your fish need. This is true whether you cycled your tank without fish or used products like DrTim’s or Seachem Stability.

    Start with a few hardy fish like danios or guppies. Wait a few days to a week before adding more. Test the water every day after adding fish. Keep the water clean by changing it regularly and avoid overfeeding.

    Adding live plants can help control ammonia and nitrate. Keep track of your water test results. By following these steps, your nano tank will thrive.

    FAQ

    What is fishless cycling and why should I use it for my nano tank?

    Fishless cycling is a way to start a tank without fish. It uses ammonia to grow good bacteria. This method is safer and faster for small tanks.

    How long does fishless cycling usually take?

    The time it takes varies. With products like DrTim’s One & Only, it can be 5–12 days. Traditional methods take 2–6 weeks, depending on the tank’s setup.

    What ammonia concentration should I target during fishless cycling?

    Aim for 2–3 mg/L ammonia. Use a reliable test kit to check. Too much ammonia can slow down the cycle.

    Which ammonia source is best for a safe, controllable fishless cycle?

    Use aquarium-specific products. DrTim’s Ammonium Chloride Solution is recommended. Avoid household cleaning ammonia unless it’s safe for tanks.

    Can I speed up cycling with bottled bacteria products?

    Yes. Products like DrTim’s One & Only can help. But, keep dosing ammonia and testing regularly.

    How do I know when the cycle is complete and it’s safe to add fish?

    The cycle is done when ammonia and nitrite are zero. Also, nitrates should be low before adding fish.

    What equipment and conditions best support nitrifying bacteria growth?

    You need a complete setup and run equipment 24/7. Keep the tank warm and well-oxygenated for bacteria to grow.

    How often should I test water during the fishless cycling process?

    Test water often. Daily testing is best with rapid methods. Traditional methods need testing every 2–3 days.

    What should I do if the cycle stalls or nitrite/ammonia stay high?

    Check temperature and oxygen first. Add aeration or increase flow. Don’t use harmful medications. Consider adding bacteria starters.

    Is it safe to use water conditioners and other chemicals during cycling?

    Yes, use safe conditioners like Seachem Prime. Avoid products that harm bacteria. Don’t use antibacterial medications.

    Can live plants replace the need for fishless cycling?

    Plants help with cycling, but they’re not enough. Monitor parameters and consider bacterial starters or seeding media.

    Should I add used filter media from another tank to seed my nano tank?

    Yes, if it’s from a healthy tank. Used filter media can seed bacteria quickly. Make sure it’s disease-free.

    What test kits and tools do you recommend for accurate monitoring?

    Use reliable liquid test kits. JBL and NT Labs are good brands. Keep a log of readings for tracking.

    How should I dose ammonia and adjust during the cycle?

    Start with a full ammonia dose of ~2 mg/L. Test daily with rapid methods. Adjust dosing as needed.

    How do temperature and oxygen affect cycling speed?

    Warmer, oxygen-rich water helps bacteria grow faster. Keep the tank warm and well-aerated for a quicker cycle.

    What are acceptable nitrate levels before adding fish?

    Nitrate levels should be low before adding fish. Aim for below 20 ppm for sensitive species.

    How should I introduce fish after the cycle is complete?

    Stock gradually. Start with hardy fish and wait before adding more. Monitor water parameters closely.

    Can I use household bleach or cleaning products to sanitize equipment before cycling?

    Use caution. Rinse equipment well after using bleach. Avoid products with fragrances or surfactants.

    Are there risks to using bacterial boosters and how should I apply them?

    Bacterial boosters are safe when used correctly. Follow the instructions. Add them with ammonia and test regularly.

    What records should I keep during fishless cycling?

    Log date, temperature, and water readings. Daily notes help track progress and solve problems.

  • The Best Places to Position a Small Aquarium in a Tiny Apartment

    The Best Places to Position a Small Aquarium in a Tiny Apartment

    Choosing the right spot for your nano tank is key. It impacts water temperature, algae, fish stress, and daily care ease.

    Tank size and type limit your choices in small spaces. Beginners often start with 5–10 gallon desktop tanks or 10–20 gallon nano tanks. These smaller tanks are cheaper and fit well, but change faster with room conditions.

    Shape is also important: rectangular tanks offer good swimming space, while corner or triangular tanks fit tight spots. Bow-front tanks enhance depth, and cube tanks blend in seamlessly. Choose a shape that suits your fish and space.

    Before deciding, check the environment. Look at natural light, distance from heat sources, drafts, floor strength, and access for feeding and cleaning.

    Try a temporary setup first. Use a strong stand or a box to test light, traffic, and noise for days. This simple test is a practical guide for finding the best spot for your nano tank.

    Understanding Nano Tanks and Their Benefits

    A beautifully arranged nano aquarium positioned on a sleek, modern coffee table in a cozy, small apartment living room. In the foreground, the transparent glass nano tank showcases vibrant aquatic plants and small colorful fish, creating a focal point. In the middle ground, the coffee table is adorned with minimalist decor, including a stylish vase and a stack of books. The background features a comfortable couch with soft cushions and a window allowing natural light to filter in, casting gentle reflections on the tank. The atmosphere is warm and inviting, evoking a sense of tranquility and charm. Utilize soft, diffused lighting to highlight the tank and create a serene ambiance, capturing the idea of living harmoniously with nature in limited space.

    Nano tanks are small aquariums, usually between 5 and 20 gallons. They fit tight living spaces. You get movement, color, and a calming focal point without a big tank.

    Their compact size makes them flexible. You can place them in studios, alcoves, and on shelves.

    In tiny apartments, a well-placed aquarium reduces stress. It introduces natural motion and subtle color shifts. You can use the optimal positioning of nano tank to frame seating areas or brighten a kitchen counter without blocking traffic paths.

    Modern tech makes maintenance easier. LED lighting from brands like Fluval or Kessil uses less power and ages well. Compact filters and integrated hoods simplify care, so your nano tank setup tips focus more on balance than constant tinkering.

    Stocking limits mean aquascaping matters more than fish numbers. Emphasize plants, stones, and driftwood for big visual impact with small bioload. This approach keeps water chemistry stable and makes your nano tank placement less demanding.

    Styling advantages are clear in subdued interiors. A small, well-composed aquarium complements wood and stone finishes. Use the optimal positioning of nano tank to create an accent that blends with neutral palettes while drawing the eye.

    • Design: favor planted hardscape over heavy fish loads.
    • Maintenance: choose compact filtration and low-energy LED lighting.
    • Placement: test lighting and traffic flow before finalizing nano tank placement.

    Follow simple nano tank setup tips to balance aesthetics and care. Start with a plan for location, filtration, and plant choices. That planning will help your small aquarium thrive in a tight apartment without overwhelming your space.

    Assessing Your Apartment Space

    Start by checking each room. Look at the living room, bedroom, kitchen, home office, and any outdoor spaces. See where sunlight hits and where air might blow from vents.

    Measure the size of every surface. Note the length, depth, and height of each spot. Then, figure out how much the tank and its accessories will weigh. Make sure the floor or furniture can handle this weight.

    Find out where the electricity is. You’ll need a special power strip for your tank’s equipment. Make sure it’s not near water or sensitive electronics. Plan how to run the cords to avoid tripping.

    Think about noise and vibrations. Identify any loud appliances or areas with a lot of foot traffic. Place your tank where it won’t be disturbed by noise or vibrations.

    If your tank will be in a closed space, think about ventilation. You might need fans to control humidity and prevent mold. Make sure you can easily get to the tank for maintenance.

    A cozy living room in a tiny apartment featuring a beautifully set up nano aquarium on a minimalist shelf. The foreground shows the colorful fish swimming within vibrant aquatic plants, creating a serene focal point. In the middle ground, a cheerful indoor plant sits nearby, enhancing the green aesthetic, while a small, rustic coffee table holds a few simple decorative items. The background reveals a stylish couch with soft cushions, subtly contrasting the aquarium’s blues and greens, complemented by warm ambient lighting from a nearby lamp. A large window allows natural daylight to flood the space, casting gentle reflections in the glass of the aquarium. The overall mood is inviting and tranquil, perfect for beginners assessing their apartment space for placing a small aquarium.

    • Room audit: list sun, heat, and traffic for each space.
    • Surface check: measure dimensions and load capacity.
    • Electrical plan: locate outlets and add GFCI protection.
    • Noise scan: avoid vents, speakers, and busy walkways.
    • Ventilation plan: provide airflow for enclosed installations.

    Use this guide to compare different spots in your apartment. Score each location based on sunlight, support, access, noise, and power. This will help you find the best spot for your nano tank.

    Ideal Locations for Your Nano Tank

    Place your nano tank against a solid wall to create a strong focal point. A wall-mounted or stand-supported setup hides cords and gear, keeps the tank stable, and gives a clean visual anchor. Make sure the wall and stand can bear the weight and that you can reach the back for service.

    Integrate the aquarium into a media unit or atop a TV console to tie the tank into your living room design. Leave a gap or thermal barrier to protect the glass from heat and vibration produced by speakers and TVs. These nano tank positioning ideas work well when you want the tank to feel built-in.

    • Use a heat-resistant mat or foam between the tank and electronics.
    • Plan service access so filters and cords remain reachable.

    Use a low or narrow tank as a room divider to define open-plan spaces without blocking light. Place it where both sides allow service access and ensure a stable base on either side. This approach offers stylish nano tank layout suggestions that help zone living and dining areas.

    Set the tank near east-facing or shaded windows to enjoy soft morning light while avoiding direct sun. Direct sunlight causes algae and temperature swings. Install blinds or sheer curtains to filter light when needed and keep the environment steady.

    Desktop and shelf tanks work well in offices, kitchens, and bedrooms. Keep them away from stoves, steam, and bright monitors. Verify that desks and shelves are flat and rated for the weight. Tidy wiring and surge protection improve safety and function.

    1. Against a solid wall for a focal point and hidden equipment.
    2. Built into or atop media units with thermal protection.
    3. As a room divider with service access on at least one side.
    4. Near, but not in, windows—prefer east-facing or shaded spots.
    5. On desks, shelves, or counters that are flat and stable.

    Use these nano tank positioning ideas and layout suggestions to match the tank to your space. When you evaluate options, ask whether the placement supports maintenance, lighting control, and structural safety. That approach helps you choose the best location for nano tank success.

    Proximity to Electrical Outlets

    Start by finding the closest GFCI-protected outlets for your nano tank. This ensures the filter, heater, and lighting can plug in easily. It also keeps maintenance safe by avoiding water damage to unprotected sockets.

    Managing cables is key for safety and looks. Hide cords behind the stand and use drip loops to prevent water damage. Cable channels or Velcro ties help keep everything neat. This makes your setup safer and more attractive.

    Consider the location of other electronics. Don’t place your aquarium under a TV or next to a computer. Heat, vibration, or glare can harm both devices. Make sure there’s enough space for airflow to prevent overheating and for easy access.

    Use a surge protector rated for aquariums and a timer for your lighting. This keeps your equipment safe during power issues. Timers also help plants grow and reduce algae by maintaining a consistent day/night cycle.

    Make sure outlets are easy to reach for quick maintenance or emergencies. You should be able to access plugs without moving the tank. This makes upkeep faster and less stressful, which is important for weekend cleanings.

    By following these steps, you can create a safe and beautiful nano tank setup. Good power planning and cable management are essential for a long-lasting and safe aquarium in small spaces.

    Safety Considerations for Nano Tanks

    Keep your nano tank away from direct sunlight and heat sources. Sunlight fuels algae and causes temperature swings that stress fish. Avoid windows with afternoon sun and stay clear of radiators, gas stoves, and space heaters.

    Use sturdy stands rated for aquarium weight. If you place a tank on furniture, secure it with anti-tip hardware to prevent spills. Place tanks out of high-traffic paths and away from curious pets and children to lower the risk of accidental knocks.

    Protect floors and electronics by using a waterproof mat or tray beneath the stand. Check seals, fittings, and tubing often to catch slow leaks before they damage hardwood or laminate. Small drips can cause big repairs if left unchecked.

    If you live on an upper floor, confirm floor load limits for heavier setups. Contact your building manager or hire a licensed structural engineer when in doubt. This step avoids structural problems and keeps you compliant with local codes.

    Ensure cabinets that house tanks have ventilation. Enclosed spaces trap humidity and condensation, which can warp wood and invite mold. Install a small fan or passive vents to maintain airflow and protect cabinetry.

    • Follow nano tank placement for beginners tips: choose low-risk areas and secure the base.
    • Adopt nano tank placement strategies: use mats, anti-tip brackets, and ventilated enclosures.
    • Plan the optimal positioning of nano tank with weight and access in mind for safe maintenance.

    Enhancing Your Nano Tank’s Visibility

    Put your nano tank where you can see it easily. Think about placing it behind seats, across from the main door, or as part of a media wall. This makes a small tank a daily highlight and supports many placement ideas.

    Use special LED lights for your tank. They make plants and fish colors stand out without needing sunlight. You can even set them to change colors like dawn and dusk. This lighting fits well with display-focused tank layouts.

    • Choose subdued backgrounds like white, black, stone, or wood tones. These make aquatic colors pop.
    • Avoid bright or patterned backdrops that compete with the aquascape.
    • Position the tank against a contrasting wall to frame it like art.

    Small tanks can be accents or modest focal features. Place them on side tables, shelves, or built-in niches. This adds color and movement without overwhelming the space. These ideas work well in living rooms, bedrooms, or home offices.

    Keep equipment hidden while ensuring easy access for upkeep. Hide cords and filters in cabinets or behind panels. Use stands with good airflow. Smart hiding supports both practical layouts and a clean setup.

    Balance visibility with care. Keep the tank away from busy areas and direct heat. With the right sightlines, lighting, and hiding, your tank will enhance both your space’s look and your daily joy.

    Avoiding Common Placement Mistakes

    You want your nano tank to be stable and healthy. Putting the aquarium in direct sunlight is a common mistake. Light from a south-facing window can cause fast algae growth and big temperature swings. Choose a shaded spot or use blinds to keep light levels steady.

    Another error is ignoring the weight of a filled tank. Calculate gallons × 8.34 lb/gal before you set the tank down. Make sure your floor or stand can support that load. If you doubt the structure, add reinforcement to prevent sagging or damage.

    • Leave room to reach the back and sides for filter and glass cleaning.
    • Design with removable panels or plan at least 12–18 inches of clearance for routine work.

    Poor access leads to skipped maintenance. Limited service access is a common nano tank placement mistake that raises cleaning time and stress for you and your fish.

    Ventilation matters when you place a tank in a cabinet or nook. Enclosed installations without airflow cause humidity and condensation. Electronics can run hot. Add vents or a small fan to keep equipment cool and air moving.

    Stocking levels deserve special care in small tanks. Overcrowding stresses fish and increases maintenance needs. For beginners, the rule is to understock and focus on a simple aquascape. This tip helps you avoid a common nano tank placement mistake tied to tank size and ecosystem balance.

    Noise and traffic affect fish behavior. Avoid locating your aquarium next to loud appliances or in heavy foot-traffic zones. Constant vibration and sudden motion make fish shy and create more audible filter noise for you.

    1. Keep sunlight controlled to prevent algae and heat spikes.
    2. Verify floor and stand capacity with the weight calculation.
    3. Ensure clear access for routine maintenance and emergency work.
    4. Provide ventilation for enclosed setups to reduce humidity and heat buildup.
    5. Choose conservative stocking to protect water quality and animal health.
    6. Place the tank away from noisy appliances and busy walkways.

    For nano tank placement for beginners, follow these checks before you set the tank in place. That way you avoid early mistakes and find the optimal positioning of nano tank for long-term success.

    Maintaining Your Nano Tank in a Tiny Space

    Keep a simple routine to protect water quality. Do partial water changes of 10–30% weekly, depending on how many fish you have. Also, test pH, ammonia, nitrite, and nitrate often to catch any changes early.

    Choose compact gear that fits your space. Opt for a hang-on-back or small canister filter, a low-wattage heater, and an LED light that fits in the hood. These choices make maintenance easier in tight spots and fit well with nano tank setup tips for small apartments.

    • Check filter media every two weeks to monthly and replace or rinse as needed.
    • Trim plants and remove debris during water changes to reduce bioload.
    • Use a small gravel vacuum and soft brushes to keep glass and substrate clean.

    Organize supplies near the tank to cut clutter. Store food, test kits, nets, and cleaning tools in a cabinet or a stand compartment. This keeps your living area tidy and follows practical nano tank placement strategies.

    Watch microclimates closely. Small tanks react faster to room changes. Keep room temperature steady around 72–78°F for tropical setups. Avoid drafty windows or direct AC vents. Place the tank where heating and cooling sources won’t cause swings.

    1. Plan service access so you can reach all sides for water changes.
    2. If built into furniture, use removable front panels or a slide-out shelf for easy reach.
    3. Leave clearance above and behind the tank for lights, cords, and tubing.

    Follow a clear maintenance checklist and adapt it to your fish and plants. Small, steady efforts pay off in stable chemistry and healthier inhabitants. Use this nano tank placement guide to set up access paths that make care fast and stress-free.

    Tips for Styling Your Nano Tank

    When styling your nano tank, focus on the aquascape first. Use wood, rock, and a clear substrate layout. This makes each element look small and balanced.

    A planted focus with Anubias, Java fern, and moss adds depth. It often needs less care than setups with lots of fish.

    Match your tank’s colors with your room’s palette. Place it against stone, natural wood, or black-and-white walls. This makes the plants and hardscape stand out.

    Avoid bright decor nearby. It helps keep the focus on your nano tank.

    Consider custom cabinetry and shelving for a seamless look. Built-in media units or floating shelves are stylish and practical. They allow for easy maintenance.

    Try out your nano tank layout on a temporary stand. This helps test sightlines, light, and traffic flow.

    For tiny apartments, choose low-maintenance themes. Hardy plants and small fish like rasboras or guppies are great for beginners. Use a mock-up for a few weeks before deciding on a permanent spot.

    This test helps refine your layout and access for maintenance. It saves you from costly changes.

    FAQ

    What is a nano tank and why choose one for a tiny apartment?

    Nano tanks are small aquariums, usually 5–20 gallons. They add movement, color, and calm to small spaces. They’re affordable, save space, and fit well with furniture.

    Thanks to new LED lights and filters, they’re easier to care for. You’ll focus on plants and decorations, not too many fish, to keep things balanced.

    How do I decide the best location for a nano tank in my apartment?

    First, check each room for sunlight, heat, and foot traffic. Use a stand or box to test spots for a few days. Look at light, noise, and how often you’ll see the tank.

    Make sure the surface is flat and strong enough for the tank and equipment.

    Which room in a small apartment is usually best for a nano tank?

    The living room or office is best because you’ll see it often. Place it against a solid wall or on a media unit. Bedrooms can be calm if you control noise and light.

    But avoid kitchens near stoves or bright windows to prevent temperature changes.

    Can I place a nano tank near a window to get natural light?

    Yes, but not directly in the window. East-facing or shaded windows are okay. Direct sun causes algae and temperature issues.

    Use blinds or curtains for shade, or LED lights for aquariums instead of sunlight.

    What floor and furniture concerns should I check before placing a tank?

    Measure the surface and calculate the tank’s weight to check if it’s strong enough. For heavy tanks or upper floors, get advice from a builder or check local codes.

    Use a sturdy aquarium stand and consider anti-tip hardware on furniture.

    How important is electrical access and what should I plan for?

    Electrical access is very important. Map out outlets and plan for a GFCI-protected source for your equipment. Keep outlets easy to reach for maintenance and emergencies.

    Use a surge protector for aquariums and timers for lights to keep a day/night cycle and reduce algae.

    How do I manage cords and prevent water from reaching outlets or electronics?

    Organize cords neatly and create drip loops to keep water away from outlets. Hide cables or use channels for a clean look. Avoid placing tanks over sensitive electronics and ensure good airflow.

    What ventilation or humidity control is needed if I enclose a nano tank in cabinetry?

    Enclosed tanks need fan-assisted ventilation or vents to control humidity. Plan for removable panels for service and ensure airflow to prevent overheating and mold.

    How does placement affect fish health and maintenance?

    Placement affects temperature, algae, and fish stress. Avoid drafts, direct sunlight, and loud appliances. Choose a spot with stable temperatures (around 72–78°F) and easy access for maintenance.

    What are common placement mistakes to avoid?

    Avoid direct sunlight, ignore floor/stand capacity, and limit service access. Don’t enclose tanks without ventilation, overcrowd fish, or place near noisy appliances. These mistakes increase maintenance and risk.

    What maintenance schedule should I plan for a nano tank?

    Do partial water changes regularly, usually 10–30% weekly. Check filter media every two to four weeks and test water often. Keep supplies nearby for quick access.

    Which nano tank shapes work best in small apartments?

    Rectangular tanks are versatile and offer good swimming space. Corner or triangular tanks fit tight spots well. Bow-front tanks add depth, and cube or cabinet-style tanks blend with decor.

    Choose based on sightlines, available space, and service access.

    How should I plan sightlines and styling so the tank complements my decor?

    Place the tank where you’ll see it most, like behind seating or across from an entry. Use simple room colors to make aquarium colors stand out. Choose aquarium-specific LED lights and neutral backgrounds to highlight your aquascape.

    What equipment is best for tight spaces?

    Opt for compact filters, low-wattage heaters, and LED lights that fit lids. Use integrated hoods and low-profile equipment for a clean look while keeping things functional.

    Can a nano tank be used as a room divider in an open-plan apartment?

    Yes. Low or tall tanks can zone spaces without blocking light. Ensure one side is accessible for service and provide a stable base for both sides. Plan for ventilation if the tank is enclosed.

    How do I protect floors and electronics from water damage?

    Use a waterproof mat or drip tray under the stand, like on hardwood floors. Regularly check seals and plumbing, and use GFCI-protected outlets. Keep cables tidy and have towels and a spill kit ready.

    What fish and plants are recommended for low-maintenance nano setups?

    Choose hardy plants like Anubias, Java fern, and mosses. Select low-bioload fish such as neon tetras, small rasboras, and guppies. Focus on aquascape elements over heavy fish stocking for balance and less maintenance.

    Should I test my chosen spot before committing to a permanent installation?

    Yes. Use a temporary stand or mock-up for a few weeks to check light, traffic, noise, and viewing frequency. This helps avoid costly moves and ensures the tank fits your design and fish health needs.

  • Comparing Internal vs. External Filtration for Limited Spaces

    Comparing Internal vs. External Filtration for Limited Spaces

    You keep an aquarium for the life and color it adds, not the clutter. In small spaces, picking the right filter is key. You might face tight spots or want to hide equipment for a clean look.

    Poor filtration in small tanks can cause water quality to drop fast. With less water, ammonia and nitrite levels rise quickly. This means your filter must handle all tasks well, without taking up too much space.

    This article looks at internal and external filters. We’ll compare them on important points like space, filtration, maintenance, noise, cost, and how they fit with your tank and fish. You’ll learn which filters work best in tight spaces and which are top choices for small tanks.

    By the end, you’ll know how to pick a filter that fits your space, needs, and maintenance routine in the United States.

    Understanding Filtration in Small Tanks

    An informative layout showcasing aquarium filtration systems suitable for small tanks. The foreground features a compact internal filter with visible cartridges and air pump, elegantly positioned beside a small, well-planted aquarium. The middle ground displays the aquarium filled with vibrant fish, demonstrating the filtration system's efficiency. In the background, softly blurred shelves lined with various external filters highlight the contrast. Natural light filters through the scene, creating a serene and educational atmosphere. The angle captures the setup slightly from above, emphasizing the details of both internal and external filtration options. The overall mood is tranquil and engaging, inviting viewers to understand the essentials of filtration in small tanks.

    Filtration in small aquariums does three main things. It removes visible debris through mechanical filtration. It also hosts beneficial bacteria on media to break down ammonia and nitrite. Lastly, it uses media like activated carbon to clear dissolved organics and improve water clarity.

    Small tanks have less water, so waste can quickly build up. This means ammonia and nitrite levels can spike fast. You need reliable small tank water filters and regular maintenance to keep these levels stable. Regular water testing and timely cleaning help avoid sudden water-quality issues.

    When choosing a filter for small tanks, look at flow rate and surface area for bacteria. More surface area means more nitrifying bacteria can grow. This improves the biological capacity of your tank. External filters often have more media volume and surface area than internal ones.

    Your filter must run all the time. If it stops, oxygen levels drop, and bacteria suffer. Bacteria populations can fall within 45 minutes of inactivity. This increases the risk of water-quality problems. Make sure your filter has reliable power and consider backup options for critical tanks.

    Upgrading your filter’s media can boost its performance quickly. Replace basic media with higher-quality options like Seachem Matrix and Purigen. This increases biological capacity and water polish. Choosing the right media is key to keeping small tanks stable with modern filters.

    Types of Filtration Systems Available

    A small tank filtering system showcased prominently in the foreground, featuring a clear canister, filter media, and tubing for water intake and output. The filtration system should display intricate details like the mesh filter and pump mechanism, emphasizing its compact size suitable for tight spaces. The middle ground features a sleek aquarium partially filled with water, showcasing aquatic plants and small fish for context. In the background, a softly blurred modern living space highlights the practicality of the filtering system, with natural light streaming from a window, creating a bright and inviting atmosphere. The shot should be taken from a slight angle to capture the dimensions of the tank and filtration system effectively, with a focus on clarity and demonstration of the filtration technology.

    There are many options for filtering small tanks. Internal filters are inside the tank and come with sponges and basic media. Models like the Sicce Shark Pro and Oase Bio Plus are great for shallow tanks. They have horizontal housings and magnetic chambers for easy removal.

    External filters, like canister and sump units, sit outside the tank. They use hoses for water flow and hold more media. They are more powerful and flexible for higher flow and varied media.

    For small tanks, you can choose sponge filters, hang-on-back (HOB) filters, or small internal powerhead-based filters. Each has its own balance of space, flow, and maintenance. Choose the one that fits your tank best.

    • Internal filters: easy to mount with suction cups, require room inside the tank and care to avoid blocking plants or hardscape.
    • External filters: need cabinet space and hose routing, offer greater media volume and service options.
    • Sponge and HOB filters: budget-friendly, simple to maintain, work well with community or fry tanks.

    Small tank filter media includes coarse mechanical pads to fine-pored sponges. High-porosity biological media like Seachem Matrix support beneficial bacteria. Chemical options like Purigen or activated carbon handle discoloration and dissolved organics.

    When choosing, consider installation constraints. External units need space for plumbing and a stable surface. Internal units must fit without blocking aquascaping and ensure proper circulation.

    Match your chosen filtration to your tank’s size, stocking levels, and the types of fish or plants. Thoughtful media selection and placement will keep your small tank’s water clear and stable.

    Advantages of Internal Filtration

    Internal filters for small aquariums come with several benefits. They are cheaper than canister units, which is great for those on a budget. This means you can set up your aquarium without spending a lot of money upfront.

    Internal filters fit inside the tank, so they don’t take up much space. This is perfect if you have limited room or your tank is on a shelf. Their small size makes it easier to plan your setup without worrying about hoses or plumbing.

    • Easy installation and removal: most internal filters come pre-assembled and are simple to position and detach for cleaning.
    • Reduced leak risk: with no external hoses, you avoid common leak points that affect external systems.
    • Air inlet options: some models include an air input to boost oxygenation without extra gear.

    You can use two small internal units placed on opposite sides to improve flow and add redundancy. This approach is similar to what professionals do when they need the best filters for small tanks. It’s also great for beginners because it makes starting up and maintaining your tank easier than more complex systems.

    The main benefits of internal filtration are simplicity, cost-effectiveness, and compact design. These qualities make maintenance easy and keep your tank running well without needing a lot of plumbing or extra space.

    Disadvantages of Internal Filtration

    Internal units often have less media than external systems. This means your mechanical and biological stages might be cramped. With less space, the cleaning power of your tank can suffer.

    Water clarity might be lower in tanks with only internal filters. There’s less room for polishing media and biological volume. This can make it hard to achieve the water purity you desire.

    Internal filters take up space inside the tank. They can interfere with your aquascaping and make it hard to hide them, even with plants or decor.

    • Visual impact: internal hardware is harder to conceal and may distract from your aquascape.
    • Frequent cleaning: sponges and fine media clog fast and often need weekly or bi-weekly attention.
    • Debris release: removing chambers or media can stir up trapped waste and cloud the water.

    Small animals like cherry shrimp or fry are at risk near intake openings. Use suction guards or gentle flow models to protect them. This is important when using internal filtration for small tanks.

    Suction cup mounts rely on clean glass and lose grip over time. Check them often. Adhesion usually degrades in six to twelve months, and you might need to replace them to avoid falls.

    Advantages of External Filtration

    External filters offer more media space. Brands like Fluval and Eheim have larger capacities than internal filters. This extra room allows for more bio-media, supporting bigger colonies of good bacteria.

    This setup boosts biological surface area. It speeds up the process of removing harmful compounds. This is key for keeping water stable in small tanks.

    These filters are hidden from view. They fit in cabinets or stands, keeping your tank looking clean. This is great for tanks with plants or shrimp.

    Changing media is simpler without disturbing the tank. This reduces stress on fish and prevents cloudy water. It makes caring for your tank easier.

    External filters also have stronger flow rates. This means water moves through the media more efficiently. It helps keep water conditions consistent, which is important for small tanks.

    Some models hold a bit more water. This extra space helps small tanks handle sudden changes in water chemistry. It’s a big plus for those with limited tank size.

    You can mix different media to tackle specific problems. Brands like Seachem and API offer specialized media. This lets you fine-tune your filtration to meet your tank’s needs.

    • Greater media diversity and volume
    • Superior biological surface area
    • Out-of-sight installation preserves aquarium aesthetics
    • Easier, less disruptive maintenance
    • Higher flow rates for swift water turnover
    • Extra water buffering inside the filter body
    • Customizable media for targeted treatment

    Disadvantages of External Filtration

    Choosing an external canister or sump means a higher upfront cost. Brands like Fluval and Eheim charge more than basic internal filters. This can be a big factor if you’re on a tight budget.

    External filters need space outside the tank. You’ll need room in a cabinet, on a stand, or a shelf for the unit and hoses. This can limit where you can place your tank, making it harder to find a good spot.

    Setting up an external filter is more complicated. You’ll need to plan and use the right fittings to avoid leaks. If you’re new to this, it might feel overwhelming, and mistakes can be frustrating or even damage your tank.

    In small tanks, an external filter might be too much. High flow rates and large media volumes are often unnecessary. This can waste energy and lead to more maintenance than you need.

    Running costs are also higher. Stronger pumps use more electricity, and replacement parts can be expensive. Over time, this increases the total cost of owning a small tank filtering system.

    Replacing media is another expense. Larger canisters need more or special media like bio-rings and carbon blocks. Replacing these can cost more than swapping a basic internal sponge.

    There’s a higher risk of leaks with external plumbing. If hoses or fittings aren’t installed right, you could face problems. You’ll need to check connections often to keep your home and tank safe.

    • Higher upfront cost compared to internal units
    • Needs external space for placement and hoses
    • More complex plumbing and installation
    • Can be oversized for very small tanks
    • Greater electrical and media running costs
    • Additional leak points from hoses and fittings

    When considering these downsides, think if the benefits are worth it for your tank size. Many hobbyists find that the simplest small tank filtering system meets their needs best after careful comparison.

    Choosing the Right Filtration for Your Tank Size

    First, match the filter’s size to your tank’s volume and how much life it holds. Choose a filter that fits your tank’s gallons and the number of fish and plants. This way, you won’t have too little or too much filtration.

    Think about where you’ll put the filter. If you don’t have much space, look for internal or hang-on-back filters. They are compact. Or, if you want a clean look, consider canisters or a remote sump. They hide the equipment and keep your tank looking good.

    • Choose models with adjustable flow for delicate fish and plants.
    • Consider noise and vibration when deciding placement.
    • Assess how often you will service gear before buying.

    How easy it is to clean the filter matters too. Internal filters need cleaning often. External filters hold more media and can go longer without cleaning. If you want to clean less, choose an external canister or HOB with big media chambers.

    Upgrade your small tank filter media to increase its power without taking up more space. Replace cheap sponges with better options like Seachem Matrix or Purigen. This boosts both biological and chemical filtration. A mix of these types of media creates the best environment.

    If you have live plants or detailed setups, look for filters that don’t disturb the water too much. For lots of fish, choose filters that can handle more and have more media. By following these tips, you can find the perfect filter for your tank and your care routine.

    Maintenance of Filtration Systems

    Keeping your small tank water filters in good shape saves time and keeps fish healthy. Clean internal filter sponges every week or every two weeks. External units need less frequent attention because they hold more media, but you must inspect them regularly.

    When cleaning mechanical media, rinse sponges and pads in tank water, not tap water. This protects beneficial bacteria. Replace chemical media like activated carbon or Purigen as the maker instructs. You can also upgrade factory media with options like Seachem Matrix for better biological capacity.

    • Run filters 24/7 to avoid drops in oxygen and bacterial decline.
    • Expect bacterial populations to fall after about 45 minutes of no flow.
    • Use a drip tray for external filter service and follow priming steps to prevent airlocks.

    Handle internal units with care when you remove chambers. Sudden jerks can release trapped debris into the tank. For external filters, keep hoses and clamps secure during maintenance to avoid spills. Check mounting hardware and replace suction cups every six to twelve months or when they stop sticking.

    Protect small livestock by fitting inlet guards to block shrimp and fry from suction. Place outlets a few inches below the surface to provide steady surface agitation without excessive CO2 loss in planted tanks. These small adjustments are central to reliable small tank filtration solutions.

    Use a checklist for each service visit. Inspect seals and hoses, rinse mechanical media in tank water, replace chemical media as directed, and note any upgrades to biological media. This routine keeps your maintenance of filtration systems efficient and extends the life of your equipment.

    Noise Levels: Internal vs. External Filtration

    You want a quiet tank, right? The choice between internal and external filtration affects noise levels. Internal filters, being in the water, often muffle sounds. But, they can vibrate against the glass if the suction cups don’t hold well.

    External canister filters, on the other hand, keep the noise-making parts outside. The motor, impeller, and hoses can make sounds. To lessen these noises, place the unit on a rubber mat and keep hoses away from rubbing or kinking.

    When space or sound is a concern, look at compact tank filtration options. Powerhead-style internal filters might run hotter and louder than fully submerged ones. Small sponges can clog easily, making the motor work harder and louder over time.

    When choosing efficient small tank filtration, pick models with adjustable flow. This way, you can lower the RPMs when you don’t need full flow. Regularly clean the impellers and motors to avoid squeaks and growling sounds.

    • Install external units inside a cabinet to dampen sound.
    • Use rubber feet beneath canister filters to cut vibration.
    • Secure suction cups or replace them to stop glass transmission.
    • Check hoses so they don’t rub against edges or floorboards.

    For quiet rooms, consider premium canister brands like Fluval or Eheim. They’re known for their low-noise models. Also, look at compact tank filtration options that focus on silent operation.

    When choosing between noise and performance, think about your stocking levels. Regular upkeep and correct installation will help both internal and external systems run smoothly and quietly.

    Cost Comparison: Internal and External Filters

    When you look for filtration, the price is the first thing you notice. Internal filters like hang-on or sponge units are often cheaper at first. But, external canister or sump systems cost more upfront. They offer more space and flexibility for small tanks.

    Think about the ongoing costs after buying. Internal filters use less power and electricity. External filters, with stronger pumps, might increase your electricity bill over time. Consider gallons per hour when comparing long-term costs.

    Maintenance costs differ based on media and how often you need to replace it. Internal filters need regular cleaning or replacement of inexpensive sponges. External filters use more expensive media like Seachem Matrix and Purigen. These last longer and handle heavy loads better for small tanks.

    • Replacement parts: suction cups and small impellers for internal units may need replacing every 6–12 months.
    • Media upgrades: adding premium media increases expense but improves performance and stability.
    • Space-related costs: cabinets or cutouts to house an external canister or sump add hidden expense.

    Value depends on your goals. External systems offer stable water chemistry and less maintenance, despite being more expensive upfront. If you’re on a tight budget and have limited space, affordable small tank water filters are a quick and cheap start.

    Make a simple cost checklist when deciding. Include the initial cost, electricity use, media replacement, and setup costs. This will help you compare and choose the best option for your small tank filtering system.

    Impact on Water Quality in Small Tanks

    Understanding how filtration affects small aquariums is key. Biological capacity is the most important factor. External canisters and hang-on-back units offer more space for nitrifying bacteria. This helps process ammonia and nitrite faster, reducing toxic spikes in tight systems.

    Mechanical filtration improves water clarity. External systems use larger mechanical stages and media to trap fine debris. This results in clearer water compared to basic internal sponges that fill up quickly.

    Chemical polishing completes the process. External filters can hold more chemical media like activated carbon or Seachem Purigen. These options remove dissolved organics and polish water better than most internal units.

    Small tanks experience rapid changes. The larger media volume and higher flow in external filters buffer these changes. This lowers stress for fish. Yet, a well-maintained internal filter with quality small tank filter media can also keep a small tank stable.

    Practical adjustments help planted tanks. To reduce surface ripple and limit CO2 loss, place outlets a few inches below the surface. Angle them for gentle circulation. This protects plants while keeping water moving.

    • Maintain sponges frequently: neglect speeds water quality decline in small tanks.
    • Use biological media with high surface area for steady nitrification.
    • Add chemical media when you need extra polishing after feeding or trimming.

    When planning aquarium filtration for small tanks, match media volume to bioload and schedule routine cleaning. This keeps beneficial bacteria healthy and water parameters steady for your fish and plants.

    Conclusion: Which Filtration System is Right for You?

    Choosing the right filtration system for your small tank depends on a few things. You need to think about space, budget, and how clean you want the water. Internal filters are cheap, easy to set up, and save space. They’re good for beginners or when you have very little room.

    But, they can be ugly, need more cleaning, and hold less media. On the other hand, external canisters or sumps offer better water quality and look nicer. They have more media space and are easier to clean. But, they cost more and need extra space outside the tank.

    For shrimp or fry tanks, it’s important to protect the inlet. Use sponge filters or guarded internal filters to keep them safe. You can also use two small internal units for extra safety. Upgrading to better media like Seachem Matrix or Purigen can also help.

    Remember, no matter what you choose, always run the filtration 24/7. Keep up with maintenance, like cleaning sponge filters weekly and changing media for externals. Make sure the flow rate and media fit your tank’s needs. The key is to find a system that works for you and keep it up for a healthy tank.

    FAQ

    What are the core functions of a filter in a small aquarium?

    Filters in small tanks clean out solids and debris. They also help convert harmful compounds into safer ones. This is key because small tanks can quickly become polluted.

    How do internal and external filters differ in biological capacity?

    External filters can handle more biological work because they have more space. Internal filters can be improved with better media, like Seachem Matrix, to boost their performance.

    I have limited cabinet space—should I pick an internal filter?

    If you can’t use external space, internal filters are a good choice. They fit inside the tank and are less likely to leak. For very tight spaces, choose a compact internal filter and add more media for better performance.

    Are internal filters noisier than external filters?

    Noise levels vary by model and how it’s installed. Internal filters can be quiet but might vibrate the glass. External filters can be noisy, but placing them in a cabinet can help. Using rubber mounts and adjusting flow can also reduce noise.

    How often should I maintain filters in small tanks?

    Clean internal filter sponges every week to two weeks because they clog fast. External filters need less cleaning but should have mechanical media rinsed and chemical media replaced as needed. Always rinse media in tank water to keep beneficial bacteria.

    Can an internal filter handle a heavily stocked small tank?

    Internal filters might struggle with heavy loads. For these cases, use external canisters, sumps, or multiple internal filters. External systems have more capacity and can handle sudden changes better.

    Do filters need to run continuously?

    Yes. Filters need to run all the time to keep bacteria alive. If they stop, bacteria will die off in about 45 minutes, risking water quality problems. Always keep filters on and plan for uninterrupted power.

    What filter flow rate is appropriate for small tanks?

    Choose a flow rate that matches your tank’s size and the needs of your fish and plants. Too much flow can stress fish and plants and affect CO2 levels in planted tanks. Find a model with adjustable flow to fine-tune it.

    Are sponge filters a good alternative for shrimp or fry tanks?

    Yes. Sponge filters are great for shrimp and fry because they filter gently and protect against suction injuries. They’re also affordable and can serve as reliable backups or primary filters in low-flow setups.

    How can I improve the performance of a small internal filter?

    Upgrading media can greatly improve an internal filter’s performance. Use high-porosity bio-media like Seachem Matrix and Purigen for better water clarity and organic removal. Adding multiple small filters can also help spread out flow and protect small fish.

    What are the leak risks for internal versus external filters?

    Internal filters have less risk of leaks because they stay inside the tank. External filters have hoses and fittings that can leak if not installed or maintained properly. Regular checks and maintenance can help prevent leaks.

    How does filter choice affect aquascaping and swimming space?

    Internal filters take up space in the tank and can be distracting. External filters keep equipment out of sight, allowing for better aquascaping and more swimming space. This is important for both looks and fish mobility.

    Do external filters increase effective water capacity?

    Yes. Some external canisters and sumps hold extra water outside the tank. This can help stabilize water quality between water changes, even in small tanks.

    Which option is more cost-effective long term: internal or external?

    Internal filters are cheaper upfront but need more frequent maintenance. External filters cost more initially but need less maintenance, making them more cost-effective for heavily stocked or planted tanks.

    How should I protect shrimp and fry from filter intakes?

    Use sponge pre-filters or inlet guards on powerheads and internal filters. Sponge covers and shrimp-safe attachments can prevent injuries. Position intakes away from where small animals gather and keep flow gentle.

    What are common maintenance errors that harm small-tank water quality?

    Avoid over-cleaning media in tap water, removing all media at once, and letting filters off for too long. Always rinse media in tank water, clean different types staggered, and keep filters running during maintenance.

    Can upgrading media turn an internal filter into an adequate long-term solution?

    Upgrading media can significantly improve an internal filter’s performance. It can make it suitable for many small tanks. But, external filters are generally better due to more media space and flexibility. Upgrades can help if you can’t use an external filter.

    How do I choose between a HOB, internal, canister, or sump for a small tank?

    Consider space, aesthetics, maintenance willingness, bioload, and fish sensitivity. Choose internal or HOB for tight spaces or low budgets. Opt for canister or sump for hidden equipment, more media, and longer maintenance intervals. Match filter capacity to tank size and fish needs.

    What maintenance schedule should I follow for small-tank filtration?

    Check internal sponges weekly to bi-weekly for debris. External filters need monthly inspections, mechanical media rinsing every 4–8 weeks, and chemical media replacement as directed. Keep maintenance logs and water test records to spot issues early.

    Are there specific brands or models recommended for small-tank filtration?

    Look for reputable internal filters with compact designs and good support. External canisters and sumps should fit your tank size. Consider models with horizontal mounting and magnetic chambers for easy removal. Upgrading to Seachem Matrix and Purigen can improve performance regardless of brand.

    How important is redundancy in small tanks?

    Very important. Small tanks are prone to quick water quality changes. Running two small internals, combining a sponge with a HOB, or having a backup air-driven sponge reduces risk. Redundancy gives you time to fix or replace equipment without harming fish.

  • How Much Light Does a Nano Tank Really Need?

    How Much Light Does a Nano Tank Really Need?

    Setting up a small aquarium raises a key question: how much light does your nano tank need? The answer varies based on several factors. These include the plants you choose, the tank’s depth, the lighting fixture, and the desired look of your aquascape. Options range from nano tank LED strip lights to compact T5 or T8 fixtures, each affecting the light plants receive.

    Understanding lumens, watts, and PAR is key to comparing lighting options. Manufacturers often list lumen output and wattage. Yet, PAR (Photosynthetically Active Radiation) is more accurate in predicting plant response. Historically, hobbyists used watts-per-liter or watts-per-gallon rules. But these vary greatly with LEDs, T5s, and metal halides.

    Lumen guidelines can aid in planning: low-light plants thrive at 10–25 lumens per liter. Medium-light species prefer 20–50 lumens per liter, and high-light plants need 40–50+ lumens per liter. If possible, check PAR values. Community ranges suggest low-light plants need about 75–100 μmol/m²/s, medium-light species around 150 μmol/m²/s, and high-light plants 200+ μmol/m²/s.

    This article will guide you in choosing the best lights for nano aquariums. You’ll learn about using nano tank LED strip lights, setting light duration and position, and avoiding common lighting mistakes. You’ll also get tips on maintenance, budgeting, and the latest in nano tank lighting. This will help you plan a healthy, beautiful nano aquarium.

    Understanding Nano Tanks and Their Lighting Requirements

    A serene scene of a beautifully aquascaped nano tank illuminated by ambient LED lights. In the foreground, the nano tank showcases vibrant aquatic plants, intricate driftwood, and a few small fish gracefully swimming among them. The middle section features soft, colorful lighting emanating from above, creating a calming glow that highlights the textures of the plants and substrate. In the background, a blurred out room setting with natural light filtering through a window, suggesting an inviting home environment. Capture the image using a shallow depth of field, focusing on the nano tank while softly blurring the background. The overall mood should evoke tranquility and fascination with aquatic life, emphasizing the importance of proper lighting for nano tanks.

    A nano tank is small, under about 10 gallons (roughly 40 liters). It has a compact depth and small surface area. This size affects how light behaves, unlike larger tanks.

    Shorter distances in nano tanks mean bright light reaches the center fast. But, light falloff from center to corners can be sharp.

    When picking nano tank lighting, consider its footprint and depth. Deeper tanks need stronger lights and better beam spread. Wider tanks might need two smaller lights or a wide-beam fixture.

    Plant choice affects the light intensity needed. Easy plants like Java fern and Microsorum pteropus need about 10–20 lumens per liter. Medium-demand plants do best near 20–40 lumens per liter. Advanced plants and dense carpeting plants need over 40 lumens per liter.

    Match your lighting to the plant type. For low-light plants, choose modest output lighting. For carpeted scenes, go for higher output and check PAR at the substrate.

    Don’t forget about other factors. CO2, flow, and nutrients also affect plant health. High light without CO2 and proper nutrients can lead to algae and poor health. Balance your lighting with good filtration, circulation, and fertilization for the best results.

    • Define the tank: under ~10 gallons, compact depth and footprint.
    • Assess plants: Easy (10–20 lumens/L), Medium (20–40 lumens/L), Advanced (>40 lumens/L).
    • Consider layout: depth needs intensity, wide tanks need broader coverage.
    • Balance systems: CO2, flow, and nutrients must match light level.

    Look at nano tank lighting options before buying. Compare by lumen output, beam angle, and PAR. Choose reliable brands like Fluval, NICREW, or Finnex for your small aquarium.

    Types of Lighting for Nano Tanks

    A beautifully arranged nano tank featuring vibrant aquatic plants illuminated by sleek, modern LED lighting specifically designed for small tanks. In the foreground, the LED fixture highlights the tank with cool white and blue hues, creating a sparkling effect on the water surface. The middle ground showcases the colorful plants and small fish, providing a lively and dynamic scene, while the background features a subtly blurred home environment, suggesting a cozy living room setting. The overall atmosphere is tranquil and serene, emphasizing the importance of proper lighting in aquascaping. The picture is captured from a low angle, with a shallow depth of field to focus on the tank, enhancing the visual appeal of the lighting and aquatic life.

    You have many lighting options for a nano tank. Each has its own pros and cons. Choose based on your plants, fish, heat tolerance, and tank size.

    • Incandescent — not good for aquariums. They waste energy, get too hot, and stress fish. Don’t use them in a planted nano tank.

    • Metal halide — very bright but hot. It’s a big debate with LED. Metal halide is intense but hard to use in small tanks because of heat and maintenance.

    • Fluorescent (T12, T8, T5) — once common, now useful in some cases. T5 tubes are brighter than T8. For example, a 15W T8 makes about 900 lumens, while a 24W T5 makes 1600 lumens. Reflectors help a lot. But, fluorescents spread light and age faster than LEDs.

    • LED — the best choice for many nano tanks. LEDs are energy-efficient, cool, and last long. They can be as bright as metal halide but without the heat. You can find LED bars, strips, and fixtures to fit your tank.

    Where you place LEDs is key. A single bar can light the center well but leave corners dark. Using many small lights or bars spreads light evenly. Many people like using two bars or a strip to cover the whole tank.

    When buying, look for PAR charts on the packaging. Lumen numbers are common, but PAR is better for plants. If no PAR chart is available, read reviews and watch videos of tanks under that light.

    Choose your lighting based on your needs. For easy care and low heat, go for LED. For high-light species and managing heat, compare metal halide and LED.

    Factors That Influence Lighting Needs

    Choosing the right nano tank lighting involves several factors. The type of plants and your skill level are key. For example, easy plants like Java fern do well with low light. But carpet plants need more light and CO2 to grow well.

    The depth and size of your tank also matter. Deeper tanks block more light, and light spreads out from the center. This means light intensity drops off from the center to the corners.

    • The type and spectrum of light are important. Red and blue light are best for plants. Look at the spectrum, CRI, and color temperature to see how plants and the tank will look.
    • Reflectors and the design of the fixture can increase usable light. Good reflectors can make light up to 4 times more useful. Even simple reflectors help more than nothing at all.
    • The distance between the light source and plants affects how intense the light is. Moving lights 10 cm closer can increase center light intensity by about 40%. But corners may not get as much benefit because of the spread.

    Choosing the right lighting for your nano tank depends on CO2, flow, and nutrients. More light means you need more CO2, stronger flow, and regular fertilization. This helps prevent algae and supports healthy growth.

    Photoperiod and room light also play a role. The timing of your lighting affects plant stress and algae risk. Plan your lighting schedule carefully with your chosen setup.

    1. Match plant category to PAR targets: easy (low), medium (moderate), advanced (high).
    2. Consider depth and footprint when choosing and placing fixtures.
    3. Focus on spectrum and reflector quality when comparing lights.
    4. Balance light with CO2, flow, and nutrients for stable growth.

    Use this checklist to compare products and settings. It helps you find the right nano tank lighting that fits your setup, plants, and maintenance routine. It also helps keep algae under control.

    Measuring Light Intensity

    Setting up lighting for a planted nano tank starts with understanding lumens, lux, and PAR. Lumens show the total light output of a bulb and are easy to compare. They’re printed on the packaging.

    Lux measures light per square meter at a specific spot. You can use a light meter to get a lux reading. This helps judge how bright a tank corner will be.

    PAR measures photons in the 400–700 nm band that plants use. It’s the most useful for plant growth. PAR meters or manufacturer curves help set targets and choose fixtures.

    • Understand lumen vs PAR nano tank trade-offs: a high lumen rating can be misleading if the spectrum is poor for plants.
    • Use lux measurement for nano aquariums to check light distribution across the tank surface.

    Conversions from photon flux to lux vary by light type. For example, cool-white fluorescent light might use a factor near 74. Other sources range from about 33 to 106. This makes conversions imprecise. For accuracy, measure PAR directly.

    Don’t rely only on lumen values. Lumens favor green wavelengths, and plants reflect much of that light. A fixture with high lumens might not be as good for photosynthesis as one with stronger PAR output.

    1. If you lack a PAR meter, use lumen-per-liter as a rough guide for fixtures of the same technology.
    2. Ensure even spread and correct distance from the water to avoid hot spots and shaded areas.
    3. Refer to manufacturer PAR curves when available for better planning.

    By balancing lux measurement for nano aquariums with attention to lumen vs PAR nano tank differences, you will get closer to the light levels your plants need. Practical checks and simple meters will keep your setup efficient and stable.

    Ideal Lighting Duration

    Begin with a good starting point: 8 hours of light a day is great for planted nano tanks. Many people choose between 6 to 10 hours of light, based on the plants and algae risk.

    Use a timer to keep the light schedule the same. A steady light cycle helps plants grow better and keeps algae away.

    Don’t confuse longer light time with more intense light. More time and intensity can make plants grow faster. This means they need more nutrients and CO2.

    If you have a strong LED light, increase the light time slowly. Watch for algae during this time.

    Here’s how to deal with algae:

    • Shorten the light time by an hour or two.
    • Lower the light intensity before adding CO2 or extra fertilizers.
    • Only boost nutrients or CO2 after adjusting duration and intensity.

    For most setups, adjust the light time based on plant health. Trim or change the light schedule a little at a time. This keeps plants healthy and avoids common mistakes.

    Positioning Your Lights

    When placing your lights, make sure they’re low enough to light up plants well. But they should be high enough to avoid heat and glare. This way, you get more light in the middle of your nano tank. But, corners might stay a bit dim.

    Using reflectors or multi-source nano tank light fixtures helps spread light evenly. Good reflectors can increase usable light by up to four times. They also reduce dark spots in small spaces.

    For wide or long tanks, consider using two smaller bars or a set of nano tank LED strip lights. This setup prevents dark spots and ensures plants at the edges get enough light.

    Put high-light-demand plants in the middle and elevate them on stones or small stands. This way, they catch more light. Plants that prefer low light do well in corners where the light is softer.

    Remember, equipment like filters and heaters can cast shadows. Move your lights or add another nano tank LED strip lights module to overcome these shadows.

    • Test spread with a lux meter for objective readings.
    • Watch short-term algae or plant growth as a practical check.
    • Adjust over a week and record changes to find the best setup.

    Keep tweaking the position of your lights until the coverage is even. Plants should grow well without stress. Small adjustments in height and angle can make a big difference.

    Effects of Insufficient Lighting

    Plants that don’t get enough light show signs in weeks. They grow leggy and leaves stretch out. Colors also fade to pale green or yellow.

    Carpet plants lose their shape and don’t spread. This is because they don’t get enough light.

    Dead leaves and uneaten food build up. This is called detritus. It stresses plants and fish.

    Weaker plants can’t fight off algae and disease. They can’t compete for nutrients because of the lack of light.

    Photosynthesis slows down without enough light. This means less oxygen at night and less nutrient uptake during the day. Your planted setup won’t grow as planned.

    Not all plants are affected the same way. Some like Cryptocoryne, Java fern, Anubias, and many mosses can handle low light. These plants are great for beginners who are exploring nano tank lighting options.

    • Poor growth and stretched stems
    • Pale coloration and loss of form
    • Detritus buildup and weaker plants
    • Lower oxygen and reduced nutrient uptake
    • Some species thrive in low light

    Be mindful of the effects of low light in your nano aquarium. If you want lush growth, change your lighting instead of hoping plants will adapt.

    Overlighting and Its Risks

    Too much light can harm a nano tank. It can cause plants to grow too fast. This needs more CO2, nutrients, and water flow.

    If you don’t match the lighting with these needs, plants will weaken. Algae will also grow.

    Algae outbreaks are a big problem. Green water, hair algae, and diatoms grow when there’s too much light. Even plants like Hemianthius callitrichoides struggle without CO2 and better water flow.

    Too much light can also make the tank warmer. This can hurt fish and invertebrates. It makes the tank less stable.

    To avoid these problems, try a few things. Start by reducing the light or shortening the time it’s on. Add CO2 and balanced fertilizers for stronger lights. Use a better pump or spray bar for more water flow.

    If you can’t make these changes, choose plants that need less light. Anubias, Java fern, and crypts do well with less light. They also help keep algae away without constant care.

    • Lower intensity or shorten the daily light window.
    • Introduce CO2 and regular liquid or root fertilizers.
    • Improve water movement with a stronger filter or powerhead.
    • Choose low-light plants when using basic or top-rated nano tank lights that produce too much light.

    Watch your tank closely after changing the lighting. Look for signs of algae or plant problems. Small, gradual changes help keep your tank healthy and avoid big problems.

    Maintenance of Nano Tank Lighting

    Creating a simple maintenance routine is key to keeping your tank healthy. Clean the lenses and reflectors every few weeks. This removes dust, salt creep, and algae. A dirty lens can reduce light and make your fixtures work harder.

    Stick to the manufacturer’s schedule for bulb and driver replacements. Fluorescent tubes, like T5 and T8, lose brightness before they stop working. For LED setups, check the drivers and diodes every few years.

    Check your reflectors for any gaps or dark spots. A good reflector should reflect light evenly without breaks. Make sure reflectors are secure and mounting hardware is tight for even light distribution.

    Make sure your timers and dimmers are working right. Adjust the photoperiods with the seasons to match natural light cycles. Faulty timers can lead to algae growth or stress in your fish.

    Keep an eye on the temperature near your tank’s hood. Older fixtures and tight LED hoods can trap heat, reducing light output. Ensure good ventilation or move fixtures to avoid overheating and protect your equipment.

    • Clean lenses and reflectors regularly.
    • Replace bulbs and check warranties.
    • Inspect reflectors for continuous reflection.
    • Test timers, dimmers, and photoperiods.
    • Monitor heat and improve ventilation as needed.

    Keep a log of when you service your tank and replace parts. This helps you track trends and plan for future upgrades. It makes long-term maintenance easier to manage.

    Budgeting for Nano Tank Lighting

    Start by dividing costs into what you spend upfront and what you’ll spend later. Basic fluorescent lights are cheaper to buy. But, they use more power and need to be replaced more often.

    LED lights cost more at first but save money in the long run. They use less energy, produce less heat, and last longer. Look for PAR data from manufacturers to find the right LED for your tank.

    • Compare lumen and PAR specs instead of just wattage.
    • Choose well-known brands like Fluval, Kessil, or Nicrew for value.
    • Think about how much energy they use to estimate monthly costs.

    Remember, accessories like reflectors and timers also affect your budget. Reflectors can increase light use by up to four times. A timer keeps your tank’s schedule consistent and prevents algae.

    For high-light tanks, consider CO2 systems and dosing setups. They improve plant health but add ongoing costs. Weigh these costs against the benefits of better growth and color.

    1. Calculate the initial cost of the light.
    2. Estimate yearly electricity costs.
    3. Add in the cost of spare parts and accessories.

    Choose the best lights for your nano tank without spending too much. Look at warranties and real reviews to find the best options. Spending a bit more on a quality LED can save you money on electricity and replacements in the long run.

    Innovations in Nano Tank Lighting

    High-output LED fixtures now offer PAR levels like metal halides but use less power and heat. This means you can keep your small tank stable and cool. It also helps plants grow well and look vibrant.

    Tunable spectrum fixtures and programmable controllers let you control the light. You can adjust the red or blue light for plant health. Or, you can create natural-looking sunrise and sunset effects. Many brands offer smartphone apps for easy control from anywhere.

    Lighting for small tanks focuses on spreading light evenly and being low-profile. Compact LED arrays and slim bars fit well in nano tanks. This reduces shadows, making plants and corals look better.

    Reflector technology has also improved. New materials and shapes help use more light without using more energy. Pairing efficient reflectors with modern modules makes your tank lighting brighter and more even while using less power.

    • Compact fixtures tailored for nano tanks
    • Smart controllers with app integration
    • Clear PAR reporting from manufacturers

    Manufacturers now share PAR data and offer app control. This makes it easier to choose and adjust your nano tank lighting. You can find the right setup for your plants and schedule.

    Nano tank LED strip lights are great for rimless or shallow tanks. They offer flexible placement and color options. Use them for a thin, even glow without bulky hardware.

    When looking for upgrades, focus on energy efficiency, control, and light output. These trends help you create a healthy, attractive small aquarium. They fit your space and schedule perfectly.

    Conclusion: Optimizing Lighting for a Healthy Nano Tank

    To optimize nano tank lighting, match your fixture to plant needs and tank layout. First, sort plants by their light needs: easy, medium, or advanced. Then, pick a PAR or lumen level that meets those needs. Choose quality LED lights for their consistent output, energy savings, and control.

    Think about your tank’s depth and size to avoid light loss in corners. Place lights in the center and use reflectors or extra light bars for even light. Put high-light plants in the middle or on raised spots. These steps help light reach all areas evenly, preventing growth stunting.

    Keep your system clean and plan your budget wisely. Clean your lights often, replace old parts, and choose reliable LED brands to avoid frequent replacements. Use a timer to keep the light cycle steady and in sync with CO2, nutrients, and water flow. This helps prevent algae and promotes healthy plant growth.

    Here’s a quick guide for next steps: figure out your plants’ light needs, pick a PAR or lumen level, and choose the right LED lights. Install a timer and watch for algae and plant health. Adjust the light’s intensity or duration as needed, and add CO2 or nutrients when necessary. This will keep your nano tank healthy and thriving.

    FAQ

    How much light does a nano tank really need?

    The light needed for your nano tank depends on several factors. These include the type of plants, the tank’s depth, and the lighting technology used. Aim for PAR levels of 75–100 μmol/m²/s for low-light plants, 150 μmol/m²/s for medium, and 200+ μmol/m²/s for high-light plants.

    If measuring PAR is not possible, use lumen-per-liter guidelines. For low light, aim for 10–25 lumens/L. Medium light needs 20–50 lumens/L, and high light requires 40–50+ lumens/L. Remember, watts-per-liter is outdated for modern LED, T5, and other lighting technologies.

    What exactly defines a nano tank and why does lighting behave differently than in larger tanks?

    A nano tank is small, usually under 10 gallons (≈40 liters). Its compact size means light spreads unevenly. This requires using reflectors, distributed LED bars, or multiple light sources to avoid shadows and ensure even light.

    Which plants are best for low-, medium-, or high-light nano setups?

    For low light, choose plants like Cryptocoryne, Java fern, Anubias, and many mosses. They thrive in 10–20 lumens/L or 75–100 μmol/m²/s PAR. Medium-demand plants, such as many stem plants and larger rosettes, do well in 20–40 lumens/L or 150 μmol/m²/s PAR.

    For high-light species, like Hemianthu callitrichoides (HC) and many glosso strains, you need >40 lumens/L or 200+ μmol/m²/s PAR. These plants often require CO2, good flow, and robust fertilization.

    How do tank depth and footprint change my lighting choice?

    Deeper tanks need stronger LEDs with tighter beam control. Wider or longer tanks suffer from edge and corner falloff. Use multiple smaller bars or a distributed LED array for even coverage.

    Place high-light plants centrally or on raised stones to minimize depth penalties.

    What lighting types are best for nano tanks: LED, fluorescent, metal halide, or incandescent?

    LED lighting is the best choice for nano tanks. It’s energy-efficient, low heat, and long-lived. LEDs come in bars, strip lights, and integrated fixtures.

    T5 fluorescent is a good older option with good lumen output per length. Metal halide offers high PAR but too much heat for most nanos. Incandescent is outdated and should be avoided.

    Should I choose a single LED bar or multiple distributed fixtures?

    Distributed arrays or two smaller bars often provide better uniformity than a single central bar. They reduce corner shadows and give more even PAR across the footprint.

    For long or wide nano tanks, place lights to minimize center-to-corner dropoff. Use reflectors or multiple low-profile fixtures for balanced coverage.

    What’s the difference between lumens, lux, and PAR, and which should I use?

    Lumens measure total visible light output and are printed on packaging. Lux is lumens per square meter at a location. PAR (μmol/m²/s) measures photons usable by plants (400–700 nm) and best predicts plant response.

    Manufacturers often list lumens, but PAR charts or meters are more useful for planted tanks. Conversions from lux/lumens to PAR vary by spectrum and are imprecise—use PAR when possible.

    How long should I run my lights each day?

    Start with about 8 hours per day as a safe baseline. Many hobbyists run 6–10 hours depending on plant demand and algae control. Use a reliable timer for consistent photoperiod.

    Remember, increasing duration raises growth and nutrient/CO2 demand. Duration is not a substitute for appropriate intensity or CO2/nutrients.

    What happens if lighting is too low for my chosen plants?

    Underlighting causes poor growth, elongated stems, pale color, failed carpeting, and weakened plants that accumulate detritus. Some low-demand species will thrive, but if your aquascape targets dense growth or carpeting, inadequate light prevents reaching those goals and reduces photosynthesis-driven oxygen and nutrient uptake.

    What are the risks of overlighting a nano tank?

    Excessive intensity or long photoperiods drive rapid growth that demands matched CO2, nutrients, and flow. Without those, plants suffer and algae proliferate—green water, hair algae, diatoms. Overlighting can also raise tank temperature if fixtures are poorly ventilated.

    High-light carpet plants typically need CO2 and flow, not just more light.

    How do I mitigate algae if it appears after increasing light?

    First reduce photoperiod or intensity slightly, then add or increase CO2 and fertilization if you want to keep intensity. Improve flow and remove visible algae manually. Ramp lighting up gradually for high-light systems and monitor; adjust before algae becomes established.

    What mounting and spread strategies maximize usable light?

    Keep fixture distance minimal while avoiding heat and glare. Use reflectors or multi-source fixtures to improve uniformity—reflectors can boost usable light up to fourfold if well designed. For wide tanks, use two bars or a distributed array.

    Position high-demand plants centrally or elevated; move filters/heaters to reduce shadowing or add secondary lights if needed.

    How often should I maintain or replace lighting components?

    Clean lenses and reflectors periodically to remove dust, salt creep, and algae—dirty optics reduce usable light. Replace fluorescent tubes per manufacturer schedules because they dim before failing. LEDs degrade slower but check driver warranties and replace fixtures when output falls noticeably.

    Verify timers and dimmers regularly and ensure adequate ventilation to prevent heat damage.

    How should I budget for nano tank lighting?

    Entry-level fluorescent fixtures cost less up front but use more energy and require tube changes. Quality LED fixtures cost more initially but offer better efficiency, low heat, long life, and often PAR data—usually the best long-term value. Factor in reflectors, a timer, and possibly a PAR meter or CO2 system if you plan high-light planting.

    Are there any recent lighting innovations I should consider for nano tanks?

    Yes—high-output LEDs now rival metal halide in PAR while using much less power and heat. Tunable spectrum fixtures and programmable controllers let you emphasize red/blue bands or simulate sunrise/sunset. Slim distributed LED bars are built for nano footprints to reduce shadowing.

    Improved reflector materials and consumer-accessible PAR reporting and smartphone control apps also make selection and tuning easier.

    What immediate steps should I take when planning nano tank lighting?

    Identify your plants’ light category (Easy/Medium/Advanced). Decide on a target PAR or use lumen/L proxies if needed. Choose an LED fixture with good spread or multiple fixtures, install a timer, and monitor plant health and algae. If you go high-light, plan for CO2, fertilization, and good flow.

    Adjust intensity or photoperiod based on observations and consider investing in reflectors or a PAR meter for precision.

  • The Art of Hardscaping: Using Rocks and Wood for Visual Depth

    The Art of Hardscaping: Using Rocks and Wood for Visual Depth

    You’ll learn how to use rocks, timber, and other materials for depth and structure in your yard. This intro explains the article’s purpose. It shows how hardscaping principles help place elements like walls, pathways, and boulders.

    By using these design ideas, you’ll create spaces that feel intentional and last long. The right choice of stone and wood improves looks and helps the environment. They aid in drainage, control erosion, and support plants and wildlife.

    Later, we’ll dive into practical topics for your projects. You’ll learn about picking materials, layering, color and texture, and more. We’ll also share tips from professional contractors and examples of their work.

    Understanding Hardscaping Principles

    A beautifully designed hardscaping scene showcasing key principles of landscape architecture. In the foreground, a well-structured stone pathway is bordered by lush greenery and strategically placed wooden benches, emphasizing natural materials. The middle ground features an elegant rock garden with varying stone textures and colors, complemented by small water features that reflect sunlight. In the background, a gently sloping garden transitions into a serene, manicured lawn enveloped by trees, casting soft shadows. The lighting is warm, suggesting late afternoon, with sunlight filtering through the leaves, creating a tranquil and inviting atmosphere. Shot with a slight tilt-shift lens to add focus on the details of the hardscape, evoking a sense of depth and harmony among the materials used.

    Start with scale and proportion. Make sure rock sizes and wood elements match your yard’s size. This way, features look natural, not forced. Small yards need modest boulders and slim timber, while big properties can handle dramatic stones and heavy beams.

    Balance is key in arranging elements. Symmetry creates a formal look, while asymmetry offers a relaxed, organic vibe. Use rhythm and repetition by repeating forms or materials. This leads the eye through the landscape and ties areas together.

    Choose focal points to anchor the view. A standout timber, a large boulder, or a water feature can draw the eye. Apply the rule of thirds and off-center placement to add natural interest and avoid static layouts.

    • Function matters: plan paths, seating, and retaining walls to shape movement and activity.
    • Hardscape features should anchor planting schemes and define outdoor living rooms like patios and terraces.
    • Consider wildlife: ledges and crevices offer shelter, while open spaces invite pollinators.

    Structural care prevents failure. Retaining wall construction needs proper footings, drainage, and the right rock choices for stability. In colder U.S. climates, design walls and terraces to withstand freeze-thaw cycles and seasonal shifts.

    When projects involve significant grading, complex walls, or built-in lighting, hire a qualified hardscape contractor. A professional ensures code compliance, durable construction, and correct drainage. This way, your hardscaping principles will create a lasting landscape design.

    The Role of Natural Elements

    A serene garden hardscape scene featuring a variety of natural elements. In the foreground, intricately arranged flat stones and rustic wooden planks create a pathway, complemented by a scattering of small pebbles. The middle ground showcases a gently curved stone wall, intertwined with lush greenery and ornamental plants, highlighting organic textures. The background consists of a soft-focus view of a vibrant garden filled with seasonal flowers and trees, casting delicate shadows. Capture this scene during the golden hour for warm, natural lighting that enhances the earthy colors and textures. The atmosphere is tranquil and inviting, encouraging a connection with nature and showcasing the art of hardscaping with rocks and wood. No text or watermarks present.

    You shape your garden hardscape by choosing natural elements. Rocks add texture and permanence. Wood brings warmth and vertical accents. Gravel and sand control drainage and help plants root.

    Use these rock types where each property helps your design:

    • River rock — rounded stones for a natural stream look and smooth walking paths.
    • Slate — flat layers that build ledges, steps, and clean platforms in rock patio designs.
    • Lava rock — porous, lightweight material that works well for drainage beds and accent zones.
    • Limestone — sturdy and pale; it can raise soil pH, so choose it carefully near sensitive plantings.

    Wood is versatile in outdoor living spaces. Timber retaining walls hold soil and define terraces. Sleepers form durable steps and raised beds. Decking creates level gathering areas. Driftwood-style pieces act as sculptural accents.

    Pick durable woods for lasting results. Pressure-treated lumber resists rot for buried structures. Cedar and redwood resist decay naturally, which makes them good for visible features and decking. Treat or season timber to limit leaching and extend life.

    Learn from aquascaping when you plan hardscaping materials. In aquaria, rocks and wood create focal points, hiding spots, and a sense of depth. Translate those principles outdoors by arranging stones and timbers to form niches, terraces, and layered sightlines.

    Take small prep steps that prevent problems later. Pre-soak driftwood to reduce tannin release in water features. Season or seal timber before installation to avoid rot and unwanted leaching into soil. Lay proper substrate and drainage layers under rock patio designs to protect plant roots and keep surfaces stable.

    Blend these elements with your plant palette so hardscaping materials support growth, guide movement, and enrich the look of your outdoor living spaces.

    Creating Visual Depth with Layers

    Layering adds depth to your yard. Think of it in terms of foreground, middle ground, and background. Place big, tall rocks and wood pieces in the back to anchor the scene.

    Use the rule of thirds for stone groups. Group rocks in threes or fives to look natural and create focal points. This trick works for both big and small designs.

    On sloped sites, create physical tiers. Terraces, rock terraces, and short walls add surfaces and depth. Each tier can have its own plants, seating, or stone feature.

    Paths guide the eye. Winding paths through layered beds make spaces feel bigger. Mix textures like gravel and stepping stones to mark transitions.

    • Start with big rocks, then fill gaps with smaller stones and plants.
    • Use big boulders, timber posts, or walls to break sightlines.
    • Group hard elements and soft plants in odd numbers for a natural look.

    Draw from rock-garden practice. Start with big stones, then add smaller rocks and drought-tolerant plants. This creates a layered, organic look that fits many patio designs.

    Vertical elements are key. A few upright boulders or timber posts guide the eye and add scale. Mixing these with groundcovers makes your garden look richer and more three-dimensional.

    Remember to balance proportions when designing. Too many tall elements can flatten the view. Mix height with low plants and let paths reveal views gradually for a stronger sense of place.

    Choosing the Right Materials

    Choose materials that fit your climate and project needs. Think about freeze-thaw cycles, summer heat, and rainfall. Durable materials mean less repair and upkeep over time.

    Consider color and texture to match your plants and building. Local stone is a good choice for its look and lower shipping costs. Slate is great for flat areas, while river rock is perfect for natural beds and water edges. Quarried stone is strong for walls that need to hold weight.

    For wood, pick durable types like cedar or redwood for outdoor use. Pressure-treated lumber is good for structural parts. Wooden sleepers can add a modern touch, but remember they need upkeep.

    Think about the weight and ease of use of your materials. Big, heavy blocks need special tools and strong footings. Lighter pavers might be faster to lay but must handle heavy use.

    • Use crushed stone or compacted gravel under patios and paths for drainage and stability.
    • Landscape fabric and sand layers help control weeds and manage water in rock gardens.
    • Test soil and stone interaction before using calcareous rocks like limestone, as they can raise soil pH and affect acid-loving plants.

    For tall retaining walls, you need a solid plan. Include drainage, backfill, and strong footings. Always hire a licensed contractor for safety and quality.

    Buying local materials helps the environment and fits your area’s style. Get quotes, ask for references, and check past work before choosing a contractor.

    Design Strategies for Effective Hardscaping

    Begin with a site analysis. Look at sun patterns, slope, soil, and drainage. Note where water pools. This helps place patios, paths, and beds in the right spots.

    Then, decide on the functions of your outdoor spaces. Choose where to put patios, seating, walkways, and plants. Make sure movement and activity flow well. This step helps create focal points and a natural flow.

    Start building with the biggest elements first. Build patios, major walls, and terraces first. Then, add pathways and larger rocks. Finish with plants, mulch, and small stones. Remember, place bigger rocks before smaller ones.

    • Site analysis: sun, slope, and drainage
    • Function layout: patio, seating, paths, beds
    • Focal points: fire pit, sculpture, water
    • Material selection and construction order

    Add water features for depth and sound. Use rock waterfalls, ponds, or streams. Line pools with stone and add aquatic plants for a unified look.

    Plan your lighting to highlight your hardscape at night. Use low LED lights to accentuate textures and focal points. Place lights to wash stone faces and light steps for safety and beauty.

    Don’t forget about drainage and grade control. Proper grading, gravel bases, and hidden drainage channels prevent water pooling and erosion. These steps protect your hardscape and save on maintenance.

    For big projects, hire a skilled hardscape contractor. They offer site-specific solutions, correct wall installation, and reliable drainage. Their expertise saves time and avoids costly errors.

    The Importance of Color and Texture

    Choosing colors and textures carefully can shape your garden’s depth. Darker pavers or stained wood make things seem farther away. On the other hand, lighter materials make things appear closer.

    Rough stone catches light and shadow, making it seem more three-dimensional. This is more noticeable than smooth surfaces.

    Pairing materials can create contrast that works well. Try warm-toned cedar decking or redwood benches with cool gray stones. Mixing smooth slate slabs with rough boulders adds a tactile element that invites exploration.

    Plants can complement hard materials in your garden. Succulents and ornamental grasses balance heavy walls and pathways. Low groundcovers brighten rock beds without blocking views, making your garden easy to navigate.

    Lighting is essential at night. Use LED fixtures to highlight rock walls and wooden posts, revealing their texture. Soft uplighting on retaining walls and steps keeps your patio lively after dark.

    Test materials in your garden before making a final decision. Check how they look at noon, late afternoon, and evening. This ensures your garden hardscape has the depth and richness you desire.

    Sustainable Hardscaping Practices

    Choosing local stone and reclaimed timber can cut your landscape’s carbon footprint. Local rocks reduce transport emissions and enhance your space’s regional feel. Many landscape firms prefer local materials for these benefits.

    Permeable surfaces allow rain to soak in, reducing runoff. Opt for crushed stone or permeable pavers for paths and patios. Pair these with good drainage to prevent erosion and protect plants in your garden hardscape.

    Native plants and succulents are great for rock gardens, needing less water. They add texture without frequent watering. These choices are good for local wildlife and keep maintenance low.

    Reuse and repurpose materials when possible. Reclaimed timber and salvaged stones make excellent borders and terraces. They save resources, add character, and are often cheaper than new materials.

    • Choose rot-resistant wood species for long life.
    • Compact bases correctly under stonework to prevent settling.
    • Design to minimize future disturbance so repairs are rare.

    Planning for durability reduces long-term resource use. Smart material selection and careful installation make your garden last longer. This also makes upkeep easier for years to come.

    Maintenance of Hardscape Features

    Keeping your hardscaping materials in top shape is key. Clear out leaves, twigs, and soil from paver joints and rock beds. This stops weeds and stains. Use hand-pulling or targeted weed control to protect plants.

    Cleaning stone and concrete surfaces is essential. Use a stiff brush or a low-pressure washer to remove dirt and algae. For wood decks, fences, and pergolas, check for rot and loose fasteners. Apply a sealant or stain every few years to protect the wood.

    Rock gardens and gravel beds need occasional topping up. Remove organic debris that traps moisture. Add fresh gravel or sand where it settles. Replace landscape fabric if it breaks down to keep drainage and weed control effective.

    • Inspect retaining walls for bulging, leaning, or mortar cracks.
    • Make sure weep holes and gravel backfill remain clear to relieve pressure from water.
    • Address minor movement early to avoid larger repairs later.

    Water features need constant care. Clean pumps and filters, check seals, and remove algae. Keep plantings balanced and maintain circulation to avoid stagnation. Winterize systems in cold climates to prevent freeze damage.

    Some upkeep tasks you can do yourself, but others require a pro. Call a licensed hardscape contractor for significant settling, major drainage failure, or structural damage. A skilled contractor can regrade surfaces, reset large units, or repair mortar and drainage systems safely.

    Keep a seasonal checklist and document repairs to your hardscaping materials. Regular inspections and timely action protect your investment. This reduces long-term costs and keeps your outdoor spaces looking great.

    Hardscaping for Different Climates

    Choosing the right hardscaping materials is key to your outdoor space. In cold areas, like the northern U.S. and Canada, use stones that resist frost. Also, make sure the footings of retaining walls are deep.

    For places with lots of snow, pick mortars and adhesives that can handle freezing and thawing. Adding drainage helps prevent damage from frost.

    In hot, dry places like the Southwest, choose light-colored pavers and stones. This helps keep the area cooler. Use surfaces that let water through and plants that don’t need much water.

    In wet areas, like the Pacific Northwest, focus on keeping water away. Use wood that won’t rot or composite materials. Make sure paths and patios are safe and water flows away from buildings.

    Coastal areas need materials that won’t rust or break down from salt. Avoid stones that can be damaged by salt. Use wood or composites for outdoor furniture and small walls near the sea.

    • Match materials and techniques to site-specific conditions.
    • Consult local nurseries, extension services, or a licensed hardscape contractor for regional guidance.
    • Test soil, check drainage, and plan for long-term maintenance when choosing hardscaping materials.

    Choosing the right materials and construction details is important everywhere. It helps your outdoor space last for many years.

    Inspiring Hardscaping Examples

    You can create a sun-exposed rock garden that’s both rugged and elegant. Start with big boulders, then fill in with smaller stones and plants like succulents. Use weed barrier fabric and gravel for easy care and drainage.

    On a slope, build a retaining rock wall for terraces and outdoor spaces. Make sure to add gravel backfill and drainage. Include steps and timber sleepers for seating and interest. Add stone patios at each level for a unified look.

    Make a calming focal point with a cascading rock waterfall. Use river rock and flat ledges for a natural flow. Line ponds with stones and add aquatic plants for a seamless blend of rock and water. Add winding pathways or gravel walkways for a guided walk through your landscape.

    For easy care, try a rock-and-succulent garden with local stones and drought-tolerant plants. Adapt these ideas to fit your space and budget. For bigger projects, hire a licensed contractor. Choose materials wisely, use layered designs, and focus on color and texture for a beautiful outdoor space.

    FAQ

    What are the core hardscaping principles I should follow?

    The key hardscaping rules include placement, scale, balance, and focal points. Use rocks and timber that match your yard’s size. Balance and rhythm help create flow. Make sure your design is functional, considering paths and drainage.

    How do rocks, wood, and other hardscaping materials create visual depth?

    Depth is achieved by layering elements. Place larger rocks and timber in the back. Use the rule of thirds for natural-looking groupings. Paths that wind through layers add depth and discovery.

    Which stone types work best for different hardscape uses?

    Choose stone based on its use and where you live. River rock is good for water areas. Slate works well for patios. Lava rock is light and porous for decorative beds. Durable stone is best for walls.

    What wood species or treatments are recommended for outdoor structures?

    Use cedar or redwood for exposed wood. Pressure-treated lumber is good for structural parts. Seal or season timber to prevent leaching. In coastal areas, use corrosion-resistant fasteners.

    How should I plan drainage and freeze-thaw concerns for retaining walls?

    Retaining walls need proper footings and drainage. Use frost-resistant stone in cold climates. Ensure backfill drains well and drainage channels stay clear.

    When should I hire a hardscape contractor?

    Hire a contractor for complex projects or those needing permits. They ensure durability and safety. Professionals handle heavy stone walls and structural terraces.

    How do I choose materials with climate-specific resilience in mind?

    Match materials to your local climate. In cold, wet areas, choose frost-resistant stone and wood. In hot, dry places, use light-colored stone and drought-tolerant plants. Locally sourced rock is better for the environment.

    What sustainable hardscaping practices should I use?

    Use permeable materials to reduce runoff. Source local stone and reclaimed timber. Design with native plants to save water. Reuse stones for borders to reduce waste.

    How do substrate choices affect drainage and plant health?

    The right substrate layers are key for drainage and plant health. Use crushed stone and gravel for stability. In rock gardens, add a sand/gravel layer and landscape fabric for drainage and weed control.

    What are practical sequencing and construction steps for a hardscape project?

    Start with site analysis and establish functions. Build primary structures first, then add pathways and rock groupings. Finish with plantings and details. For rock gardens, place large rocks first.

    How can lighting enhance hardscape materials at night?

    Use low-angle LED lights to highlight textures. Uplighting boulders and grazing light on stone walls create evening beauty. Position lights for safety and to highlight focal points.

    What maintenance do stone patios, wood features, and water elements require?

    Regularly remove debris and weeds. Clean stone surfaces to control algae. Inspect wood for rot and reapply sealants. Service water feature pumps and filters. Top up gravel in rock beds and check retaining walls for movement.

    Which plants pair well with rock gardens and hardscape beds?

    Choose drought-tolerant plants like succulents and sedums. Use natives to save water. Select plants that complement the materials, adding texture and color.

    How do color and texture choices affect perceived depth?

    Darker materials recede, while lighter ones advance. Rough textures create strong shadows, adding depth. Mix materials for contrast and variety. Test samples in-situ to confirm the effect.

    Are there special considerations for coastal or wet climates?

    In wet climates, focus on drainage and erosion control. Use rot-resistant woods and design to shed water. In coastal areas, choose nonreactive stones and corrosion-resistant hardware.

    Can reclaimed materials be used for durable hardscaping?

    Yes. Reclaimed timber and stones add character and reduce waste. Check structural integrity and treat wood as needed. Use reclaimed materials for borders and terraces, but hire a contractor for structural elements.